Home>Garden Essentials>Bumps Where Infill Meets Outer Wall
Garden Essentials
Bumps Where Infill Meets Outer Wall
Modified: August 20, 2024
Looking for a garden solution? Discover how to address bumps where the infill meets the outer wall for a seamless and impressive garden space.
(Many of the links in this article redirect to a specific reviewed product. Your purchase of these products through affiliate links helps to generate commission for Storables.com, at no extra cost. Learn more)
Introduction
When it comes to 3D printing, achieving a smooth and flawless print surface is the ultimate goal. However, even with the most precise settings and high-quality filaments, you may occasionally encounter bumps or imperfections on your 3D printed objects. One common area where these bumps often appear is at the junction where the infill meets the outer wall of the print.
To understand why these bumps occur and how to prevent them, it is important to have a basic understanding of the infill and outer wall in 3D printing.
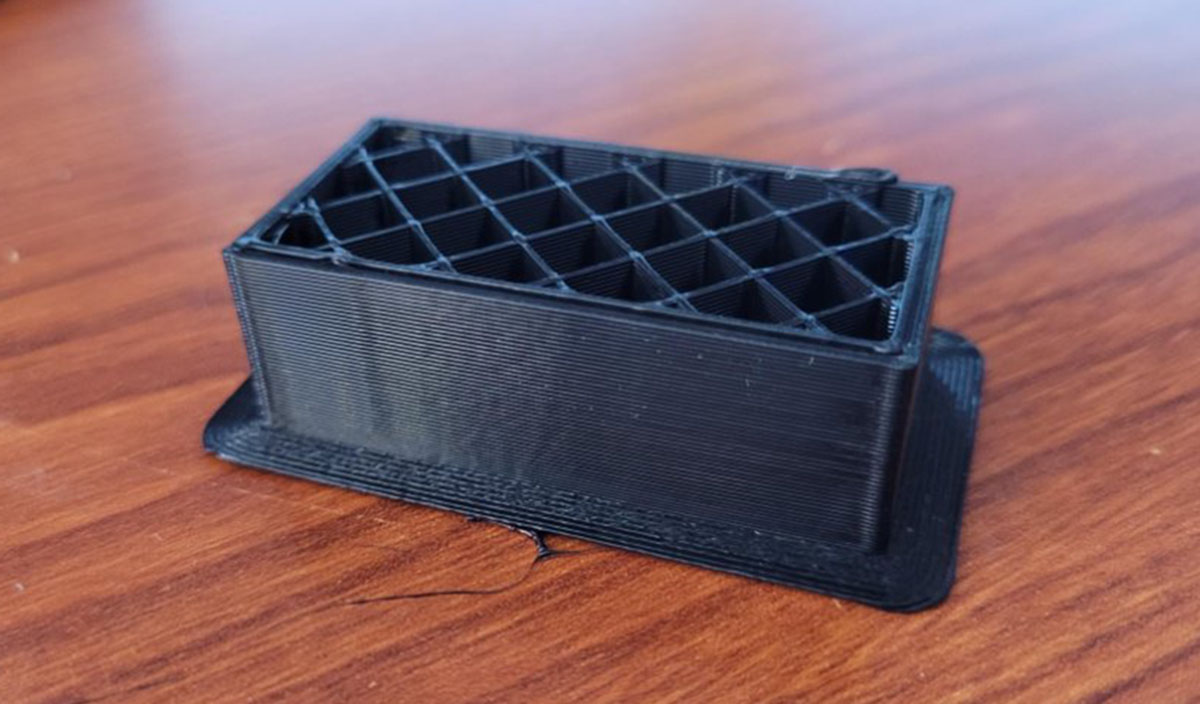
The infill refers to the internal structure of a 3D printed object. It is responsible for providing support and stability, filling the empty space between the inner and outer walls. The outer wall, on the other hand, is the visible external surface of the print that encloses the infill and gives the object its final shape and appearance.
When the infill and outer wall meet, they form an interface that can sometimes result in bumps or unevenness. These imperfections not only affect the aesthetics of the print but can also impact its overall strength and durability.
In this article, we will explore the common issues that arise at the infill and outer wall junction, examine the causes of these bumps, and provide tips on how to prevent them. By following these guidelines, you can ensure high-quality, smooth prints without any unsightly imperfections.
Key Takeaways:
- Smooth 3D prints are essential, but bumps at the infill and outer wall junction can ruin the aesthetics and strength of your prints. Understanding and adjusting settings like infill density and extrusion multiplier can help prevent these imperfections.
- To achieve flawless 3D prints, optimize settings like infill percentage and outer wall thickness. Experiment with different infill patterns and consider using support structures to create a seamless interface between the infill and outer wall.
Read more: Basement Leaking Where Wall Meets Floor
Understanding Infill and Outer Wall
Before diving into the details of bumps at the infill and outer wall junction, it’s essential to have a clear understanding of these two components in 3D printing.
Infill: Infill is the internal structure of a 3D printed object. It plays a crucial role in providing support and enhancing the overall strength of the print. Infill patterns can be varied, such as honeycomb, grid, or triangles, and the density can be adjusted depending on the desired strength and stability of the print.
Outer Wall: The outer wall is the visible exterior surface of the print. It encloses the infill and gives the object its final shape and appearance. The thickness of the outer wall can be adjusted based on the desired level of durability and aesthetic appeal of the print.
The infill and outer wall are typically printed simultaneously, layer by layer, to create a complete 3D object. The infill acts as a support structure for the outer wall, preventing it from collapsing or becoming weak. Additionally, the infill helps to reduce print time and filament usage by filling in the empty space inside the object, rather than printing it solid.
By adjusting the infill density and outer wall thickness, 3D printing enthusiasts can customize the strength, weight, and print time of their objects, depending on their specific requirements.
However, achieving a seamless junction between the infill and outer wall can sometimes be challenging and result in bumps or imperfections. Understanding the causes of these issues is crucial in order to prevent them and obtain a smooth and flawless print.
Common Issues at Infill and Outer Wall Junction
When it comes to 3D printing, the infill and outer wall junction can be a source of various issues and imperfections. Let’s take a closer look at some of the common problems that occur at this junction:
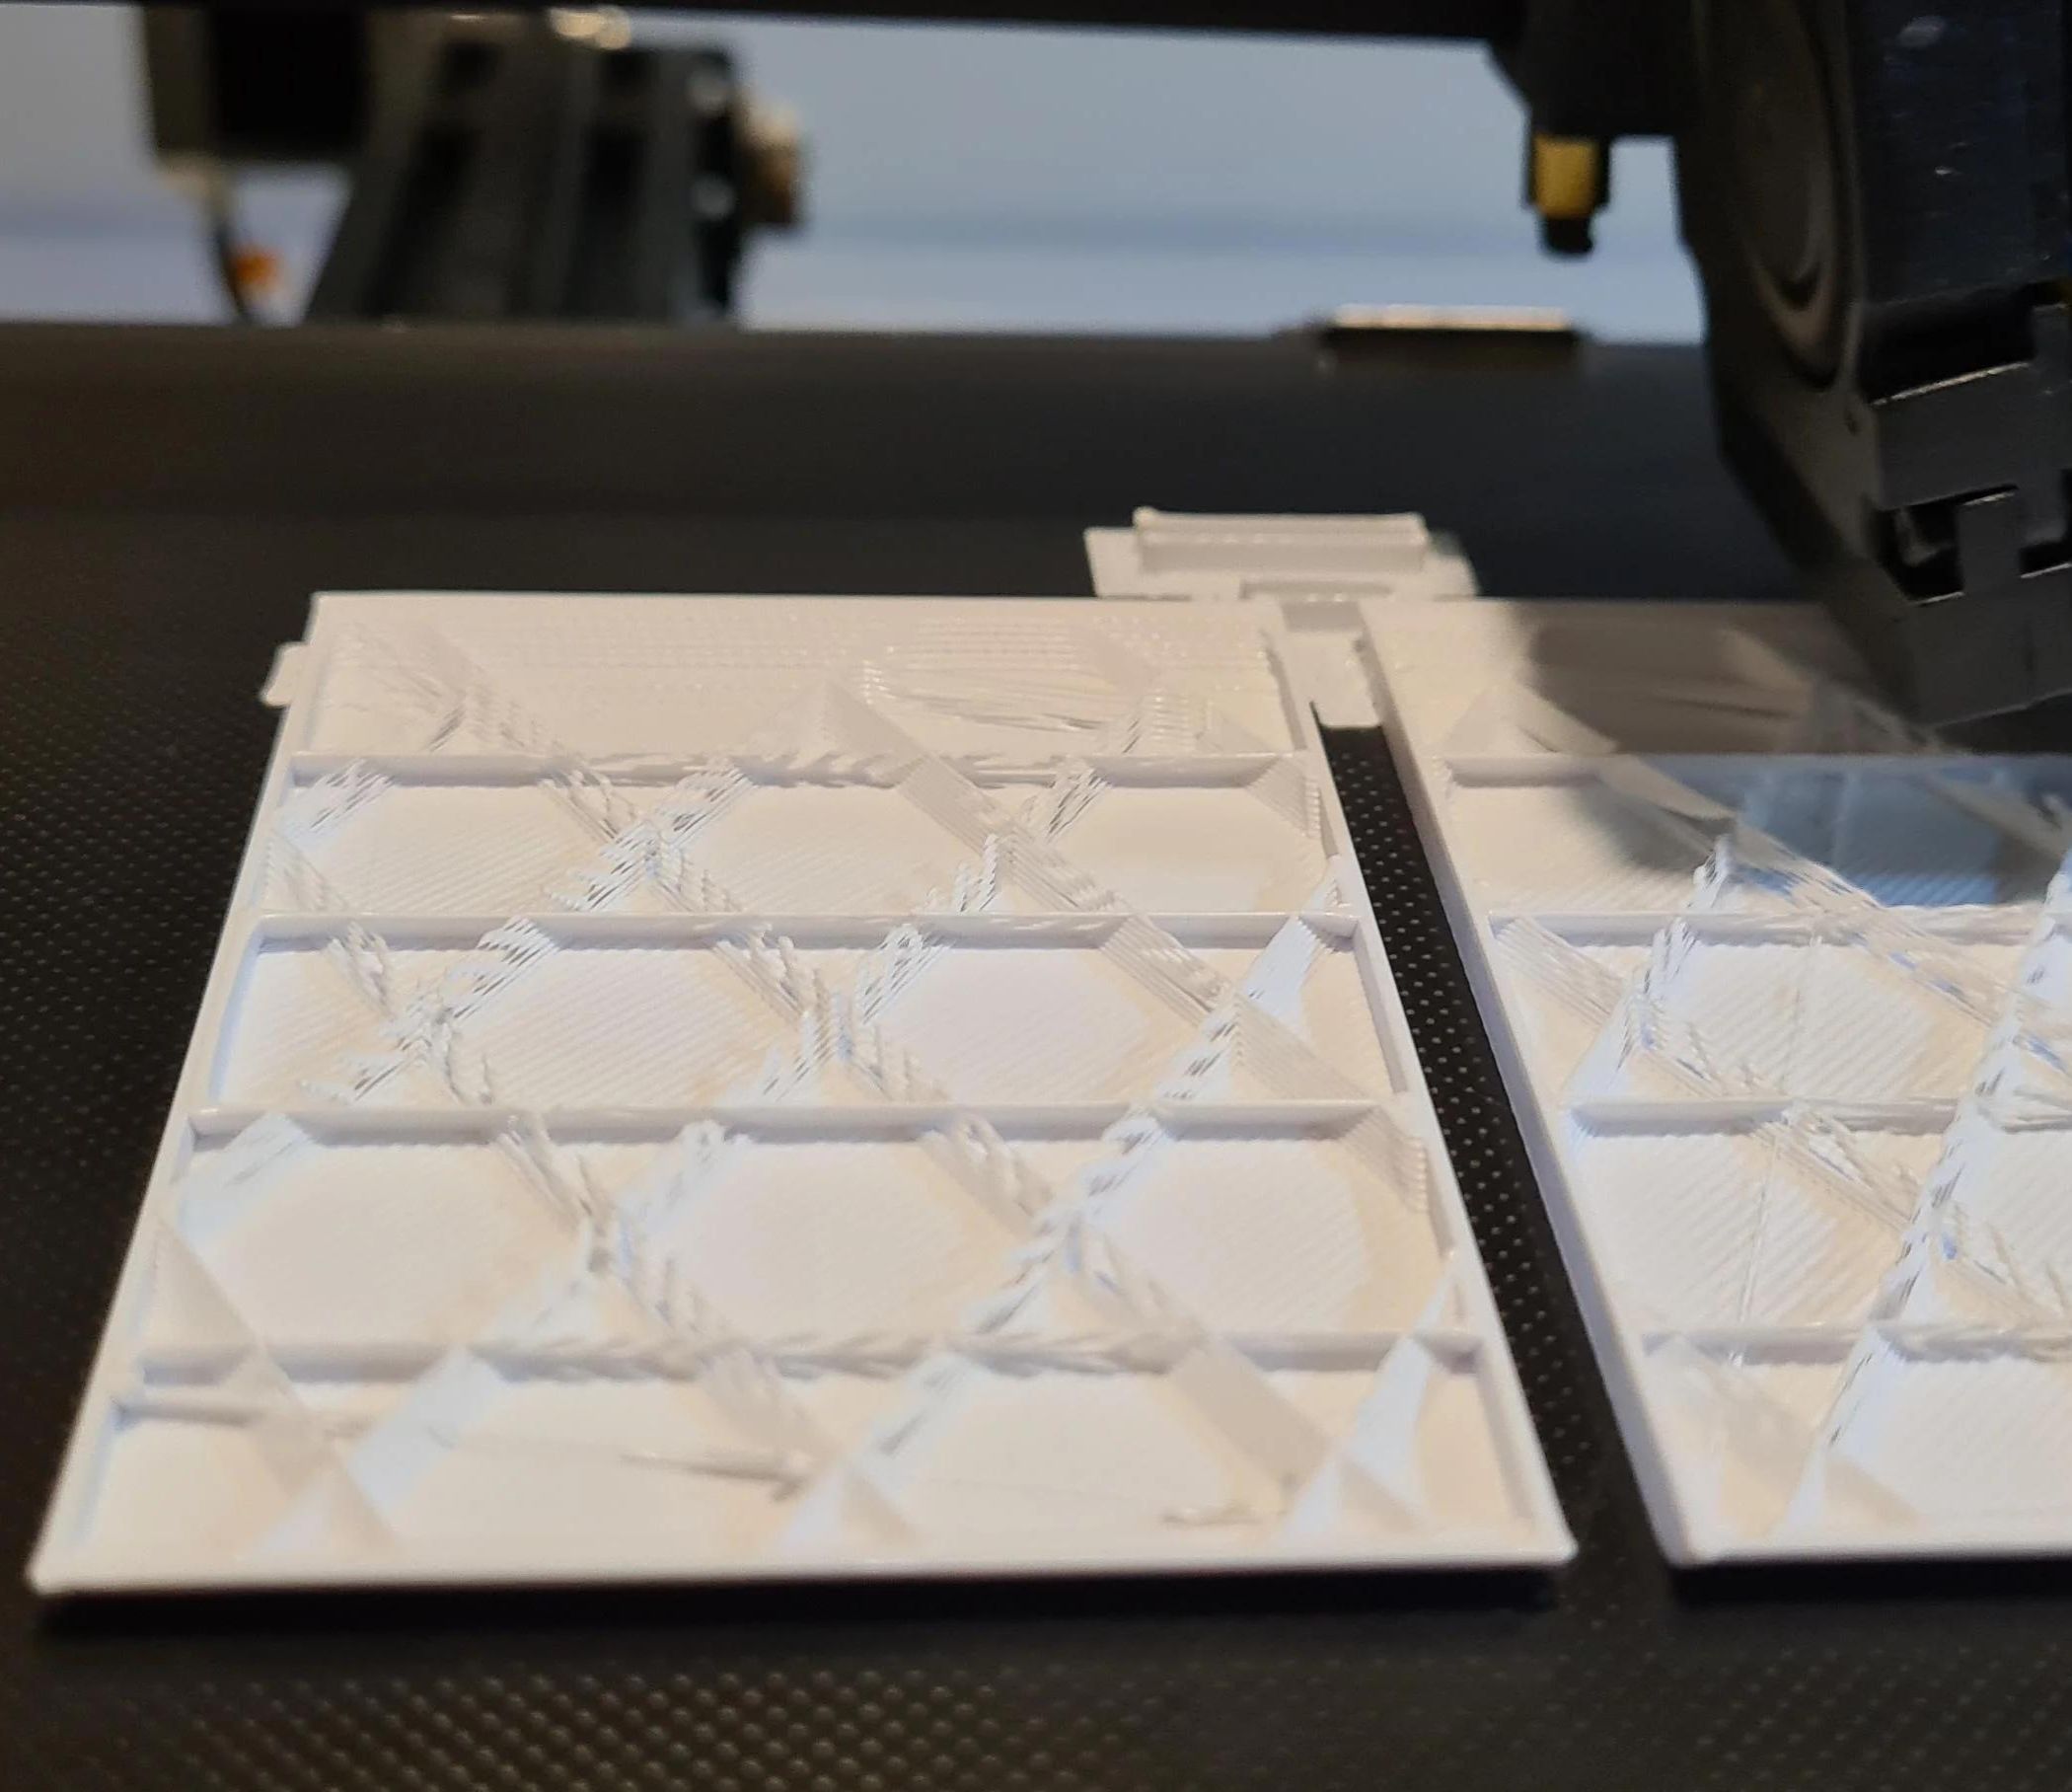
- Bumps or Bulges: One of the most common issues at the infill and outer wall junction is the appearance of bumps or bulges along the outer surface of the print. These bumps can disrupt the smoothness and precision of the print, resulting in an undesirable aesthetic finish.
- Layer Inconsistencies: Another issue that can occur at the infill and outer wall junction is inconsistent layer adhesion. This can lead to visible gaps or weak points in the print where the layers do not bond properly. These inconsistencies can compromise the strength and structural integrity of the object.
- Stringing or Overhangs: Stringing or overhangs can also be problematic at the infill and outer wall junction. These occur when excess filament is deposited or when small bits of filament droop or hang down from the inner structure of the print. This not only affects the appearance but can also lead to print failures or difficulties in removing support material.
- Warping or Curling: Warping or curling can also occur at the infill and outer wall junction if the print bed temperature is not properly calibrated or if the cooling settings are incorrect. This can result in the corners or edges of the print lifting or curling, leading to an uneven surface and potential print failure.
Understanding these common issues is essential for troubleshooting and finding effective solutions to ensure high-quality prints without any imperfections.
Causes of Bumps at Infill and Outer Wall Junction
There are several factors that can contribute to the appearance of bumps at the infill and outer wall junction in 3D printing. By understanding these causes, you can make the necessary adjustments to prevent these imperfections. Let’s explore some of the main culprits behind the bumps:
- Extrusion Multiplier: The extrusion multiplier, also known as the flow rate or filament multiplier, determines the amount of filament that is extruded during printing. If the extrusion multiplier is set too high, it can lead to over-extrusion, resulting in excess filament being deposited at the infill and outer wall junction, causing bumps.
- Layer Height: The layer height, or the thickness of each printed layer, can also play a role in the appearance of bumps. If the layer height is too large, it may create a noticeable step or uneven transition between the infill and outer wall, leading to a bumpy surface.
- Infill Density: The infill density defines the amount of internal structure inside the print. If the infill density is too low, the infill may not provide enough support for the outer wall, causing it to bulge or deform. On the other hand, if the infill density is too high, it can exert excessive pressure on the outer wall, resulting in bumps.
- Printer Settings: Inaccurate printer settings can also contribute to bumps at the infill and outer wall junction. Issues such as incorrect extruder temperature, print speed, or cooling settings can cause uneven filament deposition or insufficient bonding between layers, resulting in bumps or inconsistencies.
- Infill and Outer Wall Overlaps: The overlap between the infill and outer wall can also affect the appearance of bumps. If the overlap is too large, it can cause excess filament to be deposited, resulting in bumps. Conversely, if the overlap is too small, it can create gaps or weak points along the junction.
By identifying and addressing these causes, you can effectively eliminate the bumps at the infill and outer wall junction, resulting in smoother and more visually appealing prints.
Increase the infill overlap percentage in your slicer settings to improve the adhesion between the infill and outer wall, reducing the likelihood of bumps at the intersection.
Impact of Bumps on 3D Printed Objects
While bumps at the infill and outer wall junction may seem like a minor aesthetic issue, they can have a significant impact on the overall quality and functionality of 3D printed objects. Let’s explore the implications of these bumps:
- Aesthetic Appearance: Bumps can significantly detract from the visual appeal of 3D printed objects. They disrupt the smooth and flawless surface that is desired in many prints, making the final product look unprofessional or unfinished.
- Structural Integrity: Bumps can compromise the structural integrity of 3D printed objects. When bumps are present, it indicates an uneven distribution of material or a weak connection between the infill and outer wall. This can lead to weaker points in the print that are more prone to breaking or failing under stress.
- Print Accuracy: Bumps can also impact the accuracy and precision of the print. If the bumps are significant, they can throw off the dimensions and measurements of the object, making it deviate from the intended design. This can be particularly problematic in functional prints that require precise tolerances.
- Support and Stability: The infill serves an important role in providing support and stability to the outer wall of a 3D printed object. When bumps are present, it can affect the distribution of support within the print, potentially leading to weaker sections or areas where the print is less stable.
- Post-Processing: Bumps can make post-processing tasks, such as sanding or painting, more challenging. Achieving a smooth finish or applying a consistent coat of paint becomes more difficult when there are bumps on the surface. This can result in additional time and effort spent on post-processing to achieve the desired result.
It is important to address and eliminate any bumps at the infill and outer wall junction to ensure the desired quality, functionality, and appearance of your 3D printed objects.
Read more: Why Can I See Infill Through Outer Layer
Preventing Bumps at Infill and Outer Wall Junction
While bumps at the infill and outer wall junction can be frustrating, there are several steps you can take to prevent them and ensure smooth and flawless 3D printed objects. Here are some effective strategies:
- Optimize Extrusion Multiplier: Adjust the extrusion multiplier to ensure the right amount of filament is extruded during printing. Fine-tune this setting by printing a calibration cube or using test prints to achieve optimal extrusion and minimize any over-extrusion that can lead to bumps.
- Choose Appropriate Layer Height: Consider using a smaller layer height to minimize noticeable step-like transitions between the infill and outer wall. This can create a smoother surface with fewer imperfections. However, be cautious as using an extremely small layer height may increase print time.
- Adjust Infill Density: Optimize the infill density to strike a balance between providing sufficient support and avoiding excessive pressure on the outer wall. Experiment with different infill percentages to find the right balance for your specific print, ensuring a smooth and reliable interface.
- Calibrate Printer Settings: Ensure your printer settings are accurately calibrated. Check and adjust parameters such as extruder temperature, print speed, and cooling settings based on the specific characteristics of your filament and printer. Fine-tuning these settings can help minimize irregularities at the infill and outer wall junction.
- Optimize Infill and Outer Wall Overlaps: Adjust the overlap between the infill and outer wall to prevent excess material deposition or weak points. Fine-tune this setting to achieve a clean and seamless junction. Keep in mind that the optimal overlap can vary based on your printer and specific print design.
- Use High-Quality Filament: Ensure you are using high-quality filament that has consistent diameter and good flow characteristics. This can contribute to smoother extrusion and reduce the likelihood of bumps at the infill and outer wall junction.
- Check for Mechanical Issues: Periodically inspect your printer for any mechanical issues that may lead to bumps, such as loose belts, misaligned axes, or clogged extruders. Maintaining your printer in good working condition can help produce more consistent and accurate prints.
Implementing these preventive measures can greatly reduce the occurrence of bumps at the infill and outer wall junction, resulting in cleaner and more professional 3D printed objects.
Tips for Successful Infill and Outer Wall Interface
Creating a successful interface between the infill and outer wall of your 3D printed objects is crucial to achieving high-quality prints. Here are some tips to ensure a smooth and seamless infill and outer wall junction:
- Choose the Right Infill Pattern: Select an infill pattern that complements the design and purpose of your print. Each pattern has its own advantages in terms of strength, flexibility, and print time. Experiment with different patterns to find the one that best suits your needs.
- Optimize Infill Percentage: Adjust the infill percentage to strike a balance between strength and print time. For models that require more strength, increase the infill percentage. Conversely, if strength is not a critical factor, you can reduce the infill percentage to save time and filament. Keep in mind that excessive infill can lead to increased pressure on the outer wall and potential bumps.
- Ensure Sufficient Top Layers: Adding more top layers can help improve the surface quality and strength of the print. Consider increasing the number of top layers to create a more solid and smooth outer surface, reducing the visibility of the infill and minimizing the chances of bumps.
- Adjust Outer Wall Thickness: Increase the thickness of the outer wall to improve the overall strength and smoothness of the print. A thicker outer wall can help hide imperfections or irregularities at the infill and outer wall junction, resulting in a cleaner and more aesthetically pleasing print.
- Utilize Support Structures: In some cases, using support structures can enhance the interface between the infill and outer wall. Support structures provide additional stability and prevent sagging or drooping of overhangs, ensuring a smoother transition between the infill and outer wall.
- Consider Printing Slowly: Decreasing the printing speed can help produce cleaner and more precise prints. Slowing down the printing process can allow for better filament deposition and reduce the chances of bumps or inconsistencies at the infill and outer wall junction.
- Minimize Retraction and Stringing: Proper calibration of retraction settings and temperature can help reduce stringing and blobs which can affect the surface quality. Stringing can often lead to irregularities at the infill and outer wall junction, causing bumps or imperfections.
- Use Cooling Fan: Proper cooling can ensure that each layer of the print solidifies properly before the next layer is laid down. This can help minimize any deformations or inconsistencies at the infill and outer wall interface, resulting in a smoother surface.
By following these tips, you can achieve a successful interface between the infill and outer wall, leading to high-quality prints with minimal imperfections.
Conclusion
Achieving a seamless and flawless infill and outer wall junction is crucial for obtaining high-quality 3D prints. Bumps, bulges, and imperfections at this interface not only affect the appearance of the print but can also compromise its structural integrity.
In this article, we have explored the common issues that occur at the infill and outer wall junction, delved into the causes of these bumps, and provided valuable tips for preventing them. By optimizing settings such as extrusion multiplier, layer height, infill density, and printer calibration, you can minimize the appearance of bumps and create smoother prints.
Remember, choosing the right infill pattern, adjusting the infill percentage and outer wall thickness, and carefully considering the use of support structures all contribute to achieving a successful interface. Additionally, fine-tuning print speed, minimizing retraction and stringing, and implementing proper cooling can further improve the quality of the infill and outer wall junction.
By following these guidelines, you can ensure that your 3D printed objects have a clean and professional appearance, with no unsightly bumps or imperfections. Not only will this enhance the aesthetics of your prints, but it will also improve their structural integrity and functionality.
Take the time to experiment with different settings and techniques to find the optimal balance for your specific prints. Each printer and filament combination may require some adjustments to achieve the desired results, so don’t be afraid to iterate and refine your settings.
With a deeper understanding of the infill and outer wall interface and the factors that contribute to bumps, you can overcome these challenges and deliver exceptional, high-quality 3D prints that meet your exact requirements. Happy printing!
Frequently Asked Questions about Bumps Where Infill Meets Outer Wall
Was this page helpful?
At Storables.com, we guarantee accurate and reliable information. Our content, validated by Expert Board Contributors, is crafted following stringent Editorial Policies. We're committed to providing you with well-researched, expert-backed insights for all your informational needs.


0 thoughts on “Bumps Where Infill Meets Outer Wall”