Home>Garden Essentials>How Do You Cut Fake Grass
Garden Essentials
How Do You Cut Fake Grass
Modified: March 7, 2024
Looking to maintain your garden? Learn how to cut fake grass for a beautiful and hassle-free outdoor space with our helpful guide.
(Many of the links in this article redirect to a specific reviewed product. Your purchase of these products through affiliate links helps to generate commission for Storables.com, at no extra cost. Learn more)
Introduction
When it comes to creating a lush, green lawn, many homeowners are opting for the convenience and durability of fake grass. Also known as artificial or synthetic grass, this alternative to natural grass offers a low-maintenance solution for those looking to enjoy the beauty of a well-kept lawn without the arduous upkeep.
Whether you’re looking to transform your yard into a stunning oasis or seeking a durable surface for sports or play, fake grass can be a fantastic choice. Not only does it eliminate the need for regular mowing, watering, and fertilizing, but it also stays vibrant and green all year round, regardless of weather conditions.
In this guide, we will walk you through the process of cutting and installing fake grass in your outdoor space. From preparing the area to securing the grass, we’ll cover all the essential steps to ensure that your artificial lawn looks seamless and natural. So, grab your tools and let’s get started on this exciting DIY project!
Key Takeaways:
- Say goodbye to mowing and watering – fake grass offers a low-maintenance, allergy-free, and durable alternative to natural grass, perfect for creating a stunning and hassle-free outdoor space.
- Transform your yard with ease – follow the steps to prepare, measure, cut, and secure fake grass for a vibrant, long-lasting, and environmentally friendly artificial lawn.
Read more: How Do You Install Fake Grass
Why Use Fake Grass
Before we dive into the process of cutting and installing fake grass, let’s take a moment to explore why you might want to consider this option for your outdoor space.
1. Low Maintenance:
One of the primary advantages of fake grass is its low maintenance nature. Unlike natural grass, which requires regular watering, mowing, and fertilizing, artificial grass requires minimal upkeep. Say goodbye to spending your weekends pushing a lawn mower and hello to more leisure time.
2. Drought Resistance:
Another significant benefit of fake grass is its ability to withstand drought conditions. In areas with limited water availability or restrictions on water usage, synthetic grass can be a lifesaver. You can maintain a lush green lawn without worrying about the impact on your water bill or the environment.
3. Durability:
Fake grass is incredibly durable and can withstand heavy foot traffic, making it an ideal choice for high-traffic areas or homes with children and pets. Unlike natural grass, which can become worn and patchy over time, artificial grass maintains its vibrant appearance and structural integrity for years to come.
4. Allergy-Free:
If you or your family members suffer from allergies, fake grass can provide relief. Unlike natural grass, which releases pollen and other allergens into the air, synthetic grass is pollen-free, eliminating the risk of allergic reactions. You can enjoy a beautiful lawn without the discomfort of sneezing and itchy eyes.
5. Versatility:
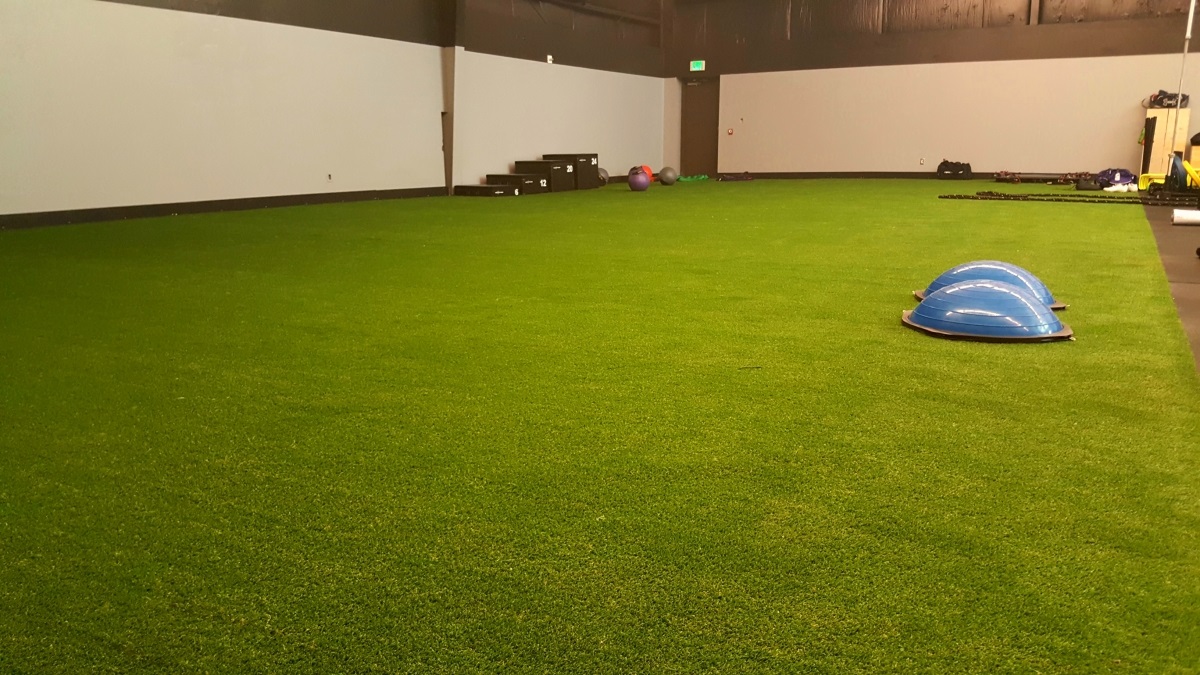
Fake grass is incredibly versatile and can be used in various outdoor applications. From residential lawns and landscaping to sports fields and playgrounds, synthetic grass offers a consistent, reliable surface that maintains its appearance even with heavy usage.
6. Environmental Benefits:
While natural grass plays a significant role in improving air quality and reducing soil erosion, maintaining a healthy lawn requires extensive water usage and the application of chemicals. Fake grass reduces the need for water and eliminates the use of fertilizers and pesticides, making it an eco-friendly alternative.
With these compelling benefits, it’s no wonder that more and more homeowners are opting for fake grass to create stunning outdoor spaces that require minimal maintenance and provide long-lasting beauty.
Tools and Materials Needed
Before you can begin the process of cutting and installing fake grass, it’s important to gather all the necessary tools and materials. Here’s a list of what you’ll need:
- Measuring tape: This will ensure accurate measurements for cutting the fake grass to fit your space.
- Utility knife or carpet cutter: These tools will be used for cutting the fake grass to the desired size.
- Stiff bristle brush: This will be used to brush the fibers of the fake grass and create a more natural appearance.
- Shovel: If you need to remove existing grass or prepare the area, a shovel will come in handy.
- Geotextile membrane: This fabric acts as a weed barrier and helps to prevent the growth of unwanted vegetation under the fake grass.
- Durable landscape fabric: This fabric will be used as a base layer to provide stability and drainage for the fake grass.
- Artificial grass adhesive: This specialized adhesive is designed to bond the seams of the fake grass together, ensuring a secure and seamless installation.
- Seaming tape: This tape is used in conjunction with the adhesive to create strong and durable seams in the fake grass.
- Nails or landscape staples: These will be used to secure the edges of the fake grass to the ground, preventing it from shifting or moving.
- Optional: Sand or rubber infill: Depending on your preference and intended use, you may choose to use sand or rubber infill to add weight and stability to the fake grass.
By gathering these tools and materials before you begin, you’ll have everything you need to successfully cut and install your fake grass, ensuring a professional-looking and long-lasting result. Now let’s move on to the next steps!
Step 1: Preparing the Area
Before you can start cutting and installing your fake grass, it’s essential to prepare the area properly. Follow these steps to ensure a smooth and successful installation:
- Clear the area: Remove any existing plants, rocks, or debris from the area where you plan to install the fake grass. Use a shovel or rake to clear the space and create a clean, level surface.
- Measure the area: Use a measuring tape to determine the dimensions of the area where you’ll be installing the fake grass. This will help you determine the amount of artificial grass you’ll need to purchase.
- Remove existing grass (optional): If there is existing grass in the area, you have the option to remove it before installing the fake grass. Use a shovel or a sod cutter to remove the grass and any underlying layers, such as soil or turf.
- Grade the area: Ensure that the area has proper drainage by grading the surface. Use a rake or shovel to create a slight slope away from any structures to prevent water pooling.
- Install the geotextile membrane: If you want to prevent the growth of weeds and other vegetation, lay down a geotextile membrane over the cleared area. This fabric acts as a barrier, allowing water to drain while inhibiting the growth of unwanted plants.
- Prepare the base: Next, lay down a durable landscape fabric over the geotextile membrane. This will provide stability, prevent the fake grass from sinking, and allow for proper drainage.
- Compact the base: Use a plate compactor or a tamper to compact the base and ensure a firm and even surface. This will help prevent any unevenness or bumps in the finished lawn.
By properly preparing the area, you’ll create a solid foundation for your fake grass installation. This ensures that the final result will be level, stable, and visually appealing. Once you’ve completed these preparation steps, you’re ready to move on to measuring and cutting the fake grass to fit your space.
Step 2: Measuring and Cutting the Grass
Now that you have prepared the area, it’s time to measure and cut the fake grass to fit your space perfectly. Follow these steps:
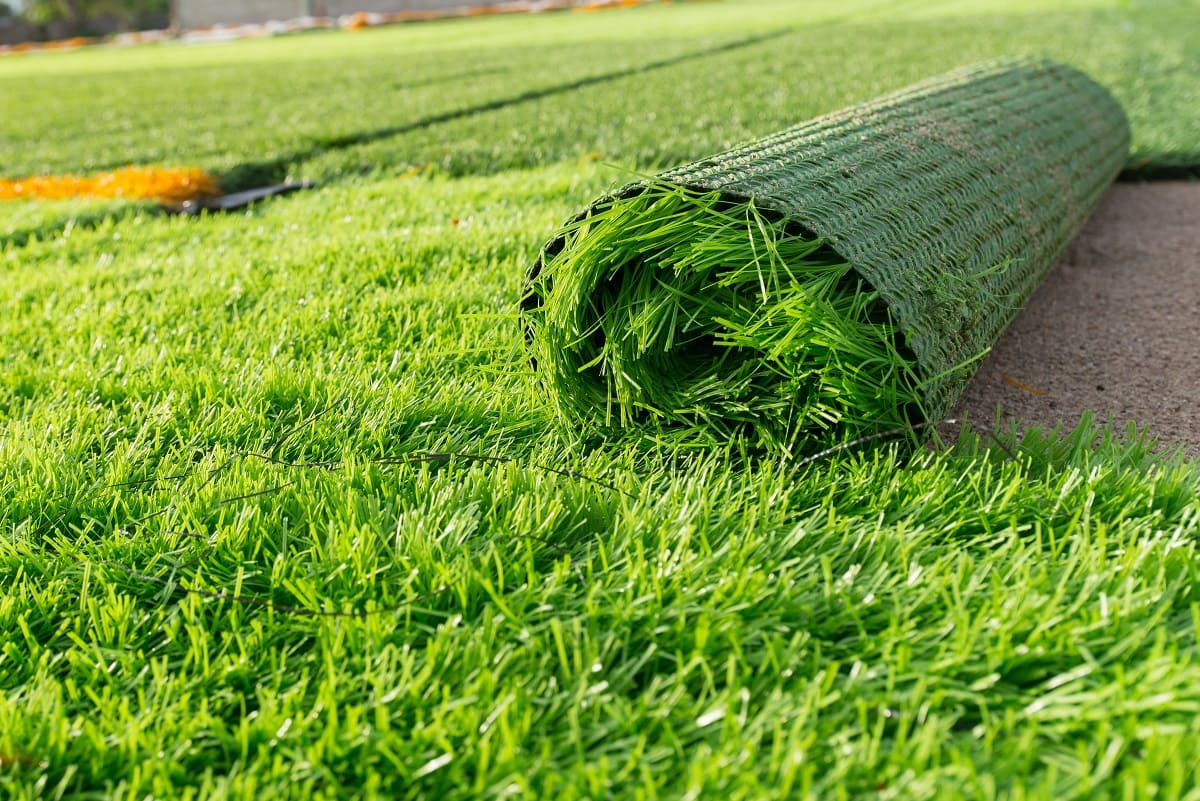
- Roll out the fake grass: Unroll the artificial grass over the prepared area, making sure it covers the entire space. Allow the grass to relax for a few hours to help eliminate any wrinkles or creases that may have formed during transportation.
- Measure the dimensions: Use a measuring tape to determine the length and width of the area you need to cover with the fake grass. Make sure to take accurate measurements to ensure a precise fit.
- Add extra length: It’s advisable to add a few inches of extra length to your measurements to account for any adjustments and trimming that may be necessary during the installation process.
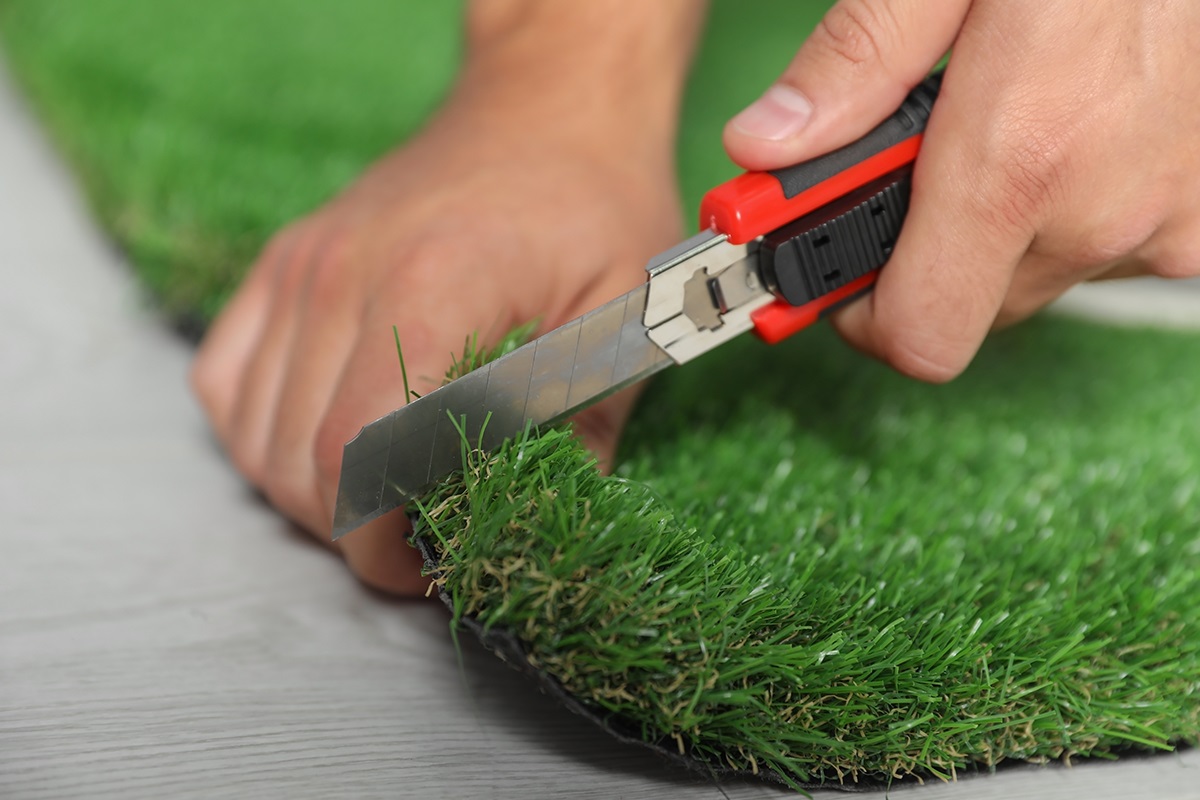
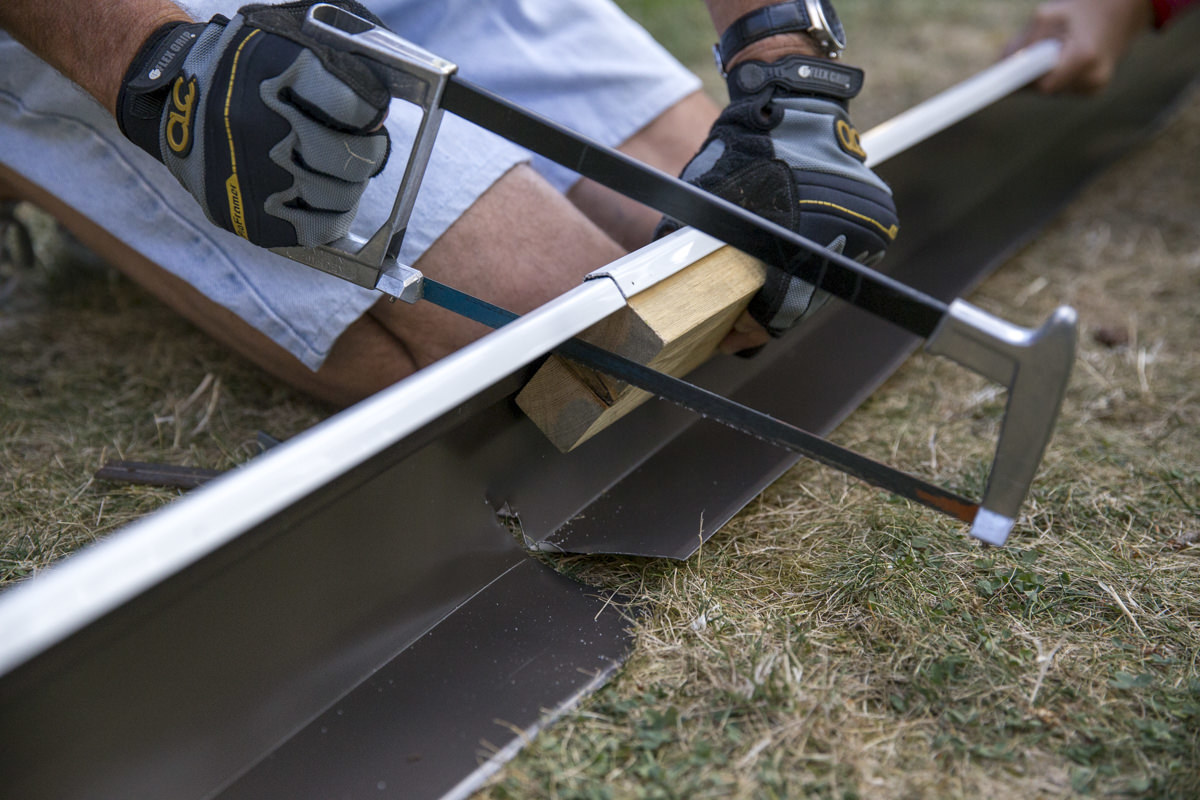
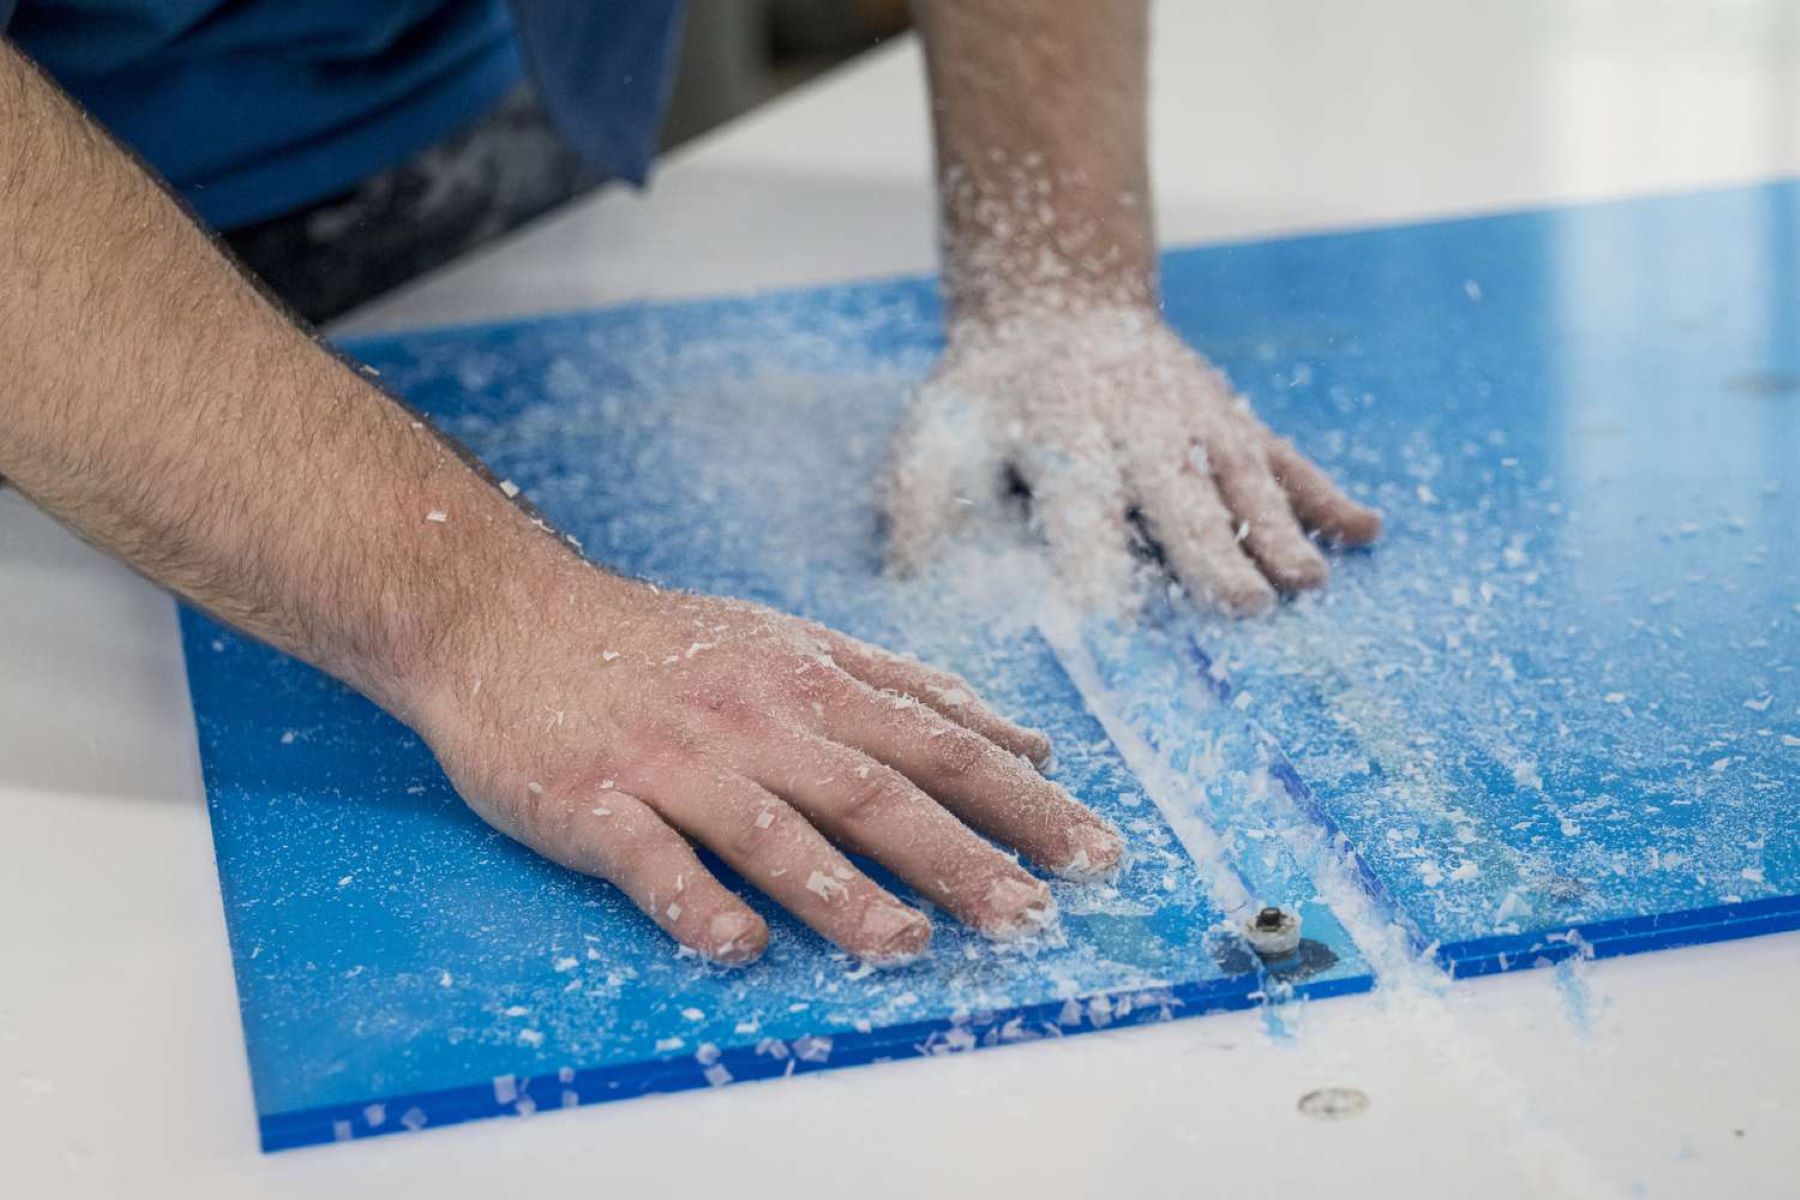
- Cut the grass: Once you have the accurate measurements, use a utility knife or carpet cutter to carefully cut the fake grass along the marked lines. Make sure to apply even pressure and use a straight edge as a guide to create clean and precise cuts.
- Trim around obstacles: If there are any obstacles in the area, such as trees, flower beds, or pathways, you’ll need to trim the fake grass to fit around them. Use your utility knife to carefully cut around the obstructions, following the contours for a seamless fit.
- Remove excess grass: After cutting the fake grass to fit your space, carefully lift and remove any excess grass. Be sure to dispose of it properly.
By taking accurate measurements and cutting the fake grass with precision, you’ll ensure a seamless and professional-looking installation. Keep the leftover pieces of grass as they can be handy for filling in smaller areas or for future repairs. With the grass cut to the appropriate size, you are now ready to move on to the next step: removing the existing grass (if necessary).
When cutting fake grass, use a sharp utility knife or scissors to make clean, straight cuts. Measure and mark the area before cutting to ensure accuracy. Be careful not to damage the backing material while cutting.
Read more: How To Cut Fake Grass To Size
Step 3: Removing the Existing Grass (Optional)
In some cases, you may need to remove existing grass before installing your fake grass. This step is optional and depends on the condition of the area and your personal preference. Here’s how to remove the existing grass:
- Mark the area: Use marking paint or stakes and string to mark the boundaries of the area where you want to remove the grass. This will help guide you during the removal process.
- Moisten the grass: If the soil is dry, lightly water the area where the grass needs to be removed. This will make it easier to cut and remove the grass.
- Cut the grass: Using a shovel, sod cutter, or a mechanical turf cutter, cut the grass into manageable sections. Start at one end and work your way across the marked area. Take care to cut along the roots and remove as much of the grass as possible.
- Remove the grass: Once you have cut the grass, use a shovel or a garden fork to lift and remove the sections. You can also roll the sections of grass for easier disposal. If the grass is still attached to a layer of soil, shake off the excess dirt.
- Dispose of the grass: Properly dispose of the removed grass. You can compost it, if applicable, or arrange for green waste pickup in your area. Avoid dumping the grass in natural areas, as it can introduce non-native species and disrupt the ecosystem.
Removing the existing grass can help ensure a level surface for the installation of your fake grass. It also allows for better drainage and prevents the growth of any weeds underneath. However, if the existing grass is already dead or the area is in good condition, you can skip this step and proceed directly to the next stage: laying the fake grass.
Step 4: Laying the Fake Grass
Now that you have prepared the area and, if necessary, removed the existing grass, it’s time to lay the fake grass. Follow these steps to ensure a smooth and successful installation:
- Roll out the grass: Begin by unrolling the fake grass over the prepared area, starting from one end. Make sure the grass is aligned properly with the edges and any obstructions, such as trees or pathways.
- Eliminate wrinkles and bubbles: As you unroll the grass, use a stiff bristle brush to brush against the natural grain of the fibers. This will help eliminate any wrinkles or bubbles and ensure a smooth and even surface.
- Trim if necessary: If you find that the fake grass extends beyond the edges of the area or overlaps any obstructions, use your utility knife to trim the excess grass. Take your time and make clean, straight cuts.
- Match the seams: If you have multiple rolls of fake grass, carefully match the seams where the sections meet. Use a seam adhesive and seaming tape to join the sections together. Follow the manufacturer’s instructions for applying the adhesive and securing the seams.
- Brush the fibers: Once the grass is laid and the seams are secure, use a stiff bristle brush to brush the fibers of the grass. This step helps the fibers stand upright and gives the grass a more natural and realistic appearance.
Take your time during the installation process to ensure that the fake grass is laid flat and securely in place. Pay attention to any seams or edges to ensure a seamless and visually appealing finish. Once you have completed laying the fake grass, you’re ready to move on to the next step: trimming and adding finishing touches.
Step 5: Trimming and Finishing Touches
With the fake grass laid in place, it’s time to trim any excess and add the finishing touches to ensure a polished and professional-looking installation. Follow these steps:
- Trim the edges: Use a utility knife or carpet cutter to carefully trim any excess grass along the edges of your installation. Take your time and make precise cuts to create clean and straight edges.
- Create a border: If desired, you can add a border around the perimeter of the fake grass area. This can be done using materials such as bricks, pavers, or landscape timbers. Install the border according to the manufacturer’s instructions, ensuring that it is secure and level.
- Brush the fibers: Once the edges are trimmed, use a stiff bristle brush to brush the fibers of the grass in all directions. This will help the grass blades stand upright and give your lawn a more natural and well-groomed appearance.
- Remove debris: Take a final walk-through of the installed grass area and remove any debris, such as leaves, twigs, or dirt. This will give your artificial lawn a clean and pristine look.
By taking the time to trim the edges, create a border if desired, and brush the fibers, you’ll enhance the overall appearance of your fake grass installation. These finishing touches will give your lawn a polished and well-maintained look. Once you’ve completed these steps, you’re ready for the final step: securing the fake grass in place.
Step 6: Securing the Fake Grass
Now that the fake grass is laid and trimmed to perfection, it’s important to secure it in place to ensure it stays put and maintains its pristine appearance. Follow these steps to securely fasten the fake grass:
- Secure the perimeter: Use landscape nails or landscape staples to secure the edges of the fake grass to the ground. Place them every 6-8 inches along the edges, making sure they go through the grass and into the base material.
- Apply adhesive to seams (if necessary): If you have multiple sections of fake grass, apply artificial grass adhesive along the seams. Follow the manufacturer’s instructions for applying the adhesive and joining the sections together.
- Weigh down the edges: If you’re concerned about the edges of the fake grass lifting or shifting, you can place bags of sand or heavy objects along the perimeter to keep them in place temporarily. This will allow the adhesive to fully cure and provide a more permanent solution.
- Brush once more: After securing the fake grass and applying any infill material, use a stiff bristle brush to once again brush the fibers in all directions. This will help distribute the infill and give the grass a more natural appearance.
By following these steps to secure the fake grass, you’ll ensure a long-lasting and aesthetically pleasing installation. The grass will stay in place even during heavy use, providing you with a beautiful and durable outdoor space to enjoy for years to come.
With the fake grass secured, you have successfully completed the installation process. Take a step back and admire your transformed outdoor space, ready to be enjoyed with minimal maintenance and maximum beauty.
Read more: Where Do You Buy Fake Grass
Conclusion
Cutting and installing fake grass can transform your outdoor space into a lush, low-maintenance haven. With its many benefits, including minimal upkeep, drought resistance, and durability, fake grass provides an attractive and practical alternative to natural grass. By following the steps outlined in this guide, you can successfully cut and install fake grass, creating a stunning and long-lasting artificial lawn.
From the initial preparation of the area to measuring, cutting, and laying the fake grass, each step is crucial to achieving a seamless and professional-looking installation. Clearing the area, measuring accurately, and taking the time to trim and secure the edges will ensure an immaculate finish.
Fake grass offers versatility, making it suitable for residential lawns, sports fields, and recreational areas. Its low-maintenance nature saves you time and effort, and its durability makes it a perfect choice for high-traffic areas. Additionally, by using artificial grass, you can reduce water consumption, decrease the use of chemicals, and create an allergy-free environment.
Remember to follow the manufacturer’s instructions and use the appropriate tools and materials for cutting and installing fake grass. Brushing the fibers of the grass at various stages of the process will help achieve a natural and well-groomed appearance.
Whether you’re looking to create a picture-perfect backyard or a sports field that can endure intense usage, fake grass is an excellent option. By following the steps outlined in this guide, you can enjoy a vibrant and hassle-free lawn for years to come. So, bring out your tools, get your hands dirty, and embark on this exciting DIY project that will provide you with a beautiful, green landscape that is sure to impress.
Frequently Asked Questions about How Do You Cut Fake Grass
Was this page helpful?
At Storables.com, we guarantee accurate and reliable information. Our content, validated by Expert Board Contributors, is crafted following stringent Editorial Policies. We're committed to providing you with well-researched, expert-backed insights for all your informational needs.


0 thoughts on “How Do You Cut Fake Grass”