Home>Garden Essentials>How Do You Install Fake Grass Indoors?
Garden Essentials
How Do You Install Fake Grass Indoors?
Modified: October 19, 2024
Learn how to install fake grass indoors and create a beautiful garden-like environment inside your home. Step-by-step guide for a hassle-free installation process.
(Many of the links in this article redirect to a specific reviewed product. Your purchase of these products through affiliate links helps to generate commission for Storables.com, at no extra cost. Learn more)
Introduction
Welcome to the world of indoor gardening! If you’ve been dreaming of bringing the beauty of the outdoors inside your home, installing fake grass indoors is an excellent way to do just that. Artificial turf has come a long way in recent years, offering a realistic and low-maintenance alternative to natural grass. Whether you want to create a small indoor garden space, a pet-friendly area, or a vibrant play area for your children, fake grass can provide a lush and green environment without the hassle of watering, mowing, or weeding.
Indoor fake grass has gained popularity for several reasons. Not only does it add a touch of nature to your home decor, but it also offers unique benefits that go beyond aesthetics. Fake grass requires minimal upkeep, making it a great option for those with a busy lifestyle or those who lack a green thumb. It is also safe for children and pets, as it does not require the use of harmful chemicals such as pesticides or fertilizers.
In this article, we will guide you through the process of installing fake grass indoors. From preparing the space to securing the edges, we will cover all the necessary steps to ensure a successful installation. So let’s dive in and explore how you can transform your indoor space with beautiful, low-maintenance fake grass.
Key Takeaways:
- Transform any indoor space into a lush oasis with low-maintenance fake grass, offering a safe and versatile environment for kids and pets.
- Follow a step-by-step process to install and maintain indoor fake grass, creating a vibrant and visually appealing area with minimal upkeep.
Read more: How To Install Fake Turf
Benefits of Installing Fake Grass Indoors
Installing fake grass indoors offers numerous benefits that make it an attractive option for homeowners. Whether you’re looking to create a green oasis in your living room or a soft play area for your children, here are some of the key advantages of incorporating artificial turf indoors:
1. Low Maintenance:
One of the most significant benefits of fake grass is its low maintenance requirements. Unlike natural grass, which demands regular watering, mowing, and fertilizing, artificial turf requires minimal upkeep. You won’t have to worry about watering or dealing with unsightly brown patches. Simply brush off any debris that accumulates on the surface, and your indoor grass will continue to look vibrant and fresh.
2. Allergy-Friendly:
Natural grass can trigger allergies for some individuals, causing discomfort and respiratory issues. In contrast, fake grass provides an allergy-friendly alternative. Since it is free from pollen and other allergens commonly found in real grass, it can help create a healthier and more comfortable environment, especially for those prone to allergies.
3. Safe for Kids and Pets:
Indoor fake grass is an excellent option for families with children and pets. The soft and cushioned surface of the artificial turf provides a safe and comfortable play area for kids, reducing the risk of injuries from falls. It also eliminates the need for pesticides, herbicides, and fertilizers, ensuring that your little ones are not exposed to harmful chemicals. Additionally, synthetic grass is resistant to pests, limiting the chances of insect bites or infestations.
Read more: What Do You Put Under Fake Grass
4. Durability:
Fake grass is designed to withstand heavy foot traffic and maintain its appearance over time. Whether you’re hosting indoor gatherings, setting up a children’s play area, or practicing yoga, artificial turf can handle it all. It won’t wear down or develop bare patches like natural grass, giving you a long-lasting, aesthetically pleasing indoor garden space.
5. Versatility:
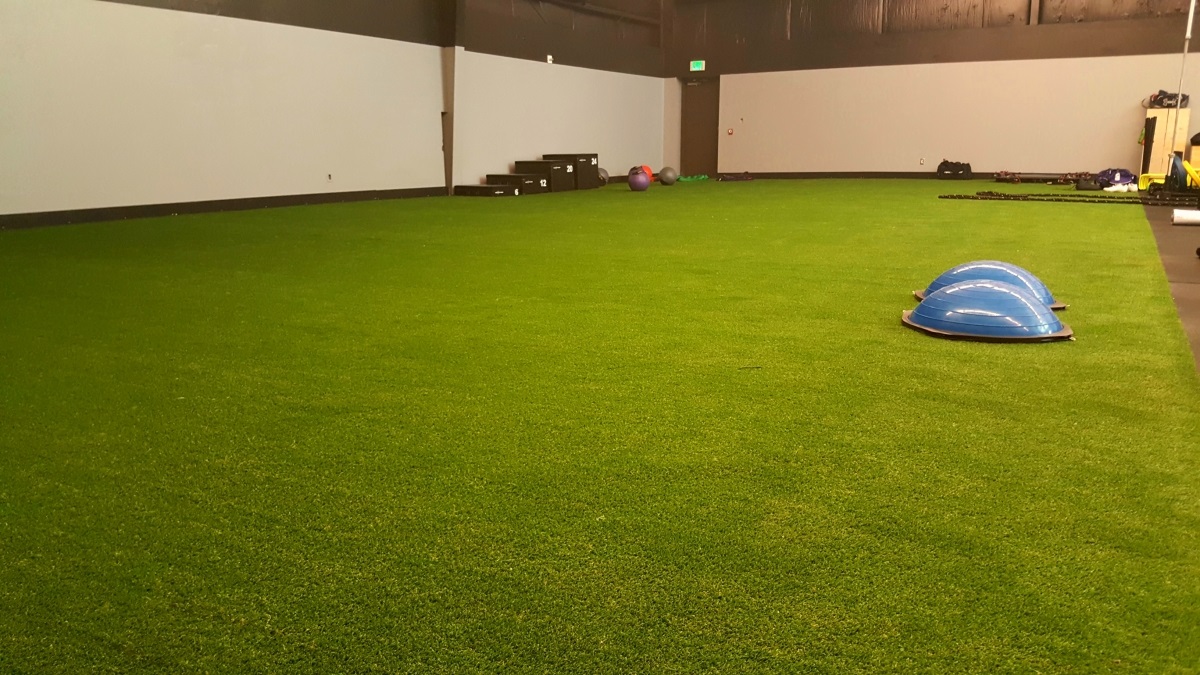
One of the great advantages of indoor fake grass is its versatility. You can install it in any indoor space, whether it’s a living room, basement, or even a commercial area like a shop or office. It provides endless possibilities for creativity and allows you to create a unique and eye-catching design that suits your style and preferences.
By choosing to install fake grass indoors, you can enjoy all these benefits and create a natural and inviting atmosphere in your home. Now that you know the advantages, let’s move on to the step-by-step process of installing fake grass indoors.
Step 1: Clearing the Indoor Space
Before you begin installing fake grass indoors, it is essential to clear the space and ensure a clean and level surface. Follow these steps to prepare the area:
1. Remove Furniture and Objects:
Start by removing any furniture, rugs, or objects from the area where you plan to install the fake grass. Clearing the space will give you a blank canvas to work with and make the installation process much easier.
Read more: How To Install Fake Grass On A Balcony
2. Clean the Floor:
Thoroughly clean the floor or subfloor where the artificial turf will be installed. Remove any dust, debris, or dirt using a broom or vacuum cleaner. It is important to have a clean surface to ensure proper adhesion and a smooth installation.
3. Determine the Base for the Grass:
Assess the type of flooring you have in the indoor space. Fake grass can be installed on a variety of surfaces, including concrete, tile, or wooden floors. However, the method and materials used for the installation may vary depending on the base. Make sure you choose the appropriate approach for the type of floor you have.
4. Check for Moisture and Drainage:
If you’re installing the fake grass in a basement or an area prone to moisture, check for any existing moisture issues or poor drainage. It is crucial to address these problems before installing the artificial turf to prevent any future damage or mold growth. Consult with a professional if necessary.
5. Allow for Proper Ventilation:
Ensure that there is proper ventilation in the indoor space where you’re installing the fake grass. Good airflow will help prevent odors and potential moisture buildup beneath the artificial turf.
By following these steps and clearing the indoor space, you are setting the stage for a successful fake grass installation. With a clean and level surface, you’re now ready to move on to the next step: preparing the subfloor.
Read more: How Do You Install Synthetic Grass
Step 2: Preparing the Subfloor
Once you’ve cleared the indoor space, the next step in installing fake grass is preparing the subfloor. The subfloor provides the foundation for the artificial turf and ensures a stable and even surface. Follow these steps to prepare the subfloor:
1. Smooth Out Any Imperfections:
Inspect the subfloor for any bumps, cracks, or unevenness. Use a floor leveler or self-leveling compound to smooth out any imperfections. This will help create a level base for the fake grass and prevent it from developing uneven areas or bumps over time.
2. Fill in Cracks and Holes:
If there are any cracks or holes in the subfloor, fill them in with a floor patching compound. Smooth it out with a trowel to ensure a seamless surface. It’s important to address these issues to prevent them from affecting the appearance and longevity of the artificial turf.
3. Install a Moisture Barrier (if necessary):
If you’re installing fake grass in a basement or an area prone to moisture, consider installing a moisture barrier to protect the artificial turf from any moisture seeping up from the subfloor. Consult with a professional to determine if a moisture barrier is necessary for your specific situation.
Read more: Where To Buy Fake Grass Carpet For Indoors
4. Allow for Proper Drainage:
If your indoor space has a drainage system, ensure that it is functioning correctly. Clear any debris or blockages and make sure the drains are clear and free-flowing. This will help prevent water pooling and potential damage to the artificial turf.
5. Check Flooring Compatibility:
Ensure that the type of subfloor you have is suitable for synthetic turf installation. Consult the manufacturer’s guidelines or seek advice from a professional to ensure compatibility and the best installation method for your specific subfloor material.
By properly preparing the subfloor, you are laying the groundwork for a successful installation of fake grass indoors. With a smooth and stable surface, you’re now ready to move on to the next step: measuring and cutting the artificial turf.
Step 3: Measuring and Cutting the Artificial Turf
Now that you have prepared the subfloor, it’s time to measure and cut the artificial turf to fit your indoor space. Accurate measurements and precise cuts are crucial for a seamless and professional-looking installation. Follow these steps to measure and cut the artificial turf:
1. Measure the Indoor Space:
Using a measuring tape, determine the dimensions of the area where you will be installing the fake grass. Take accurate measurements of both the length and width, ensuring that you account for any curves or irregular shapes. It’s better to measure twice to ensure accuracy.
2. Select the Right Type and Size of Fake Grass:
Choose the right type of artificial turf that suits your indoor space and intended use. Consider factors such as pile height, blade density, and color. Additionally, make sure you purchase enough fake grass to cover the entire measured area, with some extra material for cutting and fitting.
3. Cut the Artificial Turf:
Using a sharp utility knife or carpet knife, carefully cut the artificial turf according to your measured dimensions. Start by making a small incision at one end of the turf and gradually cut along the measured lines. Take your time to ensure clean and precise cuts.
4. Fit the Fake Grass:
After cutting the artificial turf, lay it in the designated area and check the fit. Make any necessary adjustments to ensure a proper fit and alignment with the walls or edges of the space. It’s essential to take your time during this step to achieve a seamless and professional finish.
5. Overlap and Seam if Needed:
If the measured area is larger than the width of the artificial turf, you may need to overlap pieces and create seams. Use artificial grass adhesive or seam tape to join the pieces together. Follow the manufacturer’s instructions for a secure and durable seam.
By measuring accurately and cutting the artificial turf to fit your indoor space, you are one step closer to achieving a realistic and visually appealing indoor garden. Once the fake grass is appropriately cut and fitted, it’s time to move on to the next step: applying the adhesive.
Read more: Who Installs Fake Grass In NYC?
Step 4: Applying the Adhesive
Now that you have cut and fitted the artificial turf in your indoor space, it’s time to secure it in place by applying adhesive. The adhesive ensures that the fake grass stays firmly attached to the subfloor, providing a stable and durable surface. Follow these steps to apply the adhesive:
1. Gather the Necessary Tools and Materials:
Before you begin, gather all the tools and materials you will need for applying the adhesive. This typically includes a trowel, adhesive recommended by the manufacturer, and a paint roller or adhesive spreader.
2. Read the Manufacturer’s Instructions:
Read and understand the instructions provided by the manufacturer for the specific adhesive you will be using. Different adhesives may have slightly different application techniques, so it’s essential to follow the guidelines carefully.
3. Apply the Adhesive:
Starting from one end of the artificial turf, apply a thin layer of adhesive onto the subfloor using a trowel. Work in small sections to ensure that the adhesive doesn’t dry before you lay the fake grass on top.
Read more: How To Install Fake Grass In A Dog Run
4. Spread the Adhesive:
After applying the adhesive, use a paint roller or adhesive spreader to spread it evenly across the subfloor. This will help ensure proper adhesion and avoid any lumps or bumps under the artificial turf.
5. Lay the Artificial Turf:
Carefully place the fake grass onto the adhesive, starting from one end and gradually working your way across the area. Press down firmly to ensure good contact between the grass and the adhesive. Smooth out any wrinkles or bubbles as you go.
6. Trim Excess Grass (if necessary):
If there is any excess artificial turf extending beyond the designated area or edges, use a utility knife or carpet knife to trim it neatly. Take caution to avoid cutting into the subfloor or damaging the already installed turf.
7. Allow the Adhesive to Dry:
Follow the recommended drying time specified by the adhesive manufacturer. This can vary depending on the adhesive used and the environmental conditions. Allow sufficient time for the adhesive to fully dry and cure before proceeding to the next step.
By carefully applying the adhesive, you are ensuring a secure and long-lasting installation of the fake grass in your indoor space. With the turf firmly attached to the subfloor, it’s time to move on to the next step: securing the edges.
Step 5: Placing the Artificial Grass
Now that you have applied the adhesive and secured the fake grass to the subfloor, it’s time to focus on properly placing and arranging the artificial turf in your indoor space. This step ensures that the grass looks natural and visually appealing. Follow these steps to place the artificial grass:
1. Smooth out the Surface:
Start by smoothing out the surface of the artificial grass with a stiff-bristled broom or brush. This helps to distribute the grass blades evenly and ensures a more realistic appearance.
2. Adjust the Pile Direction:
Take a moment to evaluate the direction of the grass blades. If desired, you can adjust the pile direction to achieve a more uniform and visually pleasing look. Simply use your hands or a brush to gently lift and rearrange the grass blades in the desired direction.
3. Flatten and Settle the Grass:
Press down firmly on the grass with your hands or use a heavy object to help the artificial turf settle and adhere to the adhesive. This helps to eliminate any air pockets beneath the grass and ensures a smooth and even surface.
Read more: How Much Does It Cost To Install Fake Grass?
4. Check for Wrinkles or Bumps:
Inspect the fake grass for any wrinkles, bumps, or uneven areas. Smooth out any imperfections by applying pressure or adjusting the placement of the turf as needed. It’s important to take your time during this step to achieve a seamless and natural-looking appearance.
5. Inspect the Seam (if applicable):
If you have created seams by joining different pieces of artificial turf, inspect the seam to ensure it is well-aligned and securely attached. Make any necessary adjustments to ensure a cohesive and visually pleasing transition between the pieces.
6. Double-check the Alignment:
Step back and take a moment to double-check the alignment of the artificial grass. Ensure that it lines up properly with the edges of the indoor space and any surrounding walls or objects. Make any final adjustments to achieve the desired look.
By following these steps, you will ensure that the artificial grass is properly placed and arranged in your indoor space, creating a natural and visually appealing area. With the turf in place, it’s time to move on to the next step: securing the edges.
Step 6: Securing the Edges
Now that you have placed the artificial grass in your indoor space, it’s important to secure the edges to ensure a tidy and professional-looking installation. Securing the edges helps to keep the fake grass in place and prevent any shifting or movement. Follow these steps to secure the edges of the artificial turf:
1. Trim Excess Grass:
Start by trimming any excess grass that extends beyond the edges of the designated area. Use a sharp utility knife or carpet knife to achieve clean and precise cuts. Be careful not to cut into the subfloor or damage the already installed artificial turf.
2. Secure with Nails or Staples:
Along the edges of the artificial grass, use nails or staples to secure it to the subfloor. Place the nails or staples approximately 6 inches apart, ensuring they are driven into the subfloor at an angle to provide a secure hold. Be careful not to penetrate the turf and avoid placing nails or staples too close to the edges to prevent visible holes.
3. Apply Artificial Grass Adhesive:
If the edges of the fake grass are not secured by a physical barrier, apply artificial grass adhesive along the edges. Follow the manufacturer’s instructions for the specific adhesive you are using. Use a trowel to apply a thin layer of adhesive onto the subfloor, ensuring that it covers the edge of the turf. Press the turf firmly into the adhesive, making sure it is securely attached to the subfloor.
4. Use Landscape or Edging Borders:
If you prefer a more defined edge for your indoor grass installation, consider using landscape or edging borders along the edges. These borders can provide a clean and finished look to the artificial turf and help keep it in place. Follow the manufacturer’s instructions for installing the borders, whether they require digging a trench or simply securing them to the subfloor.
Read more: What Is Fake Grass
5. Allow the Adhesive to Dry:
If you have used artificial grass adhesive to secure the edges, allow sufficient time for it to dry and cure completely. Follow the recommended drying time specified by the adhesive manufacturer. Avoid any foot traffic or heavy objects on the edges until the adhesive is fully dried to ensure a strong and durable hold.
By securing the edges of the artificial grass, you are ensuring that your indoor installation looks polished and prevents any movement or shifting. With the edges properly secured, it’s time to move on to the optional step of adding infill, which can provide additional stability and cushioning to the fake grass.
Step 7: Adding Infill (Optional)
Adding infill to your indoor fake grass installation is an optional step that can provide additional stability, support, and cushioning to the turf. Infill consists of small, granular materials that are spread over the fake grass and help to weigh it down. Follow these steps to add infill to your indoor artificial turf:
1. Choose the Right Type of Infill:
Select the appropriate type of infill for your specific indoor space and intended use. Common infill options include silica sand, rubber granules, or a mix of both. Consider factors such as comfort, drainage, and maintenance when choosing the infill material.
2. Determine the Amount of Infill Required:
Consult the manufacturer’s instructions or guidelines to determine the recommended amount of infill for your particular fake grass product. The amount of infill needed can vary depending on factors such as pile height and the intended use of the indoor space.
3. Spread the Infill Evenly:
Evenly distribute the infill over the artificial turf using a spreader or by hand. Start at one end and gradually work your way across the entire area. Use a rake or brush to help spread the infill and ensure it penetrates the grass blades evenly.
4. Brush the Grass to Ensure Infill Penetration:
After spreading the infill, use a stiff-bristled broom or brush to brush the fake grass in different directions. This helps to ensure proper penetration of the infill into the turf, minimizing any gaps or uneven distribution.
5. Check for Proper Amount of Infill:
Once the infill is spread and brushed into the fake grass, check for the proper amount. The turf should have enough infill to weigh it down and provide support, but not so much that the grass blades are completely buried. Adjust the infill as needed to achieve the desired balance.
6. Allow the Infill to Settle:
Give the infill some time to settle into the artificial turf. This can happen naturally over time or by lightly misting the grass with water to help the infill particles settle. Avoid heavy foot traffic on the turf until the infill has settled in place.
Adding infill to your indoor fake grass installation can improve its stability, provide cushioning underfoot, and enhance the overall look and feel of the turf. If you have decided to include infill in your installation, follow these steps to complete this optional step. And with the infill applied, your indoor fake grass is now ready for enjoyment!
Read more: How Do You Install A Showerhead
Step 8: Cleaning and Maintaining Indoor Fake Grass
Cleaning and maintaining indoor fake grass is essential to keep it looking vibrant and fresh for an extended period. With regular care and maintenance, you can ensure that your artificial turf remains in optimal condition. Follow these steps to clean and maintain your indoor fake grass:
1. Remove Debris:
Regularly remove any leaves, twigs, dirt, or other debris that may accumulate on the surface of the fake grass. Use a leaf blower, broom, or gentle vacuum cleaner to keep the turf clean and free from visible debris.
2. Spot Cleaning:
Address any spills or stains on the fake grass promptly. Blot the affected area with a clean cloth or paper towel to remove any liquid. For more stubborn stains, use a mixture of mild soap and water, and gently scrub the area. Rinse thoroughly and allow it to air dry.
3. Pet Waste:
If you have pets, promptly remove solid waste from the artificial turf. Hose down the area to dilute any remaining residue and prevent odors. For urine odors, use a specially formulated artificial grass cleaner or a mixture of vinegar and water to neutralize the odor.
Read more: How To Cut Fake Grass To Size
4. Brush the Grass:
Regularly brush the fake grass with a stiff-bristled broom or brush to help restore the appearance and keep the grass blades upright. This helps to prevent matting or flattening of the turf due to foot traffic or heavy use.
5. Preventing Odors:
To keep your indoor fake grass smelling fresh, ensure proper ventilation in the space. Allow for adequate airflow to prevent moisture buildup, which can lead to odors. If necessary, use artificial grass deodorizers to maintain a pleasant scent.
6. Protect from Direct Sunlight:
Indoor fake grass is usually not exposed to direct sunlight, but if any portion of the turf is near a window or skylight, consider using blinds or curtains to protect it from intense sunlight. Prolonged exposure to sunlight can cause fading or discoloration over time.
7. Inspect for Damage:
Regularly inspect your indoor fake grass for any signs of damage, such as tears, loose edges, or fraying. Address any issues promptly to prevent further damage and ensure the longevity of the artificial turf.
Read more: How To Lay Fake Grass Down
8. Follow Manufacturer’s Guidelines:
Lastly, always refer to the manufacturer’s guidelines and instructions for specific care and maintenance recommendations. Follow their recommendations for cleaning products, frequency of maintenance, and any other specific requirements to keep your indoor fake grass in optimal condition.
By following these steps and implementing a regular cleaning and maintenance routine, you can ensure that your indoor fake grass remains lush, vibrant, and enjoyable for years to come. With proper care, your synthetic turf will continue to enhance your indoor space with its natural beauty.
Conclusion
Congratulations! You have successfully learned how to install and maintain fake grass indoors. By following the step-by-step process outlined in this article, you can transform any indoor space into a lush and vibrant area that mimics the beauty of the outdoors. The benefits of installing fake grass indoors are plenty, from low maintenance and allergy-friendliness to creating a safe and versatile environment.
Remember to start by clearing the indoor space and preparing the subfloor for a smooth and level surface. Take accurate measurements and cut the artificial turf to fit your space perfectly. Applying adhesive and securing the edges will ensure that the grass stays firmly in place. Adding infill, although optional, can provide additional stability and cushioning. Lastly, keeping your indoor fake grass clean and well-maintained will preserve its beauty for years to come.
Whether you’re looking to create a cozy indoor garden, a pet-friendly play area, or a unique design element in your home or office, fake grass offers a practical and visually appealing solution. With its low maintenance requirements and realistic appearance, artificial turf is an excellent choice for those seeking the beauty of real grass without the hassle.
As you embark on your indoor fake grass installation journey, make sure to follow the manufacturer’s instructions and guidelines specific to your chosen artificial turf product. Each brand may have slightly different recommendations, so it’s crucial to reference their documentation for the best results.
Now it’s time to let your creativity soar and enjoy the soothing beauty of your indoor fake grass. Sit back, relax, and relish in the joy of having a green oasis right within your home or office!
Frequently Asked Questions about How Do You Install Fake Grass Indoors?
Was this page helpful?
At Storables.com, we guarantee accurate and reliable information. Our content, validated by Expert Board Contributors, is crafted following stringent Editorial Policies. We're committed to providing you with well-researched, expert-backed insights for all your informational needs.
0 thoughts on “How Do You Install Fake Grass Indoors?”