Home>Garden Essentials>How Long To Grow Corn From Seed
Garden Essentials
How Long To Grow Corn From Seed
Modified: March 16, 2024
Learn how long it takes to grow corn from seed in your garden. Discover the secrets to successful corn cultivation and enjoy a bountiful harvest!
(Many of the links in this article redirect to a specific reviewed product. Your purchase of these products through affiliate links helps to generate commission for Storables.com, at no extra cost. Learn more)
Introduction
Welcome to the world of corn gardening! Growing your own corn from seed is not only a rewarding experience but also a great way to enjoy the freshness and flavor of homegrown produce. Whether you have a spacious garden or a small balcony, you can still grow delicious corn with a little patience and care.
When it comes to growing corn from seed, there are a few key factors to consider. This article will guide you through the process, from selecting the right corn seeds to harvesting your first plump ears of corn.
Before we dive into the details, it’s important to note that the time it takes for corn to grow from seed to harvest can vary based on various factors, such as the variety of corn, weather conditions, and gardening practices. On average, it takes about 60-100 days from sowing the seeds to harvesting ripe ears of corn. Now, let’s get started!
Key Takeaways:
- Growing corn from seed takes 60-100 days on average, but factors like weather and variety can affect the timeline. Patience and care are key to a successful harvest!
- Selecting the right corn seeds and preparing the soil are crucial for growing healthy corn. Remember, proper care and attention lead to a bountiful harvest!
Read more: How Long Does Corn Take To Grow From Seed
Selecting Corn Seeds
Choosing the right corn seeds is crucial for a successful harvest. There are different varieties of corn to choose from, each with its own characteristics. Here are some factors to consider when selecting corn seeds:
- Growing Season: Corn varieties are classified into three main groups – early season, mid-season, and late season. The choice of variety depends on your local climate and the length of your growing season. If you live in an area with a short growing season, opt for early season varieties that mature quickly.
- Sweet or Field Corn: Determine whether you want to grow sweet corn, which is consumed as a fresh vegetable, or field corn, which is grown for livestock feed or processing into products like flour or cornmeal. Sweet corn varieties are available in a range of flavors, from super sweet to heirloom varieties with a more traditional taste.
- Disease Resistance: Look for corn varieties that are resistant to common diseases in your area. This will help ensure a healthy crop and reduce the need for chemical interventions.
- Plant Height: Consider the height of the corn plants. If you have limited space or want to plant in containers, choose shorter varieties that won’t overshadow other plants.
- Taste and Texture: Personal preference plays a role in selecting corn varieties. Some people prefer crisp and tender kernels, while others enjoy a more starchy texture. Read seed catalogs or consult with local gardening experts to find the varieties that suit your taste buds.
- Genetically Modified (GM) or Non-GM: If you have concerns about genetically modified organisms, look for non-GM corn seeds that are labeled as such.
Once you’ve chosen the corn seeds that best suit your needs, it’s time to prepare the soil for planting.
Preparing Soil for Corn Planting
The success of your corn crop depends greatly on the quality of the soil. Before planting corn seeds, it’s important to prepare the soil to create the ideal conditions for germination and growth. Here’s how to prepare the soil for corn planting:
- Choose a sunny location: Corn thrives in full sunlight, so select a spot in your garden that receives at least 6-8 hours of direct sunlight per day.
- Test the soil: Perform a soil test to assess its pH and nutrient levels. Corn prefers slightly acidic soil with a pH of 6.0-7.0. Adjust the pH if necessary by adding lime to raise it or sulfur to lower it.
- Clear the area: Remove any weeds, rocks, or debris from the planting area. Weeds can compete with corn plants for nutrients and water, so it’s important to eliminate them before planting.
- Loosen the soil: Use a garden fork or tiller to loosen the soil to a depth of 8-10 inches. This will promote good drainage and allow the corn roots to penetrate deeply.
- Improve soil fertility: Add organic matter, such as compost or well-rotted manure, to enrich the soil. This will provide essential nutrients and improve its structure.
- Apply fertilizer: Before planting, apply a balanced fertilizer according to the manufacturer’s instructions. This will provide additional nutrients to support the corn’s growth.
- Level the soil: Smooth out the soil surface with a rake to create a level planting bed. This will help ensure uniform germination and make it easier to care for the corn plants.
- Create furrows or hills: Depending on your preferred planting method, you can either create furrows (rows) or hills (mounds) in the soil. Furrows are ideal for traditional planting, while hills are suitable for intensive planting or areas with poor drainage.
Once the soil is prepared, you’re ready to plant the corn seeds and start your corn-growing journey. Remember to follow the specific guidelines provided by the seed packet or consult with your local gardening experts for any additional recommendations based on your region’s soil and climate conditions.
Planting Corn Seeds
Now that you’ve prepared the soil, it’s time to plant your corn seeds. Follow these steps to ensure successful germination and growth of your corn plants:
- Select the planting method: There are two common planting methods for corn – traditional rows and intensive hills. Choose the method that best suits your space and preferences.
- Plant at the right time: Plant corn seeds when the soil temperature reaches around 55-60°F (13-16°C). This is typically when the spring weather is consistently warm and there is no risk of frost.
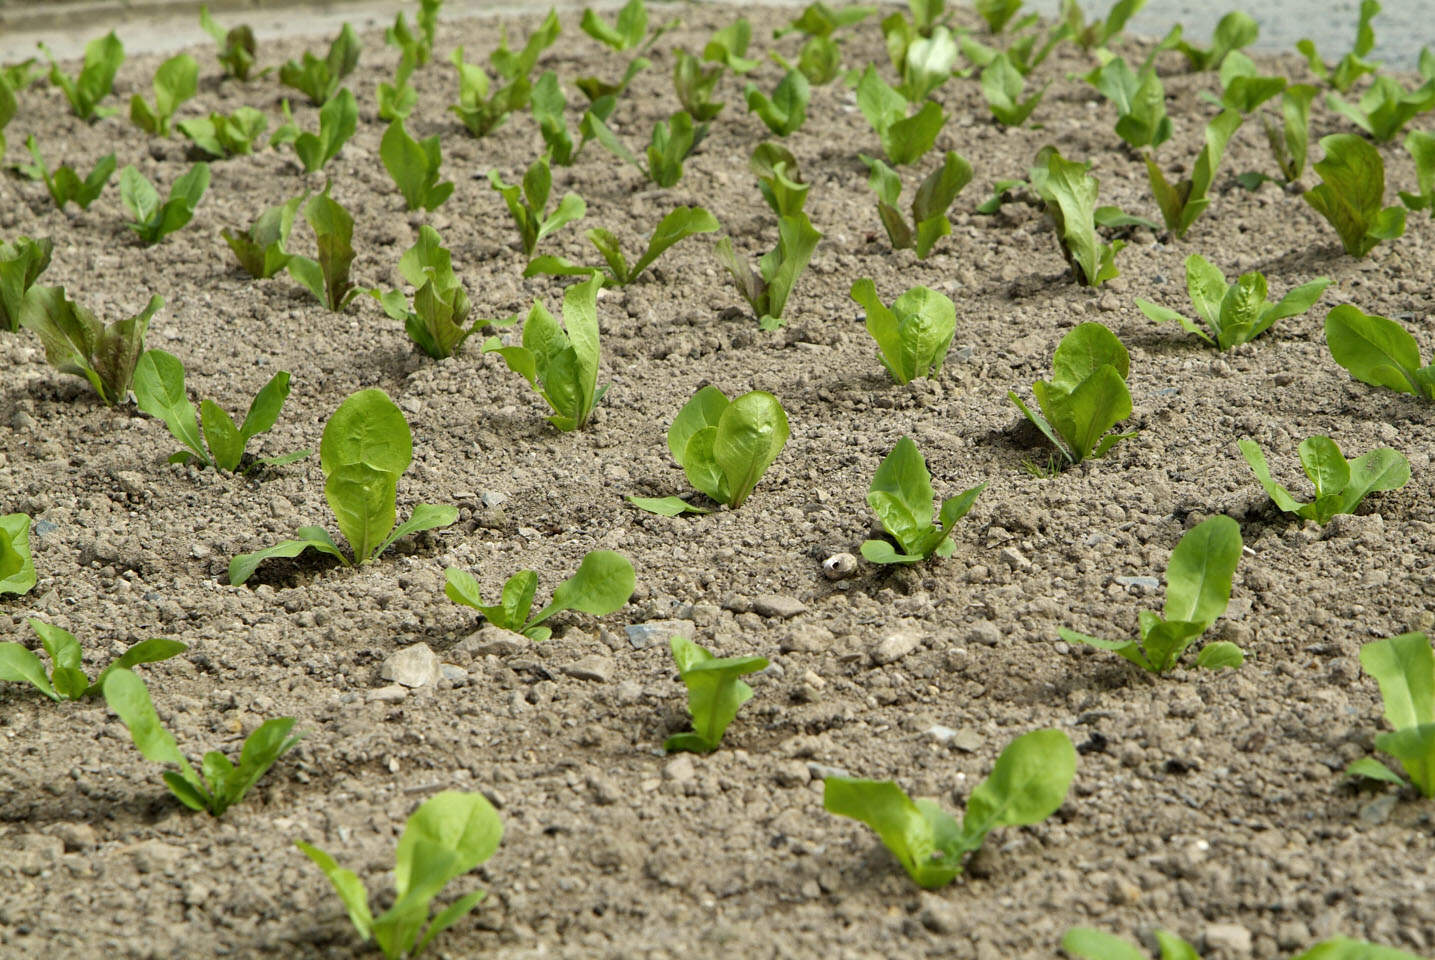
- Sow the seeds: Dig a small hole in the soil, about 1-2 inches deep. Drop a few corn seeds into the hole, spacing them 8-12 inches apart. Cover them with soil and gently pat it down.
- Water the seeds: Give the newly planted seeds a good watering to help settle the soil and initiate germination. Make sure the soil remains consistently moist but not waterlogged throughout the germination process.
- Thin out the seedlings (if necessary): Once the seedlings emerge and grow a few inches tall, thin them out if they are too close together. This will ensure adequate space for each corn plant to grow and receive proper sunlight and nutrients.
- Mulch the soil: Apply a layer of organic mulch, such as straw or shredded leaves, around the base of the corn plants. This will help suppress weeds, retain soil moisture, and moderate soil temperature.
- Provide support (optional): If you live in a windy area or planting a tall variety of corn, consider providing support to the plants. You can use stakes or cages to prevent them from bending or toppling over.
- Keep an eye on the plants: Monitor the growth of your corn plants regularly. Water them deeply and evenly, especially during dry spells. Watch out for any signs of pests or diseases and take appropriate measures to prevent or treat them.
With proper care and attention, your corn plants will soon start to flourish and develop those iconic ears of corn. In the next sections, we will discuss watering, fertilizing, weed management, pest control, and harvesting, so stay tuned to complete your corn-growing journey!
Watering and Fertilizing Corn Plants
Watering and fertilizing are essential aspects of corn plant care. Proper irrigation and nutrient management will help your corn plants grow strong, healthy, and produce bountiful ears of delicious corn. Here are some guidelines for watering and fertilizing your corn plants:
Watering:
– Corn plants need consistent moisture, especially during their critical growth stages. Aim for at least 1 inch of water per week, either from rainfall or supplemental irrigation. Deep watering is preferred to promote deep root growth and drought tolerance.
– Water the plants in the morning to allow the foliage to dry before evening and reduce the risk of fungal diseases.
– Avoid overwatering, as excessive moisture can lead to root rot and other issues. Ensure that the soil is well-draining to prevent waterlogged conditions.
Fertilizing:
– Before planting, incorporate a balanced fertilizer into the soil based on a soil test recommendation. This will provide the initial nutrients necessary for seed germination and early plant growth.
– When the corn plants reach a height of about 6 inches, side-dress them with nitrogen-rich fertilizer. Apply about 1-2 pounds of nitrogen per 1,000 square feet of planting area. This helps promote healthy leaf and stalk development.
– Monitor the plants for signs of nutrient deficiencies, such as yellowing leaves, stunted growth, or reduced yield. If deficiencies are observed, adjust the fertilization regimen accordingly, adding the specific nutrients needed.
– Organic options, such as compost or well-rotted manure, can also be used as fertilizers to supply natural nutrients to the corn plants. Apply them in a layer around the base of the plants and incorporate them into the soil.
It’s important to note that the specific fertilizer rates and timing may vary depending on your soil conditions, corn variety, and local climate. Consult with your local agricultural extension or gardening expert for more precise recommendations based on your specific growing region.
In addition to regular watering and fertilizing, pay attention to the overall health of your corn plants. Monitor for any signs of stress, insect infestation, or disease and take appropriate measures to address them promptly. Healthy, well-nourished corn plants will reward you with large, juicy ears of corn for you to enjoy at harvest time.
Corn typically takes about 60-100 days to grow from seed to harvest, depending on the variety. Check the seed packet or plant tag for specific information on the variety you are growing.
Read more: How Long To Grow A Pumpkin From Seed
Managing Weeds in Corn Fields
Weeds can compete with corn plants for essential nutrients, water, and sunlight, affecting their growth and overall productivity. Therefore, effective weed management is crucial to ensure healthy corn plants and maximize yield. Here are some strategies for managing weeds in your corn fields:
Preventive Measures:
– Proper soil preparation: Prepare the soil before planting by removing any existing weeds and ensuring a clean, weed-free planting area.
– Mulching: Apply a layer of organic mulch, such as straw or wood chips, around the base of the corn plants. This helps suppress weed growth, retain soil moisture, and regulate soil temperature.
– Crop rotation: Rotate corn with other crops each growing season to break the weed cycle and reduce weed pressure.
– Tight plant spacing: Plant corn in dense rows to create a canopy that shades out weed growth and minimizes available space for weeds to establish.
– Weed barrier fabric: Use weed barrier fabric or landscape fabric in between rows to prevent weeds from emerging.
Cultural Control:
– Hand weeding: Regularly inspect the corn field for weeds and manually remove them by pulling them out from the root. This method is most effective for small-scale or home gardens.
– Cultivation: Use a hoe or cultivator to shallowly cultivate around the base of the corn plants, breaking up the soil surface and uprooting small weeds. Be cautious not to damage the corn roots in the process.
– Timing of cultivation: Time cultivation activities when the weeds are small and vulnerable, typically a few weeks after planting. This will prevent them from becoming established and competing with the corn plants.
Chemical Control:
– Herbicide application: Selective herbicides specifically labeled for use in corn fields can be applied to control weeds. Follow the instructions carefully and apply them when the weeds are actively growing. Take precautions to avoid herbicide drift onto the corn plants.
– Organic options: Organic herbicides derived from natural ingredients, such as vinegar or citrus oil, can be used to manage weeds in corn fields. Be sure to choose products labeled for use in organic gardening and follow the instructions provided.
Remember to always read and follow the instructions on any weed control product you use, and be mindful of any environmental considerations or restrictions in your area.
Implementing a combination of preventive measures, cultural control methods, and, if necessary, targeted herbicide applications will help keep weeds at bay and provide your corn plants with the best conditions for growth. Regular monitoring and timely weed management interventions will keep your corn field free from excessive competition, ensuring a successful corn harvest.
Protecting Corn Plants from Pests and Diseases
Just like any other crop, corn plants are susceptible to various pests and diseases that can significantly impact their health and productivity. To ensure a successful corn harvest, it’s important to be proactive in protecting your corn plants from these potential threats. Here are some strategies to safeguard your corn plants from pests and diseases:
Pest Control:
– Regular scouting: Monitor your corn plants frequently to identify any signs of pest infestation. Look for chewed leaves, visible insects, or any other symptoms that indicate the presence of pests.
– Natural predators: Encourage beneficial insects, such as ladybugs and lacewings, that feed on pests like aphids and caterpillars. You can attract them by planting companion plants, such as marigolds or dill, that attract these beneficial insects.
– Mechanical methods: Handpick large insects, like corn earworms or Japanese beetles, and remove them from the plants. Use sticky traps or barriers to prevent crawling pests from reaching the plants.
– Organic insecticides: If pest infestations become severe, organic insecticides made from natural ingredients, like neem oil or pyrethrum, can be used to control the population. Be sure to follow the instructions on the product label and apply them only when necessary.
Disease Management:
– Crop rotation: Avoid planting corn in the same location year after year to minimize the risk of disease buildup in the soil. Rotate corn with other crops that are not affected by the same diseases.
– Healthy seed selection: Start with disease-free, high-quality seeds. Look for certified disease-resistant varieties that are less susceptible to common corn diseases.
– Proper spacing: Provide adequate spacing between corn plants to improve air circulation and reduce the likelihood of disease spread.
– Fungicide application: In cases of severe disease pressure, apply fungicides specifically labeled for corn to prevent or control diseases. Follow the recommended application rates and timing provided by the product label.
– Sanitation: Practice good garden hygiene by removing and destroying any infected plant parts or debris. This reduces the chance of diseases spreading and overwintering.
Good Cultural Practices:
– Water management: Avoid overwatering or waterlogging the soil, as it can create favorable conditions for diseases to thrive. Water the plants at the base to keep the foliage dry to prevent fungal infections.
– Weed control: Weeds can harbor pests and diseases, so maintaining a weed-free environment around your corn plants is crucial.
– Nutrient balance: Ensure your corn plants receive proper nutrition through regular fertilization, as healthy, well-nourished plants are better able to withstand pest and disease pressure.
– Timely harvesting: Harvest corn at the appropriate stage of maturity to prevent diseases from spreading to mature ears.
By implementing these preventive measures, practicing good cultural practices, and staying vigilant in monitoring your corn plants, you can minimize the damage caused by pests and diseases and promote healthy growth. Consult with local agricultural extension services or experienced gardeners in your area for specific pest and disease concerns in your region and the most effective control methods.
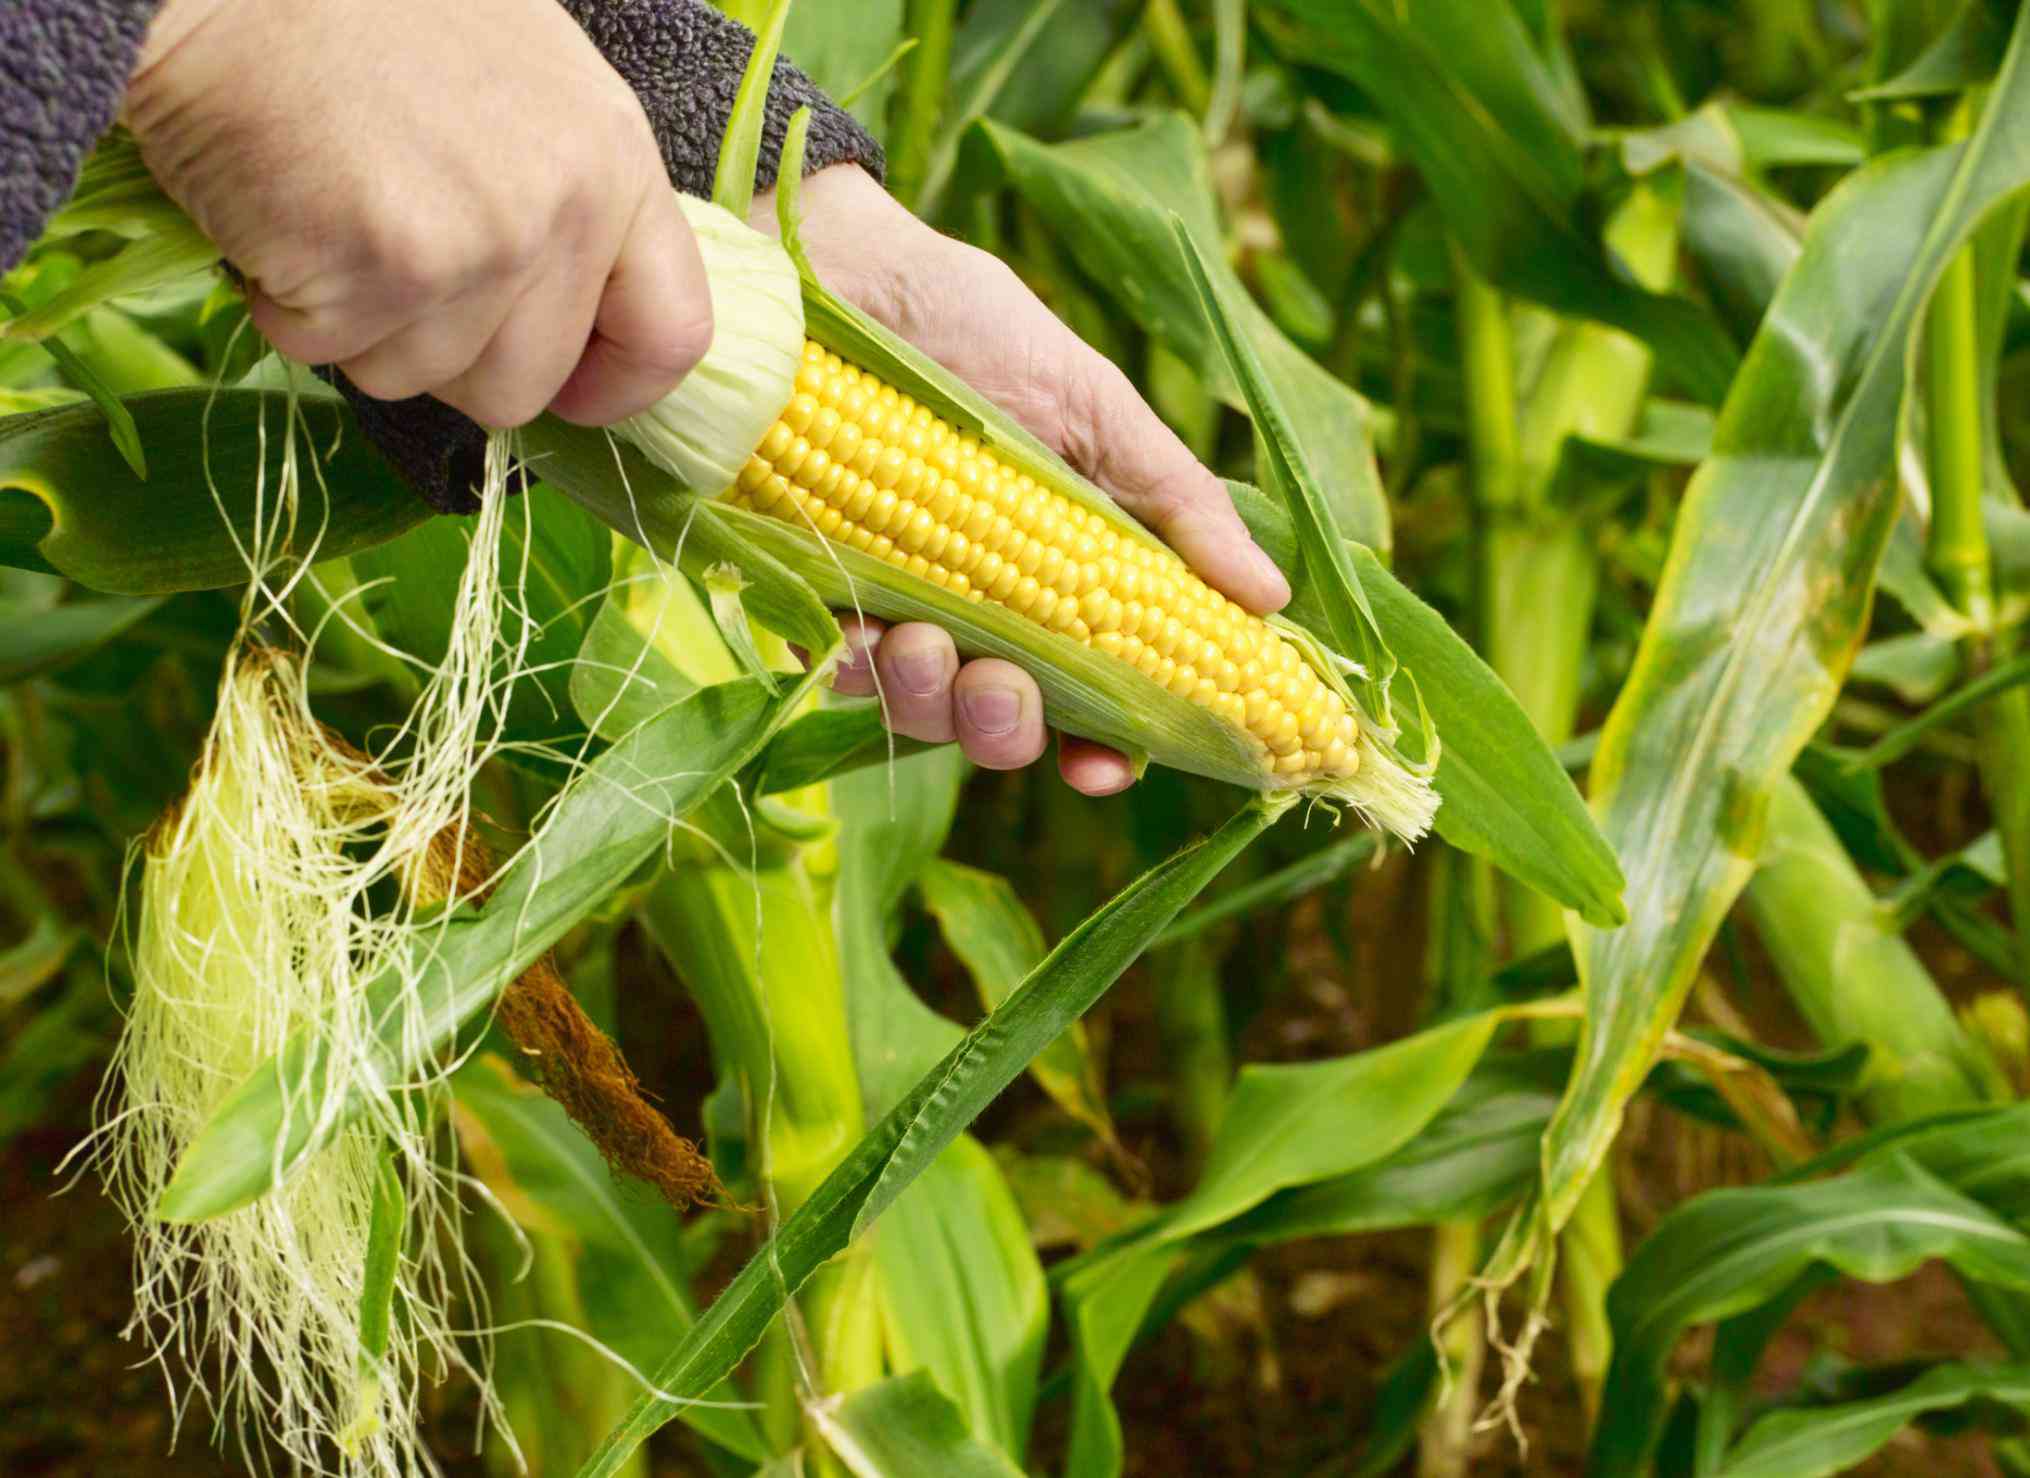
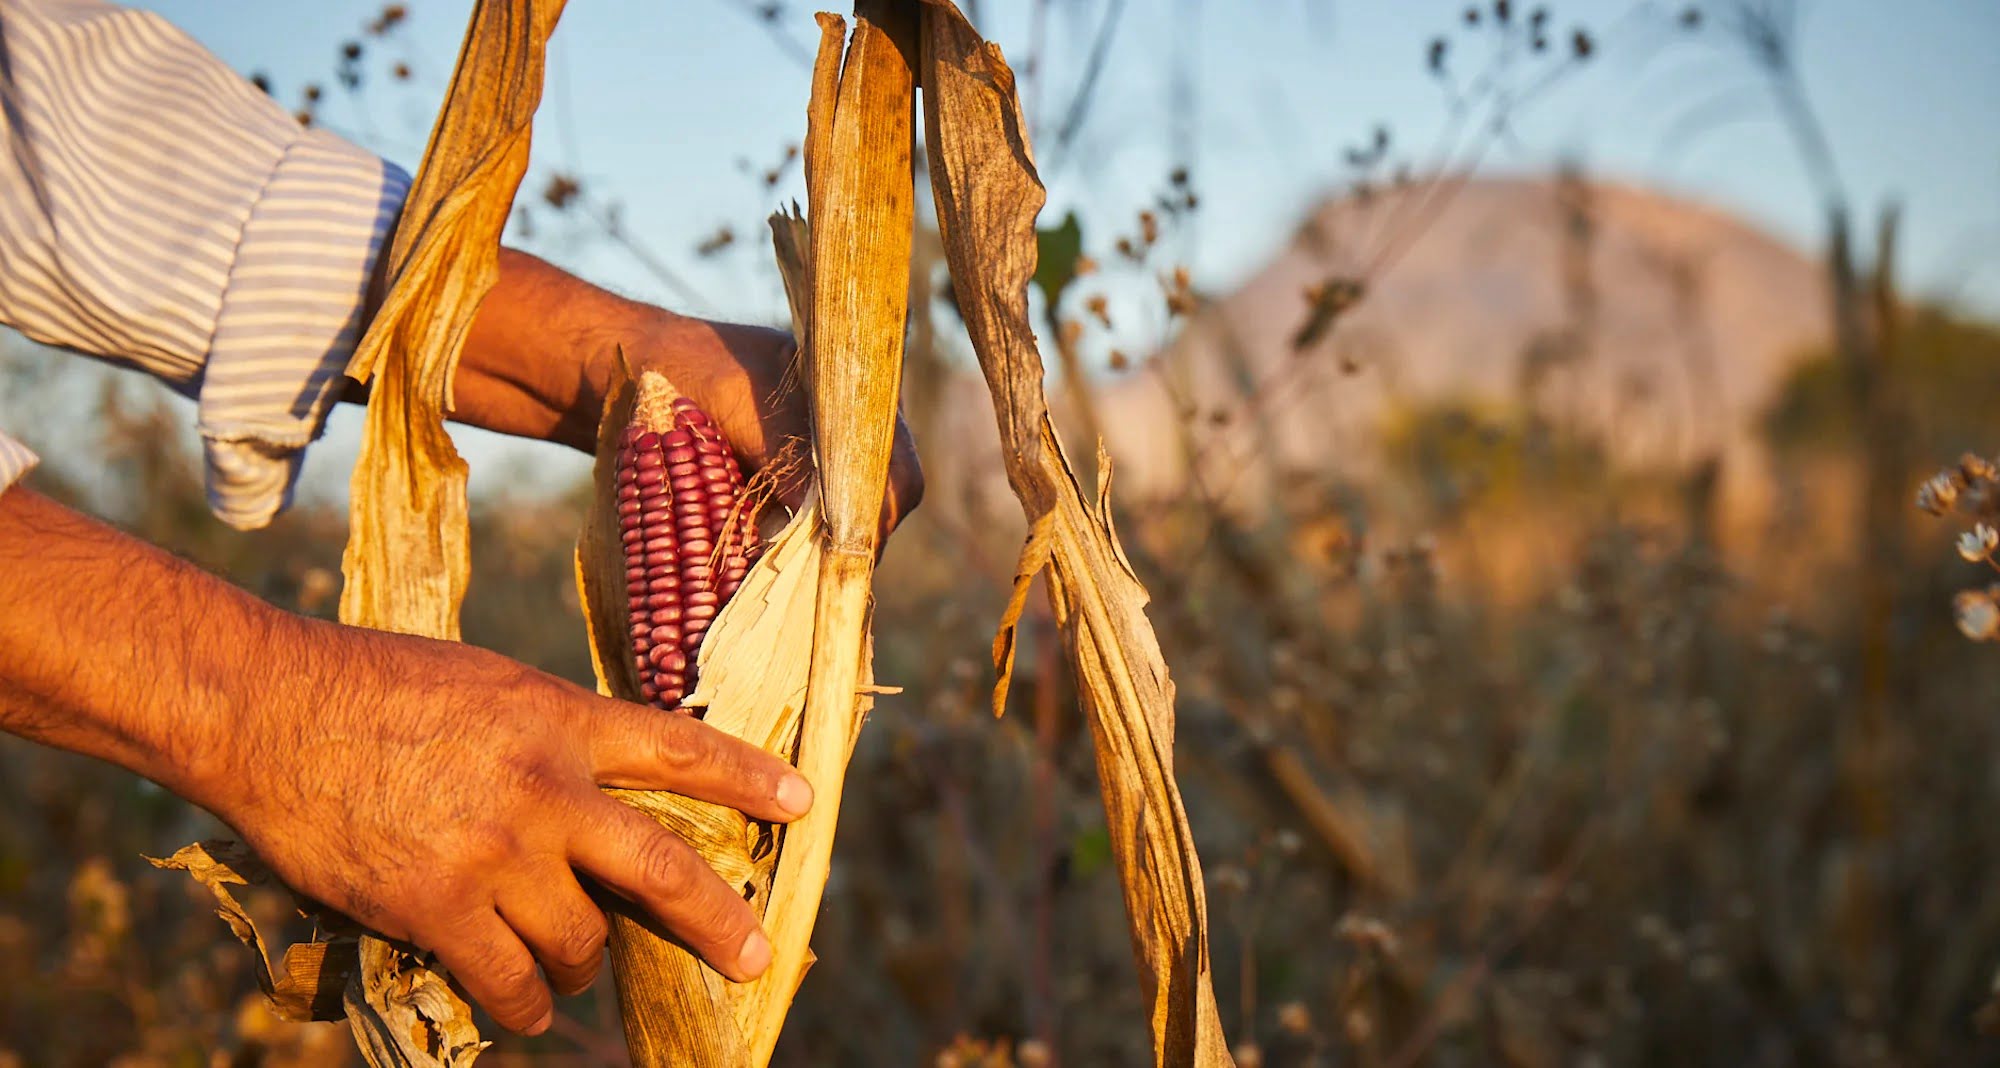
Harvesting Corn
Harvesting corn is an exciting and rewarding time in the garden. When the ears of corn are plump and the husks have turned dry and brown, it’s time to reap the fruits of your labor. Here are some guidelines to help you have a successful corn harvest:
Timing:
– Corn is typically ready for harvest when the silks have dried and turned brown, and the kernels are full and well-developed. Different corn varieties have different maturity times, so refer to the seed packet or variety-specific information to determine the estimated harvest date.
– The ideal time to harvest corn is usually in the early morning when temperatures are cooler. This helps retain the flavor and quality of the corn.
Harvesting techniques:
– Grasp the ear of corn firmly in one hand, close to the base.
– With your other hand, gently pull downward and twist the ear to detach it from the stalk.
– Alternatively, use a sharp knife or shears to cut the ear of corn from the stalk. Make the cut as close to the base as possible, without damaging the plant.
Post-harvest handling:
– Immediately after harvesting, place the ears of corn in a cool and shaded area. Avoid exposing them to direct sunlight or high temperatures, as this can cause the sugars to convert to starch and diminish the corn’s sweet taste.
– Remove the outer husks, but leave a few layers intact to protect the kernels.
– Rinse the ears of corn in cool water to remove any dirt or debris, but do not soak them as this can introduce excess moisture.
– Enjoy your corn as soon as possible for the best flavor and texture. Sweet corn is tastiest when consumed within a few hours of harvesting.
Storage and preservation:
– If you have a surplus of harvested corn, you can store it in the refrigerator for up to one week. Keep the corn in a plastic bag to retain moisture and prevent it from drying out.
– To preserve corn for a longer period, consider freezing. Blanch the ears of corn in boiling water for a few minutes, then transfer them to an ice bath to cool. Once cooled, remove the kernels from the cob and store them in airtight containers or freezer bags in the freezer.
Remember, the sweetness and flavor of corn diminishes over time, so it’s best to consume freshly harvested corn for the most enjoyable culinary experience. With proper harvesting and care, you can savor the taste of your homegrown corn and share it with family and friends.
Conclusion
Congratulations on completing your journey through the world of growing corn! From selecting the right corn seeds to harvesting the ripe ears, you’ve gained valuable knowledge on how to successfully cultivate this delicious crop. By following the guidelines outlined in this article, you can ensure a bountiful harvest of flavorful corn for you and your loved ones to enjoy.
Remember, growing corn from seed is a process that requires patience, care, and attention to detail. From preparing the soil to managing pests and diseases, each step contributes to the overall success of your corn crop. Regular monitoring, timely action, and implementing preventive measures are crucial to maintaining the health and productivity of your corn plants.
As you continue your gardening journey, consider experimenting with different corn varieties to explore the diverse flavors and textures that corn can offer. Try companion planting with other vegetables or herbs to create a more diverse and vibrant garden ecosystem. Remember to rotate your crops, practice good garden hygiene, and maintain a balanced fertility program to keep your garden healthy and thriving.
Lastly, relish the experience of harvesting your homegrown corn. There’s something truly special about savoring the taste of sweet, juicy corn that you’ve nurtured from seed to harvest. Whether you enjoy it fresh off the cob, add it to your favorite recipes, or preserve it for later use, the satisfaction of a successful corn harvest will be a reward in itself.
So, get your hands dirty, embrace the joy of growing corn, and let the flavors of your homegrown harvest be a testament to your green thumb. Happy gardening!
Frequently Asked Questions about How Long To Grow Corn From Seed
Was this page helpful?
At Storables.com, we guarantee accurate and reliable information. Our content, validated by Expert Board Contributors, is crafted following stringent Editorial Policies. We're committed to providing you with well-researched, expert-backed insights for all your informational needs.


0 thoughts on “How Long To Grow Corn From Seed”