Home>Garden Essentials>How Long To Grow Rosemary From Seed
Garden Essentials
How Long To Grow Rosemary From Seed
Modified: October 20, 2024
Discover how long it takes to grow rosemary from seed in your garden and get ready to enjoy fresh herbs in no time!
(Many of the links in this article redirect to a specific reviewed product. Your purchase of these products through affiliate links helps to generate commission for Storables.com, at no extra cost. Learn more)
Introduction
Growing rosemary from seed is a rewarding and fulfilling experience for any gardener. Not only does it allow you to witness the entire lifecycle of this aromatic herb, but it also gives you the opportunity to cultivate a plant that offers numerous benefits for both the garden and the kitchen. Whether you’re a seasoned gardener or just starting out, learning how to grow rosemary from seed is a valuable skill that will provide you with a bountiful supply of this versatile herb.
Rosemary (Rosmarinus officinalis) is an evergreen herb that is native to the Mediterranean region. With its distinct fragrance and needle-like leaves, rosemary has been cherished for centuries for its culinary uses, medicinal properties, and ornamental value. This herb is known for its ability to thrive in a variety of conditions, making it an excellent choice for both indoor and outdoor gardens.
By starting rosemary from seed, you have the advantage of being able to choose from a wide variety of cultivars and enjoy the satisfaction of watching your plants grow from tiny seeds to robust, aromatic bushes. Additionally, growing rosemary from seed allows you to control the entire growing process, from selecting the seeds to providing the optimal conditions for germination and growth. With a little patience and care, you can successfully grow rosemary from seed and enjoy its many benefits.
In this article, we will guide you through the process of growing rosemary from seed, sharing step-by-step instructions and valuable tips to help you achieve success. Whether you plan to grow rosemary in your garden, on your balcony, or even indoors, our comprehensive guide will provide you with the knowledge and skills to cultivate thriving rosemary plants from seed.
Key Takeaways:
- Growing rosemary from seed offers cost-effective, educational, and flavorful benefits. With patience and care, you can enjoy a bountiful supply of this aromatic herb for your garden and kitchen.
- By providing the right conditions and attention, you can successfully grow healthy rosemary plants from seed. From selecting and preparing the seeds to harvesting the flavorful herb, each step contributes to a rewarding gardening journey.
Read more: How To Grow Rosemary From Seeds
Benefits of Growing Rosemary from Seed
Growing rosemary from seed offers several advantages over purchasing seedlings or mature plants. Not only does it give you complete control over the growing process, but it also allows you to select from a wide variety of cultivars and experience the joy of nurturing a plant from its earliest stages. Here are some of the key benefits of growing rosemary from seed:
- Cost-effective: Starting rosemary from seed is a cost-effective way to expand your herb garden. A packet of rosemary seeds typically contains numerous seeds, providing you with multiple plants for a fraction of the cost of purchasing individual seedlings. This is particularly advantageous if you have a large garden or plan to grow rosemary in containers.
- Wide variety: Choosing to grow rosemary from seed opens up a world of possibilities in terms of cultivars. You can select from a wide range of rosemary varieties, each offering unique characteristics such as growth habit, leaf color, and fragrance. Whether you prefer a compact variety for an indoor herb garden or a sprawling variety for your backyard, growing from seed gives you the freedom to choose exactly what you want.
- Higher success rate: While rosemary is a hardy herb, it can sometimes be challenging to establish mature plants from cuttings or transplants. By starting from seed, you give the plants a fresh start and increase the likelihood of successful germination and growth. With proper care and attention, you can achieve a higher success rate when growing rosemary from seed.
- Learning experience: Growing rosemary from seed provides a valuable learning experience, especially for novice gardeners. You get to witness the entire lifecycle of the plant, from germination to maturity, and learn important gardening skills such as seed starting, transplanting, and plant care. This hands-on approach allows you to develop a deeper understanding of the needs and characteristics of rosemary, setting you up for success in future gardening endeavors.
- Fresh and flavorful harvest: One of the most rewarding aspects of growing rosemary from seed is enjoying the fresh and flavorful harvest. Homegrown rosemary tends to have a more intense aroma and taste compared to store-bought counterparts, as it is picked at its peak of freshness. You can pluck sprigs of rosemary whenever you need them for culinary purposes, ensuring the finest flavor in your dishes.
These benefits highlight the value of growing rosemary from seed. By starting the plants from scratch, you have the opportunity to save money, select from a wide variety of cultivars, increase the success rate, learn valuable gardening skills, and enjoy the freshest and most flavorful harvest. So why wait? Let’s dive into the steps of growing rosemary from seed and get started on this exciting gardening journey!
Steps to Grow Rosemary from Seed
Growing rosemary from seed is a relatively straightforward process, but it requires attention to detail and patience. By following these steps, you can ensure the successful germination and growth of your rosemary seeds:
- Selecting and preparing the seeds: Choose high-quality rosemary seeds from a reputable supplier or save seeds from a mature rosemary plant. Before sowing, soak the seeds in water for 24 hours to improve germination rates. Additionally, you can scarify the seeds by gently rubbing them with sandpaper to break their outer coating and promote faster germination.
- Germinating rosemary seeds: Fill seed trays or pots with a well-draining seed starting mix. Sow the rosemary seeds on the surface of the soil, lightly pressing them in, and cover them with a thin layer of vermiculite or fine soil. Mist the soil to keep it moist, but avoid overwatering, as rosemary seeds are prone to rotting. Place the trays in a warm location with indirect sunlight or use a grow light to provide adequate light for germination.
- Transplanting the seedlings: Once the seedlings have developed true leaves and are sturdy enough to handle, usually after 4-6 weeks, they can be transplanted into individual pots or into the garden. Choose a location with full sun and well-drained soil. Space the seedlings 12-18 inches apart to allow for their sprawling growth. Gently remove the seedlings from the tray, taking care not to damage the delicate roots, and plant them at the same depth as they were in the tray.
- Caring for rosemary seedlings: Rosemary thrives in well-drained soil, so ensure that your seedlings are not sitting in waterlogged soil. Water them thoroughly but allow the top inch of soil to dry out between waterings to prevent root rot. Provide regular sunlight or grow lights for at least 6-8 hours a day. Fertilize the seedlings with a diluted organic fertilizer every 4-6 weeks to promote their growth.
- Harvesting rosemary: Once your rosemary plants have matured (usually after 3-4 months), you can start harvesting the leaves. Use sharp pruning shears or scissors to snip off sprigs of rosemary as needed. Remember to never remove more than a third of the plant’s foliage at once, as this can hinder its growth. Regular pruning will encourage bushier growth and ensure a continuous supply of fresh rosemary for your culinary creations.
By following these steps and providing the necessary care and attention, you can successfully grow rosemary from seed. Remember to be patient, as rosemary can take some time to establish and reach maturity. With each step, you will learn more about the unique characteristics of rosemary and witness the transformation of tiny seeds into vibrant, aromatic plants. Soon enough, you’ll be reaping the benefits of your homegrown rosemary in your kitchen and garden.
Selecting and Preparing the Seeds
The first step in growing rosemary from seed is selecting and preparing the seeds. Here are some important considerations to keep in mind:
- Source of Seeds: Choose high-quality rosemary seeds from a reputable supplier or save seeds from a mature rosemary plant. It’s best to select seeds that are specifically labeled for germination to ensure the highest success rate.
- Freshness of Seeds: Fresh seeds have a higher chance of germination compared to older ones. Check the seed packet or label for the date of harvest or expiration. If you are saving seeds from a mature rosemary plant, ensure that the seeds are fully mature and dry before collecting them.
- Seed Stratification: Rosemary seeds can benefit from a process called stratification, which helps break their dormancy and improve germination rates. This involves exposing the seeds to a period of cold temperatures to mimic the natural winter conditions they would experience in their native environment. To stratify the seeds, place them in a plastic bag with a moistened paper towel, seal the bag, and refrigerate it for 2-4 weeks.
- Soaking Seeds: Before sowing, you can enhance germination rates by soaking the rosemary seeds. Place the seeds in a container of room temperature water for 24 hours. This hydrates the seeds and softens their outer coating, making it easier for them to absorb water and germinate.
- Scarification: In some cases, rosemary seeds may have a tough outer coating that inhibits germination. Scarifying the seeds can help break this coating and encourage faster germination. This can be done by gently rubbing the seeds with sandpaper or using a nail file to create small abrasions on the surface of the seed.
- Seed Starting Mix: Choose a well-draining seed starting mix for sowing the rosemary seeds. This ensures that excess moisture is not retained and reduces the risk of seed rot. You can purchase a commercial seed starting mix or create your own by combining equal parts of vermiculite, peat moss, and perlite.
By carefully selecting and preparing the rosemary seeds, you optimize their chances of successful germination. Choosing fresh, stratified, and soaked seeds, as well as scarifying them if necessary, sets the stage for a healthy and robust rosemary plant. The next step is germinating the seeds, where you will create the ideal conditions for sprouting the seeds and nurturing them into healthy seedlings.
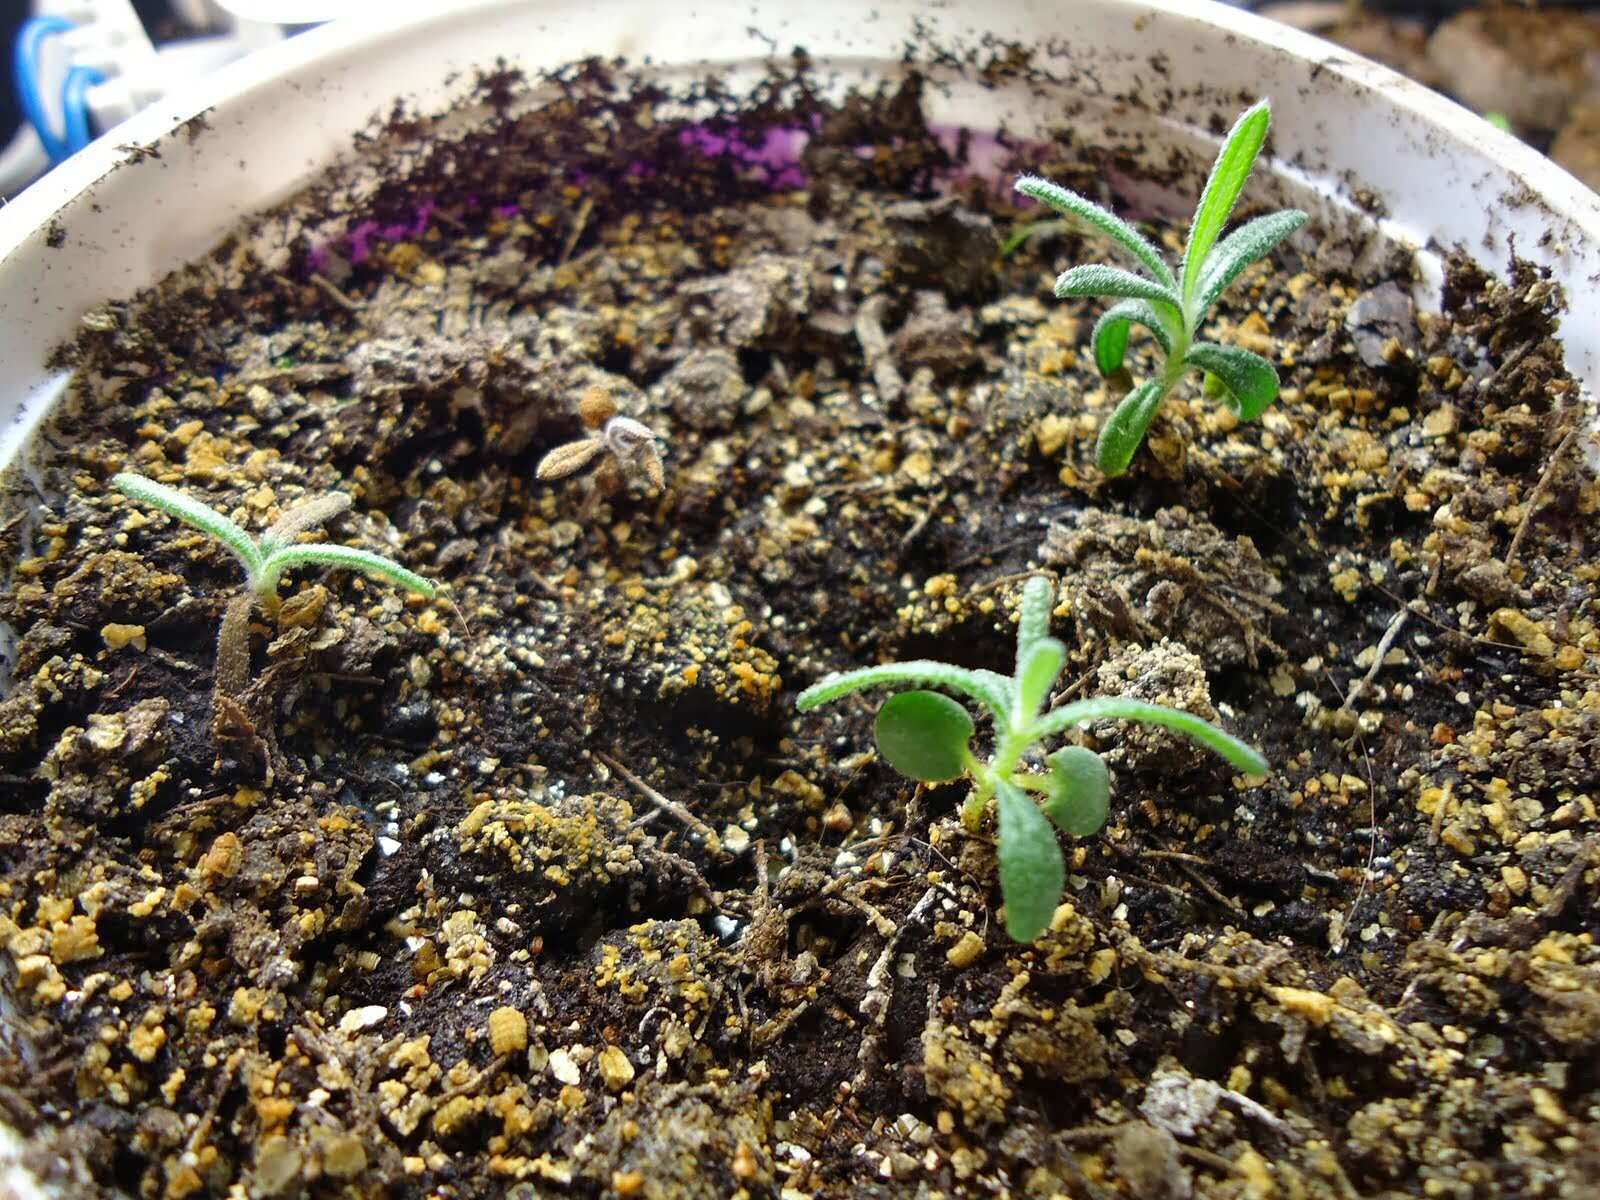
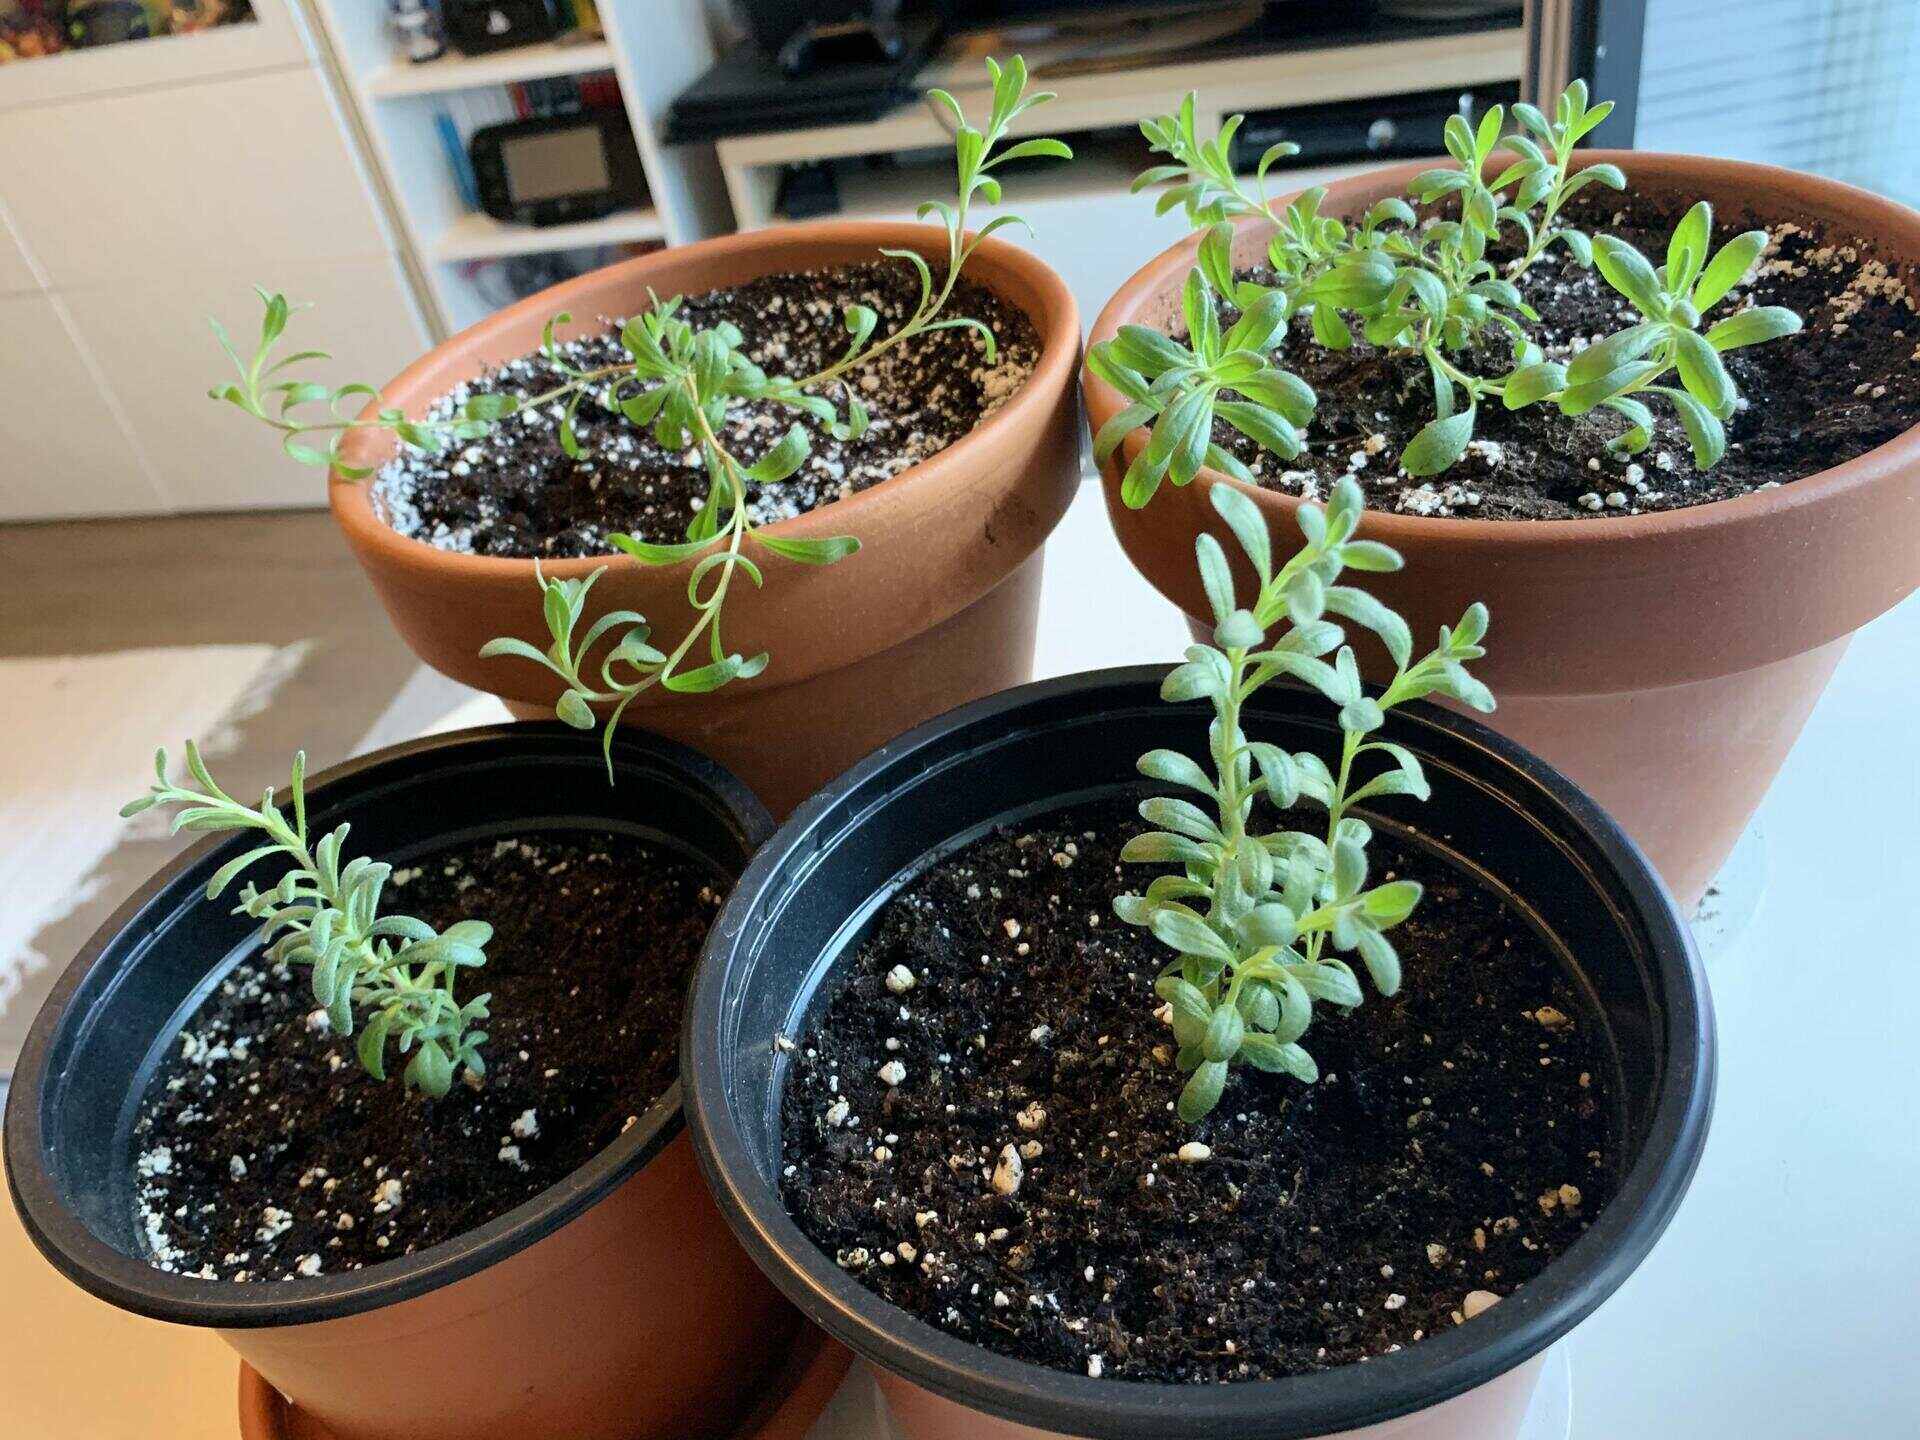
Rosemary seeds can take 14-21 days to germinate. It will take about 3-4 months for the seedlings to grow into mature plants ready for harvesting. Keep the soil moist and provide plenty of sunlight for best results.
Germinating Rosemary Seeds
Once you have selected and prepared your rosemary seeds, it’s time to begin the process of germination. Follow these steps to give your seeds the best chance of sprouting:
- Prepare the Growing Containers: Fill seed trays or pots with a well-draining seed starting mix. Make sure the containers have drainage holes to prevent water from pooling at the bottom.
- Sow the Seeds: Place the rosemary seeds on the surface of the soil, spacing them about an inch apart. Lightly press the seeds into the soil to ensure good soil-to-seed contact.
- Cover and Mist: Sprinkle a thin layer of vermiculite or fine soil over the seeds to provide some coverage. Mist the soil with water to ensure it is moist but not overly wet. Avoid overwatering, as excess moisture can cause the seeds to rot.
- Provide the Ideal Environment: Rosemary seeds require warmth and indirect sunlight to germinate. Place the seed trays or pots in a warm location, such as near a south-facing window, or use a grow light to provide sufficient warmth and light. Aim for a temperature between 65 to 75°F (18 to 24°C).
- Water Carefully: Check the moisture level of the soil regularly. While it’s important to keep the soil moist, avoid waterlogging. Water lightly whenever the top inch of soil feels dry to the touch.
- Be Patient: Germination can take anywhere from 14 days to a few weeks, so be patient. Keep an eye on the seed trays and watch for the first signs of sprouts breaking through the soil surface.
- Provide Adequate Light: Once the seedlings emerge, make sure they receive sufficient light. Place them in a bright location or continue using grow lights, making sure they receive 6 to 8 hours of light daily.
- Thin Out Seedlings (optional): If multiple seedlings emerge in close proximity, they may compete for resources. Thin out the weaker seedlings by gently removing them to allow the stronger ones more space to grow.
During the germination phase, it’s important to provide a warm and moist environment and avoid overwatering to prevent damping off or fungal diseases. Monitor the seed trays regularly, adjust watering as needed, and be patient as the rosemary seeds work their magic and sprout into delicate seedlings.
Once the seedlings have developed true leaves and are sturdy enough to handle, you can proceed to transplant them into individual pots or into your garden. But before transplanting, be sure to acclimate the seedlings gradually to outdoor conditions by hardening them off for a week or two. This involves gradually exposing them to the outdoor environment by placing them outside for a few hours each day, gradually increasing the duration over time.
With proper care and attention during the germination phase, you’re on your way to growing healthy rosemary plants from seed. The next step is transplanting the seedlings, where you will give them room to grow and flourish.
Read more: How Long To Grow A Pumpkin From Seed
Transplanting the Seedlings
Once your rosemary seedlings have developed true leaves and are sturdy enough to handle, it’s time to transplant them into individual pots or into your garden. Transplanting is an important step in the growth process, as it provides the seedlings with more space to develop robust root systems and ultimately become healthy, mature rosemary plants. Follow these steps to ensure a successful transplant:
- Choose the Right Time: Wait until the seedlings are 4-6 weeks old and have reached a height of about 2-3 inches before transplanting. This allows the plants to establish a strong root system and reduces the risk of transplant shock.
- Prepare Individual Pots or Garden Beds: If transplanting the seedlings into individual pots, select pots that are at least 6-8 inches in diameter with drainage holes. Fill the pots with a well-draining potting mix. If transplanting into the garden, choose a location with full sun and well-drained soil.
- Water the Seedlings: Before transplanting, water the seedlings thoroughly to ensure they are well-hydrated. This will help minimize stress during the transplanting process.
- Gently Remove the Seedlings: Carefully remove the seedlings from the seed tray using a spoon or small trowel. Be gentle to avoid damaging the delicate roots.
- Transplant into Individual Pots: If transplanting into individual pots, make a small hole in the potting mix and place the seedling in the hole. Firmly press the soil around the base of the seedling to secure it in place.
- Transplant into the Garden: If transplanting into the garden, dig a hole slightly larger than the root ball of the seedling. Gently place the seedling into the hole and backfill with soil, ensuring that the seedling is at the same depth as it was in the seed tray.
- Water the Transplanted Seedlings: After transplanting, water the seedlings thoroughly to help settle the soil and promote root growth. Be careful not to overwater, as rosemary dislikes soggy soil.
- Provide Adequate Space: Space the transplanted seedlings at least 12-18 inches apart in the garden to allow for their spreading growth habit. This ensures that each plant has enough room to receive sunlight and nutrients.
- Protect from Harsh Conditions: If the weather is particularly hot or windy, provide temporary protection to the transplanted seedlings. Use shade cloth or create a small windbreak until they can acclimate to their new environment.
Transplant shock can occur when seedlings are moved to new containers or garden beds. To minimize this shock, handle the seedlings with care, water them well before and after transplanting, and avoid disturbing the sensitive roots. With proper transplanting techniques, your rosemary seedlings will establish themselves in their new homes and continue to grow into healthy, mature plants.
Once the seedlings have been successfully transplanted, it’s important to provide proper care and maintenance to ensure their continued growth and development. The next step is to learn about the essential care practices for your rosemary seedlings.
Caring for Rosemary Seedlings
Proper care is essential for the healthy growth of your rosemary seedlings. By providing the right conditions and attention, you can ensure that your plants thrive and become robust, aromatic additions to your garden or herb collection. Here are some important care tips for your rosemary seedlings:
- Sunlight: Rosemary thrives in full sun, requiring at least 6 to 8 hours of direct sunlight each day. Place your seedlings in a sunny location, such as a south-facing window or a spot in your garden that receives ample sunlight. If growing indoors, consider using grow lights to supplement natural sunlight.
- Watering: Rosemary prefers well-drained soil and does not tolerate overwatering. Allow the top inch of the soil to dry out between waterings, and then water the seedlings thoroughly. Avoid keeping the soil constantly wet, as this can lead to root rot. Check the moisture level of the soil regularly to ensure you are providing the right amount of water.
- Soil: Rosemary grows best in well-draining soil with a slightly acidic to neutral pH level, between 6.0 and 7.0. If planting in pots, use a high-quality potting mix that provides good drainage. In the garden, amend the soil with organic matter, such as compost, to improve its drainage capabilities.
- Fertilization: Young rosemary seedlings do not require much fertilizer. If you notice slow growth or pale leaves, you can apply a diluted organic fertilizer once every 4 to 6 weeks. Avoid overfertilizing, as excessive nutrients can negatively affect the flavor and aroma of the herb.
- Pruning: Regular pruning helps to promote bushier growth and ensures a compact and healthy plant. Starting from when the seedlings have reached a height of around 4 inches, you can pinch back the tips of the stems to encourage branching. Use sharp pruning shears or scissors to remove any dead or damaged foliage as well.
- Pest and Disease Control: Rosemary is generally resistant to most pests and diseases. However, keep an eye out for common issues like aphids, spider mites, and powdery mildew. If necessary, treat infestations with organic insecticidal soap or neem oil, and ensure good air circulation around the plants to prevent fungal diseases.
- Winter Protection: If you live in a region with cold winters, provide some protection for your rosemary seedlings during the colder months. Cover them with a frost cloth or move them indoors if temperatures drop below freezing. Rosemary is frost-sensitive, so protecting it from severe cold is essential for its survival.
With proper care and attention, your rosemary seedlings will flourish and develop into healthy, mature plants. Remember to monitor their sunlight, water, and soil conditions regularly. Prune and fertilize as needed, and be vigilant for any signs of pests or diseases. By following these care guidelines, you’ll be rewarded with vibrant and aromatic rosemary plants that will delight your senses and provide an abundance of fresh herbs for culinary use.
Next, let’s explore the exciting process of harvesting rosemary and making the most of this versatile herb!
Harvesting Rosemary
Harvesting rosemary is a gratifying experience, as it allows you to enjoy the fresh and aromatic flavors of this versatile herb in your culinary creations. Here are some guidelines to help you harvest rosemary at the right time and in the most effective way:
- Mature Growth: Wait until your rosemary plants have reached a mature growth stage before harvesting. This is typically around 3 to 4 months after transplanting the seedlings. At this stage, the plants will have established a strong root system and developed ample foliage for harvest.
- Choose the Right Time of Day: The best time to harvest rosemary is in the morning, after the dew has dried but before the heat of the day sets in. The aromatic oils in the leaves are at their peak during this time, providing the best flavor and aroma.
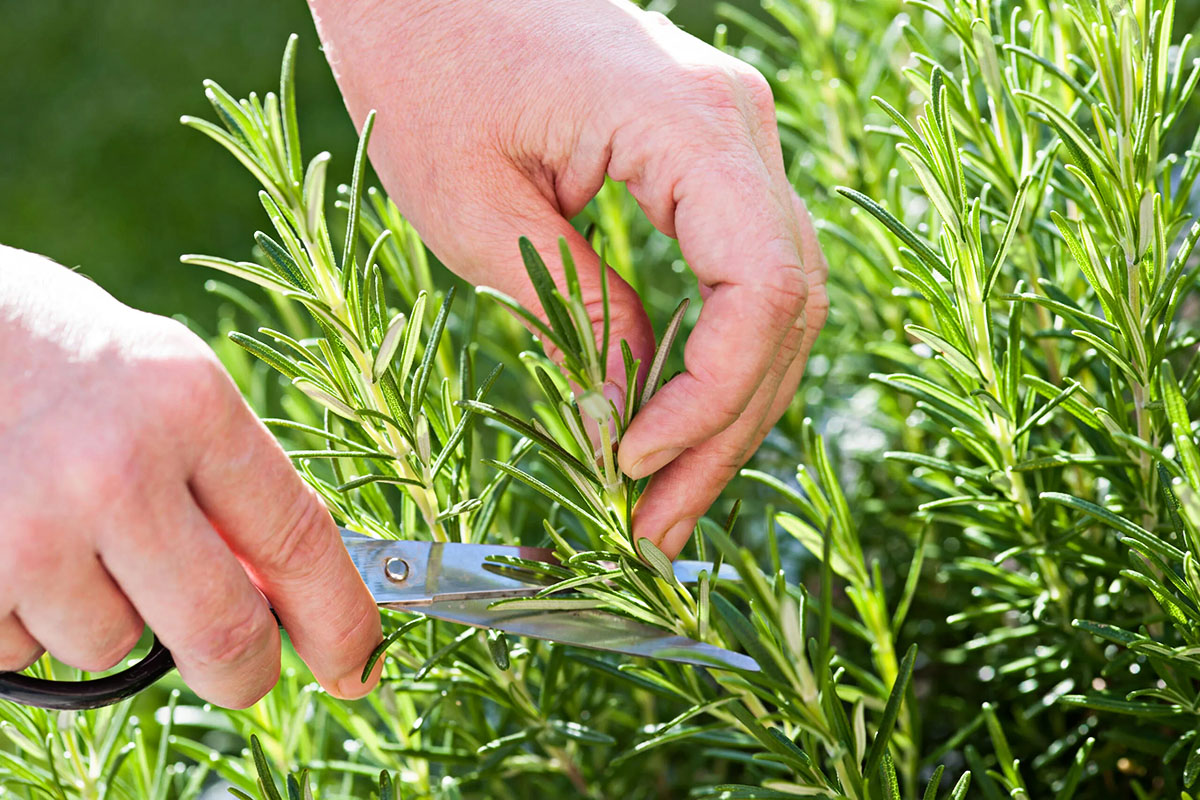
- Pruning Techniques: When harvesting rosemary, use sharp pruning shears or scissors to cut off sprigs or branches. Avoid pulling or tearing the foliage, as this can damage the plant. Cut each stem just above a node or leaf joint to promote new growth from that point.
- Prune Conservatively: While rosemary can tolerate pruning, avoid removing more than one-third of the plant’s foliage at once. This ensures that the plant continues to grow vigorously and remains healthy. Regular pruning encourages bushier growth and prevents the rosemary from becoming woody and leggy.
- Preserving Fresh Rosemary: Use the fresh rosemary immediately after harvesting for optimal flavor. If you have more than you can use, you can store the sprigs in a plastic bag or airtight container in the refrigerator. Alternatively, you can dry the rosemary by hanging bunches upside down in a cool, dry place. Once dry, remove the leaves from the stem and store them in airtight containers.
- Using Rosemary in Culinary Dishes: Rosemary is a versatile herb that complements a wide range of dishes. It pairs well with roasted meats, potatoes, vegetables, soups, stews, and sauces. Infuse olive oil with fresh rosemary for a flavorful addition to your cooking. Remember that rosemary has a strong flavor, so use it sparingly and taste as you go when adding it to recipes.
- Continual Harvest: Regular harvesting of your rosemary plants promotes growth and ensures a continuous supply of fresh herbs. As your plants grow, you can harvest more sprigs at a time while still adhering to the one-third rule. Pruning encourages new growth, ensuring a healthy and prolific rosemary plant.
Harvesting rosemary not only provides you with an abundant supply of this aromatic herb, but it also fosters the growth and vitality of your plants. With proper pruning techniques and careful preservation, you can relish the flavors of fresh rosemary in your favorite dishes throughout the year.
Now that you’ve learned how to harvest your rosemary, it’s time to put your knowledge into practice and enjoy the culinary delights that this versatile herb brings to your kitchen!
Now that you've mastered growing rosemary from seed, why not spruce up your garden further? For those with a flair for creativity and a love for practical outdoor projects, checking out some unique garden fence designs could be the next step. Whether you're looking for privacy, beauty, or just a new project, these suggestions will surely inspire your next garden makeover. So, don't wait to give your outdoor space a fresh, new look!
Frequently Asked Questions about How Long To Grow Rosemary From Seed
Was this page helpful?
At Storables.com, we guarantee accurate and reliable information. Our content, validated by Expert Board Contributors, is crafted following stringent Editorial Policies. We're committed to providing you with well-researched, expert-backed insights for all your informational needs.


0 thoughts on “How Long To Grow Rosemary From Seed”