Home>Garden Essentials>How To Do An Infill Plot Plan
Garden Essentials
How To Do An Infill Plot Plan
Modified: March 7, 2024
Learn how to create an infill plot plan for your garden with this step-by-step guide. Transform your outdoor space into a lush and thriving oasis.
(Many of the links in this article redirect to a specific reviewed product. Your purchase of these products through affiliate links helps to generate commission for Storables.com, at no extra cost. Learn more)
Introduction
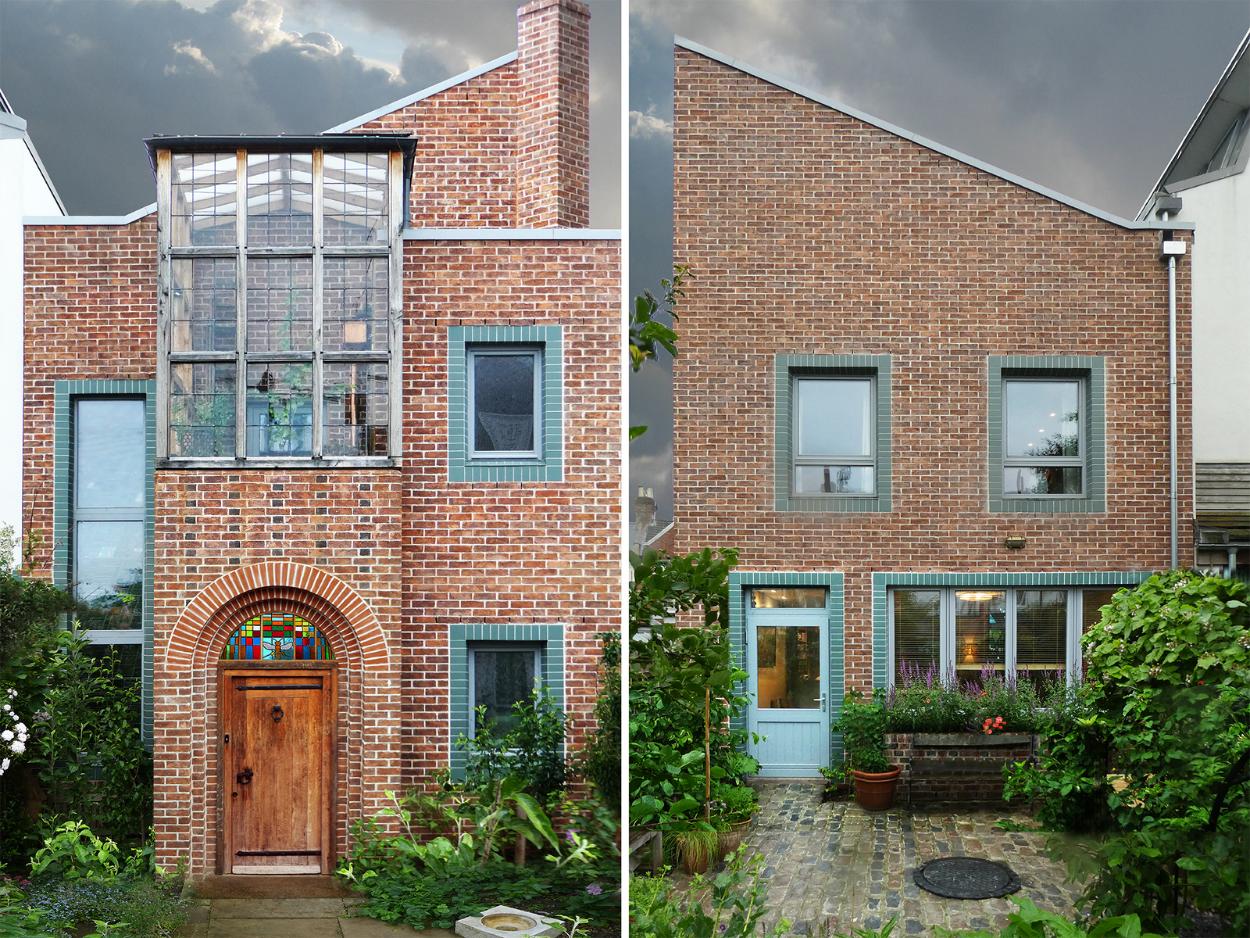
Infill development has become increasingly popular in urban areas where land is limited and the demand for housing is high. This type of development involves the construction of new structures on vacant or underutilized lots within existing neighborhoods. However, before embarking on an infill project, it is crucial to have a comprehensive and accurate plot plan.
A plot plan is a detailed drawing that shows the boundaries of a property and the placement of structures, utilities, and other important features. It is a vital tool for architects, contractors, and homeowners during the design and construction process. It ensures that the new structures are positioned correctly within the property boundaries and comply with local planning and zoning regulations.
In this article, we will guide you through the steps to create an infill plot plan. Whether you are a property owner looking to build a new structure or a professional involved in the construction industry, these steps will help you create an accurate plan that aligns with both your vision and local regulations.
So, let’s dive in and learn how to create an infill plot plan that will serve as a roadmap for your future construction project!
Key Takeaways:
- Before building on a property, it’s crucial to accurately determine its boundaries to avoid disputes. Look for markers, consult professionals, and record measurements to ensure compliance with local regulations.
- Creating a detailed plot plan involves measuring existing structures, collecting data, and considering zoning regulations. Positioning new structures strategically and finalizing the plan ensures a successful infill development.
Read more: How To Do Infill Mask In Cura
Step 1: Determine Property Boundaries
Before starting any construction project, it is crucial to identify and establish the boundaries of your property. This step is essential to ensure that you stay within your property lines and avoid any disputes with neighboring property owners. Here’s how to determine your property boundaries:
1. Obtain a copy of the property survey: The first step is to locate and review the property survey conducted at the time of purchasing the property. This survey should provide accurate measurements and markers that outline your property boundaries. If you don’t have a copy, you can contact your local land surveyor or the county assessor’s office to obtain one.
2. Look for physical markers: Take a stroll around your property and look for physical markers such as posts, stakes, or fences that indicate the boundaries. These markers are often placed by surveyors to indicate property lines.
3. Check neighboring property markers: If you are unable to find markers on your property, you can check neighboring properties for markers as they often align with the adjoining property lines.
4. Use a metal detector: In some cases, the physical markers may not be visible due to overgrowth or other factors. In such situations, you can use a metal detector to locate buried property markers, such as metal stakes or disks.
5. Consult with a professional surveyor: If you are unable to determine your property boundaries with certainty, it is advisable to consult a professional land surveyor. They have the expertise and tools to accurately identify and mark your property boundaries.
Once you have determined the property boundaries, it is important to record and document the measurements and markers. This information will be used in the subsequent steps of creating your infill plot plan.
Remember, accurately determining your property boundaries is essential to ensure that your new structures are positioned correctly within your property and comply with local regulations. Taking the time to complete this step will save you from potential legal disputes and costly mistakes in the future.
Step 2: Measure Existing Structures
After determining your property boundaries, the next step in creating an infill plot plan is to measure the existing structures on your property. This step is important to accurately depict the space available for new construction and ensure that the layout of the new structures aligns with the existing ones. Here’s how to measure the existing structures:
1. Use a measuring tape: Start by measuring the length, width, and height of each existing structure on your property. This includes buildings, garages, sheds, and any other permanent structures. Measure from the outer edges of the structures to determine their dimensions accurately.
2. Consider setbacks and overhangs: Take into account any setbacks or overhangs that are required by local building codes or zoning regulations. These setbacks dictate the distance that structures must be set back from property lines or other structures. Measure and note these setbacks to ensure compliance.
3. Document key features: As you measure the existing structures, make note of any key features such as doors, windows, porches, or decks. These features will be valuable information when positioning the new infill structures on your plot plan.
4. Use a graph paper or a digital tool: To create an accurate representation of the existing structures, it is recommended to use a graph paper or a digital plotting tool. This will allow you to draw the structures to scale and accurately depict their size and placement in relation to the property boundaries.
5. Label and record measurements: As you measure and draw the existing structures, label each structure appropriately and record the measurements. This will ensure clarity when referring to the plot plan during the construction process.
By accurately measuring the existing structures on your property, you will have a clear understanding of the available space for new construction. This information will be crucial in the next steps of creating your infill plot plan, such as positioning the new structures and considering setbacks and zoning regulations. Taking the time to measure and document these details will help you create a comprehensive and accurate plan for your infill project.
Step 3: Collect Data and Measurements
In the process of creating an infill plot plan, it is essential to collect relevant data and measurements that will factor into the design and placement of new structures. This step involves gathering information about the site, utilities, and any other pertinent details. Here’s how to collect data and measurements for your infill plot plan:
1. Site analysis: Begin by conducting a thorough site analysis. Take note of the topography, soil conditions, and any existing vegetation or landscaping features. This information will be helpful in determining the best placement for new structures and identifying any potential challenges or constraints.
2. Locate utility lines: Identify the locations of utility lines on your property, such as water, sewer, gas, and electric lines. These utilities will need to be considered when positioning new structures and ensuring they are not obstructed or compromised.
3. Measure distances: Use a measuring tape to measure distances between existing structures, property boundaries, and any other pertinent features. Accurate measurements will help in creating a precise and realistic plot plan.
4. Identify easements: Check for any easements on your property, which are rights given to others to access or use a portion of the land. Easements may impact where you can build new structures, so it’s important to identify and note them on your plot plan.
5. Consider neighboring buildings: Take into account the location, size, and height of neighboring buildings. This will help in determining appropriate setbacks and visualizing how the new structures will fit within the existing context.
6. Determine solar orientation: Understand the sun’s path throughout the day and across the seasons. This will assist in optimizing the positioning of new structures for optimal natural light and energy efficiency.
7. Note environmental factors: Consider any environmental factors that may impact the design and placement of new structures, such as wind patterns, noise levels, or views.
8. Document findings: Record all the data, measurements, and observations systematically. Organize the information in a way that is easy to interpret and refer back to during the planning and design process.
Collecting comprehensive data and measurements is critical to developing an informed and well-designed infill plot plan. By taking the time to gather this information, you will have a solid foundation for the subsequent steps of creating your plot plan and ensure that your new structures are positioned appropriately within the existing site context.
Step 4: Create a Scale Drawing
Once you have collected the necessary data and measurements, it’s time to create a scale drawing of your infill plot plan. This step is crucial as it provides a visual representation of the property boundaries, existing structures, and proposed new construction. Here’s how to create a scale drawing:
1. Choose a scale: Determine a scale that accurately represents the size of your property and structures. Common scales for plot plans include 1/8 inch equals 1 foot or 1/4 inch equals 1 foot. Choose a scale that allows you to clearly depict the necessary details while maintaining accuracy.
2. Start with the property boundaries: Begin by drawing the property boundaries based on your measurements and survey information. Use a ruler or a CAD (Computer-Aided Design) software to ensure straight and accurate lines.
3. Add existing structures: Using the measurements you collected in Step 2, draw the existing structures on your plot plan. Include the dimensions and relative positions of doors, windows, and other notable features.
4. Position new structures: If you are planning to build new structures as part of your infill project, sketch their position on the plot plan. Consider setbacks, zoning regulations, and the site analysis data you collected in Step 3. Ensure that the new structures have enough space and are correctly positioned within the property boundaries.
5. Include utility lines: Indicate the locations of utility lines such as water, sewer, gas, and electric on your plot plan. This will help ensure that new structures do not interfere with existing utilities.
6. Label and annotate: Label each structure, utility line, and key feature on the plot plan. Use clear and concise labels to provide easy reference and understanding.
7. Add a legend: Create a legend that explains the symbols and abbreviations used in your plot plan. This will help others interpret the drawing accurately.
8. Review and revise: After completing the scale drawing, review it carefully to ensure accuracy and clarity. Make any necessary revisions or corrections before finalizing the plan.
Creating a scale drawing of your infill plot plan provides a visual representation of your project. It allows you to see how the existing structures and proposed new construction fit together within the property boundaries. This drawing will serve as a valuable reference during the design, permitting, and construction phases of your infill project.
When creating an infill plot plan, make sure to accurately measure the dimensions of the existing structures and property boundaries to ensure that the new development fits seamlessly into the existing space.
Read more: When Do Guardrails Require Infill
Step 5: Identify Easements and Setbacks
When creating an infill plot plan, it is important to identify any easements and setbacks that may impact the placement and design of your new structures. Easements are legal rights given to others to use or access a portion of your property, while setbacks are the required distances between structures and property boundaries. Here’s how to identify easements and setbacks:
1. Review property documents: Start by reviewing your property documents, including the property survey and any previous land use or development records. These documents often contain information about existing easements and setbacks.
2. Consult local codes and regulations: Refer to the local planning and zoning codes to understand the required setbacks for your property. Setbacks can vary depending on factors such as the property’s location, size, and zoning designation. Note the setback requirements for front, side, and rear yards.
3. Check for utility easements: Contact your local utility companies to inquire about any utility easements on your property. Utility easements grant companies the right to access and maintain utility lines that run through your property.
4. Locate easement markers: If there are existing easements on your property, look for markers or signs that indicate their presence. These markers are typically placed along the boundaries of the easement area.
5. Consult with professionals: If you are unsure about the existing easements or setbacks on your property, it is advisable to consult with professionals such as land surveyors, architects, or property attorneys. They can provide guidance and help clarify any legal or regulatory requirements.
6. Note easements and setbacks on the plot plan: Once you have identified the easements and setbacks, mark them on your plot plan. Use clear symbols or labels to indicate their locations and dimensions.
7. Consider the implications: Take into account the easements and setbacks when positioning and designing your new structures. Ensure that you comply with the setback requirements and avoid building within the easement areas to avoid any legal or practical issues down the line.
By identifying easements and setbacks, you can plan and design your new structures in a way that complies with legal requirements and maintains appropriate spacing from property boundaries and existing structures. This step is crucial to ensure that your infill project is in compliance with local regulations and avoids potential conflicts or obstacles in the future.
Step 6: Position Infill Structures
After identifying the easements and setbacks, it’s time to strategically position the infill structures on your plot plan. This step requires careful consideration of the site analysis, existing structures, and any zoning regulations. Here’s how to effectively position the infill structures:
1. Assess site conditions: Consider the topography, soil conditions, and existing vegetation on your property. This information will help you determine the best location for the infill structures, taking into account factors such as drainage, foundation requirements, and preservation of trees or landscaping.
2. Plan for functionality and flow: Think about how the new structures will function within the overall layout of your property. Consider factors such as access points, parking areas, outdoor living spaces, and privacy concerns. Ensure that the positioning of the infill structures promotes a smooth flow and maximizes functionality.
3. Visual impact and aesthetics: Consider the visual impact of the infill structures on both your property and the surrounding neighborhood. Aim for a design that complements the existing architecture and maintains the character of the area. Position the structures in a way that enhances the overall aesthetic appeal of your property.
4. Maintain privacy and views: Take into account the privacy of both your property and neighboring properties. Position the infill structures in a way that respects privacy boundaries and minimizes any negative impact on views or sightlines.
5. Consider solar orientation: Optimize the positioning of the infill structures to take advantage of natural light and energy efficiency. Orienting the structures to maximize sunlight exposure can help reduce energy consumption and create a more comfortable living environment.
6. Infrastructure and utility connections: Plan the placement of the infill structures with the existing infrastructure in mind. Consider the locations of utility connections such as water, sewer, gas, and electric, and ensure that the new structures can be easily connected to these services.
7. Revise and refine: After positioning the initial layout of the infill structures, take the time to review and refine the plan. Consider input from professionals such as architects or engineers to ensure that the positioning is practical, functional, and meets all necessary requirements.
By carefully positioning the infill structures, you can create a well-designed and functional layout that enhances the overall use and value of your property. Balancing considerations of functionality, aesthetics, privacy, and infrastructure will lead to an effective and harmonious integration of the new structures within the existing site.
Step 7: Consider Planning and Zoning Regulations
When creating an infill plot plan, it is crucial to consider and comply with planning and zoning regulations that govern your property. These regulations outline the specific requirements for land use, building design, setbacks, density, and other factors that may impact your infill project. Here’s how to navigate planning and zoning regulations effectively:
1. Review local ordinances: Start by reviewing the local planning and zoning ordinances that apply to your property. These regulations are typically available online or through the local planning department. Familiarize yourself with the specific requirements and guidelines for your area.
2. Understand land use classifications: Determine the land use classification of your property, such as residential, commercial, or mixed-use. This classification will dictate the appropriate use and development on your property and may have specific requirements related to setbacks, building height, parking, and other factors.
3. Determine setbacks and building envelope: Identify the setback requirements for your property, which dictate the distance that buildings must be set back from property lines or other structures. Understand the maximum building height, lot coverage, and other parameters that determine the building envelope within which your infill structures must adhere.
4. Consider density and zoning restrictions: Take into account any restrictions on property density and zoning designations that may impact the scale and type of infill development allowed on your property. Some areas have specific regulations regarding the number of units, building size, or architectural styles that must be followed.
5. Consult with local authorities: If you have any questions or need clarification on specific regulations, reach out to the local planning department or zoning officials. They can provide guidance on the applicable regulations and help ensure that your infill project complies with all necessary requirements.
6. Seek professional assistance if needed: If navigating planning and zoning regulations seems complex or overwhelming, consider hiring professionals such as architects, land use consultants, or attorneys who specialize in local zoning and development regulations. They can provide valuable guidance and expertise to ensure compliance with all applicable rules.
7. Revise your plot plan as necessary: Based on the requirements and restrictions outlined by planning and zoning regulations, revise your plot plan as needed to ensure compliance. Adjust the positioning, size, or design of the infill structures as necessary to meet the regulatory standards.
By carefully considering and complying with planning and zoning regulations, you can ensure that your infill project aligns with the specific requirements of your area. Adhering to these regulations not only helps you avoid legal issues but also ensures that your project fits harmoniously into the surrounding neighborhood and contributes positively to the community.
Step 8: Finalize the Plot Plan
After going through the previous steps, it’s time to finalize your infill plot plan. This final step involves reviewing and refining the plan to ensure accuracy, clarity, and compliance with all relevant regulations and requirements. Here’s how to finalize your plot plan:
1. Review all previous steps: Start by reviewing each step of the plot plan creation process, including property boundaries, existing structures, data collection, easements and setbacks, positioning of infill structures, and compliance with planning and zoning regulations. Ensure that all the necessary information is accurately represented on the plot plan.
2. Verify measurements and dimensions: Double-check all measurements and dimensions included on the plot plan. Make sure they are accurate and specified in the units commonly used in architectural or construction plans, such as feet or meters.
3. Confirm all labels and annotations: Review all labels and annotations on the plot plan to ensure that they are clear, concise, and correctly identify each structure, utility line, setback, easement, or other relevant features. Consider using consistent symbols, colors, or patterns to enhance clarity and understanding.
4. Include a north arrow and scale: Add a north arrow to indicate the orientation of the plot plan and ensure that all structures and features are correctly aligned. Include a scale bar or written scale to represent the actual size of the plot plan and allow for accurate measurements.
5. Consider aesthetics and legibility: Pay attention to the overall aesthetics and legibility of the plot plan. Use clear and professional drawing techniques, such as neat lines, readable fonts, and proper spacing, to enhance the visual appeal and ensure easy interpretation.
6. Seek feedback if necessary: Consider sharing the finalized plot plan with professionals, such as architects, contractors, or land surveyors, to gather their input and ensure its feasibility and accuracy. They may provide valuable insights or suggestions for improvement.
7. Prepare digital and printed versions: Create both digital and printed versions of the finalized plot plan for easy distribution and reference. Make sure the digital version is in a widely used format, such as PDF, and that the printed version is of sufficient quality and size to maintain clarity and readability.
8. Keep a copy for your records: Retain a copy of the finalized plot plan for your own records. It will serve as a valuable reference throughout the design, permitting, and construction phases of your infill project.
By carefully reviewing, refining, and finalizing the plot plan, you ensure that it accurately represents your intended design, conforms to regulatory requirements, and provides a reliable guide for your infill project. The finalized plot plan serves as an essential tool to communicate your vision to stakeholders and professionals involved in the construction process.
Read more: How To Spread Infill Without Infill Machine
Conclusion
Creating a comprehensive and accurate plot plan is a critical step in the infill development process. It helps ensure that your new structures are positioned correctly within your property boundaries and compliant with local planning and zoning regulations. By following the steps outlined in this article, you can create an infill plot plan that serves as a roadmap for your construction project.
Starting with determining property boundaries, you establish the foundation of your plot plan. Measuring existing structures allows you to understand the space available for new construction. Collecting data and measurements provides crucial information for the design and placement of new structures. Creating a scale drawing offers a visual representation of your property, making it easier to visualize and communicate your plans.
Identifying easements and setbacks ensures that your project complies with legal requirements and respects neighboring properties. Positioning infill structures strategically optimizes functionality, aesthetics, and site conditions. Considering planning and zoning regulations guarantees adherence to specific guidelines for land use, setbacks, density, and other factors. Finally, finalizing the plot plan involves a meticulous review and refinement process to ensure accuracy, clarity, and compliance.
Remember, engaging professionals such as architects, land surveyors, or attorneys can provide additional guidance and expertise throughout the plot plan creation process. Consult with local authorities to clarify any questions regarding regulations and requirements.
With a well-crafted and finalized plot plan in hand, you can confidently move forward with your infill project. It serves as a valuable tool for obtaining necessary permits, communicating your vision to contractors, and ultimately bringing your construction project to life.
By following these steps and taking the time to create a comprehensive and accurate plot plan, you are setting yourself up for a successful infill development that seamlessly integrates with your existing property and enhances its overall value.
Frequently Asked Questions about How To Do An Infill Plot Plan
Was this page helpful?
At Storables.com, we guarantee accurate and reliable information. Our content, validated by Expert Board Contributors, is crafted following stringent Editorial Policies. We're committed to providing you with well-researched, expert-backed insights for all your informational needs.


0 thoughts on “How To Do An Infill Plot Plan”