Home>Garden Essentials>How To Do Infill Mask In Cura
Garden Essentials
How To Do Infill Mask In Cura
Modified: March 7, 2024
Learn how to do infill mask in Cura for your garden project. Improve print quality and save filament with this helpful guide.
(Many of the links in this article redirect to a specific reviewed product. Your purchase of these products through affiliate links helps to generate commission for Storables.com, at no extra cost. Learn more)
Introduction
Welcome to the world of 3D printing, where creativity and innovation meet. One of the key aspects of successful 3D printing is achieving the desired strength and structure of your printed object. This is where infill masking with Cura software comes into play. In this article, we will explore the process of infill masking in Cura, a popular slicing software used in the 3D printing community.
Cura is a user-friendly, open-source software that allows you to prepare your 3D models for printing. It provides a range of options and settings that allow you to customize various aspects of your print. One of these settings is infill, which refers to the internal structure of your 3D print. Infill plays a crucial role in determining the strength, durability, and material usage of the printed object.
The default setting for infill in Cura is typically a solid fill, where the interior of the printed object is completely solid. While this may be suitable for certain prints, it may not always be necessary or cost-effective. Infill masking allows you to selectively choose areas that require a solid fill and areas that can have a lower infill density or even no infill at all. This not only reduces material consumption but also significantly reduces the print time.
By strategically applying infill masking, you can customize the strength of different parts of your print and optimize material usage. For example, if you are printing a structural component that requires maximum strength, you can apply a solid infill to that specific area. On the other hand, for decorative or lightweight parts, you can use a lower infill density or no infill at all.
Now that we understand the importance of infill masking, let’s dive into the step-by-step process of infill masking in Cura. We will cover how to adjust the infill settings, add infill mesh modifiers, and generate G-code for your 3D printer. So let’s get started!
Key Takeaways:
- Customize the strength and material usage of 3D prints by strategically applying infill masking in Cura, saving time and reducing material consumption for efficient and high-quality results.
- With infill masking in Cura, unleash your creativity and achieve customized 3D prints by controlling infill density and pattern, creating visually stunning, durable, and efficient models.
Read more: How To Change Infill Pattern In Cura
Step 1: Opening Cura Software
Before we can begin the process of infill masking in Cura, we need to open the software and import the 3D model that we want to work with. Follow these simple steps to get started:
1. Launching Cura: Start by opening the Cura software on your computer. If you don’t have it installed already, you can download it from the official Ultimaker website.
2. Importing the model: Once Cura is open, you will be greeted with a user-friendly interface. To import your 3D model, click on the “Open File” button or go to “File” > “Open File” in the menu bar. Browse your computer and locate the file in the supported format (such as .stl or .obj). Select the file and click “Open”.
Cura will now load your 3D model and display it in the workspace. You can use the navigation tools to rotate, zoom, and pan the model to get a better view. Take your time to check if the model is oriented correctly and centered on the print bed.
Once you have successfully opened Cura and imported your 3D model, you can proceed to the next step of adjusting the infill settings.
Step 2: Adjusting the Infill Settings
Now that we have our 3D model open in Cura, we can start adjusting the infill settings. Infill refers to the internal structure of the print, and it plays a crucial role in determining its strength and material usage. Let’s explore how to customize the infill settings in Cura:
1. Locating the infill settings: In the Cura interface, you will find the infill settings on the right-hand side panel. Look for the tab labeled “Infill” and click on it. This will open up the infill settings options.
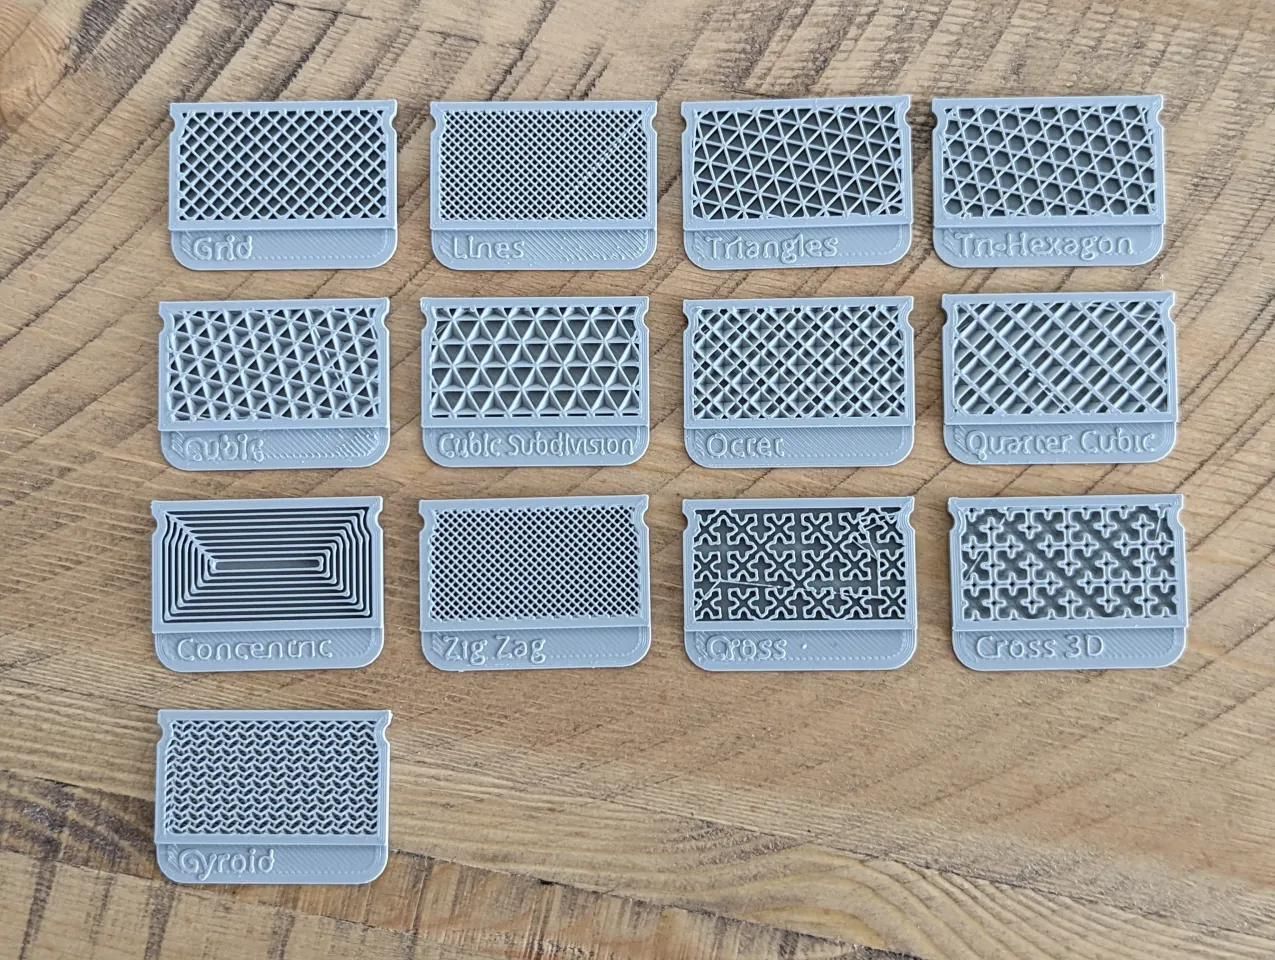
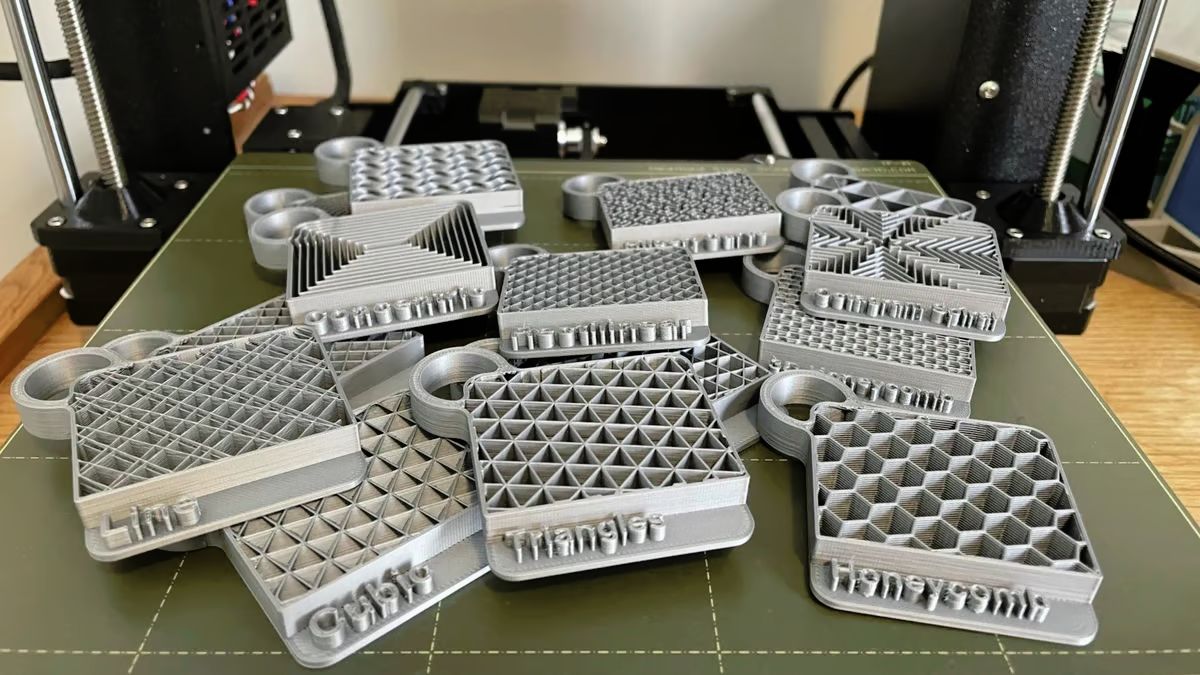
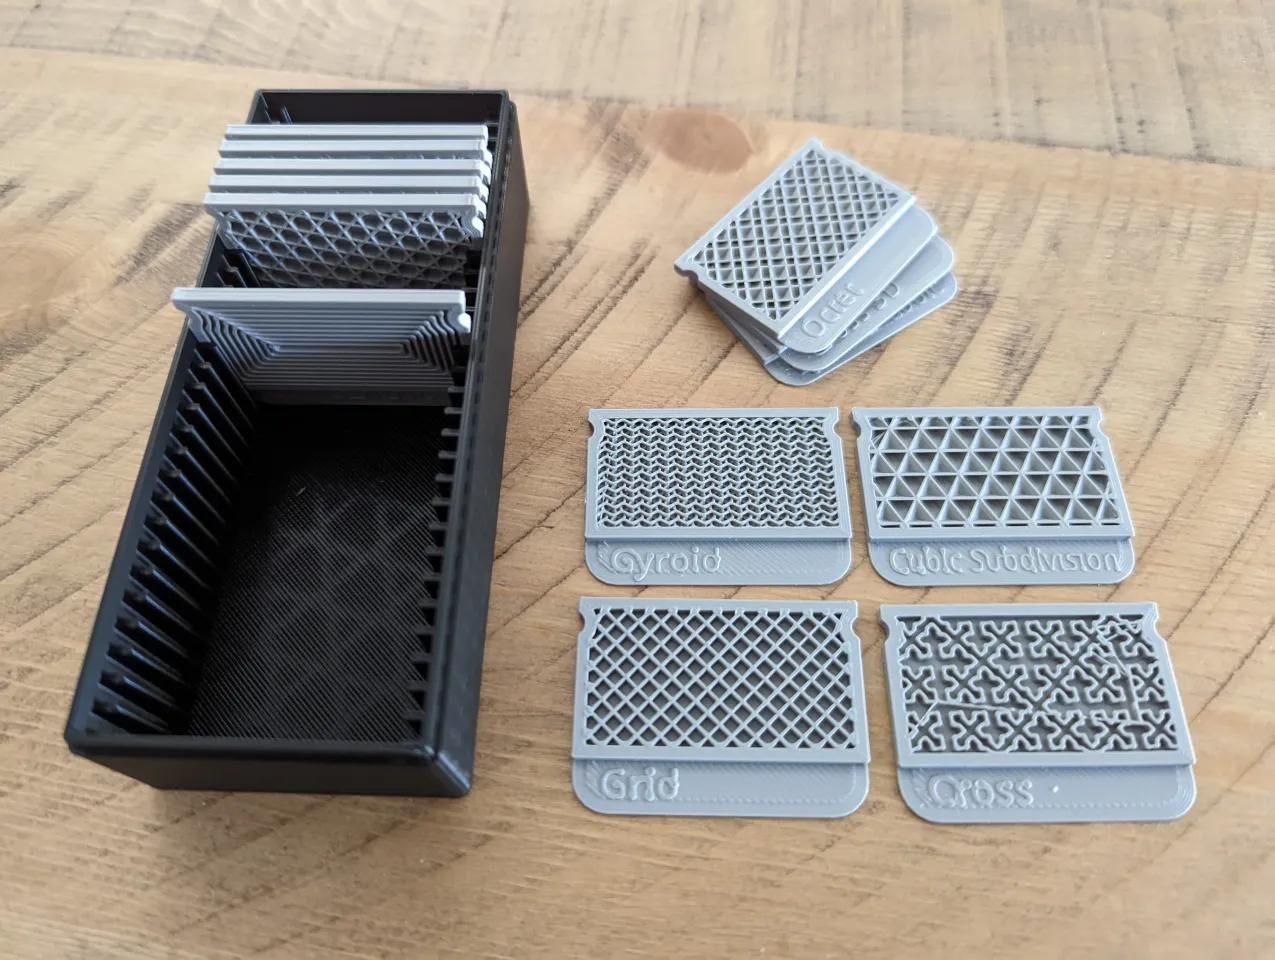
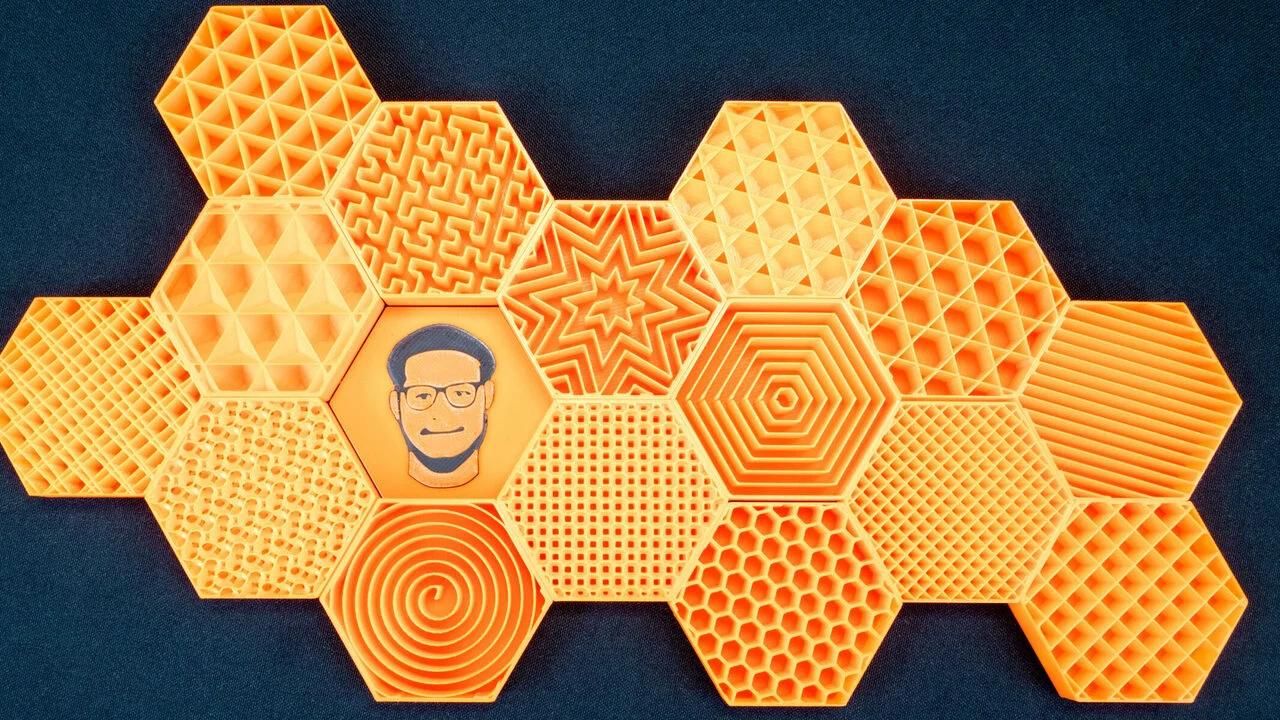
2. Choosing the infill pattern: Cura offers a variety of infill patterns, such as grid, lines, triangles, and more. The infill pattern determines the structure of the internal fill of your print. To choose a specific pattern, click on the drop-down menu under the “Pattern” section. Select the pattern that suits your requirements and desired aesthetics.
3. Adjusting the infill density: The infill density indicates the amount of material that will be used to fill the internal structure of the print. A higher infill density results in a stronger but more material-intensive print, while a lower density may save on material but potentially sacrifice strength. To adjust the infill density, use the slider or input a specific percentage in the “Infill Density” field. Experiment with different values to find the right balance for your specific print.
Take your time to explore the available infill options in Cura and adjust them according to your preferences and requirements. Once you are satisfied with the infill settings, we can move on to the next step of adding infill mesh modifiers.
When setting up infill in Cura, increase the infill density for stronger parts, and decrease it for faster prints with less material. Keep in mind that higher infill percentages will increase print time and material usage.
Step 3: Adding Infill Mesh Modifier
In this step, we will learn how to add infill mesh modifiers in Cura. Infill mesh modifiers allow you to selectively apply infill or adjust the infill settings to specific areas of your 3D model. Here’s how you can do it:
1. Activating the Infill Mesh Modifier plugin: To begin, we need to activate the Infill Mesh Modifier plugin in Cura. Go to “Extensions” in the menu bar and select “Post Processing” > “Modify G-Code”. In the pop-up window, click on “Add a script” and choose “Infill Mesh Modifier” from the available options. This will enable the Infill Mesh Modifier functionality.
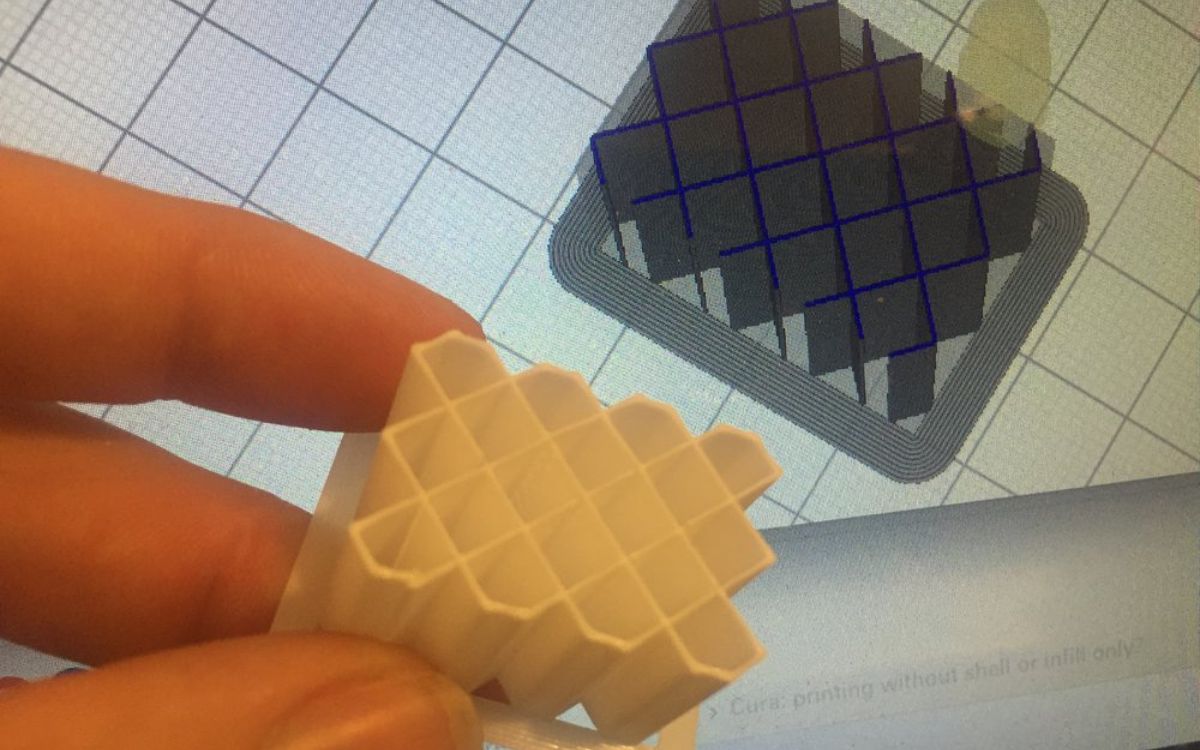
2. Selecting the areas to apply infill mask: Now that we have the Infill Mesh Modifier activated, we can start selecting the areas where we want to apply the infill mask. Click on the “Surface” button in the toolbar on the left-hand side of the Cura interface. This will bring up the selection mode. Use your mouse to draw a box or click on specific areas of your model to highlight them in blue. These selected areas will be the ones where the infill mask will be applied.
3. Adjusting the infill settings for the masked areas: Once you have selected the desired areas, click on the “Infill” button in the toolbar. This will bring up the infill settings for the masked regions. Here, you can fine-tune the infill density, pattern, and other settings specific to the masked areas. Make sure to adjust these settings based on your desired outcomes and print requirements.
By using the Infill Mesh Modifier, you have the flexibility to customize the infill settings for specific areas of your 3D model. This allows for optimized strength, material usage, and overall print quality. Once you have adjusted the infill settings for the masked areas, we can move on to the final step of generating the G-code.
Step 4: Generating G-Code
Now that you have adjusted the infill settings and applied infill mesh modifiers to your 3D model in Cura, it’s time to generate the G-code. G-code is a language that instructs your 3D printer on how to print the model layer by layer. Here’s how you can generate the G-code in Cura:
1. Checking the infill settings: Before generating the G-code, it’s important to double-check the infill settings to ensure they are set to your desired specifications. Review the overall infill density, pattern, and any customized settings you applied to the masked areas. Make any necessary adjustments if needed.
2. Exporting the model as G-Code: Once you are satisfied with the infill settings, it’s time to export the model as G-code. Go to “File” in the menu bar and select “Save G-code” or “Save to File” depending on the version of Cura you are using. Choose a location on your computer where you want to save the G-code file and give it a descriptive name.
Cura will now process your model and generate the G-code file based on the infill settings and modifications you made. The time it takes to generate the G-code will vary depending on the complexity of your model and the settings applied.
Once the G-code generation is complete, you can transfer the G-code file to your 3D printer using a USB drive or any other preferred method. Load the G-code file onto your printer and start the print. The printer will now follow the instructions in the G-code file, including the infill settings and modifications you made, to bring your 3D model to life.
Congratulations! You have successfully adjusted the infill settings and generated the G-code for your 3D print using Cura. By utilizing infill masking, you can optimize the strength and material usage of your prints, resulting in efficient and high-quality 3D prints.
Remember to experiment with different infill settings and techniques to achieve the desired results for your specific projects. Happy printing!
Read more: How To Set Honeycomb Infill In Cura
Conclusion
Infill masking with Cura software provides a powerful tool for 3D printing enthusiasts to achieve customized and optimized prints. By selectively applying infill or adjusting the infill settings, you can enhance the strength, reduce material consumption, and save printing time for your 3D models.
Throughout this article, we have explored the step-by-step process of infill masking in Cura. We learned how to open Cura software, import the 3D model, adjust the infill settings, add infill mesh modifiers, and generate the G-code necessary for printing. These steps empower you to tailor the infill density and pattern to specific areas of your model, allowing for a more efficient and effective print.
It’s important to remember that infill masking is a technique that requires experimentation and optimization. The desired infill settings may vary depending on the specific requirements of your print, such as strength, weight, and aesthetics. Take the time to test different infill densities, patterns, and modifiers to find the perfect balance for each project.
By mastering the art of infill masking in Cura, you can unlock endless possibilities for your 3D printing projects. Whether you’re creating functional prototypes, artistic sculptures, or intricate models, infill masking allows you to customize the internal structure of your prints to achieve the desired outcome.
So, don’t be afraid to explore the world of infill masking in Cura and unleash your creativity. With the ability to control the infill density and pattern, you can create prints that are not only visually stunning but also durable and efficient.
Now that you have a solid understanding of infill masking with Cura, it’s time to put your knowledge into practice. Start experimenting with different infill settings, and witness the transformative power of infill masking in your 3D prints. Happy printing!
Frequently Asked Questions about How To Do Infill Mask In Cura
Was this page helpful?
At Storables.com, we guarantee accurate and reliable information. Our content, validated by Expert Board Contributors, is crafted following stringent Editorial Policies. We're committed to providing you with well-researched, expert-backed insights for all your informational needs.


0 thoughts on “How To Do Infill Mask In Cura”