Home>Garden Essentials>How Do You Change Infill Percentage In Matter Control
Garden Essentials
How Do You Change Infill Percentage In Matter Control
Modified: August 17, 2024
Learn how to change the infill percentage in Matter Control for your garden projects. Achieve the perfect balance of strength and efficiency.
(Many of the links in this article redirect to a specific reviewed product. Your purchase of these products through affiliate links helps to generate commission for Storables.com, at no extra cost. Learn more)
Introduction
Welcome to Matter Control: the ultimate software solution for 3D printing enthusiasts and professionals. Whether you’re a beginner or an experienced user, understanding the importance of infill percentage is crucial for achieving the desired strength, durability, and aesthetic appeal in your 3D prints. In this article, we will delve into the intricacies of infill percentage and guide you through the process of changing it using the Matter Control software.
When we talk about 3D printing, we often focus on the external aspects of the object – the shape, size, and surface finish. However, the interior of a 3D printed object is equally important, as it determines its structural integrity. This is where infill comes into play.
Infill refers to the internal structure of a 3D printed object that provides support and stability. It is created by filling the empty spaces inside the object with a pattern of solid material, usually plastic. The infill percentage determines how much of the internal space is filled, thus directly influencing the strength and weight of the printed object.
The infill percentage is essentially the amount of solid material in relation to the total volume of the object. A higher infill percentage means more solid material, resulting in a stronger, more robust print. Conversely, a lower infill percentage reduces the amount of material used, making the print lighter and more cost-effective.
Key Takeaways:
- Adjusting infill percentage in Matter Control software allows you to control the strength, weight, and cost of your 3D prints by changing the internal structure. Higher infill for strength, lower for decoration.
- Experiment with different infill patterns and settings in Matter Control to unleash your creativity and achieve the best results for your 3D prints. Don’t be afraid to try new things and have fun printing!
Read more: How To Change Infill On Makerbot
Understanding Infill Percentage
Before we dive into the process of changing infill percentage in Matter Control, let’s take a moment to understand how it affects your 3D prints.
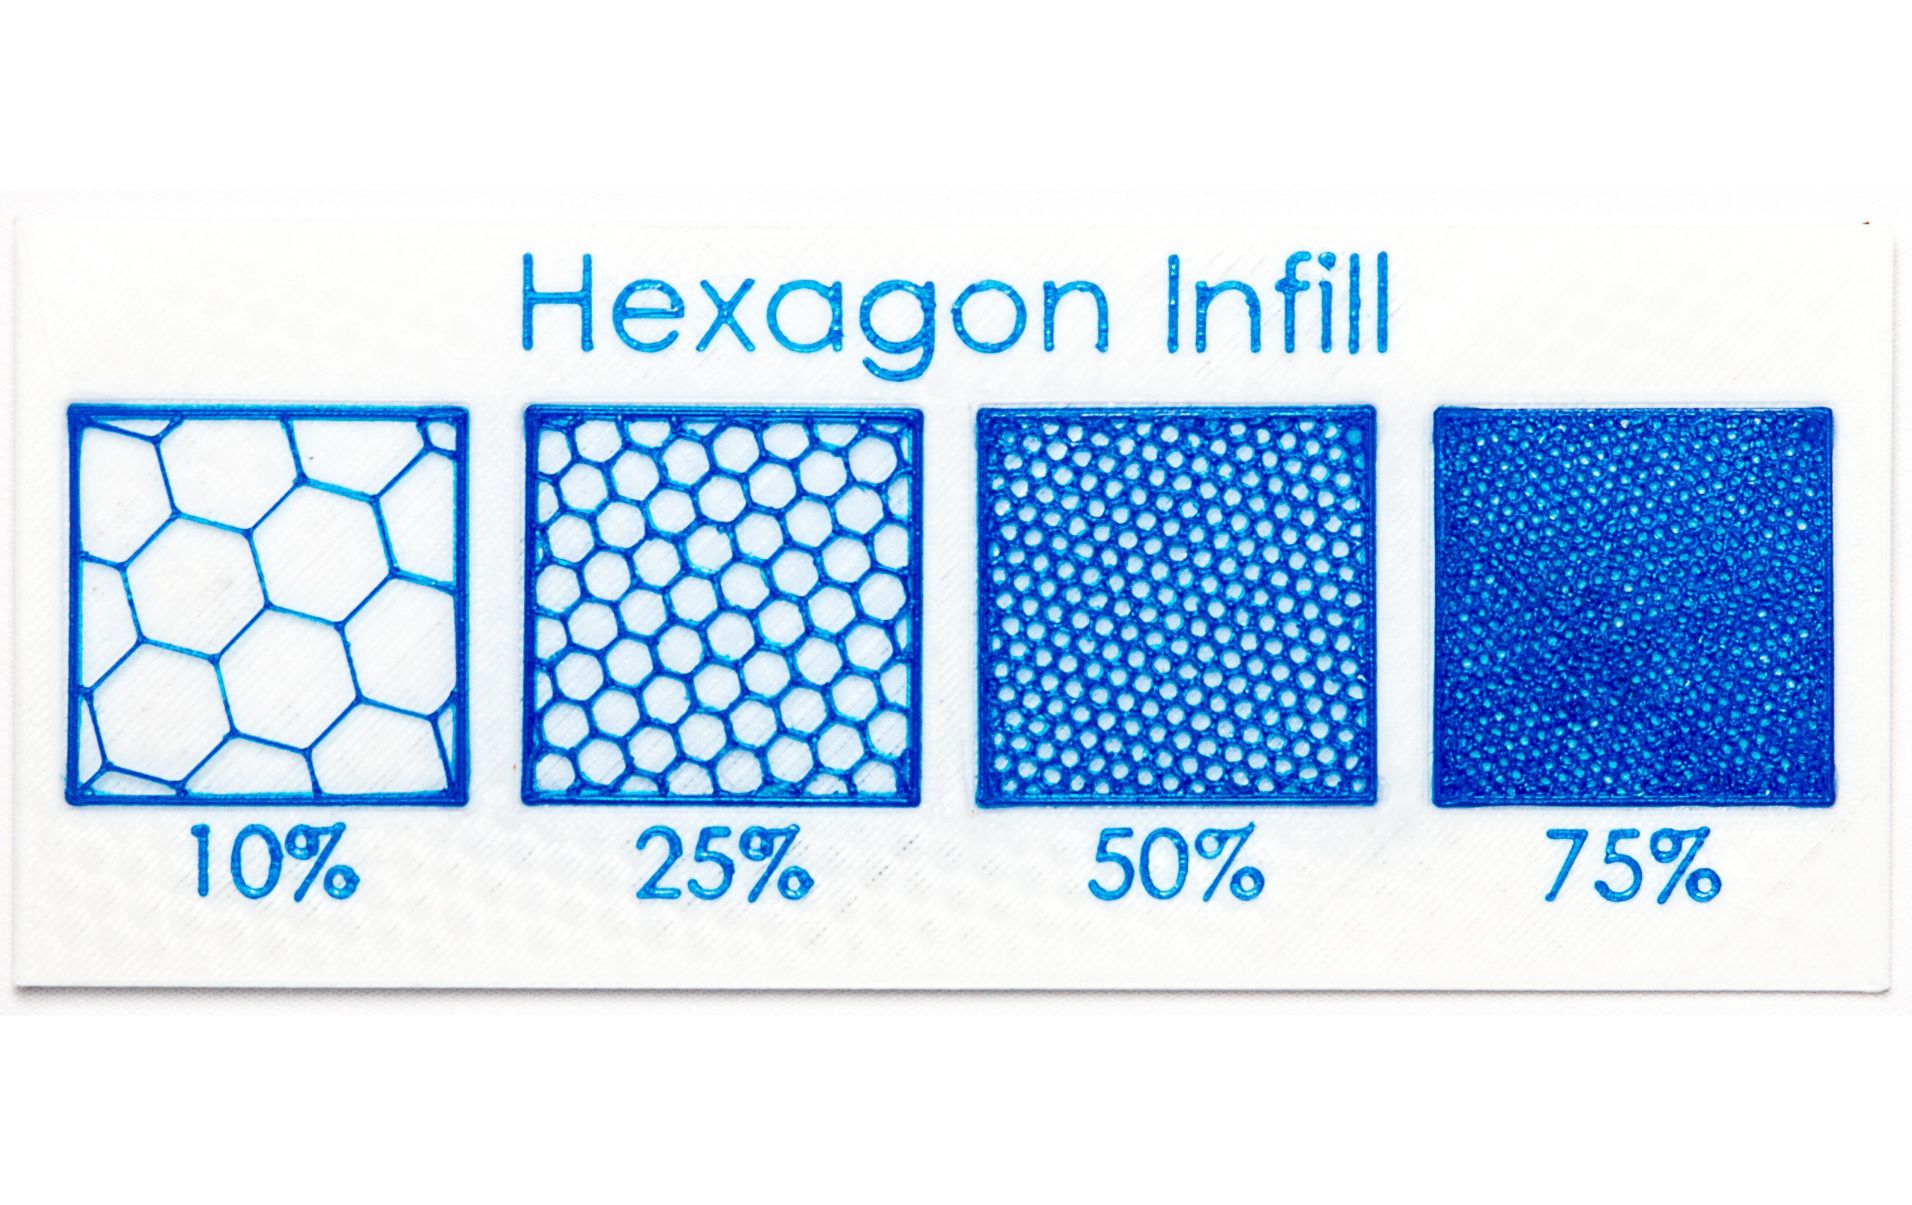
The infill percentage is typically represented as a value between 0% to 100%, where 0% means there is no infill at all, and 100% indicates that the entire internal space is filled with solid material. Most 3D printers allow you to adjust the infill percentage to strike the right balance between strength, weight, and cost.
When deciding on the appropriate infill percentage, you need to consider the nature of your 3D model and the intended use of the printed object. For example, if you are printing a decorative item that doesn’t require much strength, a lower infill percentage like 10% to 20% can be sufficient. On the other hand, functional parts such as mechanical components or load-bearing structures benefit from a higher infill percentage of 50% to 100%.
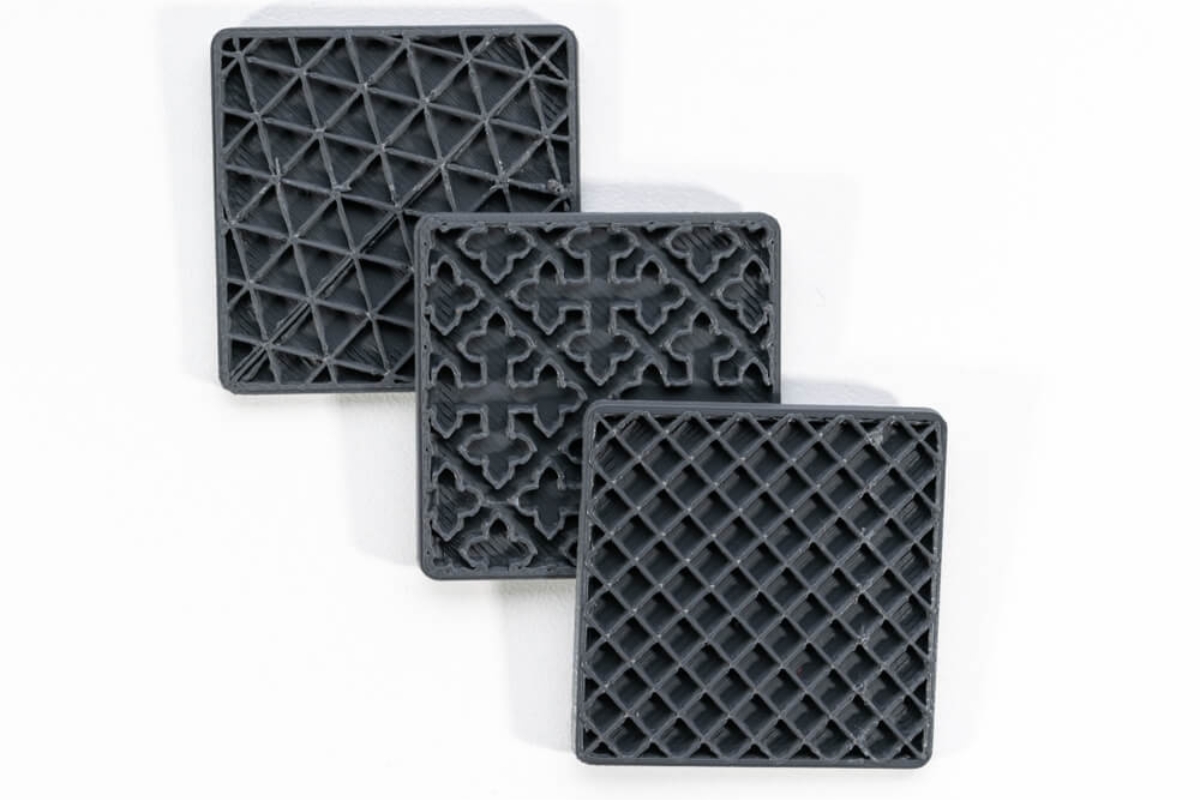
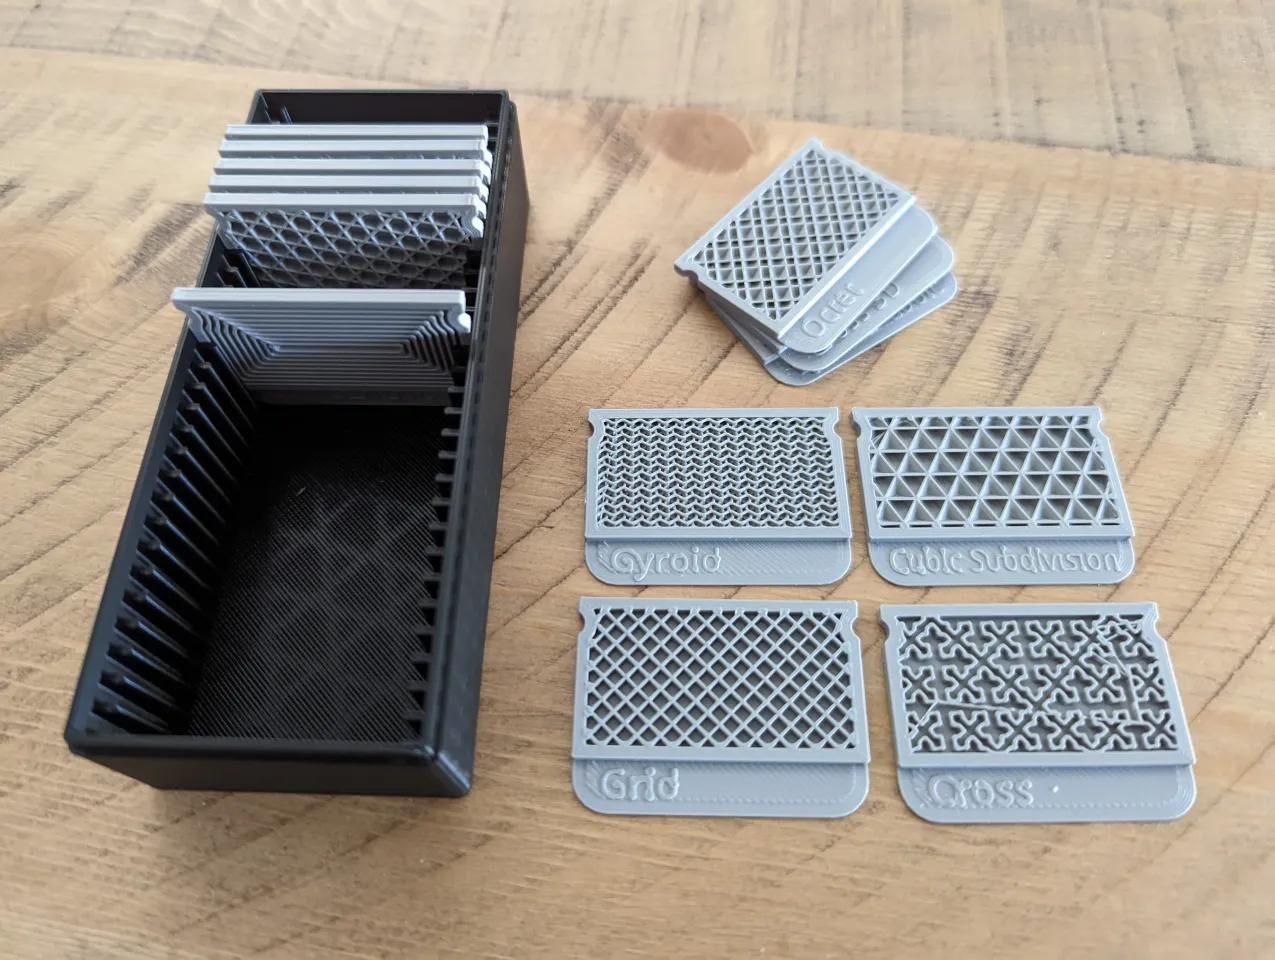
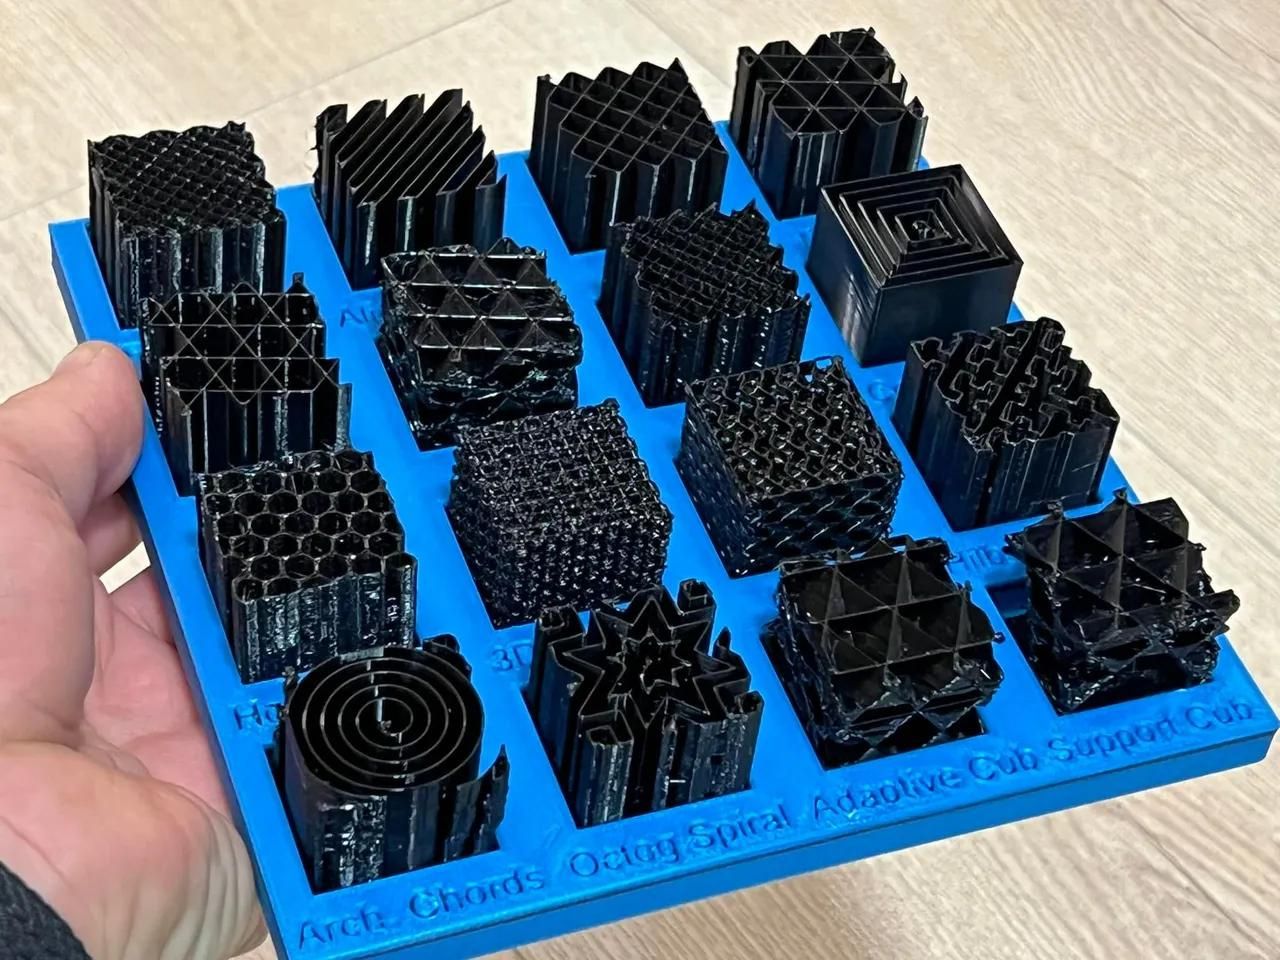
The infill pattern is another aspect to consider. Matter Control offers various infill patterns such as grid, honeycomb, and rectilinear, among others. These patterns determine the arrangement of the solid material inside the object. Each pattern has its own advantages in terms of strength, flexibility, and material usage. Experimenting with different infill patterns can help you find the optimal combination for your specific needs.
It’s important to note that increasing the infill percentage significantly affects the printing time and material consumption. Higher infill percentages require more time to print and use more material, which can impact the overall cost of the project. It’s a trade-off between strength and cost, so finding the right balance is key.
Now that we have a clear understanding of infill percentage and its significance, let’s move on to the steps involved in changing it using the Matter Control software.
To change infill percentage in Matter Control, go to the “Settings” tab, select “Infill”, and adjust the percentage slider to your desired level. Higher percentages result in stronger prints, while lower percentages save time and material.
Steps to Change Infill Percentage in Matter Control
Changing the infill percentage in Matter Control is a straightforward process. Follow these steps to adjust the infill and create the desired internal structure for your 3D prints:
- Open the Matter Control software on your computer. If you don’t have it installed, you can download it from the official Matter Control website.
- Select the 3D model you want to print and import it into the Matter Control software. Ensure that you have configured all the necessary settings such as print bed size, filament type, and nozzle diameter.
- Once you have imported the model, navigate to the “Infill” settings. In Matter Control, this option is usually located in the sidebar or the print settings section.
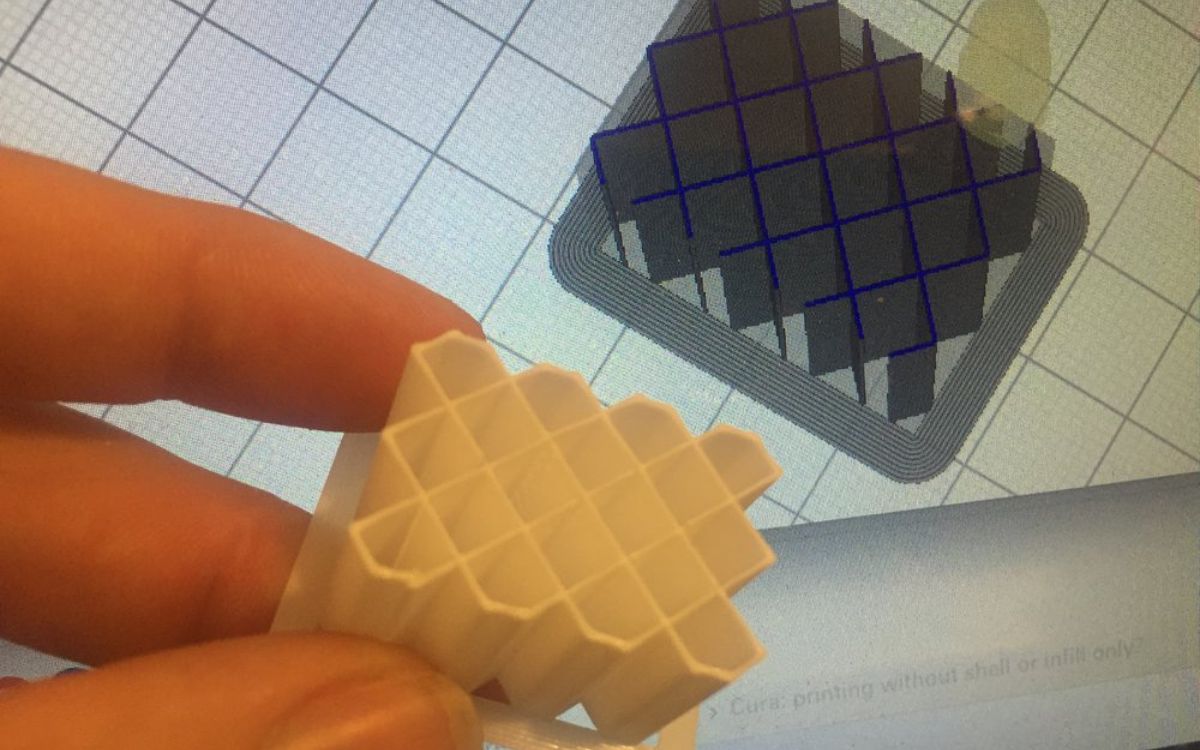
- Adjust the infill percentage by either typing in the desired value or using a slider. Matter Control provides a real-time preview of the infill pattern and its density, allowing you to visualize the internal structure before printing.
- Choose the infill pattern that suits your needs by selecting from the available options. Different patterns offer varying degrees of strength, flexibility, and material usage.
- Review the other print settings such as layer height, print speed, and temperature to ensure they align with your requirements.
- Once you are satisfied with the infill percentage and other settings, click on the “Slice” or “Prepare to Print” button. Matter Control will generate the G-code instructions necessary for the 3D printer to create your object.
- Save the sliced file to an SD card or send it directly to your 3D printer using Matter Control’s built-in printer connectivity features.
- Insert the SD card into your 3D printer or establish a connection between the printer and the Matter Control software.
- Start the printing process and monitor the progress to ensure the infill and other settings are being executed correctly.
By following these steps, you can easily change the infill percentage in Matter Control and optimize the internal structure of your 3D prints according to your specific requirements.
Conclusion
Understanding and controlling the infill percentage is a vital aspect of 3D printing. By adjusting the infill, you can optimize the strength, weight, and cost of your printed objects. The Matter Control software provides a user-friendly interface to change the infill percentage and select from various infill patterns, giving you full control over the internal structure of your 3D prints.
When deciding on the appropriate infill percentage, consider the nature of your object and its intended use. Higher infill percentages are ideal for functional parts that require strength and durability, while lower infill percentages work well for decorative items. Experimenting with different infill patterns can further enhance the performance and aesthetics of your prints.
In addition to infill percentage, don’t forget to review other print settings such as layer height, print speed, and temperature. These factors can also influence the quality and success of your 3D prints.
With Matter Control, you have a powerful tool at your disposal to unleash your creativity and bring your designs to life. Embrace the flexibility and control it offers, and don’t be afraid to experiment with different settings to achieve the best possible results.
Now that you have a clear understanding of infill percentage and how to change it in Matter Control, you are ready to embark on your 3D printing journey with confidence. Happy printing!
Frequently Asked Questions about How Do You Change Infill Percentage In Matter Control
Was this page helpful?
At Storables.com, we guarantee accurate and reliable information. Our content, validated by Expert Board Contributors, is crafted following stringent Editorial Policies. We're committed to providing you with well-researched, expert-backed insights for all your informational needs.


0 thoughts on “How Do You Change Infill Percentage In Matter Control”