Home>Garden Essentials>How To Do River Rock Landscaping
Garden Essentials
How To Do River Rock Landscaping
Modified: March 7, 2024
Learn how to enhance your garden with river rock landscaping. Discover tips, ideas, and techniques to create a stunning outdoor space with river rock.
(Many of the links in this article redirect to a specific reviewed product. Your purchase of these products through affiliate links helps to generate commission for Storables.com, at no extra cost. Learn more)
Introduction
Welcome to the world of river rock landscaping! Adding a touch of nature to your outdoor space, river rock landscaping is a popular choice for homeowners who want to create a visually appealing and low-maintenance garden. The natural beauty, versatility, and durability of river rocks make them an ideal choice for various landscaping projects.
In this article, we will guide you through the process of creating a stunning river rock landscape. From choosing the right river rocks to maintaining your garden, we will cover everything you need to know to transform your outdoor space into a beautiful oasis. So, let’s dive in!
Key Takeaways:
- Choose river rocks based on size, color, and texture. Visit a local stone yard to ensure high-quality, durable rocks for your landscaping project.
- Prepare the landscaping area by clearing, defining boundaries, installing a weed barrier, and leveling the ground. Proper preparation is vital for successful river rock landscaping.
Read more: Where To Buy River Rock For Landscaping
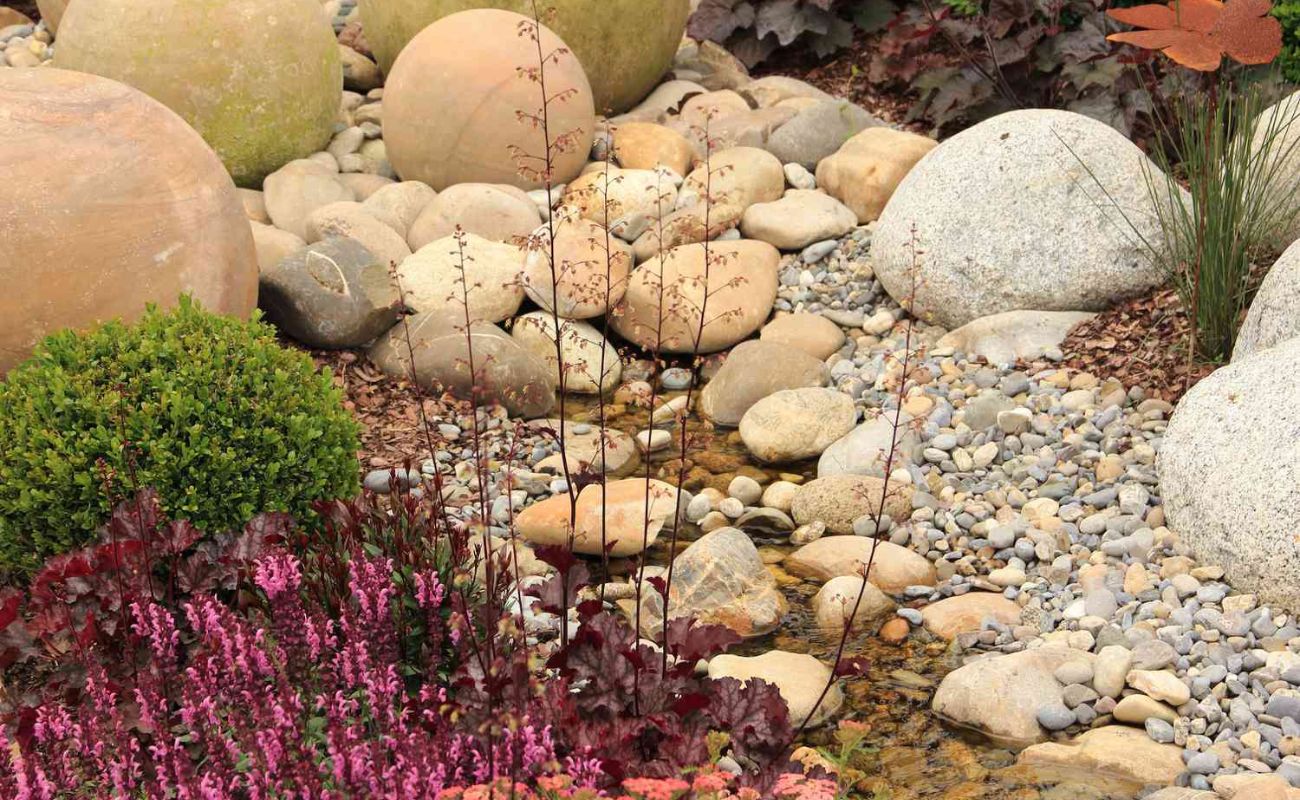
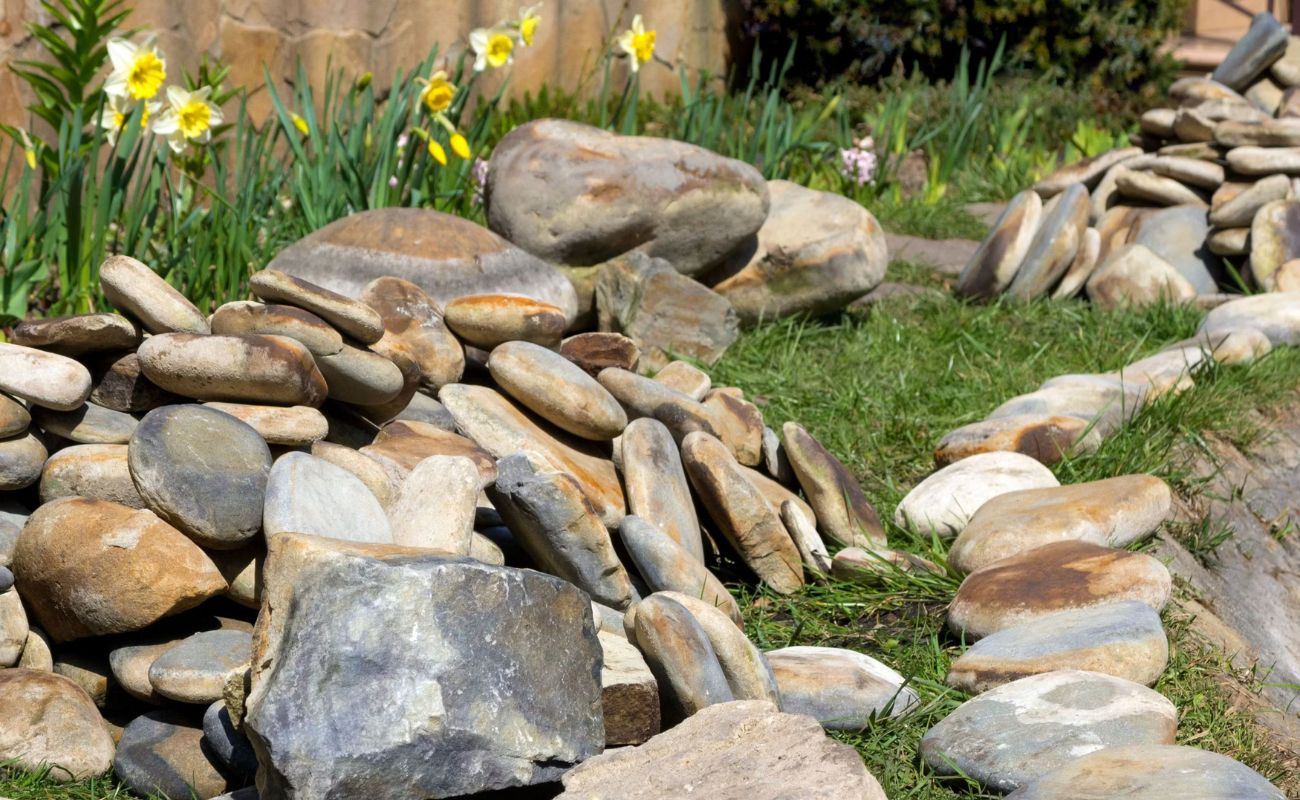
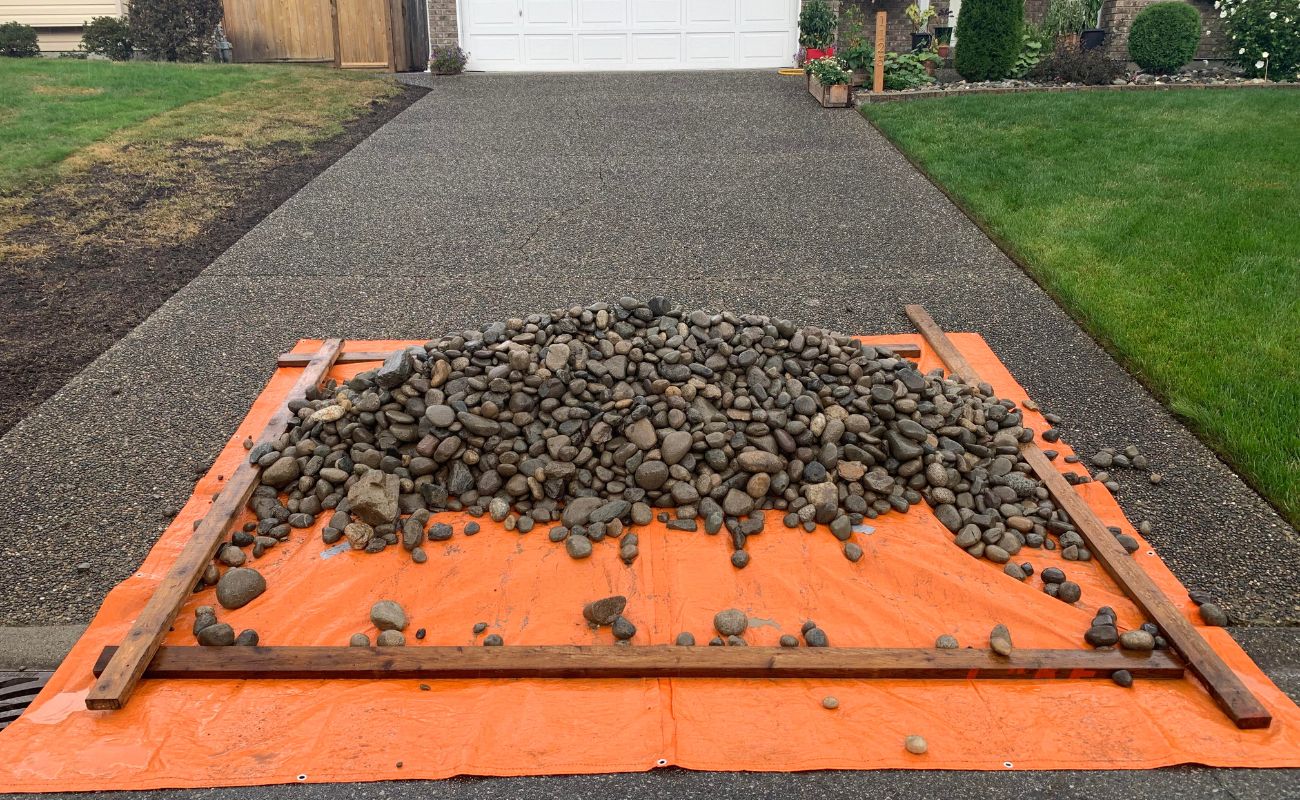
Choosing the Right River Rocks
When it comes to river rock landscaping, the first step is to choose the right type of river rocks for your project. There are various factors to consider, such as size, color, and texture.
Size: River rocks come in various sizes, ranging from small pebbles to larger stones. The size you choose will depend on the specific project you have in mind. Smaller rocks are perfect for pathways and ground cover, while larger stones can be used for creating focal points or defining borders.
Color: River rocks come in a range of colors, including shades of gray, brown, beige, and even red. Consider the existing color scheme of your outdoor space and choose river rocks that will complement the surroundings. Earthy tones are popular choices as they blend well with natural landscapes.
Texture: River rocks have a smooth and rounded texture, which adds a unique visual appeal to your garden. However, you can also find river rocks that have a more jagged or rough texture, adding a bit of contrast and character to your landscaping.
It’s important to visit a local stone yard or nursery to see the river rocks in person before making a purchase. This way, you can assess the size, color, and texture of the rocks and ensure that they will meet your landscaping needs.
Remember, river rocks are a long-term investment, so it’s crucial to choose high-quality stones that will withstand the test of time. Look for rocks that are smooth and free of cracks, as these will be more durable and less likely to break or chip.
Once you’ve chosen the right river rocks for your project, you can move on to the next step: preparing the landscaping area.
Preparing the Landscaping Area
Before you start laying down the river rocks, it’s essential to properly prepare the landscaping area. This will ensure a smooth and successful installation process.
1. Clear the area: Begin by clearing the area of any existing vegetation, debris, or obstacles. This includes removing weeds, grass, and rocks. Use a garden rake or shovel to level the ground and create a clean slate for your river rock landscaping.
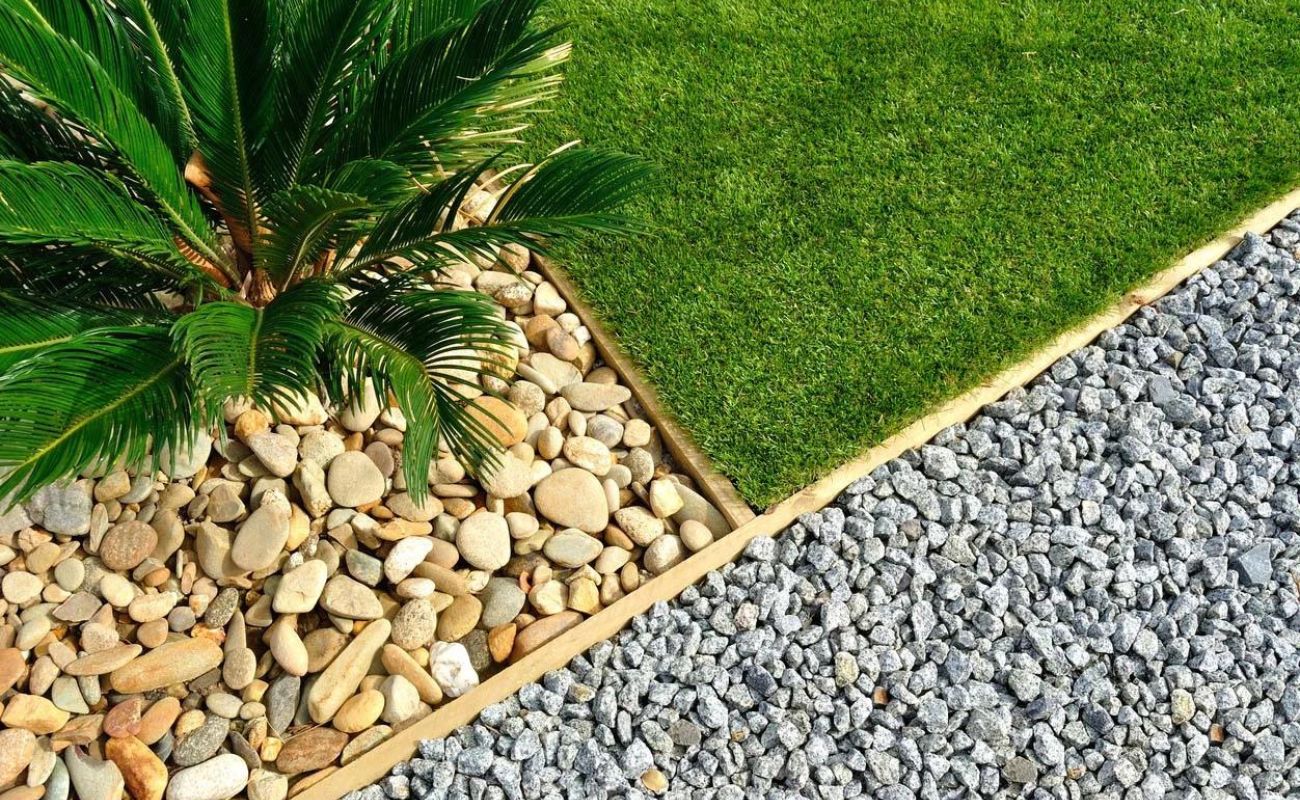
2. Create boundaries: Define the boundaries of your landscaping area using landscape edging or a border material. This will help keep the river rocks in place and prevent them from spreading onto other parts of your garden. Options for edging materials include plastic or metal lawn edging, stone pavers, or even natural elements like rocks or logs.
3. Install a weed barrier: To prevent weeds from growing through the river rocks, it’s advisable to install a weed barrier. This can be landscape fabric or a geotextile membrane that allows water to pass through while blocking weed growth. Lay the weed barrier over the prepared area and cut it to fit the dimensions of your landscaping space.
4. Level the ground: Use a garden rake or a shovel to level the ground and create a smooth surface for the river rocks. This will ensure that the rocks lay evenly, with no uneven or bumpy areas.
Once you have completed these preparation steps, you are ready to move on to the next phase of your river rock landscaping project. Whether you’re building a retaining wall, creating pathways, or designing a rock garden, the proper preparation of the landscaping area is vital for a successful outcome.
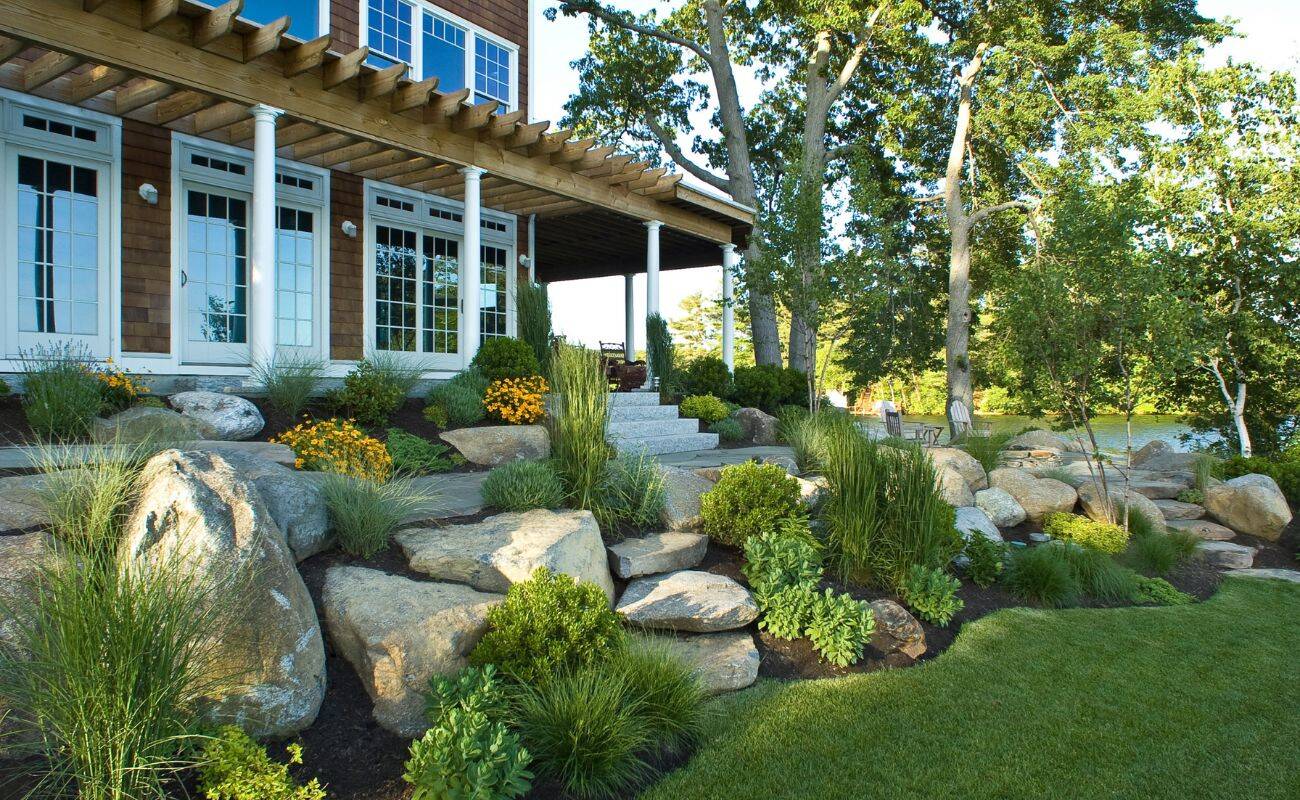
Building a Retaining Wall
A retaining wall serves both functional and aesthetic purposes in river rock landscaping. It helps prevent soil erosion and can add dimension to your garden. Here’s a step-by-step guide on how to build a retaining wall using river rocks:
1. Plan and design: Determine the location and dimensions of your retaining wall. Consider the height and length needed to adequately hold back the soil. Sketch out your design and calculate the amount of river rocks and other materials required.
2. Excavate the area: Dig a trench for the base of the retaining wall. The trench should be wide enough to accommodate the first layer of river rocks and deep enough to provide stability. Use a level and measuring tape to ensure the trench is even and sloped for proper drainage.
3. Lay the base: Fill the trench with a layer of gravel or crushed stone, then compact it with a tamper. This will provide a stable base for the retaining wall.
4. Stack the river rocks: Start stacking the river rocks on top of the base, making sure they interlock securely. Use a combination of larger and smaller rocks to create a stable structure. Be sure to check for levelness and adjust as necessary.
5. Backfill and compact: As you stack the rocks, backfill the area behind the retaining wall with soil. Compact the soil periodically to ensure it is tightly packed and provides support to the wall.
6. Repeat the process: Continue stacking the river rocks and backfilling until you reach the desired height. Recheck the levelness and stability with each additional layer.
7. Finish touches: Once the retaining wall is complete, step back and assess the overall appearance. Make any final adjustments or add decorative elements, such as plants or garden ornaments.
Building a retaining wall with river rocks requires careful planning and attention to detail. If you’re not confident in your DIY skills, it’s recommended to consult a professional for assistance. A well-built retaining wall will provide stability to your landscape and give it a unique and attractive feature.
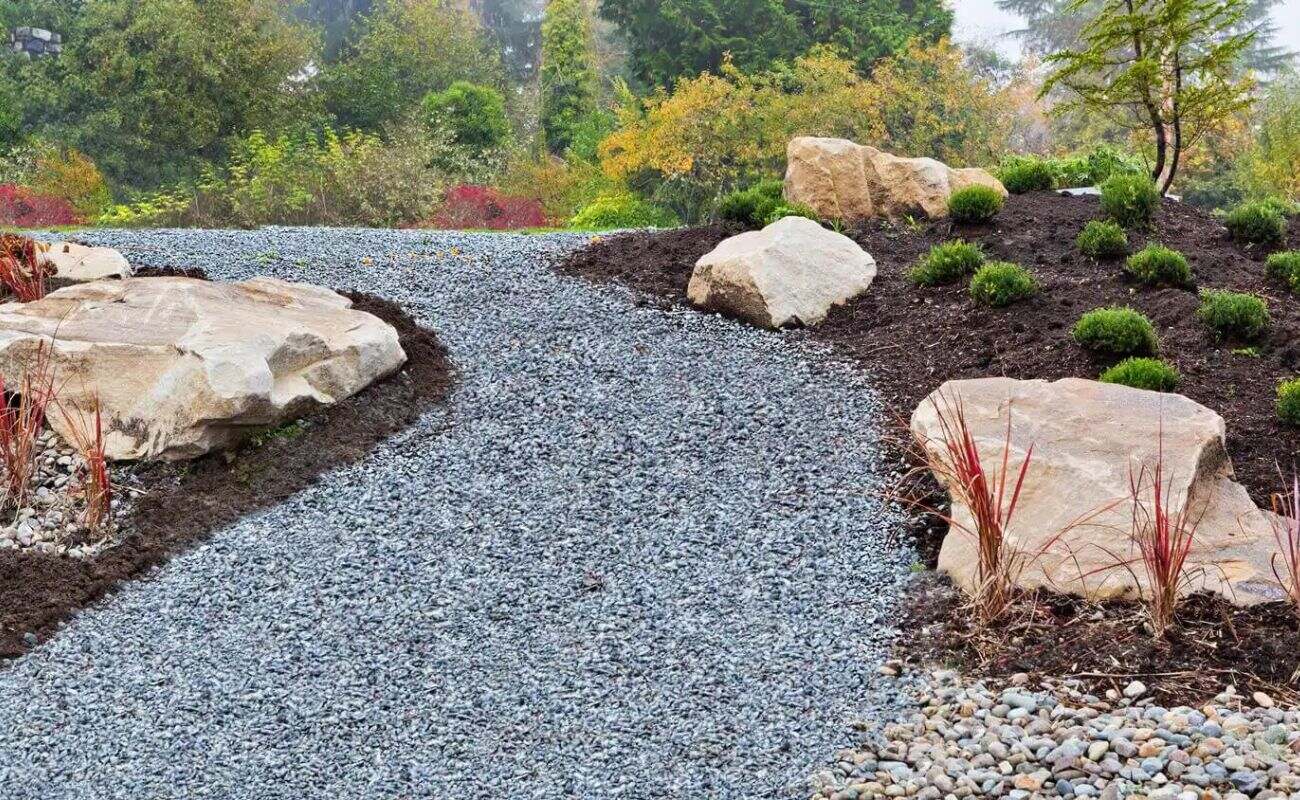
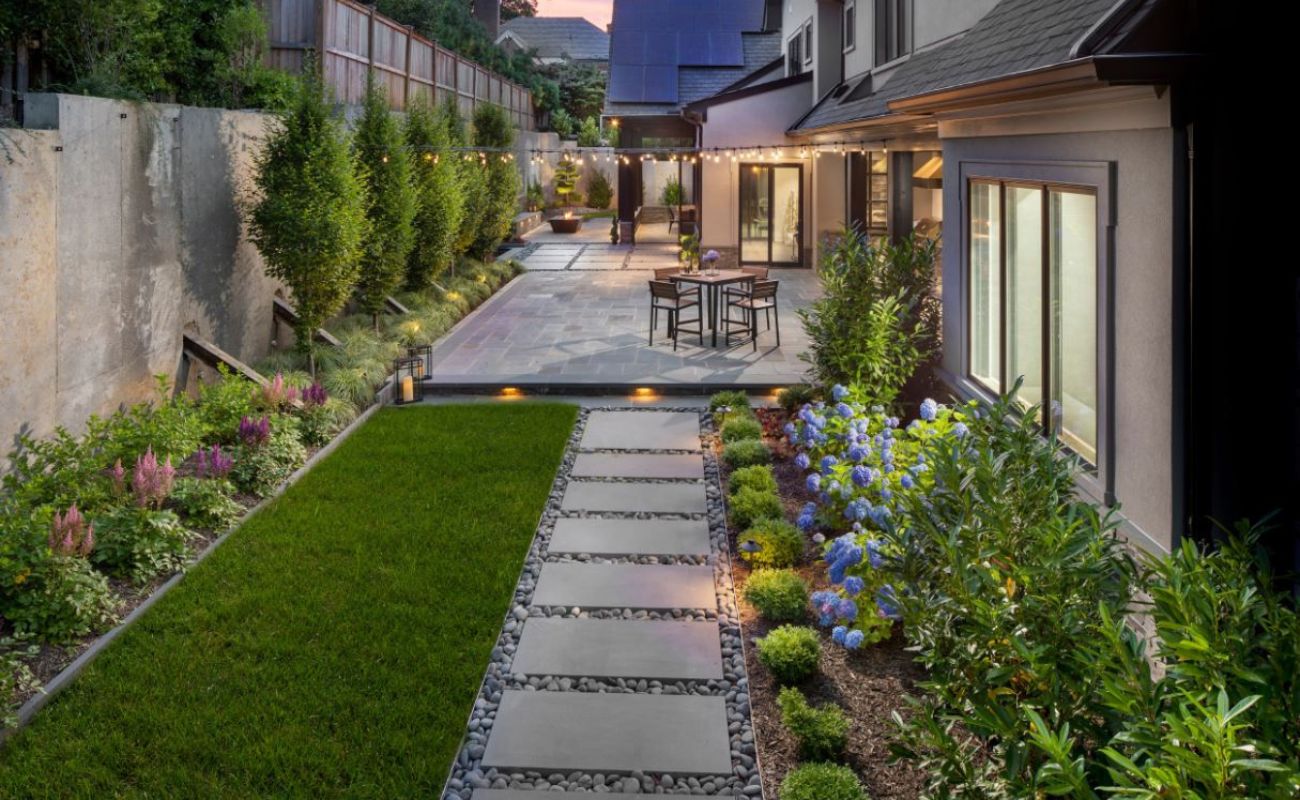
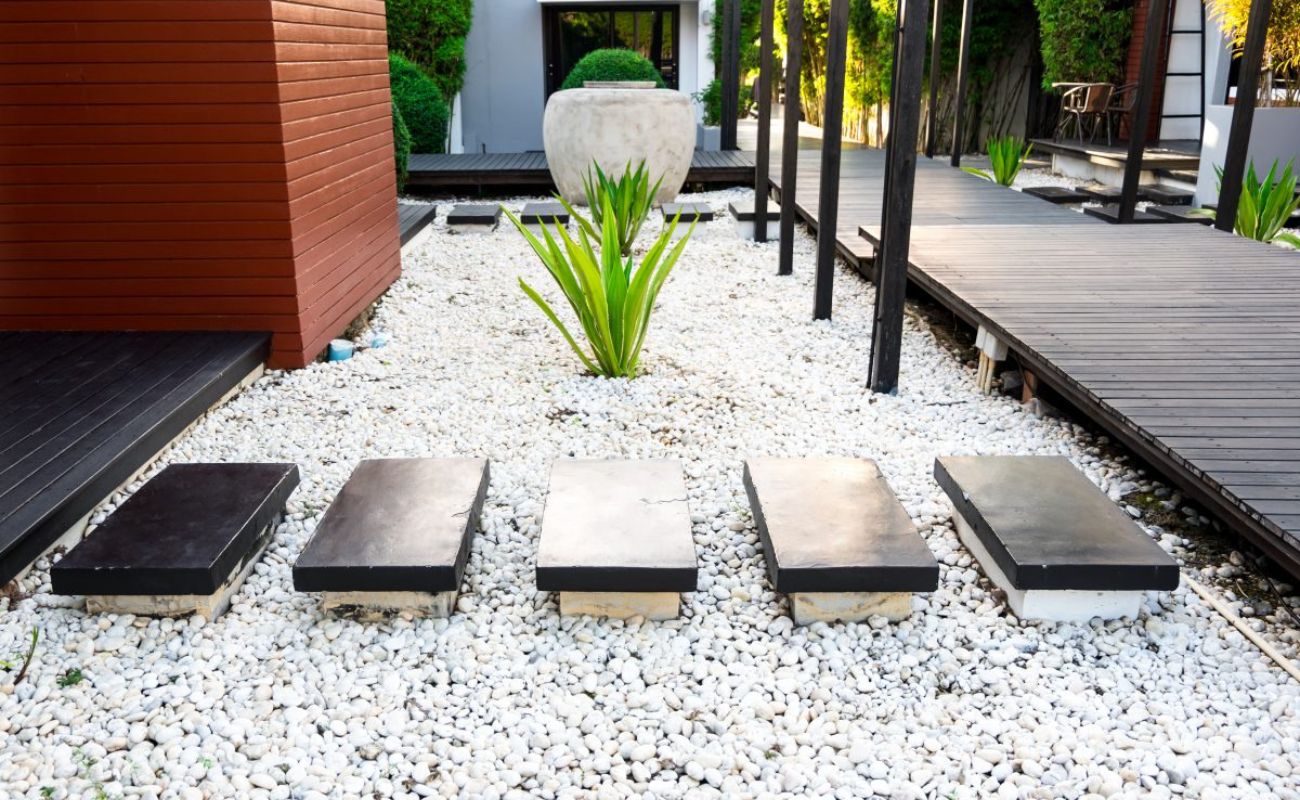
Creating Pathways and Walkways
Pathways and walkways not only provide functional access to different areas of your garden but also add visual appeal and structure to your river rock landscaping. Follow these steps to create stunning pathways and walkways using river rocks:
1. Determine the pathway layout: Decide on the desired route and shape of your pathways. Consider the flow of foot traffic and any focal points or destinations you want to connect.
2. Mark the pathway boundaries: Use stakes or spray paint to mark the boundaries of your pathways. This will serve as a guide as you begin the installation process.
3. Excavate the pathway area: Dig out the pathway area to a depth of about 3–4 inches. This will allow space for a base layer and the river rocks.
4. Install a base layer: Fill the excavated area with a layer of crushed stone or gravel. Level and compact the base layer using a tamper or a plate compactor. This will provide stability and help with water drainage.
5. Lay the river rocks: Start placing the river rocks on top of the base layer, making sure they fit snugly together. Use different sizes and shapes of river rocks to create a visually interesting pattern. Consider using larger stones as stepping stones or accents along the pathway.
6. Fill gaps and secure the rocks: Fill any gaps between the river rocks with smaller stones or pebbles. This will help stabilize the stones and provide a finished look. Use a broom or brush to sweep away excess debris.
7. Create edging: Install edging materials along the sides of the pathway to define the boundaries and help keep the river rocks in place. Options for edging include plastic or metal strips, stone pavers, or even natural elements like logs or plants.
8. Add finishing touches: Consider adding landscape lighting, potted plants, or decorative elements along the pathway to enhance the overall ambiance of your garden.
By creating pathways and walkways with river rocks, you not only improve accessibility but also add beauty and texture to your outdoor space. These pathways can lead to different garden areas, such as seating areas, flower beds, or water features, creating a cohesive and inviting landscape design.
When doing river rock landscaping, make sure to create a barrier between the rocks and the soil to prevent weeds from growing through. This can be done using landscaping fabric or plastic sheeting.
Read more: How To Store Landscaping Rocks
Designing a Rock Garden
A rock garden can be a stunning focal point in your river rock landscaping, adding texture, depth, and visual interest to your garden. Here are the steps to design a beautiful rock garden:
1. Choose the location: Identify a suitable location in your garden for the rock garden. Consider factors such as sunlight exposure, soil drainage, and proximity to other elements in your landscape.
2. Plan the layout: Sketch out a rough design for your rock garden, keeping in mind the size and shape of the area. Decide on the placement of rocks, plants, and other features.
3. Select and arrange the rocks: Choose a variety of different-sized river rocks to create contrast and visual appeal. Place the larger rocks first, using them as anchor points and focal elements. Arrange the smaller rocks around the larger ones, creating a natural and organic look.
4. Create planting pockets: Dig shallow holes in the soil between the rocks to create planting pockets. These pockets will be home to small plants that will complement the rock garden. Ensure that the soil in the pockets is suitable for the chosen plants.
5. Choose rock garden plants: Select plants that are well-suited to rock gardens and the specific conditions of your garden, such as sun exposure and soil moisture. Drought-tolerant succulents, alpine plants, and creeping groundcovers are popular choices for rock gardens. Place the plants strategically to create balance and harmony within the design.
6. Add decorative elements: Consider incorporating additional features to enhance the rock garden, such as a small water feature, decorative pebbles, or garden ornaments. These elements can add charm and a sense of tranquility to the overall design.
7. Create pathways or stepping stones: If desired, incorporate pathways or stepping stones throughout the rock garden for easy access and to improve the overall structure of the design. Use river rocks or natural stone pavers for a cohesive look.
8. Maintain the rock garden: To keep your rock garden looking its best, periodic maintenance is required. Remove any weeds or unwanted vegetation, prune the plants as needed, and replenish any bare areas with additional rocks or plants.
Designing a rock garden allows you to showcase the beauty of river rocks while creating a unique and captivating landscape feature. With careful planning and attention to detail, your rock garden will become a focal point in your overall garden design.
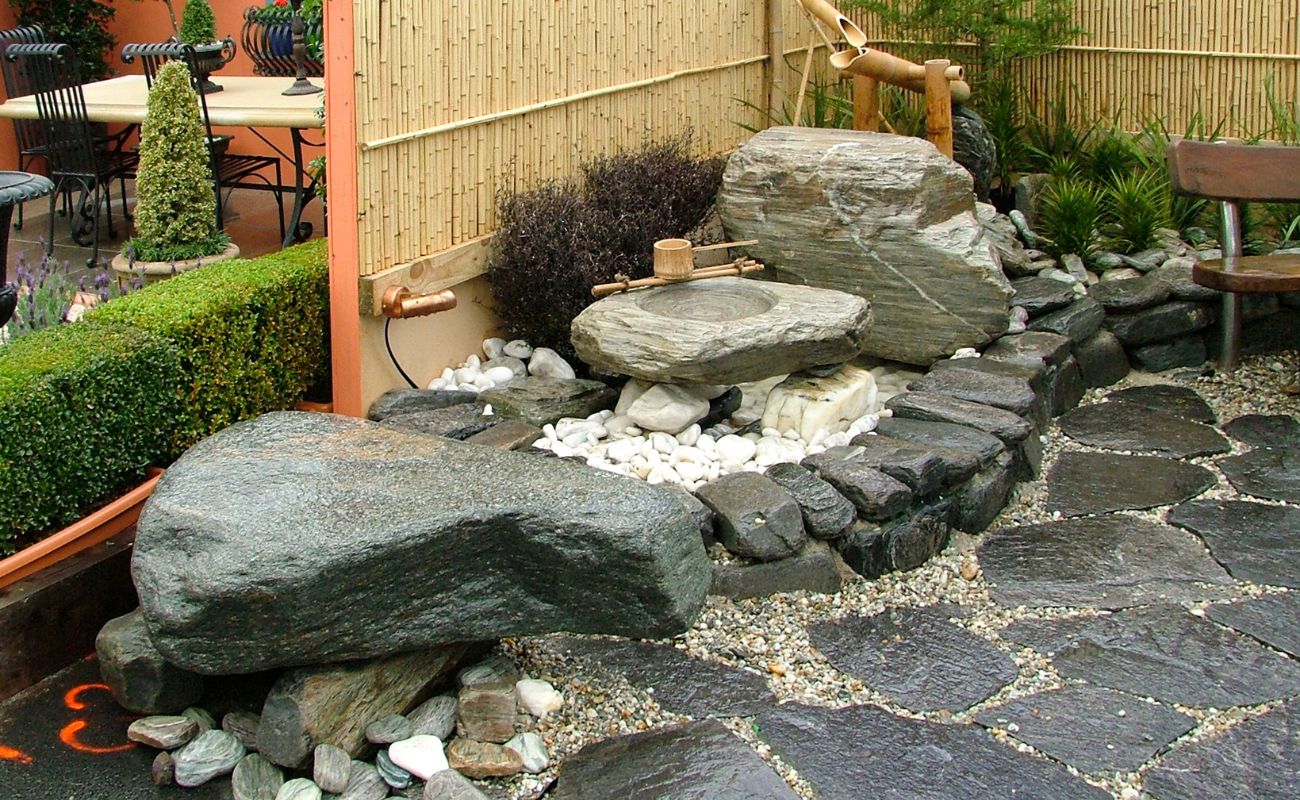
Installing Water Features
Water features can add a sense of tranquility, movement, and serenity to your river rock landscaping. Whether it’s a small pond, a cascading waterfall, or a peaceful fountain, installing water features can elevate the overall ambiance of your garden. Follow these steps to install water features in your landscape:
1. Plan the location: Determine the ideal location for your water feature. Consider factors such as the availability of sunlight, proximity to power sources for pumps, and the overall layout of your garden.
2. Choose the type and size: Select the type and size of water feature that best suits your garden and personal preferences. This could be a pond with aquatic plants and fish, a bubbling rock fountain, or a relaxing waterfall. Consider the available space and budget when making your decision.
3. Prepare the area: Clear the designated area of any vegetation, rocks, or debris. Ensure that the ground is level and properly compacted to provide a stable foundation for the water feature.
4. Dig and shape the water feature: Start digging the area according to the size and shape of the water feature. Create varying depths to accommodate different plants or aquatic life, if desired. Consider incorporating shelves or ledges for plants or rocks to provide interest and visual appeal.
5. Install a pond liner: If you are creating a pond, line the excavated area with a pond liner to prevent water from seeping into the ground. Ensure the liner is properly fitted and secured. Use rocks or bricks around the edges of the liner to hold it in place.
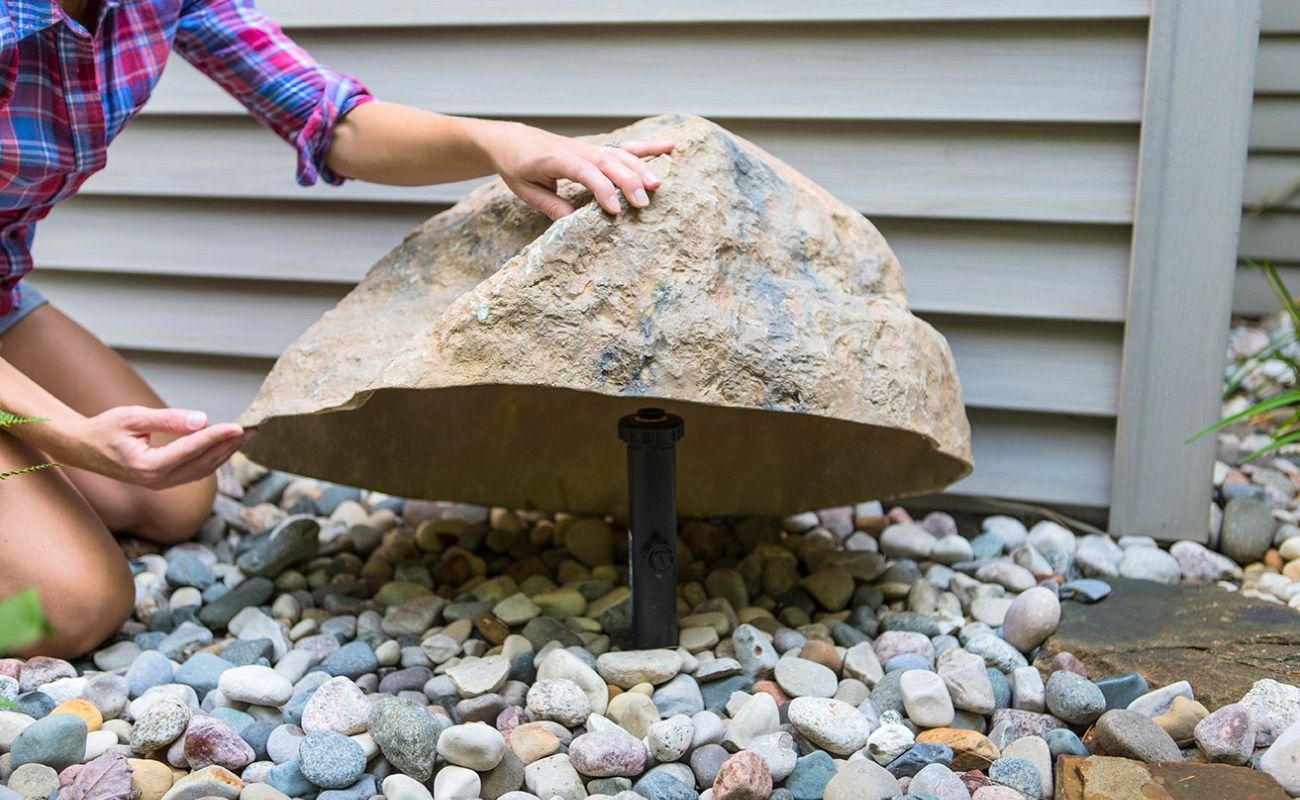
6. Add rocks and decor: Place river rocks strategically around the water feature to create a natural and visually appealing appearance. Consider adding decorative elements such as water plants, floating plants, or sculptures to enhance the overall aesthetic.
7. Install the water pump and filtration system: For water features that require circulation, install a water pump and filtration system to keep the water clean and moving. Follow the manufacturer’s instructions to properly install and connect the pump and filter.
8. Fill and adjust the water level: Fill the water feature with water, carefully monitoring the level to ensure it is balanced and visually pleasing. Adjust the rocks and decor as needed to create a harmonious and natural look.
9. Maintain the water feature: Regularly maintain and care for your water feature by cleaning filters, removing debris, and monitoring water quality. Follow any recommended maintenance guidelines for your specific feature to keep it running smoothly and looking its best.
Installing water features in your river rock landscaping can transform your outdoor space into a serene and tranquil oasis. The gentle sound of flowing water and the beauty of aquatic life can create a soothing and relaxing atmosphere, enhancing your overall garden experience.
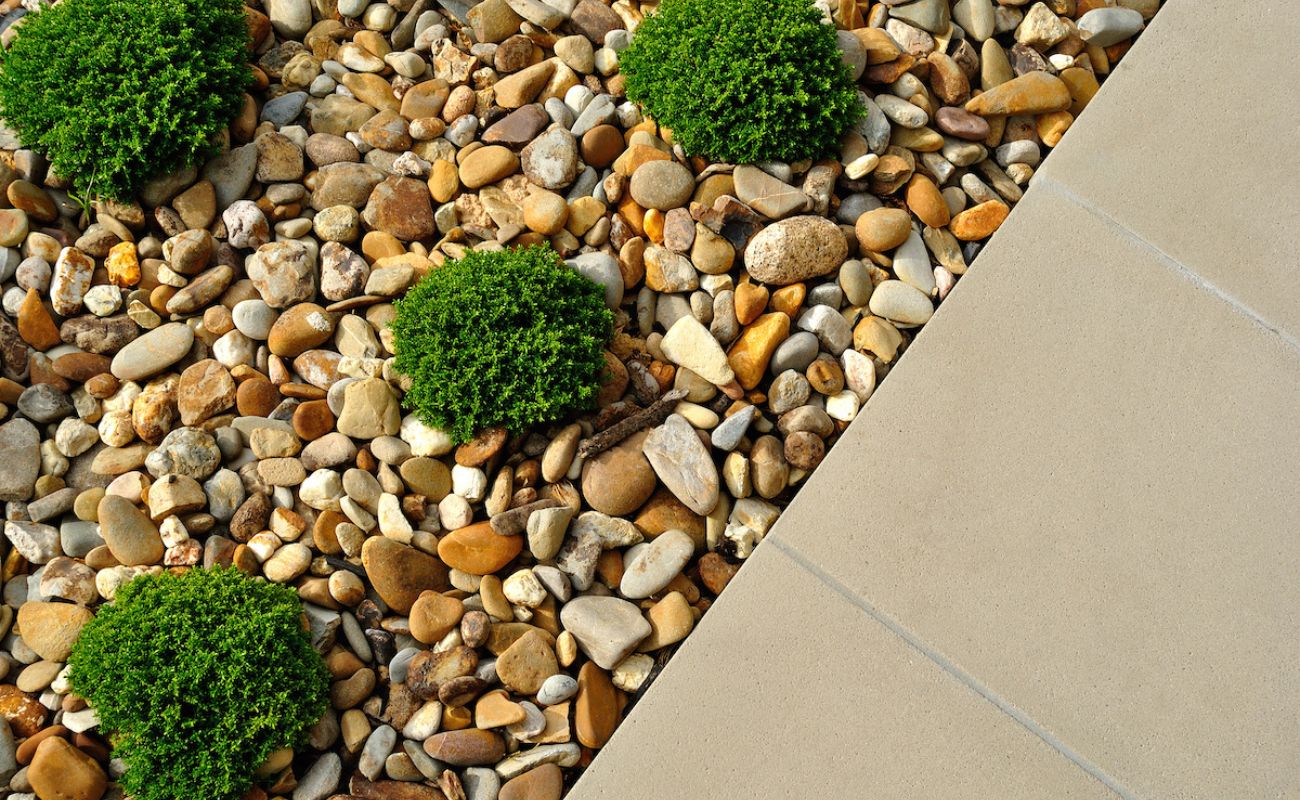
Using River Rocks for Mulching
Utilizing river rocks as mulch in your garden not only adds a decorative touch but also provides several benefits to your plants and landscape. Here’s how you can use river rocks for mulching:
1. Weed suppression: One of the primary benefits of using river rocks as mulch is their ability to suppress weeds. By creating a barrier between the soil and the sunlight, the rocks prevent weed growth and reduce the need for constant weeding.
2. Moisture retention: River rocks act as a natural mulch barrier, reducing water evaporation from the soil. They help to retain moisture in the soil, keeping the root systems of your plants hydrated, particularly during hot and dry periods.
3. Soil temperature regulation: River rocks can help regulate soil temperatures by providing insulation. They act as a buffer, keeping the soil cooler during hot summer months and preventing extreme temperature fluctuations.
4. Erosion control: By covering the soil with river rocks, you create a protective layer that helps prevent erosion caused by heavy rain or wind. This ensures that your garden retains its shape and structure, preventing soil runoff and loss.
5. Aesthetic appeal: River rocks add a unique and visually appealing element to your garden. Their natural colors and textures can complement various plants and garden styles, enhancing the overall aesthetic appeal of your landscape.
When using river rocks for mulching, it’s important to follow these steps:
– Clear the area: Remove any existing weeds, debris, or unwanted plants from the area where you plan to apply the mulch. Ensure a clean and level surface.
– Create a weed barrier: To further enhance weed suppression, consider laying down a weed fabric or landscape fabric before adding the river rocks. This will provide an additional layer of protection against weed growth.
– Apply the river rocks: Spread a layer of river rocks evenly over the soil, ensuring a consistent thickness of around 2-3 inches. Avoid piling the rocks too high around the base of plants to prevent them from suffocating or retaining excess moisture.
– Maintain the mulch: Periodically inspect the mulch for any weed growth or accumulation of debris. Remove any weeds that manage to grow through the rocks and replenish the mulch layer as needed to maintain its appearance and effectiveness.
Using river rocks for mulching provides a low-maintenance and visually pleasing alternative to traditional organic mulch. It offers long-lasting benefits for your plants and adds a touch of natural beauty to your garden landscape.
Maintaining River Rock Landscaping
Maintaining your river rock landscaping is essential to keep it looking pristine and vibrant throughout the seasons. While river rocks are low-maintenance, a few regular maintenance tasks will help preserve the beauty of your outdoor space. Here are some tips for maintaining river rock landscaping:
1. Weed control: Despite the weed suppressive properties of river rocks, occasional weeds may still find their way through. Regularly inspect your landscaping area for any weed growth and promptly remove them by pulling them out or using a weed killer. This will prevent weeds from competing with your plants for nutrients and water.
2. Cleaning and debris removal: Over time, leaves, fallen twigs, or other debris may accumulate on the surface of the river rocks. Remove any debris using a rake or leaf blower to maintain a clean and tidy appearance. This will also prevent the buildup of organic matter that can contribute to weed growth or decomposition.
3. Replenishing the rocks: Due to natural settling or displacement, some of the river rocks may shift or become unevenly distributed. Periodically inspect your landscaping area and add more rocks as needed to maintain a consistent and level surface. This will ensure a visually appealing and cohesive look.
4. Managing water stains: Depending on the source of water in your landscape, such as sprinkler systems or rainwater runoff, you may occasionally encounter water stains on the river rocks. To minimize these stains, adjust your watering techniques to avoid excessive overspray onto the rocks. If stains do occur, you can use a gentle pressure wash or a mixture of water and mild detergent to clean the affected areas.
5. Pruning and trimming: If you have plants or shrubs incorporated into your river rock landscaping, regular pruning and trimming are necessary. This will help maintain the shape and size of the plants, prevent overcrowding, and enhance the overall aesthetic appeal of your garden.
6. Inspecting for erosion or drainage issues: Periodically inspect the river rock edges and the overall integrity of your landscaping design. Look for signs of erosion or water pooling that may indicate drainage issues. Adjust the rocks or consider additional drainage measures if necessary to ensure proper water flow and prevent erosion.
7. Regular maintenance of water features: If you have water features such as fountains or ponds, they require regular maintenance to keep them clean and functioning properly. Follow the manufacturer’s instructions for cleaning and servicing the water feature to ensure its longevity and optimal performance.
By incorporating these maintenance practices into your routine, you can enjoy a well-maintained river rock landscape that continues to enhance the beauty of your outdoor space. Regular care and attention will help your garden thrive and provide a relaxing and inviting environment for you to enjoy.
Read more: How Much Rocks Do I Need For Landscaping
Conclusion
Congratulations! You are now equipped with the knowledge and understanding to create a breathtaking river rock landscape. The versatility, durability, and natural beauty of river rocks make them a perfect choice for enhancing your outdoor space. By following the steps outlined in this article, from choosing the right river rocks to maintaining your landscaping, you can create a visually stunning and low-maintenance garden that will be the envy of your neighbors.
Remember to consider the size, color, and texture of the river rocks when selecting them for your project. Properly preparing the landscaping area and building retaining walls or pathways will provide a solid foundation for your river rock landscape. Additionally, incorporating water features or designing a rock garden will add character and tranquility to your outdoor space.
Furthermore, utilizing river rocks as mulch will not only enhance the aesthetic appeal of your garden but also provide functional benefits such as weed suppression, moisture retention, and erosion control.
Maintaining your river rock landscaping is key to preserving its beauty. Regularly remove weeds, clean debris, and monitor water stains. Additionally, ensure proper drainage, prune plants, and maintain water features for long-lasting enjoyment of your outdoor oasis.
Now it’s time to put your knowledge into action and transform your garden into a captivating river rock paradise. Let your creativity flow, and have fun experimenting with different designs and arrangements. Remember to follow best practices, but also allow your personal style and preferences to shine through in your landscaping.
Embrace the natural beauty of river rocks, and let them become the centerpiece of your outdoor haven. Create an inviting space where you can relax, connect with nature, and enjoy the beauty of your surroundings. So, grab your tools, gather your river rocks, and embark on this exciting journey of creating a stunning river rock landscape!
Frequently Asked Questions about How To Do River Rock Landscaping
Was this page helpful?
At Storables.com, we guarantee accurate and reliable information. Our content, validated by Expert Board Contributors, is crafted following stringent Editorial Policies. We're committed to providing you with well-researched, expert-backed insights for all your informational needs.


0 thoughts on “How To Do River Rock Landscaping”