Home>Garden Essentials>How To Use Rocks For Landscaping
Garden Essentials
How To Use Rocks For Landscaping
Modified: August 28, 2024
Learn how to use rocks for landscaping and transform your garden into a stunning oasis. Discover expert tips and ideas for incorporating rocks in your outdoor space.
(Many of the links in this article redirect to a specific reviewed product. Your purchase of these products through affiliate links helps to generate commission for Storables.com, at no extra cost. Learn more)
Introduction
Landscaping is an art that allows you to transform your outdoor space into a beautiful and inviting oasis. While plants and trees undoubtedly play a significant role in creating a stunning landscape, utilizing rocks can take your design to a whole new level. Rocks have a timeless and natural beauty that can add texture, color, and visual interest to any garden or backyard.
In addition to their aesthetic appeal, rocks can also serve practical purposes in landscaping. They can be used as borders, pathways, retaining walls, and even as elements in water features. Whether you have a small courtyard or a sprawling yard, incorporating rocks into your landscaping can provide endless possibilities for creativity and customization.
However, it’s important to select the right rocks for your landscaping project. Different types of rocks have distinct characteristics, colors, and textures that can create various effects in your design. To ensure a harmonious and visually appealing look, you’ll need to consider the overall theme of your garden and choose rocks that complement your existing plants and architectural features.
In this article, we will explore different ways to use rocks in landscaping to enhance the beauty and functionality of your outdoor space. From creating stunning rock pathways to designing captivating rock gardens, we’ll cover it all. So, let’s dive in and discover how to unleash the beauty of rocks in your landscaping endeavors.
Key Takeaways:
- Rocks can add beauty and functionality to your outdoor space through borders, pathways, retaining walls, and more. Careful selection and maintenance can create a stunning and cohesive landscape design.
- Incorporating rocks into your landscaping design allows for endless creativity and customization, bringing a timeless and natural beauty to your outdoor space. From rock pathways to water features, rocks can transform any garden into a captivating oasis.
Read more: How To Move Landscaping Rocks
Selecting Rocks for Landscaping
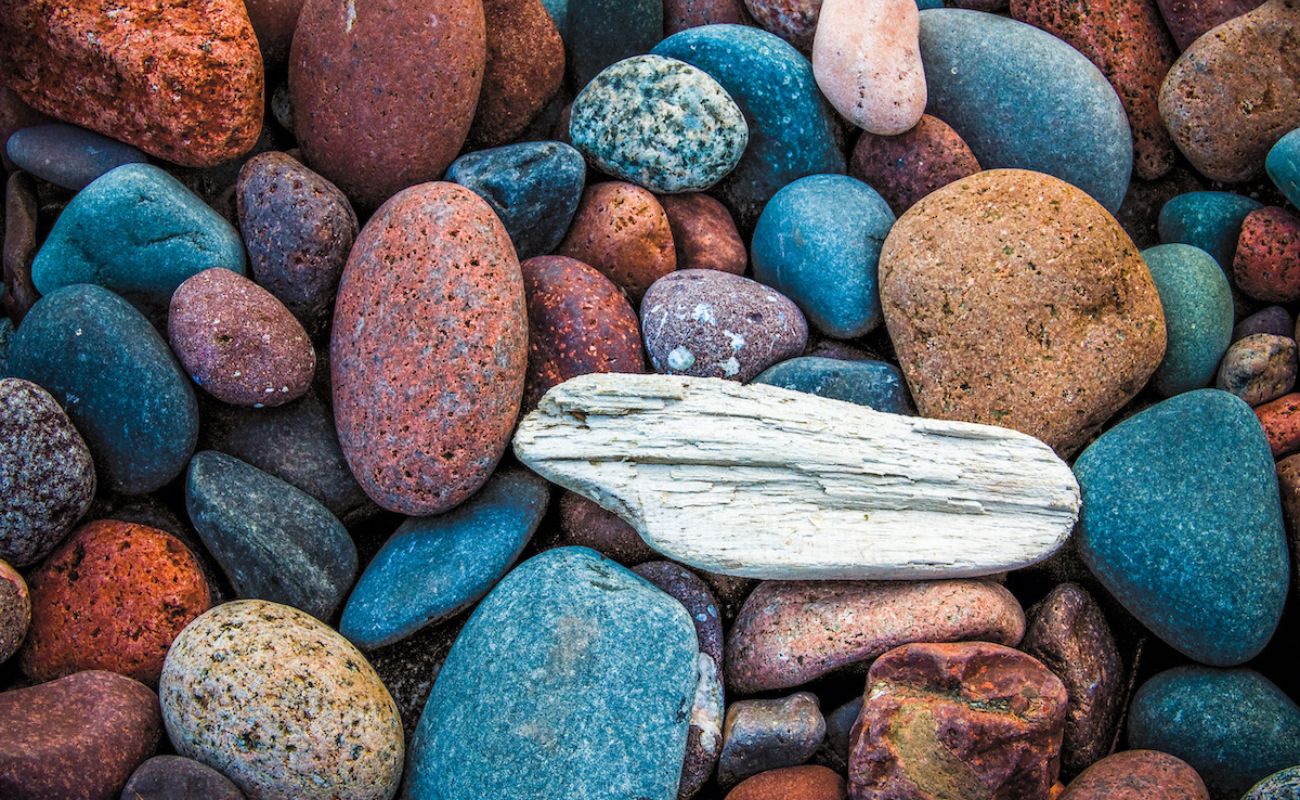
When it comes to selecting rocks for your landscaping project, you have a wide variety of options to choose from. Each type of rock has its own unique characteristics, so it’s important to consider factors such as color, texture, size, and shape to achieve the desired look and feel in your outdoor space.
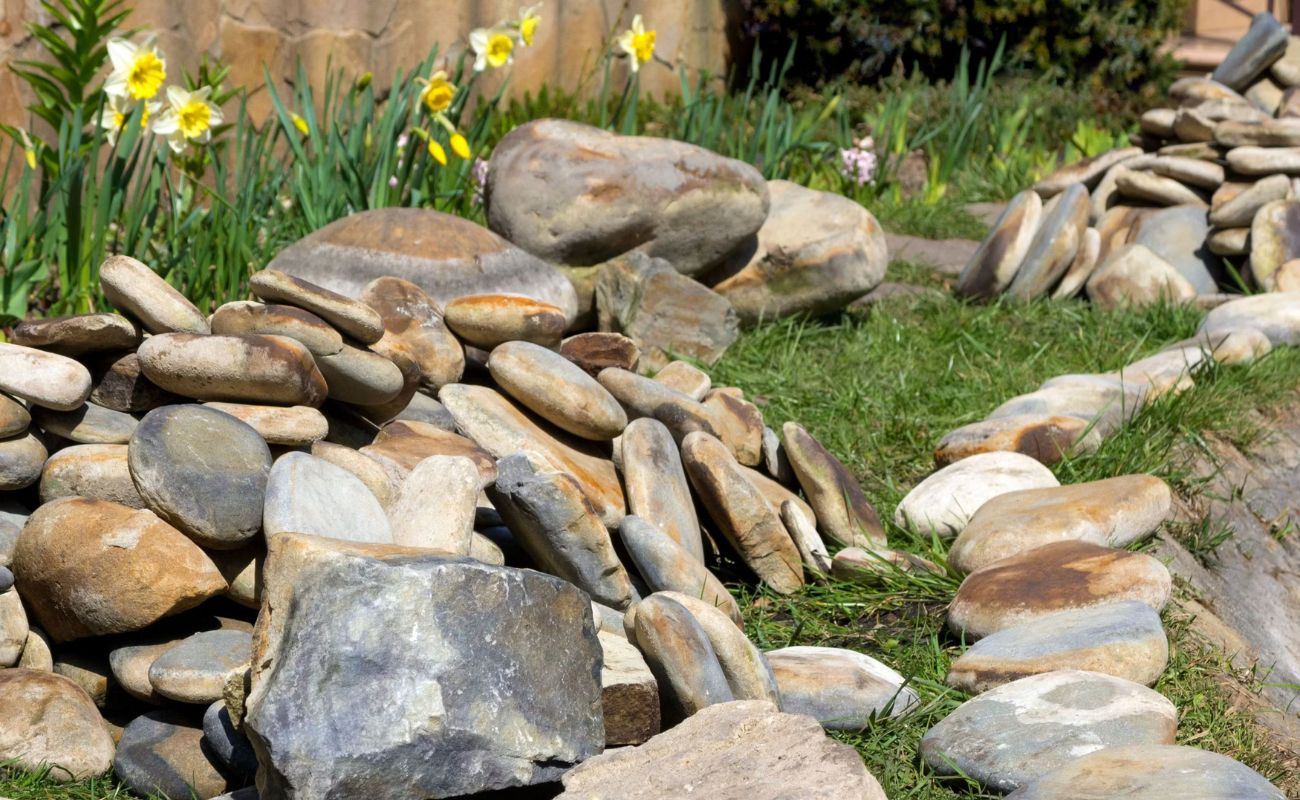
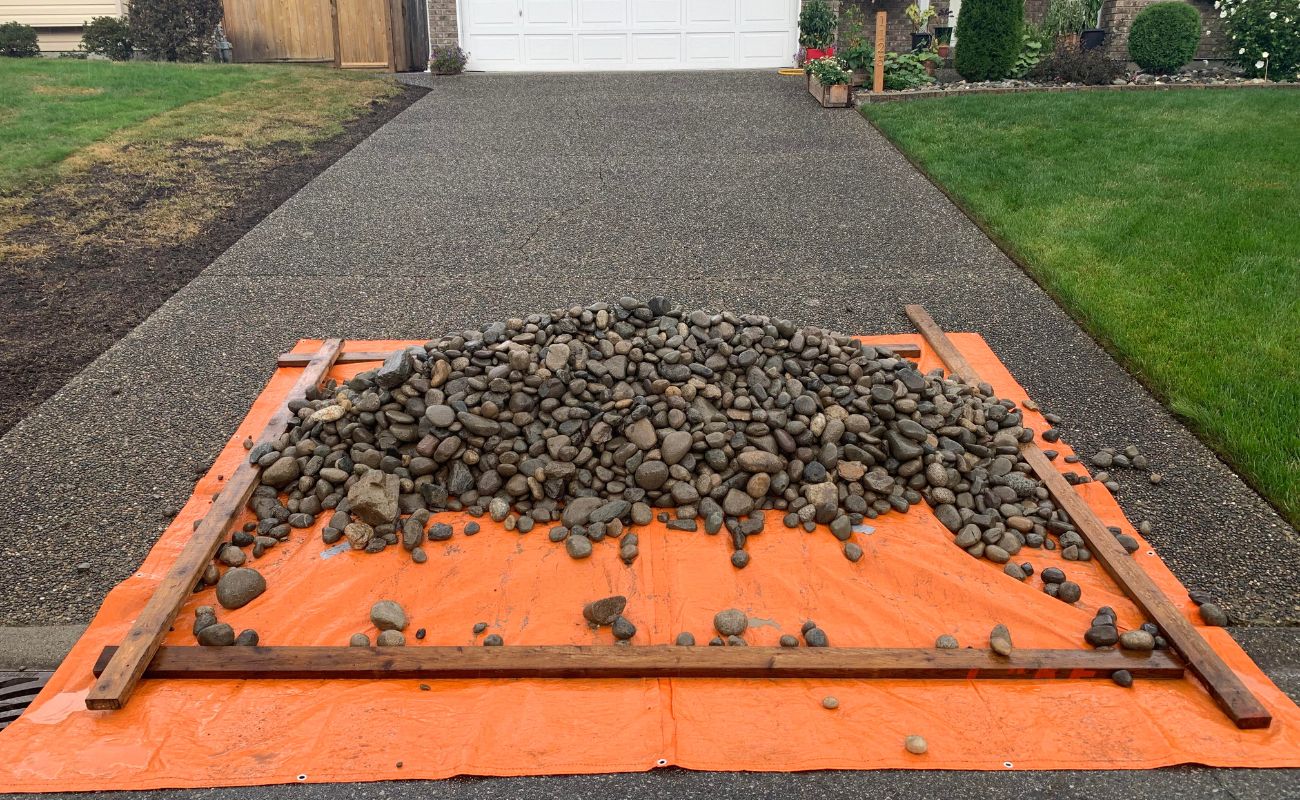
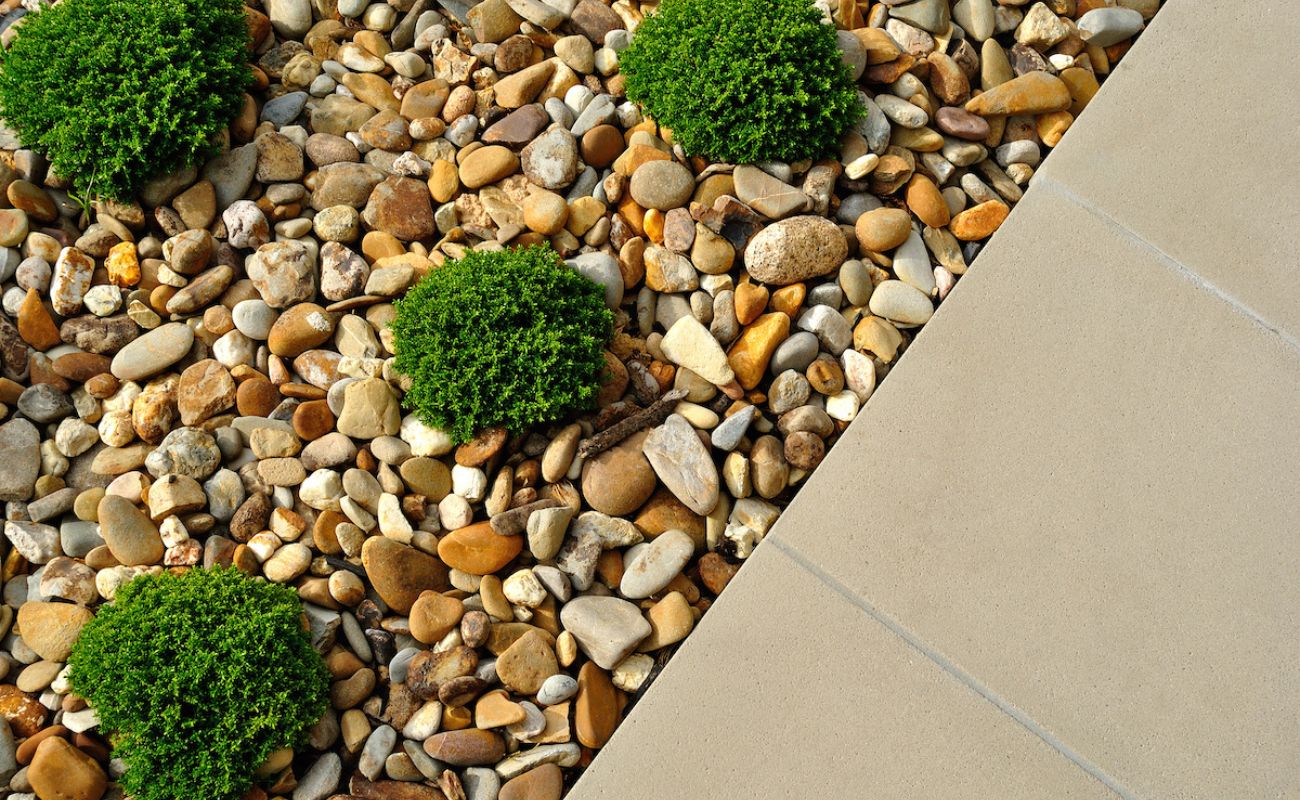
One popular choice for landscaping rocks is river rock. These smooth, rounded stones are often found near rivers and come in a range of colors, including shades of gray, brown, and beige. River rocks are versatile and can be used in various ways, such as creating borders, pathways, or even as decorative accents in rock gardens.
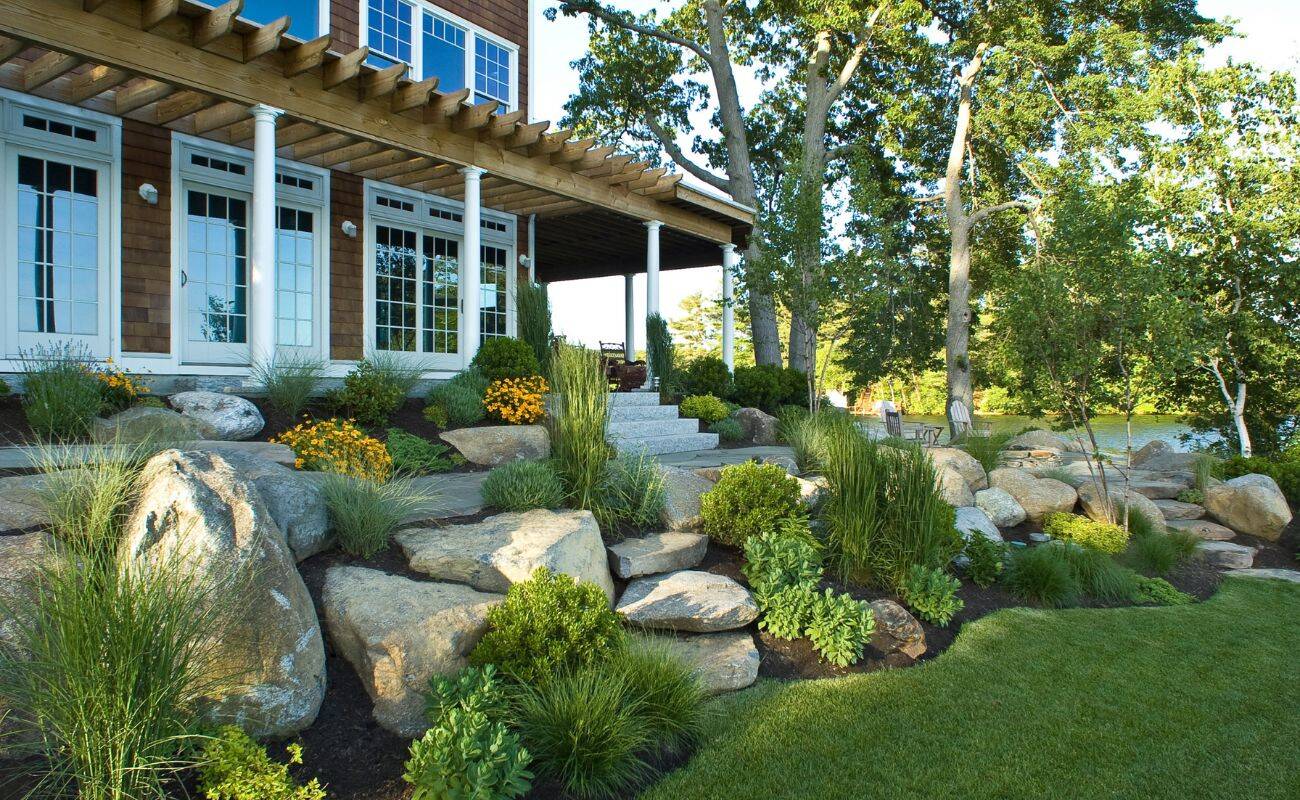
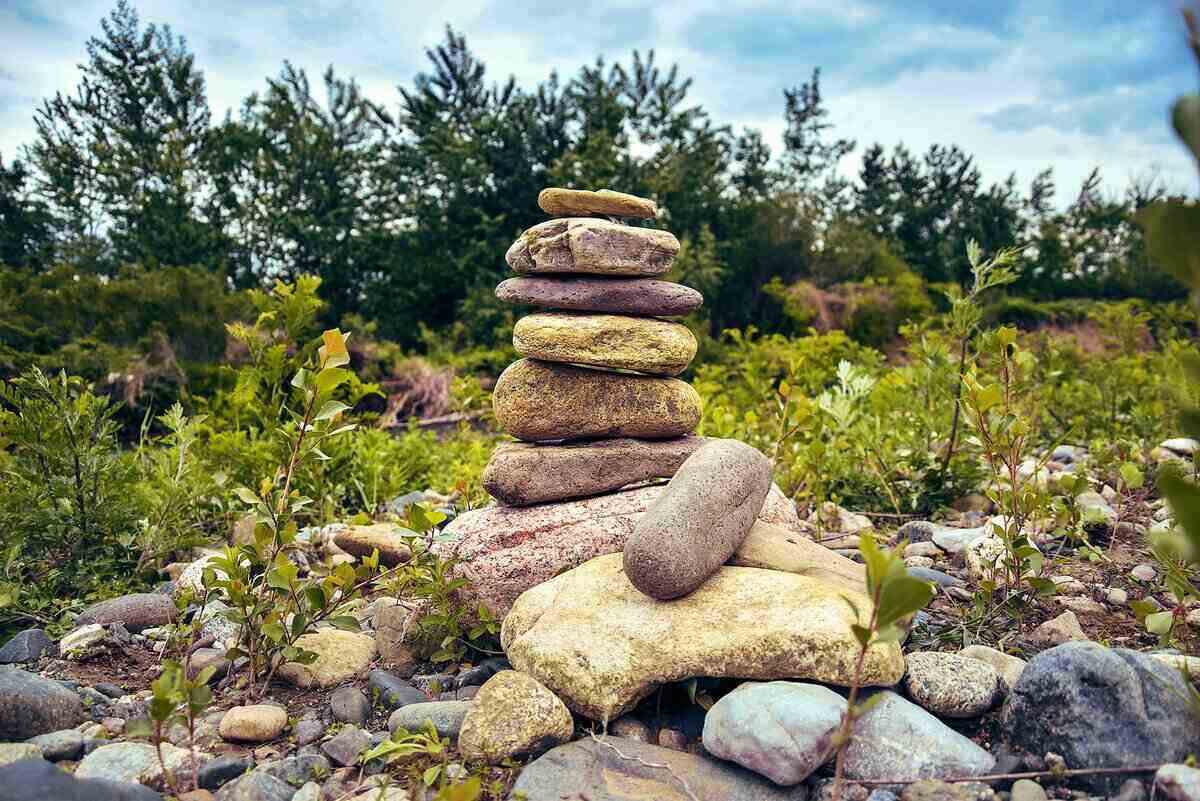
If you prefer a more dramatic and bold look, consider using boulders in your landscaping design. Boulders are large, eye-catching rocks that can create a focal point in your yard. They are ideal for adding height and dimension to your landscape and can be strategically placed to create a sense of balance and visual interest.
For a more refined and polished look, granite rocks are an excellent choice. Granite rocks come in a variety of colors, including black, gray, and pink. They are durable and can withstand harsh weather conditions, making them suitable for long-lasting landscaping projects such as retaining walls or rock pathways.
If you desire a natural and rustic vibe, consider using flagstone rocks. Flagstone rocks are flat and can be used to create beautiful natural-looking pathways or patios. They come in various colors and can be arranged in different patterns to achieve a unique and charming effect.
When selecting rocks for your landscaping, it’s essential to also consider the size and shape that will best complement your design. Smaller rocks, such as pea gravel or crushed stone, can be used as groundcover to create a textured and uniform look. Larger rocks, on the other hand, can be used as focal points or to create a sense of drama in your landscape.
It’s advisable to visit a local stone yard or garden center to see the rocks in person and get a better idea of their color, texture, and size before making a purchase. Additionally, consider seeking advice from a professional landscaper or garden designer who can provide guidance based on your specific needs and preferences.
By carefully selecting the rocks for your landscaping project, you can create a visually stunning and cohesive design that complements your existing plants and outdoor space.
Determining the Purpose and Placement of Rocks
Before incorporating rocks into your landscaping, it’s crucial to determine their purpose and the ideal placement in your outdoor space. By carefully considering these factors, you can ensure that the rocks not only enhance the beauty of your landscape but also serve a functional purpose.
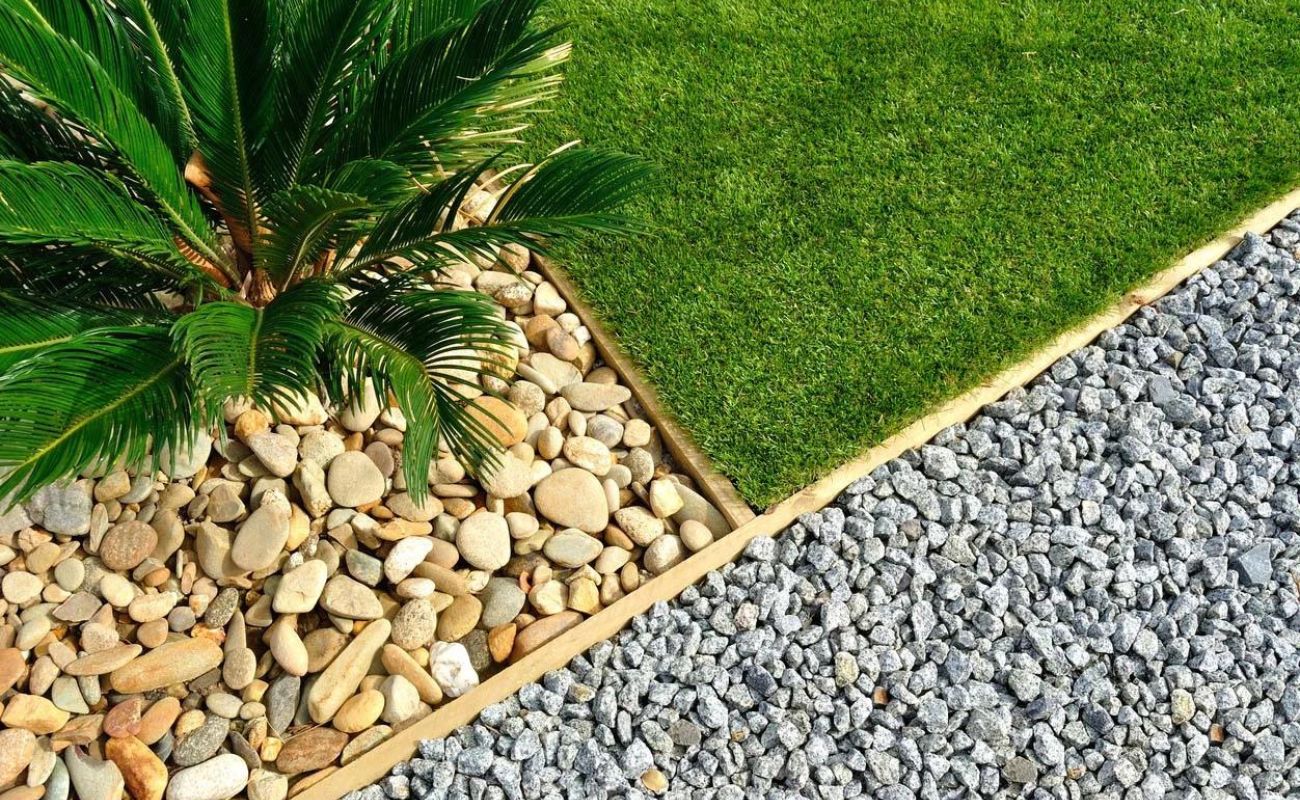
One common use of rocks in landscaping is as borders and edging. Rocks can create defined edges around flower beds, pathways, or lawns, adding structure and a polished look to your garden. To achieve this, choose rocks that are consistent in size and shape and arrange them in a neat and uniform manner along the desired perimeter.
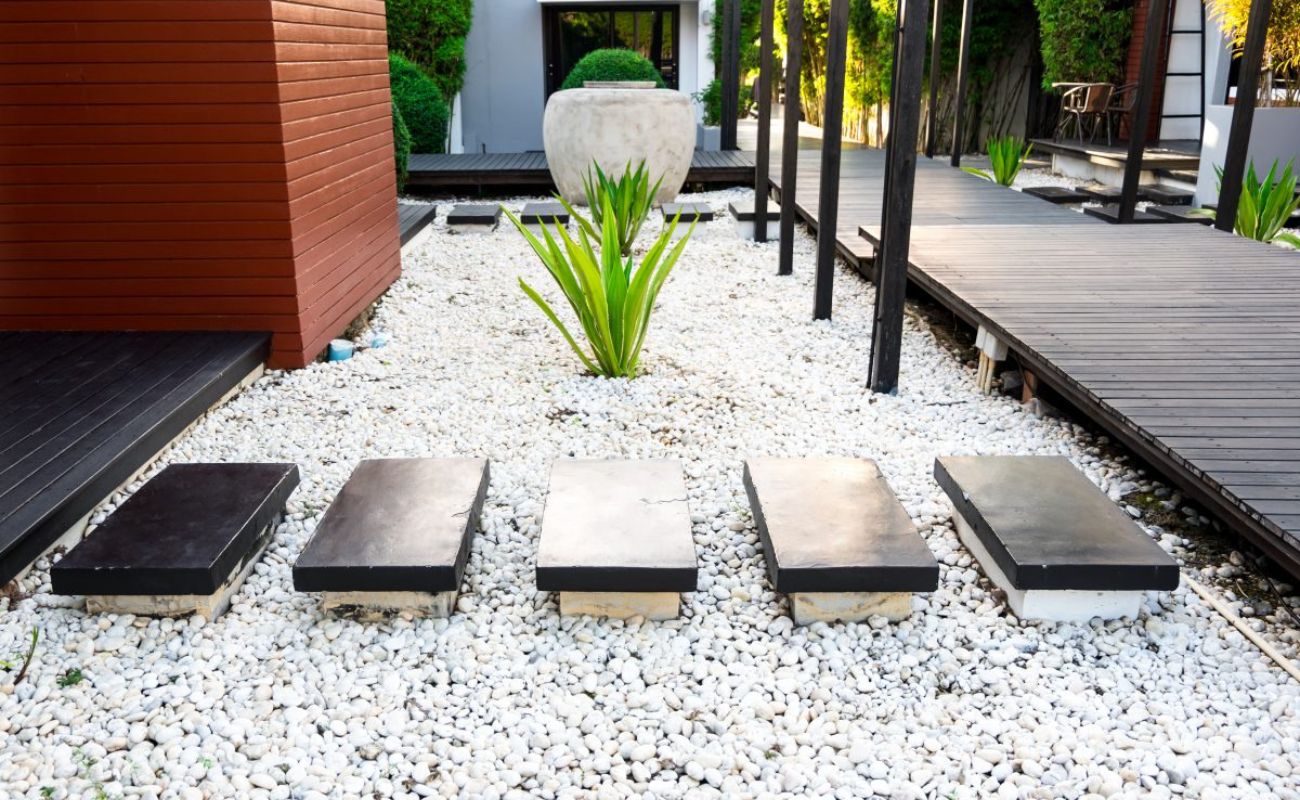
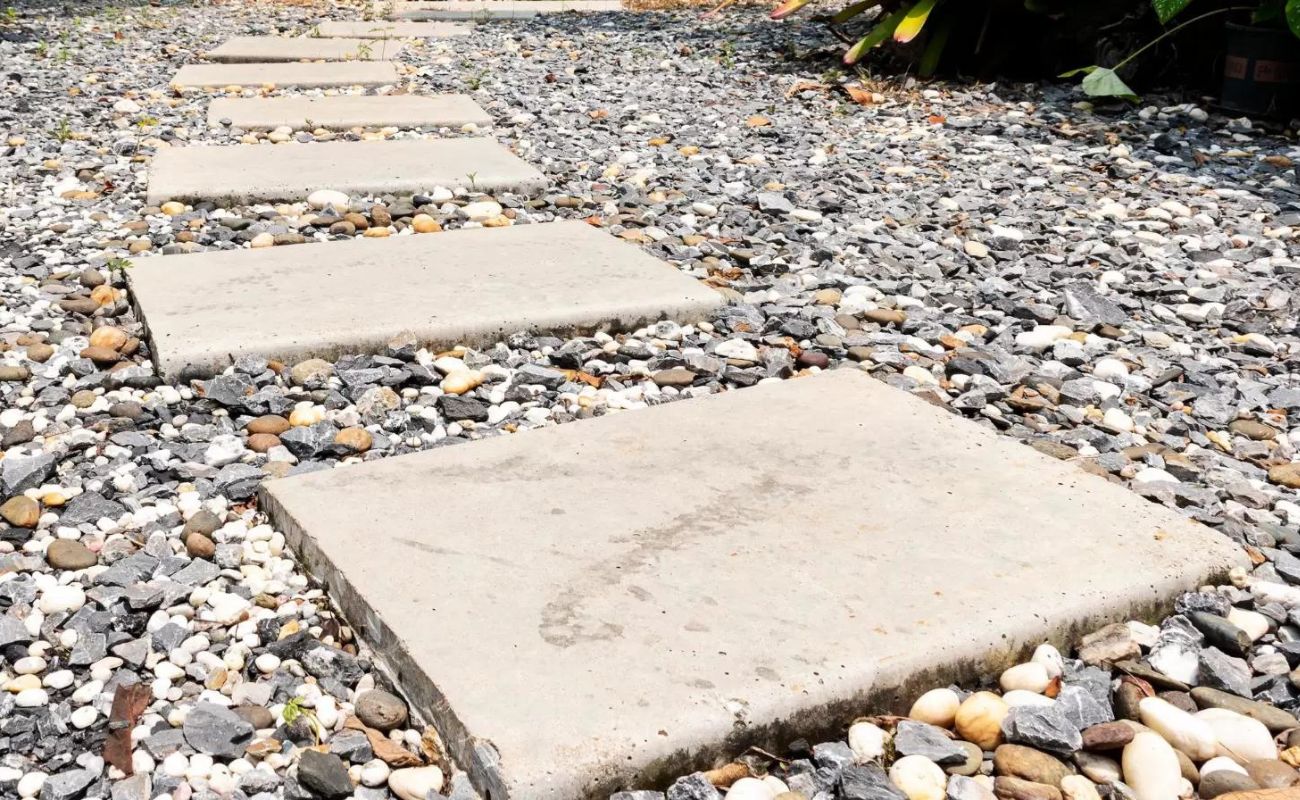
Another purpose for using rocks in landscaping is to create pathways and walkways. Rocks can be arranged to form a sturdy and visually pleasing pathway that guides visitors through your garden. Consider using flat and smooth rocks, such as flagstones or stepping stones, to ensure a comfortable walking surface. You can also incorporate smaller rocks or gravel in between the stepping stones to add texture and prevent slipping.
For those with sloped landscapes or erosion issues, rocks can be utilized as retaining walls. Retaining walls not only stabilize the soil but also add an architectural element to your yard. Boulders or larger rocks can be stacked and secured to create a functional and visually appealing retaining wall. Ensure proper drainage behind the wall and consult with a professional if you’re dealing with large slopes or complex terrain.
If you have a passion for gardening, consider designing a rock garden. Rock gardens are creative and low-maintenance alternatives to traditional flower beds. Select rocks with interesting shapes and textures and arrange them in a natural-looking pattern. Add drought-tolerant plants and gravel to create a captivating and easy-to-maintain rock garden.
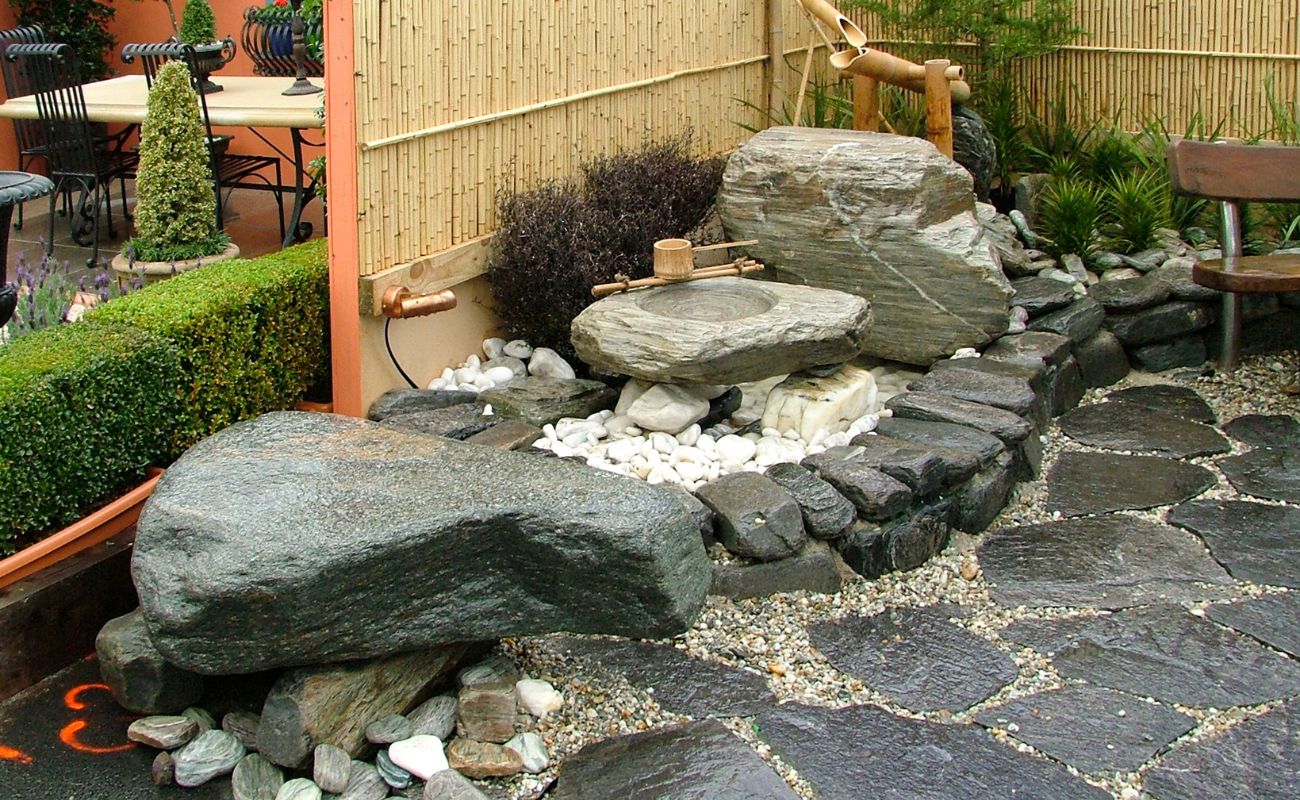
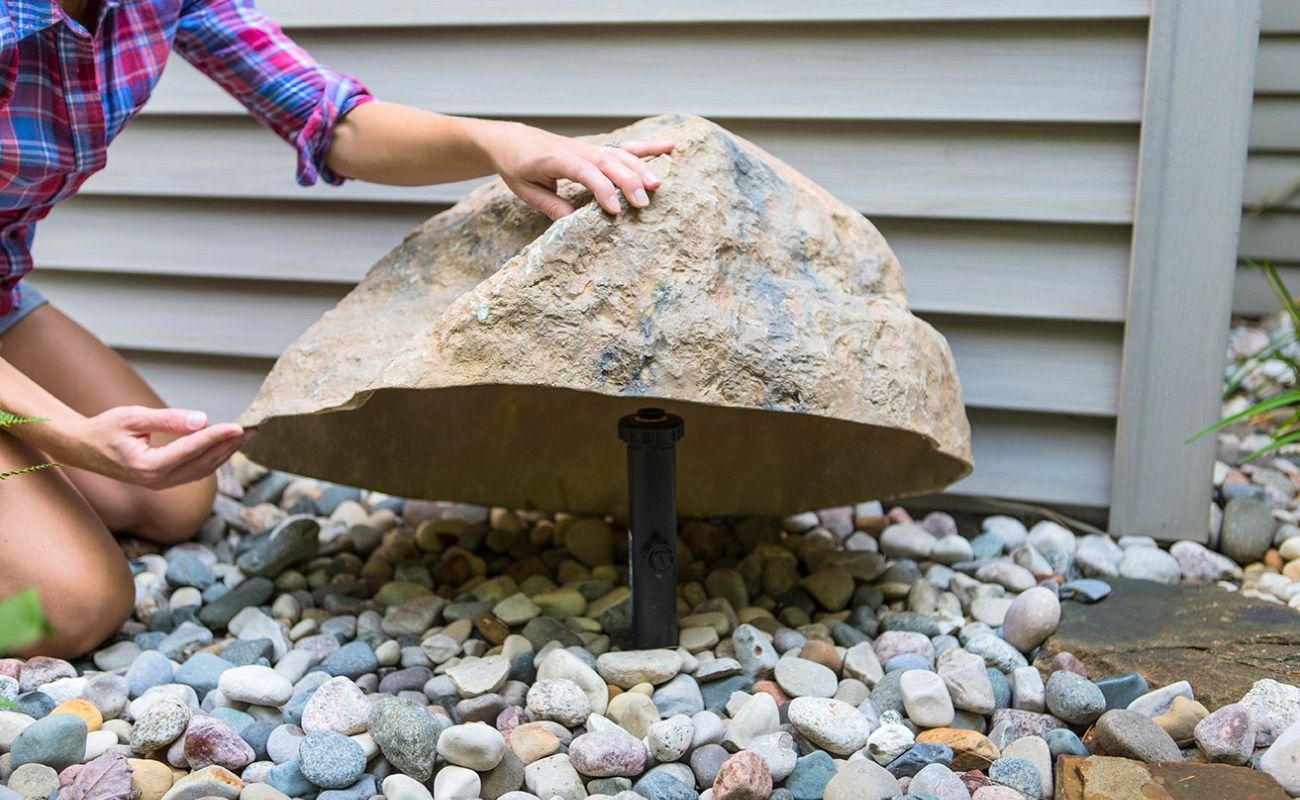
Rocks can also be incorporated into water features, such as ponds, waterfalls, or fountains. Large boulders or rocks can be strategically placed to create cascades or provide a natural-looking backdrop. Smaller rocks or pebbles can be used as bedding material or to form the base of the water feature, adding depth and texture.
Lastly, rocks can enhance the beauty of planters and flower beds. By strategically placing rocks around the base of potted plants or along the edges of flower beds, you can create a visually appealing border and prevent soil erosion. Choose rocks that complement the colors and textures of the plants to achieve a cohesive and harmonious look.
When determining the purpose and placement of rocks in your landscape, it’s essential to consider the overall theme, style, and function of your outdoor space. By doing so, you can ensure that the rocks seamlessly blend with the existing elements and create a balanced and visually stunning landscape.
Using Rocks as Borders and Edging
One of the most popular ways to incorporate rocks into your landscaping design is by using them as borders and edging. Rocks can add structure, definition, and a touch of natural beauty to your garden beds, pathways, and other outdoor areas. Here are some tips on how to effectively use rocks as borders and edging in your landscape:
1. Choose the Right Rocks: Select rocks that align with the overall aesthetic of your landscape and complement the surrounding plants and features. Consider the color, texture, and shape of the rocks to achieve the desired visual impact.
2. Determine the Border or Edging Style: Decide on the style and placement of the borders or edging. You can opt for a straight, clean line for a formal look, or a more organic, curved line for a relaxed and natural feel. Consider the shape and size of your garden beds or pathways to determine the appropriate border or edging style.
3. Prepare the Area: Clear the area where you plan to install the rocks as borders or edging. Remove any grass, weeds, or debris to create a clean and level surface. Use a shovel or edging tool to define the line where you’ll place the rocks.
4. Arrange the Rocks: Start placing the rocks along the defined line, making sure they fit snugly together. If using larger rocks, bury them partially in the ground for stability. For a more seamless look, try to position rocks close to each other, leaving as little space as possible between them.
5. Experiment with Different Sizes and Shapes: Add visual interest to your borders or edging by incorporating rocks of varying sizes and shapes. Mix larger rocks with smaller rocks to create contrast and texture. Don’t be afraid to experiment and arrange the rocks in different patterns to create a unique and eye-catching design.
6. Consider Planting Along the Borders: Soften the appearance of the rock borders or edging by planting low-growing plants or groundcovers along the edges. This will help blend the rocks with the rest of the landscape and create a more natural and cohesive look.
7. Maintain and Refresh: Regularly inspect and maintain the rock borders or edging to keep them looking their best. Remove any weeds or debris that may accumulate between the rocks. Over time, the rocks may shift or become dislodged, so periodically check and adjust their placement as needed. Additionally, consider refreshing the look by adding new rocks or rearranging the existing ones.
Using rocks as borders and edging in your landscaping design can provide a sense of structure and organization while adding a touch of natural beauty. With careful selection and installation, rocks can transform your garden beds and pathways into stunning focal points that seamlessly blend with the rest of your outdoor space.
Creating Rock Pathways and Walkways
Rock pathways and walkways are not only functional but also add a touch of natural beauty and charm to your landscape design. Whether you want a meandering path through your garden or a straight walkway to your front door, rocks can create a visually appealing and durable pathway. Here are some tips on how to create rock pathways and walkways:
1. Plan the Pathway: Determine the desired route and purpose of your pathway. Consider factors such as the flow of foot traffic, the existing landscape features, and any potential obstacles or slope issues. Take measurements and mark out the pathway using stakes and string.
2. Clear the Area: Remove any vegetation, rocks, or debris from the designated path area. Make sure the ground is level and free of any bumps or unevenness. If necessary, use a shovel or a small excavator to clear the path and create a smooth surface.
3. Lay the Foundation: To ensure stability and longevity, it’s important to prepare a solid foundation for the rock pathway. Start by digging a shallow trench along the marked path. This trench will serve as the base for the rocks. Line the trench with landscape fabric to prevent weed growth and improve drainage.
4. Choose the Right Rocks: Select rocks that are suitable for walking on and complement the overall design of your landscape. Flat and smooth rocks, such as flagstones or stepping stones, are ideal for creating a comfortable pathway. Take into consideration the size and thickness of the rocks, ensuring they are durable enough to withstand foot traffic.
5. Arrange the Rocks: Start placing the rocks in the prepared trench, leaving a small gap between each stone for stability. Experiment with different patterns and orientations to create a visually interesting design. Leave some space for plants or groundcover in between the rocks to soften the look of the pathway.
6. Secure the Rocks: Once the rocks are in place, ensure that they are stable by packing the gaps between the stones with sand or gravel. This will help to anchor the rocks and provide a firm surface for walking. Use a rubber mallet to gently tap the rocks into place if needed.
7. Add Finishing Touches: Consider adding some decorative elements along the pathway, such as solar-powered lighting, potted plants, or ornamental grasses. These finishing touches can enhance the beauty and functionality of your rock pathway, especially during the evening hours.
8. Maintain the Pathway: Regularly inspect and maintain the rock pathway to keep it looking its best. Remove any weeds, moss, or debris that may accumulate between the rocks. This will help prevent the pathway from becoming slippery or uneven. Additionally, refresh the sand or gravel between the rocks as needed.
Creating rock pathways and walkways adds character and functionality to your landscape while incorporating the timeless beauty of rocks. By following these steps and putting your creativity to work, you can design a stunning rock pathway that truly enhances the overall appeal of your outdoor space.
Building Rock Retaining Walls
Rock retaining walls not only serve a functional purpose in landscaping but also add a strong visual element to your outdoor space. Whether you need to level a sloping yard or prevent soil erosion, building a rock retaining wall can provide stability while creating a beautiful focal point. Here are some essential steps to consider when building rock retaining walls:
1. Determine the Location and Purpose: Identify the area where you want to build the retaining wall. Consider the slope of the land, drainage patterns, and potential water runoff. Determine the purpose of the wall, whether it’s for structural support, creating terraced levels, or protecting adjacent areas from shifting soil.
2. Prepare the Ground: Clear the area of vegetation, rocks, and debris. Excavate and flatten the base where the retaining wall will be built. This will allow for proper leveling and ensures a solid foundation for the wall.
3. Plan the Design and Layout: Consider the height, length, and width of the retaining wall. Determine the desired angle of the slope and the number of levels or terraces you want to create. Create a detailed plan and layout, taking into account any curves or corners in the design.
4. Choose the Right Rocks: Select rocks that are appropriate for building a sturdy retaining wall. Boulders or large rocks are typically used as the primary structural elements, while smaller rocks or gravel are used as backfill and for drainage purposes. Ensure that the rocks are durable and able to withstand pressure and erosion.
5. Start Building the Wall: Begin by placing the largest rocks as the base or foundation of the retaining wall. Ensure that these rocks are securely placed in the excavated area and are level from front to back and side to side. If needed, use a level and a mallet to adjust their position.
6. Add More Levels: As you proceed with building the retaining wall, continue to stack rocks of varying sizes, alternating their placement to create stability. Place smaller rocks and gravel behind the larger rocks to provide additional support and improve drainage. Tamp down the backfill material firmly for stability.
7. Consider Proper Drainage: To prevent water buildup and potential damage to the retaining wall, incorporate drainage elements. Install weep holes or perforated pipes behind the retaining wall to allow water to drain away from the wall’s base. This will help prevent soil saturation and potential wall failure.
8. Finish and Secure the Wall: Once the retaining wall is built, make sure all rocks are securely in place. Fill any gaps or voids with smaller rocks or gravel. Consider adding a capstone or a row of flat rocks on top of the wall for a finished look. This will also provide additional stability.
9. Maintain the Retaining Wall: Regularly inspect the retaining wall for any signs of damage, such as shifting or leaning rocks. Clear away any debris or vegetation that may accumulate on top of the wall. Address any soil erosion issues promptly by adding additional backfill or stabilizing the wall as needed.
Building a rock retaining wall requires careful planning and attention to detail. By following these steps and ensuring proper construction techniques, you can create a stunning and functional rock retaining wall that enhances the beauty and stability of your outdoor space.
When using rocks for landscaping, consider the size, color, and texture of the rocks to create visual interest. Use larger rocks as focal points and smaller rocks for ground cover. Also, consider the drainage and stability of the rocks when placing them in your landscape.
Designing Rock Gardens
Rock gardens are a wonderful way to incorporate the natural beauty of rocks into your landscape design. These gardens create a visually striking and low-maintenance focal point, making them ideal for those who want to add interest to their outdoor space without the upkeep of traditional flower beds. Here are some tips to help you design a stunning rock garden:
1. Choose the Right Location: Assess your yard and identify the best location for your rock garden. Consider factors such as sunlight exposure, soil drainage, and existing landscape features. Ideally, choose an area that receives ample sunlight and has well-draining soil.
2. Start with a Plan: Sketch out a rough design or layout for your rock garden. Consider the overall shape, size, and style you want to achieve. Take into account the surrounding landscape and any existing plants or architectural elements that you want to incorporate into the design.
3. Select the Rocks: Choose rocks of different sizes, colors, and textures for your rock garden. Bigger and more irregularly shaped rocks can serve as focal points, while smaller rocks can fill in gaps and provide a cohesive look. Consider the overall aesthetic you want to achieve, whether it’s a rugged, natural look or a more structured and formal design.
4. Prepare the Soil: Before placing the rocks, prepare the soil in the designated area. Remove any weeds, grass, or debris. Loosen the soil and improve its drainage by incorporating organic matter or sand if necessary. This will ensure healthy plant growth in your rock garden.
5. Arrange the Rocks: Start by placing the larger rocks in your design. Position them in a way that looks natural and harmonious with the surrounding landscape. Dig them partially into the ground for stability. Once the larger rocks are in place, fill in the gaps with smaller rocks, gravel, or pebbles for added texture and visual interest.
6. Choose the Right Plants: Select plants that thrive in rocky and dry conditions, such as succulents, alpine plants, or ornamental grasses. Consider the colors, heights, and textures of the plants to create a visually pleasing combination. Group plants together in clusters or pockets around the rocks to mimic their natural habitat.
7. Consider Edging: To define the boundaries of your rock garden and provide a clean finish, consider adding edging materials such as bricks, stones, or metal. Edging can also help prevent soil erosion and keep your chosen plants contained within the designated area.
8. Enhance with Mulch or Gravel: Consider adding a layer of mulch or gravel around the plants to help with moisture retention and weed control. These materials can also provide a neat and polished look to your rock garden.
9. Maintenance and Care: Rock gardens generally require less maintenance than traditional flower beds, but they still need some care. Regularly inspect the plants for signs of disease or pests, and promptly address any issues. Remove fallen leaves or debris from the rocks to keep them looking clean and tidy.
Designing a rock garden allows you to showcase the beauty of rocks while creating a unique and low-maintenance landscape feature. By following these tips and infusing your own creativity, you can design a captivating rock garden that transforms your outdoor space into a tranquil and visually stunning oasis.
Incorporating Rocks in Water Features
Water features add a sense of tranquility and beauty to any landscape, and incorporating rocks can enhance their natural appeal. Rock elements can be strategically placed to create stunning waterfalls, cascades, or to add texture and depth to ponds or fountains. Here are some tips on how to incorporate rocks in water features:
1. Natural-Looking Rocks: Choose rocks that have a natural shape, texture, and color to create a more authentic look in your water feature. Look for rocks with smooth surfaces and interesting patterns that resemble those found in nature.
2. Create Waterfalls and Cascades: Utilize rocks to create the illusion of a cascading or trickling waterfall. Position larger rocks at the base, gradually stacking smaller rocks on top to simulate the flowing water effect. Ensure proper placement and secure the rocks firmly to achieve stability and prevent them from shifting.
3. Form Ponds or Water Basins: Use rocks to define the boundaries of a pond or water basin. Arrange the rocks along the edges to create a natural-looking shoreline. Select rocks that are larger and have irregular shapes to simulate the natural contours of a water feature. Ensure proper sealing or lining of the pond or basin to prevent leakage.
4. Enhance with Rock Islands and Shelves: Create additional interest by incorporating rock islands or shelves within the water feature. These can serve as platforms for aquatic plants, ornaments, or seating areas. Position the rocks strategically to provide varying depths and levels within the water.
5. Consider Reflecting Pools: Use rocks to create shallow areas within the water feature to act as reflecting pools. Place rocks of different sizes and shapes on the pool’s bottom to capture and reflect the surrounding landscape, providing a serene and captivating visual effect.
6. Incorporate Water-Resistant Lighting: Install water-resistant lighting within or around the rocks to accentuate their natural beauty. Use underwater LED lights to highlight specific features or create a dramatic nighttime display. Lighting can greatly enhance the ambiance of your water feature, creating a magical atmosphere.
7. Add Plants and Aquatic Life: Soften the look of the rocks and further enhance the water feature by incorporating aquatic plants, such as water lilies or floating plants. Introduce fish or other aquatic life to create a dynamic and lively ecosystem within the water feature.
8. Regular Maintenance: Regularly clean the rocks in your water feature to prevent algae buildup or debris accumulation. Use a scrub brush and water to gently scrub the rocks and remove any buildup. Monitor the water quality, ensuring proper filtration and circulation for the health of your aquatic life and to maintain the clear appearance of the water.
Incorporating rocks in water features can elevate the beauty and natural aesthetics of your landscape. By incorporating these tips and using your creativity, you can design a captivating water feature that blends harmoniously with the surrounding environment and creates a soothing and enchanting atmosphere in your outdoor space.
Using Rocks to Enhance Planters and Flower Beds
Planters and flower beds are an integral part of any landscaping design, and incorporating rocks can elevate their visual appeal and functionality. Rocks can be used in various ways to enhance planters and flower beds, adding texture, structure, and a touch of natural beauty. Here are some ideas on how to use rocks to enhance planters and flower beds:
1. Create a Base Layer: Start by adding a layer of rocks to the bottom of your planters or flower beds. This base layer improves drainage and prevents the soil from becoming waterlogged. Choose rocks that are large enough to allow water to flow freely but small enough to retain the soil within the container.
2. Use Rocks as Edging: Incorporate rocks as edging around planters or flower beds to create a clean and defined look. Place rocks along the perimeter, either partially buried or stacked, to provide a barrier between the plants and surrounding grass or pathway. This edging helps to prevent soil erosion while adding a touch of visual interest.
3. Build Rock Walls: Consider using rocks to construct small rock walls around planters or flower beds. This technique adds height and depth to your landscaping design, creating a multi-tiered effect. Arrange rocks of different shapes and sizes to create a sturdy and visually appealing wall that complements the plants.
4. Arrange Rocks as Focal Points: Select unique and eye-catching rocks to serve as focal points within your planters or flower beds. Place them strategically to draw attention and add visual interest to the overall design. These rocks can be larger and more prominently displayed, creating a captivating centerpiece amidst the plants.
5. Use Rocks for Mulching: Instead of traditional mulch, consider using small rocks or pebbles as a decorative element to cover the soil surface of your planters or flower beds. Rocks provide a more permanent and low-maintenance solution, while also retaining moisture and preventing weed growth. Choose rocks in colors that complement your plants and overall design scheme.
6. Incorporate Rock Pathways: Connect planters or different sections of your flower beds with rock pathways. These pathways create a sense of continuity and structure, guiding the eye and adding a functional aspect to your landscape design. Arrange rocks in a pattern or layout that complements the surrounding vegetation, and use smaller rocks or gravel to fill in the gaps.
7. Combine Rocks with Potted Plants: Pair rocks with potted plants within your planters or flower beds to create a harmonious and balanced look. Use rocks of varying sizes and colors as a decorative topdressing for the potted plants. This not only adds aesthetic appeal but also helps retain moisture and provides stability for the plants.
8. Contrast Colors and Textures: Select rocks that contrast with the colors and textures of your plants to create visual interest. For example, if you have vibrant flowers with soft, delicate petals, choose rocks in earthy hues or with rougher textures to create a striking contrast. This contrast adds depth and dimension to your planters or flower beds.
Using rocks to enhance planters and flower beds allows you to incorporate nature’s beauty in a unique and impactful way. By applying these ideas and experimenting with different rock sizes, shapes, and placements, you can create a visually stunning and well-balanced landscape that showcases your plants and adds a touch of natural elegance.
Read more: How To Dispose Of Landscaping Rocks
Maintaining and Caring for Rock Landscaping
Rock landscaping offers a beautiful and low-maintenance option for enhancing your outdoor space. While rocks require less upkeep compared to traditional gardens, they still benefit from regular maintenance to preserve their beauty and functionality. Here are some essential tips for maintaining and caring for rock landscaping:
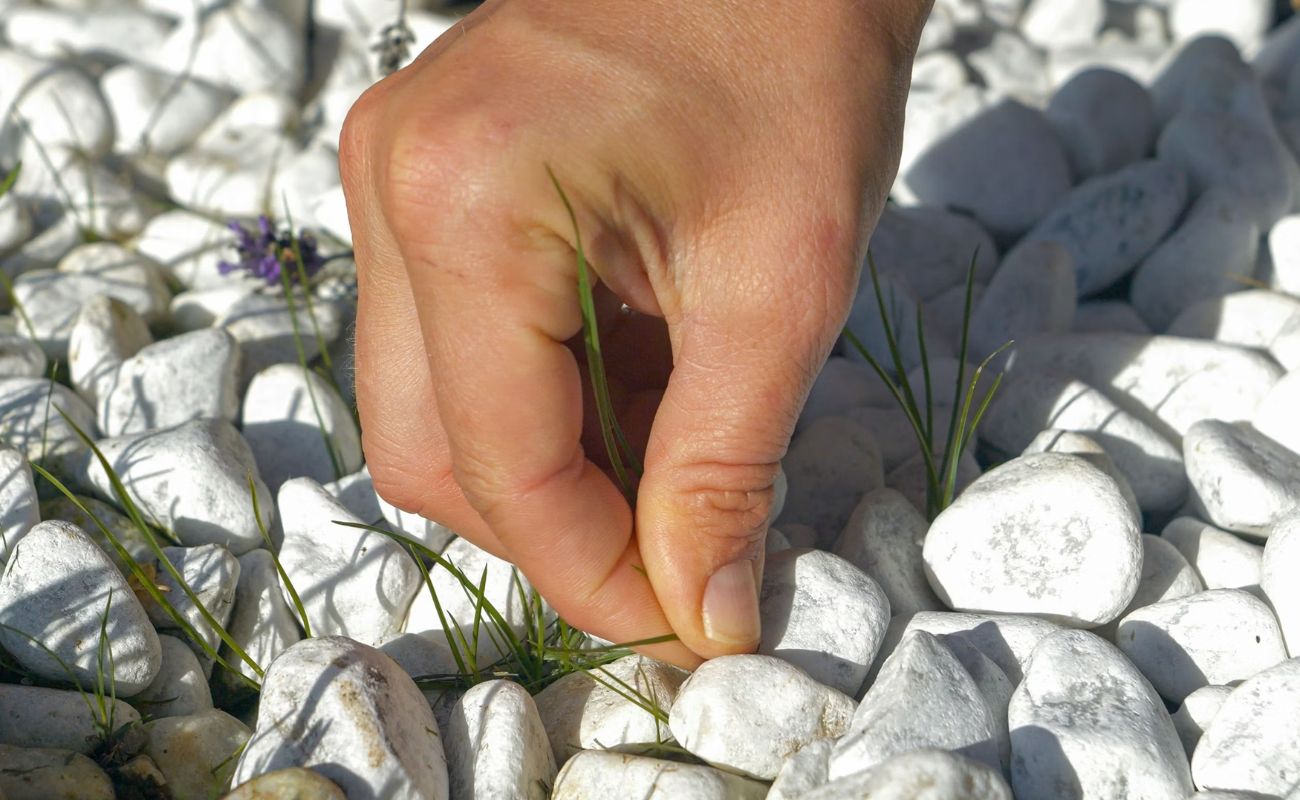
1. Weed Control: Regularly inspect your rock landscaping area for any weeds or unwanted vegetation. Remove weeds by hand, making sure to also pull out their roots to prevent regrowth. Consider using a weed barrier or landscape fabric beneath the rocks to minimize future weed growth.
2. Clear Debris: Remove fallen leaves, twigs, and other debris that may accumulate on the rocks. This helps prevent the buildup of organic matter, which can lead to the growth of moss or algae. Clearing debris also keeps the rocks looking clean and preserves their natural appearance.
3. Control Erosion: Check for signs of erosion around your rock landscaping, particularly after heavy rainfall. If you notice any soil displacement or movement of the rocks, take action to stabilize the area. Add additional rocks or gravel as needed to prevent erosion and maintain the structural integrity of the landscape.
4. Address Drainage Issues: Ensure proper drainage within your rock landscaping. Poor drainage can lead to standing water, which can damage both the rocks and the surrounding plants. Ensure that water is able to flow freely through the rocks and away from the landscape. Consider installing drains or incorporating channels to redirect excess water if necessary.
5. Check for Settling: Over time, rocks may settle or shift due to natural factors or foot traffic. Periodically check the alignment and stability of the rocks and readjust them if needed. Use a rubber mallet or your hands to gently reposition any rocks that have become dislodged or uneven.
6. Preserve Natural Look: Preserve the natural beauty of the rocks by avoiding the use of harsh chemical cleaning agents. Instead, use a soft brush or broom to gently sweep away dirt or debris. For tougher stains or growths, use a mixture of water and mild soap or vinegar to clean the rocks. Rinse thoroughly to remove any residue.
7. Monitor for Pests: Keep an eye out for any signs of pests that may affect your rock landscaping, such as ants, slugs, or snails. Take appropriate measures to control and eliminate these pests, such as using insecticidal sprays or natural pest control methods.
8. Update and Refresh: Over time, you may want to update or refresh your rock landscaping. Consider rearranging the rocks, adding new accents, or introducing new plants to create a different look. This allows you to continuously evolve and revitalize your outdoor space.
9. Professional Inspection: Schedule regular inspections by a professional landscaper or stonemason. They can assess the condition of your rock landscaping, identify any potential issues, and provide recommendations for maintenance or repairs.
By following these maintenance tips, your rock landscaping will maintain its beauty and durability for years to come. With proper care and attention, your outdoor space will continue to be a stunning showcase of natural rock features.
Conclusion
Incorporating rocks into your landscaping design can elevate the beauty and functionality of your outdoor space. Whether you use rocks as borders and edging, create rock pathways and walkways, build rock retaining walls, design rock gardens, incorporate them in water features, or enhance planters and flower beds, each application adds a unique dimension to your landscape.
The careful selection of rocks based on their color, size, shape, and texture allows you to create a visually stunning and cohesive design that complements your existing plants and outdoor features. From the natural beauty of river rocks to the strength and stability of granite boulders, each type of rock brings its own character and charm.
Maintaining and caring for rock landscaping entails regular maintenance and attention to detail. By addressing weed control, debris removal, erosion control, and proper drainage, you can preserve the beauty and structural integrity of your rock features over time. Additionally, periodic updates and refreshes can breathe new life into your landscape design.
Embracing the versatility of rocks in landscaping allows you to unleash your creativity and infuse your outdoor space with a touch of nature. The use of rocks not only adds visual interest but also brings a sense of timelessness and a connection to the natural world. Whether you have a small garden or a sprawling landscape, the incorporation of rocks can create a captivating and inviting environment.
So, whether you’re enhancing an existing garden or starting from scratch, consider the unique and endless possibilities that rocks can bring to your landscape design. With their beauty, durability, and ability to withstand the test of time, rocks are truly a remarkable element that can transform any outdoor space into a magnificent oasis.
Frequently Asked Questions about How To Use Rocks For Landscaping
Was this page helpful?
At Storables.com, we guarantee accurate and reliable information. Our content, validated by Expert Board Contributors, is crafted following stringent Editorial Policies. We're committed to providing you with well-researched, expert-backed insights for all your informational needs.

0 thoughts on “How To Use Rocks For Landscaping”