Home>Garden Essentials>How To Put Down Landscaping Rocks
Garden Essentials
How To Put Down Landscaping Rocks
Modified: April 22, 2024
Learn how to enhance your garden with landscaping rocks. Find step-by-step instructions and tips to put down these beautiful elements in your outdoor space.
(Many of the links in this article redirect to a specific reviewed product. Your purchase of these products through affiliate links helps to generate commission for Storables.com, at no extra cost. Learn more)
Introduction
Welcome to the world of landscaping rocks! If you’re looking to add some character, texture, and low-maintenance beauty to your garden or outdoor space, landscaping rocks are an excellent choice. These versatile and durable stones not only enhance the aesthetic appeal but can also serve practical purposes like weed control, erosion prevention, and water conservation. Whether you want to create a stunning rock garden, define borders, or add accents to specific areas, this comprehensive guide will walk you through the steps to successfully put down landscaping rocks.
Before we dive into the nitty-gritty of installation, it’s important to have a clear plan in mind. Take some time to envision how you want your space to look and the specific areas you want to cover with rocks. Consider factors like the color and texture of the stones, the overall style of your garden, and how the rocks will work with existing plants and features.
Once you have a solid plan in place, it’s time to get your hands dirty (literally!). Follow these step-by-step instructions to properly put down landscaping rocks and transform your outdoor space into a breathtaking oasis.
Key Takeaways:
- Planning and preparing the area is crucial before laying landscaping rocks. Clear the space, assess soil quality, and consider drainage to ensure a smooth and visually appealing finished result.
- Choosing the right type and size of landscaping rocks is essential. Consider the overall style, color, function, and local options to enhance the beauty and functionality of your outdoor space.
Read more: What To Put Under Landscaping Rocks
Step 1: Planning and preparing the area
Before you start laying any landscaping rocks, it’s crucial to plan and prepare the area thoroughly. Here’s what you need to do:
1. Measure and mark the area: Measure the dimensions of the space where you want to install the rocks. Use stakes and string to mark the boundaries clearly. This will help you determine the quantity of rocks you need and ensure an even distribution.
2. Remove any existing plants or debris: Clear the area of any existing plants, weeds, rocks, or debris. This will provide a clean and level surface to work with. If you have any valuable or desired plants, carefully transplant them to another location.
3. Consider drainage: Evaluate the drainage patterns in the area. Ensure that water doesn’t accumulate or pool around the rocks, as this can cause issues like erosion and mold growth. If necessary, create a slope or implement drainage solutions like channels or underground pipes.
4. Assess the soil: Examine the soil quality to determine its suitability for landscaping. Sandy or loamy soils are ideal, as they provide good drainage. If you have heavy clay soil, consider adding amendments like compost or sand to improve its texture and drainage capabilities.
5. Check for utility lines: Before digging or making any major changes to the area, ensure that there are no underground utility lines, such as water or electrical lines. Contact your local utility company for assistance in locating and marking any buried lines.
6. Create a rough sketch: Visualize how you want the rocks to be arranged in the area. You can create a rough sketch or use design software or apps to help you plan. Consider any focal points, pathways, or specific areas you want to highlight with rocks.
7. Research and select rock varieties: Research the different types and sizes of landscaping rocks available. Consider the overall aesthetic you want to achieve, as well as the practical aspects like the level of maintenance required and compatibility with local weather conditions. Visit local nurseries or stone suppliers to view and choose the rocks that best fit your vision.
Step 2: Clearing and leveling the ground
Once you have completed the planning phase, it’s time to prepare the ground for your landscaping rocks. Follow these steps to clear and level the area:
1. Remove vegetation: Start by removing any grass, weeds, or unwanted plants from the area where you will be placing the rocks. Use a shovel, garden rake, or weed eater to cut and remove the vegetation. Ensure you remove the roots as well to prevent regrowth.
2. Clear debris: Remove any rocks, twigs, or other debris that may be present on the ground. This will create a smooth surface for the rocks to be placed on.
3. Level the ground: Use a garden rake, hoe, or shovel to level the ground. Remove any high spots by scraping away excess soil and fill in any low spots with additional soil. Aim for a relatively even and flat surface, but keep in mind that a slight slope may be necessary for proper drainage.
4. Compact the soil: To ensure stability and longevity of your landscaping rocks, it’s important to compact the soil. Use a lawn roller or the backside of a shovel to press down on the ground, making it firm and compact. This will help prevent shifts or settling of the rocks over time.
5. Check for drainage: Once the ground is leveled and compacted, check the drainage by spraying water onto the surface. Observe how the water flows and make adjustments if needed. It should flow away from the area or be directed towards drainage solutions to prevent water pooling or erosion.
6. Inspect for any obstacles: Take a final look at the prepared ground and ensure there are no obstructions like large rocks, tree roots, or underground pipes that could interfere with the installation of the landscaping rocks. Clear any such obstacles before moving forward.
By completing these steps, you will have a clean, level, and well-prepared area ready for the next phase of installing your landscaping rocks. Taking the time to properly clear and level the ground will ensure a smooth and visually appealing finished result.
Step 3: Laying a weed barrier
One of the key aspects in maintaining a low-maintenance and weed-free rock landscape is the installation of a weed barrier. By placing a weed barrier underneath your landscaping rocks, you can prevent weeds from penetrating through the ground and detracting from the overall beauty of your design. Follow these steps to properly lay a weed barrier:
1. Choose the right weed barrier: There are various options available for weed barriers, including landscape fabric, geotextile cloth, plastic sheeting, or even layers of newspaper. Consider the durability, permeability, and longevity of the material according to your specific needs.
2. Measure and cut the weed barrier: Measure the dimensions of the area where you will be installing the rocks. Leave an extra 6-12 inches of overlap on all sides to ensure complete coverage. Use scissors or a utility knife to cut the weed barrier to the appropriate size.
3. Clear the area: Ensure the ground is clear of any debris or vegetation before laying the weed barrier. This will provide a smooth surface for the barrier to rest on and prevent punctures or tears.
4. Place the weed barrier: Lay the weed barrier directly on the prepared ground, ensuring it covers the entire area. Smooth out any wrinkles or folds to create a flat and even surface. If using multiple pieces of weed barrier, overlap them by 6-12 inches to prevent weeds from finding gaps.
5. Secure the weed barrier: Use landscape fabric stakes, U-shaped pins, or rocks to secure the weed barrier in place. Insert the stakes or pins at regular intervals around the edges and throughout the area to prevent shifting or movement.
6. Cut openings for plants: If you have existing plants or plan to incorporate new plants into your rock landscape, cut small openings in the weed barrier to accommodate them. Ensure the openings are slightly larger than the plant’s root ball to allow for growth.
7. Inspect for any gaps: After laying the weed barrier, carefully inspect the area for any gaps or uncovered spots. Make any necessary adjustments or add additional pieces of barrier to ensure complete coverage.
By taking the time to install a weed barrier, you can greatly reduce the amount of time and effort spent on weed control in your rock landscape. This will help maintain the aesthetics and minimize maintenance, allowing you to fully enjoy the beauty of your landscaping rocks.
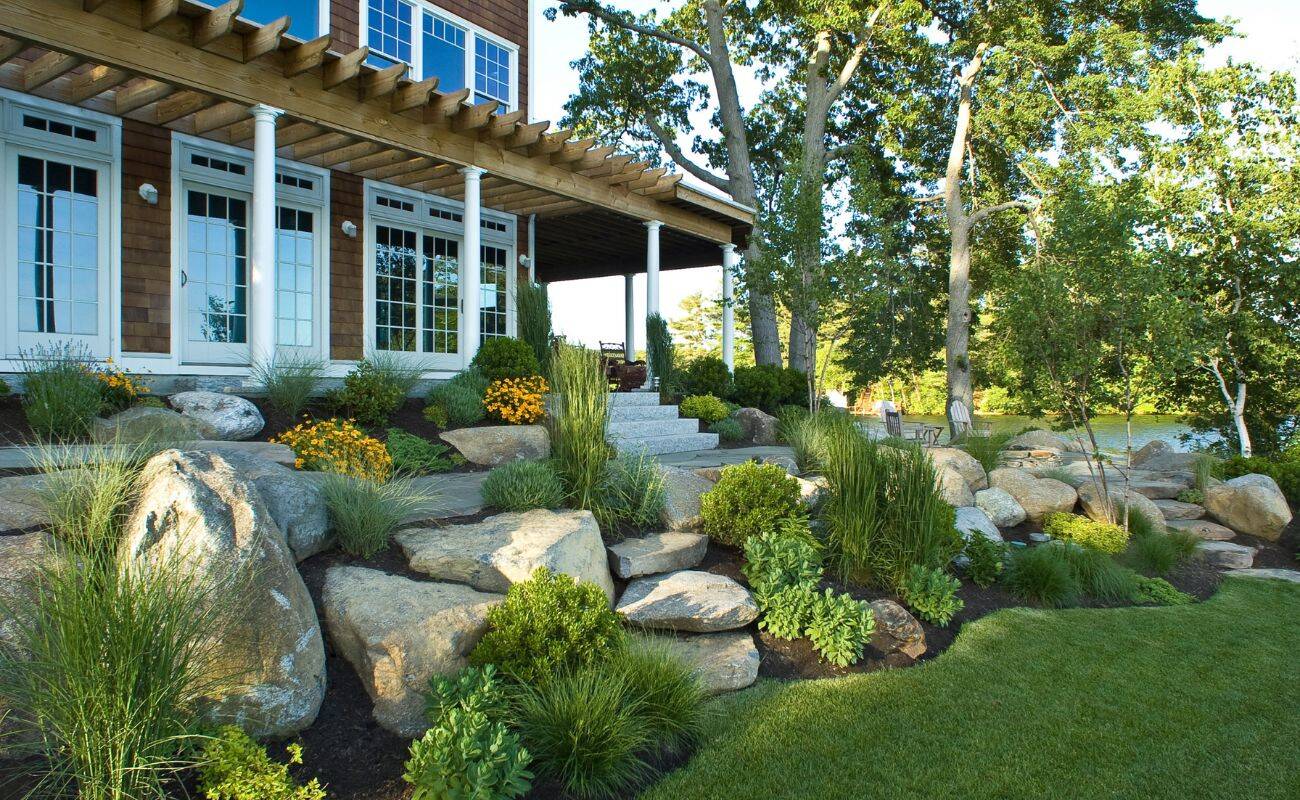
Step 4: Choosing the right type and size of landscaping rocks
Choosing the right type and size of landscaping rocks is essential to achieve the desired look and functionality of your outdoor space. Here are some factors to consider when making your selection:
1. Consider the overall style: Think about the style or theme you want to convey in your landscape. Are you looking for a rustic, natural look or something more modern and minimalist? Different types of rocks can help create different aesthetics, so choose stones that align with your vision.
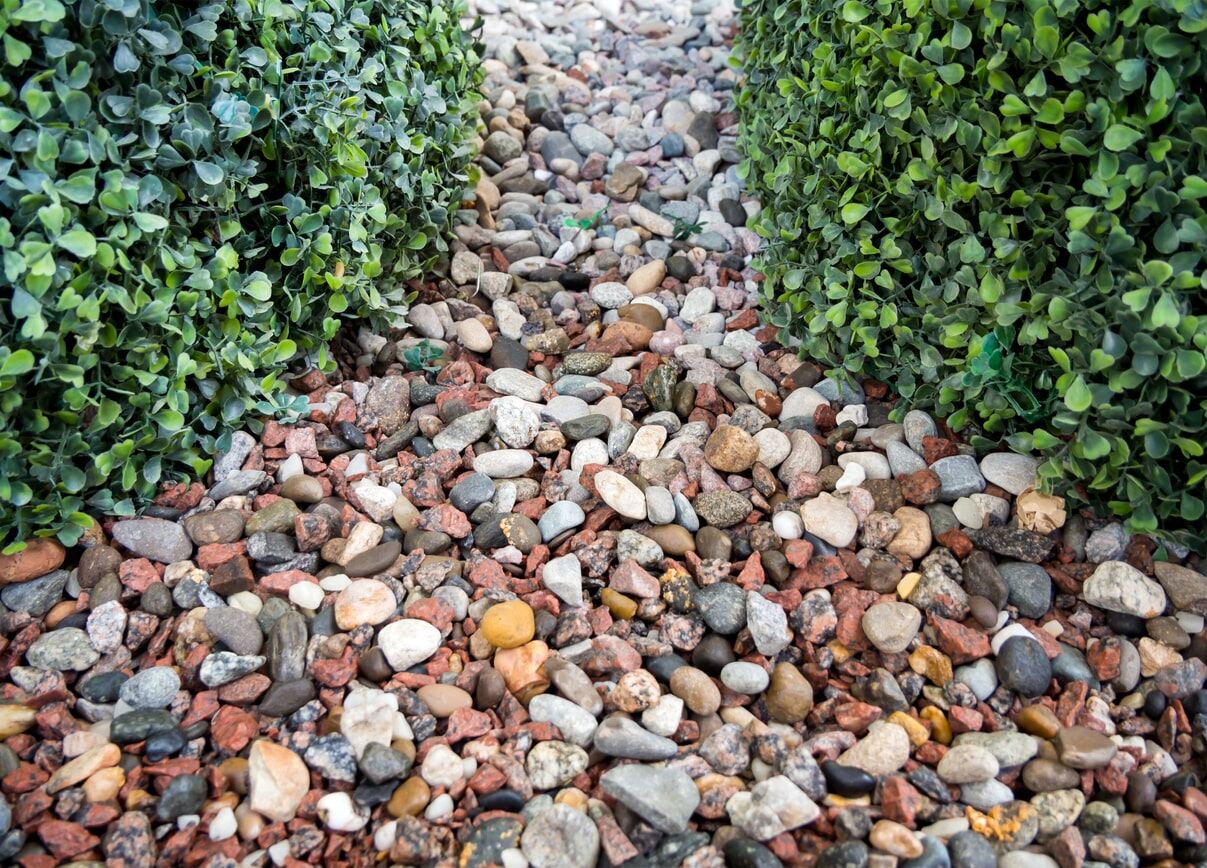
2. Think about color: Landscaping rocks come in a wide variety of colors, ranging from earthy tones like browns and grays to vibrant shades like reds and blues. Consider the existing color scheme of your outdoor space and choose rocks that complement or provide a striking contrast.
3. Assess the size: The size of the rocks you select will depend on the scale of your project and the effect you want to achieve. Larger rocks can make a bold statement and serve as focal points, while smaller rocks are better suited for ground cover or texture.
4. Consider the function: Think about how the landscaping rocks will be used in your space. Are they purely decorative, or do they need to serve a specific purpose, such as erosion control or pathway construction? Select rocks that are appropriate for the intended function.
5. Research local options: Look for landscaping rocks that are readily available in your area. Local stones are often more affordable and environmentally friendly, as they require less transportation. Additionally, using local stones can help your landscape blend in seamlessly with the natural surroundings.
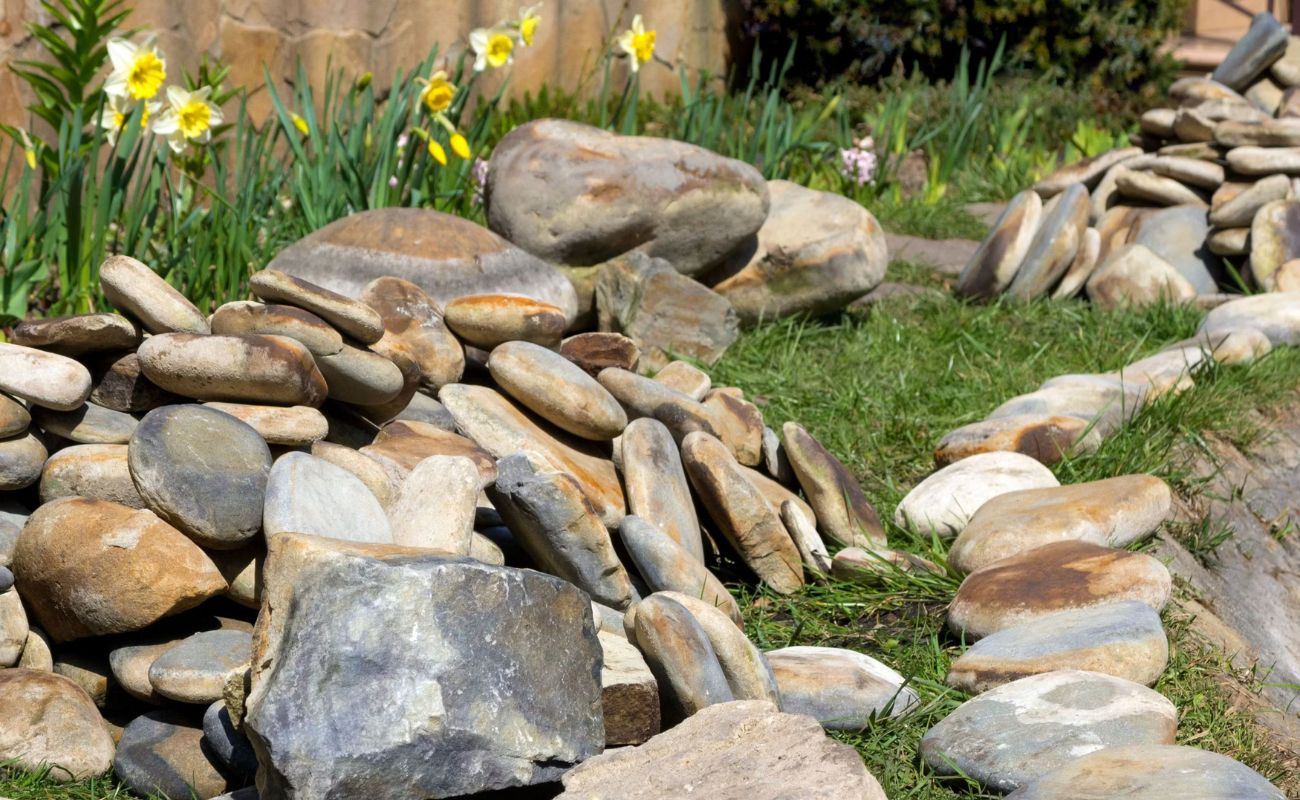
6. Explore texture and shape: Landscaping rocks come in various textures, from smooth and rounded to rugged and angular. Consider the texture that best suits your aesthetic preferences and complements other elements in your outdoor space, such as plants or architectural features.
7. Consult with professionals: If you’re unsure about the right type and size of rocks for your project, don’t hesitate to seek advice from landscaping professionals or local stone suppliers. They can provide guidance based on their expertise and knowledge of regional preferences.
Remember, the right selection of landscaping rocks can enhance the overall beauty and functionality of your outdoor space. Don’t rush the decision-making process; take your time to explore different options and choose stones that truly speak to your aesthetic vision and project goals.
Before laying landscaping rocks, make sure to prepare the area by removing any existing vegetation, leveling the ground, and installing a weed barrier to prevent weed growth. This will ensure a clean and long-lasting rock installation.
Read more: How To Move Landscaping Rocks
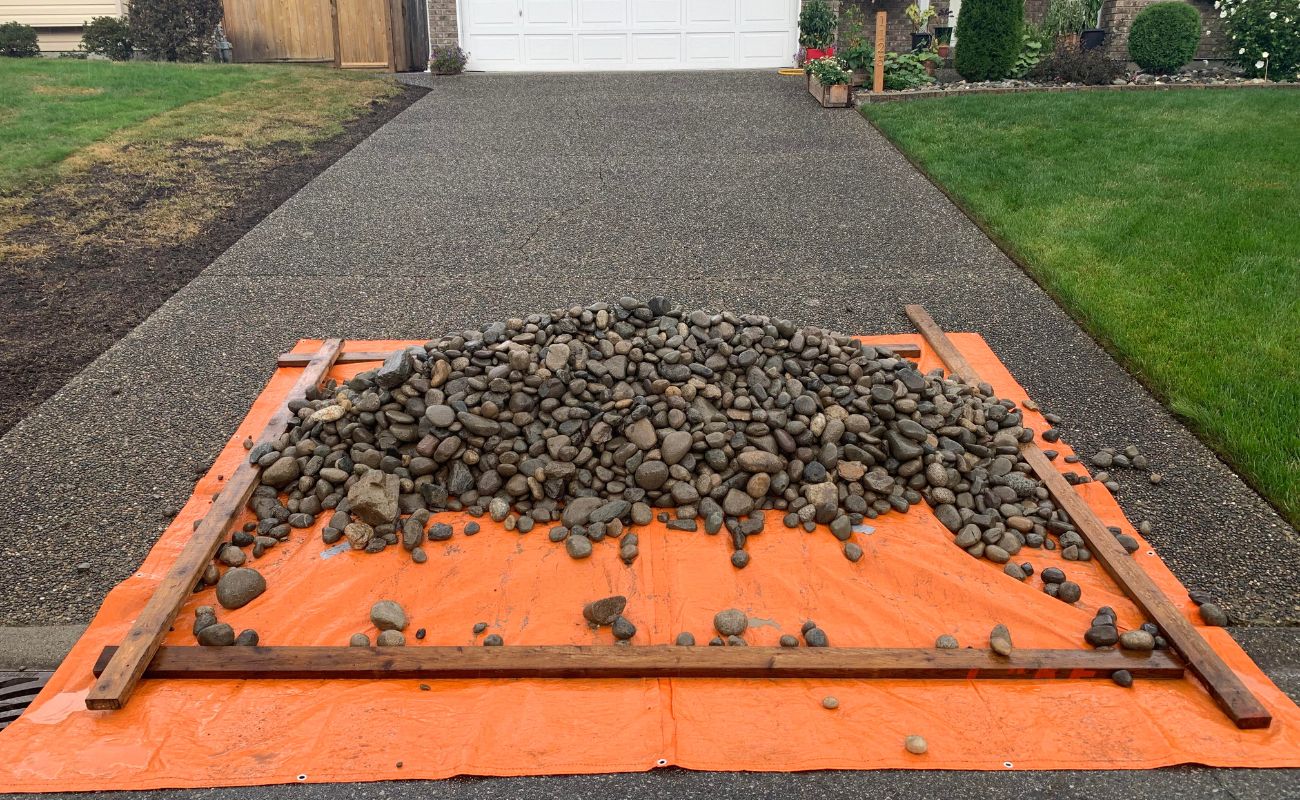
Step 5: Installing the landscaping rocks
With the preparation work complete, it’s time to start installing the landscaping rocks. Follow these steps to ensure a successful installation:
1. Start with a base layer: Begin by spreading a layer of smaller rocks or gravel as a base. This will help with drainage and create a stable foundation for the larger rocks. Aim for a base layer thickness of around 2-4 inches.
2. Distribute the rocks: Lay the larger landscaping rocks on top of the base layer, starting from one corner or edge of the designated area. Space the rocks evenly, ensuring there is enough room for them to interlock or overlap slightly to provide stability.
3. Vary the sizes and shapes: Mix different sizes and shapes of rocks to add visual interest and create a natural look. Use some larger rocks as focal points or centerpieces, while using smaller rocks to fill in gaps and add texture.
4. Step back and assess: Regularly step back and assess the placement of the landscaping rocks as you work. Make adjustments as needed to achieve a balanced and visually appealing arrangement. This is also a good time to evaluate how the rocks interact with existing plants or architectural features.
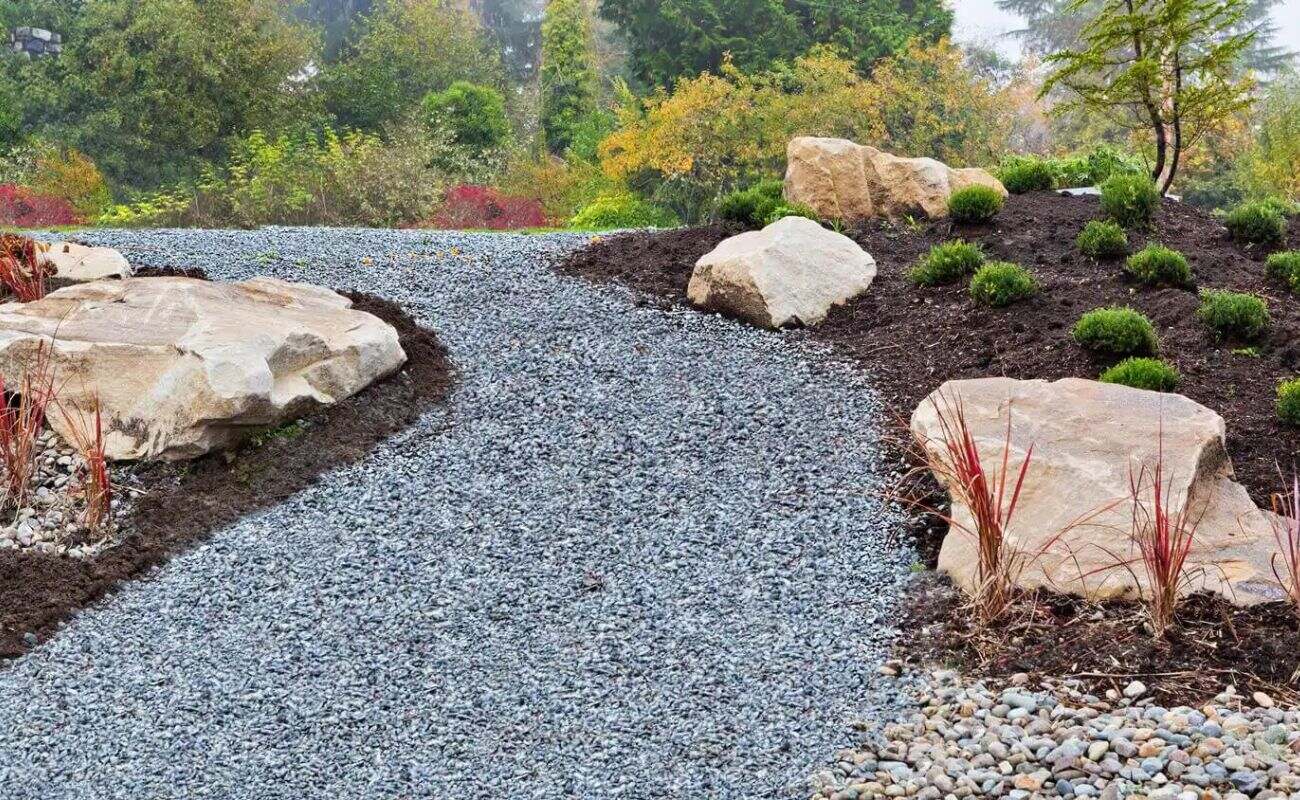
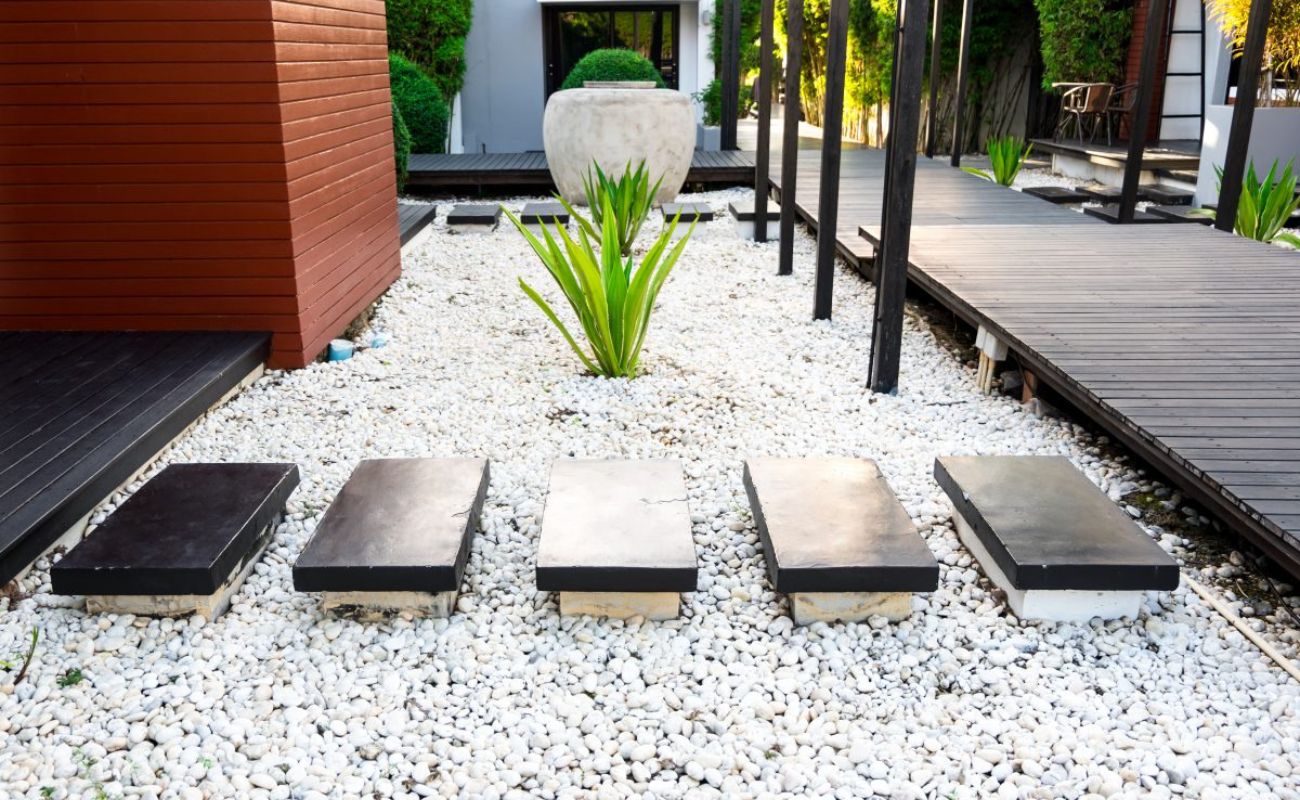
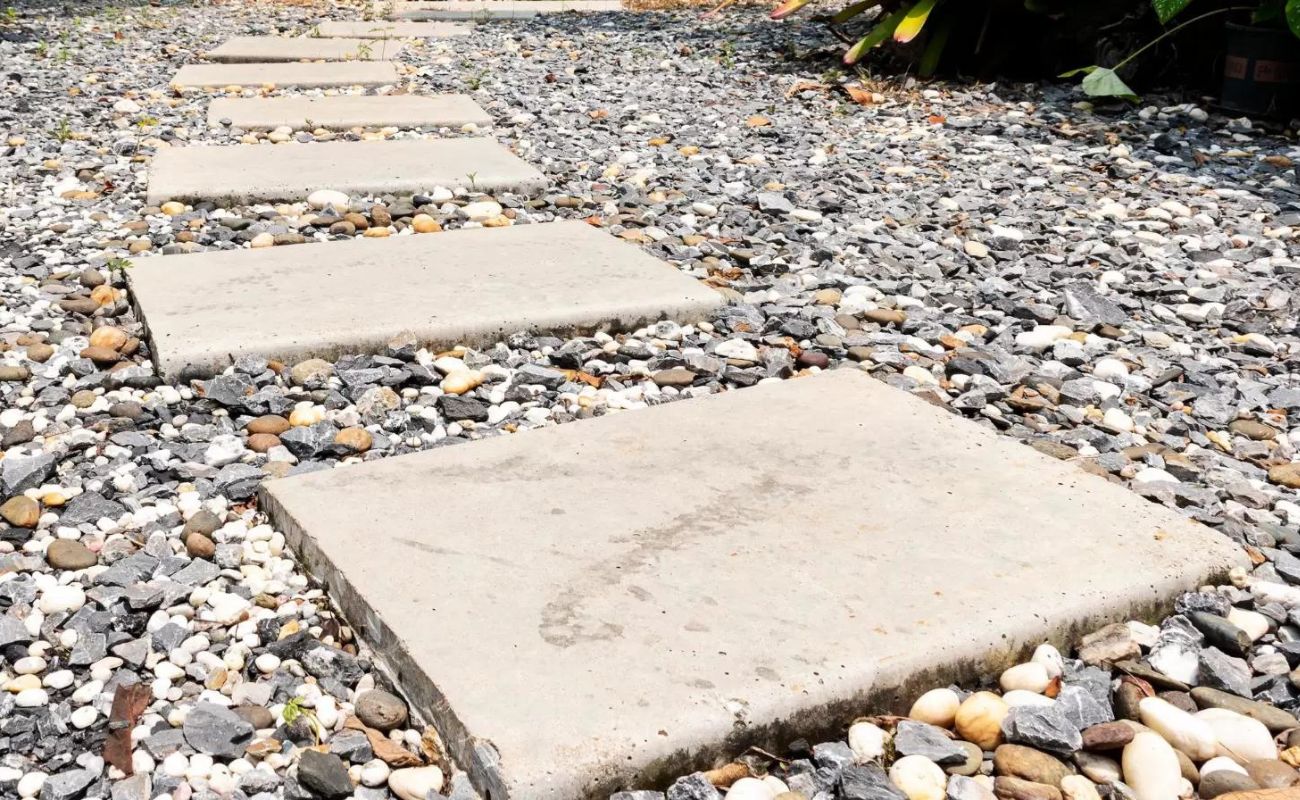
5. Consider walkways or pathways: If you’re incorporating walkways or pathways into your design, use a combination of larger flat rocks or stepping stones to create a clear and safe passage. Position them securely in the ground with a slight slope to ensure proper drainage.
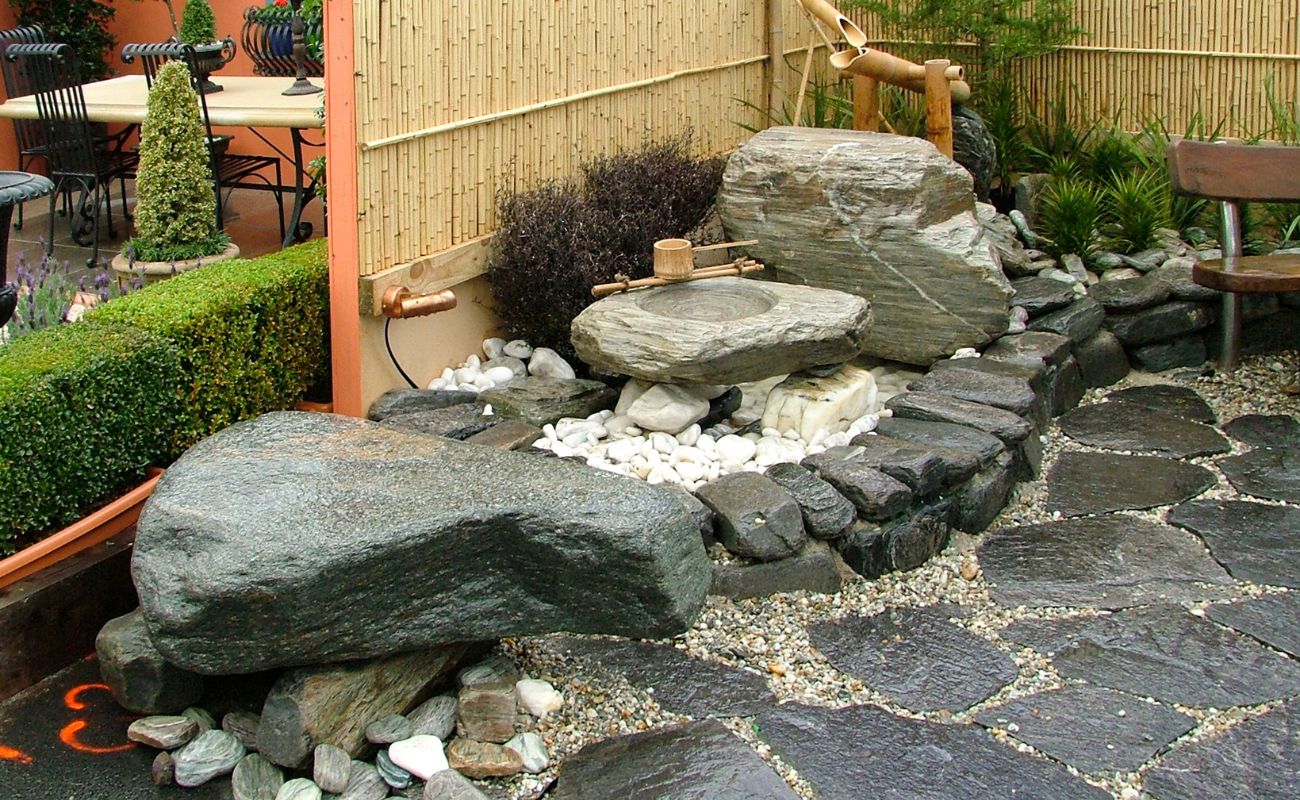
6. Stack rocks for height: If you want to add height or create interesting rock formations, consider stacking rocks on top of each other. Use smaller rocks for stability and ensure that the structure is secure and balanced. This can be a great way to create focal points or add visual intrigue to your landscape.
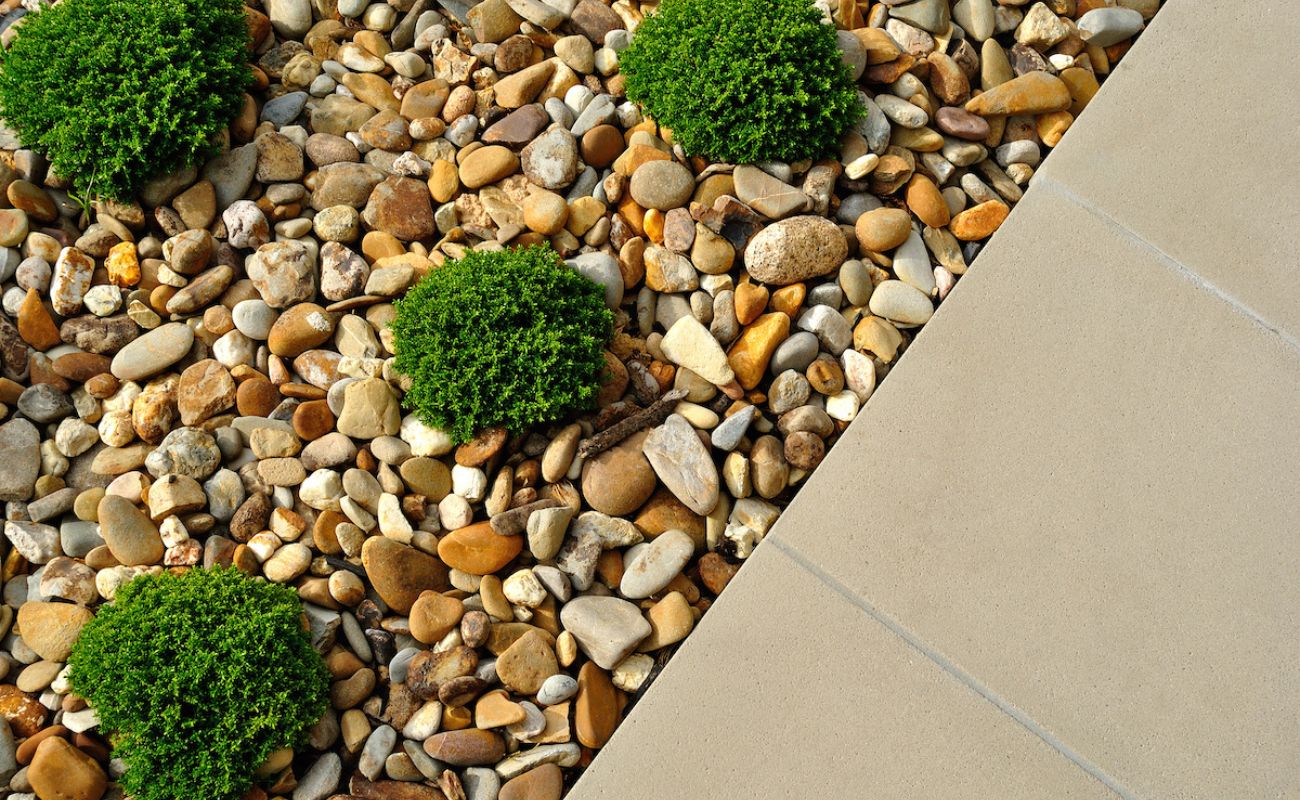
7. Fill in gaps: Once all the larger rocks are in place, fill in any gaps or empty spaces with smaller rocks or pebbles. This will provide a cohesive look and help prevent weed growth. Ensure that the rocks are firmly pressed into the ground or tightly fit together to prevent movement.
8. Step on the rocks: After the installation is complete, walk carefully on the rocks to test their stability. Make any necessary adjustments to ensure they are secure and won’t shift or become dislodged.
By carefully installing the landscaping rocks, you can create a beautiful and visually stunning outdoor space. Take your time with the placement and arrangement, and don’t be afraid to experiment with different sizes, shapes, and configurations to achieve the desired effect.
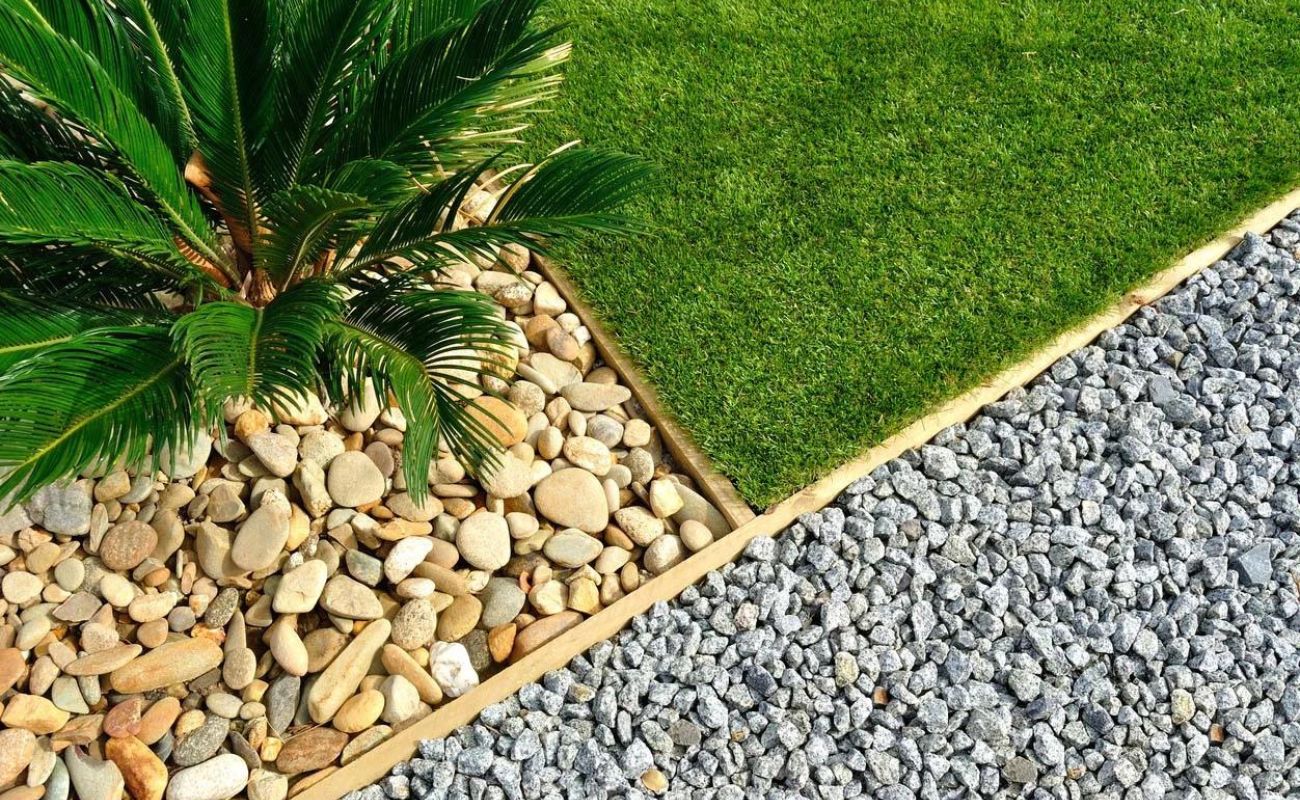
Step 6: Creating borders or edging
Creating borders or edging around your landscaping rocks is an important step that helps define the boundaries of your design and adds a polished finish to your outdoor space. Follow these steps to create borders or edging:
1. Choose the border material: There are various materials you can use to create borders or edging, such as bricks, pavers, metal strips, or natural stone. Consider the style, durability, and compatibility with your landscaping rocks when selecting the border material.
2. Measure and mark the borders: Use stakes and string or a garden hose to mark the boundaries of your desired border or edging. Ensure the borders are straight and evenly spaced, and consider any curves or angles you want to incorporate.
3. Prepare the ground: Clear the area along the marked lines, removing any grass, weeds, or debris. Use a shovel or edging tool to create a clean and defined trench along the marked borders. The depth of the trench will depend on the thickness of your chosen border material.
4. Install the border material: Place the border material into the trench, ensuring it fits snugly and is level with the ground. Use a rubber mallet or a hand tamper to secure the material in place. If using bricks or pavers, make sure they are tightly packed together to prevent shifting.
5. Consider stability: If you’re installing a taller border or edging, such as stone or metal strips, you may need to use additional materials for stability. Backfill the trench with gravel or compacted soil, and use landscape adhesive or spikes to secure the border material firmly.
6. Add finishing touches: Once the borders are in place, inspect and adjust as necessary. Use a level to ensure the borders are even and uniform. Backfill any gaps or spaces with soil or gravel, and clean off any excess dirt or debris from the border material.
7. Blend with the surroundings: To create a cohesive and seamless look, consider using small rocks or decorative mulch to fill the space between the borders and the landscaping rocks. This will help integrate the borders with the overall design and prevent weed growth along the edges.
By creating borders or edging, you not only enhance the visual appeal of your landscaping rocks but also provide structure and definition to your outdoor space. The borders or edging will help keep the rocks in place and provide a clean, organized look. Take your time during this step to ensure the borders are installed properly and aligned with your overall design vision.
Step 7: Finishing touches and maintenance tips
With your landscaping rocks installed and borders or edging in place, it’s time to add the finishing touches and ensure proper maintenance for a long-lasting and beautiful outdoor space. Follow these final steps:
1. Add decorative elements: Enhance the overall look of your landscape by adding decorative elements such as outdoor lighting, ornamental plants, or garden sculptures. These additions can highlight specific areas or create focal points that complement the landscaping rocks.
2. Mulch the surrounding areas: Applying a layer of mulch around the landscaping rocks can help prevent weed growth and retain moisture in the soil. Choose a mulch that complements the overall aesthetic and ensure it is spread evenly.
3. Create easy access for maintenance: Ensure that pathways and walkways are clear and accessible for maintenance tasks like weeding, pruning, and cleaning. Consider installing stepping stones or gravel paths to provide easy access to all areas of the landscape.
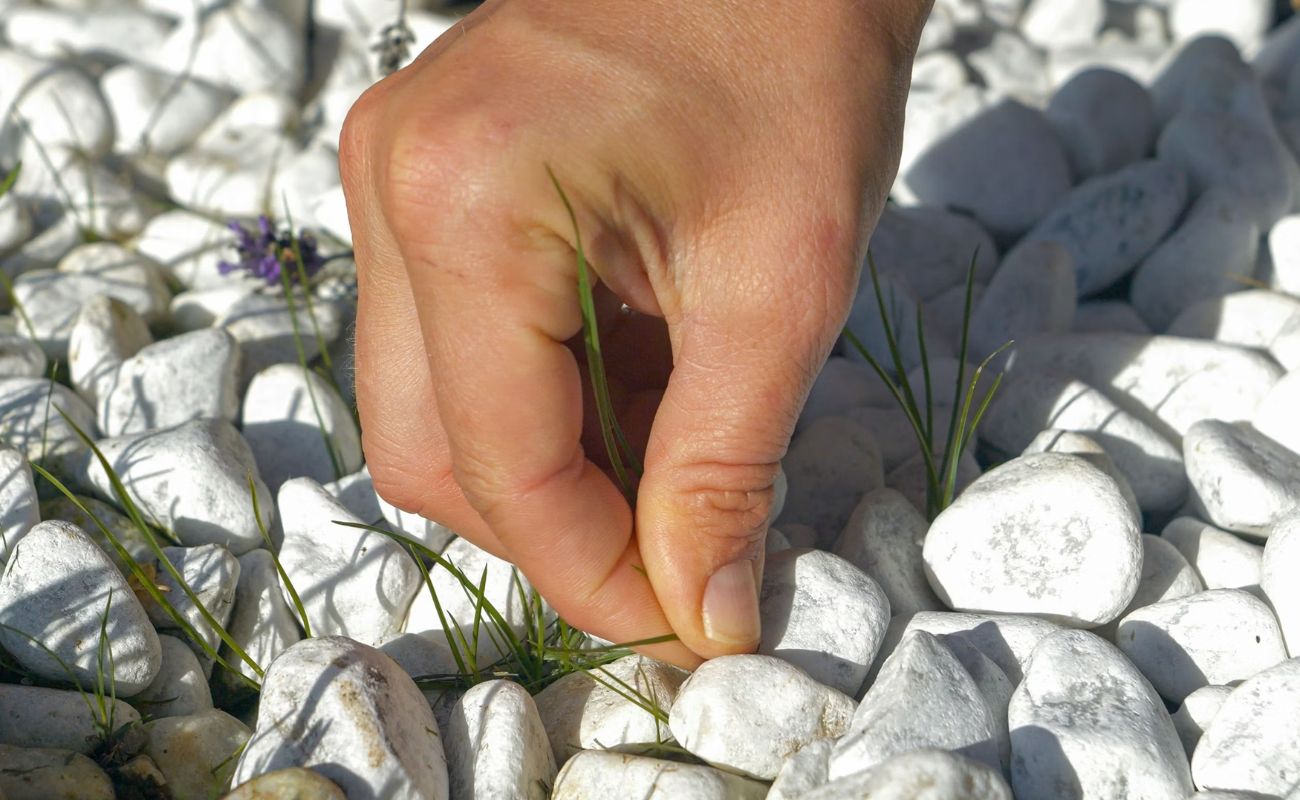
4. Regularly inspect for weeds: Despite the weed barrier, weeds may still find their way through the rocks. Regularly inspect the area and remove any weeds promptly to prevent them from taking root and spreading.
5. Monitor and adjust drainage: Periodically evaluate the drainage in your landscape to ensure that water is flowing away from the rocks and not pooling or causing erosion. Make adjustments as necessary, such as adding drainage channels or redirecting downspouts.
6. Perform routine maintenance: Regularly maintain your landscaping rocks by removing any debris, leaves, or twigs that collect on the surface. This will help maintain their appearance and prevent them from becoming a potential slipping hazard.
7. Protect against erosion: If erosion becomes an issue, consider incorporating retaining walls or terracing to stabilize the area. Consult with a professional landscaper to determine the best solution for your specific situation.
8. Replenish rocks as needed: Over time, some rocks may shift or become displaced. Periodically check and adjust the position of the landscaping rocks, and add new rocks if any are missing or damaged.
By attending to these finishing touches and implementing regular maintenance practices, you can ensure that your landscaping rocks remain visually appealing and serve their intended purpose for years to come. Enjoy your transformed outdoor space and take pride in the beauty and low-maintenance benefits of your rock landscape.
Conclusion
Congratulations on completing the installation of your landscaping rocks! You’ve transformed your outdoor space into a stunning oasis that is not only aesthetically pleasing but also low-maintenance. By following the steps outlined in this guide, you have learned how to plan and prepare the area, clear and level the ground, lay a weed barrier, choose the right type and size of rocks, install them effectively, create borders or edging, and add the finishing touches.
Landscaping rocks offer a multitude of benefits, including enhancing the visual appeal of your garden, reducing the need for regular maintenance, preventing weed growth, controlling erosion, and promoting water conservation. The careful selection and placement of rocks can completely transform the look and feel of your outdoor space, giving it a unique personality and charm.
Remember to regularly inspect and maintain your rock landscape to ensure its longevity. This includes checking for weeds, monitoring drainage, performing routine maintenance, and replenishing rocks as needed. By staying proactive in your maintenance efforts, you can continue to enjoy the beauty and functionality of your landscaping rocks for years to come.
Now that you have a solid foundation of knowledge on putting down landscaping rocks, don’t hesitate to get creative and explore different designs and arrangements. Incorporate your own personal style and vision to truly make your outdoor space a reflection of your unique taste and personality.
So go ahead, sit back, and marvel at the beauty of your newly transformed landscape. Enjoy the tranquility and low-maintenance nature of your rock garden, knowing that you have created a space that will provide endless enjoyment and admiration for years to come.
Now that you've mastered laying down landscaping rocks, why not take your garden design up a notch? Dive into our inspiring showcase, "40 Beautiful Rock Garden Ideas." You'll discover creative ways to arrange rocks, transforming your outdoor space into a visual delight. Whether you seek serene simplicity or elaborate elegance, these ideas can help spark your creativity for your next project. Ready to turn your garden into a stunning showcase? Check out our article for some brilliant rock garden inspiration.
Frequently Asked Questions about How To Put Down Landscaping Rocks
Was this page helpful?
At Storables.com, we guarantee accurate and reliable information. Our content, validated by Expert Board Contributors, is crafted following stringent Editorial Policies. We're committed to providing you with well-researched, expert-backed insights for all your informational needs.


0 thoughts on “How To Put Down Landscaping Rocks”