Home>Garden Essentials>How To Move Landscaping Rocks

Garden Essentials
How To Move Landscaping Rocks
Modified: March 7, 2024
Learn how to easily move and place garden landscaping rocks with our step-by-step guide. Transform your outdoor space with beautiful rocks!
(Many of the links in this article redirect to a specific reviewed product. Your purchase of these products through affiliate links helps to generate commission for Storables.com, at no extra cost. Learn more)
Introduction
In any garden or landscaping project, the use of rocks can add a touch of natural beauty and create an interesting focal point. However, there may be occasions when you need to move landscaping rocks for various reasons, such as repositioning them or incorporating them into a new design. While moving rocks might seem like a daunting task, with the right approach and tools, it can be a manageable and even enjoyable endeavor.
In this article, we’ll guide you through the process of moving landscaping rocks, providing step-by-step instructions and valuable tips to ensure a successful and safe move. Whether you are a seasoned gardener or just starting to explore the world of landscaping, these guidelines will help you navigate this task effectively.
Before you begin, it’s important to note that moving large rocks can be physically demanding. Make sure to assess your own capabilities and consider enlisting the help of a friend or hiring professionals if needed. Safety should always be the top priority during any landscaping project.
So, let’s get started on your rock-moving adventure and create a garden that reflects your vision and personality.
Key Takeaways:
- Moving landscaping rocks requires assessing, preparing, lifting, and placing them carefully. Safety is crucial, and proper tools and techniques make the process manageable and enjoyable, resulting in a beautiful garden design.
- Prioritize safety, proper placement, and stability when moving landscaping rocks. Assess your capabilities, gather the right tools, and follow guidelines for lifting and arranging rocks to create a visually appealing and secure garden.
Read more: How To Dispose Of Landscaping Rocks
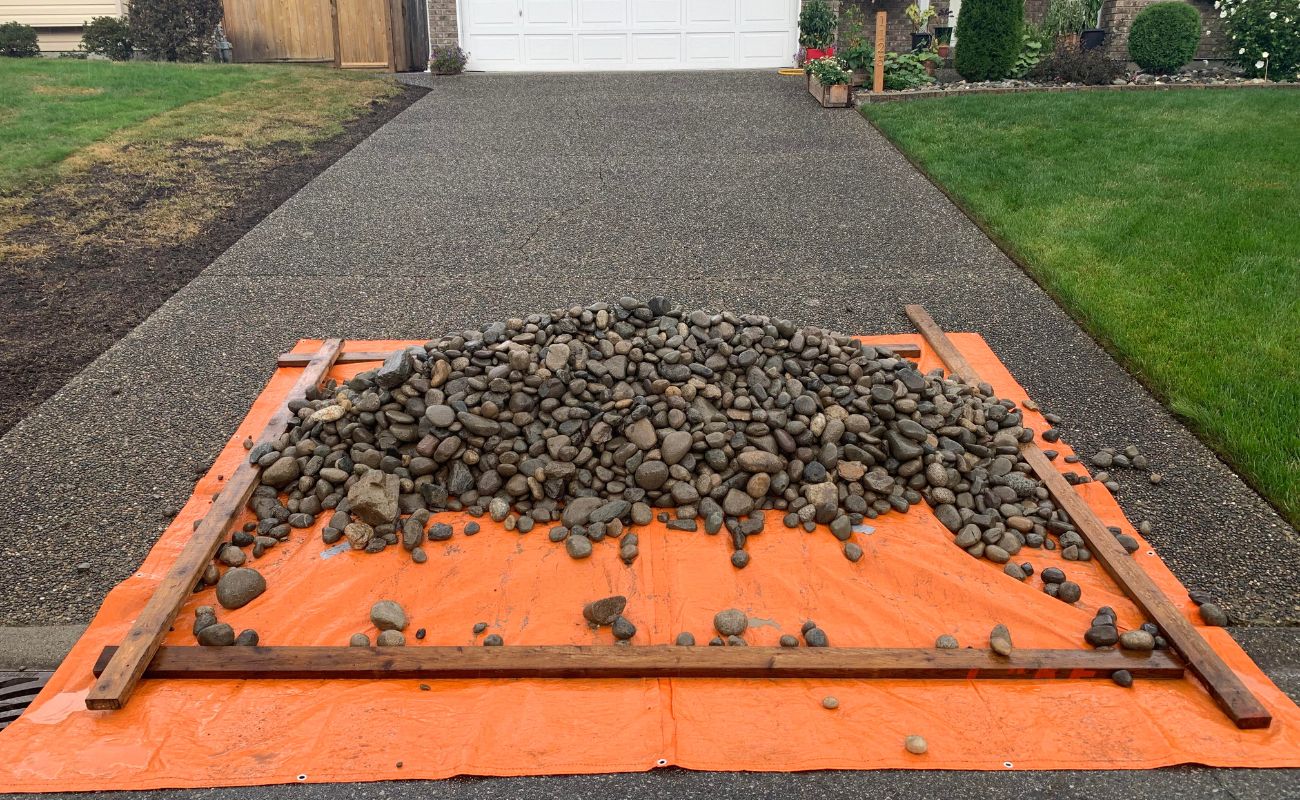
Step 1: Assessing Your Rocks
Before you embark on the task of moving landscaping rocks, it’s important to assess the size, weight, and condition of the rocks. This will help you determine the appropriate approach and tools needed to safely handle and transport them.
Start by evaluating the size and weight of the rocks. Smaller rocks weighing less than 50 pounds can typically be moved by hand, while larger rocks may require assistance or specialized equipment. It’s important to remember that lifting heavy rocks without proper technique or equipment can lead to injuries, so exercise caution.
Next, examine the condition of the rocks. Check for any cracks, loose edges, or sharp points that may pose a safety risk during the moving process. If a rock is damaged or unstable, it’s best to avoid moving it as it could crumble or cause injury.
Consider the final placement of the rocks in your landscape design. Take into account factors such as sun exposure, drainage, and visual impact. This will help you determine the exact positioning and arrangement of the rocks, ensuring that they complement the overall aesthetic of your garden.
Lastly, consider the accessibility of the area where the rocks are currently located and where they will be moved to. Take note of any obstacles, such as stairs, narrow pathways, or low-hanging branches, that may hinder the movement of the rocks. This will help you plan your approach and make any necessary adjustments to ensure a smooth and efficient move.
By thoroughly assessing your rocks and the surrounding environment, you will be better prepared to tackle the task of moving them with confidence and precision.
Step 2: Preparing for the Move
Once you have assessed your landscaping rocks and have a clear plan in mind, it’s time to prepare for the move. Proper preparation is key to ensuring a smooth and efficient process.
First, clear the area around the rocks to create a safe and clutter-free workspace. Remove any loose debris, plants, or other objects that may obstruct your path or pose a tripping hazard. This will provide you with a clear space in which to work and minimize the risk of accidents.
Next, gather the necessary tools and equipment for the move. Depending on the size and weight of the rocks, you may need a combination of tools, such as a shovel, pry bar, garden cart, or dolly. It’s also a good idea to have gloves and sturdy closed-toe footwear to protect your hands and feet during the process.
If you plan to move larger or heavier rocks, consider using a lifting technique called “lever and fulcrum.” This involves using a pry bar or lever to create a pivot point and lifting the rock with the help of a fulcrum, such as a block or another rock. This technique can significantly reduce the amount of effort required to move heavy rocks.
Additionally, if you anticipate moving rocks frequently or have a large quantity to transport, investing in a garden cart or dolly with pneumatic tires can make the task much easier. These tools provide stability and allow you to move rocks with less strain on your body.
Before you begin the actual move, it’s essential to stretch and warm up your muscles to prevent injuries. Engage in gentle stretches and movements to loosen up your back, arms, and legs. Take breaks as needed during the process to rest and hydrate.
By preparing the workspace and gathering the appropriate tools, you’ll set yourself up for a successful and efficient move of your landscaping rocks.
Step 3: Gathering the Necessary Tools
When it comes to moving landscaping rocks, having the right tools at your disposal is crucial. The appropriate tools will not only make the task easier, but they will also ensure your safety throughout the process. Here are some essential tools you’ll need:
- Shovel: A sturdy shovel is essential for digging around the base of the rock to loosen it from the ground. Choose a shovel with a durable blade and a comfortable grip.
- Pry bar: A pry bar or crowbar will come in handy for lifting and leveraging larger rocks. Opt for a pry bar with a long handle and a strong steel construction.
- Garden cart or dolly: If you’re dealing with heavier rocks or need to transport multiple rocks at once, a garden cart or dolly can be a lifesaver. Look for one with sturdy construction and pneumatic tires for smooth movement over various terrains.
- Gloves: Protect your hands with a pair of high-quality gloves that offer good grip and durability. They will safeguard your hands from sharp edges or rough surfaces.
- Sturdy closed-toe shoes: Wear closed-toe shoes with a non-slip sole to protect your feet from potential injuries caused by falling rocks or uneven terrain.
- Rock straps or slings: For extra stability and ease of lifting, consider using rock straps or slings. These specialized straps are designed to secure and distribute the weight of the rock evenly, making it easier to carry or transport.
- Wheelbarrow: If you’re tackling a large rock-moving project, a wheelbarrow can be useful for transporting rocks over longer distances. Look for a wheelbarrow with a strong frame and sturdy handles.
- Safety goggles: Protect your eyes from flying debris or splinters by wearing safety goggles during the moving process.
Having these tools on hand will ensure that you’re well-equipped to handle a variety of rock-moving scenarios. Remember to use the tools correctly and follow proper safety precautions throughout the process.
As always, it’s important to assess your own physical capabilities and limitations. If you have any concerns about your ability to safely move rocks, consider enlisting the help of a friend or hiring professionals to assist you.
With the right tools and preparation, you’ll be ready to tackle the task of moving your landscaping rocks with confidence and efficiency.
Use a sturdy wheelbarrow or dolly to transport rocks. Lift with your legs, not your back, and wear gloves to protect your hands. Start with smaller rocks and work your way up to larger ones.
Step 4: Lifting and Transporting the Rocks
Now that you have assessed your rocks, prepared for the move, and gathered the necessary tools, it’s time to dive into the actual process of lifting and transporting the rocks. Follow these steps to ensure a successful and safe move:
- Clear the area: Before attempting to lift the rock, clear the area of any obstacles or debris that may hinder your movement.
- Use proper lifting techniques: To avoid straining your back, bend your knees and lift with your legs. Keep your back straight and engage your core muscles for stability. Whenever possible, ask for assistance or use lifting tools to help with heavier rocks.
- Check your footing: Ensure that you have a stable and secure footing before attempting to lift a rock. If the ground is uneven or slippery, use caution or consider adjusting your position to a more secure location.
- Secure the rock: Once you have lifted the rock, hold it securely using your arms and hands. If the rock is too large or heavy to hold directly, consider using straps or slings to secure it for easier transportation.
- Communicate and coordinate: If you’re working with a team or have assistance, establish clear communication and coordinate your actions to ensure everyone is on the same page. Proper communication can help prevent accidents and make the lifting and transporting process more efficient.
- Use a garden cart or dolly: If you are moving multiple rocks or need to transport them over a longer distance, place the rocks on a garden cart or dolly for easier transportation. Secure the rocks to the cart or dolly using straps or slings to prevent them from shifting or falling off.
- Take breaks when needed: Moving large or heavy rocks can be physically demanding. Listen to your body and take breaks as needed to rest and hydrate. Pushing yourself too hard can lead to fatigue and increase the risk of accidents.
- Arrange rocks at the new location: Once you have transported the rocks to their new location, carefully place and arrange them according to your desired design. Take your time to ensure the rocks are positioned securely and aesthetically pleasing.
Remember, always prioritize your safety throughout the lifting and transporting process. If you are unsure about your ability to safely lift or move a rock, seek assistance from a friend or professional landscaper.
By following these steps and using proper lifting techniques, you’ll be able to effectively and safely move your landscaping rocks to their new location.
Read more: How To Use Rocks For Landscaping
Step 5: Proper Placement of the Rocks
Once you have successfully lifted and transported your landscaping rocks to their new location, it’s time to focus on their proper placement. The way you position the rocks can greatly impact the overall aesthetic and functionality of your garden. Follow these guidelines for optimal placement:
- Consider the surrounding landscape: Take a moment to assess the surrounding landscape and consider how the rocks will fit in with the existing elements. Look at the color scheme, texture, and overall style of your garden. Aim for a harmonious integration of the rocks into the overall design.
- Balance and proportion: Achieve a balanced and proportionate look by considering the size and shape of the rocks in relation to each other and the space they inhabit. Mix different sizes and shapes to create visual interest and avoid a monotonous arrangement.
- Align with the theme: If you have a specific theme or style in mind for your garden, make sure the placement of the rocks reflects that. For example, if you have a Japanese-inspired garden, position the rocks in a way that mimics the natural formations seen in Japanese landscapes.
- Create focal points: Use strategically placed rocks to create focal points or draw attention to specific areas of your garden. This can be done by positioning a larger rock at the center of a garden bed or using a group of rocks to frame a pathway or entrance.
- Enhance natural features: Utilize the rocks to enhance existing natural features in your garden, such as water features, trees, or flower beds. Position the rocks in a way that complements these elements and further accentuates their beauty.
- Consider functionality: Keep in mind the functionality of the rocks in their new placement. For example, large rocks can provide seating areas or act as a barrier or boundary. Smaller rocks can be used to create pathways or define garden borders.
- Experiment with different layouts: Don’t be afraid to try out different layouts and arrangements before finalizing the placement of the rocks. Move them around, step back, and assess the visual impact from various angles. This will help you find the perfect position for each rock.
Remember, landscaping is an art form, and there are no strict rules when it comes to rock placement. Trust your instincts and let your creativity guide you. The ultimate goal is to create a visually appealing and harmonious garden design.
By following these guidelines and considering the surrounding landscape, balance, theme, focal points, natural features, functionality, and experimenting with different layouts, you’ll be able to achieve the optimal placement of your landscaping rocks.
Step 6: Ensuring Safety and Stability
As you near the completion of your rock-moving project, it’s important to take the necessary steps to ensure the safety and stability of your newly placed landscaping rocks. Follow these guidelines to minimize the risk of accidents and maintain the integrity of your garden:
- Secure the rocks: Double-check that each rock is securely positioned and stable in its new location. Ensure that there are no wobbling or tilting rocks that could potentially cause injury or damage.
- Fill gaps: If there are any gaps between rocks or between the rocks and the ground, fill them with soil, gravel, or small stones. This will provide stability and prevent tripping hazards.
- Consider drainage: Pay attention to the drainage around the rocks. Ensure that water can flow freely and does not pool around them, as this can cause erosion and affect the stability of the rocks over time.
- Maintain pathways: If the rocks are placed in pathways or walkways, ensure that they are evenly spaced and level. This will prevent tripping hazards and ensure a smooth and safe walking surface.
- Inspect regularly: Regularly inspect the rocks for any signs of movement, cracks, or damage. Address any issues promptly to maintain the safety and stability of your garden.
- Children and pets: If you have children or pets, take measures to ensure their safety around the rocks. Create clear boundaries or barriers to prevent them from climbing or playing on the rocks unsupervised.
- Lighting: Consider adding lighting around the rocks, especially if they are placed in areas with low visibility. This will enhance safety and prevent accidents during nighttime or low-light conditions.
- Follow local regulations: Be aware of any local regulations or restrictions regarding the placement of rocks in your garden. Adhering to these guidelines will ensure that your project is both safe and compliant.
- Regular maintenance: Keep up with regular maintenance of your rocks and surrounding landscape. This includes removing weeds, maintaining proper drainage, and checking for any signs of deterioration or instability.
By following these safety and stability guidelines, you can enjoy your newly placed landscaping rocks with peace of mind, knowing that you have taken the necessary precautions to ensure a safe and secure garden environment.
Remember, safety should always be your top priority. If you are unsure about any aspect of the stability or safety of the rocks, consult a professional for guidance and assistance.
Conclusion
Moving landscaping rocks may seem like a daunting task, but with the right approach, preparation, and tools, it can be accomplished successfully. By assessing your rocks, preparing for the move, gathering the necessary tools, lifting and transporting the rocks with care, properly placing them in your garden, and ensuring safety and stability, you can transform your outdoor space into a beautiful and captivating landscape.
Throughout the process, it’s essential to prioritize safety and take precautions to prevent injuries or accidents. Assess your own physical capabilities and limitations, and don’t hesitate to ask for assistance if needed. Remember to follow proper lifting techniques, use the appropriate tools, and take breaks when necessary to avoid strain and fatigue.
Proper placement of the rocks is crucial to creating an aesthetically pleasing garden design. Consider the surrounding landscape, balance and proportion, functionality, and the overall theme or style you want to achieve. Experiment with different layouts and arrangements until you find the perfect positioning for each rock.
Once the rocks are in their new location, take the time to ensure their safety and stability. Check for any wobbling or tilting rocks and fill any gaps to create a secure and even surface. Regularly inspect and maintain the rocks to prevent any potential issues in the future.
By following these steps and guidelines, you’ll be able to successfully move your landscaping rocks and create a stunning outdoor space that reflects your vision and personality. Always remember to enjoy the process and let your creativity flourish as you transform your garden into a haven of natural beauty.
Frequently Asked Questions about How To Move Landscaping Rocks
Was this page helpful?
At Storables.com, we guarantee accurate and reliable information. Our content, validated by Expert Board Contributors, is crafted following stringent Editorial Policies. We're committed to providing you with well-researched, expert-backed insights for all your informational needs.


0 thoughts on “How To Move Landscaping Rocks”