Home>Garden Essentials>How To Dry Out Greenery
Garden Essentials
How To Dry Out Greenery
Modified: March 7, 2024
Discover effective methods to dry out greenery in your garden and preserve its natural beauty. Our comprehensive guide provides step-by-step instructions and expert tips to ensure successful drying.
(Many of the links in this article redirect to a specific reviewed product. Your purchase of these products through affiliate links helps to generate commission for Storables.com, at no extra cost. Learn more)
Introduction
Welcome to the world of dried greenery! Whether you are looking to create a stunning floral arrangement, jazz up your home decor, or even embark on a creative craft project, drying out greenery is a fantastic way to preserve the beauty of nature and bring a touch of the outdoors into your living space. In this article, we will guide you through the process of drying out greenery, from selecting the perfect specimens to displaying your dried treasures.
Dried greenery offers a wide array of benefits. Not only does it add a rustic and natural element to any space, but it also stands the test of time, allowing you to enjoy the beauty of foliage long after the vibrant colors of freshly cut greenery have faded away. Additionally, dried greenery requires very little maintenance, making it a convenient choice for those with busy schedules or a penchant for low-maintenance home decor.
To ensure the best results when drying out greenery, it is important to understand the proper techniques and methods. By following the steps outlined in this article, you will be well-equipped to dry out greenery successfully and create stunning arrangements that will impress friends and family alike.
So, let’s get started on this botanical adventure and unlock the secrets to drying out greenery in the most effective and beautiful way possible. Get your gardening gloves ready and prepare to dive into the world of dried greenery!
Key Takeaways:
- Drying out greenery preserves nature’s beauty, adds rustic charm, and requires minimal maintenance, making it a perfect way to bring the outdoors into your home decor.
- Select, prepare, dry, preserve, and display dried greenery to create stunning arrangements that showcase the beauty of nature preserved through time.
Read more: How To Dry Out Basement
Step 1: Selecting the Greenery
The first step in the process of drying out greenery is to carefully select the specimens that you wish to preserve. When choosing greenery for drying, keep in mind that certain types of plants and foliage dry better than others. Here are a few factors to consider:
- Freshness: Select greenery that is in its prime and free from any signs of decay or damage. Fresh and vibrant foliage will maintain its color and shape better during the drying process.
- Density: Choose greenery with dense leaves or petals, as they tend to retain their shape and structure when dried. Delicate or sparse foliage may not dry as well and can lose their appeal.
- Variety: Experiment with a variety of different greenery to add texture and visual interest to your dried arrangements. Consider mixing different types of leaves, flowers, and branches to create a dynamic and visually appealing display.
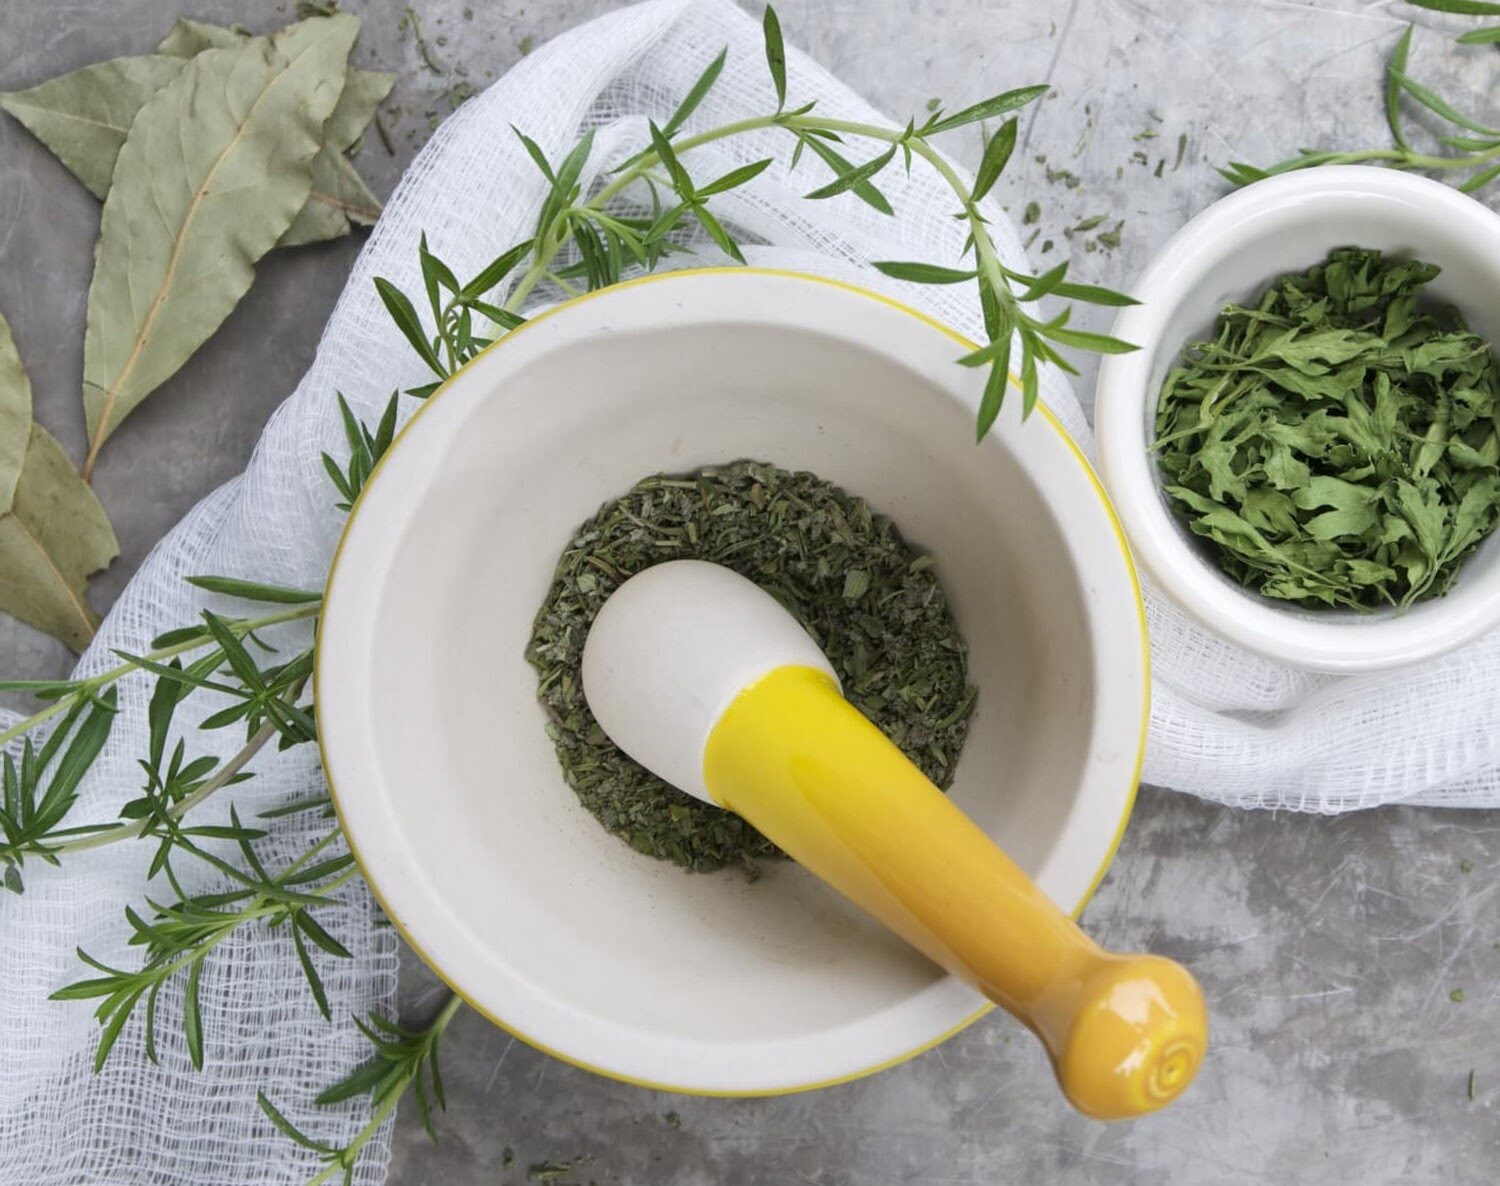
When it comes to selecting greenery, the possibilities are endless. You can choose to dry out traditional flowers like roses, lavender, or sunflowers, or opt for more unconventional choices such as eucalyptus, ferns, or even herbs like thyme or rosemary. The key is to select greenery that appeals to your personal taste and complements the overall aesthetic you are trying to achieve.
If you have access to a garden or live in an area with abundant greenery, consider going on a nature walk or a trip to a local flower market to handpick your specimens. This way, you can ensure that you are selecting the freshest and most beautiful greenery for drying.
Before moving on to the next step, make sure to inspect each piece of greenery thoroughly and remove any damaged or wilted parts. Trimming the stems or removing any unwanted leaves will help maintain the overall appearance of the dried greenery.
Now that you have selected your greenery, it’s time to prepare them for the drying process. Continue reading to learn how to properly prepare your greenery for drying in Step 2.
Step 2: Preparing the Greenery
Once you have carefully selected your greenery, it’s essential to take the necessary steps to prepare them for the drying process. Preparation includes removing excess moisture, treating for pests, and preserving the color and shape of the foliage. Here’s how to prepare your greenery:
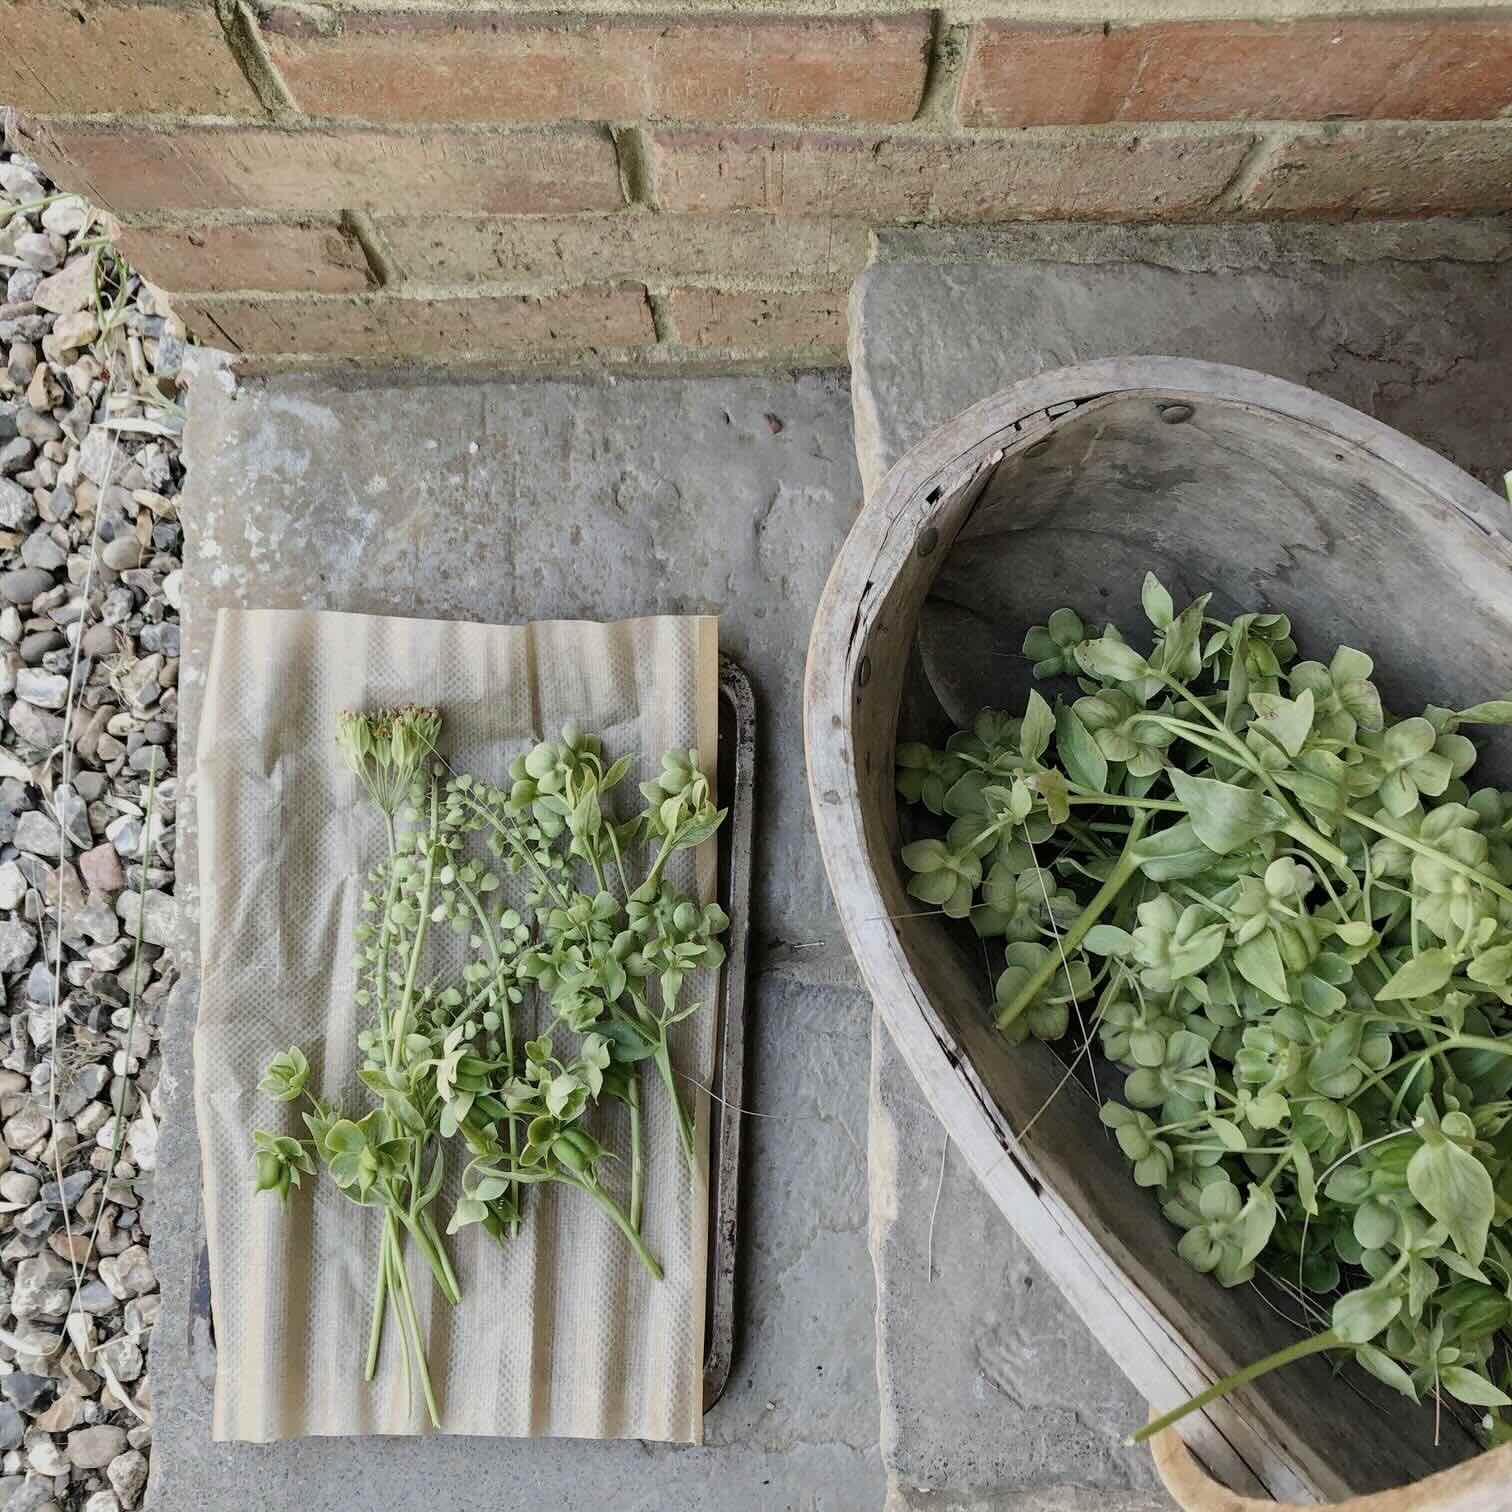
- Remove excess moisture: Before drying, it’s important to remove any excess moisture from the greenery. This can be done by gently patting the leaves or petals with a clean, dry cloth or using a paper towel to absorb any moisture. Removing excess moisture will prevent mold or decay during the drying process.
- Dealing with pests: Inspect the greenery for any signs of insects or pests. If you notice any, gently shake or brush them off. To ensure that no pests come crawling out of your dried greenery later on, you can also lightly spray the foliage with an organic insecticide or place the greenery in a sealed plastic bag with a pest repellent sachet for a few days.
- Preserving color: Many greenery varieties tend to lose some of their color during the drying process. To help preserve the vibrant hues, you can use a DIY color-preserving spray made of equal parts water and glycerin. Lightly mist the greenery with the spray, taking care not to saturate the leaves or petals. This method can help retain the natural color of the foliage as it dries.
By taking the time to properly prepare your greenery, you will increase the chances of achieving beautiful dried foliage that maintains its shape, color, and overall appeal.
Now that your greenery is prepared, it’s time to move on to the various drying methods available. In the next step, we’ll explore the process of air drying, which is one of the most popular and simplest methods of drying out greenery. Continue reading to learn how to air dry your greenery in Step 3.
Step 3: Drying Methods
When it comes to drying out greenery, there are several methods you can choose from. Each method has its own advantages and considerations, allowing you to select the one that best suits your needs and the type of greenery you are drying.
Here are three common drying methods for preserving greenery:
- Air Drying: Air drying is the most traditional and straightforward method of drying out greenery. It involves hanging the greenery upside down in a well-ventilated, dry and dark space. This method works well for sturdy foliage and flowers with thick stems.
- Microwave Drying: For those looking for a quicker drying process, the microwave method is a viable option. Place the greenery on a microwave-safe plate, cover it with a paper towel, and microwave it in short bursts. This method is suitable for more delicate leaves and flowers but requires careful monitoring to prevent scorching or burning.
- Oven Drying: While not as commonly used as the other methods, oven drying can be effective for certain greenery varieties. Set your oven to a low temperature, place the greenery on a baking sheet, and let it dry gradually. Keep a close eye on the process to avoid overheating or damage to the foliage.
It’s important to note that not all greenery is suitable for every drying method. Some delicate flowers or foliage may not withstand the heat of the microwave or oven, while thicker stems and leaves may take longer to dry through air drying alone. Consider the type of greenery you have and choose the drying method that will best preserve its color, shape, and texture.
Once you have selected your preferred drying method, it’s time to move on to the specific steps for each method. In the next step, we will delve into the process of air drying your greenery. Continue reading to learn how to air dry your greenery effectively in Step 4.
Step 4: Air Drying
Air drying is one of the oldest and most popular methods for drying out greenery. It is a simple and effective way to preserve the natural beauty of your foliage. Follow these steps to air dry your greenery:
- Gather your greenery: Collect the greenery you wish to dry and trim any excess leaves or branches. Make sure the stems are clean and free from dirt or debris.
- Bundle the greenery: Take a few stems of greenery and gather them together, making sure the bottoms of the stems align. Secure the stems together using a rubber band or twine. Avoid overcrowding the bundle to ensure proper air circulation.
- Hang the bundles: Find an area where you can hang the greenery bundles. Ideally, choose a cool, dry, and well-ventilated space away from direct sunlight. You can use a hanger, a clothesline, or a drying rack to hang the bundles upside down. This position allows the sap to flow back into the stems, helping the greenery retain its shape and color.
- Patience is key: Let the greenery hang undisturbed for several weeks to months, depending on the thickness and moisture content of the foliage. Check on the bundles regularly and ensure that the greenery is drying properly. The leaves should become crisp and dry to the touch.
- Preserve the dried greenery: Once the greenery is dry, carefully remove the rubber bands or twine and gently shake off any loose leaves or debris. Store the dried greenery in a cool, dry place until you are ready to use it.
Air drying allows the greenery to slowly lose moisture naturally, resulting in beautifully preserved leaves, flowers, and stems. It is a versatile method that can be used for a wide range of greenery, from flowers and foliage to herbs and branches.
Now that you’ve mastered the art of air drying, let’s explore alternative drying methods. In the next step, we’ll delve into the process of microwave drying, a faster option for preserving delicate greenery. Learn how to microwave dry your greenery effectively in Step 5.
To dry out greenery, gather the stems into small bunches and hang them upside down in a warm, dry place with good air circulation. This will help preserve the color and shape of the greenery as it dries.
Read more: What Kind Of Greenery Dries Nicely
Step 5: Microwave Drying
If you’re looking for a quick and efficient way to dry delicate greenery, the microwave drying method is a great option. Here’s how you can use your microwave to dry out your greenery:
- Prepare the greenery: Gather the greenery you want to dry and trim any excess leaves or stems. Make sure the greenery is clean and free from any dirt or debris.
- Choose a microwave-safe container: Select a microwave-safe plate or container that is large enough to hold the greenery without overcrowding it.
- Place the greenery: Arrange the greenery in a single layer on the microwave-safe container. Avoid layering or overlapping the greenery to ensure even drying.
- Cover and microwave: Cover the greenery with a microwave-safe paper towel or microwave-safe lid. This helps to retain moisture and prevent scorching. Microwave the greenery in short bursts of 30 seconds to 1 minute, depending on the power of your microwave.
- Monitor and rotate: During the microwaving process, keep a close eye on the greenery to prevent burning. Rotate the greenery or rearrange it halfway through to ensure even drying. Repeat the microwaving process until the greenery is completely dry and crisp to the touch.
- Cool and store: Once the greenery is dry, remove it from the microwave and let it cool. Gently shake off any loose leaves or debris. Store the dried greenery in a cool, dry place until you’re ready to use it.
The microwave drying method is particularly useful for drying delicate leaves, flowers, and herbs. However, it’s important to exercise caution and monitor the drying process closely to avoid overheating or burning the greenery.
With your newfound knowledge of microwave drying, you’re now ready to explore another alternative method. In the next step, we’ll delve into oven drying, a less commonly used but effective technique for drying out certain types of greenery. Read on to learn how to oven dry your greenery in Step 6.
Step 6: Oven Drying
Oven drying is a less common but effective method for drying certain types of greenery. This method uses low heat to gently dry out the foliage without compromising its shape and color. Here’s how you can oven dry your greenery:
- Preheat the oven: Start by preheating your oven to a low temperature, typically around 200°F (93°C). It’s important not to set the oven temperature too high, as it may scorch or damage the greenery.
- Prepare the greenery: Gather the greenery you want to dry and trim any excess leaves or stems. Clean the greenery to remove any dirt or debris.
- Arrange the greenery: Place the greenery in a single layer on a baking sheet lined with parchment paper or a silicone mat. Ensure that the greenery is spread out and not overlapping to allow for even airflow and drying.
- Place in the oven and dry: Put the baking sheet with the greenery into the preheated oven. Leave the oven door slightly ajar to allow moisture to escape. Let the greenery dry for approximately 1-3 hours, depending on the thickness and moisture content of the foliage.
- Check for dryness: Periodically check the greenery to see if it’s dry. The leaves should become crisp and brittle to the touch. If some parts are still not dry, continue baking for additional time, checking every 15 minutes.
- Cool and store: Once the greenery is fully dry, remove it from the oven and allow it to cool completely. Gently shake off any loose leaves or debris. Store the dried greenery in a cool, dry place until you’re ready to use it.
Oven drying is best suited for greenery with thicker leaves and stems, such as branches, herbs, or certain flowers. It’s important to closely monitor the drying process to avoid over-baking or scorching the foliage.
Now that you’ve learned the intricacies of oven drying, let’s move on to the next step: preserving your dried greenery. Continue reading to learn how to ensure the longevity and beauty of your dried greenery in Step 7.
Step 7: Preserving the Dried Greenery
After investing time and effort into drying out your greenery, it’s important to take steps to preserve its longevity and beauty. By properly preserving your dried greenery, you can ensure that it stays vibrant and intact for years to come. Here are some techniques to help preserve your dried greenery:
- Keep it dry: Moisture is the enemy of dried greenery, as it can cause mold or decay. Store your dried greenery in a cool, dry place away from any sources of humidity or moisture.
- Avoid direct sunlight: Prolonged exposure to direct sunlight can fade and deteriorate the color of dried greenery. Display or store your dried greenery in a location where it won’t be subjected to direct sunlight, or use UV-blocking sprays or treatments to protect the color.
- Handle with care: Dried greenery can be fragile, so handle it gently to prevent any breakage or damage. Avoid excessive bending or crushing of the leaves, petals, or branches.
- Seal with a protective spray: Consider using a clear acrylic spray or a hairspray with a protective sealant to preserve the shape and prevent shedding of dried greenery. Test the spray on a small, inconspicuous area first to ensure it won’t alter the color or texture.
- Regularly dust and clean: Dust can accumulate on dried greenery, so it’s important to regularly dust and clean the foliage. Use a soft brush or a gentle stream of compressed air to remove any dust particles that may settle on the leaves or petals.
By following these preservation techniques, you can maintain the beauty and integrity of your dried greenery for an extended period of time. Whether you choose to display your dried greenery in a vase, use it in creative crafts, or incorporate it into home decor, properly preserved foliage will continue to bring a touch of nature into your space.
Now that you know how to preserve your dried greenery, it’s time to explore the final step: displaying your dried treasures. Continue reading to learn how to showcase and arrange your dried greenery effectively in Step 8.
Step 8: Displaying the Dried Greenery
Now that you have successfully dried and preserved your greenery, it’s time to showcase its beauty by displaying it in your home or office. Here are some creative and effective ways to arrange and display your dried greenery:
- Vase arrangements: Arrange your dried greenery in a decorative vase or jar to create an elegant centerpiece for your dining table, mantel, or side table. Mix different types of dried greenery, such as flowers, leaves, and branches, for added visual interest.
- Wreaths and swags: Create a beautiful wreath or swag using your dried greenery. Use a wire wreath frame or a flexible wire to shape and secure the greenery in a circular or swag shape. Hang it on your front door, above a fireplace, or on any wall as a stunning natural decor piece.
- Shadow boxes and frames: Display individual dried leaves, flowers, or branches in shadow boxes or frames. Arrange them in a visually appealing pattern and hang them on your wall for a unique and artistic display.
- Wall hangings: Create a statement wall hanging by attaching dried greenery to a decorative hoop or wooden dowel with twine or floral wire. Add additional elements like ribbons, feathers, or beads to enhance the visual appeal.
- Dried flower bouquets: Arrange a bouquet of dried flowers, tying them together with twine or ribbon. Place the bouquet in a vase or wrap it with tissue paper and give it as a thoughtful and long-lasting gift.
- Decorative bowls and trays: Fill a decorative bowl or tray with dried greenery for a simple yet stylish display. Mix different textures and colors for a visually pleasing arrangement that can be placed on a coffee table, entryway console, or as a centerpiece on a dining table.
Remember to choose a display option that complements your personal style and the overall aesthetic of your space. Consider experimenting with different arrangements, colors, and textures to create a visually captivating and unique display of your dried greenery.
By following these tips for displaying your dried greenery, you can bring the beauty of nature indoors and enjoy the long-lasting elegance and charm it brings to your home or office.
Congratulations! You have successfully completed the process of drying out greenery and learned how to select, prepare, dry, preserve, and display your dried treasures. With your newfound knowledge, you can now embark on your own botanical adventures and create stunning arrangements that showcase the beauty of nature preserved through time.
Read more: How To Dry Out A Mattress
Conclusion
Congratulations on your journey into the world of dried greenery! You have learned how to turn fresh foliage into stunning and long-lasting decorative pieces that add beauty and charm to any space. By following the steps outlined in this article, you now have the knowledge and skills to select, prepare, dry, preserve, and display greenery with confidence.
Through careful selection, you can choose the perfect specimens for drying, considering factors such as freshness, density, and variety. The preparation stage allows you to remove excess moisture, treat for pests, and preserve the color and shape of the foliage. From there, you can explore various drying methods, such as air drying, microwave drying, or oven drying, to suit the needs of different types of greenery.
Preserving your dried greenery ensures its longevity and beauty. By keeping it dry, avoiding direct sunlight, handling it with care, and using protective sprays, you can enjoy your dried greenery for years to come. And finally, displaying your dried treasures in creative ways, such as vase arrangements, wreaths, shadow boxes, or wall hangings, allows you to showcase the natural beauty and artistry of your dried greenery.
Dried greenery offers a range of benefits, from its rustic aesthetic to its low-maintenance nature. It brings a touch of the outdoors into your living space and provides a lasting reminder of the beauty found in nature. Whether you choose to create arrangements as a hobby, incorporate them into your home decor, or even turn them into unique gifts, the art of drying greenery allows you to explore your creativity and personalize your space.
Remember to experiment with different types of greenery, colors, and textures to create visually captivating displays. Allow your imagination to run wild as you incorporate dried greenery into your interior design, events, or crafting projects. The possibilities are endless!
So, embrace the beauty of dried greenery and let it inspire you to bring nature’s elegance into every corner of your life. Enjoy the tranquility and charm it brings to your space, and revel in the satisfaction of creating stunning arrangements that will be admired for years to come.
Frequently Asked Questions about How To Dry Out Greenery
Was this page helpful?
At Storables.com, we guarantee accurate and reliable information. Our content, validated by Expert Board Contributors, is crafted following stringent Editorial Policies. We're committed to providing you with well-researched, expert-backed insights for all your informational needs.


0 thoughts on “How To Dry Out Greenery”