Articles
How To Dry Out Ceiling After Leak
Modified: August 16, 2024
Learn effective techniques and solutions to dry out your ceiling after a leak with our informative articles. Get expert advice and prevent further damage.
(Many of the links in this article redirect to a specific reviewed product. Your purchase of these products through affiliate links helps to generate commission for Storables.com, at no extra cost. Learn more)
Introduction
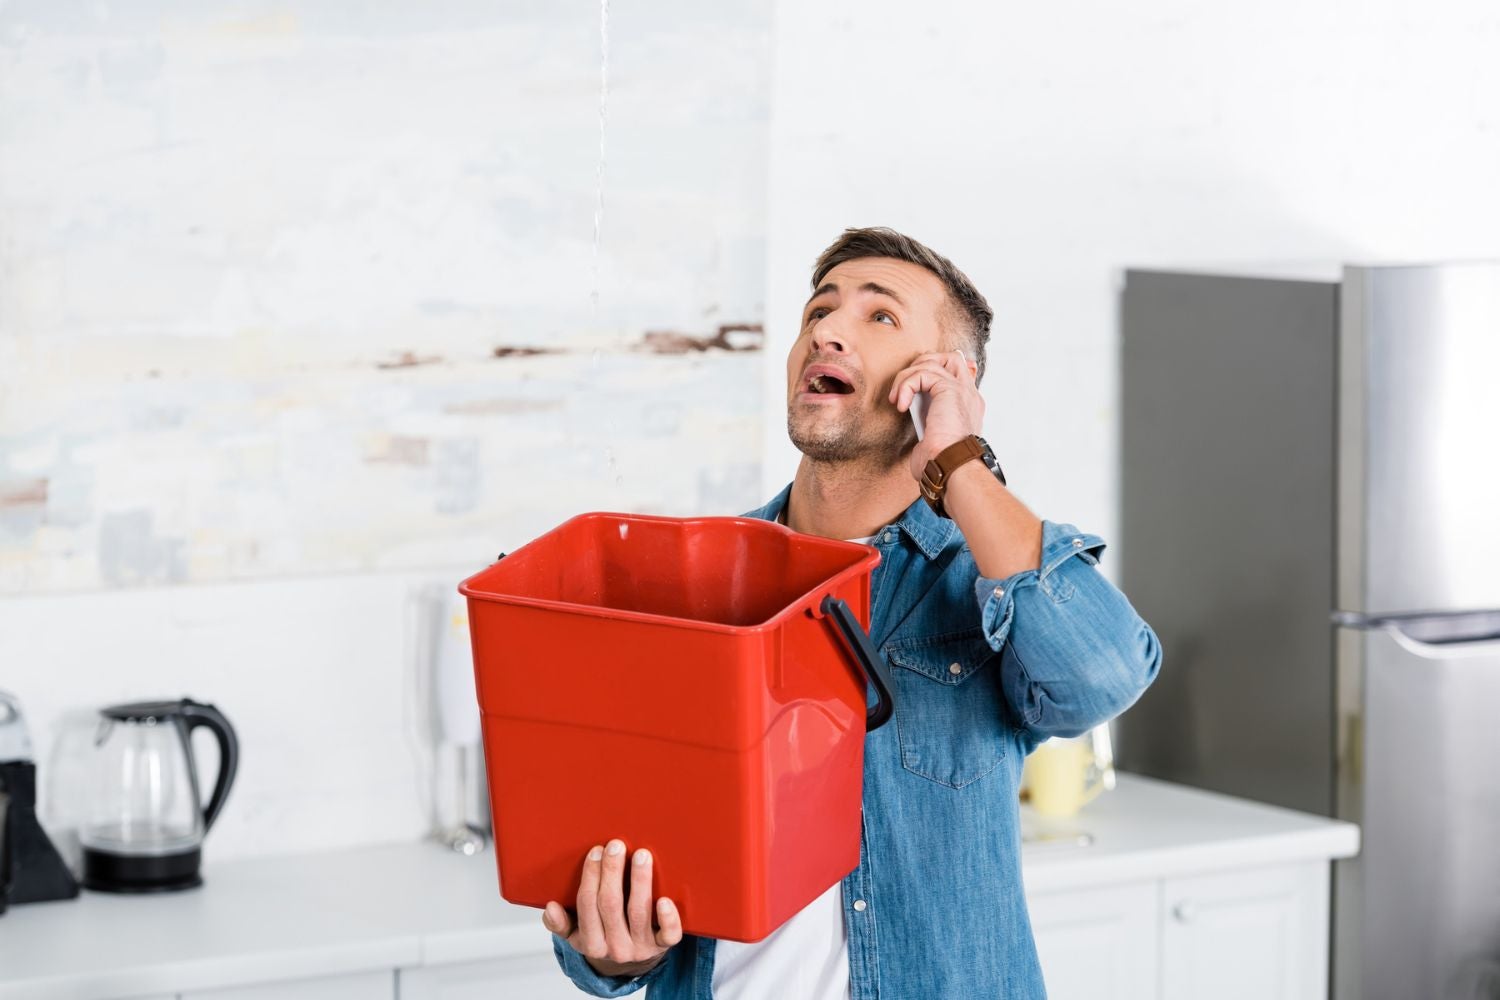
Dealing with a leaky ceiling can be a stressful and frustrating experience. Not only can it cause damage to your property, but it can also lead to mold growth and compromise the structural integrity of your home. One crucial step in the restoration process is drying out the affected ceiling properly to prevent further issues.
In this article, we will guide you through the necessary steps to dry out a ceiling after a leak. From identifying the source of the leak to repairing and restoring the ceiling, we will cover all the essential information you need to know.
Before you begin the drying process, it’s crucial to ensure that the source of the leak has been identified and resolved. If the leak is ongoing, it may cause continuous damage to the ceiling, making it challenging to dry effectively. Once you have addressed the root cause, you can proceed with the following steps.
Key Takeaways:
- Identifying and addressing the source of a ceiling leak is crucial before beginning the drying process. From roof issues to plumbing leaks, understanding the root cause is essential for effective restoration and prevention of future damage.
- Proper ventilation, use of dehumidifiers, and thorough inspection and repair are key steps in drying out a ceiling after a leak. By following these steps, you can ensure a successful restoration and create a safe living environment.
Read more: How To Dry Out Attic After Leak
Step 1: Identify the Source of the Leak
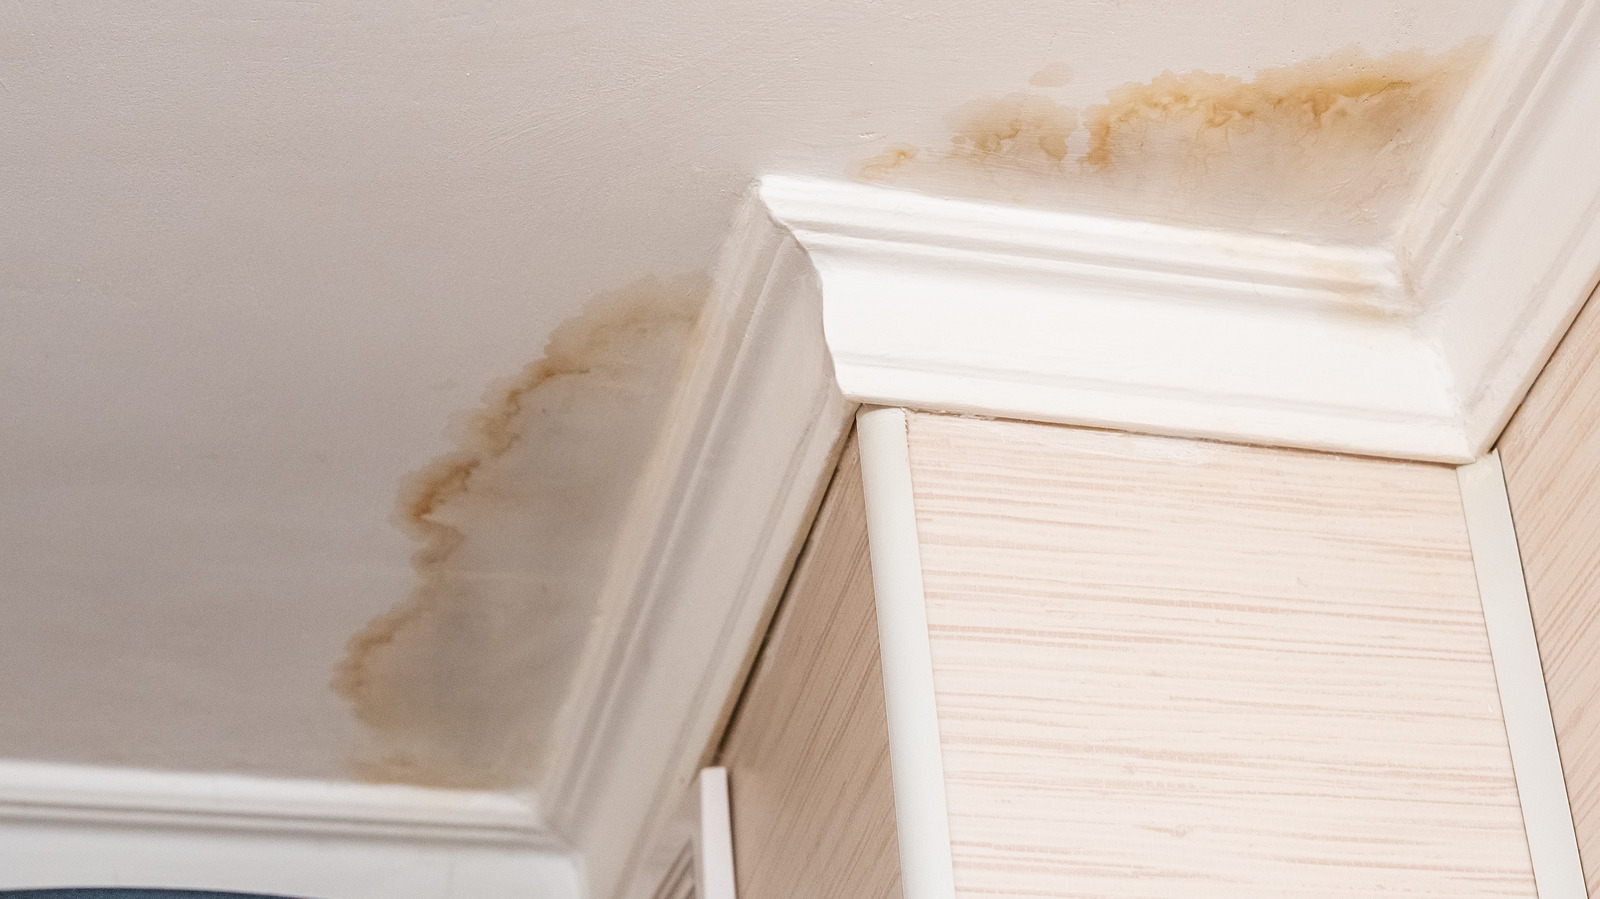
The first step in drying out a ceiling after a leak is to identify the source of the water intrusion. This is crucial to prevent further damage and ensure that the drying process is effective.
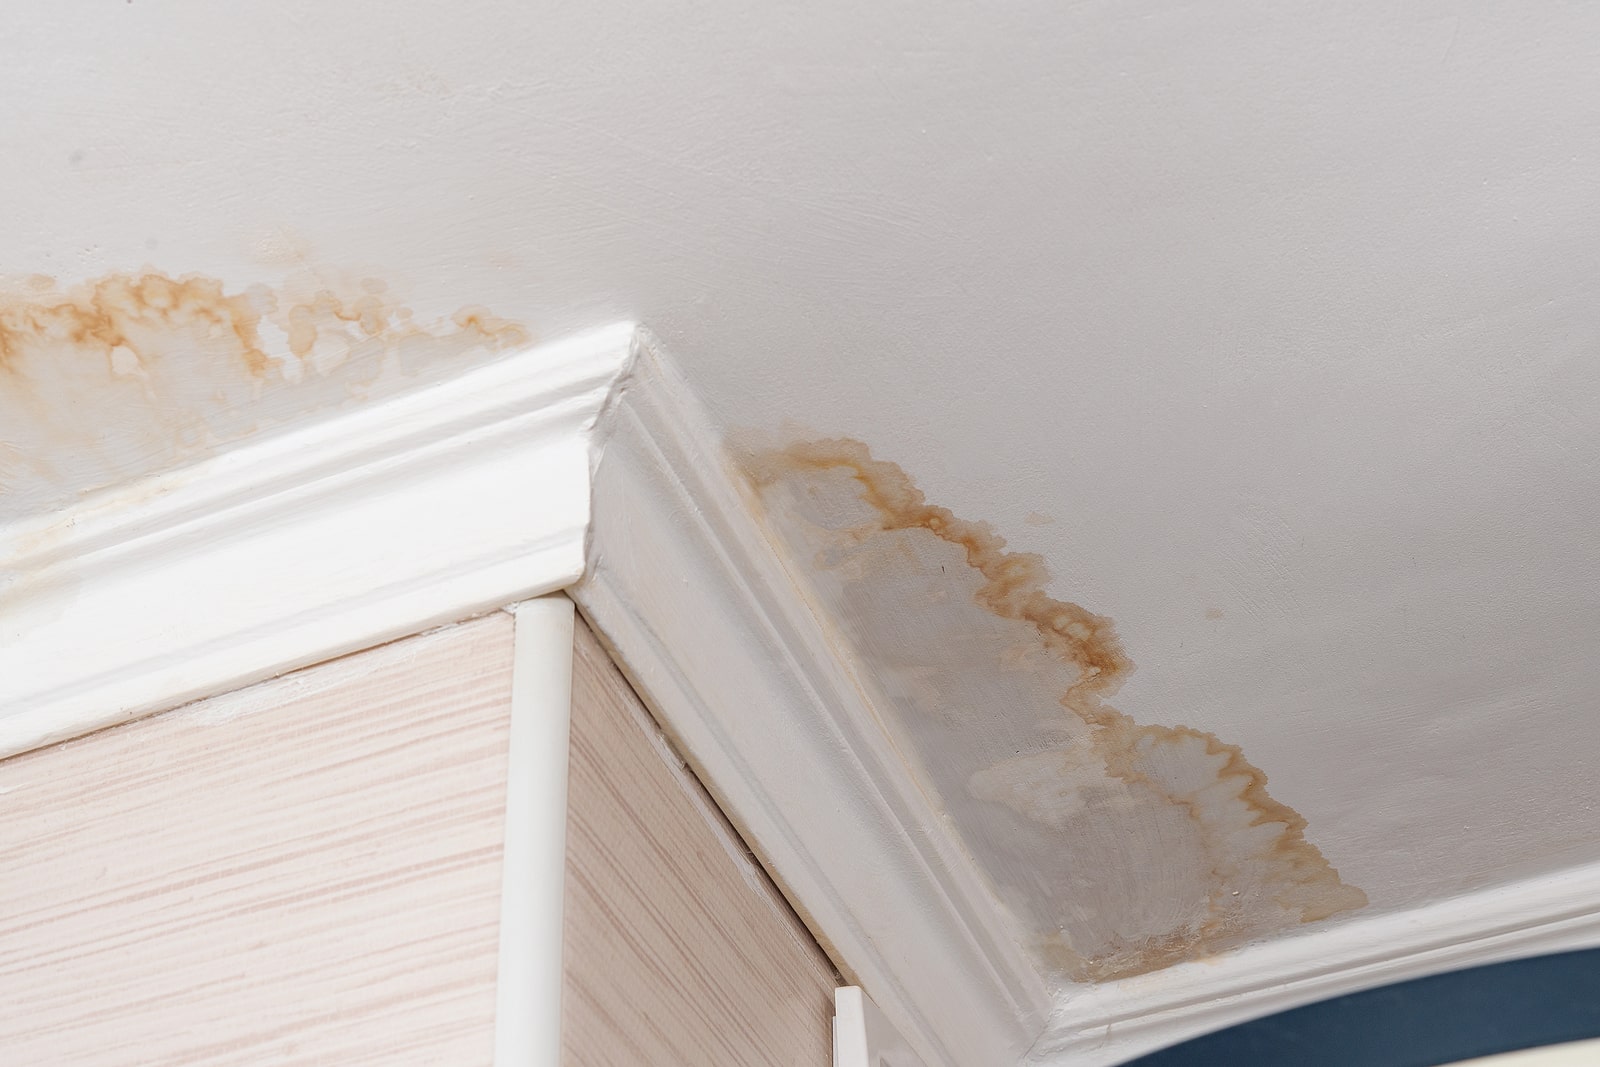
Start by inspecting the area where the water is dripping or where stains appear on the ceiling. Look for any signs of visible water damage such as wet spots, discoloration, or bulging. Trace the water stains to their highest point on the ceiling, as this can indicate the probable source of the leak.
Common causes of ceiling leaks include roof issues, plumbing leaks, or condensation buildup. If the leak is occurring during or after heavy rainfall, the problem could be a damaged or missing roof tile or a compromised flashing. Plumbing leaks can be caused by faulty pipes, fittings, or water supply lines. Condensation buildup is common in areas with poor ventilation, such as bathrooms or kitchens.
Once you have identified the potential sources, take the necessary steps to stop the leakage. For roof leaks, you may need to engage a professional roofer to repair or replace damaged materials. Plumbing leaks require the expertise of a plumber to fix or replace faulty pipes or fittings. In the case of condensation buildup, improving ventilation by installing exhaust fans or dehumidifiers can help prevent future issues.
Remember, it’s essential to address the source of the leak before proceeding with the drying process. Otherwise, your efforts to dry the ceiling may be in vain if the water intrusion continues.
Step 2: Stop the Leakage
Once you have identified the source of the leak, it’s crucial to take immediate action to stop the water intrusion. By stopping the leakage, you can prevent further damage and ensure that the drying process is effective.
The steps you need to take to stop the leakage will depend on the specific cause. Here are a few common scenarios and suggested solutions:
- Roof Leaks: If the leak is due to a damaged or missing roof tile, you may need to engage a professional roofer to inspect and repair the roof. They will determine the extent of the damage and replace any compromised materials, such as tiles or flashing.
- Plumbing Leaks: Plumbing leaks can occur in pipes, fittings, or supply lines. If you notice water dripping or pooling around plumbing fixtures, shut off the water supply to the affected area. Contact a licensed plumber who can assess and repair the leak. They may need to replace faulty pipes or fittings to stop the water intrusion.
- Condensation Buildup: Condensation can cause moisture to accumulate on the ceiling, leading to water stains and possible damage. Improve ventilation in the area by installing exhaust fans or dehumidifiers. These devices will help remove excess moisture from the air and prevent condensation from forming.
It’s important to prioritize safety while addressing the leakage. If there is a risk of electrical hazards or if the leak is significant, consider turning off the electricity in the affected area and contacting a professional for assistance.
Remember, stopping the leakage is crucial to ensure the success of the drying process. Once you have addressed the source of the water intrusion, you can move on to the next step of removing any wet or damaged materials.
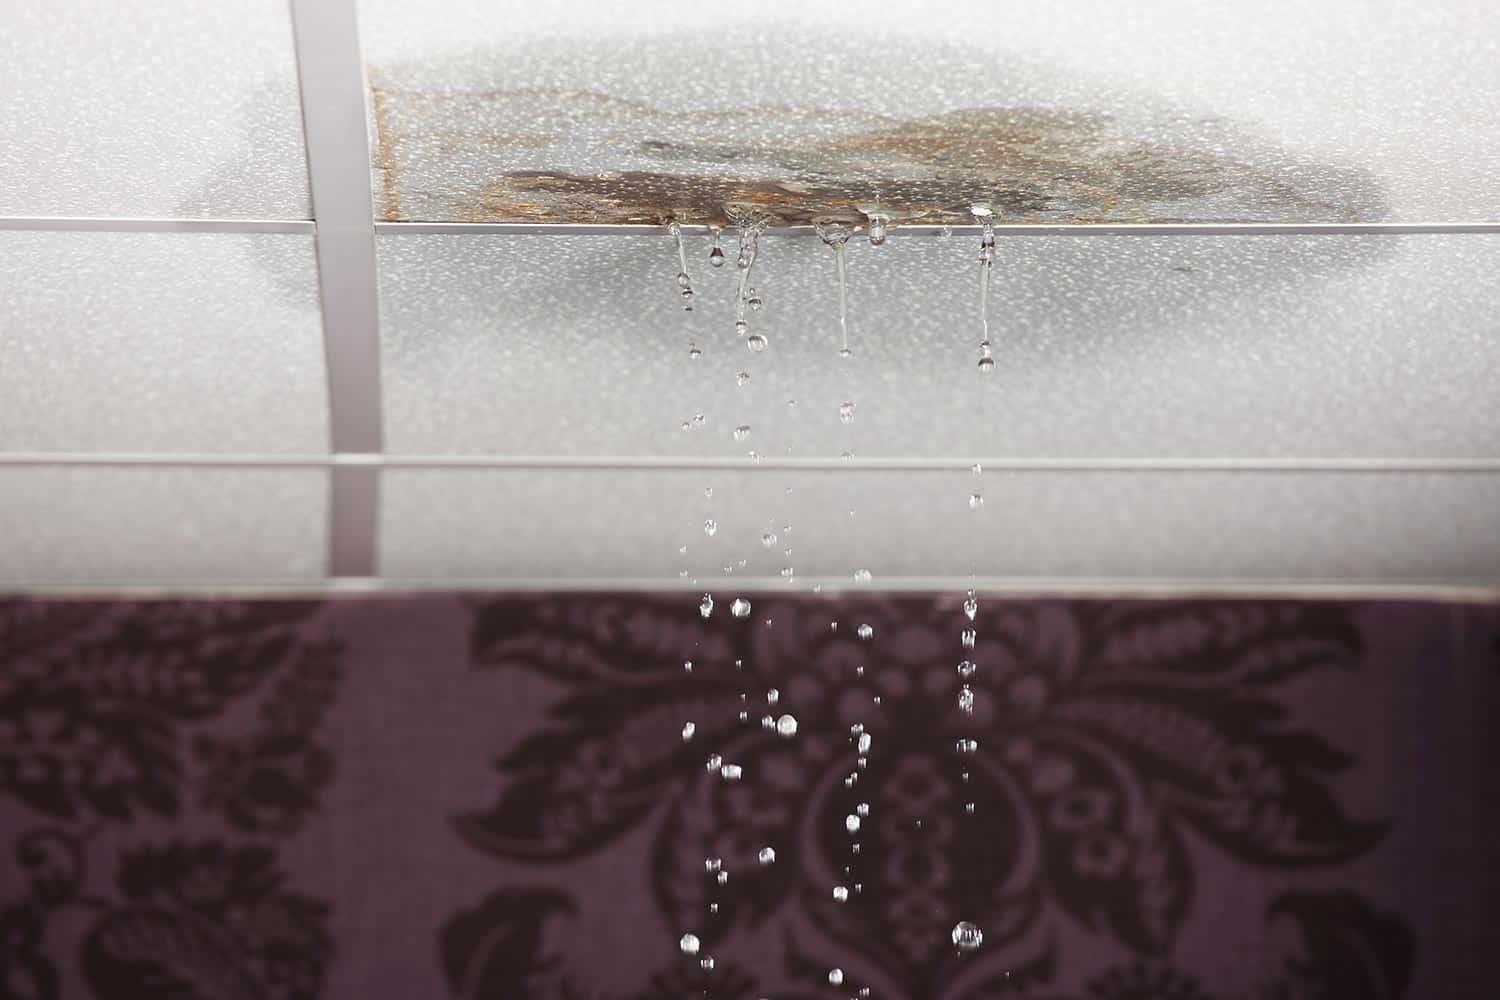
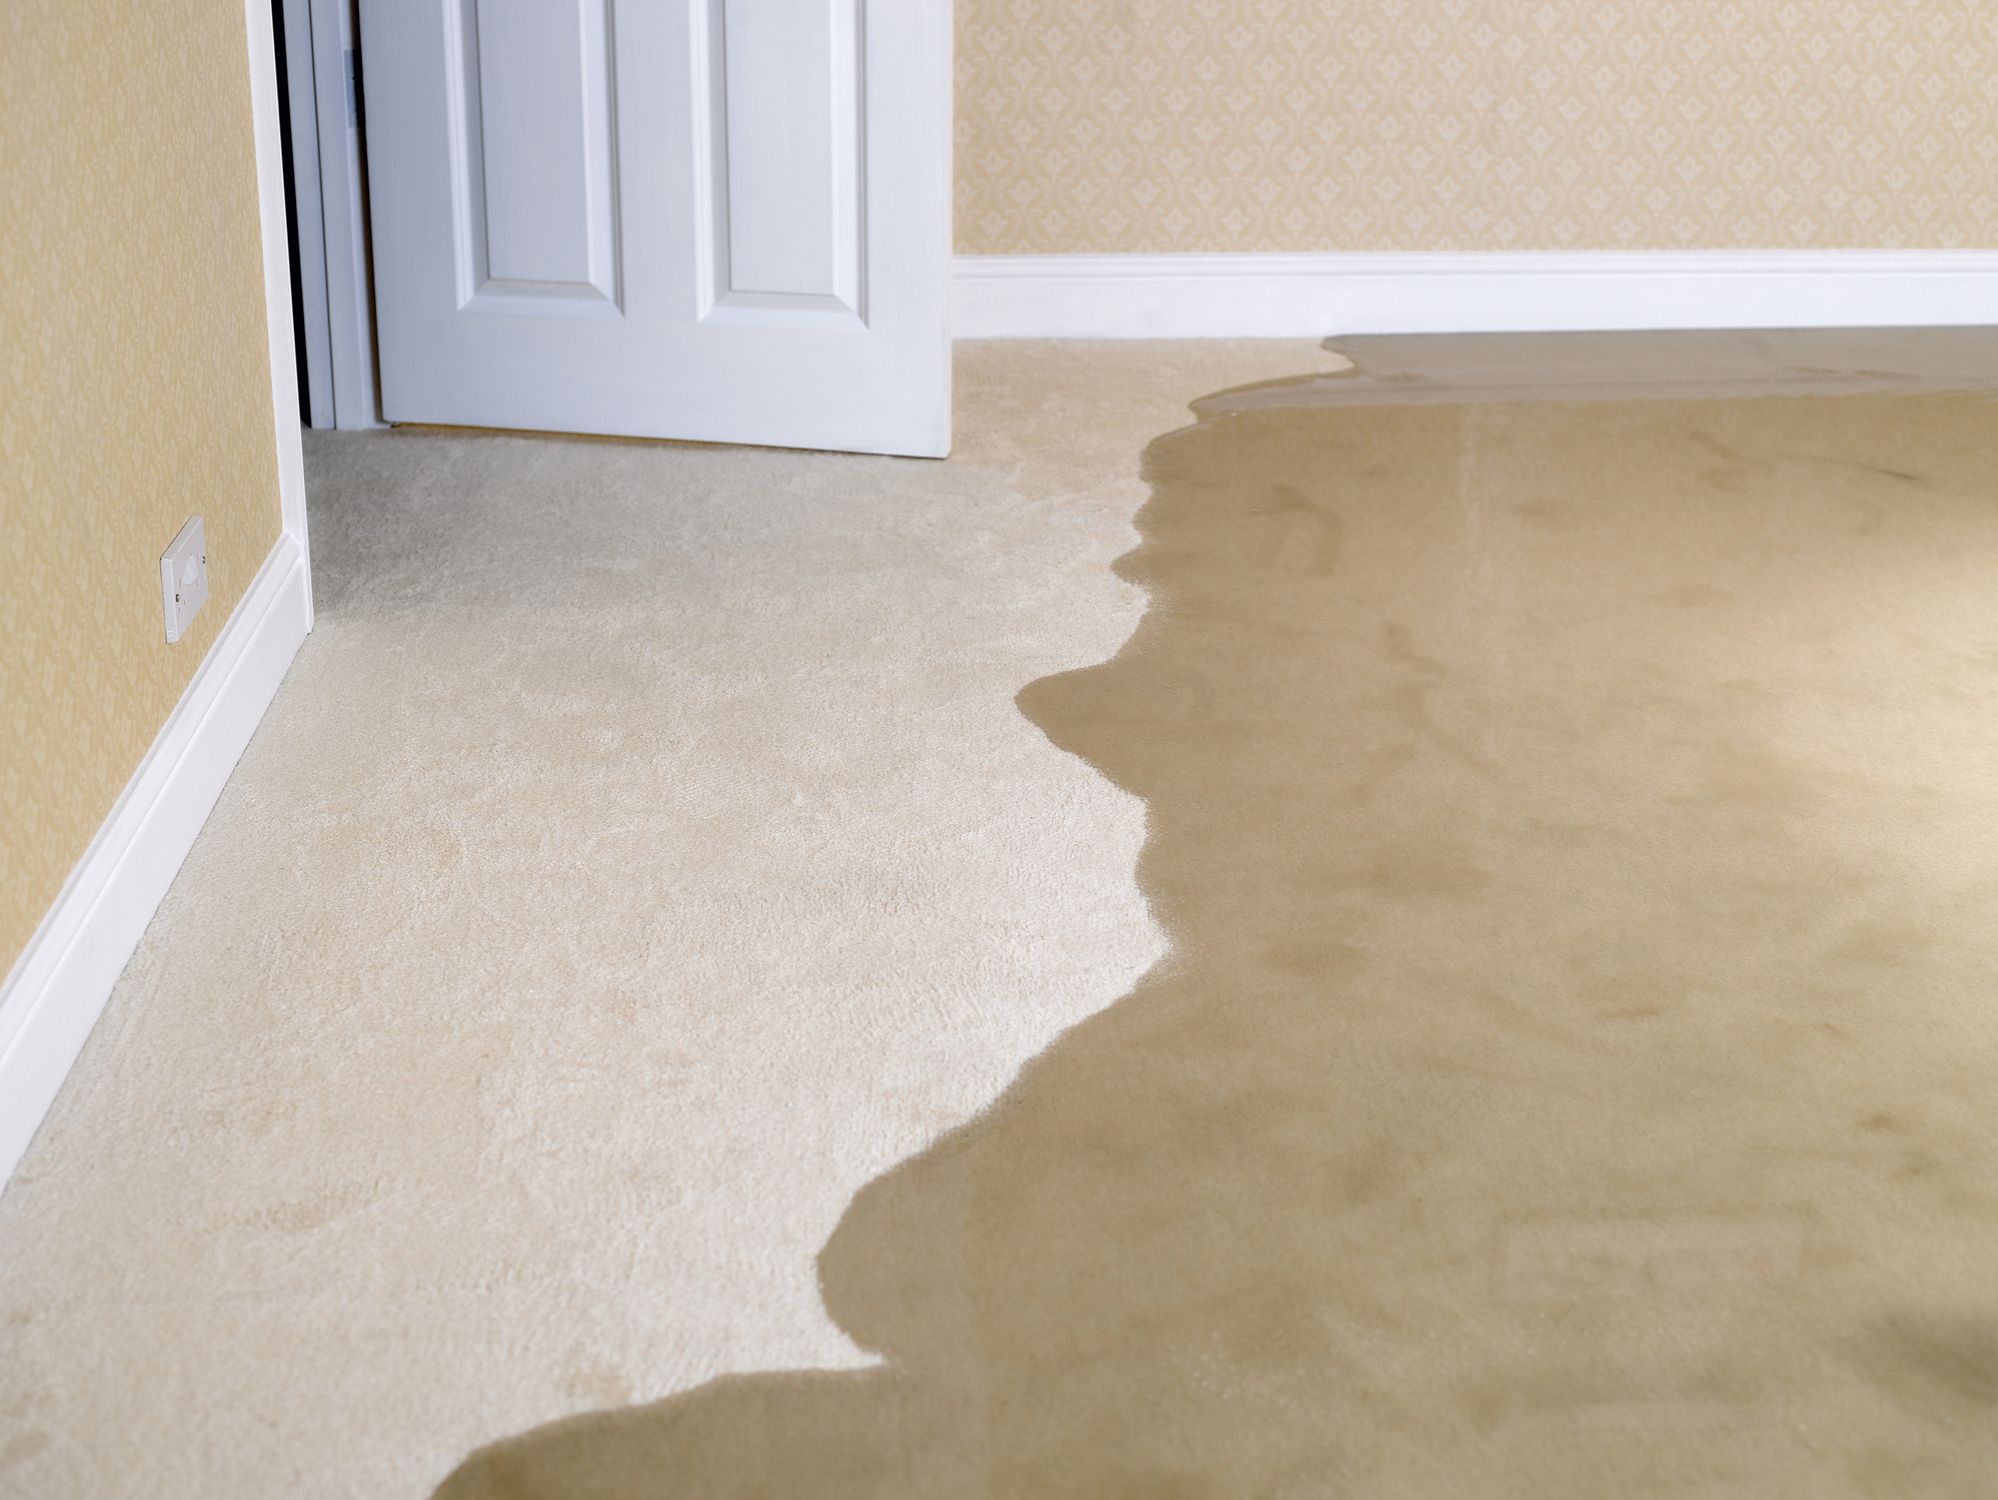
Step 3: Remove any Wet or Damaged Materials
After you have successfully stopped the leakage, the next step in drying out a ceiling after a leak is to remove any wet or damaged materials. This is an important step as it helps prevent the growth of mold and further damage to your ceiling.
Before you begin the removal process, gather the necessary tools and protective gear, such as gloves and goggles, to ensure your safety. Here’s how you can effectively remove wet or damaged materials:
- Identify the affected areas: Carefully inspect the ceiling for any signs of moisture or damage. Look for sagging or discolored areas, as they are likely to indicate the presence of water-soaked materials.
- Controlled removal: Start by cutting away the wet or damaged materials using a utility knife. Make small, controlled cuts to prevent further damage to the surrounding area. Depending on the extent of the damage, you may need to remove sections of the ceiling, including drywall or ceiling tiles. Be cautious and work gradually to avoid creating additional mess or compromising the structural integrity of the ceiling.
- Bag and dispose: Place the removed wet materials into sturdy garbage bags, ensuring proper containment. This prevents the spread of mold spores or further water damage. Depending on your local regulations, you may need to dispose of these materials in a specific way, such as arranging for a hazardous waste pickup or taking them to a designated landfill.
- Dry the area: Once the wet or damaged materials have been removed, use towels or a wet/dry vacuum to absorb any excess moisture from the ceiling and surrounding areas. This will help speed up the drying process.
Remember to exercise caution when handling wet materials, as they can be heavy and may contain mold or bacteria. If the affected area is large or you are unsure about how to safely remove the materials, it is advisable to seek professional assistance.
By removing the wet or damaged materials, you create a clean and dry environment for the next step: creating ventilation in the affected area.
Step 4: Create Ventilation in the Affected Area
Creating proper ventilation in the affected area is crucial to help dry out the ceiling after a leak. Good airflow helps to remove excess moisture and prevents the growth of mold and mildew. Here’s how you can effectively create ventilation:
- Open windows and doors: If weather conditions permit, open windows and doors in the room to allow fresh air to circulate. This helps to remove the stagnant air and moisture buildup.
- Use fans: Place fans strategically in the room to promote air circulation. Point them towards the wet ceiling and set them to a high speed. This will help to speed up the drying process by encouraging evaporation.
- Position dehumidifiers: Dehumidifiers are excellent tools for removing excess moisture from the air. Place one or more dehumidifiers in the affected area, following the manufacturer’s instructions. These machines extract water vapor from the air and help to dry out the ceiling.
- Utilize natural airflow: If there are any vents or air ducts in the room, make sure they are open and unblocked. This allows for the natural flow of air, further aiding in drying out the ceiling.
- Consider using air movers: Air movers, also known as air blowers or carpet dryers, are powerful fans that direct a strong airflow over the wet surface. They are particularly useful for larger areas or cases where there is excessive moisture. Place air movers strategically to cover the affected ceiling and help facilitate evaporation.
It’s important to note that the drying process may take some time, depending on the extent of the moisture and the ambient conditions. Be patient and allow for sufficient airflow to ensure thorough drying. Monitor the progress regularly and adjust the positioning of fans and dehumidifiers as needed.
Creating proper ventilation lays the foundation for effective drying. Once the air circulation is established, move on to the next step: using dehumidifiers and fans for drying.
Use fans and dehumidifiers to circulate air and remove moisture. Remove any wet insulation and ceiling materials to prevent mold growth. Check for any structural damage and make repairs as needed.
Read more: How To Dry Out Basement
Step 5: Use Dehumidifiers and Fans for Drying
Dehumidifiers and fans are essential tools for drying out a ceiling after a leak. They help to remove excess moisture from the air and speed up the drying process. Here’s how you can effectively use dehumidifiers and fans:
- Position the dehumidifiers: Place one or more dehumidifiers in the affected room, following the manufacturer’s instructions. Aim to achieve a relative humidity level of around 45-50%. This will help to prevent further moisture damage and inhibit the growth of mold and mildew.
- Set up fans: Position fans around the room to enhance air circulation. Point them towards the wet ceiling, ensuring that the airflow is directed upward. This helps to promote drying by speeding up evaporation.
- Run the equipment consistently: Keep the dehumidifiers and fans running consistently until the ceiling is completely dry. Depending on the severity of the moisture, this may take several days or even weeks. Regularly empty the dehumidifier’s water collection container to maintain optimal performance.
- Monitor the progress: Regularly check the moisture levels in the room using a moisture meter. This will help you determine if the drying process is effectively reducing the moisture content in the ceiling. Additionally, visually inspect the ceiling for any signs of remaining moisture or potential mold growth.
- Adjust the equipment placement: If you notice areas that are drying slower than others, consider repositioning the dehumidifiers and fans to target those specific spots. It’s important to ensure even airflow throughout the affected area to achieve thorough drying.
Remember, drying out the ceiling may take time, especially if the damage is extensive. Be patient, and continue to monitor and adjust the equipment as needed. If you have concerns about the drying process or suspect lingering moisture, it’s advisable to consult with a professional water damage restoration company to ensure thorough drying and prevent further issues.
Once the ceiling is fully dry, it’s essential to assess the condition and proceed with the necessary repairs. This leads us to the next step: inspecting and repairing the ceiling.
Step 6: Inspect and Repair the Ceiling
After successfully drying out the ceiling, it’s important to thoroughly inspect the area for any remaining damage and proceed with the necessary repairs. Here’s how you can effectively inspect and repair the ceiling:
- Examine for structural damage: Carefully inspect the ceiling for any signs of structural damage. Look for cracks, sagging, or unevenness that may indicate more severe issues. If you notice any significant damage, it’s advisable to consult with a professional contractor to assess the situation and make the necessary repairs.
- Check for mold and mildew: Inspect the ceiling for any signs of mold or mildew growth. Look for discoloration, musty odors, or visible fungal growth. If you detect any mold, it’s crucial to address it promptly by hiring a certified mold remediation specialist. They will safely and effectively remove any mold and treat the affected areas to prevent regrowth.
- Repair aesthetic damage: If the ceiling has cosmetic issues such as water stains or paint peeling, you can proceed with repairing these damages. Remove any loose or flaking paint using a scraper and sand the surface to create a smooth texture. Apply primer to the affected areas and then repaint the ceiling to match the surrounding area.
- Address structural issues: If the ceiling has sustained significant structural damage, it’s important to bring in professional help. A contractor or experienced handyman can assess the damage, determine the underlying cause, and perform the necessary repairs. This may involve replacing damaged drywall, reinforcing the structure, or addressing any plumbing or electrical issues.
- Consider hiring professionals: In cases where the damage is extensive or beyond your expertise, it’s recommended to seek the assistance of professionals. They have the knowledge, experience, and specialized equipment to handle complex repairs and ensure the long-term stability of the ceiling.
Remember, it’s crucial to address any underlying issues and complete the necessary repairs not only for aesthetic purposes but also to maintain the integrity of your ceiling. A thorough inspection and proper repairs will help prevent future water damage and ensure a safe and aesthetically pleasing living space.
Once the repairs are completed, you can move on to the final step: repainting or restoring the ceiling.
Step 7: Repaint or Restore the Ceiling
After inspecting and repairing the ceiling, the final step in the process of drying out a ceiling after a leak is to repaint or restore the surface. This step not only restores the appearance of the ceiling but also protects it from future damage.
Here’s how you can effectively repaint or restore the ceiling:
- Prepare the surface: Ensure the repaired areas are dry, clean, and free from any loose debris or particles. Use a damp cloth or sponge to gently wipe the surface, removing any dust or residue.
- Apply primer: Before painting, it’s recommended to apply a coat of primer. This helps to seal the surface, improve adhesion, and provide a consistent base for the paint. Choose a primer that is specifically designed for ceilings and follow the manufacturer’s instructions for application.
- Choose the paint: Select a high-quality paint that is suitable for ceilings. Consider the desired finish, such as matte or satin, and ensure it is formulated to resist moisture and mold growth. It’s also essential to choose a color that complements the overall aesthetic of the room.
- Apply the paint: Use a roller or paintbrush to evenly apply the paint to the ceiling. Start from one corner and work your way across the surface, using long, smooth strokes. Apply multiple coats if necessary, allowing sufficient drying time between each coat as per the manufacturer’s instructions.
- Consider professional restoration: In some cases, the water damage may have caused significant discoloration or structural issues that require professional restoration. A professional contractor or restoration specialist can assess the damage and determine the best course of action. They may recommend techniques such as drywall patching, texture matching, or ceiling panel replacement to achieve a seamless and professional-looking result.
- Allow proper drying time: After painting or restoring the ceiling, it’s crucial to allow sufficient drying time before introducing moisture or additional stress to the surface. Follow the manufacturer’s guidelines for drying times, and avoid any activities or conditions that may compromise the newly painted or restored area.
By repainting or restoring the ceiling, you not only enhance its appearance but also create a protective barrier against future damage. A properly painted or restored ceiling is more resistant to moisture, mold, and regular wear and tear.
With the completion of this final step, the process of drying out a ceiling after a leak is successfully finished. You can now enjoy a dry, restored, and visually appealing ceiling in your home.
Conclusion
Drying out a ceiling after a leak is a critical process to restore your home and prevent further damage. By following the steps outlined in this guide, you can effectively address the issue and ensure a successful restoration.
Remember to start by identifying the source of the leak and taking immediate action to stop the water intrusion. Once the leakage is under control, remove any wet or damaged materials from the ceiling, creating a clean and dry environment for the drying process.
Create proper ventilation in the affected area by opening windows, using fans, and employing dehumidifiers. These tools will accelerate the drying process and prevent the growth of mold and mildew.
Inspect the ceiling for any remaining damage, such as structural issues or mold growth. Make the necessary repairs, whether it’s cosmetic fixes like repainting or more extensive restoration work. It’s important to address all repairs to maintain the integrity and appearance of the ceiling.
Finally, consider repainting or restoring the ceiling to protect against future damage and restore its aesthetic appeal. Choose the right paint and apply it properly to achieve a seamless and long-lasting finish.
Throughout the entire process, it’s essential to prioritize safety and, if needed, seek professional assistance for complex issues or extensive damage. Water damage restoration professionals have the expertise and equipment to handle challenging situations and ensure a thorough and effective restoration.
By following these steps and taking the necessary precautions, you can successfully dry out a ceiling after a leak. Remember, addressing the issue promptly and thoroughly is vital to prevent further damage, protect your home, and create a safe and comfortable living environment for you and your family.
Frequently Asked Questions about How To Dry Out Ceiling After Leak
Was this page helpful?
At Storables.com, we guarantee accurate and reliable information. Our content, validated by Expert Board Contributors, is crafted following stringent Editorial Policies. We're committed to providing you with well-researched, expert-backed insights for all your informational needs.


0 thoughts on “How To Dry Out Ceiling After Leak”