Home>Garden Essentials>How To Germinate Hickory Nuts

Garden Essentials
How To Germinate Hickory Nuts
Modified: March 15, 2024
Learn the best techniques for germinating hickory nuts in your garden. Discover step-by-step instructions and expert tips to ensure successful growth.
(Many of the links in this article redirect to a specific reviewed product. Your purchase of these products through affiliate links helps to generate commission for Storables.com, at no extra cost. Learn more)
Introduction
Welcome to the wonderful world of hickory nuts! If you’re an avid gardener or simply have a passion for cultivating your own plants, learning how to germinate hickory nuts is a rewarding endeavor. From the beautiful shade they provide to the delicious nuts they produce, hickory trees are a fantastic addition to any garden or landscape.
Germinating hickory nuts may seem like a daunting task, but with the right knowledge and a little patience, you can successfully grow these magnificent trees from seeds. In this article, we’ll guide you through the step-by-step process of germinating hickory nuts and provide you with tips on how to care for the seedlings until they are ready to be transplanted.
Before we dive into the details, let’s take a moment to appreciate the hickory tree itself. Hickory trees are deciduous hardwoods that belong to the genus Carya. They are native to North America and are known for their strong, durable wood and the delicious nuts they bear. Hickories are large, majestic trees that can reach heights of up to 100 feet, providing ample shade and creating a stunning focal point in any landscape.
One of the main challenges in germinating hickory nuts is breaking their hard outer shell, which acts as a protective layer for the seed inside. This process, known as stratification, mimics the natural conditions that the nuts would experience in the wild during the winter months. By following a few simple steps, you can encourage the nut to sprout and grow into a healthy hickory tree.
In the next section, we’ll go over the materials you’ll need to successfully germinate hickory nuts. These materials are easily accessible and will set you up for success in your hickory nut growing journey.
Key Takeaways:
- Growing hickory trees from nuts is a patient and rewarding process, involving careful nut selection, stratification, and nurturing the seedlings to maturity.
- Hickory trees provide shade, beauty, and delicious nuts, making them a valuable addition to any garden. With proper care and attention, you can enjoy the benefits of these majestic trees for years to come.
Read more: How To Germinate A Chinquapin Nut
Materials Needed
Before you begin the process of germinating hickory nuts, gather the following materials:
- Hickory nuts: Collect mature hickory nuts from the ground during the autumn months. Look for nuts that are free from cracks or damage.
- Water: You’ll need water for soaking the nuts and for providing moisture during the germination process.
- Container: Use a container that is deep enough to hold the nuts and allow for root development. A plastic or ceramic container with drainage holes works well.
- Seedling tray: If you plan on transplanting the hickory seedlings, it’s helpful to have a seedling tray to start them off. You can also use small pots or cups.
- Potting soil: Choose a well-draining potting mix that is suitable for seedlings. Avoid heavy soils that retain too much moisture.
- Plastic wrap or clear plastic bag: This will help create a moist and warm environment for the seeds during the stratification process.
- Labels or markers: It’s essential to label your containers or trays to keep track of the hickory nut varieties and planting dates.
- Garden tools: Basic gardening tools, such as a trowel or small shovel, will come in handy when planting the nuts and transplanting the seedlings.
Now that you have your materials ready, let’s move on to the step-by-step process of germinating hickory nuts.
Step 1: Collecting Hickory Nuts
The first step in germinating hickory nuts is to collect mature nuts from the ground during the autumn months. Look for nuts that have fallen naturally from the tree and are free from cracks or damage. Collecting nuts directly from the tree can be challenging, as they are often high up and hard to reach.
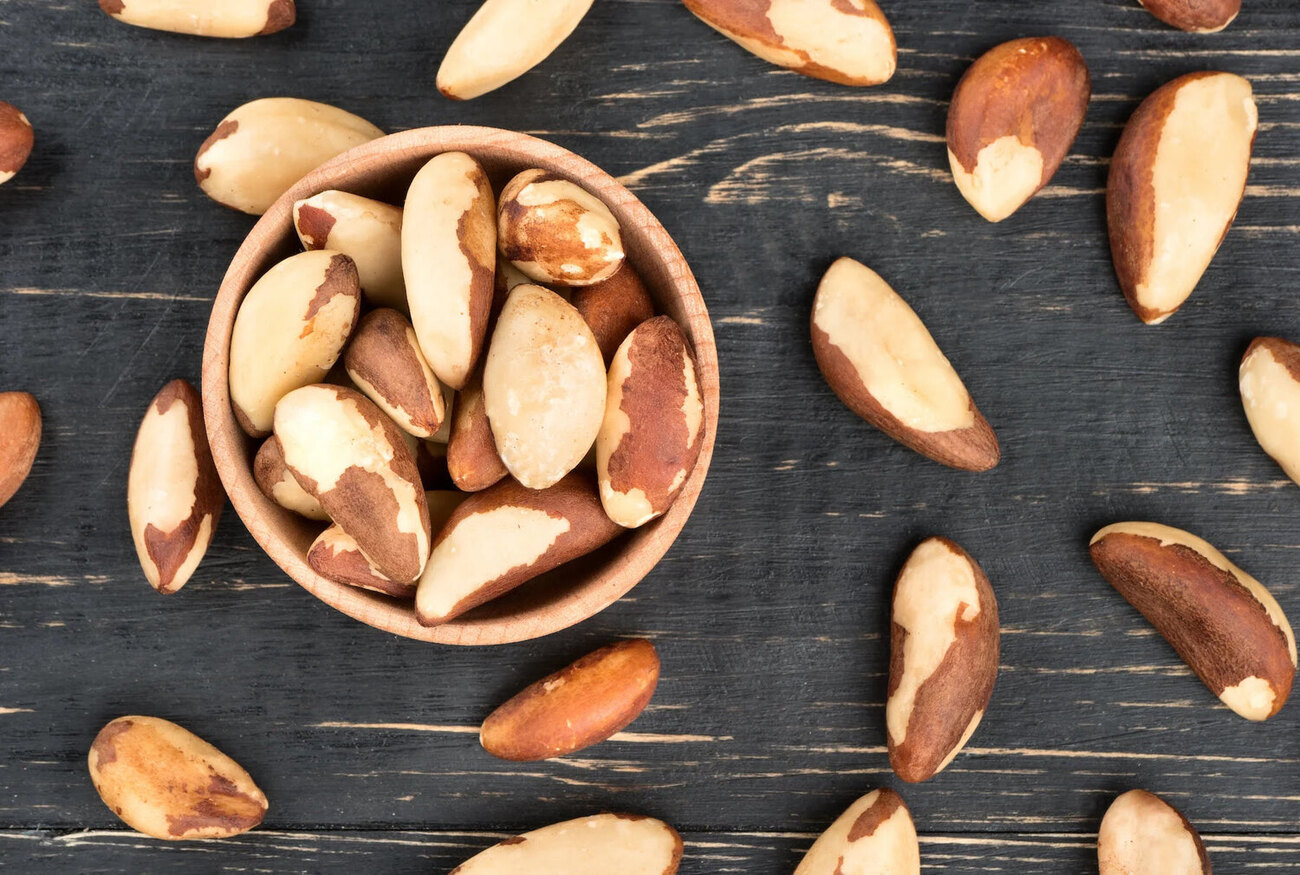
Identifying hickory nuts can be a fascinating experience. Hickory nuts are generally round or oval-shaped, with a hard outer shell that has distinctive ridges or grooves. The color of the shell can vary depending on the hickory tree species, ranging from light brown to dark brown. Inside the shell, you’ll find the delicious hickory nut kernel, which is a rich source of nutrients.
Once you’ve collected the hickory nuts, give them a thorough inspection to ensure that they are viable for germination. Discard any nuts that are damaged, bruised, or have mold growth. These nuts are unlikely to sprout, and it’s best to focus your efforts on healthy specimens.
It’s important to mention that different hickory tree species produce nuts with varying flavors and characteristics. Some common hickory species you may come across include the Shagbark Hickory (Carya ovata), Pignut Hickory (Carya glabra), and Shellbark Hickory (Carya laciniosa). Each species has its own unique charm and taste, so feel free to experiment with different varieties of nuts.
Once you have gathered your hickory nuts, it’s time to prepare them for the germination process. In the next section, we’ll discuss the steps involved in preparing the nuts for successful sprouting.
Step 2: Preparing the Nuts
Now that you have collected a selection of healthy hickory nuts, it’s time to prepare them for successful germination. The preparation process involves removing the outer shell and soaking the nuts to encourage faster and more consistent sprouting.
Start by ensuring that the hickory nuts are fully mature. Look for nuts that have a hard outer shell and a solid, well-formed kernel inside. Immature nuts will not germinate successfully, so it’s crucial to select fully mature specimens.
To remove the outer shell, you can use a nutcracker or a hammer. Place the hickory nut on a solid surface and gently tap the shell, being careful not to damage the kernel inside. The goal is to crack the shell without crushing the nut inside. Once the shell is cracked, use your fingers to carefully remove it, revealing the hickory nut’s kernel.
After successfully removing the shells, it’s time to soak the hickory nuts. Fill a bowl or bucket with room temperature water and place the nuts inside. Allow them to soak for 24 to 48 hours. Soaking the nuts softens the outer shell and helps to break any remaining dormancy in the seed.
During the soaking period, you may notice some nuts float to the top while others sink. This is normal and doesn’t necessarily indicate the viability of the nut. Simply leave them in the water as they are and proceed with the germination process.
After soaking, drain the water and pat the nuts dry with a towel. At this point, your hickory nuts are ready for stratification, which is the next step in the germination process. We’ll explore the stratification process in the following section.
Step 3: Stratification Process
The stratification process is a crucial step in germinating hickory nuts. Stratification simulates the natural winter conditions that nuts would experience in the wild, breaking their dormancy and preparing them for germination when the weather warms up. This process involves subjecting the nuts to a period of cold and moist conditions.
To stratify your hickory nuts, you’ll need a container with a lid, such as a plastic bag or a sealed plastic container. Start by lining the bottom of the container with a layer of damp paper towels or sphagnum moss. The moisture helps to create a humid environment for the nuts during stratification.
Next, place the hickory nuts in a single layer on top of the dampened material. Make sure the nuts are not touching each other to allow for air circulation. If you have multiple varieties of hickory nuts, you can separate them into different containers or label them to keep track of the different species.
Once the nuts are arranged in the container, cover them with another layer of dampened paper towels or sphagnum moss. The goal is to create a moist and insulated environment for the nuts. Slightly moistening the top layer will help maintain the necessary humidity.
Securely close the container to create a sealed environment. If you are using a plastic bag, tightly seal it, making sure no air can escape. This step ensures that the nuts remain in a controlled and moist environment during stratification.
Now it’s time to place the container in a cold location, such as a refrigerator or an unheated garage. The ideal temperature for stratification is around 35-40°F (2-4°C). This temperature range mimics the winter conditions that hickory nuts would naturally experience outdoors.
Allow the nuts to stratify for a period of 90-120 days. During this time, periodically check the moisture level of the container and add a small amount of water if needed to maintain the desired humidity. Avoid excessive moisture, as it can lead to fungal growth.
After the stratification period is over, it’s time to move on to the exciting step of planting the hickory nuts. We’ll explore the planting process in the next section.
Soak hickory nuts in water for 24 hours, then plant them in a pot with well-draining soil. Keep the soil moist and place the pot in a sunny spot. Germination can take several months, so be patient!
Read more: How To Store Nuts Long Term
Step 4: Planting the Nuts
After successfully stratifying your hickory nuts and breaking their dormancy, it’s time to plant them and provide the conditions necessary for germination and growth. Follow these steps to plant the hickory nuts:
- Select a suitable location: Choose a spot in your garden or landscape that receives full sun or partial shade. Hickory trees thrive in well-draining soil, so ensure the planting site has good drainage.
- Prepare the soil: Dig a hole that is slightly larger than the size of the hickory nut. Loosen the soil and remove any weeds or debris from the area. Amend the soil with organic matter, such as compost or well-rotted manure, to improve fertility.
- Plant the nuts: Place a single hickory nut in each planting hole, with the pointy end facing down and the rounded end facing up. Cover the nut with soil, ensuring it is completely buried and firmly pressed down. Leave a small depression around the nut to collect water.
- Water the planting area: Give the newly planted nuts a thorough watering to settle the soil and provide moisture to the seeds. Keep the soil consistently moist throughout the germination process, avoiding both excessive dryness and waterlogging.
- Provide protection: Place a protective layer of mulch around the planting area to help retain moisture and suppress weed growth. This also helps to insulate the soil and regulate temperature fluctuations.
- Monitor and maintain: Regularly check the planting area for signs of growth. It may take several weeks or even months for the hickory nuts to sprout. Be patient and continue to provide appropriate care, ensuring the soil remains consistently moist.
Remember that not all hickory nuts will successfully germinate, and it’s normal to have some nuts not sprout. However, with proper care and attention, you should see the majority of the nuts starting to grow into seedlings.
In the next step, we’ll discuss the care and maintenance required for the hickory nut seedlings as they continue to grow and develop.
Step 5: Care and Maintenance
Once the hickory nut seedlings have emerged and started their journey towards becoming trees, it’s important to provide them with proper care and maintenance. Here are some essential steps to follow:
- Watering: Keep the soil around the hickory nut seedlings consistently moist but not waterlogged. Water deeply and thoroughly, ensuring the root zone receives adequate moisture. Avoid overwatering, as it can lead to root rot.
- Fertilizing: In their first year of growth, hickory nut seedlings don’t typically require additional fertilizer. However, you can apply a slow-release balanced fertilizer in the second year to provide necessary nutrients. Follow the instructions on the fertilizer package for proper application.
- Weed control: Regularly remove weeds and grass from around the base of the hickory nut seedlings. Weeds compete for nutrients and water, so removing them helps the seedlings thrive.
- Protect from pests: Keep an eye out for common pests that may disturb or damage the hickory nut seedlings, such as rabbits, deer, or insects. Use appropriate measures, such as fencing or organic pest control methods, to protect the young plants.
- Pruning: Once the hickory nut seedlings have established a good amount of growth, you can selectively prune any damaged or congested branches to promote healthy development. Prune during the dormant season to minimize stress on the plants.
- Monitoring: Regularly inspect the hickory nut seedlings for any signs of disease or nutrient deficiencies. Look for yellowing leaves, stunted growth, or unusual spots or discoloration. Address any issues promptly to ensure the health of the plants.
- Support: As the hickory nut seedlings grow taller, it may be necessary to provide support. Use stakes or tree ties to secure the seedlings and prevent them from bending or breaking in strong winds or heavy rain. Check the supports regularly and adjust as needed.
With proper care and maintenance, your hickory nut seedlings will gradually grow into healthy and robust trees. Continue to monitor their progress, adapt to their needs, and provide the necessary care to ensure their successful establishment.
In the next step, we’ll discuss the process of transplanting the hickory nut seedlings once they have reached an appropriate size and maturity.
Step 6: Transplanting the Seedlings
Once your hickory nut seedlings have grown to a suitable size and have developed a strong root system, it’s time to transplant them into their permanent location. Follow these steps to successfully transplant your hickory nut seedlings:
- Choose the right time: The best time to transplant hickory nut seedlings is in early spring before new growth starts or in late fall after the leaves have fallen. Avoid transplanting during periods of extreme heat or cold.
- Prepare the new planting hole: Dig a hole in your desired location that is slightly larger than the root ball of the seedling. Ensure that the hole is deep enough to accommodate the entire root system without bending or crowding.
- Carefully remove the seedling: Gently dig around the seedling, starting at a distance from the stem to avoid damaging the fragile roots. Lift the seedling out of the ground, taking care to keep the root ball intact.
- Place the seedling in the new hole: Lower the hickory nut seedling into the prepared hole, making sure it is at the same depth it was previously planted. Backfill the hole with soil, gently firming it around the roots to eliminate air pockets.
- Water the newly transplanted seedling: Give the transplanted hickory nut seedling a thorough watering to settle the soil and provide moisture to the roots. Continue to monitor the moisture level and water regularly until the seedling becomes established.
- Mulch and protect: Apply a layer of organic mulch around the base of the transplanted seedling, leaving a small gap around the trunk. This helps conserve moisture, suppress weeds, and insulate the roots. Consider using a tree guard to protect the young tree from wildlife or lawn equipment.
- Maintain care after transplanting: Continue to provide proper care for the transplanted hickory nut seedling, including regular watering, weed control, and monitoring for any signs of stress or nutrient deficiencies. Gradually reduce watering frequency as the seedling becomes established.
Transplanting hickory nut seedlings can be a delicate process, but with proper handling and care, they will adapt to their new location and thrive in their permanent home. Be patient as they adjust to the transplant shock, and continue to provide the necessary care to ensure their successful growth.
Congratulations! You have completed the process of germinating hickory nuts and transitioning the seedlings into thriving trees. With time and care, your hickory trees will provide you with beautiful shade, stunning foliage, and a bountiful harvest of delicious nuts to enjoy for years to come.
Remember to stay observant and adaptable to the specific needs of your hickory trees as they continue to grow and mature. Happy gardening!
HTML code below:
<h2>Step 6: Transplanting the Seedlings</h2>

<p>Once your hickory nut seedlings have grown to a suitable size and have developed a strong root system, it's time to transplant them into their permanent location. Follow these steps to successfully transplant your hickory nut seedlings:</p>

<ol>
  <li><strong>Choose the right time:</strong> The best time to transplant hickory nut seedlings is in early spring before new growth starts or in late fall after the leaves have fallen. Avoid transplanting during periods of extreme heat or cold.</li>

  <li><strong>Prepare the new planting hole:</strong> Dig a hole in your desired location that is slightly larger than the root ball of the seedling. Ensure that the hole is deep enough to accommodate the entire root system without bending or crowding.</li>

  <li><strong>Carefully remove the seedling:</strong> Gently dig around the seedling, starting at a distance from the stem to avoid damaging the fragile roots. Lift the seedling out of the ground, taking care to keep the root ball intact.</li>

  <li><strong>Place the seedling in the new hole:</strong> Lower the hickory nut seedling into the prepared hole, making sure it is at the same depth it was previously planted. Backfill the hole with soil, gently firming it around the roots to eliminate air pockets.</li>

  <li><strong>Water the newly transplanted seedling:</strong> Give the transplanted hickory nut seedling a thorough watering to settle the soil and provide moisture to the roots. Continue to monitor the moisture level and water regularly until the seedling becomes established.</li>

  <li><strong>Mulch and protect:</strong> Apply a layer of organic mulch around the base of the transplanted seedling, leaving a small gap around the trunk. This helps conserve moisture, suppress weeds, and insulate the roots. Consider using a tree guard to protect the young tree from wildlife or lawn equipment.</li>

  <li><strong>Maintain care after transplanting:</strong> Continue to provide proper care for the transplanted hickory nut seedling, including regular watering, weed control, and monitoring for any signs of stress or nutrient deficiencies. Gradually reduce watering frequency as the seedling becomes established.</li>
</ol>

<p>Transplanting hickory nut seedlings can be a delicate process, but with proper handling and care, they will adapt to their new location and thrive in their permanent home. Be patient as they adjust to the transplant shock, and continue to provide the necessary care to ensure their successful growth.</p>

<p>Congratulations! You have completed the process of germinating hickory nuts and transitioning the seedlings into thriving trees. With time and care, your hickory trees will provide you with beautiful shade, stunning foliage, and a bountiful harvest of delicious nuts to enjoy for years to come.</p>

<p>Remember to stay observant and adaptable to the specific needs of your hickory trees as they continue to grow and mature. Happy gardening!</p>
Conclusion
Growing hickory trees from germinated nuts is a rewarding and fulfilling gardening project. With a little knowledge and care, you can successfully cultivate these majestic trees and enjoy their shade, beauty, and delicious nuts for years to come.
Throughout this guide, we have covered the step-by-step process of germinating hickory nuts, from collecting and preparing the nuts to stratifying them and finally planting and caring for the seedlings. Each step plays a crucial role in the successful growth and development of your hickory trees.
Remember to collect mature and healthy hickory nuts, remove their hard outer shells, and soak them before stratifying in a cold and moist environment. After stratification, plant the nuts in a suitable location, providing adequate care and maintenance as they grow. Finally, transplant the seedlings into their permanent location when they have reached an appropriate size.
Throughout the entire process, patience is key. Growing hickory trees from nuts takes time, as it involves both stratification and the gradual growth of seedlings. Be attentive to the needs of your hickory trees, ensuring they receive proper watering, nutrition, and protection from pests and diseases.
As your hickory trees mature, they will provide valuable shade and beauty to your garden or landscape. Their strong, durable wood can also be utilized in various woodworking projects. Additionally, the delicious hickory nuts they produce can be enjoyed fresh or used in cooking and baking.
Remember to continue monitoring and caring for your hickory trees as they grow and mature. Prune them as necessary to maintain their shape and health, and watch as they become a focal point of your outdoor space.
So dive into the world of hickory trees, and begin your journey of germinating and growing these remarkable plants. With dedication and a green thumb, you will be rewarded with the beauty, shade, and nutty delights of your very own hickory trees.
Frequently Asked Questions about How To Germinate Hickory Nuts
Was this page helpful?
At Storables.com, we guarantee accurate and reliable information. Our content, validated by Expert Board Contributors, is crafted following stringent Editorial Policies. We're committed to providing you with well-researched, expert-backed insights for all your informational needs.


0 thoughts on “How To Germinate Hickory Nuts”