Home>Garden Essentials>How To Grow Sage From Seed
Garden Essentials
How To Grow Sage From Seed
Modified: March 16, 2024
Learn how to grow sage from seed in your garden with our helpful guide. Discover the step-by-step process and tips for successful cultivation.
(Many of the links in this article redirect to a specific reviewed product. Your purchase of these products through affiliate links helps to generate commission for Storables.com, at no extra cost. Learn more)
Introduction
Welcome to the world of gardening! If you are a beginner looking to cultivate your own garden or someone with a green thumb seeking to expand your plant collection, growing sage from seed is a wonderful and rewarding endeavor. Sage, scientifically known as Salvia officinalis, is a perennial herb that adds beauty, fragrance, and culinary versatility to any garden.
With its aromatic leaves and attractive flowers, sage is not only a delightful addition to your garden but also a valuable herb with numerous health benefits. Known for its antioxidant properties and medicinal uses, sage has been used for centuries in traditional medicine and culinary practices.
If you’re wondering how to grow sage from seed, you’ve come to the right place. This comprehensive guide will provide you with step-by-step instructions on selecting the right seeds, preparing the soil, sowing the seeds, caring for your sage plants, transplanting them, and finally, reaping the rewards of your efforts through a bountiful harvest.
So, let’s roll up our sleeves and dive into the wonderful world of sage gardening!
Key Takeaways:
- Growing sage from seed is a rewarding endeavor, offering beauty, fragrance, and culinary versatility. Follow the steps to select high-quality seeds, prepare the soil, sow the seeds, and care for your sage plants.
- Proper care, including watering, mulching, and pruning, is essential for healthy sage growth. Harvesting sage leaves at the right time and preserving them allows for continuous growth and flavorful culinary use.
Read more: How To Grow Sage Indoors From Seed
Choosing the Right Seeds
Choosing high-quality sage seeds is crucial for successful cultivation. Here are some factors to consider when selecting the right seeds:
- Variety: Sage comes in various varieties, such as common sage, purple sage, or tricolor sage. Consider the flavor, appearance, and intended use of the sage when choosing the variety. Common sage is a popular choice for culinary purposes, while purple sage adds a pop of color to your garden.
- Source: Purchase seeds from reputable seed companies or nurseries. Look for organic and non-GMO seeds to ensure the highest quality and avoid the use of harmful pesticides or genetic modifications.
- Freshness: Check the expiration date on the seed packet. Fresh seeds have a higher germination rate and are more likely to yield healthy plants.
- Germination Rate: Some seed packets provide information on the germination rate, which indicates the percentage of seeds that are expected to sprout. Opt for seeds with a high germination rate to increase your chances of success.
- Storage: Properly stored seeds have a longer shelf life. Ensure that the seeds have been stored in a cool, dry place to maintain their viability.
Consider your specific needs and preferences when choosing the right sage seeds. Remember, selecting high-quality seeds is the first step towards a successful sage garden.
Preparing the Soil
Preparing the soil is a crucial step in creating the optimal growing environment for your sage plants. Here’s how you can prepare the soil:
- Location: Choose a sunny location for your sage plants, as they thrive in full sun. Ensure that the area receives at least 6-8 hours of direct sunlight daily.
- Soil Type: Sage prefers well-draining soil with a pH level between 6.0 and 7.0. Test the soil pH and make necessary amendments if it is too acidic or alkaline. You can add organic matter, such as compost or well-rotted manure, to improve the soil’s fertility and structure.
- Soil Preparation: Before planting your sage seeds, loosen the soil by removing any weeds, stones, or debris. Use a garden fork or tiller to break up compacted soil, ensuring proper aeration and drainage.
- Adding Organic Matter: Mix in organic matter, such as compost or aged manure, to enrich the soil with nutrients essential for sage growth. Spread a layer of organic matter on the soil surface, then gently incorporate it into the soil using a garden fork or tiller.
- Mulching: Applying a layer of organic mulch around the sage plants after planting helps suppress weeds, conserve moisture, and regulate soil temperature. Use materials like straw, wood chips, or dry leaves for mulching.
By preparing the soil properly, you are creating an ideal foundation for your sage plants to thrive and flourish. Remember to provide your plants with the optimal growing conditions they need for healthy development.
Sowing the Seeds
Now that you have chosen the right sage seeds and prepared the soil, it’s time to sow the seeds and kickstart your sage garden. Follow these steps to sow your sage seeds:
- Timing: Sage seeds are usually sown indoors 6-8 weeks before the last expected frost date in your area. This allows the plants to establish before transplanting them outside. Consult your local gardening resources or the seed packet for specific timing recommendations.
- Seed Trays or Pots: Fill seed trays or small pots with well-draining seed-starting mix. Moisten the mix before sowing the seeds to ensure proper moisture levels.
- Planting Depth: Place the sage seeds on top of the moistened soil, spacing them about 1-2 inches apart. Lightly press the seeds into the soil, ensuring good seed-to-soil contact. Cover the seeds with a thin layer of seed-starting mix, approximately ¼ inch deep.
- Watering: After planting, water the trays or pots gently, keeping the soil consistently moist but not waterlogged. Avoid overwatering, as it can lead to rotting or fungal issues.
- Temperature and Location: Place the trays or pots in a warm location with temperatures around 70-75°F (21-24°C). Consider using a seedling heat mat to maintain optimal temperature conditions for germination.
- Germination: Sage seeds typically germinate within 7-14 days. Keep the soil moist and provide adequate light for the emerging seedlings.
- Thinning: Once the sage seedlings have developed their first set of true leaves, thin them out by removing the weaker or crowded seedlings. Leave the healthiest and strongest seedlings, spacing them about 6-8 inches apart. This will ensure sufficient air circulation and room for growth.
Remember to label your pots or trays with the date of sowing and variety to track their progress. With proper care and patience, your sage seeds will soon sprout into healthy seedlings, ready for the next phase of growth.
To grow sage from seed, start indoors 6-8 weeks before the last frost. Plant seeds in well-draining soil, keep moist, and provide plenty of sunlight. Transplant outdoors after the last frost.
Watering and Care
Proper watering and care are essential for the healthy growth and development of your sage plants. Follow these guidelines to ensure your sage plants thrive:
- Watering: Sage plants prefer moderate watering. Water the soil when the top inch feels dry, providing enough moisture to keep the soil evenly moist but not waterlogged. Avoid overwatering, as sage is susceptible to root rot. In hot weather or drought conditions, water more frequently to prevent wilting.
- Mulching: Mulch around the sage plants with a layer of organic mulch, such as straw or wood chips. Mulching helps retain soil moisture, inhibit weed growth, and regulate soil temperature.
- Fertilization: Sage is a low-maintenance herb that typically doesn’t require heavy fertilization. However, you can apply a balanced, slow-release organic fertilizer in early spring to provide essential nutrients. Avoid over-fertilization, as it can lead to excessive foliage growth with reduced flavor intensity.
- Pruning: Regular pruning helps maintain the shape and vigor of your sage plants. Trim off any dead or damaged leaves and flowers to promote new growth. Pruning also prevents the plant from becoming leggy and encourages bushier growth.
- Pest and Disease Control: Sage plants are relatively resistant to pests and diseases. However, keep an eye out for common pests like aphids, spider mites, or powdery mildew. If necessary, treat infestations with organic pest control methods or insecticidal soap.
- Harvesting: You can start harvesting sage leaves once the plants are well-established and have reached a height of 6-8 inches. Clip off individual leaves or prune whole stems as needed. Sage leaves are most flavorful when harvested in the morning, after the dew has dried but before the heat of the day.
By providing adequate water, light, and care, you will ensure healthy growth and abundant harvests of flavorful sage leaves. Enjoy the process of nurturing your sage plants and reap the rewards of their culinary and medicinal benefits.
Read more: How To Start Sage Seeds
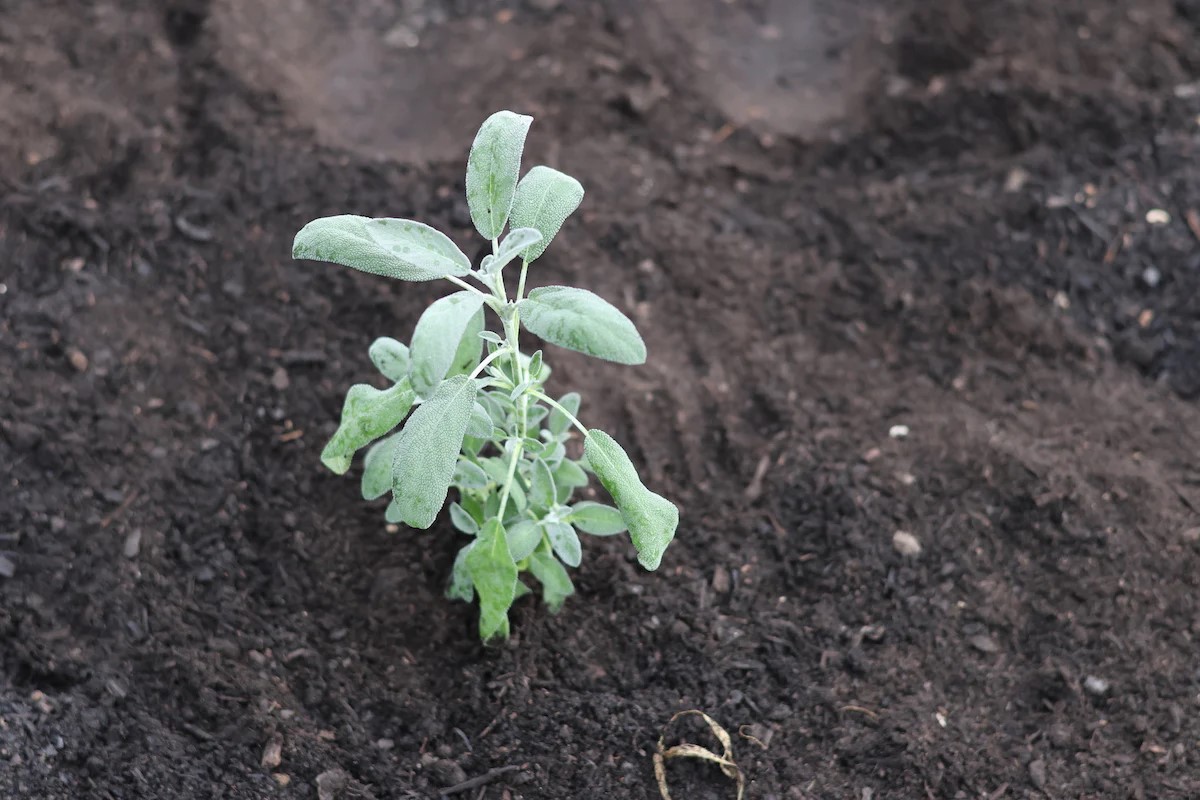
Transplanting
Transplanting sage seedlings into their permanent outdoor location is an exciting step in the gardening journey. Here’s how you can successfully transplant your sage plants:
- Timing: Wait until the danger of frost has passed and the seedlings are 6-8 weeks old before transplanting them outside. This is usually when the weather has warmed up and the soil has reached a temperature of around 60°F (15°C).
- Site Selection: Choose a sunny location with well-draining soil for transplanting your sage plants. Ensure that the soil pH is between 6.0 and 7.0, as sage thrives in slightly acidic to neutral soil.
- Preparing the Hole: Dig holes in the transplant area that are slightly larger than the root ball of each seedling. Space the holes approximately 12-18 inches apart to allow for proper air circulation and growth.
- Preparing the Seedlings: Water the seedlings thoroughly a few hours before transplanting to ensure that the roots are well-hydrated. Gently loosen the soil around the seedlings, being careful not to damage the roots.
- Transplanting: Carefully lift each seedling from its container, holding it by the leaves or root ball. Place the seedling into the prepared hole, ensuring that it sits at the same depth as it was in the container. Backfill the hole with soil, gently firming it around the seedling to remove any air pockets.
- Watering and Mulching: After transplanting, water the seedlings thoroughly to settle the soil around the roots. Apply a layer of organic mulch, such as straw or wood chips, around the plants to conserve moisture and suppress weed growth.
- Care and Protection: Provide regular watering during the initial few weeks after transplanting to help the seedlings establish themselves. Protect the young plants from extreme weather conditions, such as strong winds or heavy rains, by using stakes or temporary covers if necessary.
- Spacing and Thinning: If you have multiple sage plants, ensure they are spaced adequately to allow for proper growth. If the seedlings are overcrowded, thin them out by removing the weaker ones, leaving the healthiest specimens to flourish.
Transplanting sage seedlings with care and attention sets the stage for their successful establishment in your garden. With the right conditions and maintenance, your sage plants will continue to thrive and provide you with an abundant harvest for years to come.
Harvesting Sage
Harvesting sage is a gratifying experience that allows you to enjoy the flavorful leaves and aromatic scent of this wonderful herb. Here’s how you can harvest sage:
- Growth Stage: Wait until your sage plants are well-established and have reached a height of 6-8 inches before harvesting. This typically occurs around 2-3 months after transplanting or when the plants are mature enough.
- Harvesting Technique: To harvest sage leaves, use clean, sharp pruning shears or scissors. Select the stems with abundant foliage and cut them about 1-2 inches above the base of the plant or above the branching point. Avoid cutting into the woody part of the stem, as it may hinder regrowth.
- Timing: The most flavorful time to harvest sage leaves is in the morning, after the dew has dried but before the heat of the day. The essential oils that give sage its distinct aroma and taste are most concentrated during this time.
- Leaf Preservation: To preserve the flavor and aroma of sage leaves, handle them with care to avoid bruising or crushing. If you want to store the leaves, gently rinse them to remove any dirt or debris, pat them dry with a paper towel, and consider air drying or using other preservation methods.
- Continuous Harvesting: Sage is a perennial herb and has the ability to regrow after harvesting. Harvesting a few leaves at a time rather than the entire plant allows for continuous growth and ensures a steady supply of fresh sage throughout the growing season.
- Flower Harvesting: While the main focus of harvesting sage is on the leaves, some gardeners may choose to harvest the flowers as well. Sage flowers have a milder flavor and can be used in cooking or to make herbal teas.
- Overwintering Sage: In colder climates, sage plants may go dormant or die back during the winter. Before the first frost, consider harvesting any remaining leaves from the plant. Provide protection or bring potted sage plants indoors to overwinter and continue enjoying fresh sage leaves throughout the year.
By practicing proper harvesting techniques and allowing your sage plants to regenerate, you can enjoy the fresh and aromatic flavors of sage in your culinary creations, teas, and herbal remedies. Harvesting your homegrown sage is a true delight for both the senses and the taste buds.
Conclusion
Congratulations on completing this comprehensive guide on how to grow sage from seed! From choosing the right seeds to harvesting the flavorful leaves, you’ve learned the essential steps to cultivate a thriving sage garden. By following these instructions and providing the necessary care, you’ll be able to enjoy the beauty, fragrance, and culinary versatility of sage right in your own backyard.
Sage, with its aromatic leaves and attractive flowers, is not only a valuable herb in the kitchen but also a source of medicinal benefits. From boosting digestion and promoting oral health to providing antioxidants and anti-inflammatory properties, sage is a versatile herb that has been used for centuries in traditional medicine.
Remember to pay attention to the soil quality, sunlight requirements, watering needs, and proper care of your sage plants. Regular pruning and harvesting will maintain the health and productivity of your sage garden. Whether you use sage in your favorite recipes, brew soothing herbal teas, or create homemade herbal remedies, the joy of growing and harvesting your own sage is truly rewarding.
As you continue your gardening journey, don’t forget to explore other herbs and plants that complement sage in taste, aroma, and visual appeal. The possibilities are endless, as your garden can become a haven for a variety of herbs, flowers, and vegetables.
Lastly, remember that gardening is an ongoing learning experience. Embrace the knowledge gained from each season and adapt your gardening practices accordingly. Take the time to appreciate the beauty and serenity that your sage garden brings, and share your experiences and harvested sage with family, friends, and neighbors.
So, go ahead and sow those sage seeds, tend to your plants with care, and enjoy the bountiful rewards of your labor. Happy gardening and happy sage-growing!
Frequently Asked Questions about How To Grow Sage From Seed
Was this page helpful?
At Storables.com, we guarantee accurate and reliable information. Our content, validated by Expert Board Contributors, is crafted following stringent Editorial Policies. We're committed to providing you with well-researched, expert-backed insights for all your informational needs.


0 thoughts on “How To Grow Sage From Seed”