Home>Garden Essentials>How To Prepare The Ground For Fake Grass
Garden Essentials
How To Prepare The Ground For Fake Grass
Modified: October 20, 2024
Want a beautiful fake grass garden? Learn how to prepare the ground for fake grass with our step-by-step guide. Create a lush and low-maintenance garden today!
(Many of the links in this article redirect to a specific reviewed product. Your purchase of these products through affiliate links helps to generate commission for Storables.com, at no extra cost. Learn more)
Introduction
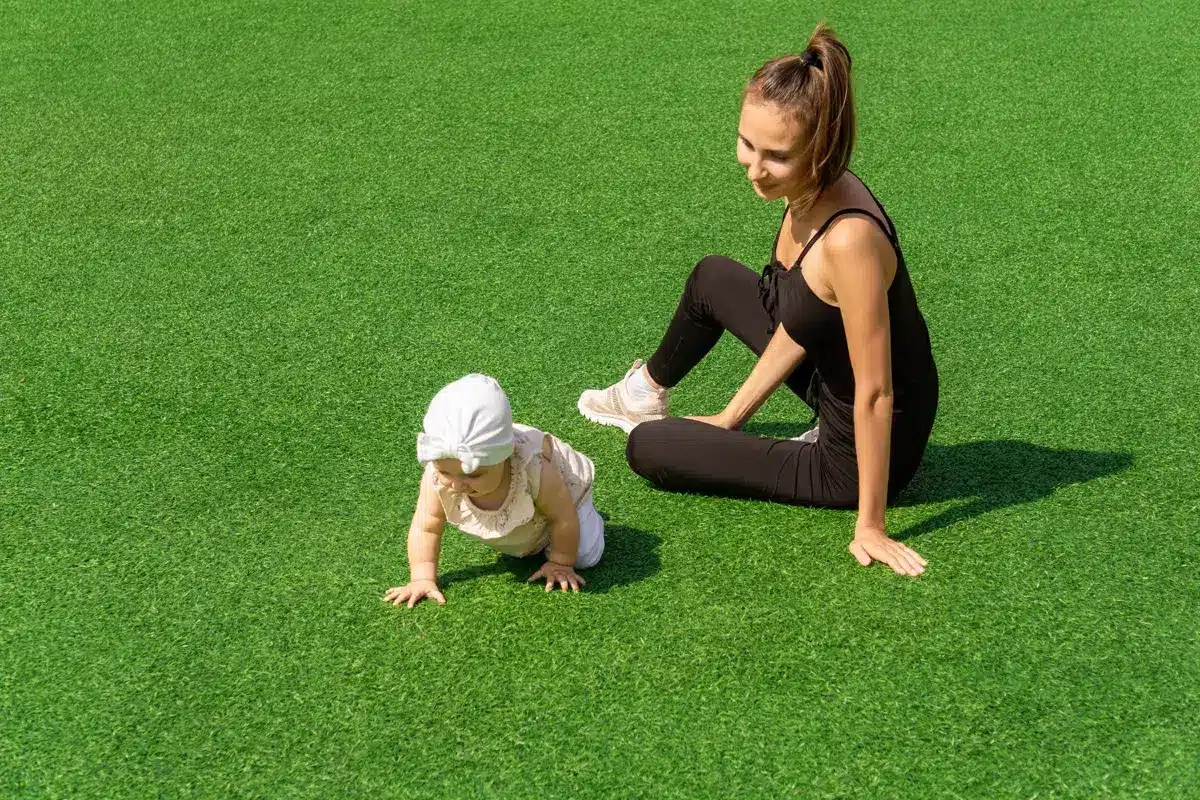
Are you tired of maintaining a natural lawn? Looking for a low-maintenance alternative that will still provide a lush and green outdoor space? Artificial grass, also known as fake grass or synthetic turf, could be the perfect solution for you. Not only does it require minimal upkeep, but it also looks and feels incredibly realistic.
However, before you can enjoy the benefits of artificial grass, proper preparation of the ground is essential. By following a few simple steps, you can ensure a durable and long-lasting installation. In this article, we will guide you through the process of preparing the ground for fake grass, from choosing the right location to adding the finishing touches.
Key Takeaways:
- Prepare the ground for fake grass by choosing the right location, clearing the area, leveling the ground, and adding a base material. This ensures a stable foundation for a beautiful and low-maintenance artificial lawn.
- After laying the artificial grass, secure the edges, brush and fluff the turf, and consider adding infill for enhanced performance. Regular maintenance, such as removing debris and inspecting for damage, will keep your fake grass looking fresh and vibrant.
Read more: How To Prepare Ground For Garden
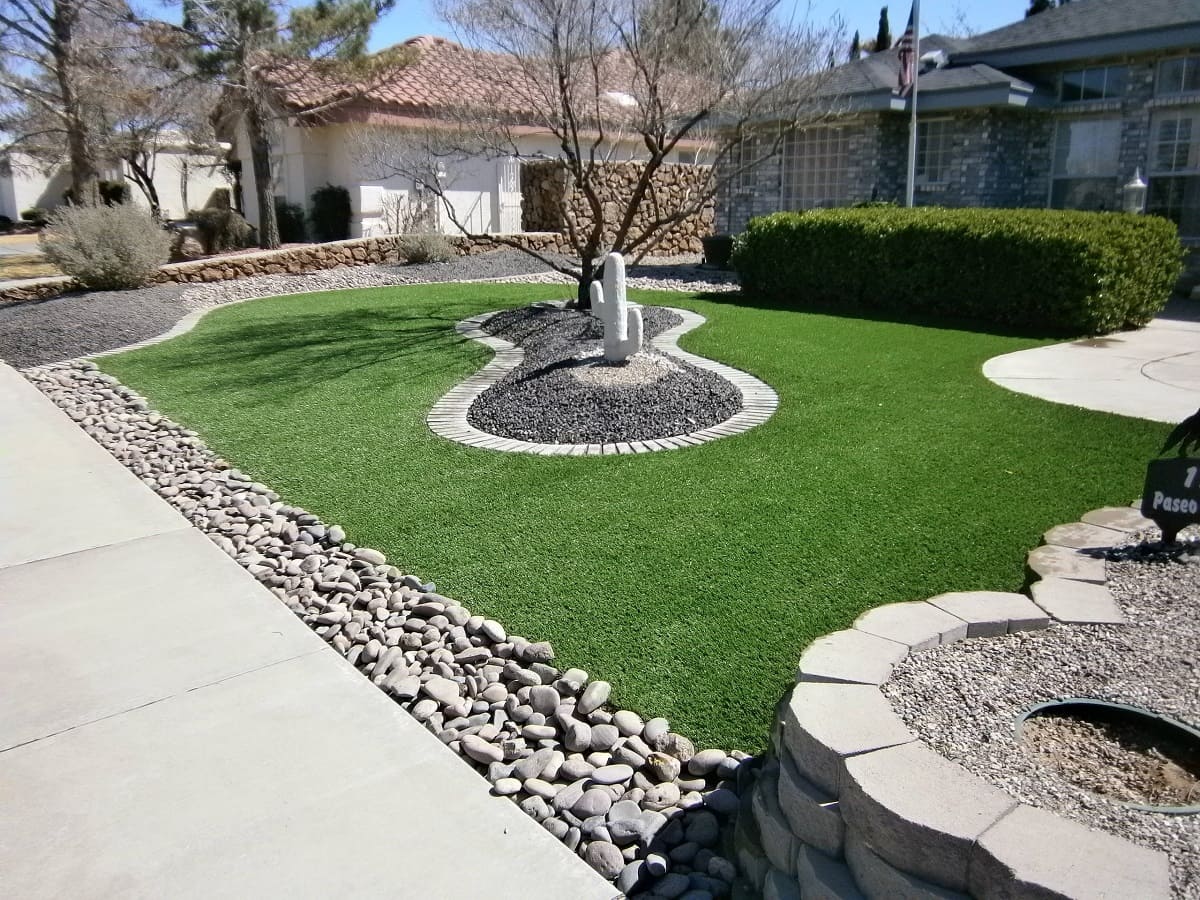
Choosing the Right Location
The first step in preparing the ground for fake grass is choosing the right location. Evaluate your outdoor space and consider factors such as sunlight exposure, drainage, and usage patterns.
Artificial grass can withstand different light conditions, but it is best to choose an area that receives a moderate amount of sunlight. This will prevent fading and ensure a vibrant and natural-looking lawn. Additionally, consider the drainage in your chosen location. Artificial grass requires proper drainage, so avoid areas that are prone to water accumulation.
Furthermore, think about how you plan to use the space. If you have children or pets, opt for a durable, high-traffic area. If you are installing fake grass for aesthetic purposes, choose a focal point such as a garden or patio.
Remember to measure the dimensions of the space accurately to determine how much artificial grass you will need. This will allow you to purchase the correct amount and prevent wastage.
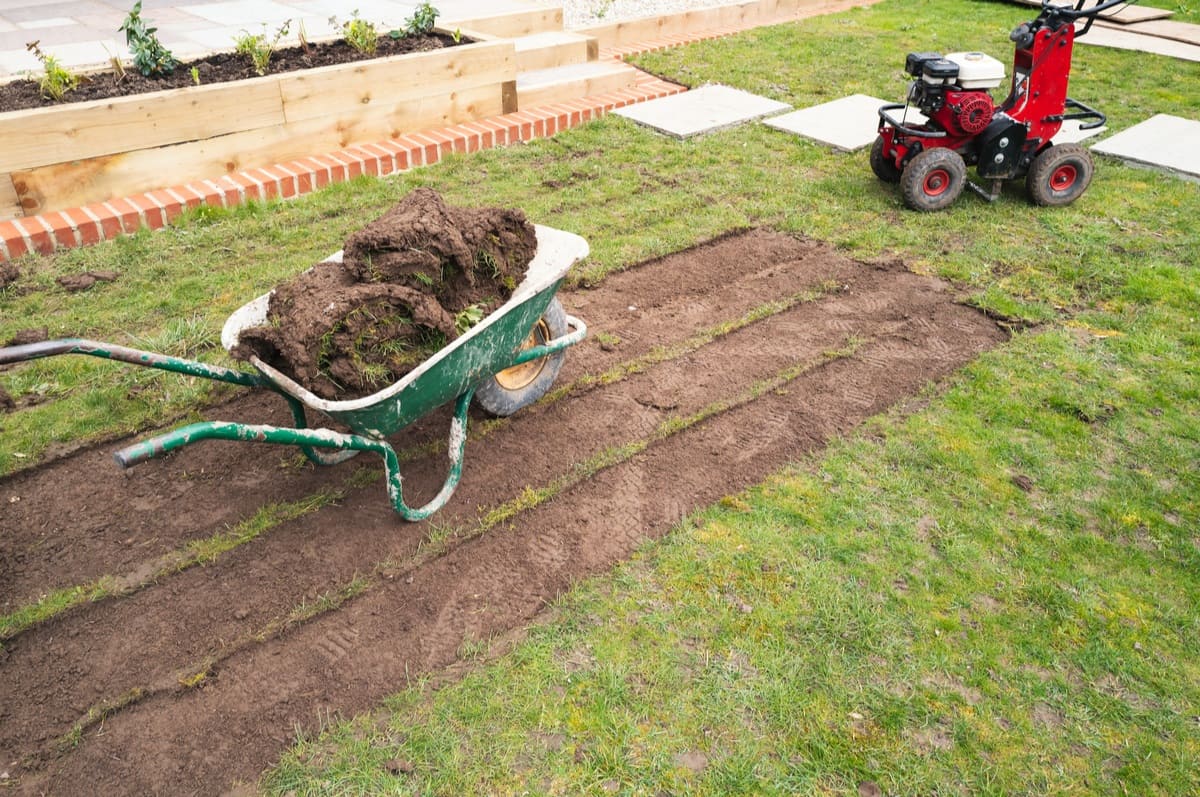
Clearing the Area
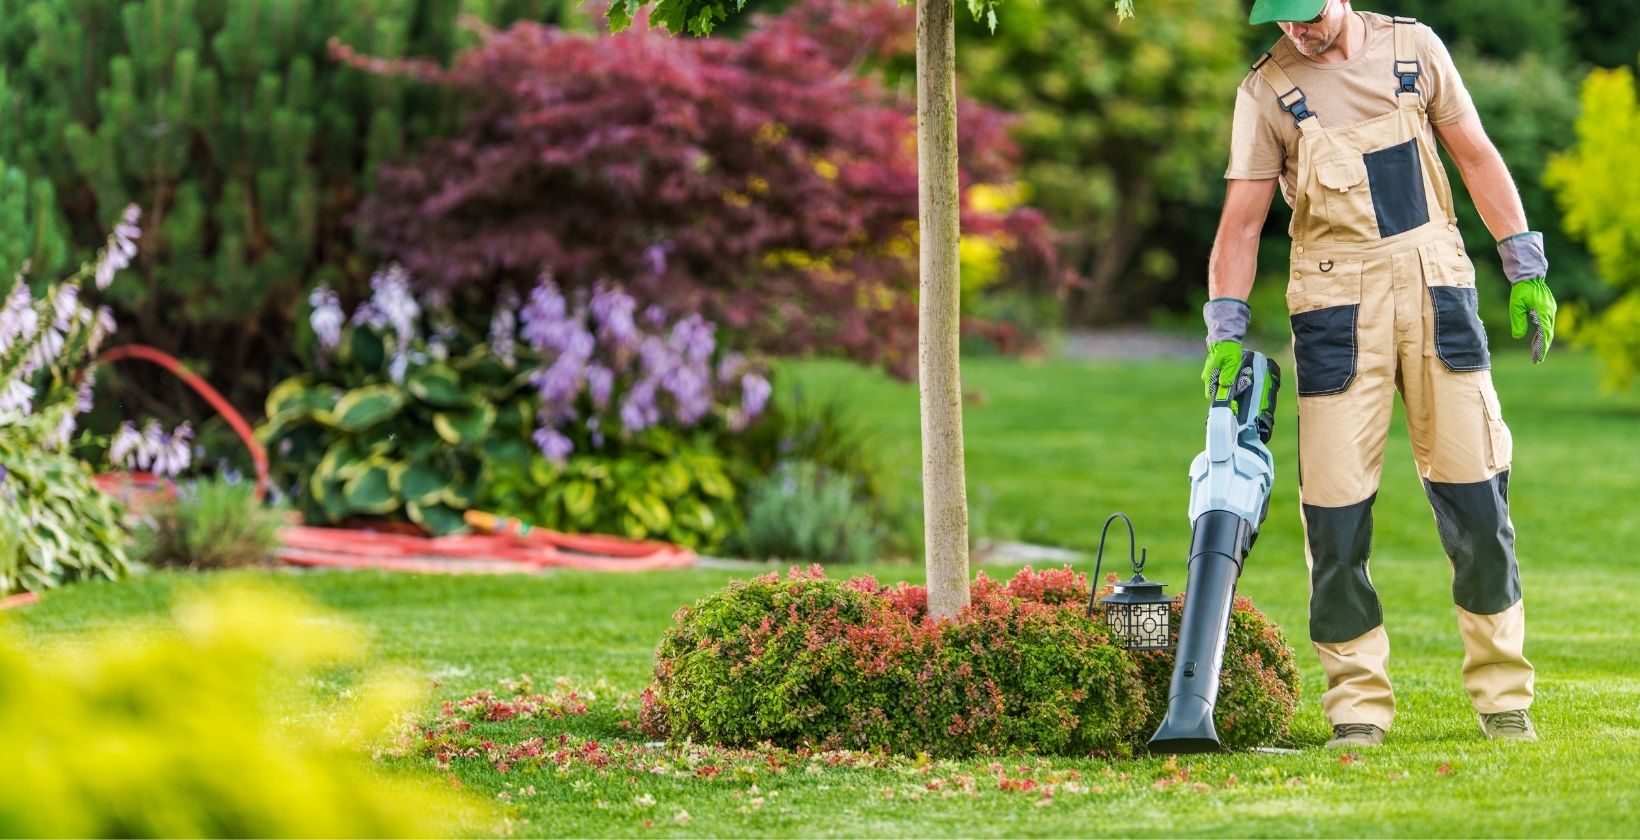
Once you have chosen the location for your fake grass, the next step is to clear the area. Remove any existing vegetation, rocks, or debris to create a clean and even surface for installation.
Start by removing any large objects such as furniture, plant pots, or toys from the area. Use a sturdy rake or blower to clear away leaves, branches, and other loose debris. If there are any weeds or grass, use a weed eater or garden hoe to remove them. It is important to ensure that the ground is as level as possible to achieve a smooth and professional-looking installation.
If you encounter any stubborn plants or roots, you may need to use a shovel or hand tools to dig them out. Make sure to remove the entire root system to prevent regrowth. Alternatively, you can use herbicides or weed killer products to eliminate weeds and prevent future growth.
Once the area is clear, take the time to inspect the ground for any uneven spots or low areas. Use a rake or shovel to level the ground, making sure it is flat and even.
Leveling the Ground
After clearing the area, the next step in preparing the ground for fake grass is to ensure that it is properly leveled. A level surface will provide a stable foundation for your artificial turf and prevent any unevenness or tripping hazards.
To level the ground, start by assessing the current state of the surface. If there are any noticeable high or low spots, use a shovel or rake to either remove excess soil or add soil to fill in low areas. The goal is to create a smooth, even surface.
One helpful tool for leveling the ground is a lawn roller. Use a roller to compact the soil and ensure that it is firm and stable. This will help prevent future settling or sinking of the fake grass.
If you have a larger area or if the ground is severely uneven, you may consider using a skid steer or a small tractor with a grading attachment to help with the leveling process. These machines can efficiently redistribute soil and create a more even surface.
Once the ground is leveled, use a long board or a level to check for any remaining unevenness. Adjust accordingly until you are satisfied with the levelness of the ground.
Remember, a properly leveled ground is crucial for the overall appearance and longevity of your artificial grass. Spending time and effort on this step will ensure a professional and seamless installation.
Removing Existing Vegetation
After leveling the ground, the next step in preparing the ground for fake grass is to remove any existing vegetation. This includes weeds, grass, and other plants that may interfere with the installation and growth of the artificial turf.
Start by thoroughly inspecting the area for any remaining plants. Use a shovel, garden hoe, or weed killer to remove or eradicate them. It is important to remove the entire root system to prevent regrowth.
If you choose to manually remove the vegetation, make sure to dig deep enough to get the entire root system. This will help prevent any future growth that may interfere with the integrity of the fake grass. You can also consider using an herbicide or weed killer product to effectively eliminate any stubborn weeds.
Once the vegetation is removed or eradicated, take the time to rake the area to remove any residual plant material or loose debris. This will create a clean and debris-free surface for the next steps of the installation process.
Removing existing vegetation is a crucial step in ensuring the longevity and appearance of your artificial grass. By eliminating potential obstructions and competition, you create an optimal environment for your fake grass to thrive.
Read more: How To Prepare The Ground For A Storage Shed
Installing Weed Barrier
After removing existing vegetation, the next step in preparing the ground for fake grass is to install a weed barrier. A weed barrier, also known as a geotextile fabric, helps prevent weeds from growing through the artificial turf and causing damage.
To install the weed barrier, follow these steps:
- Cut the weed barrier to the size and shape of your intended area. Make sure it overlaps the edges of the installation area by a few inches.
- Lay the weed barrier over the leveled ground. Smooth it out to remove any wrinkles or bumps.
- Secure the weed barrier in place by using landscape staples. Place the staples every few feet along the edges and in the center of the fabric to ensure it stays in place.
The weed barrier acts as a barrier between the soil and the artificial grass, preventing weeds from penetrating through the turf. It also helps with drainage by allowing water to pass through while keeping the soil separate from the fake grass.
Installing a weed barrier is a crucial step in ensuring that your artificial lawn remains weed-free and maintains its pristine appearance throughout its lifespan. It will also save you time and effort on ongoing weed maintenance.
Adding a Base Material
Once the weed barrier is installed, the next step in preparing the ground for fake grass is to add a base material. This base layer will provide stability, proper drainage, and a solid foundation for the artificial turf.
The type of base material you choose will depend on the specific needs of your project. Here are two common options:
- Crushed Stone Base: This is a popular choice for artificial grass installations. Start by adding a layer of crushed stone, commonly known as class 2 road base, to a depth of 2-3 inches. Use a rake or shovel to evenly spread the crushed stone across the area. Make sure it is compacted and leveled. The crushed stone provides excellent drainage and helps to prevent the formation of puddles under the fake grass.
- Artificial Turf Base Panels: Another option is to use artificial turf base panels, which are prefabricated interlocking panels made from high-density polyethylene. These panels provide stability and drainage while reducing the amount of excavation and base material required. Simply place the panels on the leveled ground and interlock them together.
Regardless of the base material you choose, it is important to ensure that it is properly compacted. Use a plate compactor or a roller to compact the base material firmly. This will create a solid and stable surface for the artificial grass.
Adding a base material is a crucial step in preparing the ground for fake grass. It provides stability, proper drainage, and a level foundation that will contribute to the overall performance and longevity of your artificial lawn.
Compact the Base
After adding the base material, the next step in preparing the ground for fake grass is to properly compact the base. Compacting the base material ensures a firm and stable foundation for the artificial turf, preventing any unevenness or sinking in the future.
To compact the base, follow these steps:
- Start by moistening the base material lightly. This will improve compaction and help the particles bind together.
- Using a plate compactor or a roller, go over the entire area in a systematic pattern. Start from one side and work your way to the other, ensuring that you cover the entire installation area.
- Apply even pressure as you move the compactor or roller back and forth over the loose base material. This will help to consolidate and compress the particles, creating a solid surface.
- Go over the area multiple times, making sure to overlap the passes to ensure consistent compaction.
- Continue compacting until the base material feels firm and does not shift or move underfoot.
Proper compaction of the base is crucial for ensuring the stability and durability of your artificial grass installation. It helps to prevent shifting or settling of the base material, reducing the risk of any unevenness or sagging in the fake grass.
Take your time during this step, as thorough compaction will ensure long-lasting and visually appealing results for your artificial lawn.
Before laying fake grass, make sure the ground is level and free of debris. Use a weed barrier to prevent weeds from growing through the fake grass. Compact the soil to create a stable base for the artificial turf.
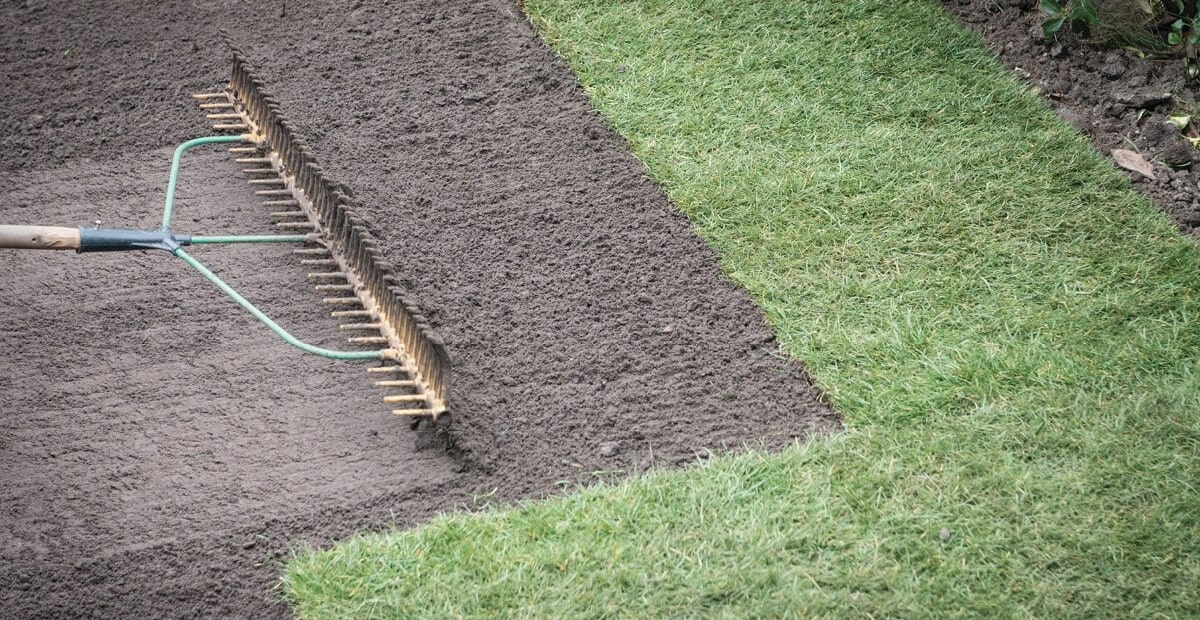
Applying Sand or Fine Aggregate
After compacting the base, the next step in preparing the ground for fake grass is to apply a layer of sand or fine aggregate. This layer helps to further stabilize the base, provide additional drainage, and create a smooth surface for the artificial grass.
Here’s how you can apply sand or fine aggregate:
- Spread the sand or fine aggregate evenly over the compacted base. Use a shovel or a rake to distribute it across the entire installation area.
- Ensure that the layer of sand or fine aggregate is uniform and consistent in thickness, typically around ¼ to ½ inch depending on the specific requirements of your project.
- Use a push broom or a power broom to sweep the sand or fine aggregate into the fibers of the artificial grass. This process, known as brushing-in, helps to support the turf and keep it in place.
- Continue brushing-in the sand or fine aggregate until it is evenly distributed and no longer visible on the surface. This will help to create a smooth and natural appearance.
The layer of sand or fine aggregate provides weight and stability to the artificial grass, helping to prevent it from shifting or wrinkling. It also improves drainage, allowing water to flow freely through the turf and into the underlying layers.
Applying sand or fine aggregate is an important step in the installation process that enhances the overall performance and aesthetics of your artificial lawn. Take care to apply it evenly and distribute it thoroughly to achieve the best results.
Read more: How To Prepare Grass For Seeding
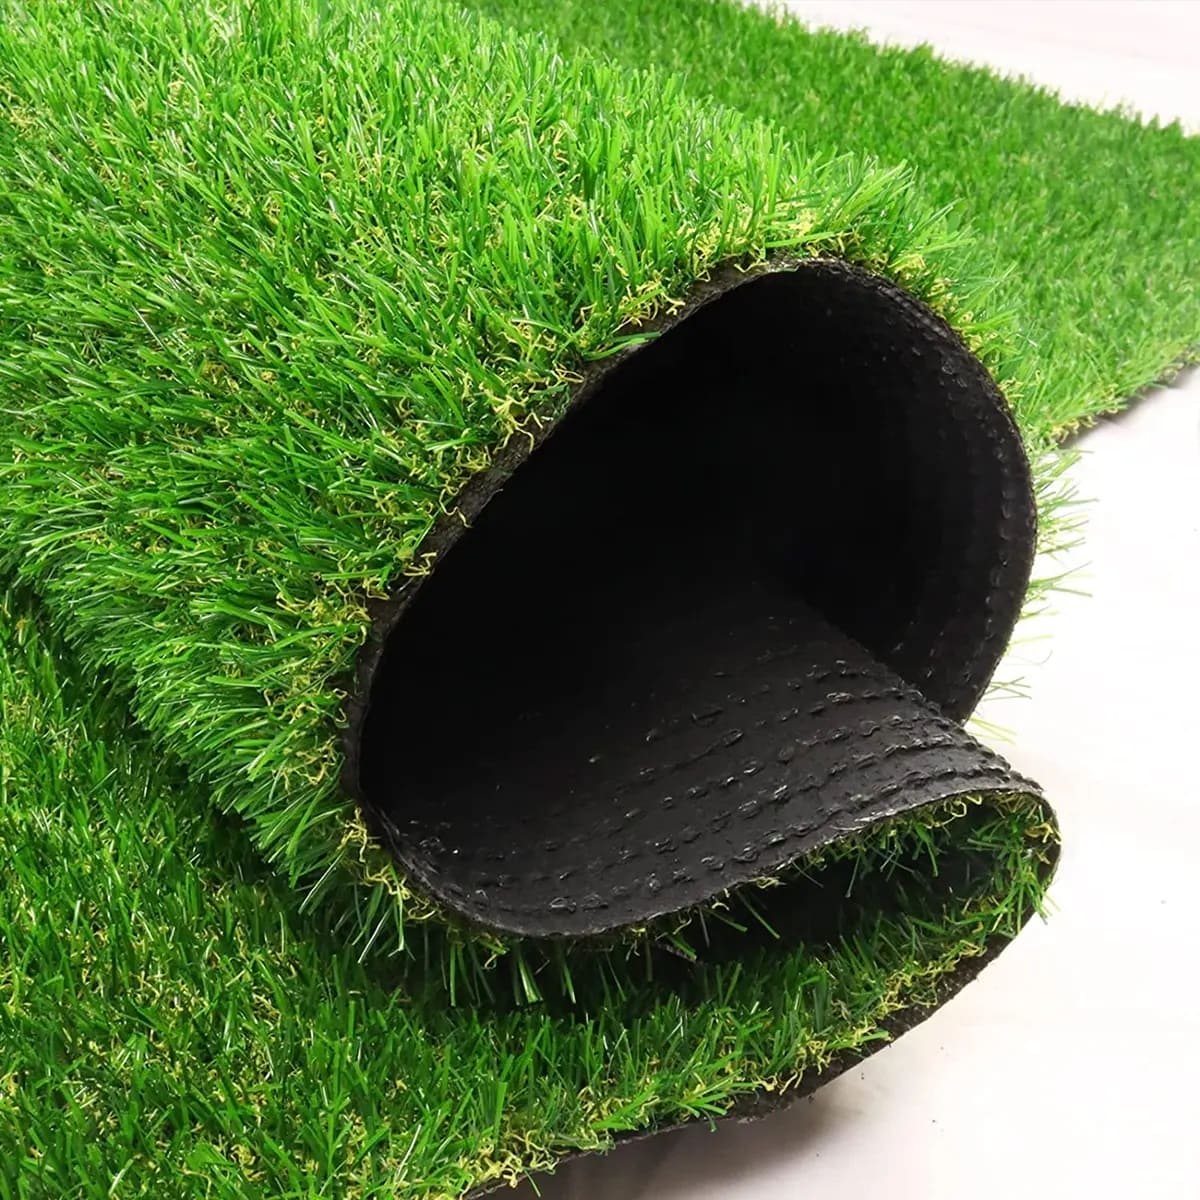
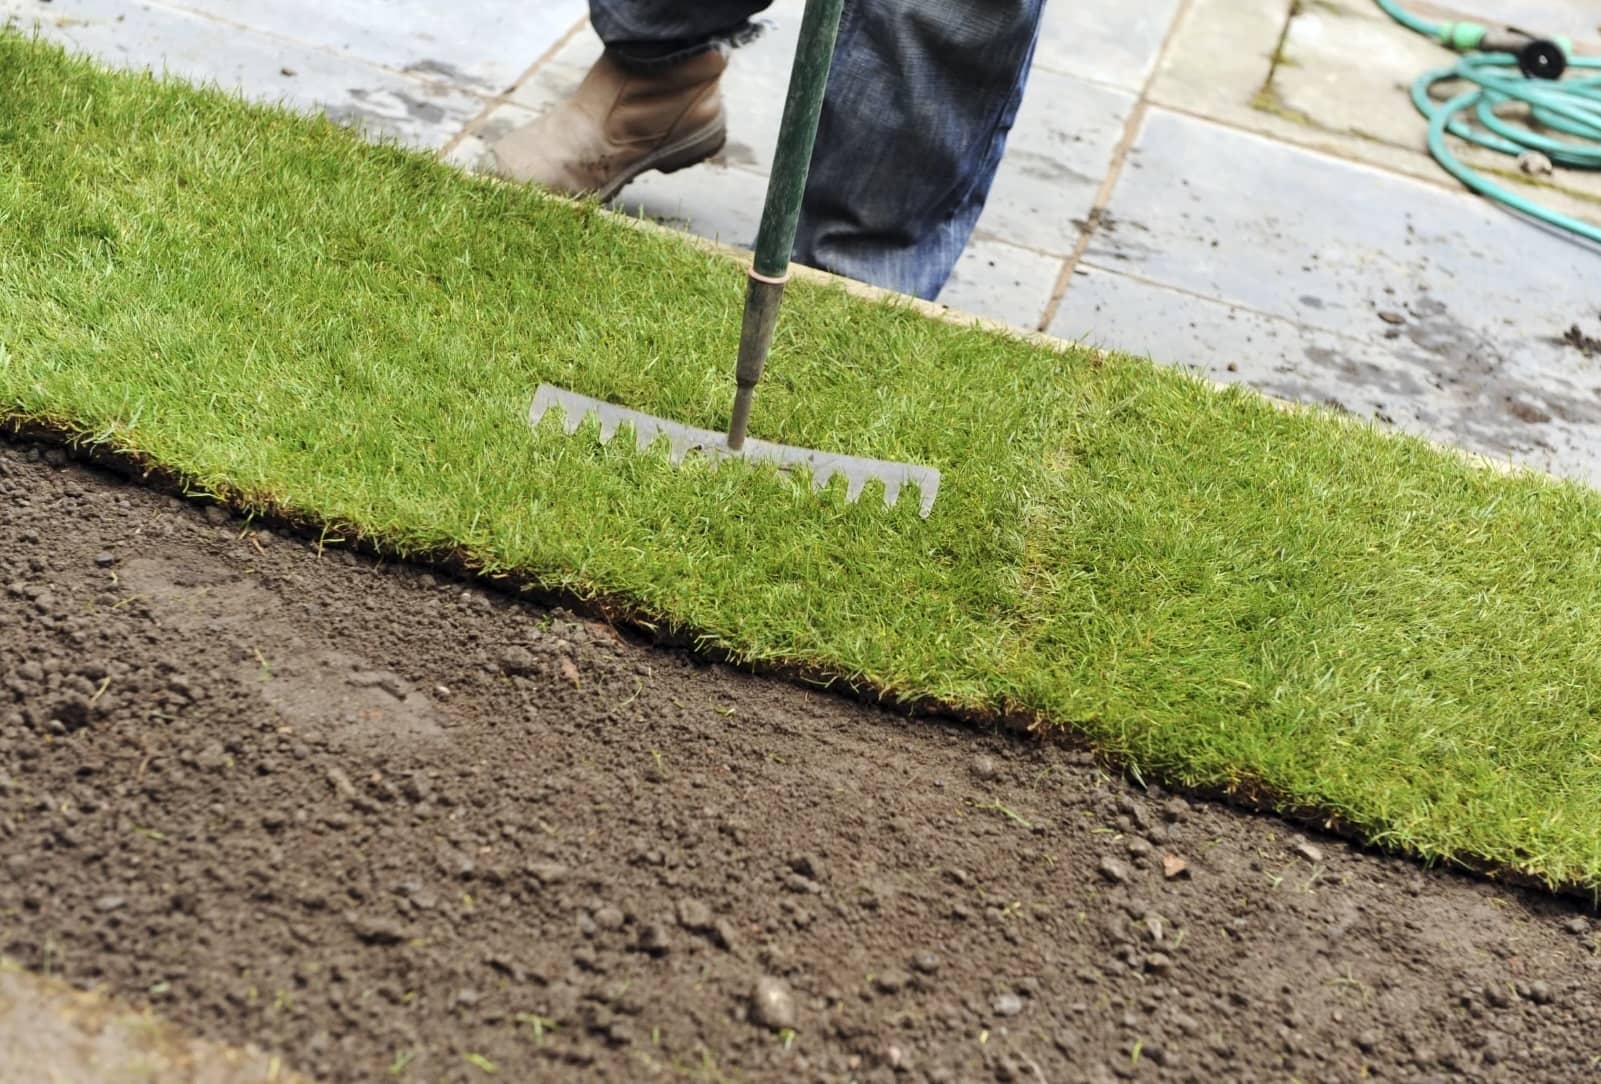
Laying the Artificial Grass
After preparing the ground and applying the necessary base materials, it’s time to lay the artificial grass. This is a crucial step in achieving a realistic and visually appealing lawn. Follow these steps to ensure a successful installation:
- Roll out the artificial grass over the prepared area. Make sure to position it so that the pile direction (the direction the blades of grass face) is consistent throughout the entire installation.
- Allow the grass to acclimate to the surrounding temperature and humidity for at least two hours. This will help the blades to stand upright and reduce any wrinkles or creases.
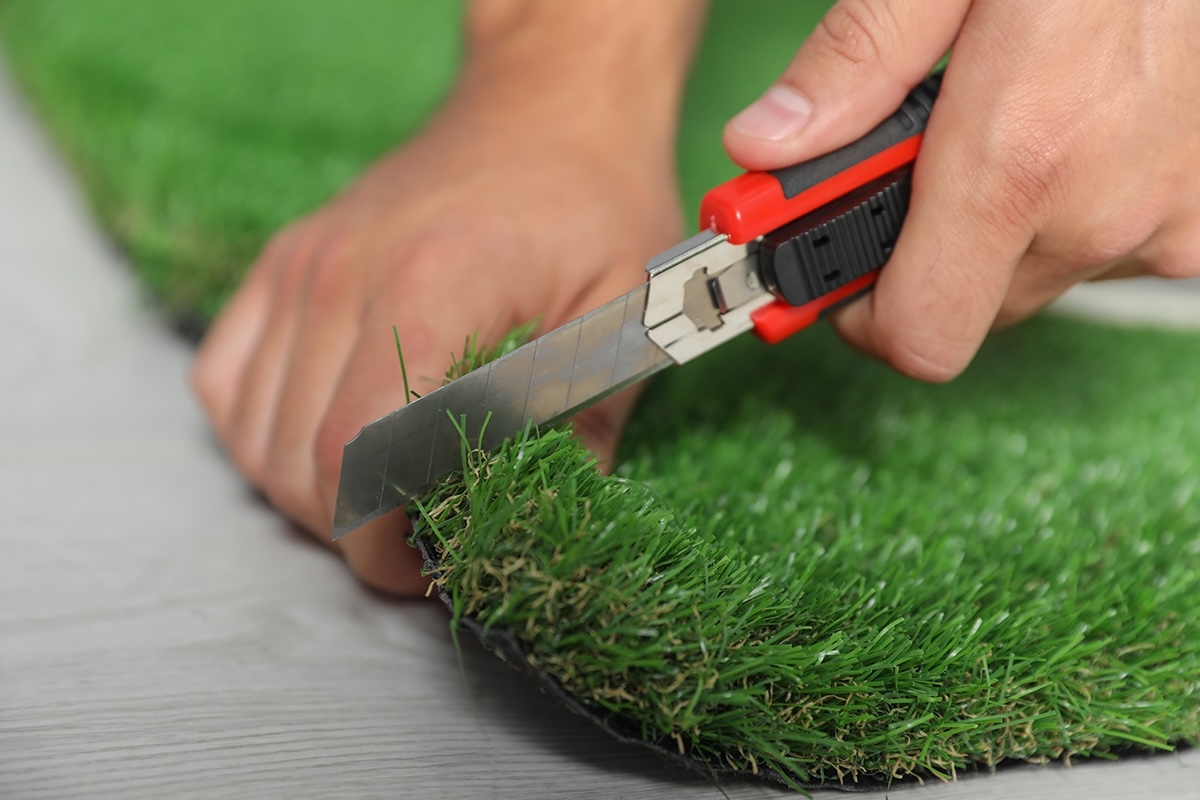
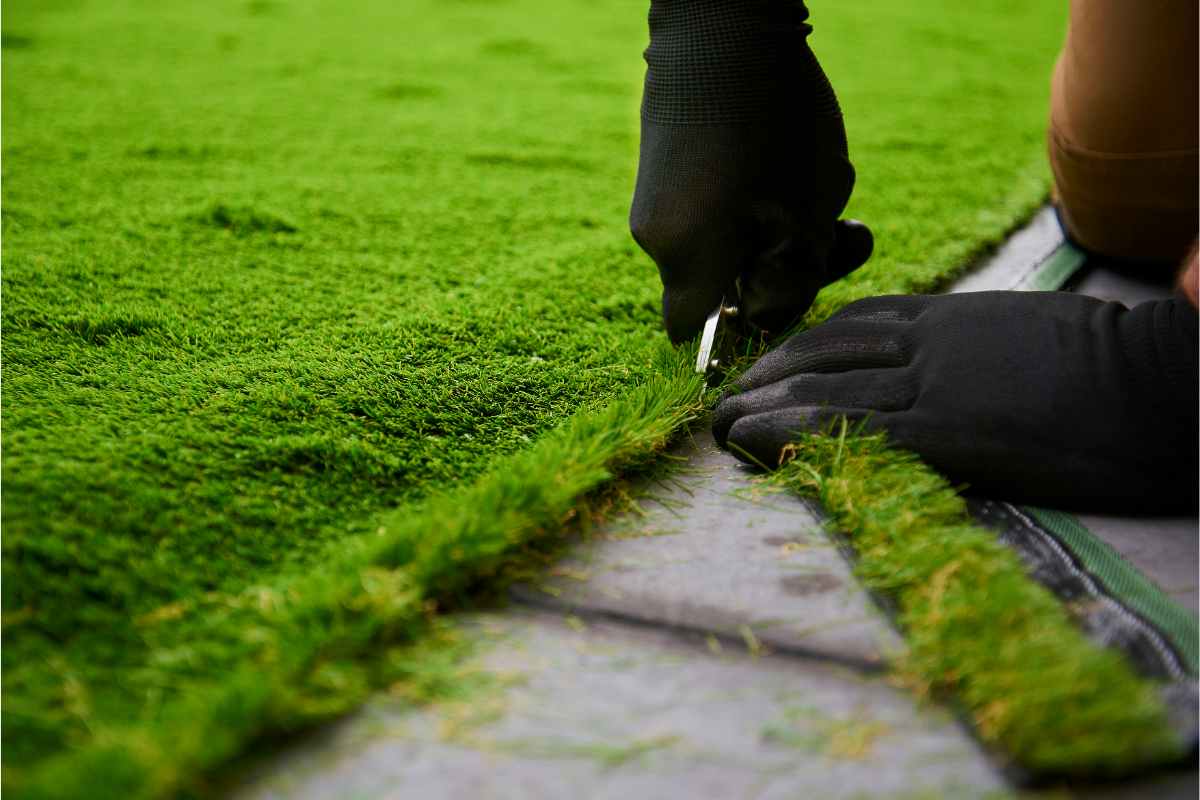
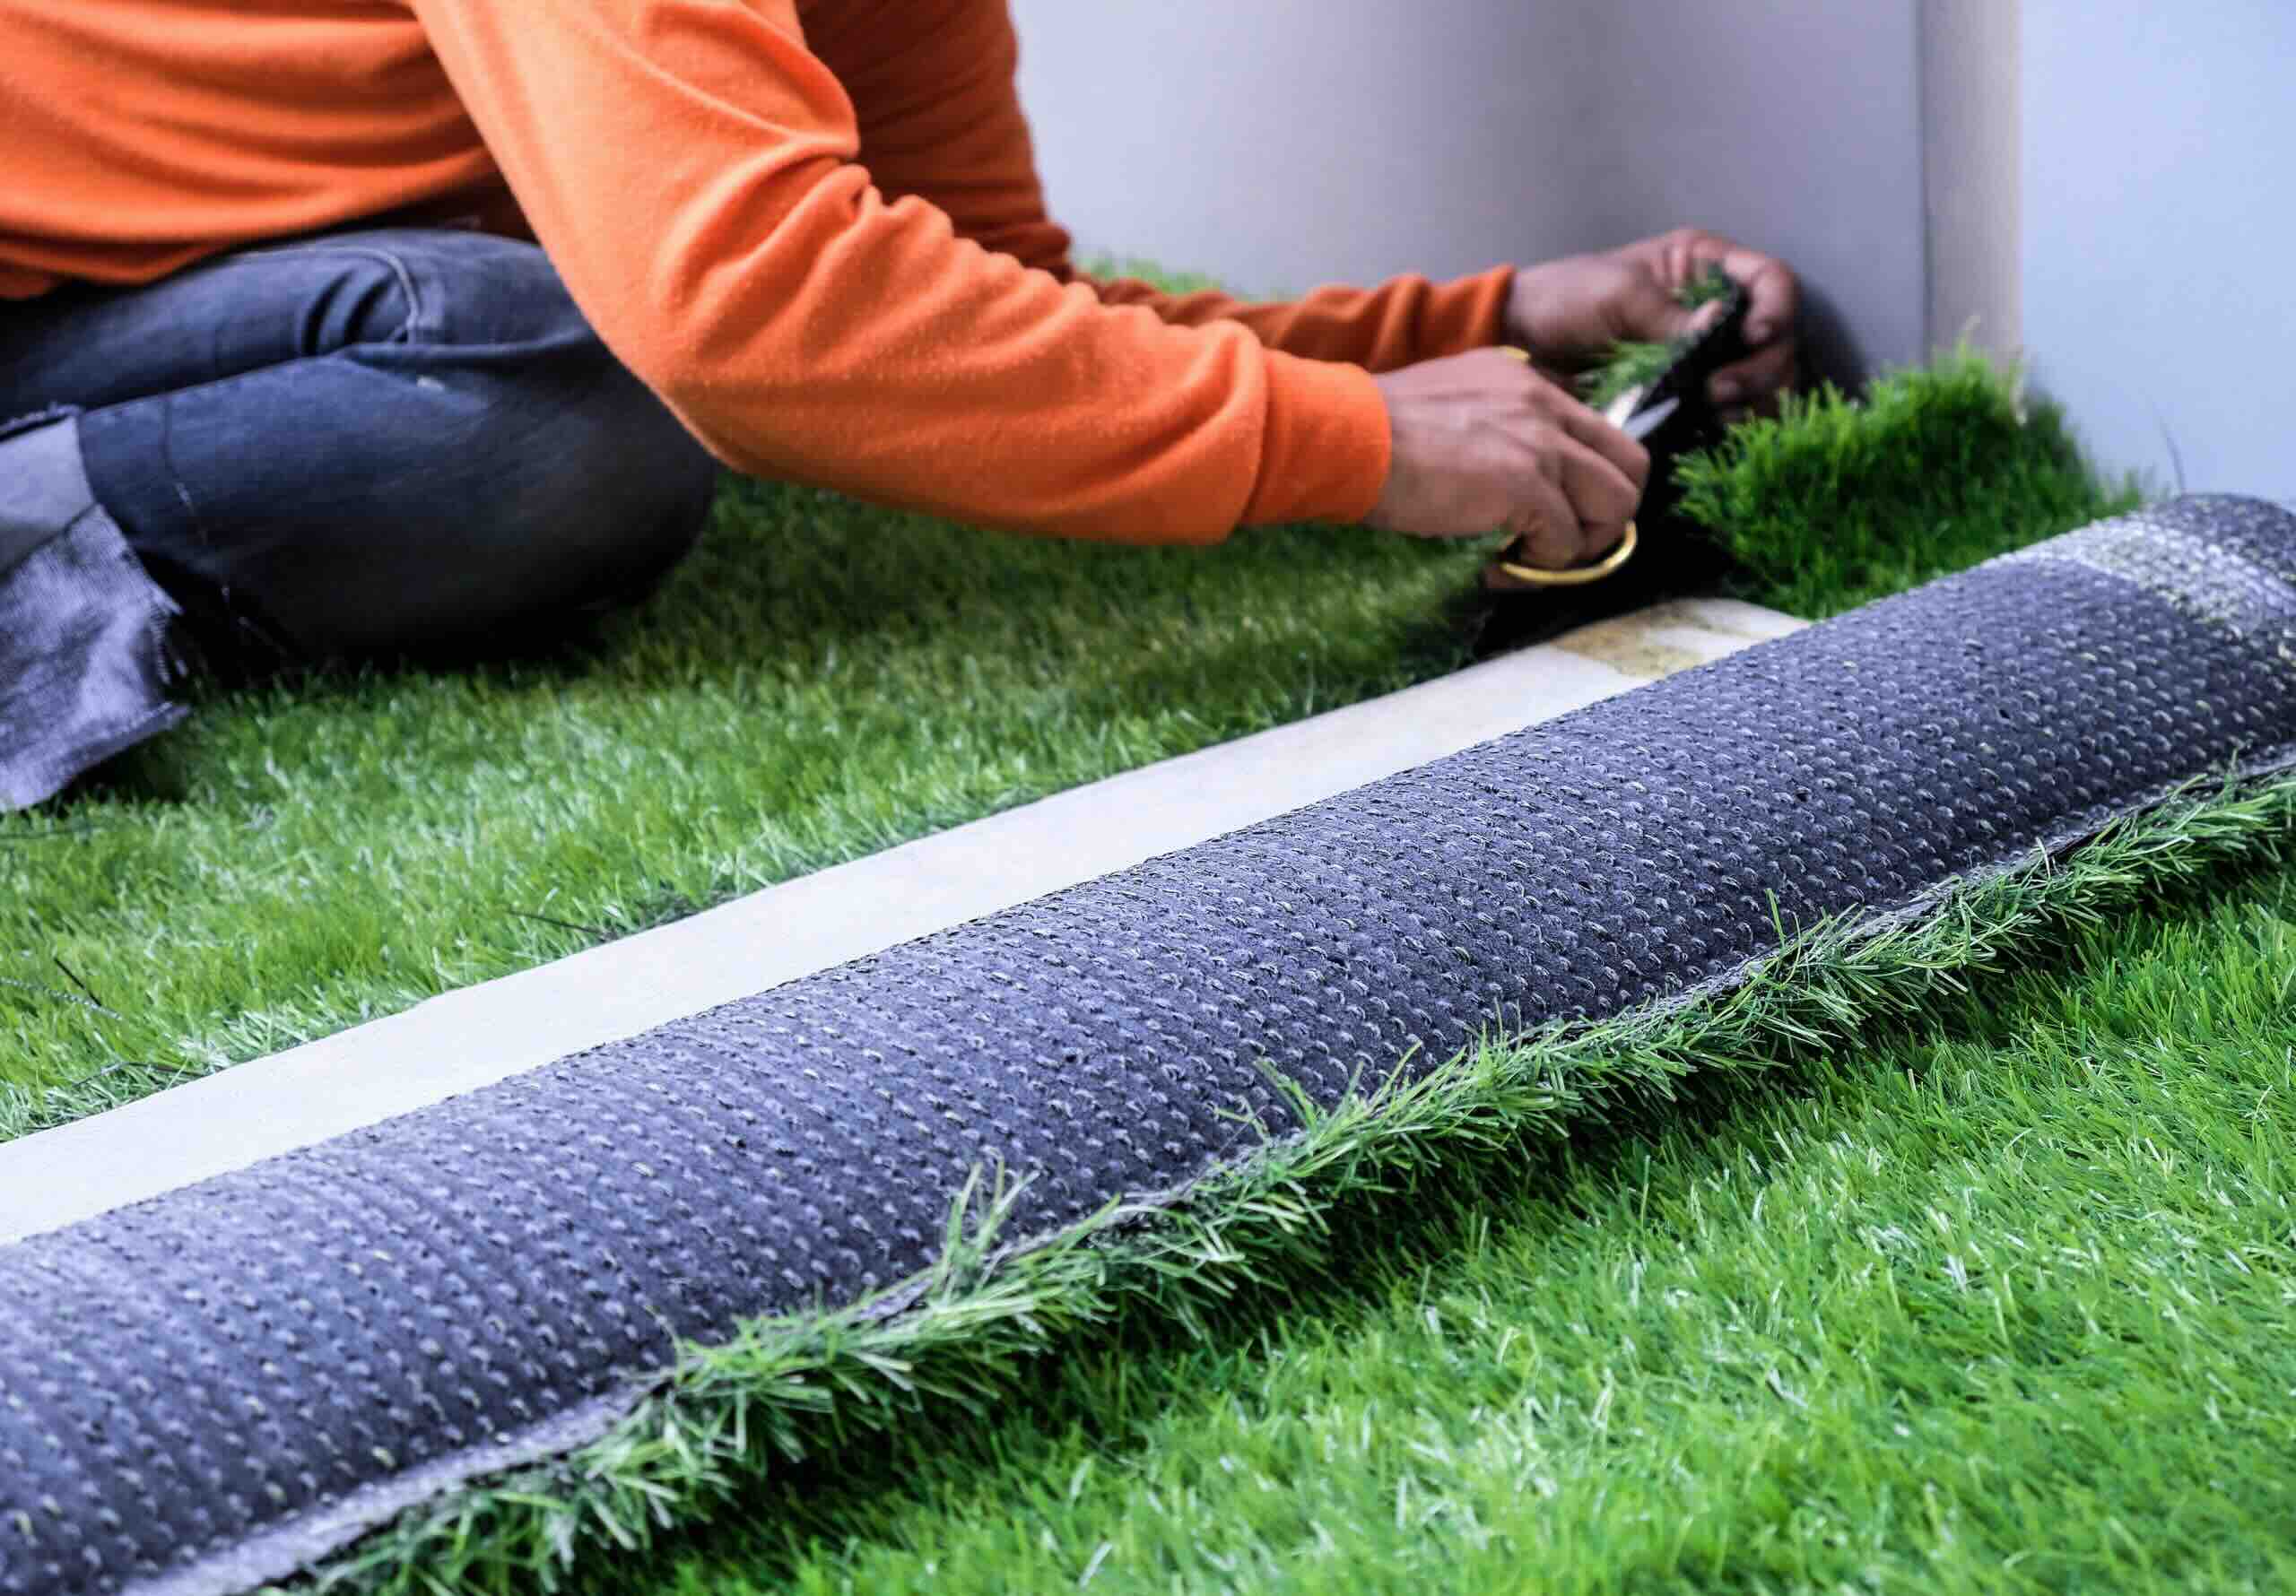
- Trim the edges of the artificial grass as needed to fit the installation area. Use a utility knife or a carpet cutter to make clean and precise cuts.
- If multiple strips of artificial grass are required, carefully align the seams and make sure they fit tightly together. Use adhesive or seaming tape to secure the edges and create a seamless appearance.
- Once the grass is in position, use a stiff bristle broom or a power broom to brush the fibers upwards. This will help the grass blades stand upright and create a natural look.
- Check the entire installation for any wrinkles, folds, or unevenness. Smooth out any imperfections and ensure that the grass is uniformly laid across the entire area.
It’s important to follow the manufacturer’s guidelines and instructions for the specific type of artificial grass you are installing. This will ensure a proper and successful installation.
Laying the artificial grass is an exciting step that brings your vision of a green and maintenance-free lawn to life. Take your time during this process to ensure a professional and visually appealing result.
Securing the Edges
Securing the edges of the artificial grass is an essential step in the installation process. Properly secured edges will ensure that the turf remains in place and maintains a clean and tidy appearance over time.
Follow these steps to secure the edges of your artificial grass:
- Start by placing landscaping nails or anchor pins along the perimeter of the installation area. Position them approximately 12-18 inches apart.
- Using a rubber mallet or hammer, gently tap the nails or pins into the ground, making sure they are secure and flush with the top of the grass.
- For added stability, you can also use landscape adhesive or seaming tape to secure the edges. Apply the adhesive or tape along the edges, ensuring that it is evenly distributed.
- Where multiple strips of artificial grass meet, make sure to secure the seams with adhesive or seaming tape. This will ensure that the edges remain aligned and seamless.
- After securing the edges, use a power broom or a stiff bristle broom to brush the fibers of the grass away from the edges. This helps to create a clean and finished look.
Properly securing the edges of your artificial grass will prevent shifting or movement, especially in high-traffic areas or during inclement weather. It will also help maintain the overall appearance and longevity of your artificial lawn.
Take the time to securely fasten the edges of the artificial grass, and you’ll enjoy a beautiful and well-maintained lawn for years to come.
Brushing and Fluffing the Turf
Once the artificial grass is laid and the edges are secured, the next step in preparing the ground for fake grass is to brush and fluff the turf. This step helps to achieve a natural, lush appearance by standing the blades of grass upright and evenly distributing the infill (if used).
Follow these steps to brush and fluff the turf:
- Start by using a broom with stiff bristles or a power broom to brush against the grain of the grass. This helps to lift the blades and remove any residual debris or infill that may have settled during installation.
- Continue brushing the turf in different directions to ensure that all blades are upright. Pay extra attention to areas with heavy foot traffic or furniture placement, as these areas may require additional brushing to restore the natural appearance.
- If your artificial grass requires infill, evenly distribute it across the surface using a drop spreader or a shovel. Once the infill is spread, use a broom or a power broom to brush it into the fibers. This will help to stabilize the turf and provide a softer feel underfoot.
- After brushing and infilling, inspect the turf for any visible seams or inconsistencies. Use your hands or a stiff brush to blend the seams and ensure they are not noticeable.
- Periodically brush and fluff the turf to maintain its appearance and prevent flattening. This is especially important in high-traffic areas or areas where furniture or objects may compress the grass.
Brushing and fluffing the artificial grass not only enhances its visual appeal but also helps to maintain its longevity. Regularly brushing the turf can prevent matting, improve drainage, and ensure a uniform and vibrant appearance.
Take the time to brush and fluff your fake grass regularly, and you’ll enjoy a beautiful and well-maintained lawn for years to come.
Adding Infill (optional)
Adding infill to your artificial grass is an optional step in the installation process. Infill provides several benefits, such as added cushioning, improved stability, and enhanced drainage. However, not all types of artificial grass require infill, so make sure to check the manufacturer’s guidelines before proceeding.
If you decide to add infill to your artificial grass, follow these steps:
- Choose the appropriate type of infill for your specific artificial grass. There are different options available, including silica sand, rubber granules, or a combination of both. Consider factors such as foot traffic, desired feel, and any specific requirements from the manufacturer.
- Spread the infill evenly across the surface of the artificial grass. Use a drop spreader or a shovel to distribute it in a controlled manner. Start with a moderate amount and gradually add more as needed.
- Once the infill is spread, use a broom or a power broom to work it into the fibers of the artificial grass. Brush against the grain to ensure that the infill penetrates deep into the turf.
- Continue brushing until the infill is evenly distributed and fully incorporated into the artificial grass. This helps to stabilize the turf, provide support, and create a softer feel.
Adding infill to your artificial grass can help to extend its lifespan, improve resiliency, and enhance its overall performance. It is especially beneficial for high-traffic areas or if you want a more natural and cushioned feel underfoot.
Remember to periodically check the infill level and replenish it as needed to maintain the desired performance and appearance of your artificial lawn.
Read more: How To Prepare Lemongrass Tea
Final Touches and Maintenance Tips
Once the artificial grass is installed and any optional infill is added (if applicable), there are a few final touches and maintenance tips to keep in mind to ensure the longevity and beauty of your fake grass. Follow these steps:
- Trim any excess or protruding fibers using a sharp utility knife. This will give the grass a clean and neat appearance.
- Sweep or blow off any debris, leaves, or dirt that may accumulate on the surface of the artificial grass. Doing this regularly will help maintain a clean and tidy-looking lawn.
- If you have pets, be sure to remove solid waste and rinse the area with water to prevent odors and promote cleanliness.
- Consider using a mild detergent and water to clean any stains or spills on the artificial grass. Avoid using harsh chemicals or high-pressure washers, as these may damage the turf.
- Inspect the turf regularly for any signs of damage or wear. Repair any small tears or loose edges promptly to prevent further damage.
- Brush the synthetic grass periodically to keep the blades upright and maintain a natural appearance. This is especially important if you frequently use the lawn for activities or have heavier furniture placed on it.
- Avoid placing hot objects, such as grills or cigarettes, directly on the surface of the artificial grass, as this can cause melting or discoloration.
- If you live in an area with heavy foot traffic, consider periodically redistributing the infill to prevent any compaction and ensure a consistent feel underfoot.
- During harsh weather conditions, remove any snow or ice using a plastic shovel or broom with soft bristles. Avoid using metal tools that may damage the turf.
- Consider scheduling regular professional maintenance, such as power brushing or deep cleaning, to keep your artificial grass in optimal condition.
By following these final touches and maintenance tips, you can enjoy a vibrant and well-maintained artificial lawn for years to come. Remember that proper care and regular upkeep will help extend the lifespan and preserve the beauty of your fake grass.
Conclusion
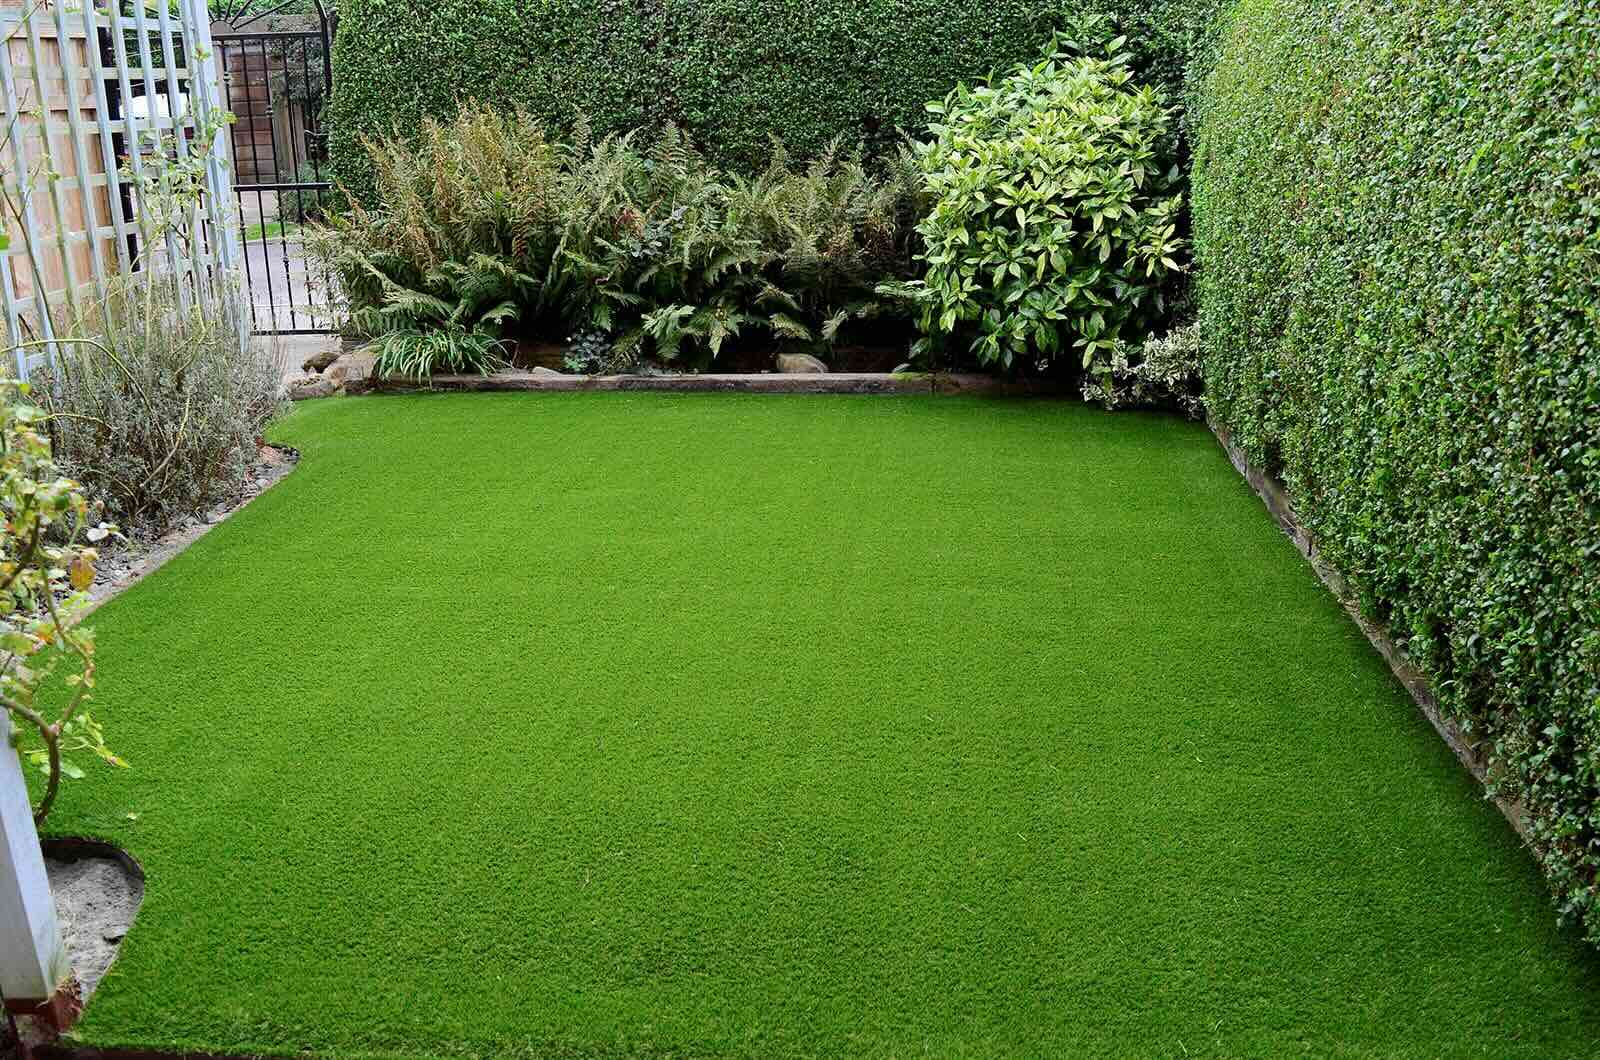
Preparing the ground for fake grass is a crucial step in achieving a beautiful and long-lasting artificial lawn. By carefully following the steps outlined in this guide, you can create a solid foundation that will support the artificial turf and ensure its performance for years to come.
From choosing the right location to securing the edges and adding optional infill, each step plays a significant role in the overall success of the installation. Thoroughly clearing the area, leveling the ground, and removing existing vegetation are important for creating a smooth and even surface. Installing a weed barrier helps prevent weed growth, while adding a base material provides stability and drainage.
Once the ground is properly prepared, you can lay the artificial grass, ensuring seamless seams and brushing the blades for a natural appearance. If desired, you can also add infill to enhance the performance and feel of your fake grass.
To maintain your artificial lawn, regular maintenance such as brushing, removing debris, and inspecting for damage is necessary. By following these maintenance tips, you can keep your artificial grass looking fresh, clean, and vibrant.
Artificial grass offers a low-maintenance alternative to natural lawns, providing a year-round green and lush outdoor space. With proper ground preparation and ongoing care, you can enjoy the benefits of a beautiful and hassle-free artificial lawn for years to come.
So, get ready to transform your outdoor space with the beauty and convenience of artificial grass! Follow the steps in this guide to prepare the ground, lay the turf, and maintain its appearance, and soon you’ll have a stunning and envy-inducing artificial lawn to enjoy.
Frequently Asked Questions about How To Prepare The Ground For Fake Grass
Was this page helpful?
At Storables.com, we guarantee accurate and reliable information. Our content, validated by Expert Board Contributors, is crafted following stringent Editorial Policies. We're committed to providing you with well-researched, expert-backed insights for all your informational needs.

0 thoughts on “How To Prepare The Ground For Fake Grass”