Home>Gardening & Outdoor>Landscaping Ideas>How To Edge Artificial Grass
Landscaping Ideas
How To Edge Artificial Grass
Modified: August 20, 2024
Discover expert landscaping ideas for edging artificial grass and creating a polished, low-maintenance outdoor space. Enhance your yard with our top tips and techniques.
(Many of the links in this article redirect to a specific reviewed product. Your purchase of these products through affiliate links helps to generate commission for Storables.com, at no extra cost. Learn more)
Introduction
Welcome to the world of artificial grass landscaping! Whether you’re a seasoned pro or a novice enthusiast, edging artificial grass can elevate the aesthetics and longevity of your outdoor space. Proper edging not only adds a polished look to the installation but also helps to prevent the edges of the turf from fraying or becoming uneven over time. In this guide, we’ll walk through the step-by-step process of edging artificial grass to achieve a professional and durable finish.
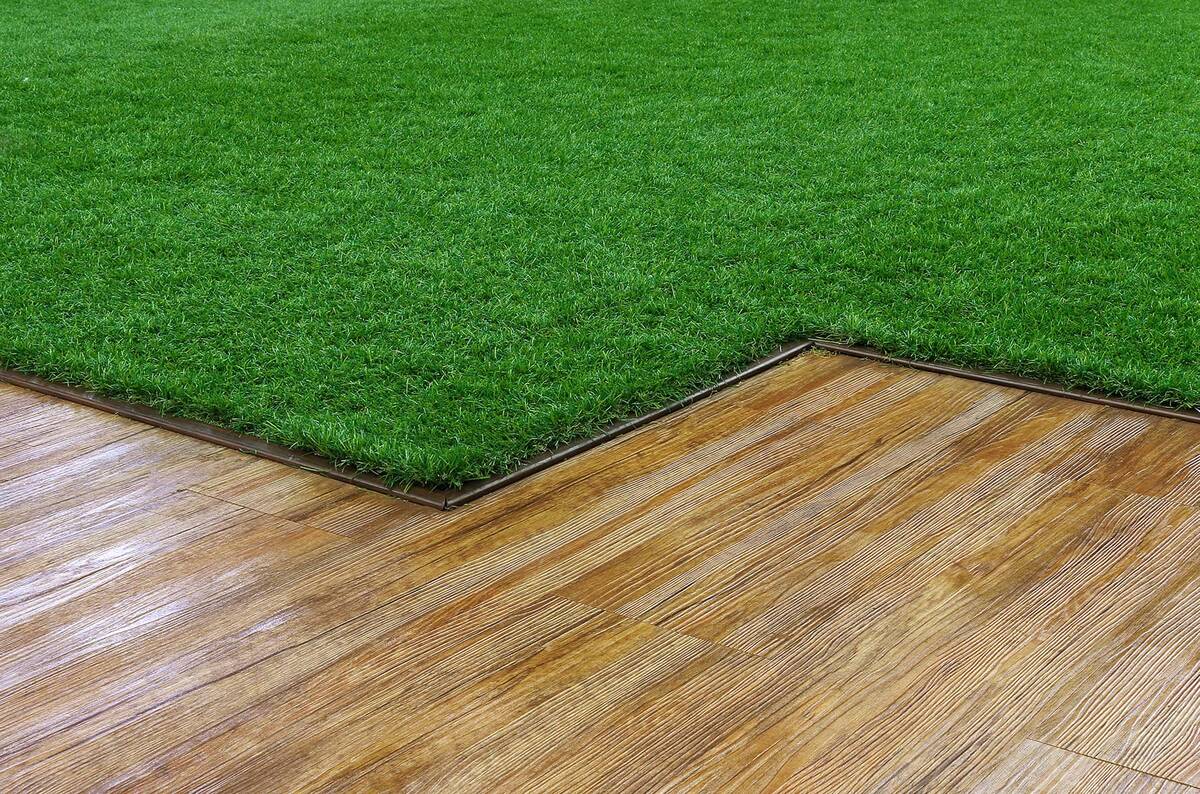
Edging artificial grass involves creating a defined border around the perimeter of the turf, which serves both functional and aesthetic purposes. Not only does it provide a clean separation between the artificial grass and other landscaping elements, but it also helps to keep the edges of the turf securely in place, minimizing the risk of shifting or damage.
Whether you’re installing artificial grass in your backyard, front yard, or any outdoor space, proper edging can make a significant difference in the overall appearance and structural integrity of the turf. By following the techniques outlined in this guide, you’ll be able to achieve a professional-looking edge that complements the beauty of your artificial grass installation.
Now, let’s dive into the tools and materials you’ll need to get started with edging your artificial grass!
Key Takeaways:
- Edging artificial grass not only enhances its appearance but also prevents fraying and shifting, ensuring a long-lasting and well-maintained outdoor space.
- By following the step-by-step process of edging artificial grass, you can create a visually striking and enduring landscape feature that reflects your commitment to precision and quality.
Read more: How To Install Landscaping Edging
Tools and Materials Needed
Before you begin edging your artificial grass, it’s essential to gather the necessary tools and materials to ensure a smooth and efficient process. Here’s a comprehensive list of what you’ll need:
Tools:
- Spade or edging tool: A sturdy spade or specialized edging tool will be instrumental in creating clean and precise borders around the artificial grass.
- Utility knife: A sharp utility knife will come in handy for cutting the artificial grass to fit the designated area and for trimming the edges during the edging process.
- Hammer: A hammer will be required for securing the edging material in place, especially if you're using metal or plastic edging.
- Tape measure: Accurate measurements are crucial for ensuring the edging is installed at the appropriate distance from the edge of the artificial grass.
- Work gloves: Protect your hands with a pair of durable work gloves, especially when handling edging materials and tools.
- Safety goggles: To safeguard your eyes during cutting and hammering, wear safety goggles to prevent any potential debris from causing harm.
Materials:
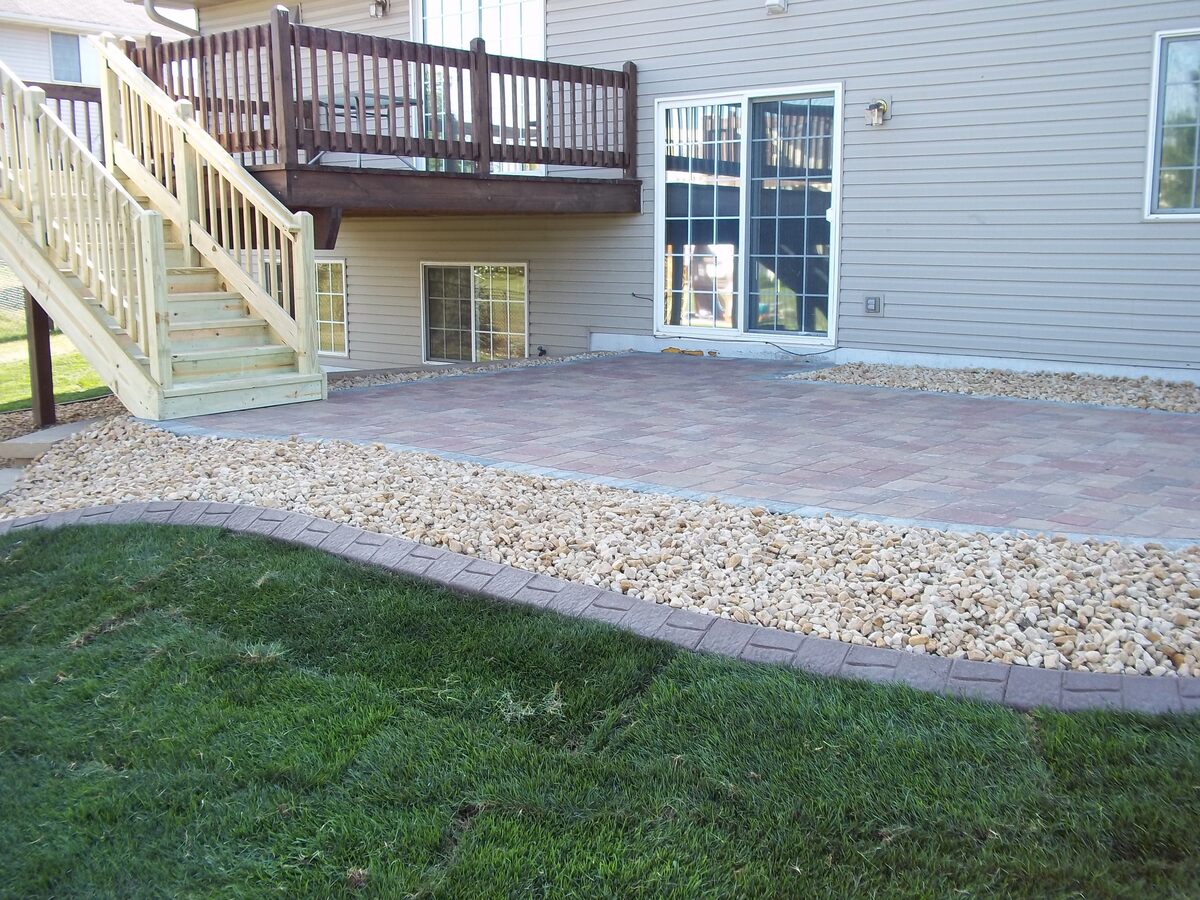
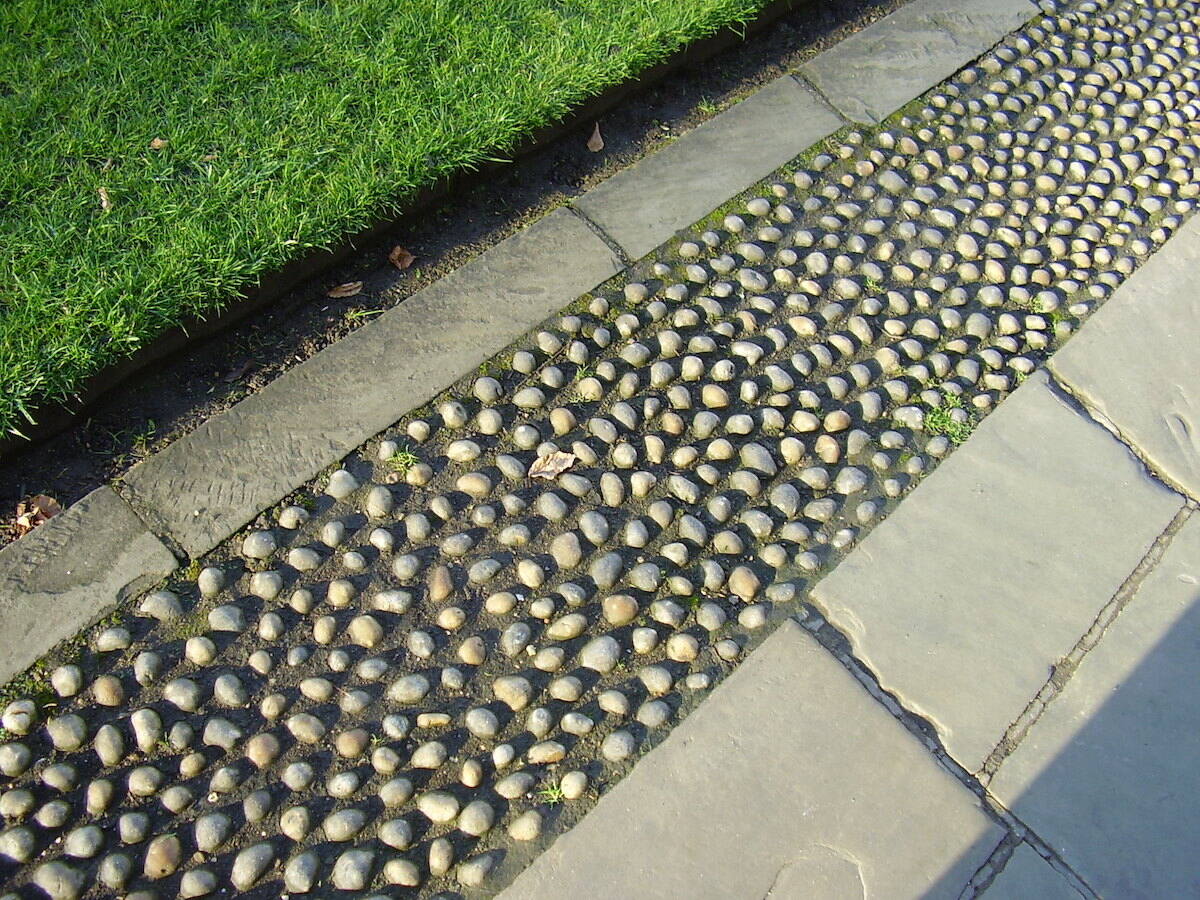
- Edging material: Choose from a variety of edging options such as bender board, composite edging, metal landscape edging, or flexible plastic edging. The material you select should align with the design and functional requirements of your landscaping project.
- Stakes: If your edging material requires anchoring, stakes will be essential for securing the edging in place.
- Adhesive (if applicable): Depending on the edging material and installation method, you may need adhesive to bond the edging to the artificial grass or the substrate beneath it.
- Gravel or sand (if applicable): In some cases, using gravel or sand as a base for the edging material can enhance stability and durability.
- Artificial grass infill: If you're refilling or adjusting the infill along the edges of the turf, make sure to have an ample supply of artificial grass infill on hand.
By ensuring that you have the necessary tools and materials ready, you’ll be well-equipped to proceed with edging your artificial grass with confidence and precision. Now that you’re prepared, let’s move on to the first step: preparing the area for edging.
Step 1: Prepare the Area
Before diving into the edging process, it’s crucial to prepare the area surrounding the artificial grass for seamless and effective edging. Here’s a detailed walkthrough of the preparatory steps:
Clear the Perimeter: Begin by clearing any debris, rocks, or vegetation along the perimeter of the artificial grass. Use a spade or edging tool to create a clean and defined border around the turf, ensuring that the area is free from any obstructions that could hinder the edging process.
Trim the Edges: If the edges of the artificial grass are uneven or overgrown, use a utility knife to trim and shape them to achieve a uniform and tidy appearance. This step is essential for ensuring that the edging material can be installed smoothly along the perimeter.
Assess the Substrate: Inspect the substrate or base beneath the artificial grass to ensure that it is level and compact. Any unevenness or soft spots in the substrate can impact the stability of the edging, so it’s important to address any irregularities before proceeding with the installation.
Measure and Mark: Using a tape measure, determine the precise distance from the edge of the artificial grass to where the edging will be installed. Mark the designated points along the perimeter, ensuring that the measurements are consistent and accurate throughout the area.
Clear a Trench (if applicable): Depending on the type of edging material you’re using, you may need to clear a shallow trench along the marked perimeter to accommodate the edging. This step is common when installing rigid edging materials such as bender board or metal landscape edging.
By meticulously preparing the area for edging, you’ll set the stage for a successful and visually appealing installation. With the groundwork in place, it’s time to move on to the next crucial step: installing the edging material.
Read more: What Is Edging In Lawn Care
Step 2: Install the Edging
With the area prepared for edging, it’s time to proceed with the installation of the edging material around the perimeter of the artificial grass. Follow these steps to ensure a precise and secure installation:
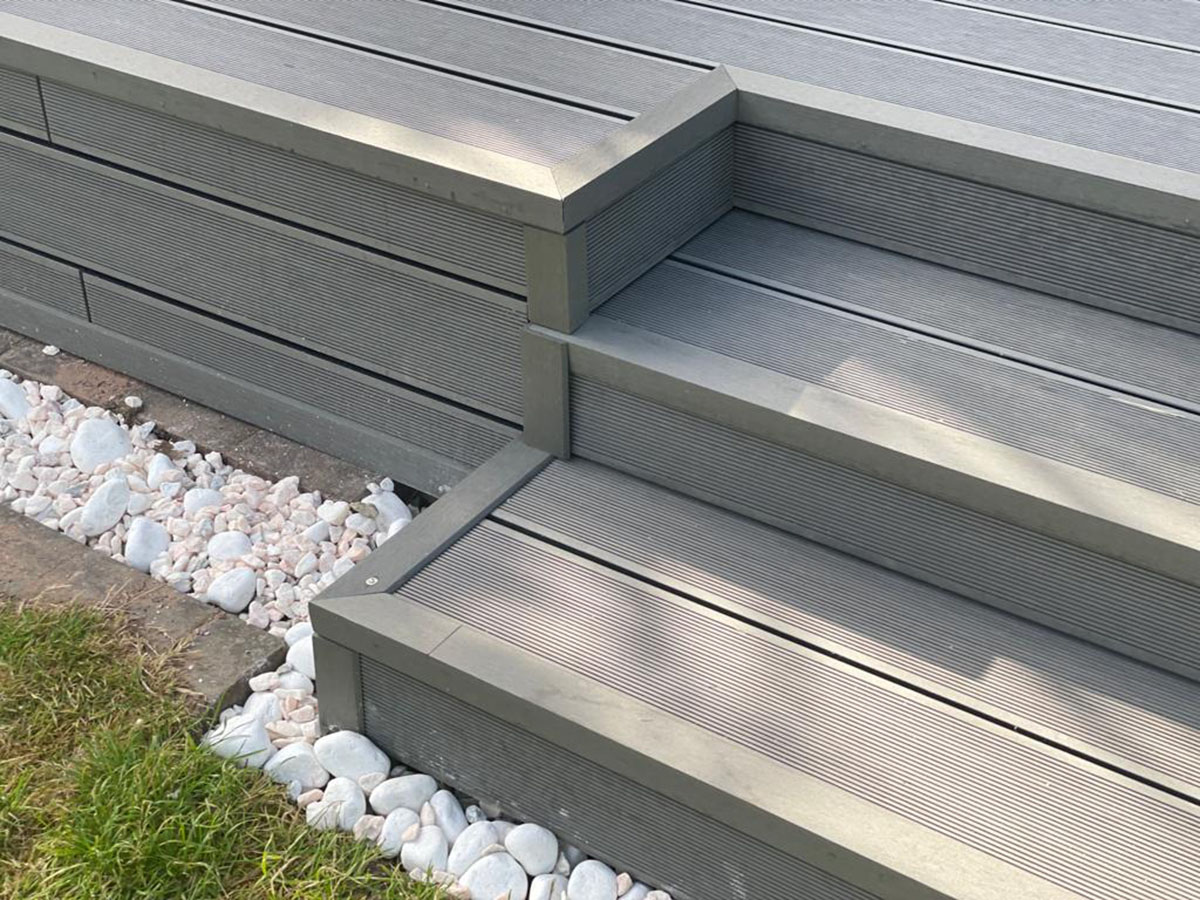
Select the Appropriate Edging Material: Depending on your design preferences and functional requirements, choose the most suitable edging material for your artificial grass installation. Options include bender board, composite edging, metal landscape edging, or flexible plastic edging, each offering unique benefits in terms of durability, flexibility, and aesthetic appeal.
Position the Edging: Place the selected edging material along the marked perimeter, ensuring that it aligns with the designated points and contours smoothly around curves or corners. If you’re using flexible edging, carefully shape it to conform to the desired border, maintaining a consistent distance from the edge of the artificial grass.
Secure the Edging (if applicable): Depending on the type of edging material, you may need to anchor it in place using stakes, particularly for rigid materials like bender board or metal landscape edging. Drive the stakes into the ground at regular intervals to firmly secure the edging and prevent any shifting or movement over time.
Adjust for Curves and Corners: If your artificial grass installation features curves or corners, make any necessary adjustments to the edging material to ensure a seamless and visually appealing border. Flexible and malleable edging materials can be manipulated to follow the contours of the turf, creating a smooth transition along curved sections.
Verify Alignment and Levelness: Double-check the alignment and levelness of the installed edging to guarantee a uniform and professional finish. Use a spirit level or simply visually inspect the edging to ensure that it maintains a consistent height and alignment along the entire perimeter.
By following these steps, you’ll successfully install the edging material, creating a well-defined border that enhances the overall appearance and structural integrity of the artificial grass installation. With the edging in place, it’s time to move on to the next step: securing the edging to ensure long-lasting stability.
Step 3: Secure the Edging
Once the edging material is in position, the next crucial step is to secure it effectively to ensure long-term stability and structural integrity. Follow these guidelines to securely fasten the edging in place:
Use Anchoring Stakes (if applicable): If your chosen edging material requires anchoring, such as bender board or metal landscape edging, drive anchoring stakes through the designated slots or holes in the edging. Position the stakes at regular intervals to provide adequate support and prevent the edging from shifting or loosening over time.
Secure with Nails or Screws (if applicable): For certain types of edging materials, such as metal landscape edging or composite edging, use nails or screws to secure the edging to the substrate beneath the artificial grass. This method ensures a firm and permanent attachment, especially in areas prone to ground movement or environmental factors.
Apply Adhesive (if applicable): In cases where the edging material requires bonding to the artificial grass or the substrate, use a suitable adhesive to create a durable and resilient connection. Follow the manufacturer’s guidelines for the specific adhesive product, ensuring proper application and sufficient curing time for optimal results.
Backfill with Gravel or Sand (if applicable): If your edging material is designed to accommodate backfilling for added stability, consider filling the space behind the edging with gravel or sand. This backfilling technique enhances the overall support and resistance to ground movement, particularly in regions with varying soil conditions.
Inspect and Adjust: After securing the edging, conduct a thorough inspection to verify that it is firmly in place and free from any signs of instability. Make any necessary adjustments or reinforcements to address any areas where the edging may require additional support or fastening.
By properly securing the edging, you’ll fortify the perimeter of the artificial grass, ensuring that it remains steadfast and resistant to external forces. With the edging firmly in place, it’s time to move on to the final step: refining the edging and putting the finishing touches on your artificial grass installation.
Use a power brush to fluff up the edges of the artificial grass and create a clean, defined edge. This will give your lawn a professional and polished look.
Step 4: Finish and Refine
As you approach the final stage of edging your artificial grass, it’s essential to refine the installation and add the finishing touches that will elevate the overall appearance and functionality of the edging. Follow these steps to complete the process with finesse:
Trim Excess Material: If there are any protruding or excess portions of the edging material, use a utility knife or appropriate cutting tool to trim them, ensuring a clean and uniform edge along the perimeter of the artificial grass.
Smooth Out Edges: After trimming, run your hands along the edges of the artificial grass to ensure that they are smooth and free from any rough or uneven sections. This step contributes to a polished and professional finish that enhances the visual appeal of the entire installation.
Adjust Infill (if necessary): Inspect the infill along the edges of the artificial grass, and adjust it as needed to ensure that it is evenly distributed and level with the top of the turf. Proper infill management contributes to the stability and longevity of the artificial grass, especially along the newly edged areas.
Refine Curves and Corners: Pay special attention to any curved or cornered sections of the edging, ensuring that they maintain a smooth and natural flow that complements the contours of the artificial grass. Make any adjustments to the edging material to achieve a seamless transition around curves and corners.
Clean and Inspect: Remove any debris or excess materials from the edging and the surrounding area, leaving the entire installation spotless and visually appealing. Conduct a final inspection to ensure that the edging is secure, the edges of the artificial grass are neatly trimmed, and the overall appearance meets your expectations.
Appreciate the Results: Take a moment to step back and admire the impact of the edging on your artificial grass installation. The refined borders and meticulously finished edges not only enhance the aesthetics of the landscape but also contribute to the longevity and durability of the turf.
With the finishing touches in place, you’ve successfully completed the edging process, culminating in a professionally refined artificial grass installation. Your attention to detail and commitment to quality have resulted in an exceptional outcome that will be enjoyed for years to come.
Conclusion
Congratulations on successfully edging your artificial grass! By following the comprehensive steps outlined in this guide, you’ve not only enhanced the visual appeal of your landscaping but also fortified the edges of the turf for long-term durability. The meticulous preparation, precise installation, and careful refinement have collectively contributed to a professional and polished finish that elevates the entire outdoor space.
Properly edged artificial grass not only creates a clean and defined border but also helps to prevent fraying and shifting, ensuring that your investment in artificial turf remains pristine and well-maintained. The attention to detail exhibited throughout the edging process reflects your commitment to creating a landscape that is both aesthetically pleasing and structurally sound.
As you admire the seamless transition between the artificial grass and the surrounding elements, take pride in knowing that your dedication to edging has resulted in a landscape feature that stands the test of time. The refined borders serve as a testament to your craftsmanship and attention to detail, setting the stage for a visually striking and enduring outdoor environment.
Whether you’re enjoying the beauty of your backyard, front yard, or any outdoor space graced by artificial grass, the impact of well-executed edging will be a constant source of satisfaction and pride. Your commitment to maintaining the integrity and aesthetics of your landscape has yielded a result that will be appreciated by all who encounter it.
As you continue to revel in the beauty and functionality of your edging-enhanced artificial grass, take a moment to appreciate the transformative power of attention to detail. Your dedication to precision and quality has not only elevated the appearance of your landscape but has also contributed to the long-term resilience of your artificial grass installation.
With the edging process now complete, your artificial grass stands as a testament to the harmonious blend of artistry and practicality, ensuring that your outdoor space remains a captivating and enduring sanctuary for years to come.
Frequently Asked Questions about How To Edge Artificial Grass
Was this page helpful?
At Storables.com, we guarantee accurate and reliable information. Our content, validated by Expert Board Contributors, is crafted following stringent Editorial Policies. We're committed to providing you with well-researched, expert-backed insights for all your informational needs.


0 thoughts on “How To Edge Artificial Grass”