Home>Garden Essentials>How To Lay Astro Turf On Decking
Garden Essentials
How To Lay Astro Turf On Decking
Modified: August 27, 2024
Transform your decking into a beautiful green garden oasis with our step-by-step guide on how to lay astro turf. Create the perfect outdoor space with ease.
(Many of the links in this article redirect to a specific reviewed product. Your purchase of these products through affiliate links helps to generate commission for Storables.com, at no extra cost. Learn more)
Introduction
Welcome to our guide on how to lay astro turf on decking. Whether you want to transform your deck into a lush green space or create a low-maintenance outdoor area, laying astro turf can be a great solution. Astro turf, also known as artificial grass, offers the look and feel of real grass without the need for constant upkeep.
Before we delve into the steps of laying astro turf on decking, let’s take a moment to understand the benefits of doing so. Astro turf is durable, long-lasting, and can withstand heavy foot traffic, making it an ideal choice for areas like decks that see a lot of use. It requires minimal maintenance, eliminating the need for mowing, watering, and fertilizing. Additionally, astro turf stays green all year round, ensuring that your deck will look vibrant regardless of the season.
To successfully lay astro turf on your decking, there are a few materials you’ll need. These include:
- Measuring tape
- Sharp utility knife or scissors
- Adhesive or double-sided tape
- Heavy-duty staple gun
- Safety goggles
- Hand tamper or vibrating plate compactor (optional)
Before you get started, it’s important to thoroughly clean your decking to ensure proper adhesion of the astro turf. Remove any dirt, debris, or existing grass from the surface. Sweep the area and use a power washer or scrub brush to clean away any stubborn stains.
Next, measure your decking area to determine how much astro turf you’ll need. Add a few extra inches to each side to allow for trimming and securing.
Once you’ve gathered your materials and prepared your decking, you’re ready to move on to the next steps. In the following sections, we’ll guide you through the process of measuring, cutting, and laying the astro turf, as well as securing the edges for a finished look.
By the end of this guide, you’ll have a beautiful and low-maintenance astro turf deck that will enhance your outdoor living space for years to come.
Key Takeaways:
- Transform your deck into a low-maintenance green space with astro turf. It’s durable, easy to install, and stays vibrant all year round, enhancing your outdoor living area.
- Clean and prepare your decking before laying astro turf for a successful installation. Measure, cut, and secure the turf to create a polished and inviting outdoor space.
Read more: How To Lay Astro Turf On Concrete
Materials Needed
Before we begin laying astro turf on your decking, let’s gather all the materials you’ll need for this project:
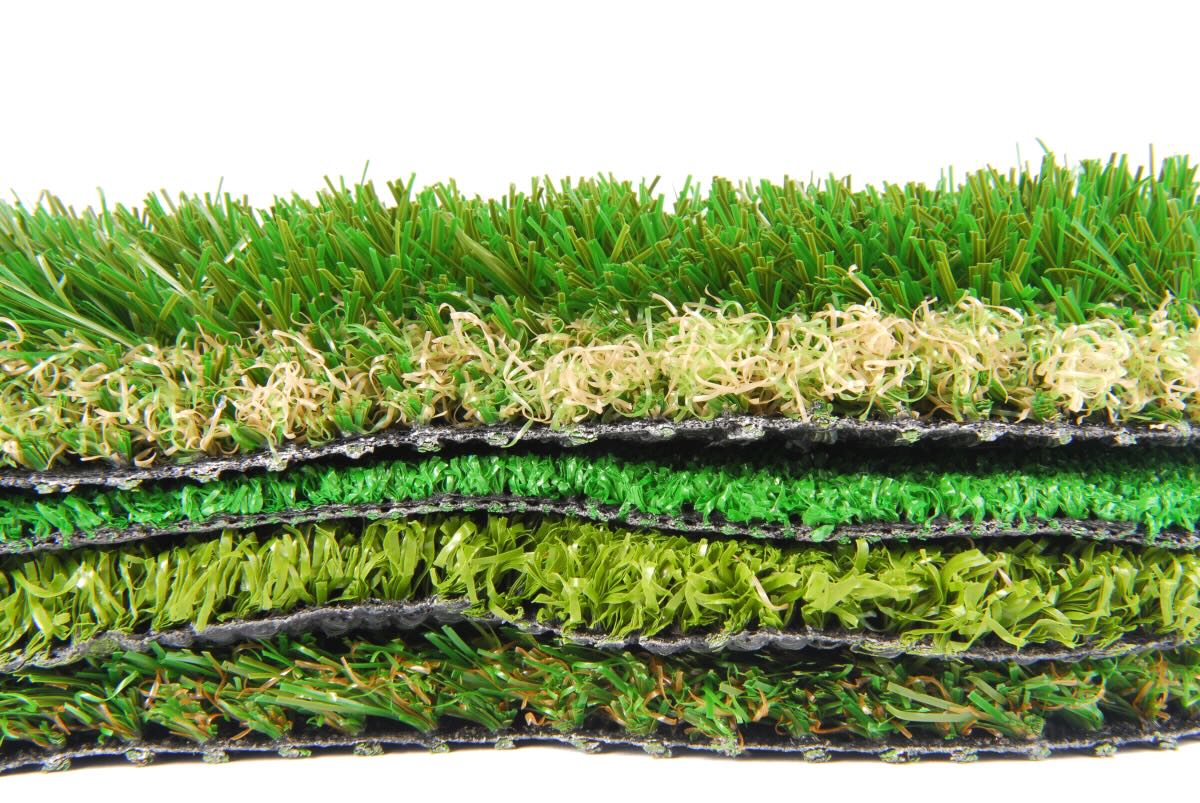
- Astro turf: Measure your decking area to determine how much astro turf you’ll need. Make sure to add a few extra inches to each side for trimming.
- Measuring tape: Essential for accurate measurements of your decking area.
- Sharp utility knife or scissors: You’ll use this to cut the astro turf to the correct size.
- Adhesive or double-sided tape: Depending on your preference, you can use adhesive or double-sided tape to secure the astro turf to the decking.
- Heavy-duty staple gun: This will be used to secure the astro turf along the edges.
- Safety goggles: Protect your eyes while working with the utility knife or any other sharp tools.
- Hand tamper or vibrating plate compactor (optional): If you want to ensure a more compact and stable surface, you can use a hand tamper or vibrating plate compactor to level the decking before laying the astro turf.
It’s essential to gather all these materials before you start the project to ensure a smooth and efficient installation process.
Additionally, you may need some additional tools and supplies depending on your specific decking and installation requirements. These may include:
- Power washer or scrub brush: Use these to clean your decking surface before laying the astro turf.
- Seam adhesive: If you’re laying multiple pieces of astro turf and need to join them together, you’ll need seam adhesive.
- Geotextile membrane: This can be used as a weed barrier under the astro turf to prevent weed growth.
- Sharp sand: In some cases, you may need sharp sand for leveling purposes or to create a stable base for the astro turf.
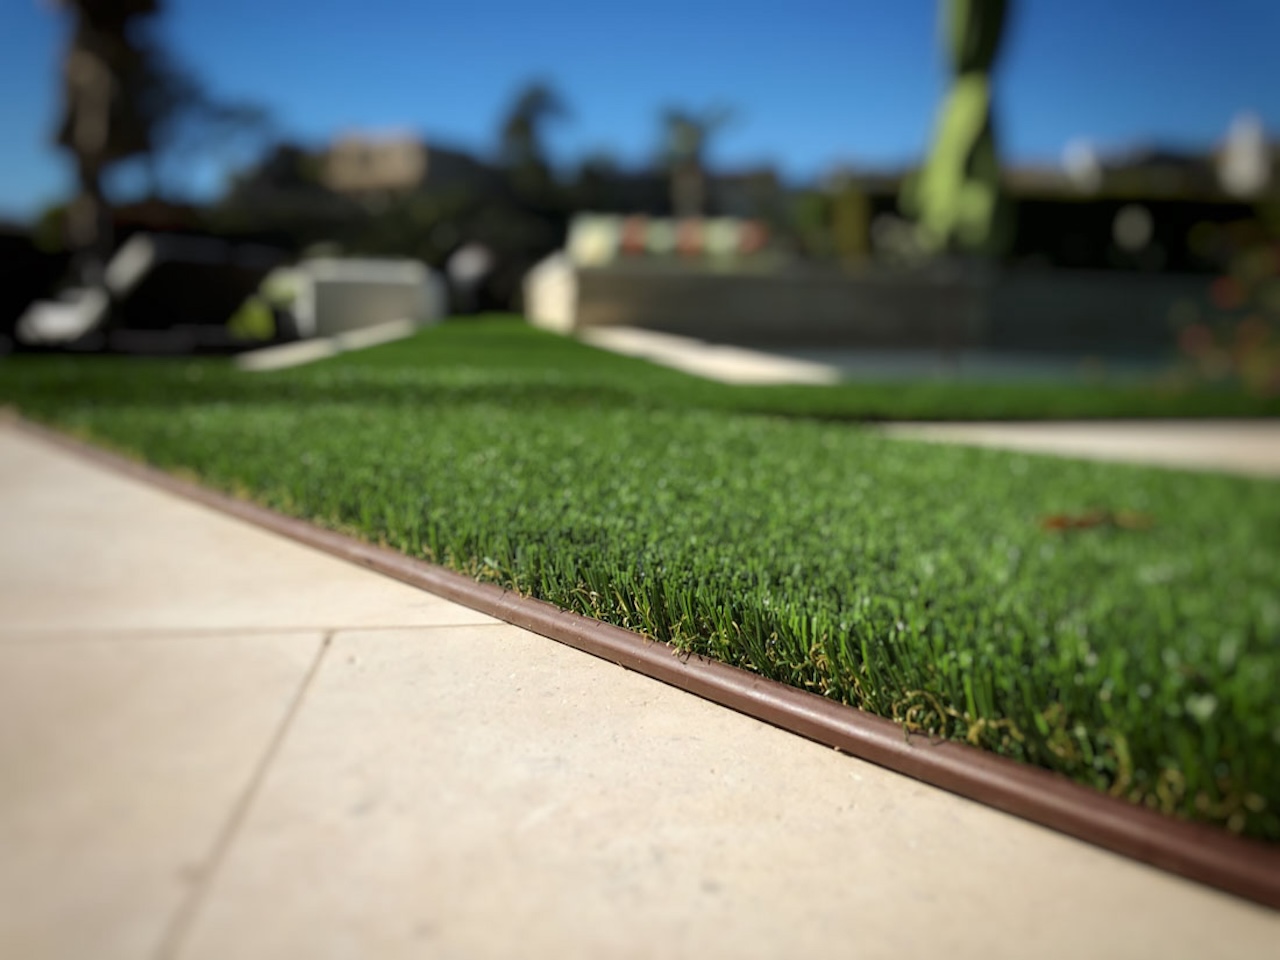
- Edging strips: If you want to create a clean border around the astro turf, you can use edging strips to secure and finish the edges.
Make sure to assess your specific requirements and consult with your local supplier or professional for any additional materials or tools you may need for your particular decking and astro turf installation.
With all the necessary materials on hand, you’re ready to move on to the preparation steps before laying the astro turf on your decking.
Preparation
Before you begin laying astro turf on your decking, it’s important to thoroughly prepare the surface to ensure a successful installation. Follow these preparation steps:
- Clean the Decking: Start by removing any dirt, debris, or existing grass from the surface of your decking. Sweep the area to remove loose debris, and use a power washer or scrub brush to clean away any stubborn stains or grime.
- Level the Decking (Optional): If your decking is uneven or has any low spots, you may consider leveling the surface to ensure a smooth and stable foundation for the astro turf. Use a hand tamper or vibrating plate compactor to compact the soil and create a more even surface.
- Allow for Drainage: If your decking is built with gaps or drainage channels, ensure that they are clear and free from any obstructions. Proper drainage is essential to prevent moisture buildup under the astro turf.
- Inspect for Damaged Areas: Check your decking for any damaged or rotten sections. If you come across any, replace or repair them before proceeding with the installation. A solid and stable decking surface is crucial for the longevity of the astro turf.
- Apply Weed Barrier (Optional): If weed growth is a concern, you can lay a geotextile membrane over the decking as a weed barrier before installing the astro turf. This will help prevent weeds from popping up through the astro turf.
By following these preparation steps, you’ll create a clean, level, and well-prepared surface for your astro turf installation. Taking the time to properly prepare the decking will ensure a smooth and long-lasting result.
Once you’ve completed the necessary preparation, you can move on to the next steps of measuring, cutting, and laying the astro turf on your decking.
Cleaning the Decking
Before you start laying astro turf on your decking, it’s essential to clean the surface thoroughly. Cleaning the decking will remove any dirt, debris, or existing grass, ensuring proper adhesion of the astro turf. Follow these steps to clean your decking:
- Sweep the Decking: Start by sweeping the decking surface to remove loose debris such as leaves, twigs, and dirt. Use a broom or a brush to sweep the entire area, paying attention to corners and edges.
- Use a Power Washer (Optional): If your decking has stubborn stains, algae, or moss growth, you may want to use a power washer. Use a suitable pressure setting to clean the surface effectively. Ensure that you follow the manufacturer’s instructions and keep the nozzle at a distance to prevent damage to the decking material.
- Scrub the Decking: If you don’t have access to a power washer or have a small area to clean, you can use a scrub brush and a mixture of warm water and mild detergent. Scrub the decking surface gently to remove any stains or grime. Rinse the area thoroughly to remove the detergent residue.
- Allow the Decking to Dry: After cleaning, give the decking ample time to dry completely. Ensure that there is no moisture left on the surface before proceeding with the astro turf installation. Moisture can hinder the adhesive from bonding properly, leading to potential issues later on.
Cleaning the decking not only improves the aesthetic appeal but also ensures a clean and debris-free surface for the astro turf. By removing dirt, stains, and organic matter, you create a smooth and suitable base for the installation.
Once the decking is clean and dry, you can move on to the next step of measuring and cutting the astro turf to fit the area.
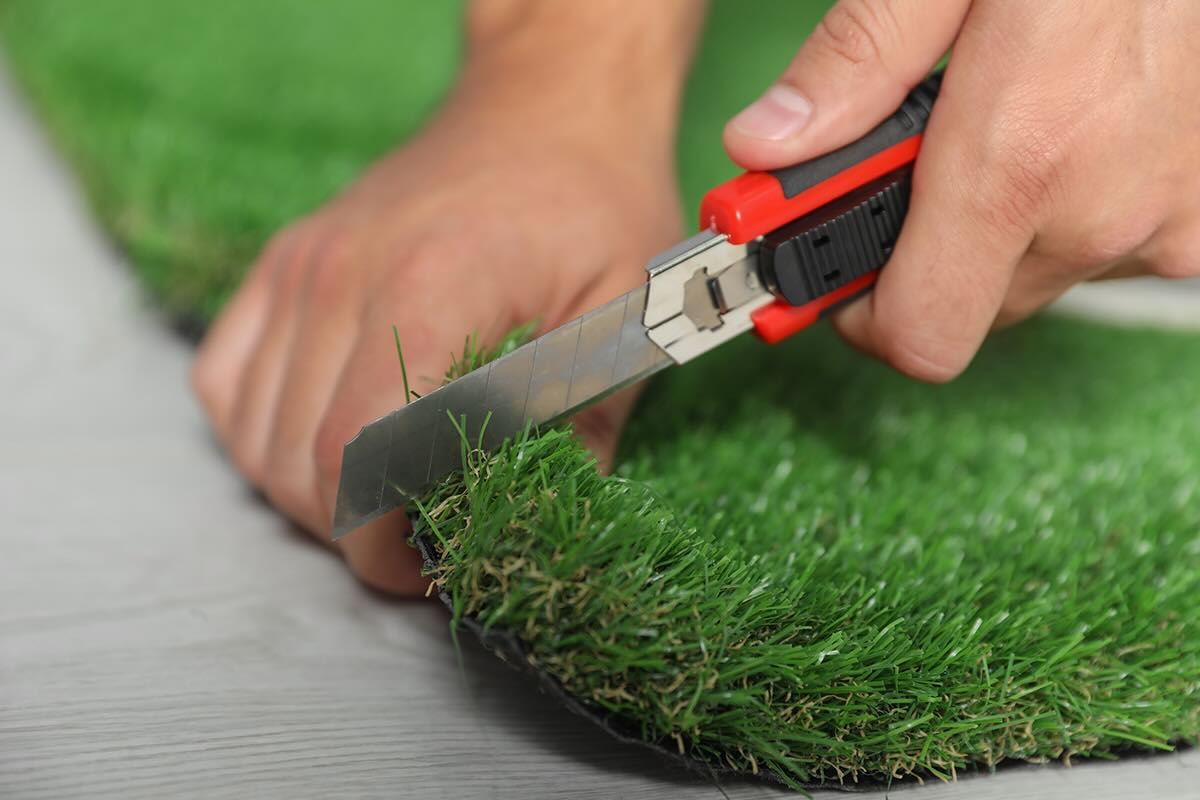
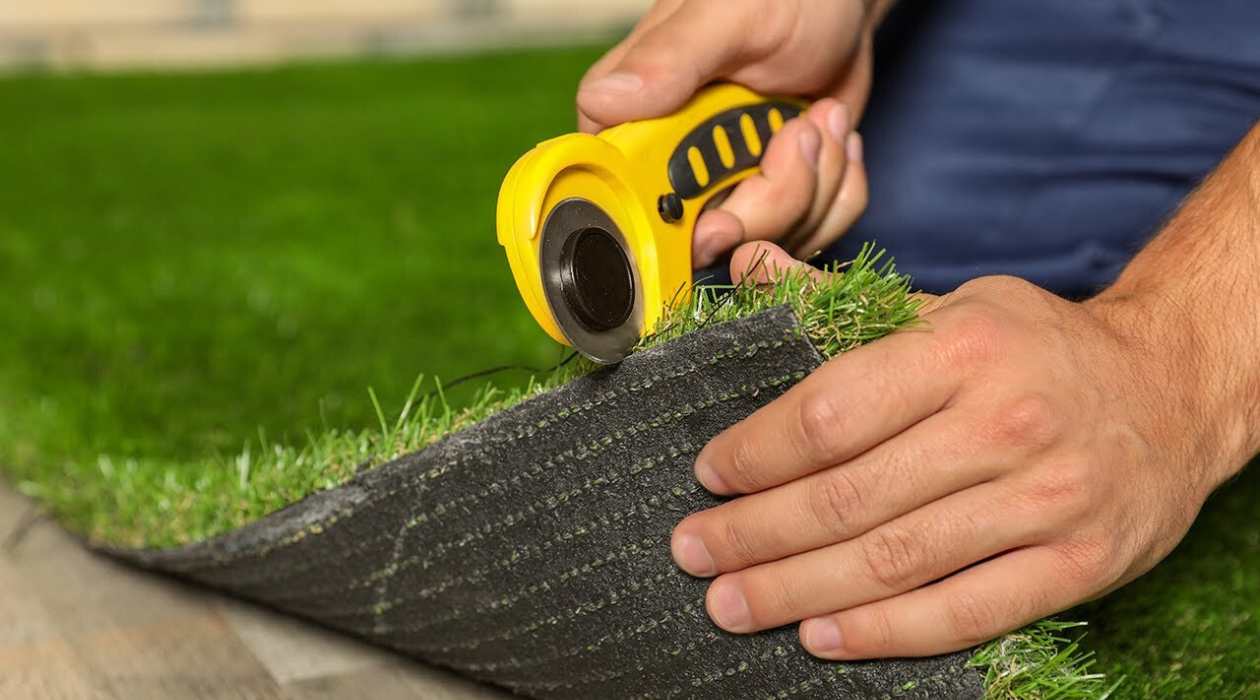
Measuring and Cutting the Astro Turf
Now that your decking is clean and dry, it’s time to measure and cut the astro turf to fit the area. This step is crucial to ensure a precise and professional-looking installation. Follow these steps:
- Measure the Decking: Use a measuring tape to measure the dimensions of your decking area. Measure both the length and width. Make sure to add a few extra inches to each side to allow for trimming and securing of the astro turf.
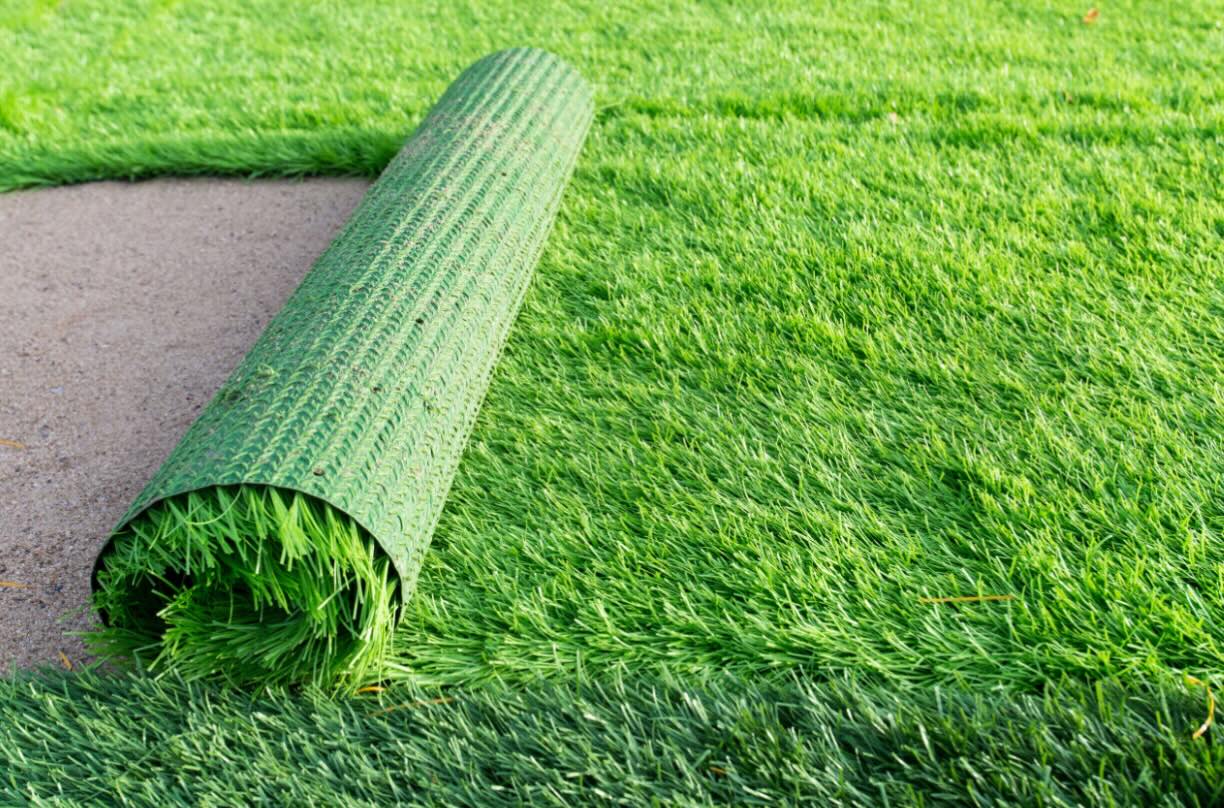
- Roll Out the Astro Turf: Unroll the astro turf on a flat surface, ensuring that the grass fibers are in the correct direction. This will help achieve a more natural and aesthetically pleasing look.
- Mark the Measurements: Use chalk or a marker to mark the measurements on the back of the astro turf. This will serve as your cutting guide.
- Cut the Astro Turf: Using a sharp utility knife or scissors, carefully cut along the marked lines to trim the astro turf to the desired size. Make sure to cut through the backing but avoid cutting the grass fibers.
- Trim Around Obstacles: If your decking has any obstacles like posts, beams, or fixtures, carefully cut the astro turf to fit around these areas. Take your time to ensure precise cuts for a seamless installation.
- Check the Fit: After cutting the astro turf, place it on the decking to check the fit. Make any necessary adjustments or additional trims if needed.
Remember, it’s better to start with a slightly larger piece of astro turf and trim it down gradually to achieve the perfect fit. This will help avoid any mistakes or miscalculations that can result in wasted material.
Once you’re satisfied with the measurements and the astro turf fits the decking area correctly, you’re ready to move on to the next step of applying adhesive to secure the astro turf in place.
Make sure the decking is clean and level before laying the astro turf. Use adhesive specifically designed for outdoor use to secure the turf in place.
Read more: How To Lay Astro Turf On Plywood
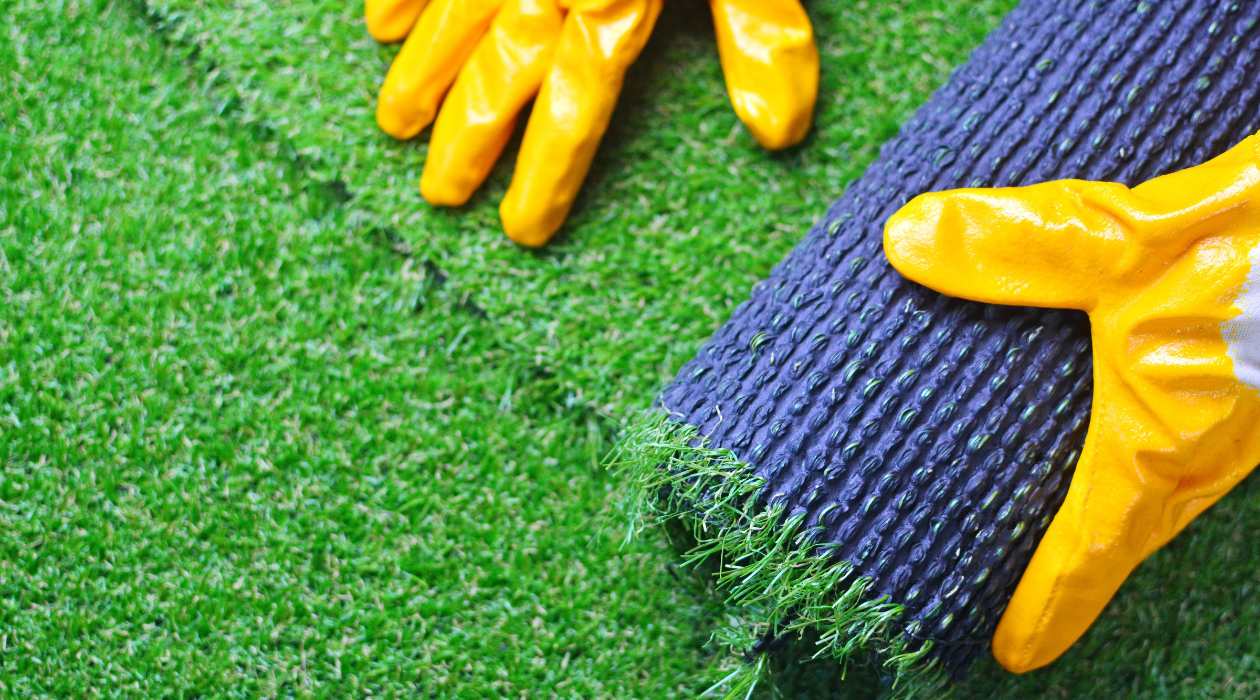
Applying Adhesive
Now that you have cut the astro turf to the correct size, it’s time to apply adhesive to secure it to the decking. The type of adhesive you choose will depend on the specific requirements of your project and the type of astro turf you’re using. Follow these steps for applying adhesive:
- Read the manufacturer’s instructions: Before applying any adhesive, carefully read and follow the instructions provided by the manufacturer. This will ensure that you use the adhesive correctly and achieve the best results.
- Choose the appropriate adhesive: Select an adhesive specifically designed for outdoor use and suitable for the type of astro turf you’re installing. Consider factors such as weather resistance and durability.
- Apply the adhesive: Start by applying the adhesive along one side of the decking, using a notched trowel or a suitable application tool. Make sure to spread the adhesive evenly and in a thin layer.
- Work in sections: Divide your decking into manageable sections and apply the adhesive to one section at a time. This will prevent the adhesive from drying out before you lay the astro turf.
- Smooth out the adhesive: Use a trowel or a smooth, flat object to smooth out the adhesive. This will help create an even surface for the astro turf and ensure proper adhesion.
- Lay the astro turf: Carefully place the cut astro turf onto the adhesive, starting from one corner of the decking. Slowly unroll and lay it down, making sure it fits snugly against the edges and any obstacles.
- Press down firmly: Once the astro turf is in place, press down firmly to ensure good contact between the turf and the adhesive. This will help achieve a secure bond.
- Repeat the process: Continue applying adhesive and laying the astro turf section by section until the entire decking area is covered.
It’s important to work efficiently while applying the adhesive, as it can dry quickly, especially in warm or dry weather. Follow the instructions provided by the adhesive manufacturer for any specific drying or curing times.
After applying the adhesive and laying the astro turf, allow sufficient time for the adhesive to dry and bond properly before moving on to the next steps of securing the edges and adding finishing touches.
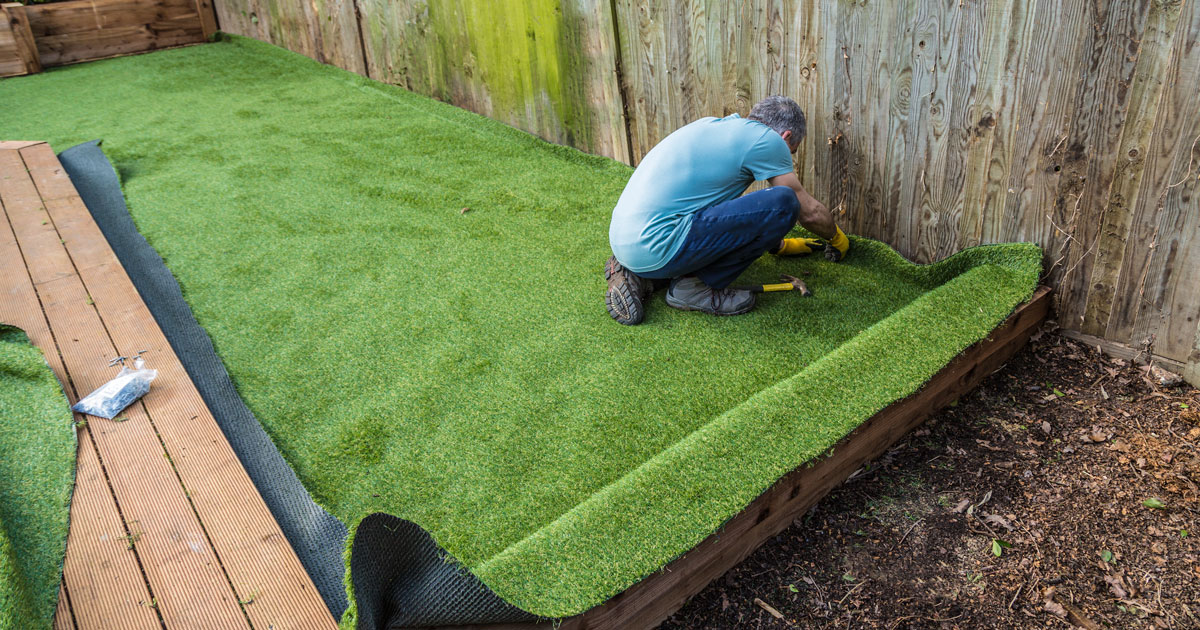
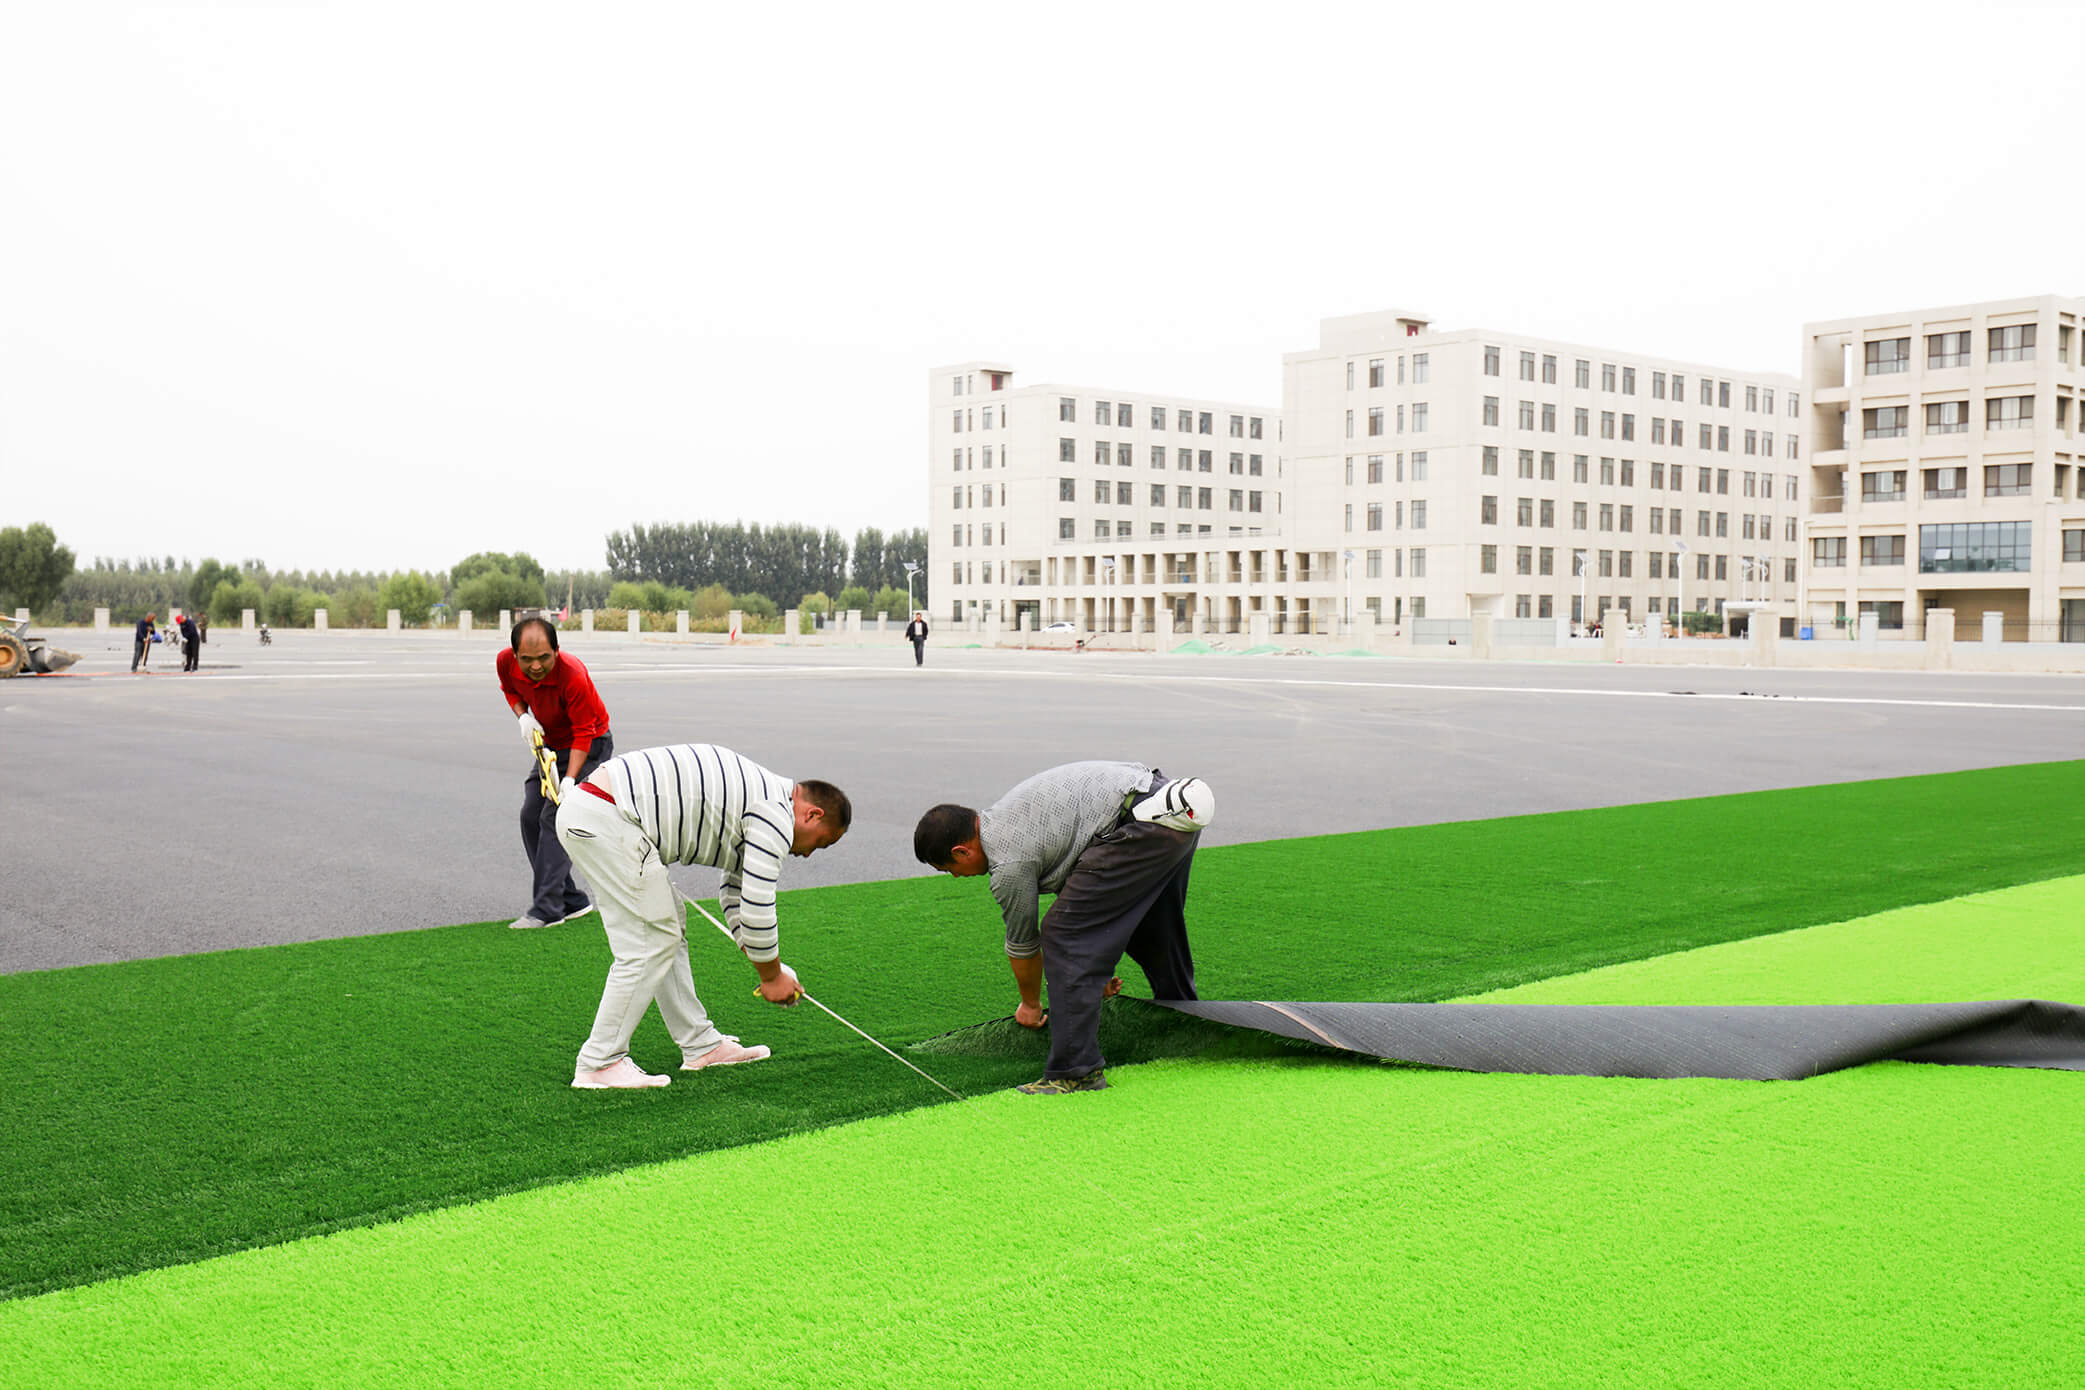
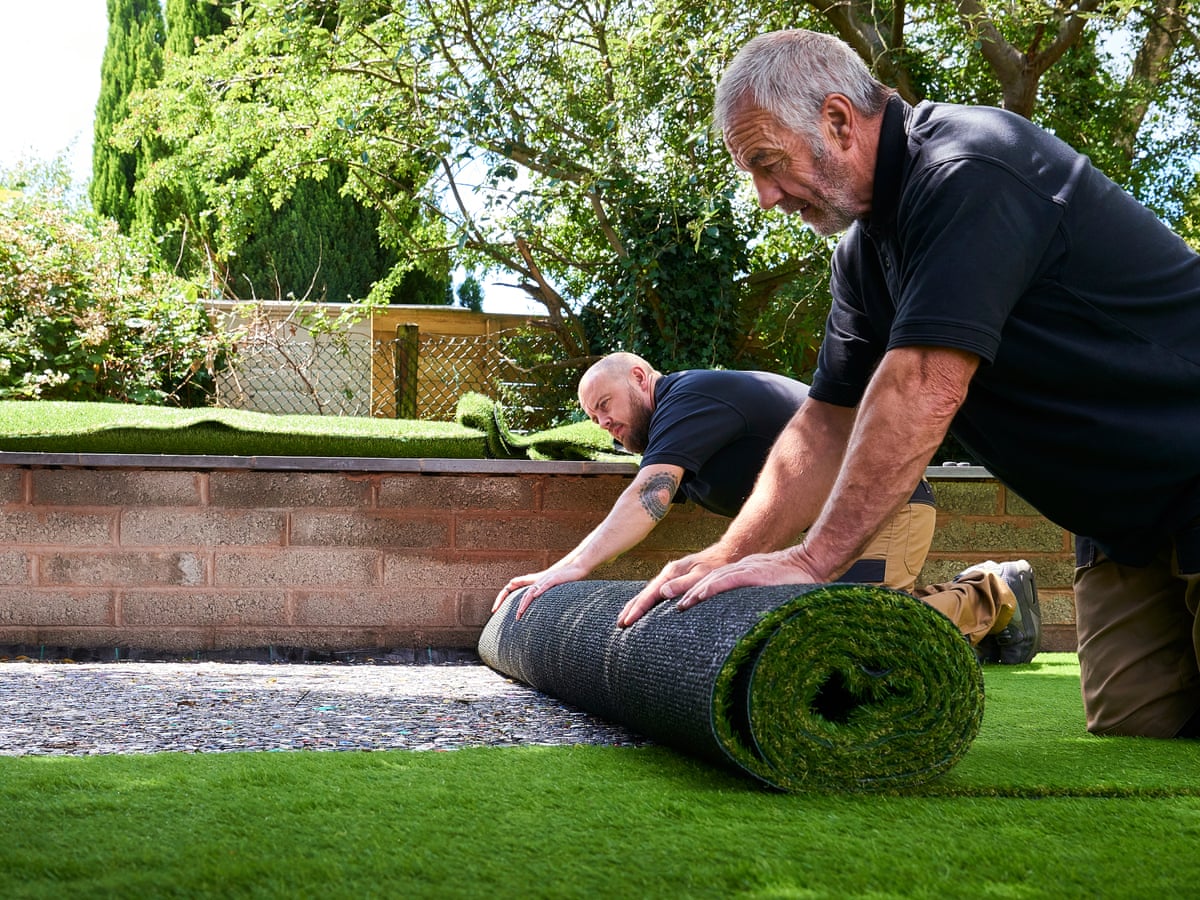
Laying the Astro Turf
With the adhesive applied and dried, it’s time to lay the astro turf onto the decking. Follow these steps to ensure a smooth and successful installation:
- Start at one corner: Begin the installation at one corner of the decking. This will provide a starting point and help you ensure proper alignment.
- Unroll the astro turf: Slowly unroll the astro turf onto the decking, taking care to align the edges with the sides of the decking. Work your way across the surface, smoothing the turf as you go.
- Avoid stretching: Be careful not to stretch the astro turf while laying it. This can lead to unevenness and distortion in the final result.
- Smooth out wrinkles and air pockets: As you lay the astro turf, smooth out any wrinkles or air pockets that may form. Use your hands or a broom to gently push out any imperfections.
- Align the seams (if applicable): If you’re using multiple pieces of astro turf and need to join them together, ensure that the seams align properly. Use seam adhesive or special tape designed for astro turf to create a seamless transition between the sections.
- Brush the fibers against the grain: Once the astro turf is laid, use a stiff brush to brush the grass fibers against the grain. This will help achieve a more natural and upright look.
- Inspect and make adjustments: Step back and inspect the entire area for any visible seams, unevenness, or gaps. Make any necessary adjustments or tweaks to ensure a visually appealing and even surface.
Throughout the process, take your time and pay attention to detail to achieve the best results. Proper installation and attention to alignment and smoothness will contribute to a professional-looking astro turf deck.
Once the astro turf is laid, you can move on to securing the edges for a neat and finished appearance.
Securing the Edges
Securing the edges of the astro turf is an important step to ensure a tidy and long-lasting installation. By properly securing the edges, you can prevent the astro turf from shifting or lifting over time. Follow these steps to secure the edges:
- Trim any excess turf: Use a sharp utility knife or scissors to trim any excess astro turf along the edges of the decking. This will create a clean and precise edge.
- Apply adhesive or double-sided tape: Depending on your preference and the type of astro turf you’re using, you can use adhesive or double-sided tape to secure the edges. Apply the adhesive or tape along the edge, about 2-3 inches from the edge of the astro turf.
- Press down firmly: After applying the adhesive or tape, press down firmly along the edges to ensure good contact and adhesion. This will help secure the astro turf in place.
- Staple the edges (optional): If you prefer additional reinforcement, you can use a heavy-duty staple gun to staple the edges of the astro turf to the decking. Space the staples approximately 6-8 inches apart, ensuring they go into the decking securely.
- Trim around obstacles: If you encounter any obstacles such as posts or fixtures along the edges, carefully trim the astro turf to fit around them. Take your time to ensure clean and precise cuts.
Properly securing the edges of the astro turf will give your installation a polished and finished appearance. It will also help ensure that the turf remains in place even during heavy use or inclement weather.
Once you’ve secured the edges, take a moment to step back and inspect the entire astro turf deck for any visible gaps, unevenness, or areas that may require further attention. Make any necessary adjustments to achieve a seamless and aesthetically pleasing result.
Finishing Touches
With the astro turf laid and the edges secured, it’s time to add the finishing touches to complete your astro turf deck installation. These final steps will give your deck a polished and professional look:
- Brush the grass fibers: Use a stiff brush to brush the grass fibers of the astro turf against the grain. This will help the fibers stand upright and create a more natural appearance.
- Add infill material (optional): Depending on the type of astro turf you’ve chosen, you may consider adding infill material to enhance the durability and aesthetics of the turf. Infill can help the grass fibers stay upright and provide cushioning underfoot. Follow the manufacturer’s instructions for the specific infill material you’re using.
- Trim any excess fibers: If you notice any long or uneven grass fibers, use sharp scissors to trim them to an even height. This will create a consistent and neat look across the entire deck.
- Clean up the area: Remove any debris or stray grass fibers from the surface of the astro turf deck. This will give your deck a clean and pristine appearance.
- Add decorative elements: Enhance the overall look of your astro turf deck by adding decorative elements such as potted plants, outdoor furniture, or decorative lighting. These elements will help create an inviting and appealing outdoor space.
After completing these finishing touches, take a moment to step back and admire your newly installed astro turf deck. Enjoy the lush, green space that requires minimal maintenance and provides a beautiful outdoor area for relaxation and entertainment.
Remember to follow the manufacturer’s instructions for any specific care and maintenance recommendations for your astro turf to ensure its longevity and optimal performance.
By following these steps and paying attention to detail, you can create a stunning astro turf deck that will transform your outdoor space and provide years of enjoyment with minimal upkeep.
Read more: How To Lay Astro Turf For Dogs On Dirt
Conclusion
Congratulations! You have successfully learned how to lay astro turf on decking. By following the step-by-step guide and implementing the proper techniques, you have transformed your deck into a vibrant and low-maintenance outdoor space.
Astro turf offers numerous benefits, such as its durability, minimal upkeep, and year-round green appearance. With just a few materials and some careful preparation, you can enjoy a beautiful and lush astro turf deck that will enhance your outdoor living experience.
Throughout the process, you have learned how to measure and cut the astro turf to fit your decking precisely. You have also mastered the art of applying adhesive and securing the edges to ensure a secure and long-lasting installation. The finishing touches, such as brushing the grass fibers and cleaning up the area, have added the final touches to create a polished and inviting deck.
Remember, proper maintenance is essential to keep your astro turf deck looking its best. Regularly brush the grass fibers, remove any debris, and follow any care instructions provided by the manufacturer. By doing so, you can extend the lifespan and beauty of your astro turf and continue to enjoy its benefits for years to come.
Now that you have the knowledge and skills to lay astro turf on your decking, you can confidently embark on your next outdoor project. Whether you want to create an entertainment area, a play space for kids and pets, or simply a relaxing oasis, astro turf can be the perfect solution for a low-maintenance and visually appealing outdoor space.
Thank you for following our guide on how to lay astro turf on decking. We hope you have found it informative and helpful. Enjoy your newly transformed deck and the countless hours of enjoyment it will bring!
Frequently Asked Questions about How To Lay Astro Turf On Decking
Was this page helpful?
At Storables.com, we guarantee accurate and reliable information. Our content, validated by Expert Board Contributors, is crafted following stringent Editorial Policies. We're committed to providing you with well-researched, expert-backed insights for all your informational needs.


0 thoughts on “How To Lay Astro Turf On Decking”