Home>Garden Essentials>How To Remove Seeds From Blackberries For Jam
Garden Essentials
How To Remove Seeds From Blackberries For Jam
Modified: March 15, 2024
Learn how to remove seeds from blackberries in your garden for the perfect homemade jam. Step-by-step guide to seedless blackberry jam.
(Many of the links in this article redirect to a specific reviewed product. Your purchase of these products through affiliate links helps to generate commission for Storables.com, at no extra cost. Learn more)
Introduction
Welcome to the world of blackberry jam-making! There’s nothing quite like the sweet, tart taste of homemade blackberry jam spread generously on a warm slice of toast. However, if you’ve ever bitten into a homemade blackberry jam only to be greeted by an unwelcome crunch of seeds, you may be wondering how to remove those pesky seeds and enjoy a smooth jam. Don’t worry! In this article, we will explore various methods for removing seeds from blackberries to help you create the perfect seedless blackberry jam.
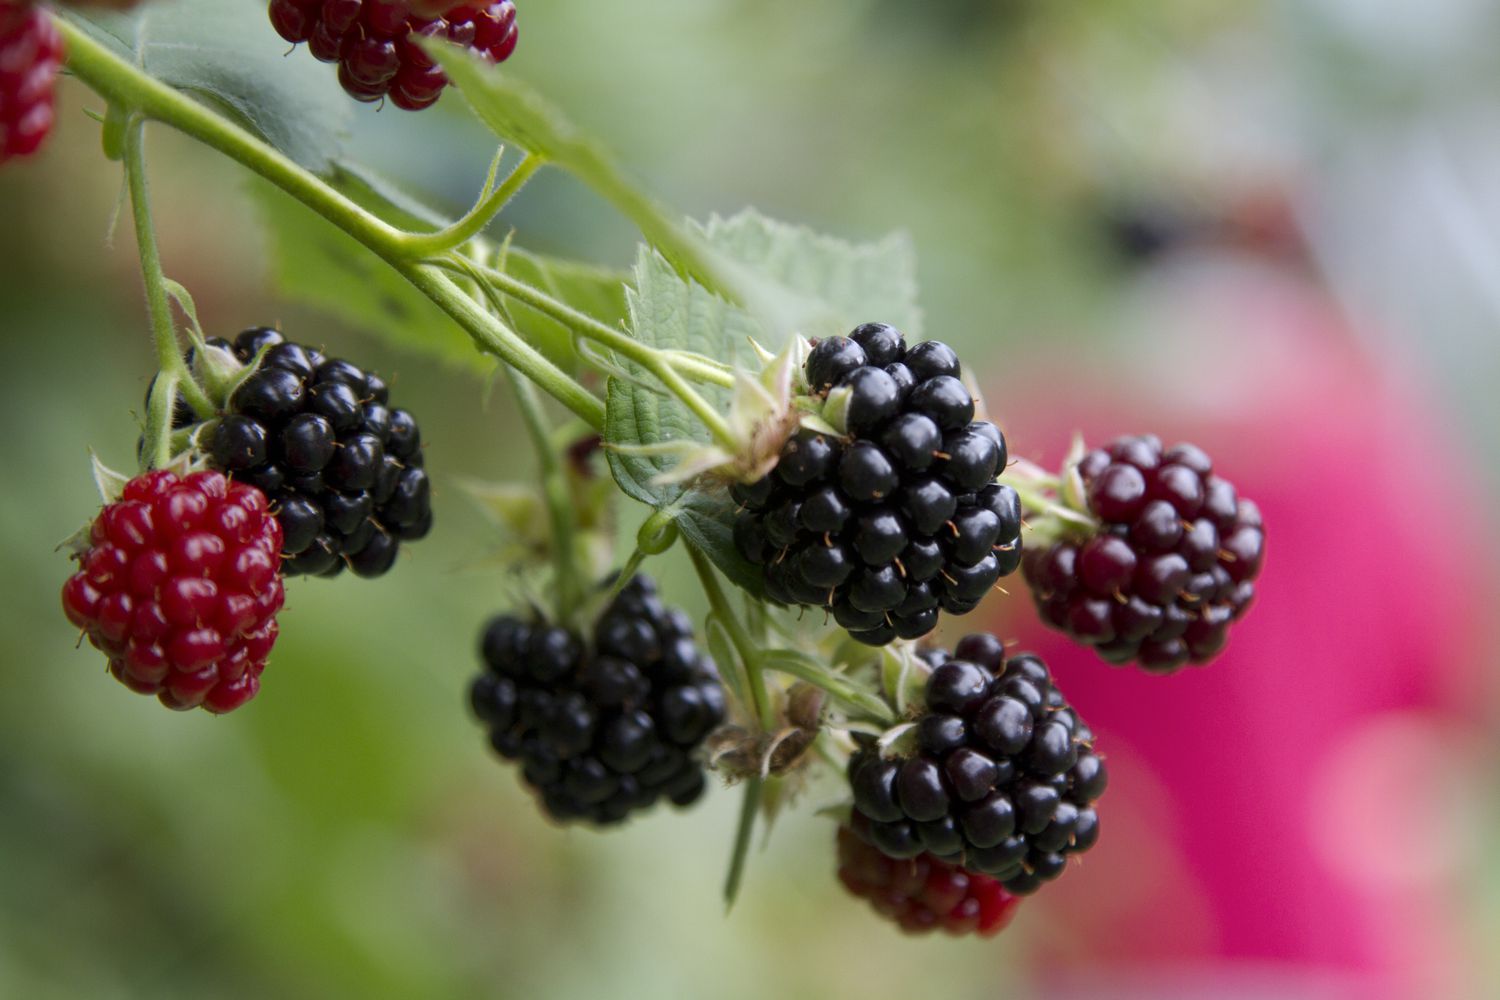
Blackberries are a beloved fruit that grows abundantly in backyards and gardens. They are packed with essential nutrients like vitamin C, fiber, and antioxidants. Blackberry jam is a delicious way to preserve the bountiful harvest and enjoy the flavors of summer throughout the year. While some people don’t mind the seeds in their jam, others prefer a smoother texture. Removing the seeds can be a time-consuming process, but the end result is a velvety delight.
There are several methods you can use to remove the seeds, depending on your preference and the equipment you have available. In the following sections, we will explore four popular methods for removing seeds from blackberries: straining, blending, boiling and straining, and using a food mill. Each method has its advantages and can be tailored to suit the level of smoothness you desire.
Before we dive into the methods, it’s important to note that while removing the seeds can provide a smoother texture, it may alter the taste and slightly reduce the nutritional content. The seeds of blackberries contain fiber and some antioxidants, so by removing them, you may be losing some of these beneficial elements. However, if you prefer a seedless jam or have specific dietary needs, these methods will help you achieve it.
Now that you understand the importance of removing seeds, let’s explore each method in detail. By the end of this article, you’ll be equipped with the knowledge and skills to transform your blackberry jam into a velvety, seedless creation that will impress family and friends alike.
Key Takeaways:
- Say goodbye to crunchy blackberry jam! Use straining, blending, boiling and straining, or a food mill to remove seeds and create a smooth, velvety texture for your homemade jam.
- Removing blackberry seeds may alter taste and nutrition, but it’s worth it for a visually appealing, smooth jam. Experiment with different methods and enjoy the process of creating delicious, seedless blackberry jam.
Read more: How To Remove Seeds From Blackberries
Why Remove Seeds from Blackberries?
Blackberries are a popular fruit for making jam due to their intense flavor and natural sweetness. However, the abundance of small seeds in blackberries can be a turn-off for some people. Here are a few reasons why you might want to consider removing the seeds from your blackberries before making jam:
- Texture: The seeds in blackberries can add a gritty texture to the jam, which may not be desirable for those who prefer a smooth and velvety consistency. By removing the seeds, you can create a jam with a luscious texture that melts in your mouth.
- Aesthetics: Seedless jams have a more polished appearance, with a consistent color and texture. This can be visually appealing and make your homemade jam look even more enticing when presented or gifted to others.
- Kids and Seniors: Some people, especially young children or older adults with sensitive teeth or digestive issues, may find it difficult to chew and digest the small seeds. Removing the seeds from blackberries ensures that everyone can enjoy your jam, regardless of age or dental health.
- Baking and Cooking: If you plan to use your blackberry jam as an ingredient in baked goods or savory recipes, you may want to remove the seeds for a smoother and more uniform texture. This can help prevent any unwanted crunchiness or distraction from the other flavors in your dish.
- Presentation: A seedless blackberry jam can be a versatile ingredient for various culinary creations. It can be used as a filling for cakes, pastries, and doughnuts, or as a topping for pancakes, waffles, and ice cream. Removing the seeds allows for a more refined and enjoyable eating experience.
While there are valid reasons for removing blackberry seeds, it’s important to note that the seeds also offer nutritional benefits. Blackberry seeds contain dietary fiber, which aids in digestion, and they are a source of antioxidants, which have numerous health benefits. By removing the seeds, you may be sacrificing some of these nutritional advantages. However, if a smooth texture and seedless jam are your priorities, the following methods will guide you in achieving the desired result.
Now that you understand why removing blackberry seeds can be advantageous, let’s explore some methods for achieving seedless blackberry jam.
Methods for Removing Seeds
When it comes to removing seeds from blackberries, there are several methods you can choose from. The method you select will depend on your personal preference, the equipment you have available, and the level of smoothness you desire for your blackberry jam. Let’s explore four popular methods:
- Method 1: Straining: This is the most basic method for removing seeds from blackberries. All you need is a fine-mesh strainer or sieve and a spoon. Start by placing your blackberries in the strainer and using the back of the spoon to press them against the mesh. The juice and pulp will pass through the strainer while the seeds remain on the surface. Continue pressing and stirring until most of the seeds are separated from the pulp. This method is simple and doesn’t require any specialized equipment.
- Method 2: Blending: If you prefer a smoother texture and don’t mind investing in a blender or food processor, this method is for you. Start by placing your blackberries in the blender and pulsing them until they are pureed. Once pureed, pour the mixture into a fine-mesh strainer or sieve placed over a bowl. Use a spoon or spatula to press the pulp against the strainer, allowing the juice and pulp to pass through while leaving the seeds behind. This method ensures a seedless jam with a silky texture.
- Method 3: Boiling and Straining: This method requires a little extra time and effort but yields excellent results. Start by placing your blackberries in a saucepan and adding a small amount of water. Bring the mixture to a boil and simmer for a few minutes until the blackberries start to break down. Remove the saucepan from the heat and let it cool slightly. Once cooled, pour the mixture through a fine-mesh strainer or sieve to separate the seeds from the pulp. Use the back of a spoon to press down and extract as much juice and pulp as possible. This method not only removes the seeds but also helps intensify the flavor of the blackberries.
- Method 4: Using a Food Mill: If you have access to a food mill, this method is highly effective in removing seeds from blackberries. Start by passing your blackberries through the food mill, allowing the seeds to be collected in the mill’s catch bowl while the puree passes through. The food mill’s rotating mechanism separates the seeds from the fruit, resulting in a smooth, seedless pulp. This method is perfect for those looking for an efficient and effortless way to remove seeds from large quantities of blackberries.
These methods provide various options to suit your preferences and the equipment available in your kitchen. Experiment with different methods to find the one that works best for you. You can even combine methods or tweak them to suit your individual needs. Now that you know the different techniques, let’s look at some tips to ensure successful seed removal.
Method 1: Straining
Straining is the simplest and most straightforward method for removing seeds from blackberries. It requires minimal equipment and is ideal for those who prefer a slightly chunky texture in their jam. Follow these steps to remove the seeds using the straining method:
- Gather your supplies: You will need a fine-mesh strainer or sieve and a spoon or spatula to press the blackberries against the mesh. Ensure that your strainer has small enough gaps to catch the seeds while allowing the juice and pulp to pass through.
- Prepare the blackberries: Rinse the blackberries under cool water to remove any dirt or debris. Place the blackberries in the strainer or sieve.
- Press and stir: Use the back of a spoon or spatula to press the blackberries against the mesh. Apply gentle pressure to extract the juice and pulp while leaving the seeds behind. Stir and scrape the blackberries against the strainer to ensure maximum seed removal.
- Collect the juice and pulp: The seeds will remain on the surface of the strainer while the juice and pulp pass through. Use the spoon or spatula to scrape the underside of the strainer and collect the seedless juice and pulp in a bowl or container below.
- Discard the seeds: Once you have collected most of the juice and pulp, discard the seeds that are left on the strainer. You can compost them or dispose of them in an environmentally friendly manner.
Straining is a quick and easy method that allows you to remove the majority of the seeds while still retaining some texture in your blackberry jam. If you prefer a smoother consistency, you can pass the strained juice and pulp through the strainer a second time to ensure even fewer seeds remain. This method is especially ideal if you only have a small amount of blackberries to process.
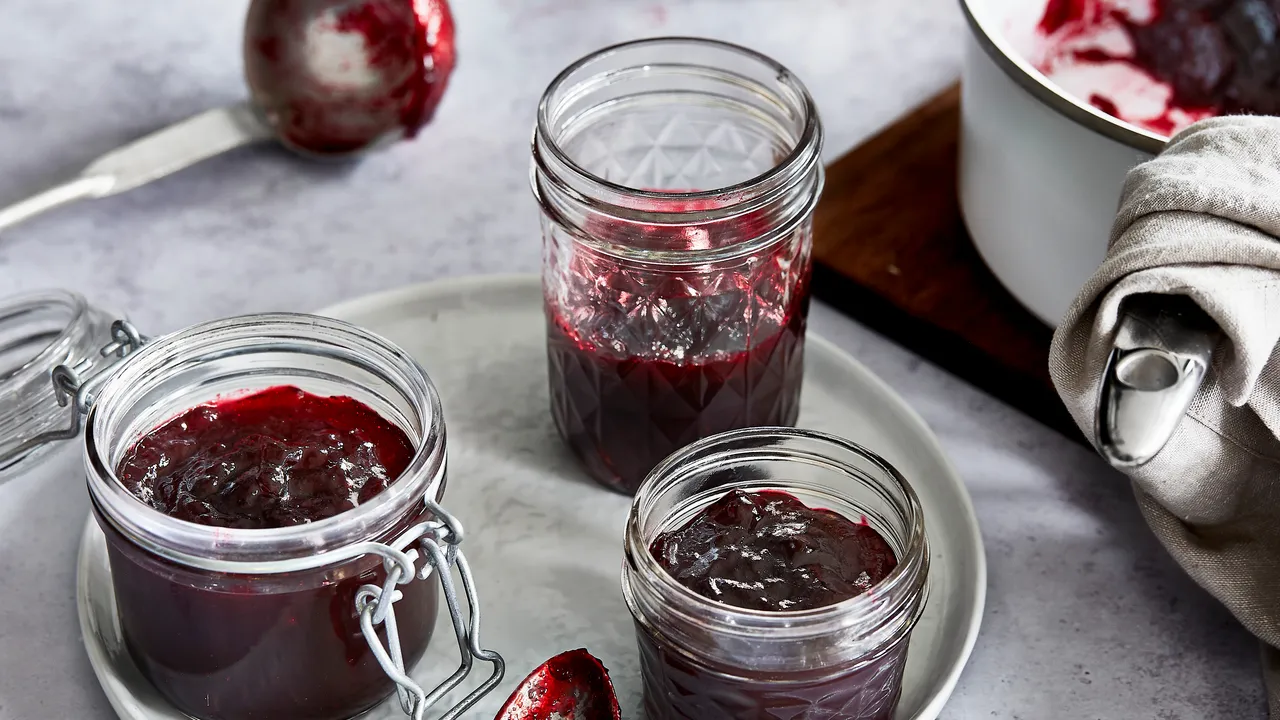
Once you have strained your blackberries, you can proceed with the jam-making process by adding sugar and cooking the mixture down to a desired consistency. The resulting seedless blackberry jam will be perfect for spreading on toast, stirring into yogurt, or using as a filling in pastries and cakes.
Now that you’ve learned how to remove seeds using the straining method, let’s explore another popular technique: blending.
Method 2: Blending
If you prefer a smoother texture and don’t mind investing in a blender or food processor, the blending method is an excellent option for removing seeds from blackberries. By pureeing the blackberries, you can easily separate the seeds from the pulp. Follow these steps to remove seeds using the blending method:
- Prepare the blackberries: Start by rinsing the blackberries under cool water to remove any dirt or debris. Drain them well and place them in the blender or food processor.
- Puree the blackberries: Pulse the blackberries in the blender or food processor until they are fully pureed. The result should be a smooth and uniform mixture with no visible seeds.
- Strain the puree: Set a fine-mesh strainer or sieve over a bowl or container. Pour the pureed blackberries into the strainer.
- Press the pulp: Use a spoon or spatula to press the pulp against the strainer, extracting the juice and separating it from the seeds. Apply gentle pressure and stir to ensure effective straining.
- Collect the seedless juice and pulp: As you press the pulp against the strainer, the seedless juice and pulp will pass through and collect in the bowl or container below.
- Discard the seeds: Once you have collected the seedless juice and pulp, discard the seeds that remain in the strainer. Dispose of them in an environmentally friendly manner.
The blending method ensures a smooth and seedless puree, perfect for creating a silky-textured blackberry jam. It eliminates the need for manually pressing the blackberries against a strainer, resulting in a more efficient and consistent removal of seeds.
Remember that the blended mixture will be relatively dense, so it may take a little longer for the juice and pulp to pass through the strainer. Be patient and continue pressing and stirring to extract as much seedless juice and pulp as possible.
Once you have successfully strained the blackberry puree, you can proceed with making your jam by adding sugar and cooking the mixture down to your desired consistency. The result will be a delightful seedless blackberry jam that you can enjoy on toast, pancakes, or even as a topping for desserts.
Now that you know how to remove seeds using the blending method, let’s move on to another technique: boiling and straining.
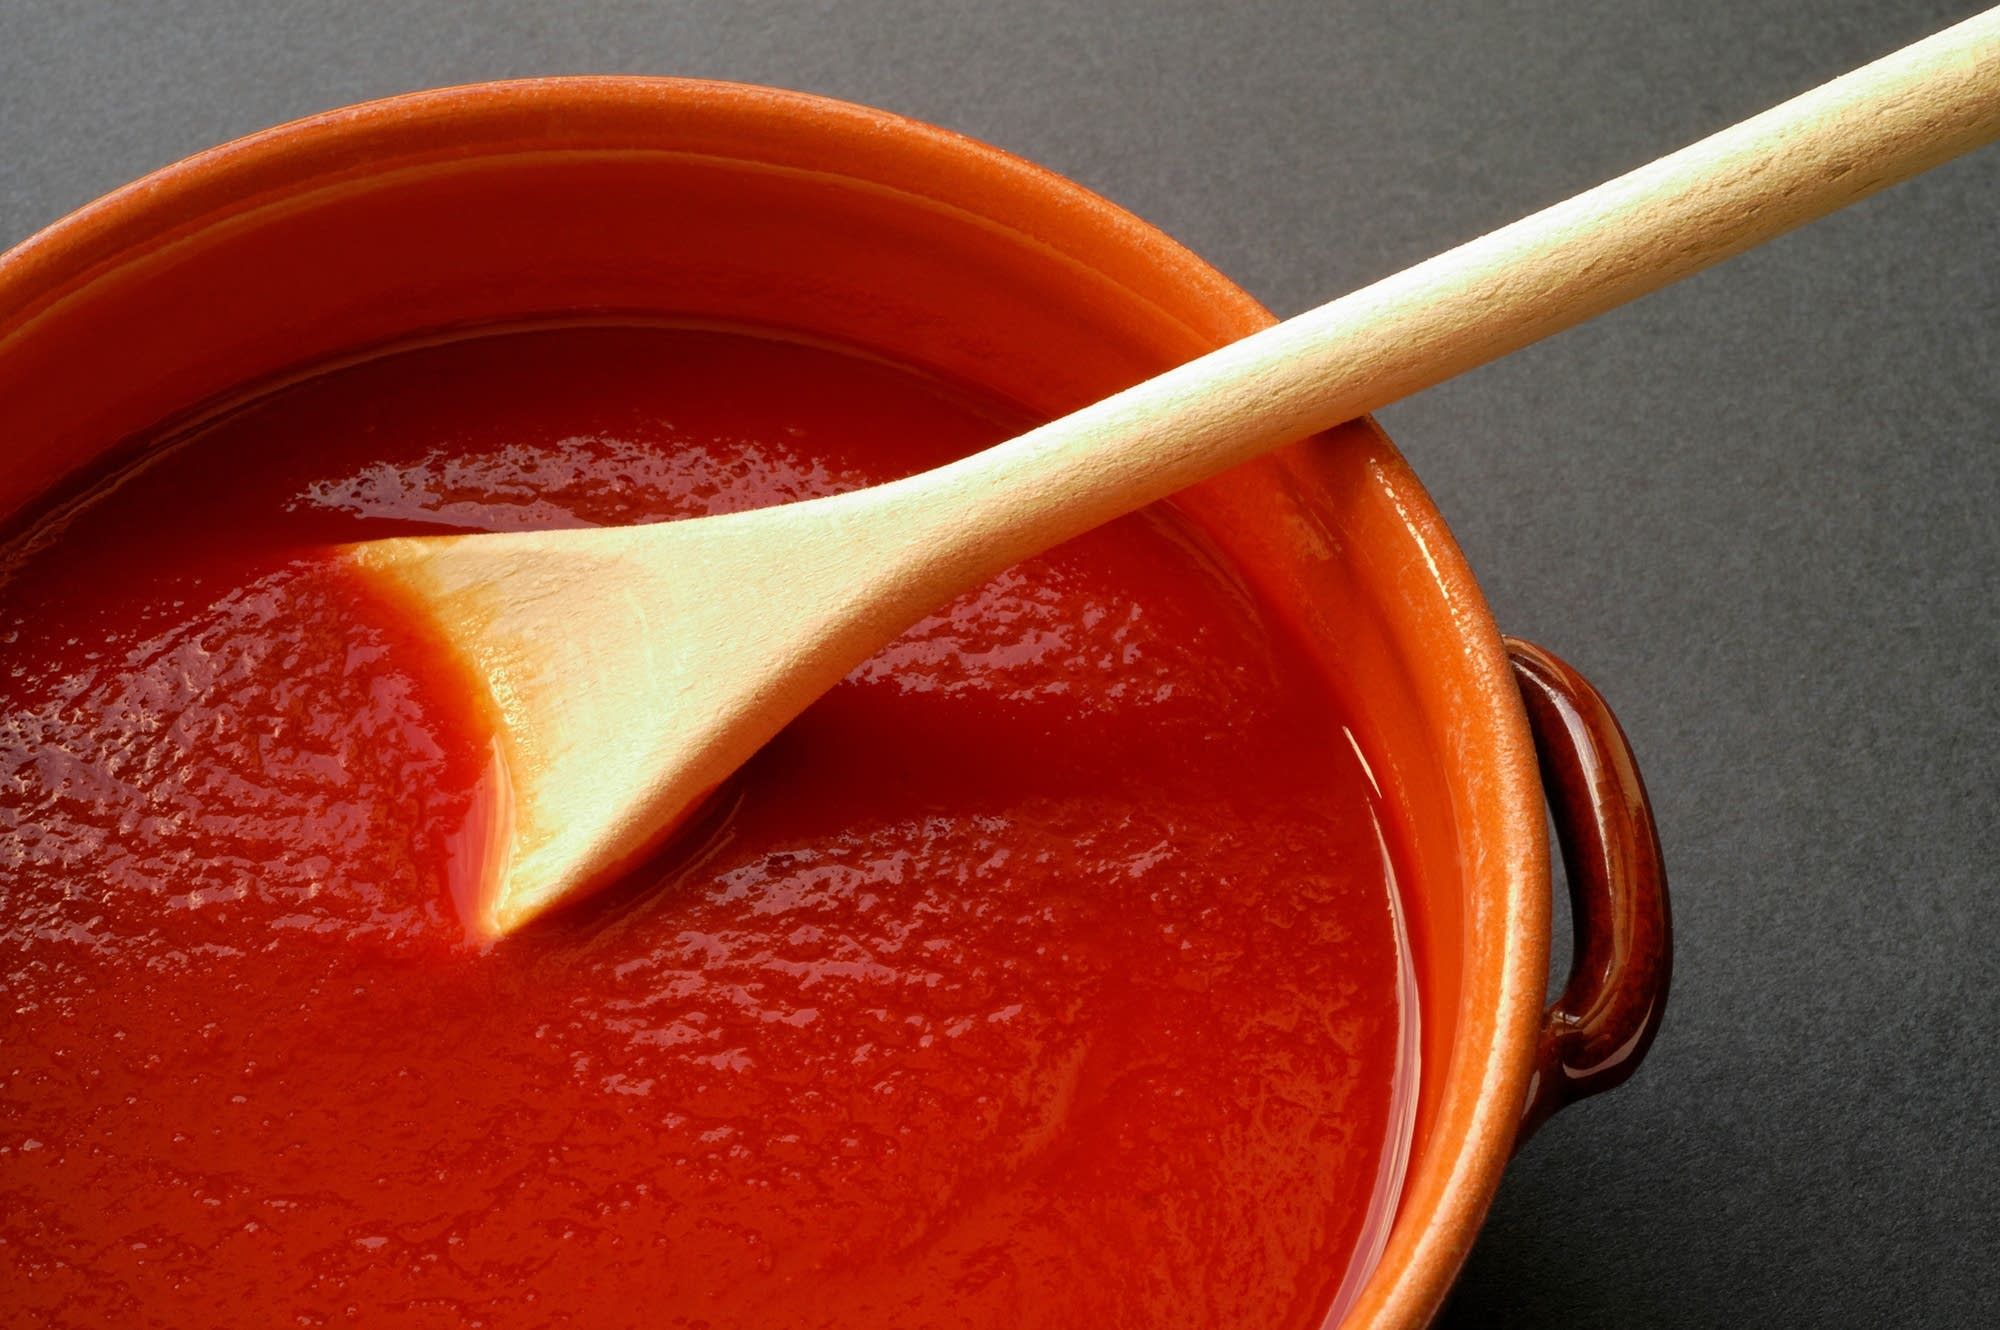
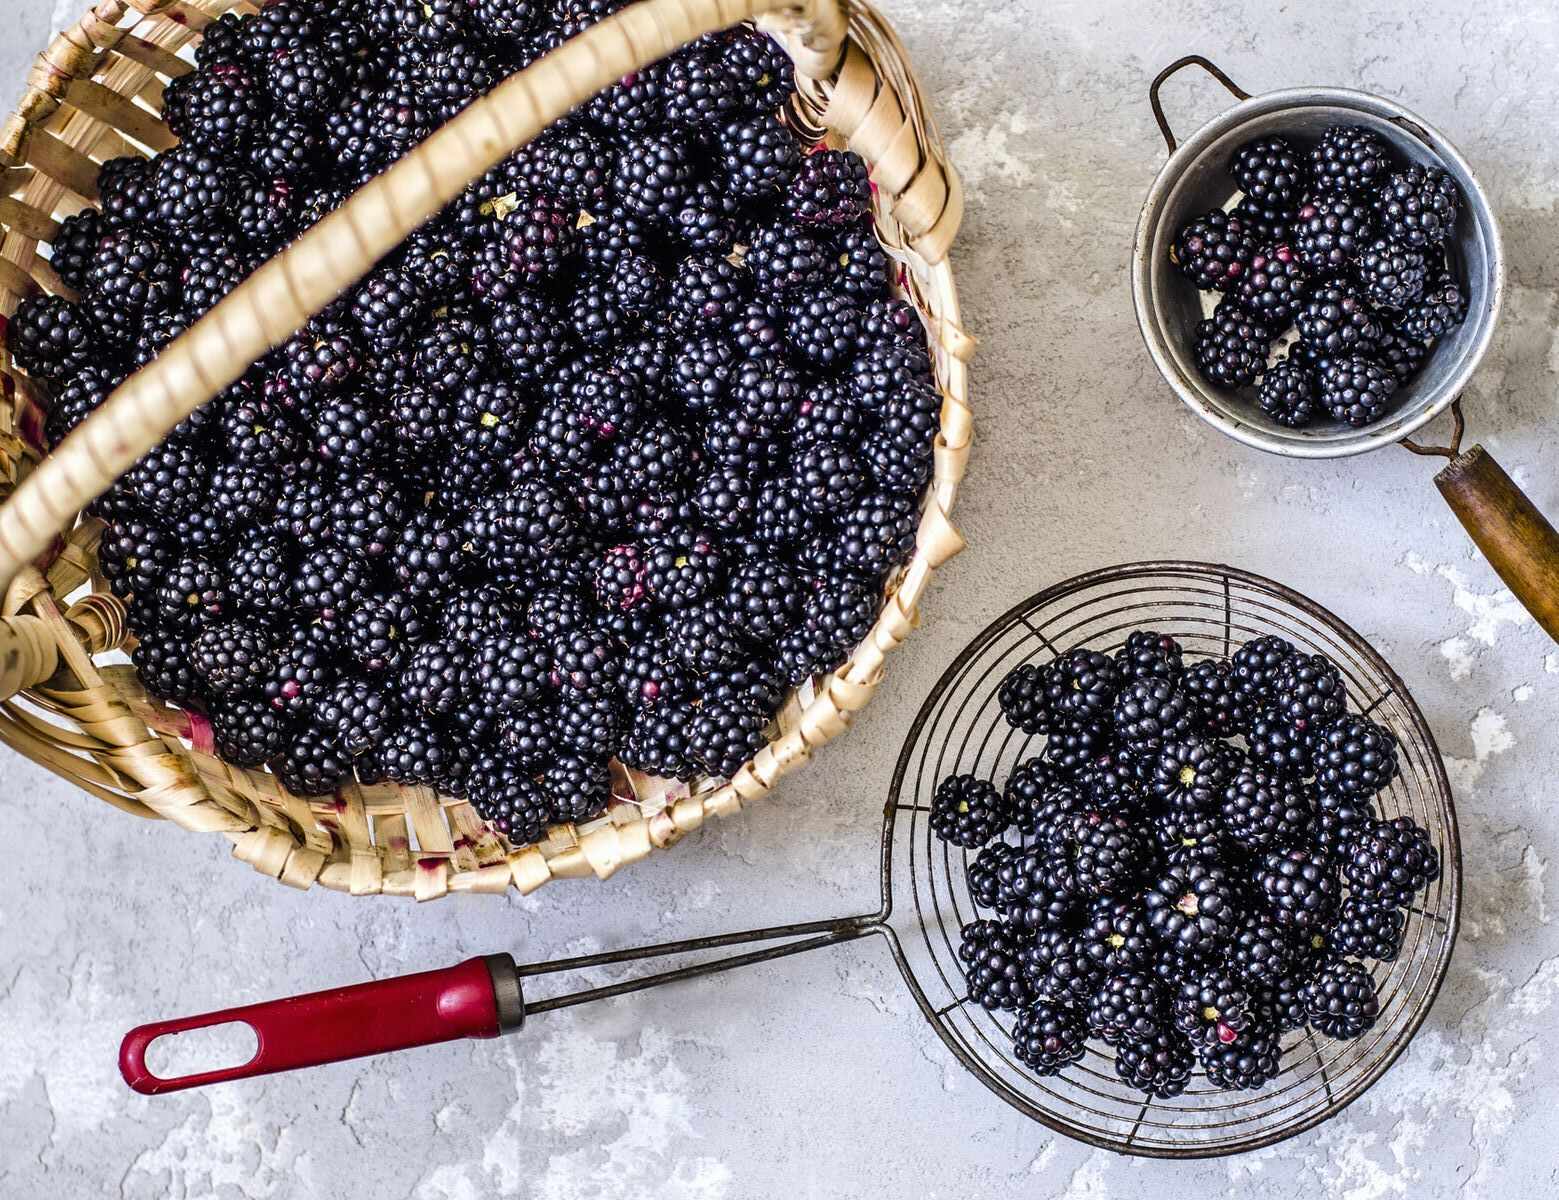
Use a fine mesh strainer to remove seeds from blackberries for jam. Press the berries through the strainer with a spoon, leaving the seeds behind.
Read more: How To Grow Blackberries From Seed
Method 3: Boiling and Straining
If you’re looking for a method that not only removes seeds but also intensifies the flavor of your blackberries, the boiling and straining method is a great option. By simmering the blackberries and then straining the mixture, you can achieve a smooth and concentrated pulp. Follow these steps to remove seeds using the boiling and straining method:
- Prepare the blackberries: Start by rinsing the blackberries under cool water to remove any dirt or debris. Drain them well and place them in a saucepan.
- Add water and simmer: Add a small amount of water to the saucepan, just enough to cover the bottom and prevent the blackberries from sticking. Place the saucepan over medium heat and bring the mixture to a boil. Reduce the heat and simmer for a few minutes until the blackberries start to break down and release their juices.
- Let the mixture cool: Remove the saucepan from the heat and let the mixture cool for a few minutes. As it cools, the blackberry pulp will become more concentrated, making it easier to separate the seeds.
- Strain the mixture: Set a fine-mesh strainer or sieve over a bowl or container to collect the strained juice and pulp. Pour the blackberry mixture through the strainer.
- Press the pulp: Use the back of a spoon or spatula to press the pulp against the strainer, extracting as much juice and pulp as possible. Apply gentle pressure and stir to assist in straining and seed removal.
- Collect the seedless juice and pulp: As you press the pulp against the strainer, the seedless juice and pulp will pass through and collect in the bowl or container below.
- Discard the seeds: Once you have collected the seedless juice and pulp, discard the seeds that remain in the strainer. Dispose of them in an environmentally friendly manner.
The boiling and straining method not only removes the seeds but also concentrates the flavor of the blackberries. Simmering the blackberries allows some of the water content to evaporate, leaving a more intense and flavorful pulp.
Once you have successfully strained the blackberry mixture, you can proceed with making your jam. Add sugar to the juice and pulp, return it to the saucepan, and cook it down to your desired consistency. The end result will be a rich and smooth blackberry jam, perfect for spreading on toast or adding to your favorite recipes.
Now that you’ve learned how to remove seeds using the boiling and straining method, let’s explore another technique: using a food mill.
Method 4: Using a Food Mill
If you have access to a food mill, using it to remove seeds from blackberries is a highly effective and efficient method. The food mill’s rotating mechanism separates the seeds from the fruit, resulting in a smooth and seedless pulp. Follow these steps to remove the seeds using a food mill:
- Prepare the blackberries: Start by rinsing the blackberries under cool water to remove any dirt or debris. Drain them well and place them in the food mill’s hopper.
- Process the blackberries: Turn the hand crank or switch on the food mill to start the process. The blackberries will pass through the mill’s small holes while the seeds will be collected in the mill’s catch bowl.
- Continue milling: Keep turning the hand crank or operating the food mill until all the blackberries have been processed. This will separate the seeds from the fruit and create a smooth, seedless pulp.
- Collect the seedless pulp: Open the food mill’s bottom or remove the catch bowl to collect the seedless blackberry pulp. This pulp can be used directly for making jam or further processed according to your recipe’s requirements.
- Discard the seeds: Once you have collected the seedless pulp, dispose of the seeds that remain in the food mill’s catch bowl. You can compost them or dispose of them in an environmentally friendly manner.
Using a food mill is a fantastic option for large quantities of blackberries or for those who prefer a completely seedless pulp. It removes the seeds efficiently and produces a smooth texture with minimal effort required.
After using the food mill to remove the seeds, you can proceed with making your blackberry jam. Add sugar to the seedless pulp, cook it down to your desired consistency, and savor the delightful taste of homemade blackberry jam without any pesky seeds.
Now that you’ve learned how to remove seeds using a food mill, you are well equipped to enjoy the process of making seedless blackberry jam. In the next section, we’ll provide you with some helpful tips to ensure successful seed removal and jam-making.
Tips for Removing Seeds Successfully
Removing seeds from blackberries can be a delicate process, especially if you want to achieve a seedless result. Here are some helpful tips to ensure successful seed removal:
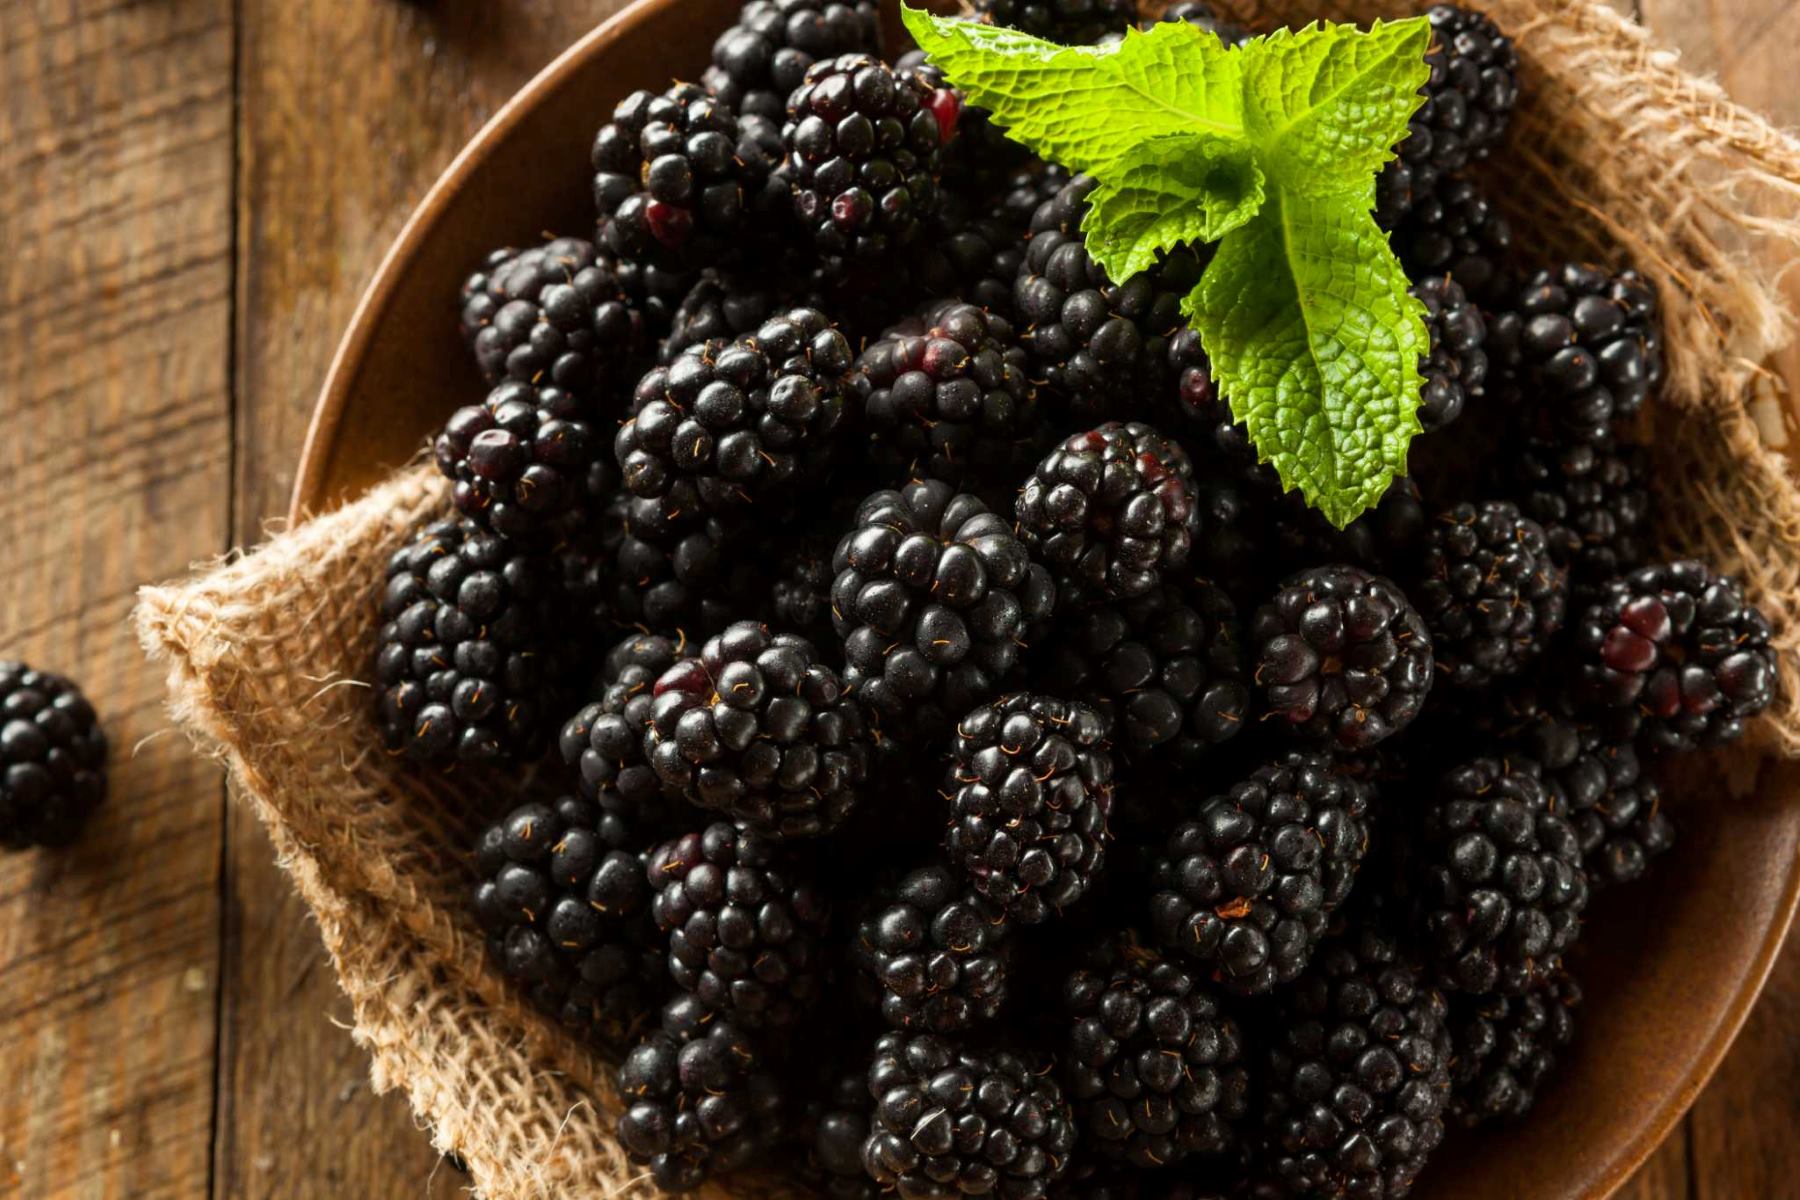
- Select ripe and plump blackberries: Choose blackberries that are fully ripe and plump. Ripe blackberries will be easier to process and will yield more juice and pulp, making it easier to separate the seeds.
- Use the right equipment: Depending on the method you choose, make sure you have the appropriate equipment. A fine-mesh strainer or sieve, a blender or food processor, a saucepan, or a food mill will all aid in the effective removal of seeds.
- Work in small batches: If you’re using the straining method, handle only a small amount of blackberries at a time to ensure thorough seed removal. Working in smaller batches allows for better control and more efficient pressing against the strainer.
- Be patient and thorough: Regardless of the method you choose, take your time to press and stir the blackberries against the strainer or sieve. Apply gentle pressure and ensure that you scrape the underside of the strainer to release any trapped pulp and juice.
- Experiment with different methods: Try out different methods and see which one works best for you. Each method offers its own advantages in terms of texture and efficiency. The method you choose will depend on your individual preferences and the desired outcome for your blackberry jam.
- Strain the juice and pulp twice: If you want a smoother consistency, consider straining the juice and pulp a second time. This extra step will help remove any remaining seeds and further refine the texture of your blackberry jam.
- Adjust the sugar and flavorings: Once you have successfully removed the seeds, you can proceed with adding sugar and any other desired flavorings to your blackberry jam. Keep in mind that the removal of seeds may slightly alter the taste of the jam, so adjust the sweetener and other ingredients accordingly.
- Label and store: Once you’ve made your seedless blackberry jam, be sure to label it with the date and store it in airtight containers. Proper storage will help ensure its freshness and maintain its delicious flavor for months to come.
Remember, removing seeds from blackberries requires practice and experimentation to find the method that suits your preferences. Don’t be discouraged if your first attempt doesn’t yield perfect results. With each batch, you’ll gain more experience and get closer to achieving the ideal seedless blackberry jam.
Now that you have these tips in mind, you’re ready to embark on your seed-removing journey and create a smooth and delicious blackberry jam that everyone will love!
Happy jam-making!
Conclusion
Removing seeds from blackberries is a process that can transform your homemade jam into a smooth and delightful treat. Whether you prefer a velvety texture or have specific dietary needs, the methods discussed in this article offer a range of options for successfully removing the seeds from blackberries.
We explored four popular methods: straining, blending, boiling and straining, and using a food mill. Each method has its own advantages and can be tailored to suit your desired level of smoothness. From the simplicity of straining to the efficiency of a food mill, these techniques provide you with the tools to create a seedless blackberry jam that will impress both your family and friends.
While removing the seeds may alter the taste and slightly reduce the nutritional content, the end result is a visually appealing, smooth, and enjoyable jam. Remember to choose ripe and plump blackberries, use the proper equipment, and be patient and thorough in the seed removal process.
Experiment with different methods to find the one that best suits your preferences and the equipment you have available in your kitchen. You can even combine methods or make adjustments to achieve the desired level of smoothness and flavor.
Once you have successfully removed the seeds, add sugar and any desired flavorings to your blackberry pulp. Cook it down to your desired consistency, and enjoy the fruits of your labor. Spread your homemade, seedless blackberry jam on toast, swirl it into yogurt, or use it as a delectable filling in your favorite baked goods.
Remember to label and store your jam properly to ensure its freshness and delicious taste over time.
Now, armed with the knowledge and tips from this article, you are ready to embark on your seed-removing journey and create a delightful batch of homemade blackberry jam. Enjoy the process, savor the flavors, and share your delicious creation with loved ones.
Happy seed removal and jam-making!
Frequently Asked Questions about How To Remove Seeds From Blackberries For Jam
Was this page helpful?
At Storables.com, we guarantee accurate and reliable information. Our content, validated by Expert Board Contributors, is crafted following stringent Editorial Policies. We're committed to providing you with well-researched, expert-backed insights for all your informational needs.


0 thoughts on “How To Remove Seeds From Blackberries For Jam”