Home>Garden Essentials>How To Seed A Lawn In Fall
Garden Essentials
How To Seed A Lawn In Fall
Modified: October 19, 2024
Learn how to seed your garden lawn in the fall season for optimal growth and lush greenery. Follow our step-by-step guide now!
(Many of the links in this article redirect to a specific reviewed product. Your purchase of these products through affiliate links helps to generate commission for Storables.com, at no extra cost. Learn more)
Introduction
Welcome to our comprehensive guide on how to seed a lawn in fall! Transforming your outdoor space into a lush, vibrant green oasis requires proper care and planning. By seeding your lawn in the fall, you set it up for success in the following spring and summer.
Fall is the optimal time for seeding a lawn due to the favorable weather conditions and reduced competition from weeds. The cooler temperatures and increased rainfall create the perfect environment for grass seed to germinate and establish strong roots.
Whether you’re starting from scratch with a bare patch or looking to improve the density and health of your existing lawn, fall seeding is an essential step. In this guide, we will walk you through the entire process, from preparing the lawn to nurturing the newly seeded areas.
By the end of this article, you’ll have a clear understanding of the benefits of fall seeding, how to choose the right grass seed, and the necessary steps to ensure a successful outcome. So grab a pen and paper, and let’s dive into the world of lawn seeding!
Key Takeaways:
- Fall seeding offers optimal conditions for grass growth, reduced weed competition, and a cost-effective way to achieve a lush, healthy lawn.
- Proper preparation, choosing the right grass seed, and consistent watering and maintenance are essential for successfully seeding a lawn in the fall.
Read more: What To Do For Fall Lawn Care
Benefits of Seeding a Lawn in Fall
Seeding a lawn in the fall offers numerous benefits that contribute to the overall health and appearance of your lawn. Let’s take a closer look at some of the advantages:
- Optimal Growing Conditions: The cooler temperatures and increased moisture in the fall create the perfect environment for grass seed to germinate and establish strong root systems. This allows the grass to get a head start and develop resilience before the harsh conditions of winter arrive.
- Reduced Weed Competition: Seeding in the fall reduces the competition from weeds. Most weed seeds have already germinated and gone dormant by this time, meaning that your newly seeded grass will face less competition for nutrients, sunlight, and water.
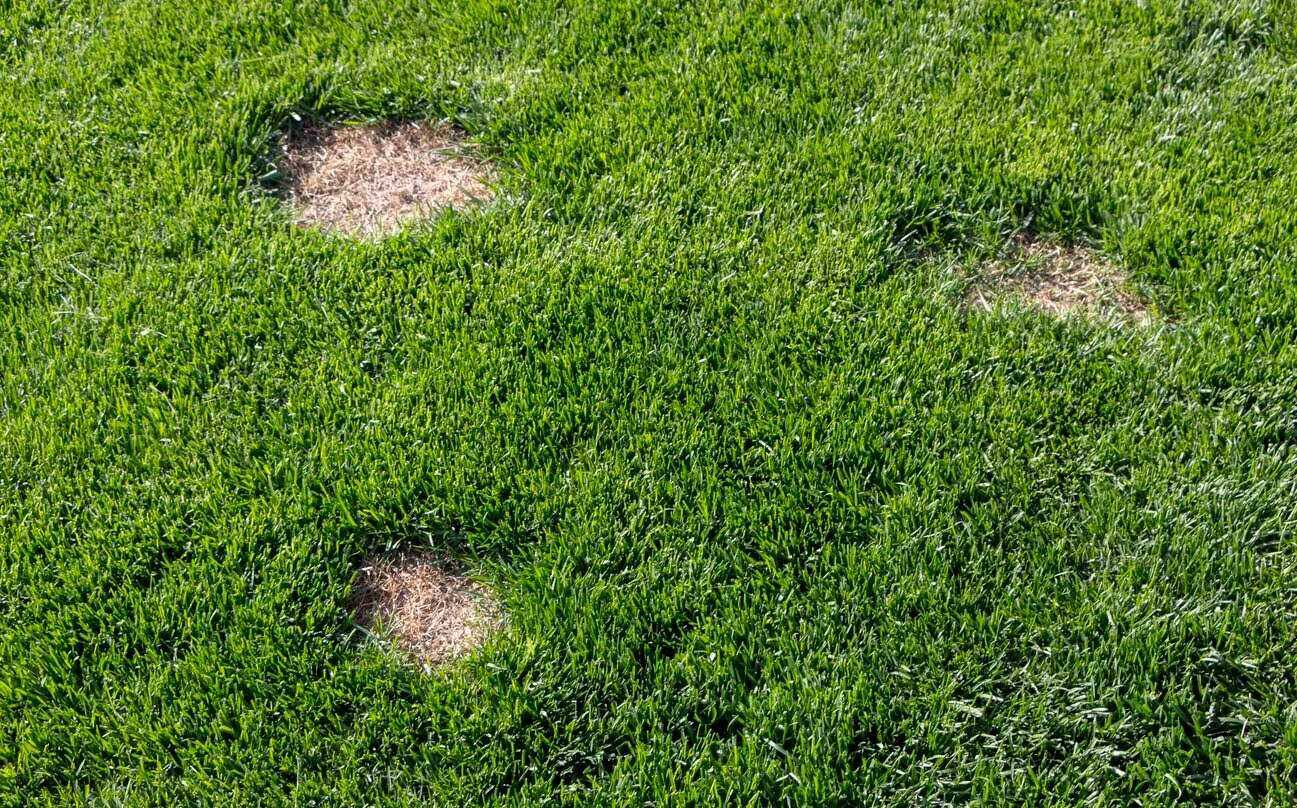
- Thicker and Healthier Lawn: Fall seeding helps to improve the overall density and health of your lawn. By introducing new grass seed, you can fill in bare patches, repair damaged areas, and enhance the visual appearance. This leads to a thicker, lusher, and more uniform lawn.
- Enhanced Weed Control: By establishing a dense lawn through fall seeding, you create a natural barrier that helps to prevent weed growth. The thick grass shades the soil, making it difficult for weeds to take root and establish themselves.
- Cost-Effective: Seeding in the fall is a cost-effective way to improve your lawn. Grass seed is typically less expensive during this season, and with proper care and maintenance, you can achieve significant results without breaking the bank.
- Improved Disease Resistance: New grass seedlings planted in the fall have a chance to develop strong root systems and establish themselves before diseases become more prevalent in the warmer months. This can help your lawn resist common diseases and remain healthy throughout the growing season.
- Environmental Benefits: Seeding your lawn in the fall contributes to environmental benefits as well. A healthy, thick lawn helps prevent soil erosion, filters pollutants, absorbs rainfall, and reduces water runoff.
Seeding a lawn in the fall is a proactive approach to lawn care that yields long-lasting results. By taking advantage of the ideal growing conditions and reduced weed competition, you can achieve a thicker, healthier, and more beautiful lawn. So don’t wait any longer – let’s get started with preparing your lawn for seeding!
Preparing the Lawn for Seeding
Before you begin the process of seeding your lawn in the fall, it’s crucial to prepare the area properly. Adequate preparation ensures optimal conditions for seed germination and establishment. Here are the steps to follow:
- Clear the Area: Remove any debris, rocks, or existing vegetation from the area you plan to seed. This creates a clean and level surface for the new grass seed to take root.
- Mow the Existing Grass: If you have existing grass, mow it as short as possible without scalping it. This helps the new grass seed make direct contact with the soil.
- Rake or Dethatch: If there is a layer of thatch (dead grass and debris) on your lawn, use a garden rake or dethatching machine to remove it. Thatch can hinder seed germination and prevent proper root growth.
- Test the Soil: It’s essential to test the soil’s pH level and nutrient content. A soil test will provide valuable information on any necessary amendments, such as adjusting the pH level or adding fertilizer, to create optimal growing conditions for the new grass seed.
- Aerate the Soil: If your soil is compacted, it’s beneficial to aerate it. Aerating creates small holes in the ground, allowing air, water, and nutrients to reach the grassroots. It promotes better water absorption and creates space for the new grass seed to establish healthy roots.
- Apply Soil Amendments: Based on the results of your soil test, apply any necessary soil amendments, such as lime to adjust pH or compost to improve nutrient levels. Follow the recommended rates and guidelines for the specific product you’re using.
- Water the Lawn: Moisture is vital for successful grass seed germination. Water the lawn thoroughly, ensuring that the soil is adequately moist but not saturated. This will provide a moist environment for the seeds to start their growth.
- Wait for the Weeds: After watering the area, give any weed seeds time to germinate. This typically takes about two weeks. Once the weeds have sprouted, remove them by hand or with a gentle herbicide, being careful not to disturb the soil or new grass seedlings.
By following these steps, you’ll create an ideal environment for the new grass seed to take root and flourish. Properly preparing the lawn sets the stage for a successful seeding process, resulting in a healthier and more beautiful lawn. Now let’s move on to choosing the right grass seed for your specific needs!
Choosing the Right Grass Seed
Choosing the right grass seed is crucial for achieving a healthy, lush lawn. There are different types of grass seed available, each with its unique characteristics and suitability for specific regions and growing conditions. Here are some factors to consider when selecting grass seed for your lawn:
- Climate: The climate of your region plays a significant role in determining the type of grass that will thrive. Cool-season grasses, such as Kentucky bluegrass, fescue, and ryegrass, are well-suited for regions with cold winters and hot summers. Warm-season grasses, such as Bermuda grass and zoysia grass, thrive in areas with mild winters and hot, humid summers.
- Sunlight and Shade: Evaluate the amount of sunlight your lawn receives throughout the day. Some grass varieties, like Bermuda grass and zoysia grass, require full sun, while others, such as fine fescue or shade-tolerant varieties, can handle partial shade.
- Soil Type: Take into consideration the soil type in your lawn. Different grasses have specific soil preferences. Some grasses, like Kentucky bluegrass, thrive in well-drained soils, while others, like St. Augustine grass, are more tolerant of heavier soils.
- Drought Tolerance: If you live in an area prone to drought or water restrictions, it’s important to choose a grass seed variety that is drought-tolerant. Certain grasses, such as Bermuda grass and buffalo grass, have natural drought resistance and can withstand periods of limited water availability.
- Maintenance Requirements: Consider your desired level of lawn maintenance. Some grass varieties, like Kentucky bluegrass, require regular mowing, fertilizing, and watering, while others, like fine fescue or Bermuda grass, have lower maintenance needs.
- Local Recommendations: Seek advice from local gardening centers, landscapers, or agricultural extension offices. They can provide valuable insights and recommendations on the grass seed varieties that perform well in your specific area.
Once you’ve identified the grass seed variety that best suits your needs, make sure to purchase high-quality seed from a reputable supplier. Look for seed that is free from weeds, debris, and other contaminants.
Keep in mind that it’s often beneficial to choose a seed mix or blend that combines different grass varieties. This helps to ensure a more resilient and visually appealing lawn, as different grasses have varying strengths, such as drought tolerance or wear resistance.
By selecting the right grass seed for your lawn, you set the stage for a successful seeding process and a thriving, beautiful lawn. Now let’s move on to the next step: testing the soil to ensure optimal conditions for seed germination and growth.
Testing the Soil
Before you seed your lawn in the fall, it’s important to test the soil to assess its pH level and nutrient content. A soil test provides valuable information that helps you make informed decisions about soil amendments and fertilizer application. Here’s how to test your soil:
- Collect Soil Samples: Using a garden trowel or shovel, collect soil samples from various areas of your lawn. Take samples from both the surface and the root zone, ensuring that the samples represent the overall soil composition.
- Prepare the Soil Samples: Remove any roots, rocks, or debris from the soil samples. Break up any clumps and mix the soil thoroughly in a clean bucket. This ensures that the sample is a representative composite of the entire area.
- Choose a Soil Testing Kit or Lab Analysis: You can choose between using a DIY soil testing kit or sending your soil samples to a professional lab for analysis. DIY testing kits are readily available at garden centers and provide a basic assessment of pH and nutrient levels. Professional lab analysis offers a more detailed report, including specific nutrient recommendations.
- Follow the Testing Kit Instructions: If you opt for a DIY soil testing kit, carefully follow the instructions provided. Typically, you’ll add water to a portion of the soil sample, mix it thoroughly, and use the test strips or chemicals provided to determine the pH level and nutrient concentrations.
- Send Samples to a Lab: If you choose to send your soil samples to a lab, follow their instructions on how to properly collect and submit your samples. They will provide you with an analysis report and specific recommendations for any necessary soil amendments.
- Interpret the Results: Once you receive the soil test report, pay attention to the pH level and nutrient recommendations. The pH level indicates the acidity or alkalinity of the soil, with most grasses thriving in a slightly acidic range between 6.0 and 7.0. Nutrient recommendations will guide you on any necessary amendments, such as adding lime to raise pH or applying specific fertilizers.
Testing your soil provides crucial insights into its composition, allowing you to make informed decisions about soil amendments and fertilizer application. By addressing any soil imbalances or deficiencies, you create optimal conditions for the new grass seed to germinate and establish robust root systems.
Remember to follow the recommended rates and guidelines for any soil amendments or fertilizers you apply. Overapplication can be detrimental to the health of your lawn. With a properly tested and amended soil, you’re now ready to move on to the next steps of removing weeds and thatch. Let’s dive in!
Read also: 8 Amazing Fall Lawn Fertilizer for 2025
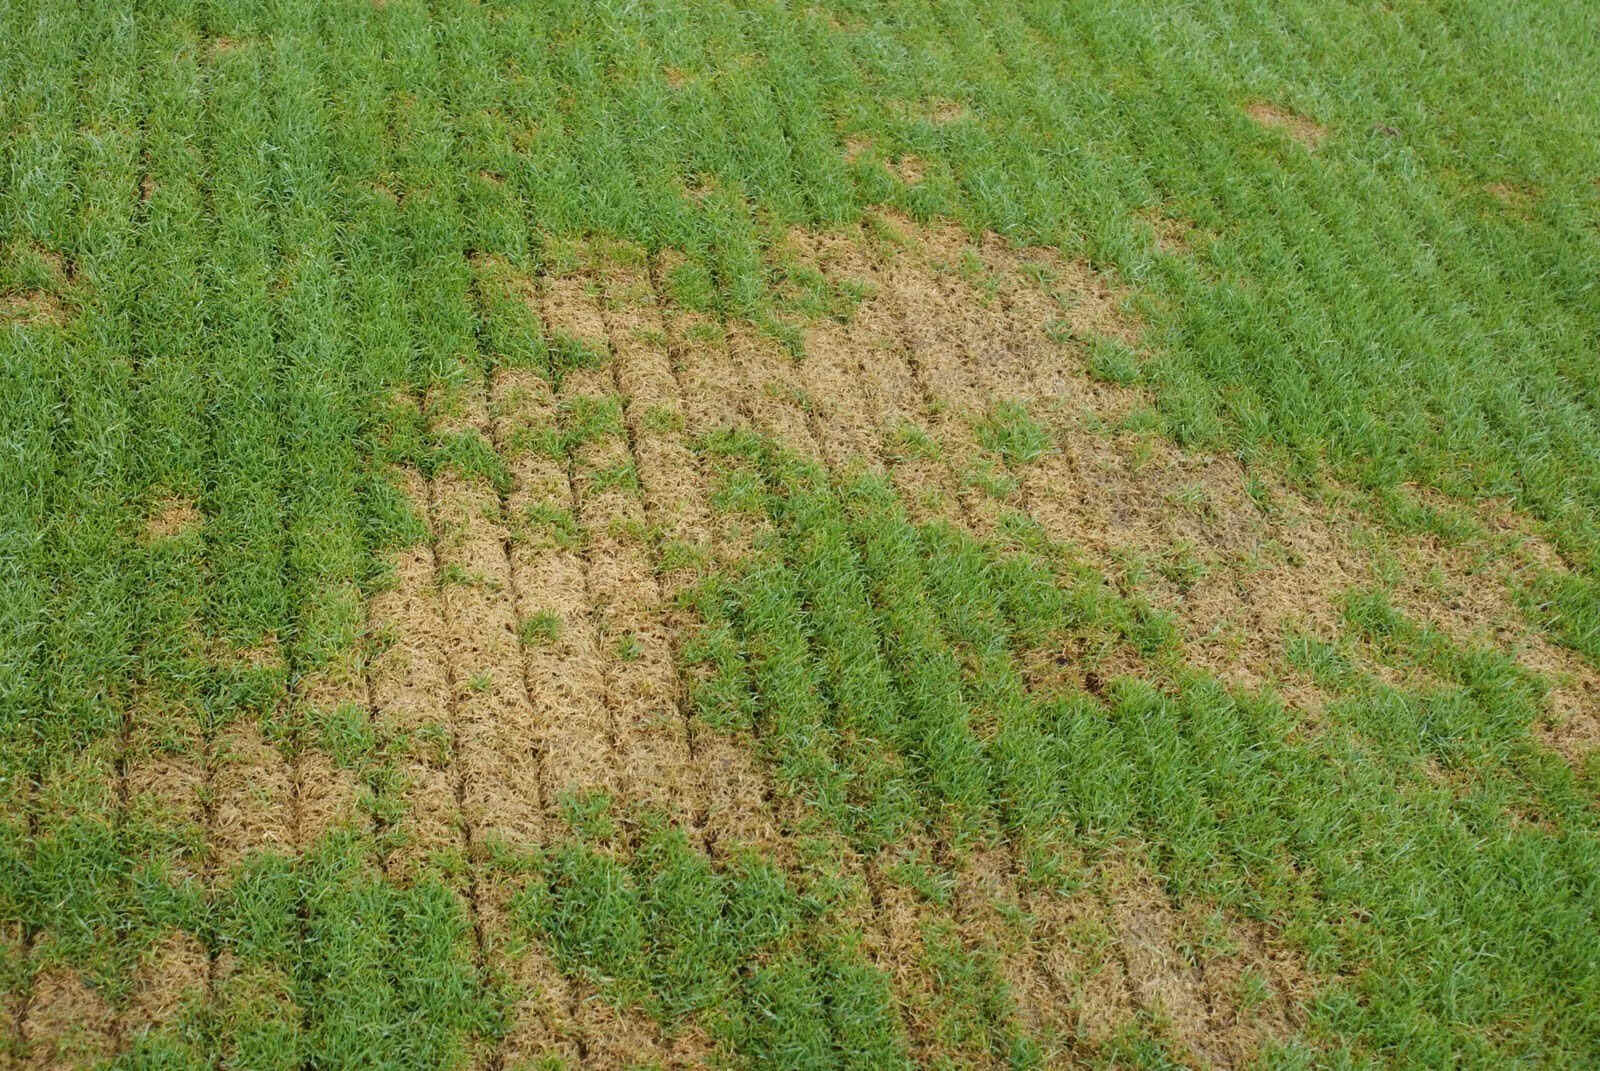
Removing Weeds and Thatching
Prior to seeding your lawn in the fall, it’s important to address any existing weeds and thatch. Weeds can compete with the new grass seed for nutrients and stifle its growth, while excessive thatch can hinder seed-to-soil contact and proper root development. Here’s how to remove weeds and thatch effectively:
- Identify Weeds: Take a close look at your lawn to identify common weeds such as dandelion, crabgrass, clover, or chickweed. Knowing the types of weeds present will help you determine the most effective approach for their removal.
- Hand Pulling: For small areas or isolated weeds, hand pulling is an effective method of removal. Ensure you remove the entire plant, including the roots, to prevent regrowth. Use a digging tool or trowel to aid in the process if necessary.
- Herbicide Application: For larger areas or persistent weed infestations, herbicides can be used. Choose a selective herbicide that targets the specific weeds present while minimizing damage to desirable grass species. Follow the instructions on the herbicide label carefully for proper application.
- Dethatching: Thatch is a layer of dead organic matter that accumulates between the grass blades and the soil surface. Excessive thatch can hinder seed germination and restrict the movement of air, water, and nutrients. Use a dethatching rake or power dethatcher to remove the thatch. Rake vigorously in a back and forth motion to break up the layer and remove the debris.
- Aerating: Aeration involves creating small holes in the soil to improve water and nutrient penetration and reduce compaction. If your lawn has compacted soil, especially in areas with heavy foot traffic, rent a core aerator or use a hand aerator to relieve compaction and promote root growth.
- Collect and Dispose: Once you have removed the weeds and thatch, collect and dispose of them properly. This prevents the spread of weed seeds and reduces the chance of reinfestation.
Addressing weeds and thatch before seeding your lawn creates a clean and optimal environment for the new grass seed to establish itself. It allows for better seed-to-soil contact, improved water and nutrient absorption, and unrestricted root growth.
Now that you’ve removed the weeds and thatch, it’s time to move on to the next step: aerating the soil. Let’s continue our journey towards establishing a healthy and vibrant lawn!
Water the newly seeded lawn regularly to keep the soil moist, but not waterlogged. This will help the seeds germinate and establish a healthy root system before winter.
Aerating the Soil
Aerating the soil is a crucial step in preparing your lawn for seeding. Soil compaction can hinder root growth, restrict water and nutrient absorption, and create an unhealthy environment for your grass. Aerating the soil helps to alleviate compaction and promote better growing conditions for the new grass seed. Here’s how to aerate your lawn:
- Choose the Right Aeration Tool: There are several options available for aerating your soil, including manual aerators, spike aerators, and core aerators. Manual aerators are suitable for smaller lawns, while powered aerators are more efficient for larger areas.
- Mow the Lawn: Before aerating, it’s essential to mow the lawn at a slightly lower height than usual. This allows the aerating tool to penetrate the soil more effectively and ensures the best results.
- Water the Lawn: It’s important to water the lawn thoroughly a day or two before aerating. Moist soil is easier to penetrate, allowing the aerator to go deeper and create more effective holes.
- Aerate the Lawn: Use the designated aeration tool to puncture the soil and create holes. For spike aerators, simply push the spikes into the ground at regular intervals. For core aerators, the machine removes small plugs of soil, creating larger openings. Ensure that the holes are spaced close enough to cover the entire lawn area without overlapping.
- Leave the Plugs: If you use a core aerator, allow the soil plugs to remain on the lawn. They will break down over time and contribute to the natural decomposition process, adding organic matter back to the soil.
- Fill in Depressions: After aerating, you may notice some depressions or uneven areas on the lawn. Use a rake to level out these spots and redistribute any soil that may have been displaced during the process.
- Apply Top Dressing (Optional): If your lawn has poor soil quality or you want to improve the soil structure, you can apply a thin layer of compost or topsoil over the lawn surface after aerating. This helps to fill in the holes created by aeration and adds beneficial nutrients to the soil.
Aerating the soil improves the overall health and vitality of your lawn. It allows air, water, and nutrients to reach the grassroots more easily, encouraging deeper root growth and stronger plants. By incorporating regular aeration into your lawn care routine, you can significantly enhance the success of your fall seeding efforts.
Now that the soil is properly aerated, it’s time to move on to the exciting process of seeding your lawn. Let’s get started!
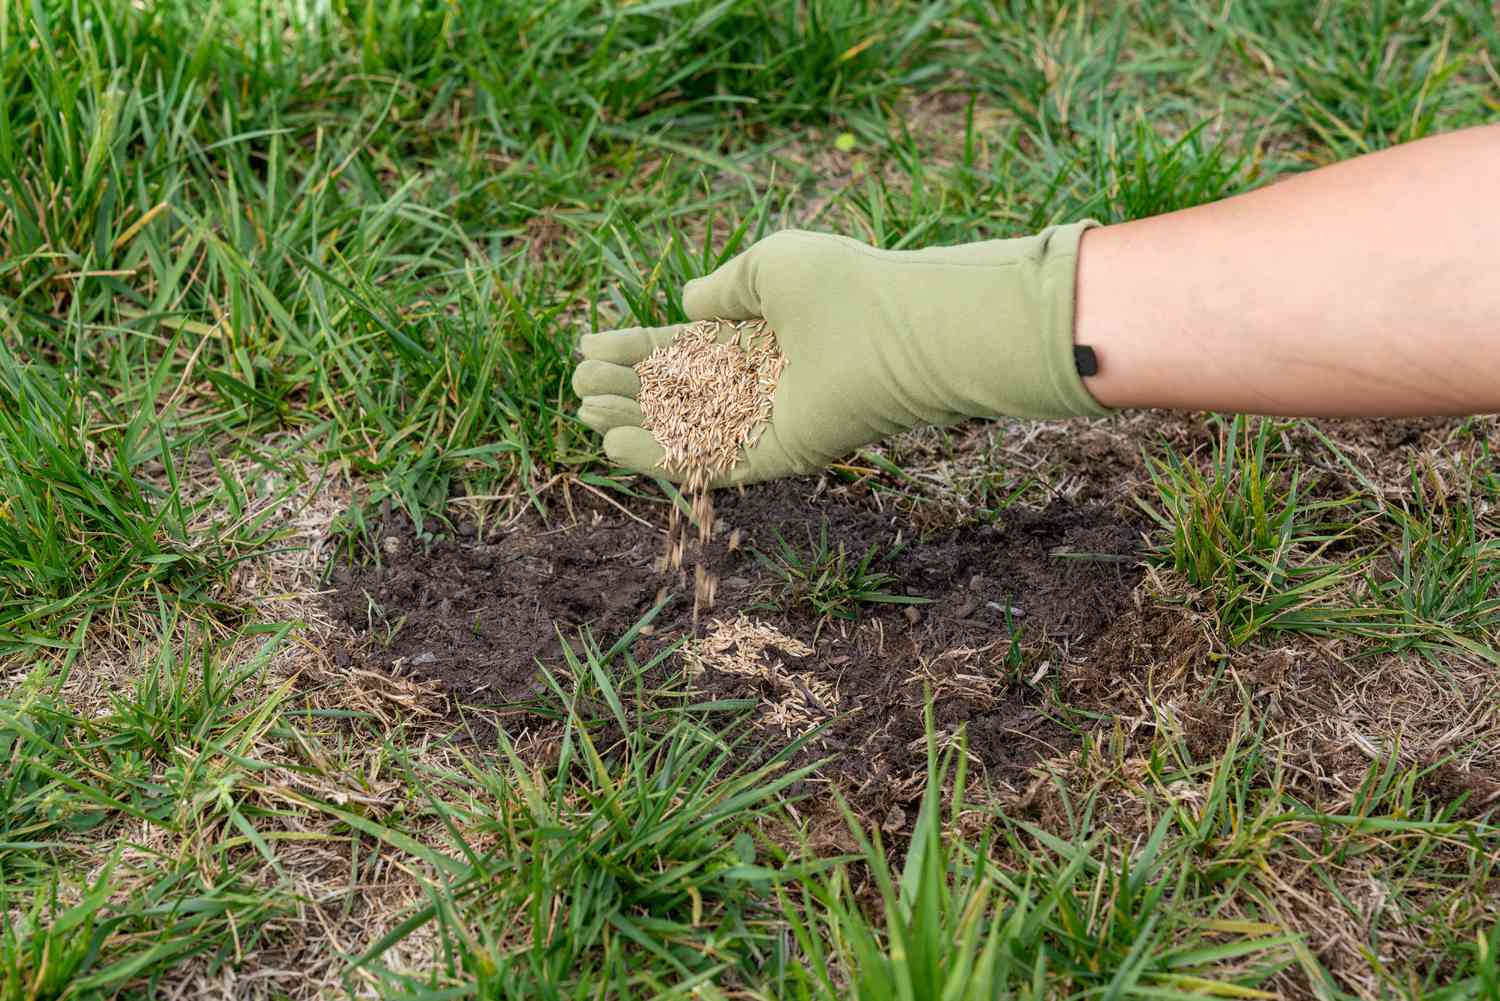
Seeding the Lawn
Seeding your lawn is the exciting step that brings new life and beauty to your outdoor space. Whether you’re starting from scratch or overseeding to fill in bare patches, proper seeding techniques are essential for successful grass establishment. Here’s how to seed your lawn effectively:
- Choose the Right Time: Fall is the ideal time to seed your lawn, typically in late summer or early fall before the first frost. The cooler temperatures and increased moisture create favorable conditions for seed germination and growth.
- Calculate the Seed Amount: Determine the amount of grass seed you’ll need based on the size of your lawn and the recommended seeding rate. Different grass species have different recommended rates, so refer to the packaging or consult with a local expert for specific guidance.
- Divide the Seed Amount: Divide the required seed amount into two equal portions. This allows for a more even application, ensuring adequate coverage and preventing over-seeding or under-seeding.
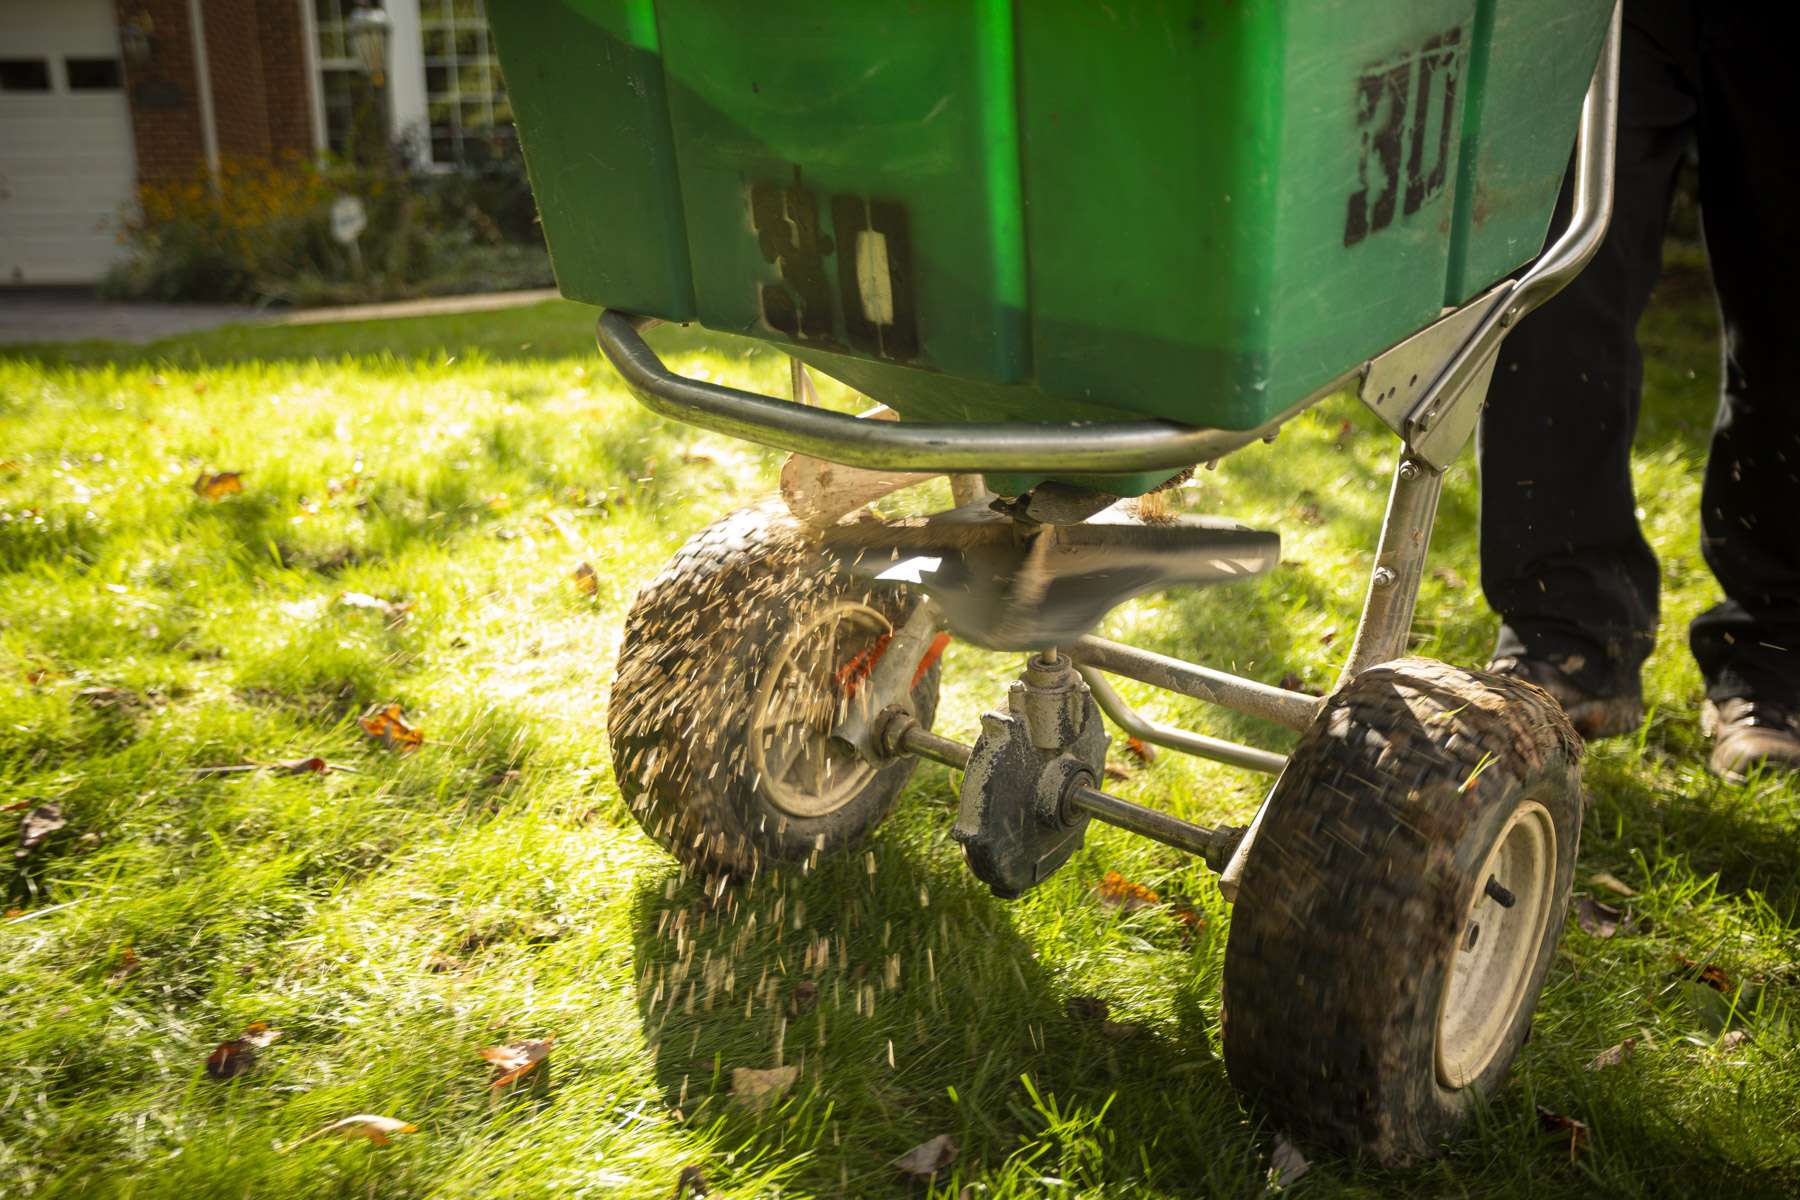
- Choose a Spreader: Use a seed spreader or broadcast spreader to evenly distribute the grass seed. This ensures consistent coverage and minimizes the risk of patchy or uneven growth.
- Seed in Two Directions: To achieve even coverage and avoid missed spots, spread the seed in two directions. Start by walking along the length of the lawn, then perpendicular to your first pass, ensuring that every inch of the lawn receives seed.
- Rake Lightly: After seeding, lightly rake the lawn with a leaf rake to gently work the grass seed into the soil. This helps to improve seed-to-soil contact, which is crucial for successful germination.
- Apply a Starter Fertilizer (Optional): Consider applying a starter fertilizer after seeding. Starter fertilizers contain a higher percentage of phosphorus, which promotes root development. Follow the recommended application rates and guidelines.
- Water Thoroughly: After seeding, water the lawn thoroughly but gently. Aim for a light and consistent moisture level throughout the germination period. Avoid over-watering, which can lead to pooling or runoff.
- Maintain Moisture: Keep the seeded area consistently moist until the grass reaches a height of about 2 inches. This typically requires daily watering or multiple light waterings per day, depending on the weather conditions.
- Mow Carefully: Once the new grass has reached a height of around 3 to 4 inches, you can begin mowing. Set your mower blade to a higher setting and only remove about 1/3 of the grass height at each mowing to avoid stressing the new seedlings.
Seeding your lawn in the fall gives the new grass ample time to establish strong roots before the arrival of winter. By following these steps and providing proper care and maintenance, you are well on your way to a lush, green lawn. Now let’s move on to the next step: spreading the grass seed!
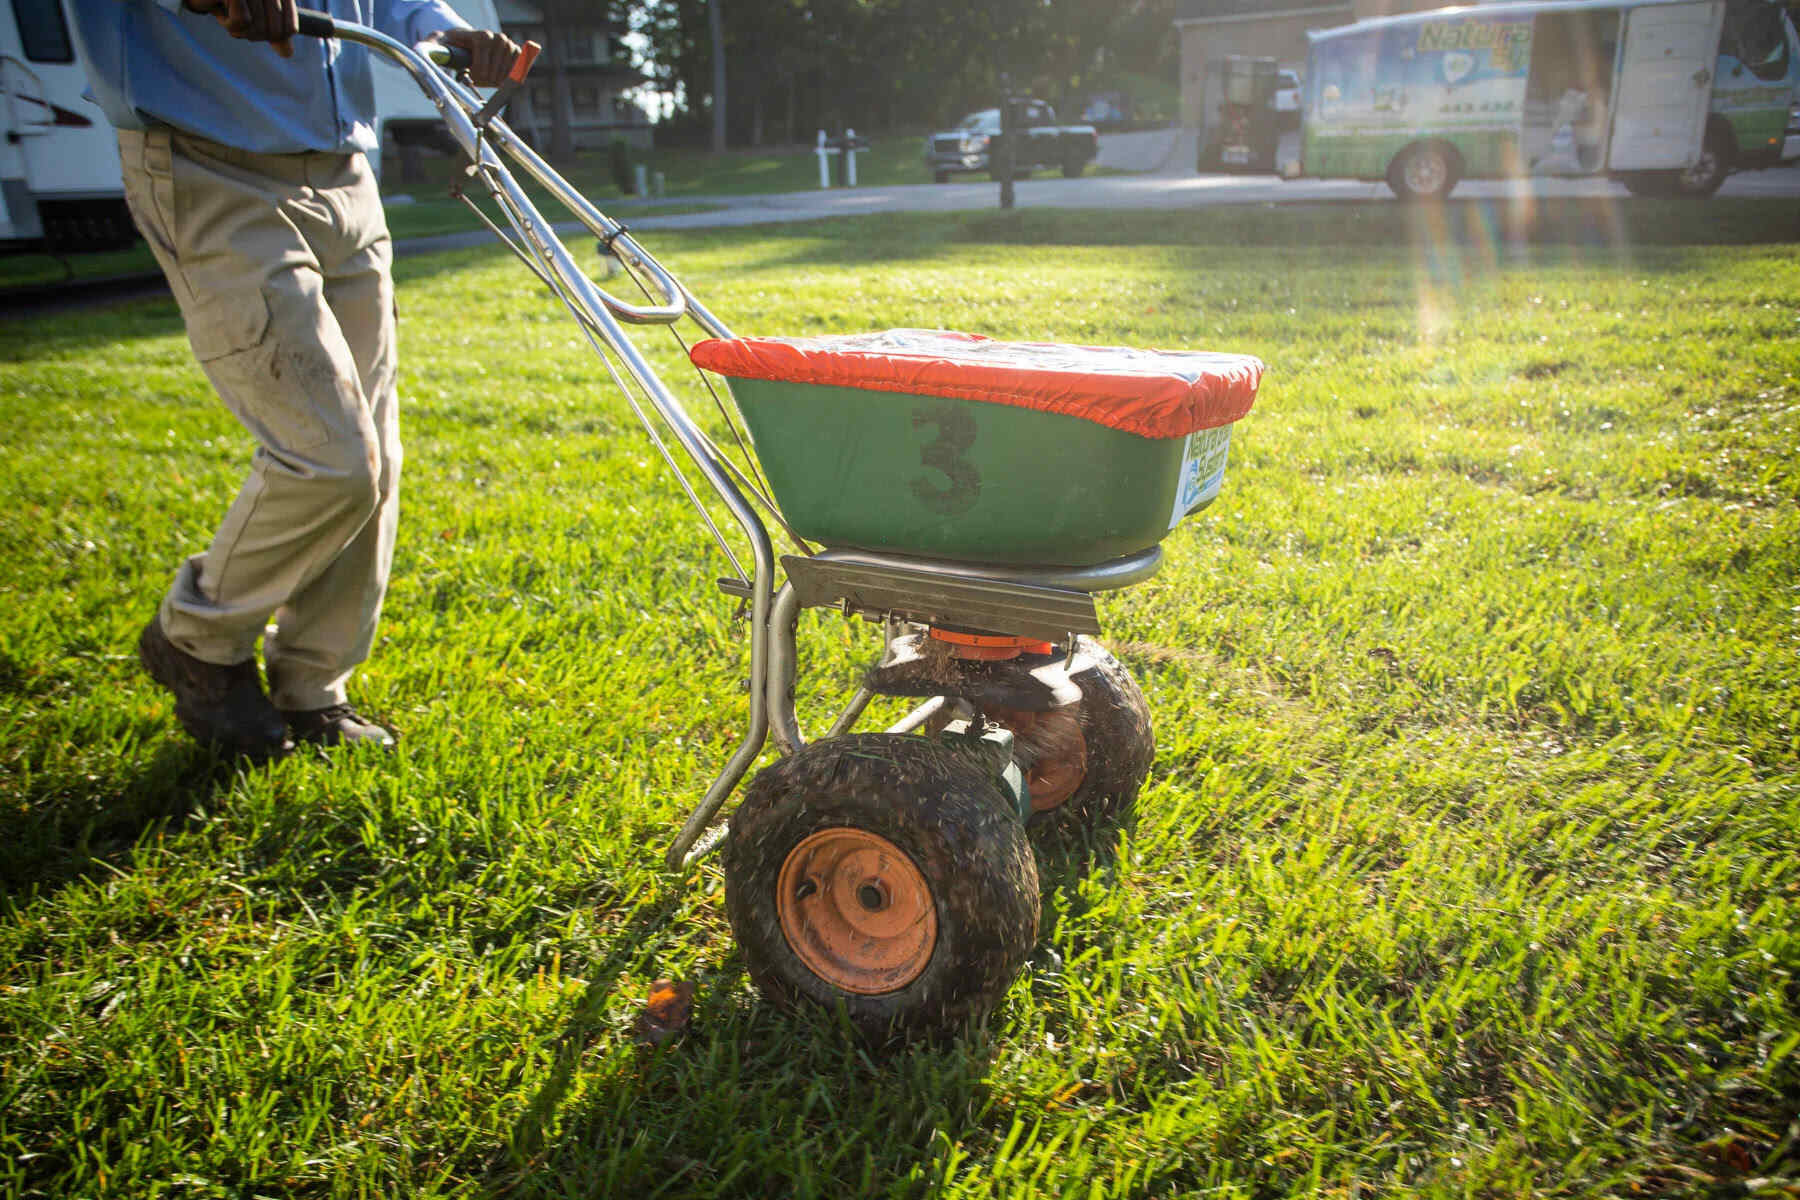
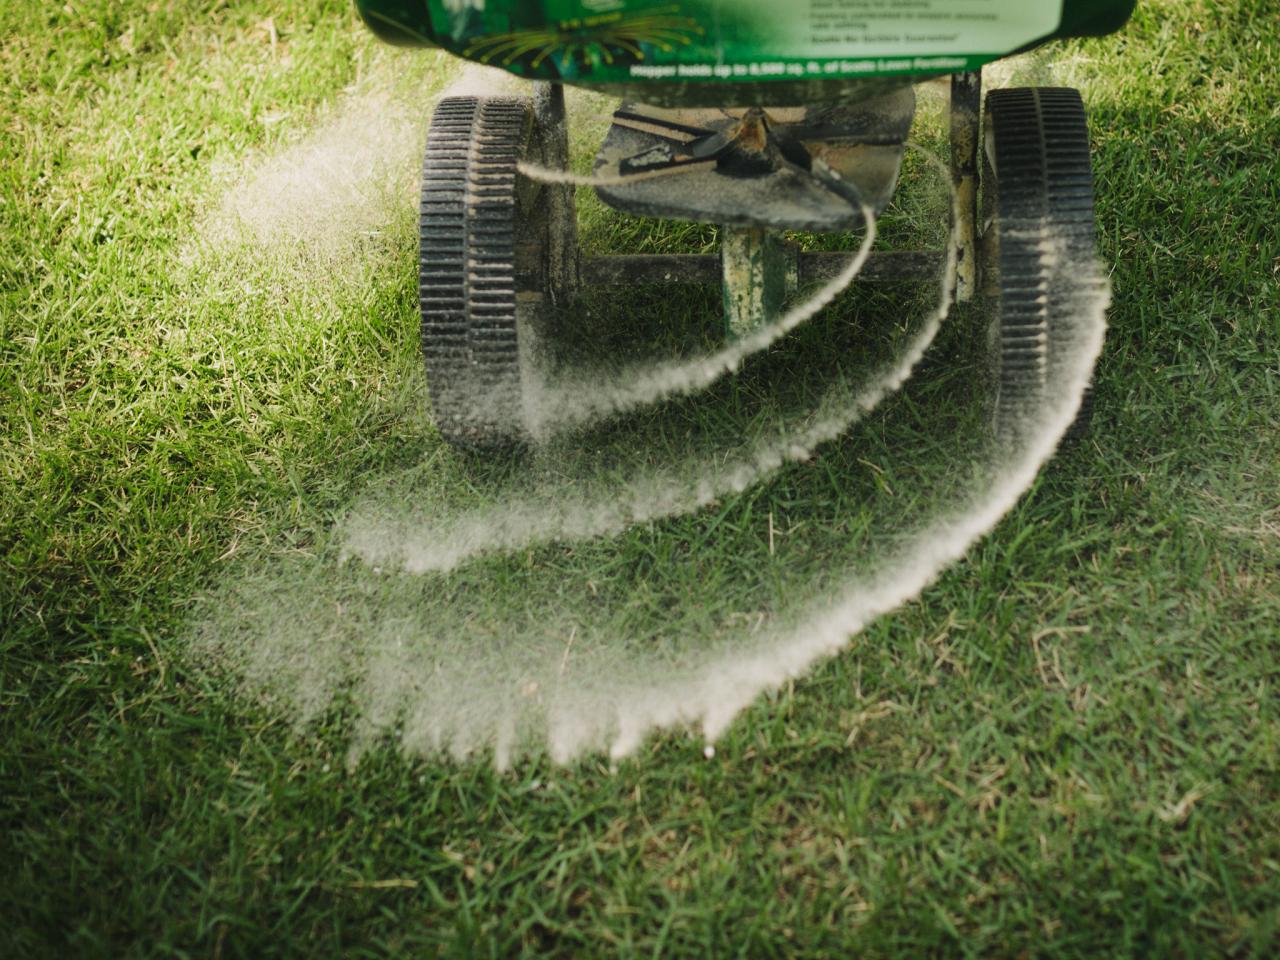
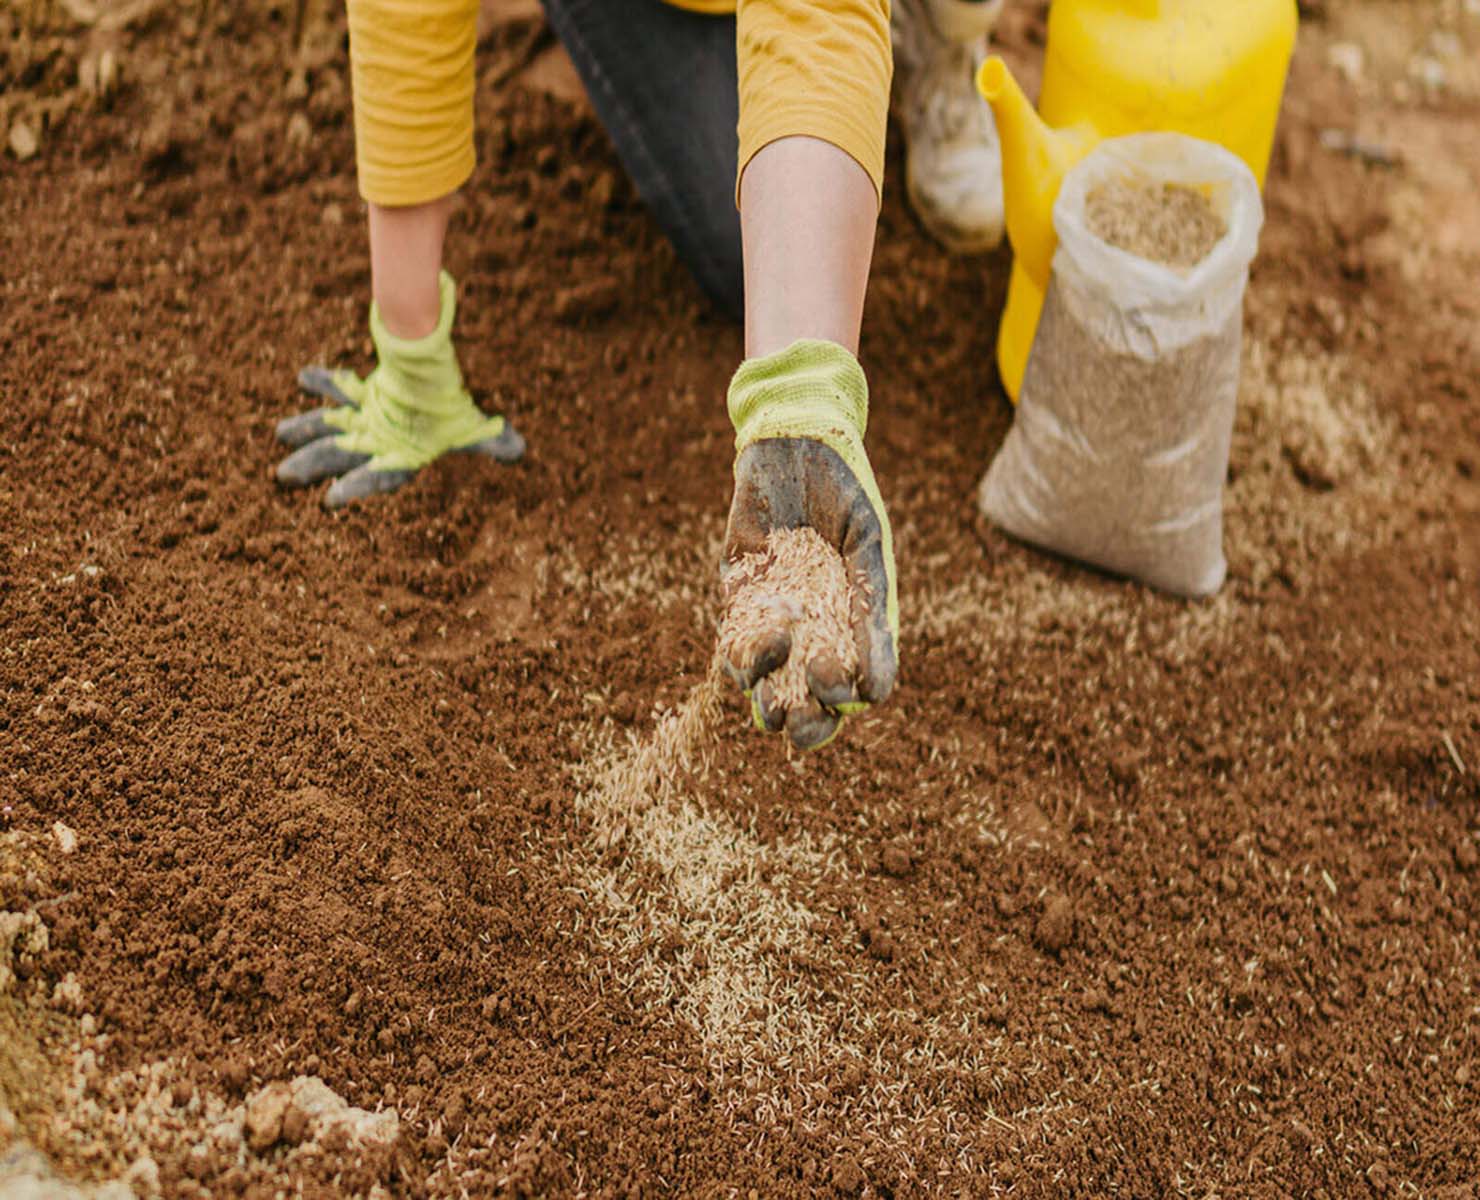
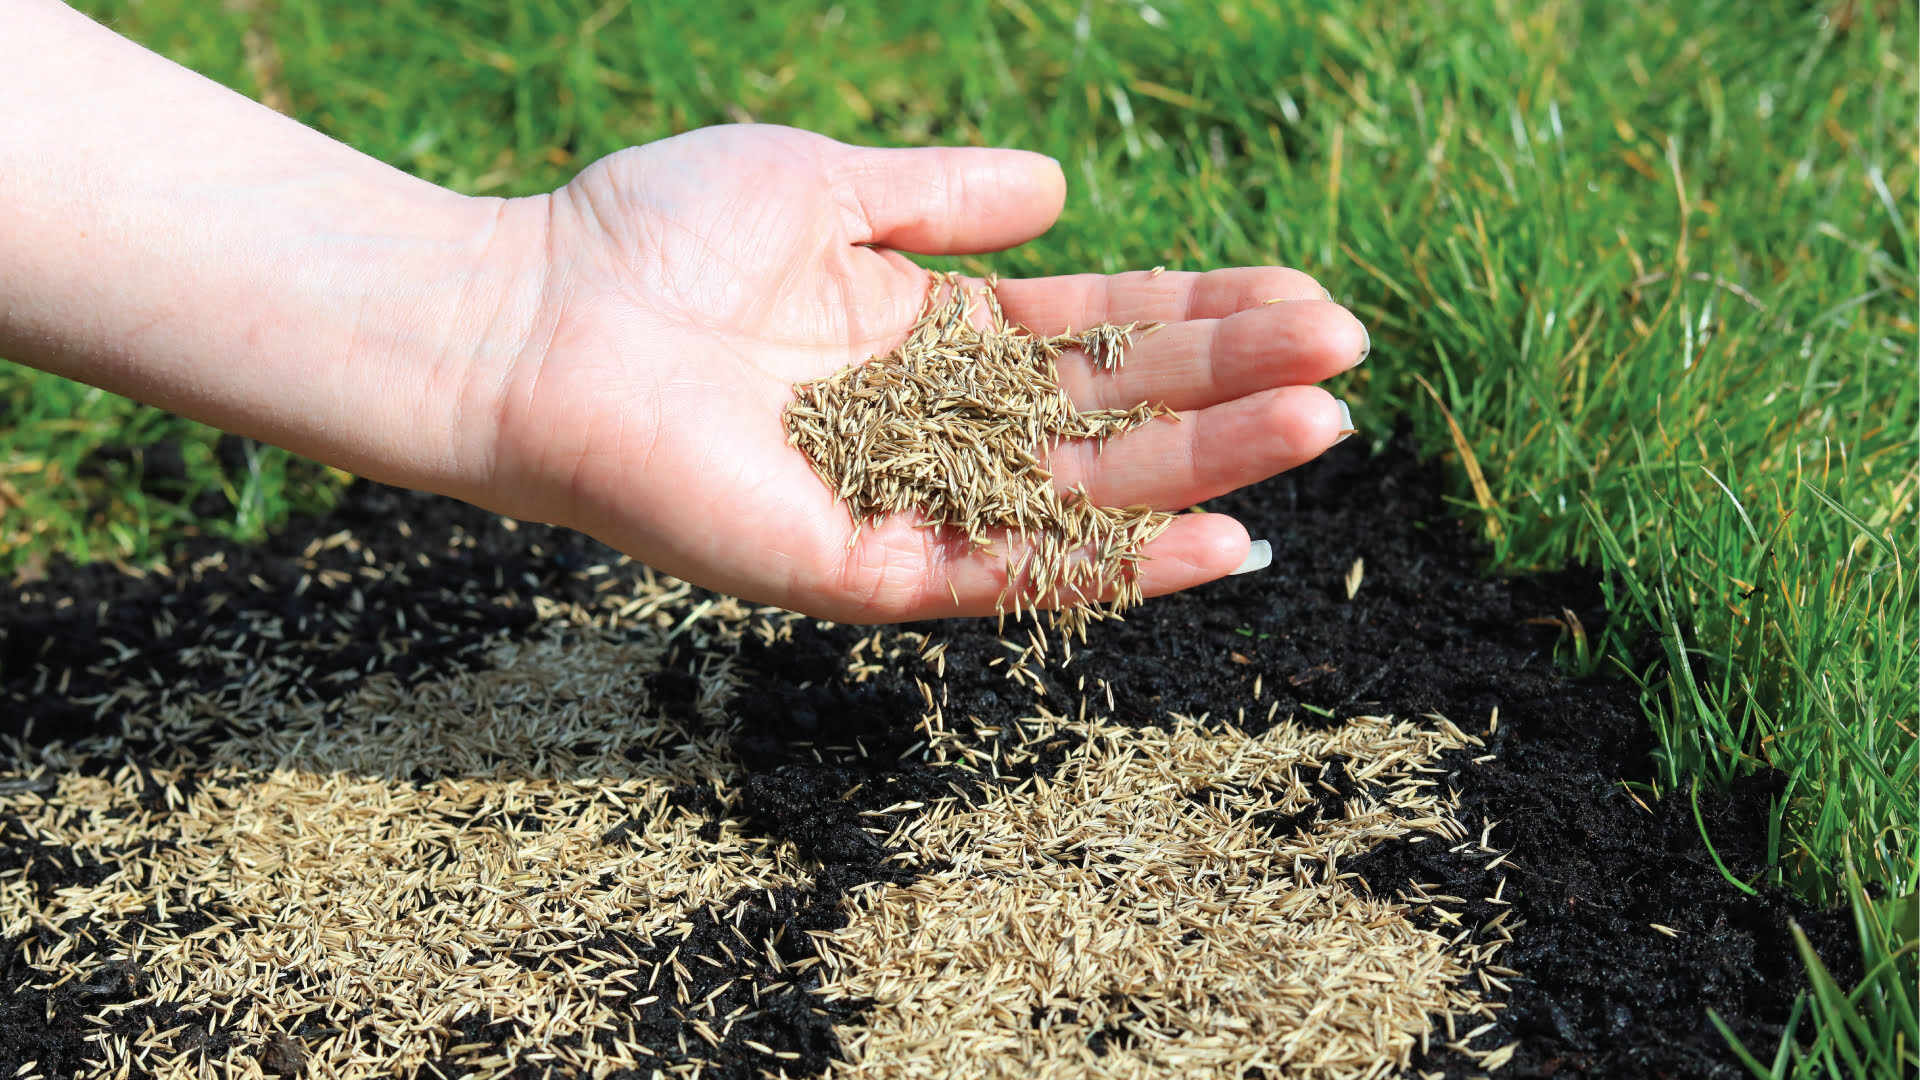
Spreading the Grass Seed
Spreading the grass seed evenly and efficiently is crucial to ensure proper coverage and optimal germination. By using the right techniques and tools, you can achieve an even distribution of seed, leading to a uniform and healthy lawn. Here’s how to spread grass seed effectively:
- Choose the Right Spreader: Select a spreader that suits your lawn size and personal preference. There are two main types of spreaders: broadcast spreaders, which distribute seed in a wide arc, and drop spreaders, which drop seed directly below the spreader.
- Calibrate the Spreader: Before beginning, calibrate the spreader according to the seed packaging instructions or the manufacturer’s recommendations. This ensures that you are distributing the correct amount of seed per square foot.
- Divide the Seed Amount: Divide the total amount of grass seed into two portions. This allows for an initial pass with half of the seed and a subsequent pass in a different direction with the remaining seed. This method ensures even coverage and reduces the risk of missing spots.
- Open the Spreader: Set the spreader to the appropriate opening size to achieve the desired coverage. Adjust the settings based on the seed type and the spreader’s recommendations.
- Begin Spreading: Start walking at a regular pace, pushing the spreader forward. As you walk, allow the seed to drop or be broadcast evenly onto the lawn. Maintain a consistent walking speed to ensure even distribution.
- Overlap the Passes: To avoid gaps or uneven areas, overlap the passes by approximately 6 inches. This ensures that every part of the lawn receives an adequate amount of seed.
- Watch for Wind: Be mindful of wind conditions when spreading the seed. Strong winds can blow the seed off target, resulting in patchy coverage. If it’s windy, consider spreading on a calmer day or take precautions to shield the seed from the wind.
- Inspect the Coverage: Once you have completed spreading the seed, take a moment to assess the coverage. Look for any areas that may need additional seed or spots that may have received excessive seed. Make adjustments as necessary.
- Clean the Spreader: After spreading the seed, clean the spreader thoroughly to prevent any leftover seed from germinating inside the equipment. This ensures that the spreader remains in good condition for future use.
Having a well-spaced and even distribution of grass seed maximizes the chances of successful germination and establishes a healthy, vibrant lawn. Now that you’ve spread the grass seed, it’s time for the crucial step of watering and maintenance. Let’s keep that seed well-nourished and on its way to becoming a beautiful lawn!
Read more: How To Seed Lawn
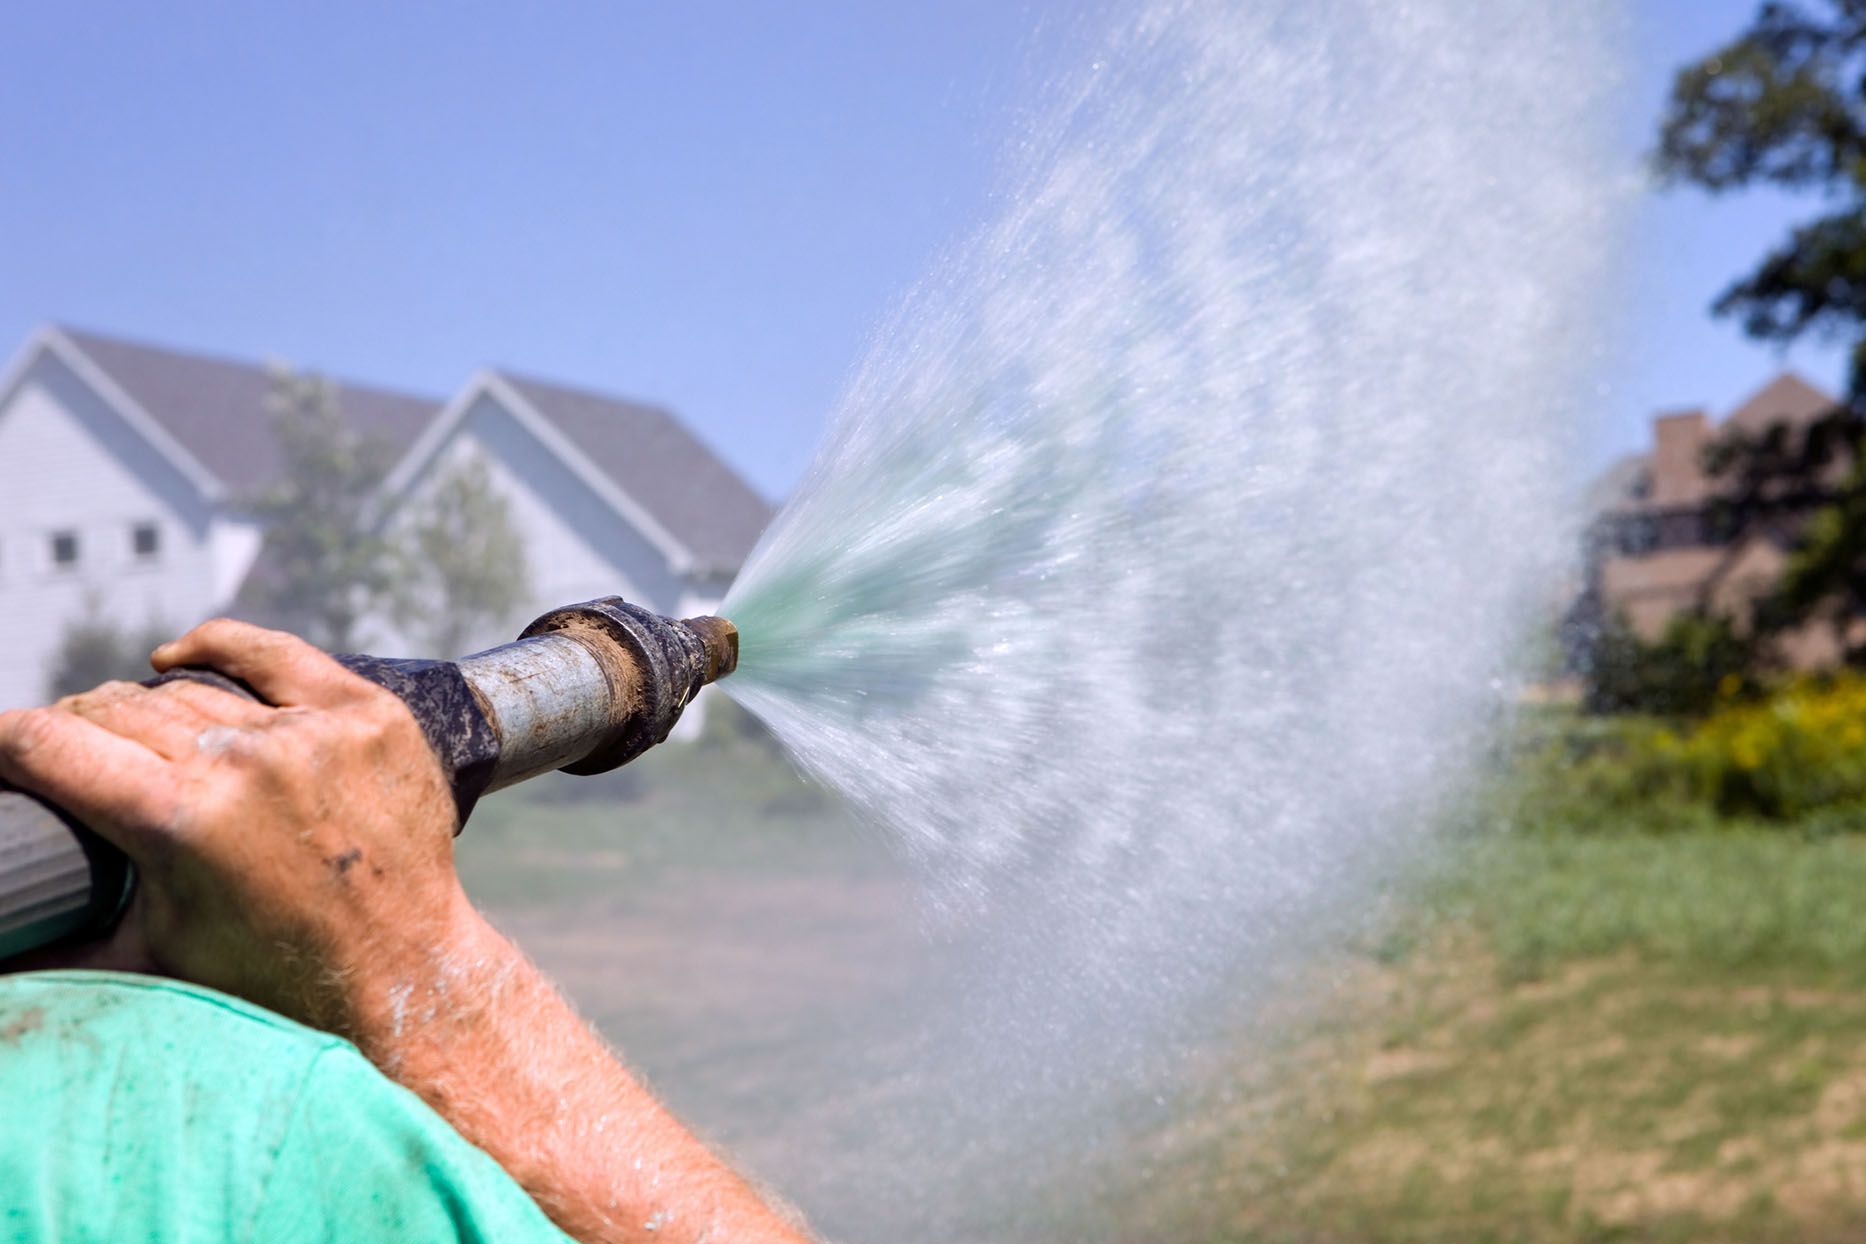
Watering and Maintenance
Watering and proper maintenance are essential for the success of your newly seeded lawn. The initial few weeks after seeding are crucial for seed germination and establishment. By following the right watering and maintenance practices, you can ensure healthy growth and a vibrant, lush lawn. Here’s what you need to do:
- Watering: Water the newly seeded lawn immediately after spreading the grass seed. Keep the soil consistently moist by watering lightly about two to three times a day or as needed. Ensure that the soil is evenly damp but not saturated, as excessive water can lead to disease or seed displacement.
- Monitor Moisture: Check the moisture level of the soil regularly during the germination period. Use a screwdriver or a soil moisture meter to gauge the soil’s moisture content. If the top inch of soil feels dry, it’s time to water again.
- Reduce Watering Frequency: As the grass seed begins to germinate and grow, gradually reduce the frequency of watering while increasing the duration of each watering session. Transition from multiple light waterings to deep, infrequent watering to encourage deeper root growth.
- Establish a Watering Schedule: Set up a watering schedule that aligns with your local weather conditions and the water requirements of the specific grass species you’ve seeded. Aim for regular watering sessions, preferably in the early morning or late afternoon, to minimize evaporation.
- Keep Foot Traffic to a Minimum: Minimize foot traffic on the newly seeded area during the germination period. Excessive foot traffic can compact the soil, disturb seedling growth, and create bare spots. Restrict access or provide clear pathways to prevent damage.
- Mowing: Once the new grass has reached a height of approximately 3 to 4 inches, you can start mowing it. Ensure that the mower blade is sharp and set to a higher cutting height, removing no more than 1/3 of the grass blade at a time. Mow in a different direction with each mowing to avoid creating ruts or compacted areas.
- Fertilizing: Wait until the new grass has been mowed a few times before applying any fertilizer. This gives the grass seedlings time to establish strong root systems. Follow the recommended application rates and timing for fertilizers appropriate for your grass species.
- Weed Control: Keep an eye out for any weeds that may emerge alongside the new grass seedlings. Once the grass is established, you can safely use herbicides or manually remove the weeds. Follow the instructions on herbicide labels, and be cautious not to harm the young grass.
- Regular Maintenance: As the new grass matures, continue regular maintenance practices such as watering, mowing, fertilizing, and aerating as necessary. Stay attentive to the specific needs of your grass species and adjust your maintenance routine accordingly.
Proper watering and maintenance are keys to establishing a healthy and vibrant lawn from your newly seeded grass. By providing adequate moisture, monitoring growth, and maintaining a consistent care routine, you’ll soon enjoy the rewards of a lush and beautiful lawn. With these tips, you’re well-equipped to nurture your grass and help it thrive for years to come.
Congratulations on completing the process of seeding your lawn! By following all the steps outlined in this guide, you’ve set your lawn up for success. Now, sit back, relax, and enjoy the process as your new grass begins to grow and flourish.
Conclusion
Congratulations! You’ve reached the end of our comprehensive guide on how to seed a lawn in the fall. By following the steps outlined in this article, you’ve gained the knowledge and confidence to transform your outdoor space into a flourishing, vibrant lawn.
Seeding your lawn in the fall offers numerous benefits, including optimal growing conditions, reduced weed competition, and a thicker, healthier lawn. Proper preparation, such as clearing the area, testing the soil, removing weeds and thatch, and aerating the soil, sets the stage for successful seed germination and establishment.
Choosing the right grass seed for your specific climate, sunlight exposure, and soil type is crucial for a thriving lawn. The proper spreader and seeding technique ensure even coverage and uniform growth.
Watering and maintaining your new lawn are key steps in nurturing the grass seedlings and promoting healthy growth. Consistent watering, monitoring moisture levels, and following a proper maintenance routine, including mowing, fertilizing, and weed control, contribute to a beautiful and resilient lawn.
Remember that lawn care is an ongoing process. Regular maintenance, periodic fertilizing, and attentive watering will help keep your lawn in top shape. Stay proactive in preventing weed growth, monitor for pests or diseases, and adapt your care routine to the specific needs of your grass species.
Now it’s time to put your knowledge into action and start seeding your lawn in the fall. With patience, dedication, and the right care, you’ll soon be rewarded with a lush, green expanse that will be the envy of your neighbors.
Enjoy the journey of creating and nurturing your beautiful lawn. Here’s to many enjoyable moments spent outdoors, surrounded by the natural beauty of your own little oasis. Happy seeding!
Frequently Asked Questions about How To Seed A Lawn In Fall
Was this page helpful?
At Storables.com, we guarantee accurate and reliable information. Our content, validated by Expert Board Contributors, is crafted following stringent Editorial Policies. We're committed to providing you with well-researched, expert-backed insights for all your informational needs.


0 thoughts on “How To Seed A Lawn In Fall”