Home>Garden Essentials>How To Sow Okra Seeds
Garden Essentials
How To Sow Okra Seeds
Modified: August 17, 2024
Learn the best techniques for sowing okra seeds in your garden and enjoy a bountiful harvest. Find step-by-step instructions and expert tips to ensure success.
(Many of the links in this article redirect to a specific reviewed product. Your purchase of these products through affiliate links helps to generate commission for Storables.com, at no extra cost. Learn more)
Introduction
Welcome to the world of okra gardening! Whether you’re a seasoned gardener looking to expand your repertoire or a beginner eager to try your hand at growing this delicious vegetable, this guide will help you sow okra seeds successfully. Okra, also known as lady’s fingers, is a versatile plant that thrives in warm climates and offers a bounty of nutritious pods.
Before we delve into the steps to sow okra seeds, let’s take a moment to understand why this vegetable is worth growing. Okra is not only a culinary delight but also a rich source of vitamins, minerals, and fiber. It’s packed with vitamin C, vitamin K, folate, and antioxidants, making it a valuable addition to a healthy diet.
Additionally, okra plants are visually appealing with their vibrant green foliage and beautiful yellow or white flowers. They can add charm to any garden, whether you have a small patio space or a large backyard.
Now that we have established the benefits of growing okra, let’s move on to the essential steps to successfully sow okra seeds. By following these steps, you’ll increase your chances of a bountiful harvest and enjoy the satisfaction of nurturing your own plants from seed to harvest.
Key Takeaways:
- Sowing okra seeds requires gathering materials, preparing soil, sowing seeds, nurturing seedlings, managing pests, and harvesting. Enjoy the delicious and versatile okra in various recipes after a bountiful harvest.
- Successful okra gardening involves patience, attention to detail, and experimentation. Share your gardening experiences with others and appreciate the joy of growing your own food while embracing the connection to nature.
Read more: How To Plant Okra From Seeds
Step 1: Gather the necessary materials
Before you begin sowing okra seeds, it’s important to gather all the necessary materials. Here are the key items you’ll need for a successful okra-growing experience:
Choosing the right pot or garden space
If you’re planning to grow okra in containers, make sure to choose a pot that is at least 12 inches deep and wide. Ensure that the pot has proper drainage holes to prevent waterlogging. If you prefer planting directly in the ground, select a sunny spot in your garden with well-drained soil.
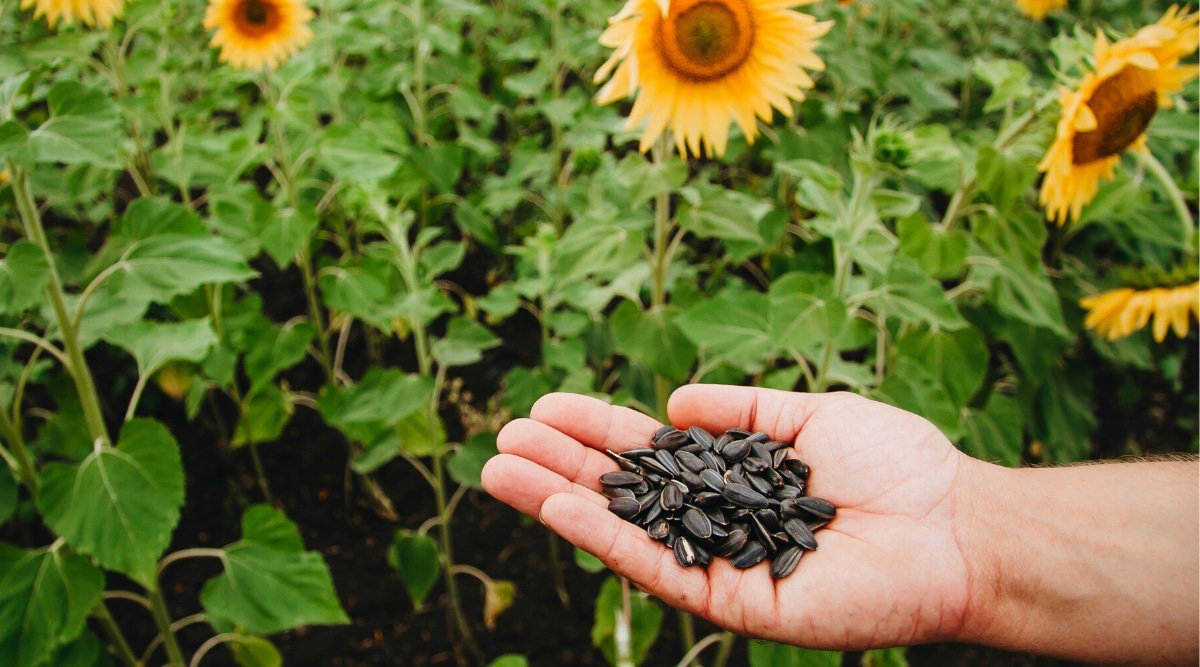
Selecting high-quality okra seeds
Visit your local nursery or garden center to find a reputable source of okra seeds. Look for fresh seeds that are not discolored or damaged. It’s always a good idea to choose hybrid or heirloom varieties that are known for their quality and flavor. Opt for varieties that are well-suited to your specific climate and growing conditions.
Ensuring proper soil conditions
Okra prefers well-draining soil with a pH level between 6.0 and 6.8. Test your soil using a soil testing kit to determine its pH level and make necessary adjustments using organic amendments like compost or sphagnum peat moss. This will provide your okra plants with the perfect environment to thrive.
Once you have gathered these materials, you’re ready to move onto the next step: preparing the soil for sowing.
Read more: How To Sow Snapdragon Seeds
Step 2: Preparing the soil for sowing
Preparing the soil properly is crucial for the successful growth of okra plants. Follow these steps to ensure that your soil is ready for sowing:
Clearing the area
Start by clearing the area where you plan to sow your okra seeds. Remove any weeds, rocks, or debris that may hinder the growth of your plants. This will provide a clean and spacious area for your okra to thrive.
Loosening the soil
Next, use a garden fork or a tiller to loosen the soil. This will help improve the soil’s structure and allow for easy root penetration. Loosening the soil also aids in proper water drainage, preventing waterlogged conditions that can harm the okra plants.
Adding organic matter for fertility
To boost the fertility of your soil, incorporate organic matter such as compost or well-rotted manure. This will enrich the soil with essential nutrients, enhance moisture retention, and promote beneficial microbial activity. Spread a layer of organic matter and work it into the top few inches of soil using a garden rake or a shovel.
By clearing the area, loosening the soil, and adding organic matter, you are creating an ideal environment for your okra seeds to germinate and grow into healthy plants. Now it’s time to move on to the next step: sowing the okra seeds.
Read more: How To Sow Cilantro Seeds
Step 3: Sowing the okra seeds
Now that your soil is prepared, it’s time to sow the okra seeds. Here’s how you can ensure successful sowing:
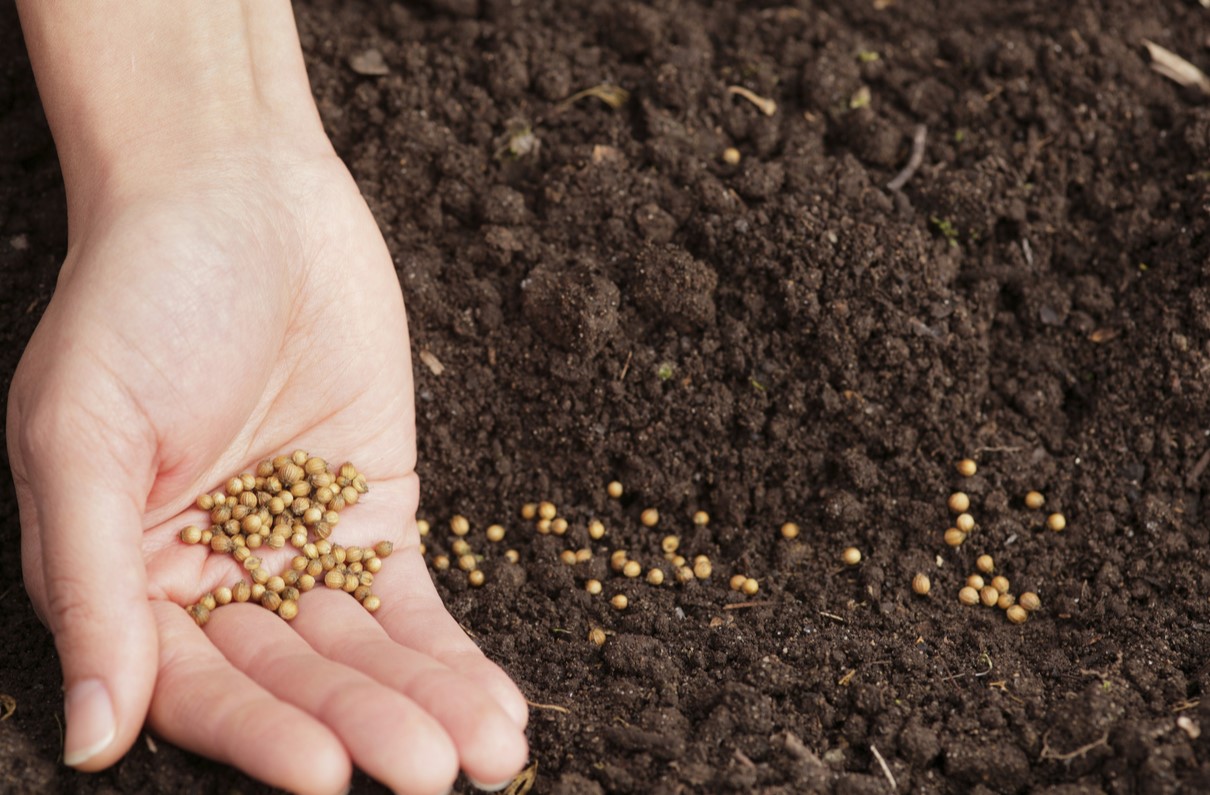
Determining the planting depth
Okra seeds should be planted at a depth of about ½ to 1 inch. This will provide them with the necessary moisture and stability to germinate. Use your finger or a small stick to create holes in the soil, keeping the depth in mind.
Spacing the seeds properly
When sowing okra seeds, it’s important to give each seed enough space to grow into a healthy plant. Space the seeds about 12-18 inches apart to allow for adequate air circulation and prevent overcrowding. This will also ensure that the plants have enough room to develop their roots.
Covering the seeds with soil
After placing the seeds in the holes, gently cover them with soil. Ensure that they are evenly covered and press the soil lightly to secure the seeds in place. Avoid compacting the soil too much, as this can hinder germination.
Remember to label each row or area where you sow the seeds to keep track of the different varieties or planting dates.
Now that you have sown the okra seeds, it’s time to move on to the next step: providing optimal care for germination.
Read more: How To Get Okra Seeds
Step 4: Providing optimal care for germination
After sowing the okra seeds, it’s crucial to provide them with the right care to ensure successful germination. Here are the steps you should take:
Watering the seeds regularly
Water is essential for seeds to germinate. Keep the soil consistently moist but not waterlogged. Water the seeds gently using a watering can or a hose with a gentle spray nozzle. Avoid overwatering, as this can lead to rotting of the seeds. Aim to keep the soil evenly moist throughout the germination process.
Applying mulch to conserve moisture
Apply a layer of organic mulch, such as straw or shredded leaves, around the base of the seedlings once they emerge. This will help conserve moisture, suppress weed growth, and regulate soil temperatures. Make sure to apply the mulch a few inches away from the seedlings to prevent moisture-related issues.
Protecting the seeds from pests or diseases
Okra seeds and young seedlings are vulnerable to pests and diseases. Consider covering the seedbed with a floating row cover or fine mesh netting to protect them from pests like birds, rabbits, and insects. Regularly inspect the plants for signs of pests or diseases and take appropriate measures, such as using organic insecticidal sprays or introducing beneficial insects, to control them.
By providing adequate water, applying mulch, and protecting the seeds from pests or diseases, you are setting a strong foundation for the successful germination and growth of your okra plants. Now, let’s move on to nurturing the okra seedlings in the next step.
Read more: How To Sow Spinach Seeds
Step 5: Nurturing the okra seedlings
Once your okra seeds have germinated and the seedlings have emerged, it’s time to provide proper care to ensure their healthy growth. Here are the steps to nurture your okra seedlings:
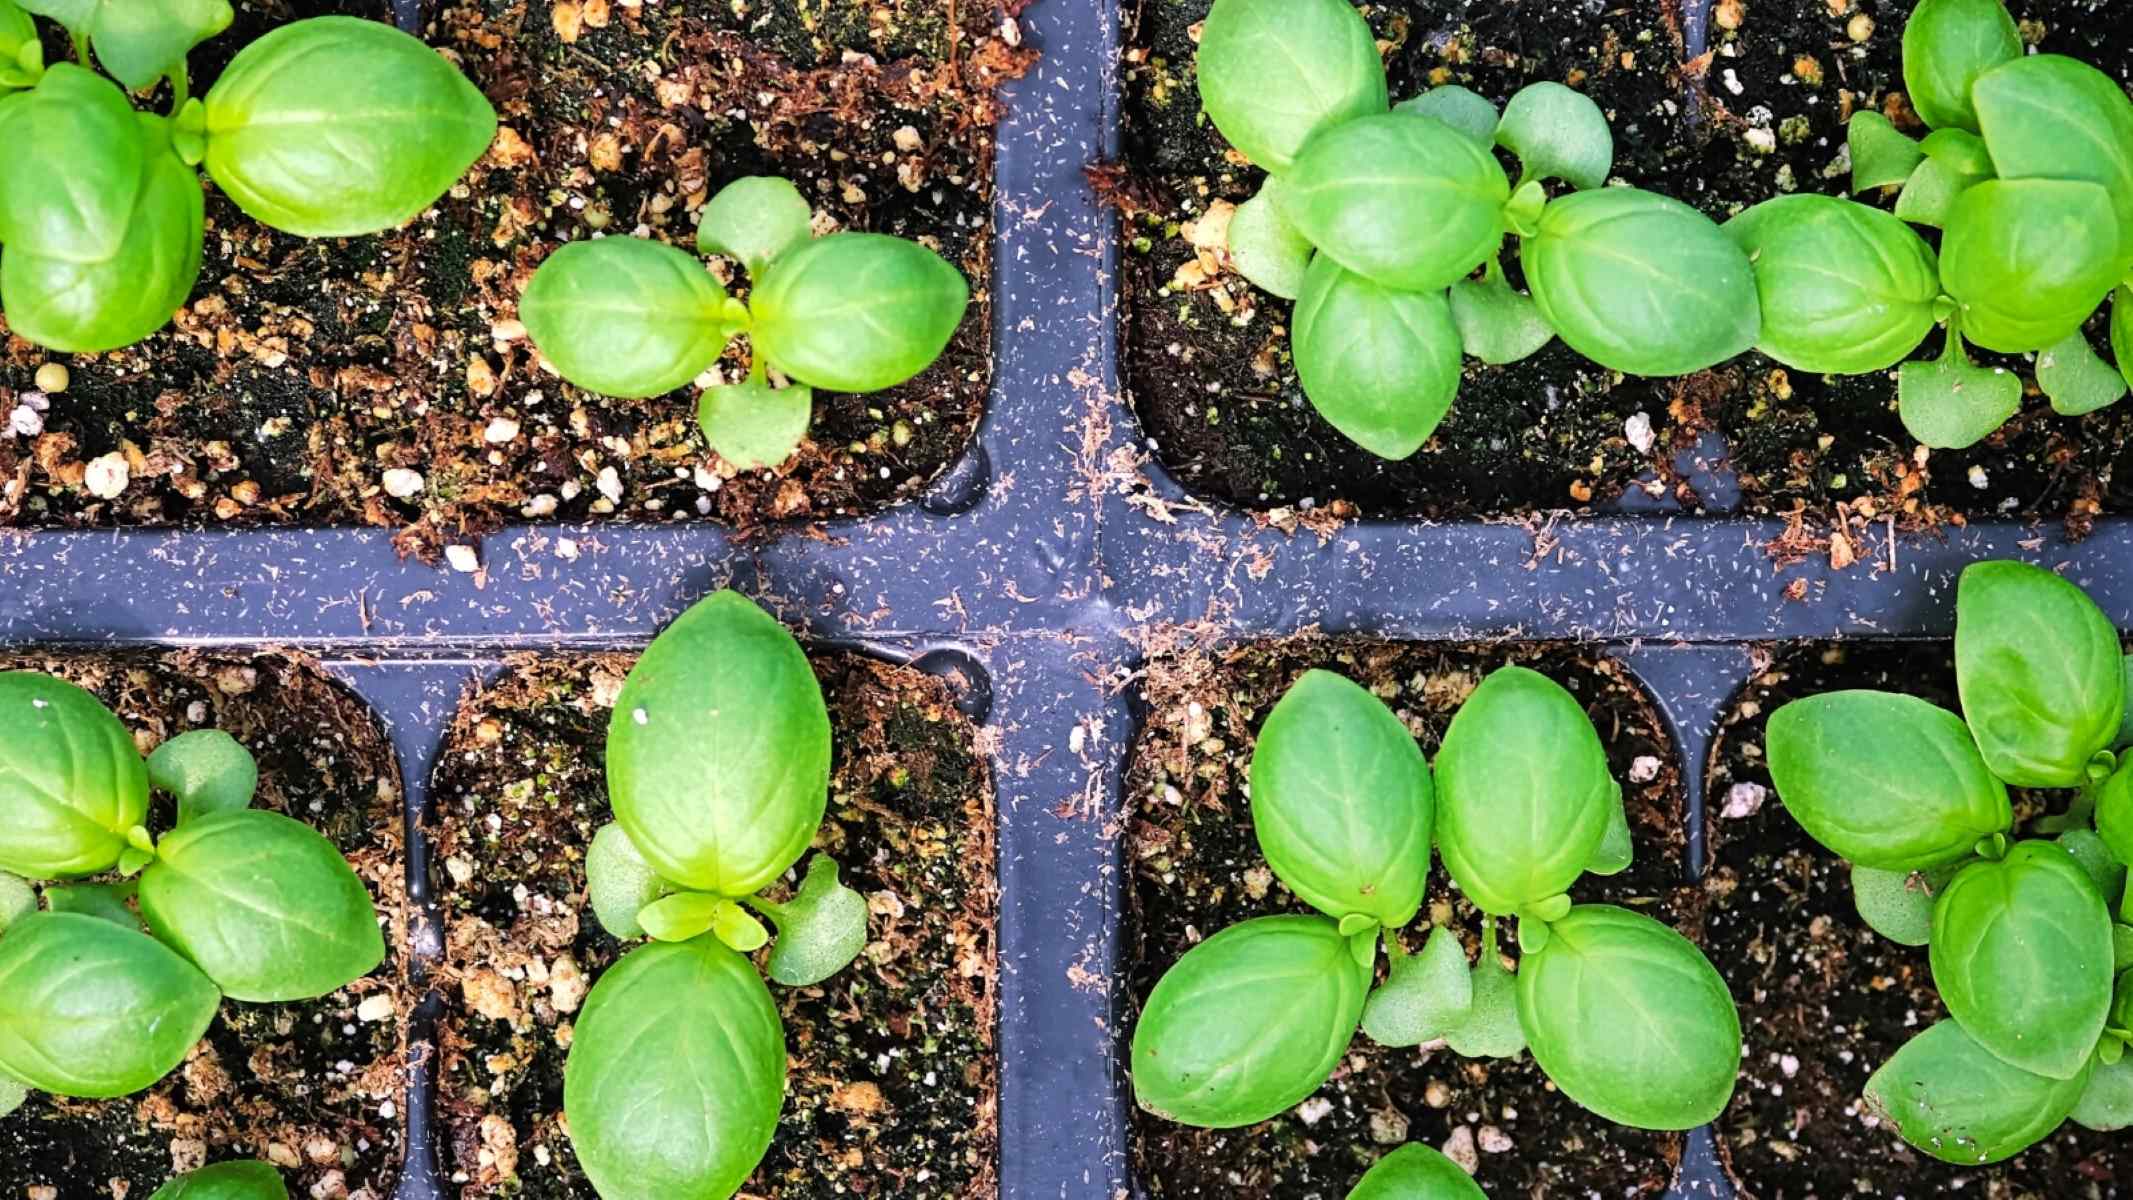
Thinning out overcrowded seedlings
If multiple seedlings have emerged close together, thin them out to ensure that each plant has enough space to grow and receive adequate nutrients and sunlight. Carefully remove the weaker seedlings, leaving the healthiest and most robust ones in place. This will allow the remaining seedlings to grow and develop into strong plants.
Fertilizing for healthy growth
Okra plants benefit from regular fertilization to support their growth and productivity. Apply a balanced organic fertilizer, following the manufacturer’s instructions, once the seedlings have established their first set of true leaves. Repeat the fertilizer application every four to six weeks throughout the growing season to provide a steady supply of nutrients. Avoid overfertilization, as this can lead to excessive foliage growth at the expense of fruit production.
Monitoring and adjusting sunlight exposure
Okra plants thrive in full sunlight, requiring at least six to eight hours of direct sunlight each day. Monitor the area where your seedlings are planted and ensure that they receive adequate sunlight. If necessary, prune back any nearby plants or obstacles that may be shading the okra plants. Proper sunlight exposure will promote healthy growth and increase the chances of a bountiful harvest.
By thinning out overcrowded seedlings, providing regular fertilization, and monitoring sunlight exposure, you are giving your okra seedlings the care they need to flourish. In the next step, we’ll explore the option of transplanting the seedlings into a new location.
Read more: When To Sow Lupine Seeds
Step 6: Transplanting the seedlings (optional)
Transplanting okra seedlings into a new location is an optional step that can be undertaken if you prefer to start your seeds indoors or if you want to rearrange their positioning in the garden. If you choose to transplant your okra seedlings, follow these steps:
Preparing the new planting location
Select a new area in your garden that receives full sunlight and has well-draining soil. Prepare the soil by removing any weeds or debris and loosening it to ensure good root penetration. Incorporate organic matter, such as compost, into the soil to enrich it with nutrients.
Safely transplanting the young okra plants
Carefully dig around the base of the okra seedlings, ensuring that you don’t damage the roots. Gently lift the seedlings from the ground, holding them by the base of the stem, and transplant them into the new planting location. Dig holes in the prepared soil that are slightly larger than the root ball of the seedling. Place the seedling in the hole and backfill with soil, gently firming it around the base of the plant.
Post-transplant care instructions
After transplanting the okra seedlings, water them thoroughly to help settle the soil around the roots. Provide regular watering to keep the soil evenly moist during the establishment phase. Apply a layer of organic mulch around the newly transplanted seedlings to conserve moisture and suppress weed growth. Monitor the transplanted seedlings for any signs of stress, and make sure they receive full sunlight and adequate nutrients.
While not always necessary, transplanting okra seedlings can be an effective way to control their positioning in the garden or get a head start on the growing season. However, it’s important to handle the seedlings with care during the transplanting process and provide proper post-transplant care to ensure their successful establishment.
Read more: When To Sow Kale Seeds
Step 7: Managing weeds and pests
As your okra plants continue to grow, it’s important to manage weeds and pests to ensure their health and productivity. Here are some steps to effectively manage weeds and identify and treat common okra pests:
Implementing effective weed control methods
Weeds compete with okra plants for nutrients, water, and sunlight. Regularly inspect your garden beds and remove any weeds that have sprouted near your okra plants. Mulching around the plants can help suppress weed growth by preventing sunlight from reaching weed seeds. Additionally, you can use manual removal, such as hand weeding, or consider using organic mulches or weed barriers to further inhibit weed growth.
Identifying and treating common okra pests
Several pests can pose a threat to your okra plants. Here are some common ones to watch out for:
- Aphids: These small insects feed on plant sap, causing stunted growth and distortion of leaves. Hose down the plants with a strong jet of water to dislodge aphids, or use insecticidal soap as a natural control method.
Natural remedies for pest management
In addition to targeted pest control methods, there are also several natural remedies that can help manage pests in your okra garden. For instance, planting companion plants like marigold or basil can repel certain insect pests. Introducing beneficial insects, such as ladybugs or lacewings, can help keep pest populations in check. It’s important to regularly monitor your plants and take action at the early signs of pest infestation.
By implementing effective weed control methods, identifying and treating common okra pests, and utilizing natural remedies, you can help protect your okra plants from damage and ensure their healthy growth. Now, let’s move on to the final step: harvesting and enjoying your okra!
Read more: When To Sow Echinacea Seeds
Step 8: Harvesting and enjoying your okra
Congratulations! After all your hard work nurturing your okra plants, it’s time to reap the rewards. Here’s how you can harvest and enjoy your okra:
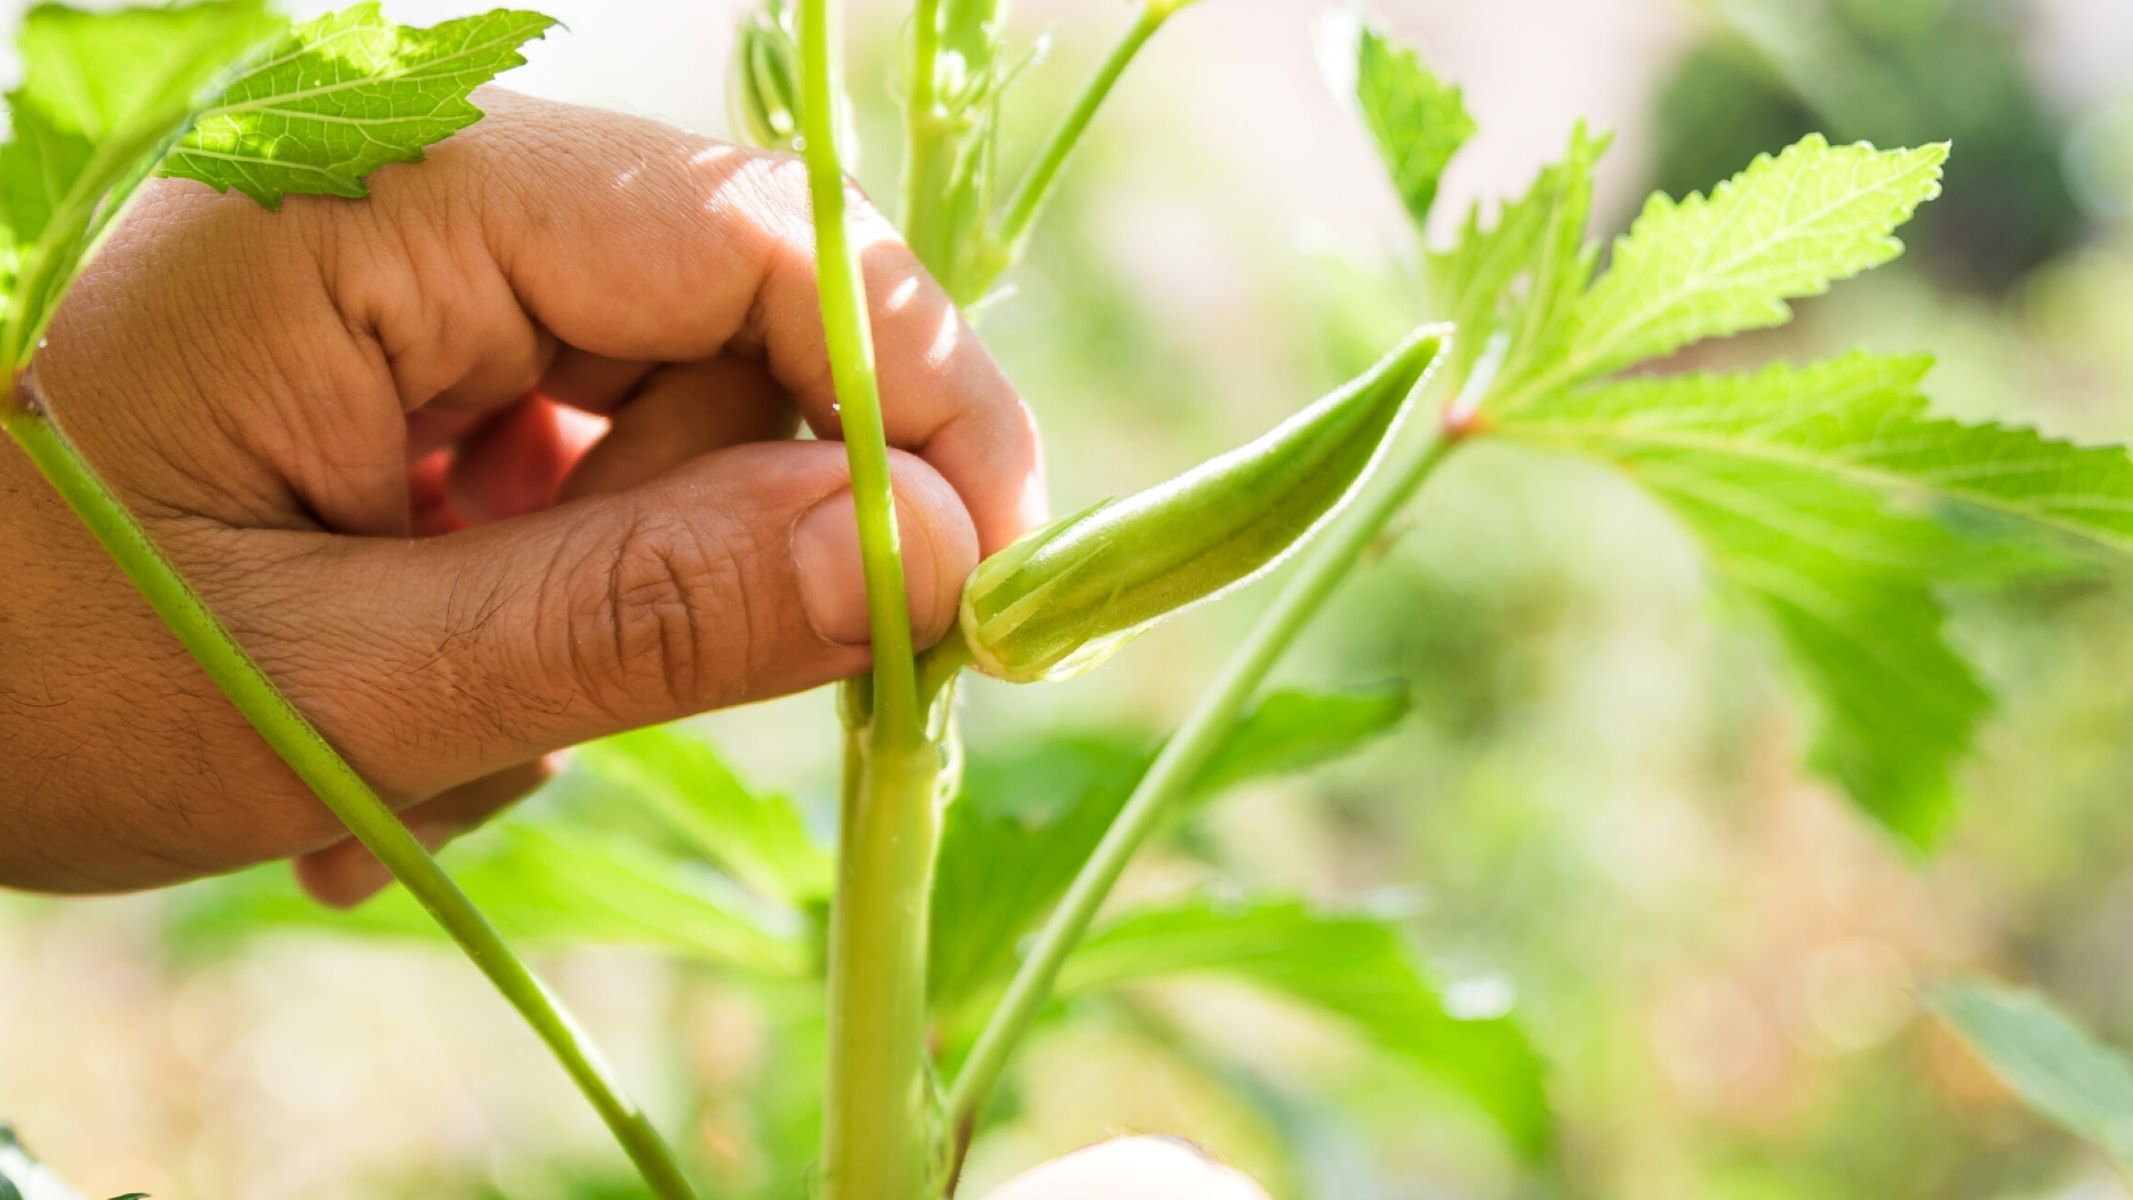
Recognizing the right harvest time
Okra pods are ready to be harvested when they reach a length of around 3-4 inches. Avoid letting the pods become too large and tough, as they can become fibrous and less enjoyable to eat. Harvest the pods regularly to encourage the production of new ones.
Proper harvesting techniques
When harvesting okra, use a sharp pair of garden shears or a knife to cut the pod from the plant. Be careful not to damage the stem or nearby branches. Harvesting in the morning when the weather is cool can help ensure crisp and tender pods.
Delicious okra recipe ideas
Once you’ve harvested your okra, it’s time to put it to good use in the kitchen. Okra is incredibly versatile and can be used in a variety of dishes. Here are a few delicious recipe ideas to try:
- Fried Okra: Coat sliced okra pods in a mixture of cornmeal and spices, then fry until golden brown for a crispy and flavorful side dish.
- Gumbo: Okra is a key ingredient in this classic Southern stew. Combine it with tomatoes, onions, bell peppers, and your choice of meat or seafood for a hearty and comforting meal.
- Grilled Okra: Toss whole okra pods with olive oil, salt, and pepper, then grill them until tender and slightly charred. Serve as a side dish or snack.
- Okra Curry: Cook okra with an assortment of spices, such as turmeric, cumin, and coriander, in a flavorful tomato-based sauce for a delicious vegetarian curry.
Don’t be afraid to experiment and get creative with okra in the kitchen. Its unique texture and flavor make it a delightful addition to a wide range of dishes.
Now that you know how to harvest and enjoy your okra, take a moment to appreciate the fruits of your labor and savor the delicious flavors that this versatile vegetable has to offer.
Read more: How Long Does Okra Take To Germinate
Conclusion
Congratulations on completing the journey of sowing and growing okra! By following the steps outlined in this guide, you have gained valuable knowledge on how to sow okra seeds, care for the seedlings, manage pests, and harvest the pods at the right time. Your dedication and effort will now be rewarded with a bountiful harvest of fresh and delicious okra.
Remember, successful okra gardening requires patience, attention to detail, and a little bit of experimentation. Each gardening experience is unique, and you may encounter challenges along the way. However, with the right knowledge and techniques, you can overcome these challenges and enjoy the satisfaction that comes with growing your own food.
As you continue your gardening journey, don’t forget to share your experiences with others. Whether it’s swapping tips with fellow gardeners, sharing your harvest with friends and neighbors, or even starting a community garden, the joy of gardening is amplified when shared with others.
Lastly, take a moment to appreciate the beauty of nature and the wonder of growing your own food. Gardening not only provides nourishment for the body but also feeds the soul. Embrace this connection to the earth and the fulfillment that comes with cultivating a garden.
So go ahead, sow those okra seeds, tend to your plants with care, and rejoice in the taste of homegrown okra. May your garden thrive and bring you endless joy and satisfaction!
Frequently Asked Questions about How To Sow Okra Seeds
Was this page helpful?
At Storables.com, we guarantee accurate and reliable information. Our content, validated by Expert Board Contributors, is crafted following stringent Editorial Policies. We're committed to providing you with well-researched, expert-backed insights for all your informational needs.


0 thoughts on “How To Sow Okra Seeds”