Home>Garden Essentials>Garden Storage>Bring Character To Your Backyard: 5 Weekend Projects
Garden Storage
Bring Character To Your Backyard: 5 Weekend Projects
Modified: October 20, 2024
Upgrade your backyard with these 5 weekend projects that add character and storage solutions. Transform your outdoor space into a functional and stylish oasis.
(Many of the links in this article redirect to a specific reviewed product. Your purchase of these products through affiliate links helps to generate commission for Storables.com, at no extra cost. Learn more)
Introduction
Welcome to your backyard, a space filled with endless possibilities. It’s not just an outdoor area; it’s an extension of your home, a place where you can relax, entertain, and reconnect with nature. If you’re looking to bring character and charm to your backyard, why not embark on some fun and rewarding weekend projects? With a little creativity and a touch of DIY magic, you can transform your outdoor space into a personal oasis.
In this article, we will explore five exciting weekend projects that will elevate your backyard’s style and functionality. Whether you’re a seasoned DIY enthusiast or just starting out, these projects are designed to be approachable, budget-friendly, and most importantly, enjoyable.
So, grab your tools, put on your work gloves, and let’s dive into these projects that will bring character and life to your backyard.
Key Takeaways:
- Transform your backyard into a personal oasis with DIY projects like a fire pit, outdoor movie theater, pergola, herb garden, and water feature. Embrace creativity and make your outdoor space a true reflection of your personality.
- Elevate your backyard with functional and charming weekend projects that bring warmth, entertainment, and tranquility. From DIY fire pits to herb gardens, infuse your unique flair and create lasting memories in your outdoor oasis.
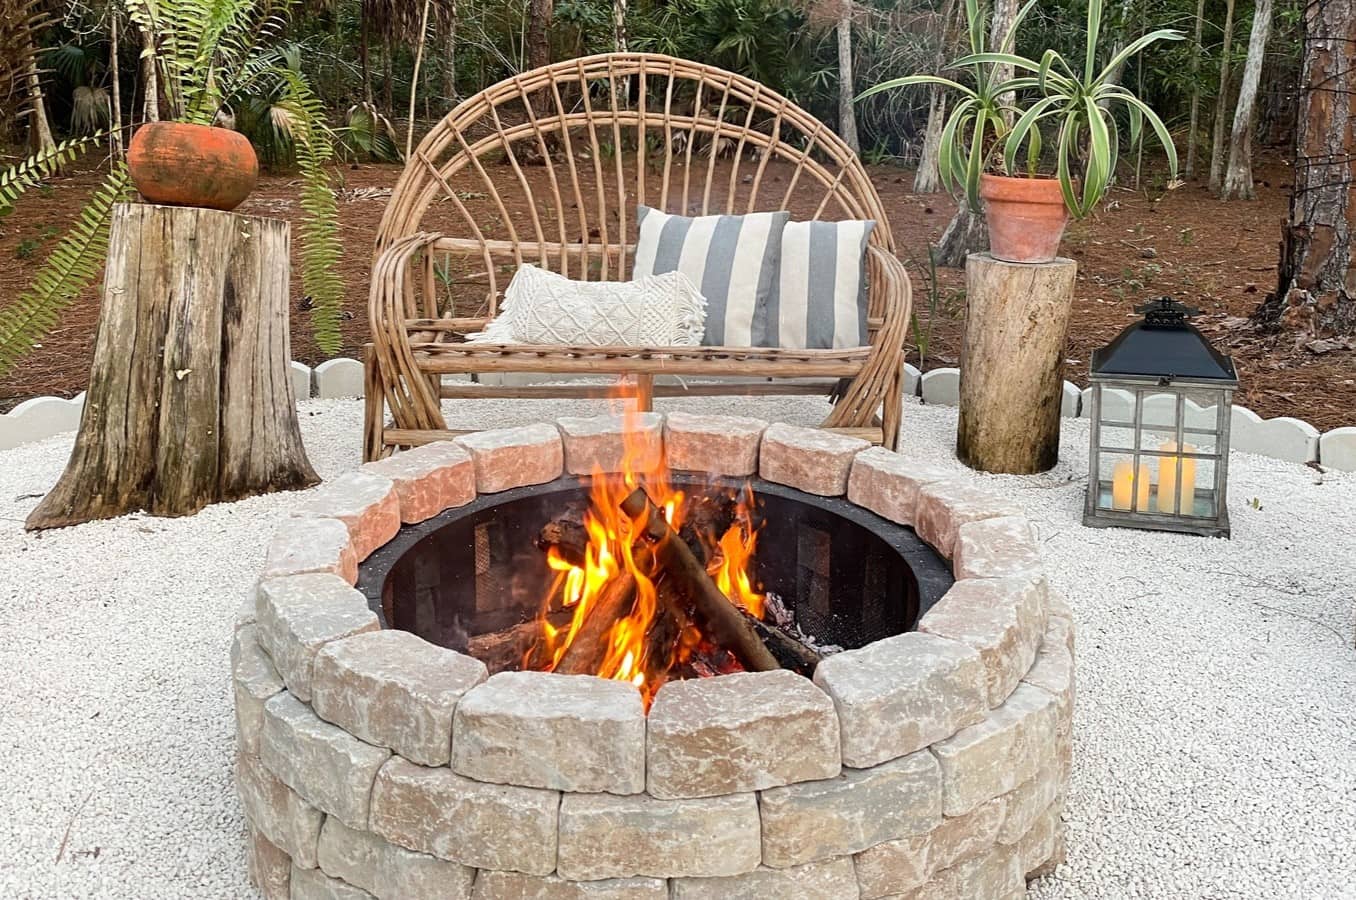
Project 1: DIY Fire Pit
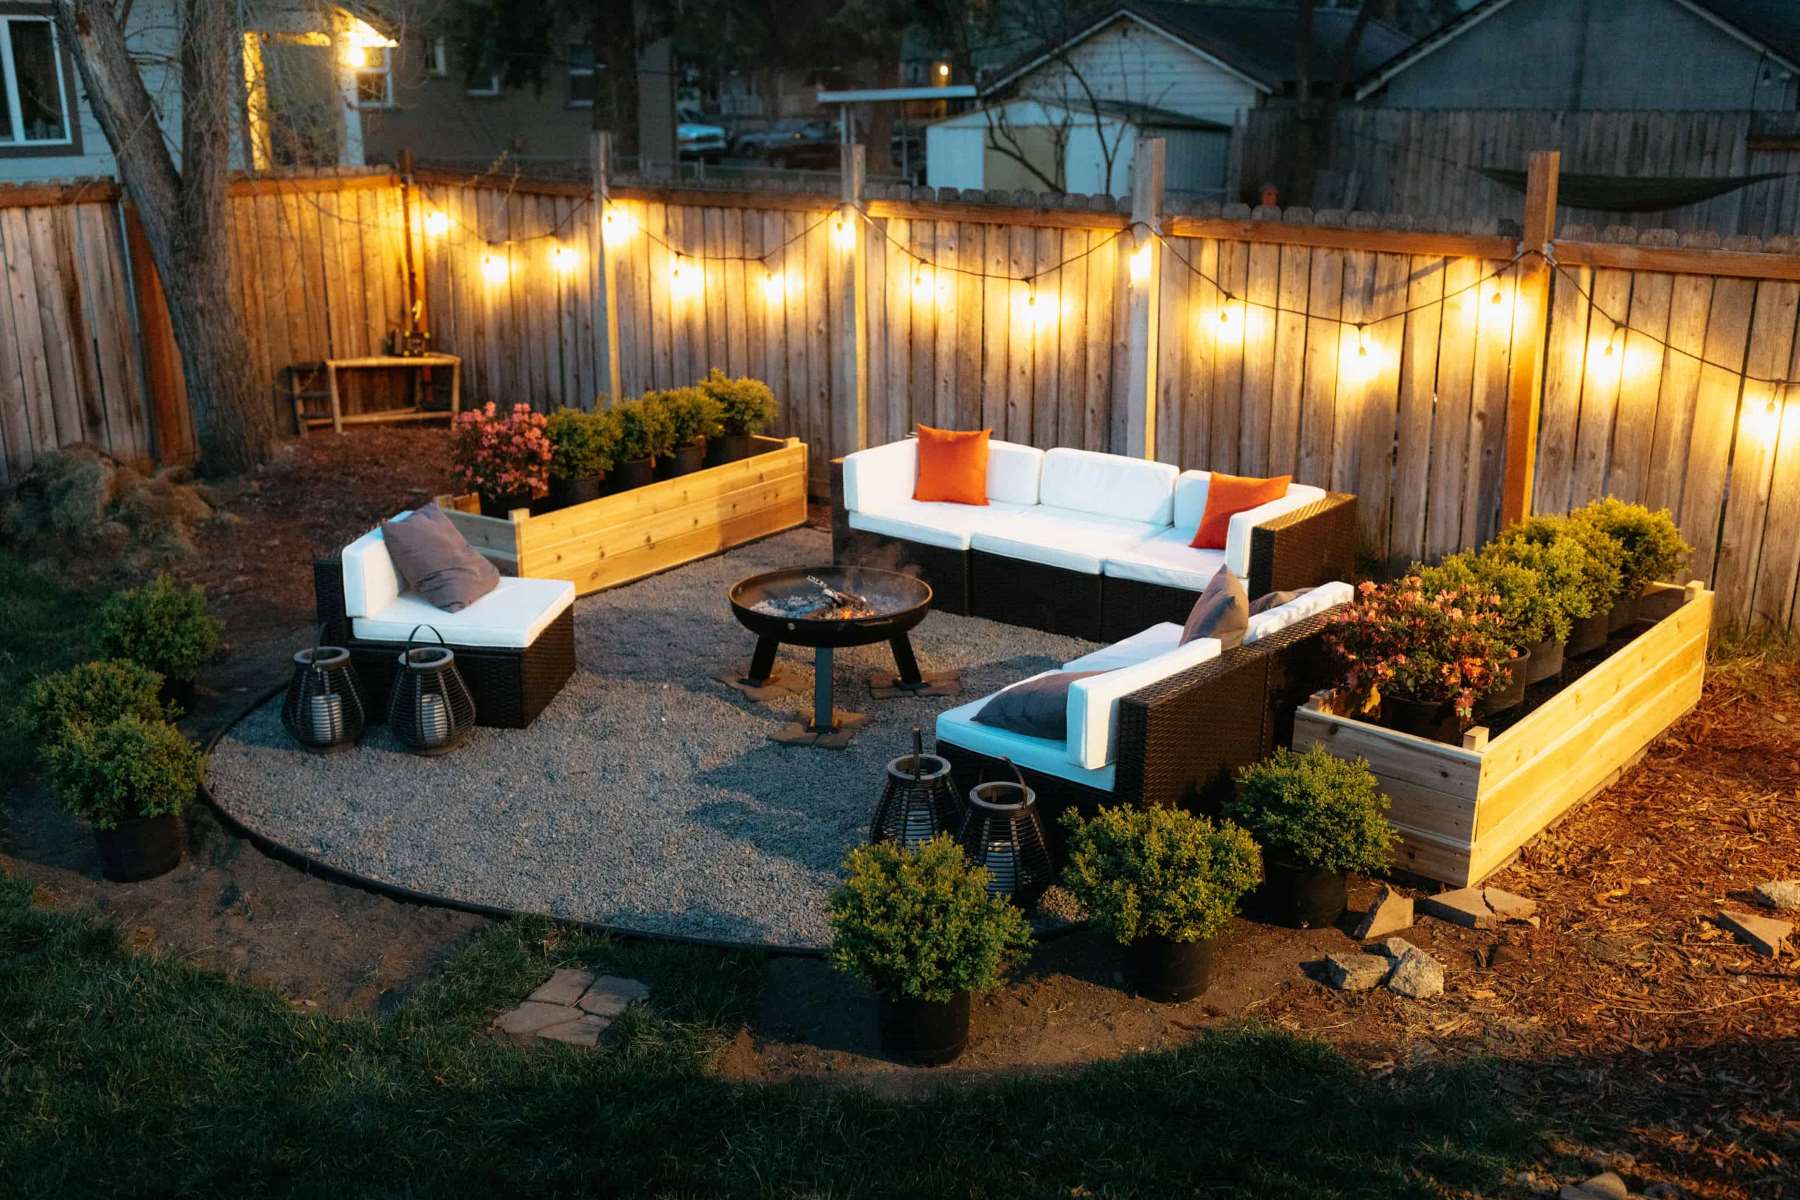
There’s something magical about gathering around a crackling fire on a cool evening. A DIY fire pit is a perfect addition to any backyard, providing warmth, ambiance, and a gathering spot for friends and family.
Materials needed:
- Concrete pavers or bricks
- Fire pit ring or metal fire pit insert
- Sand or gravel
- Shovel
- Tape measure
- Mallet or rubber hammer
- Level
- Firewood and fire starter
Step-by-step instructions:
- Choose a suitable location for your fire pit. Ensure it’s away from any flammable structures and overhanging tree branches.
- Using a tape measure, mark out the desired size and shape of your fire pit. Consider a diameter of around 3-4 feet for a comfortable seating area.
- Dig a shallow pit within the marked area, around 6 inches deep. This will provide a sturdy base for your fire pit.
- Add a layer of sand or gravel to the base of the pit for better drainage and stability.
- Begin laying your concrete pavers or bricks around the perimeter of the fire pit. Tap them gently into place using a mallet or rubber hammer.
- Ensure that each layer is level and securely in place before adding the next layer. This will help prevent any shifting or instability.
- Continue building up the walls of the fire pit until you reach your desired height. Most fire pits are approximately 12-18 inches tall.
- Place the fire pit ring or metal fire pit insert in the center of the constructed walls. This will contain the fire and provide additional safety.
- Double-check that the fire pit is level and stable. Make adjustments as necessary.
- Fill the bottom of the fire pit with a layer of sand or gravel to protect against heat and create better airflow.
- Now, it’s time to get the fire going! Place some firewood and fire starter in the center of the fire pit, and light it up.
- Sit back, relax, and enjoy the warmth and glow of your DIY fire pit.
Remember to always follow local fire regulations and exercise caution while using your fire pit. Keep a fire extinguisher or bucket of water nearby in case of emergencies. Additionally, ensure the fire is completely extinguished before leaving it unattended.
A DIY fire pit is not only functional but also adds a touch of rustic charm to your backyard. It will become a focal point for gatherings and create lasting memories with your loved ones.
Project 2: Outdoor Movie Theater
Who doesn’t love the experience of watching a movie under the stars? With an outdoor movie theater in your backyard, you can bring the magic of the cinema right to your doorstep. Grab your blankets, popcorn, and get ready for an unforgettable movie night.
Materials needed:
- Projector
- Outdoor movie screen or white sheet
- Speaker system or portable Bluetooth speaker
- Blackout curtains or tarps
- Seating options such as blankets, pillows, or outdoor chairs
- Extension cords
- Movie snacks and beverages
Step-by-step instructions:
- Choose a suitable area in your backyard for setting up the outdoor movie theater. Clear any debris and ensure the ground is level.
- Set up a projector stand or secure the projector on a stable surface where it can project onto the movie screen.
- If using a white sheet as the movie screen, hang it securely between two trees or on a clothesline. Alternatively, you can purchase an outdoor movie screen for a more professional look.
- If your backyard has a lot of ambient light, consider using blackout curtains or tarps to create a darkened area around the movie screen. This will improve the image quality and make the viewing experience more enjoyable.
- Connect your projector to a power source using an extension cord. Ensure the projector has proper ventilation and is protected from any potential weather elements.
- Set up your speaker system or portable Bluetooth speaker near the seating area for optimal sound quality. Test the audio levels to ensure everyone can hear the movie clearly.
- Create a cozy seating area using blankets, pillows, or outdoor chairs. Encourage guests to bring their own seating options for added comfort.
- Prepare your movie snacks and beverages ahead of time. Popcorn, candy, and refreshing drinks are traditional favorites.
- Dim the surrounding lights and start the movie on the projector. Sit back, relax, and enjoy the cinematic experience in your own backyard.
- After the movie, take down the screen or sheet and store it in a safe place. Disconnect and store the projector and speaker system properly to protect them from the elements.
An outdoor movie theater adds a touch of nostalgia and entertainment to your backyard. Whether it’s a family movie night or a gathering with friends, it’s a fantastic way to enjoy quality time together under the open sky.
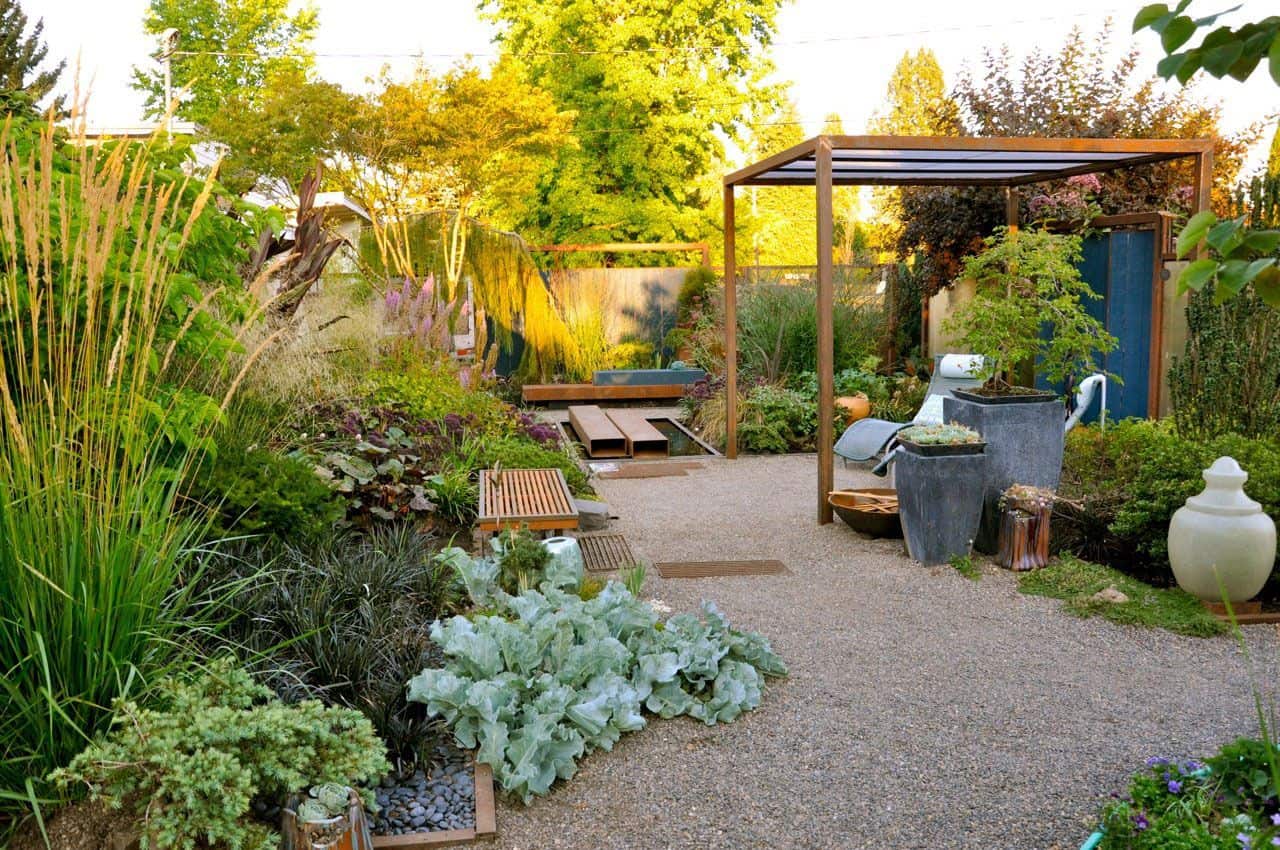
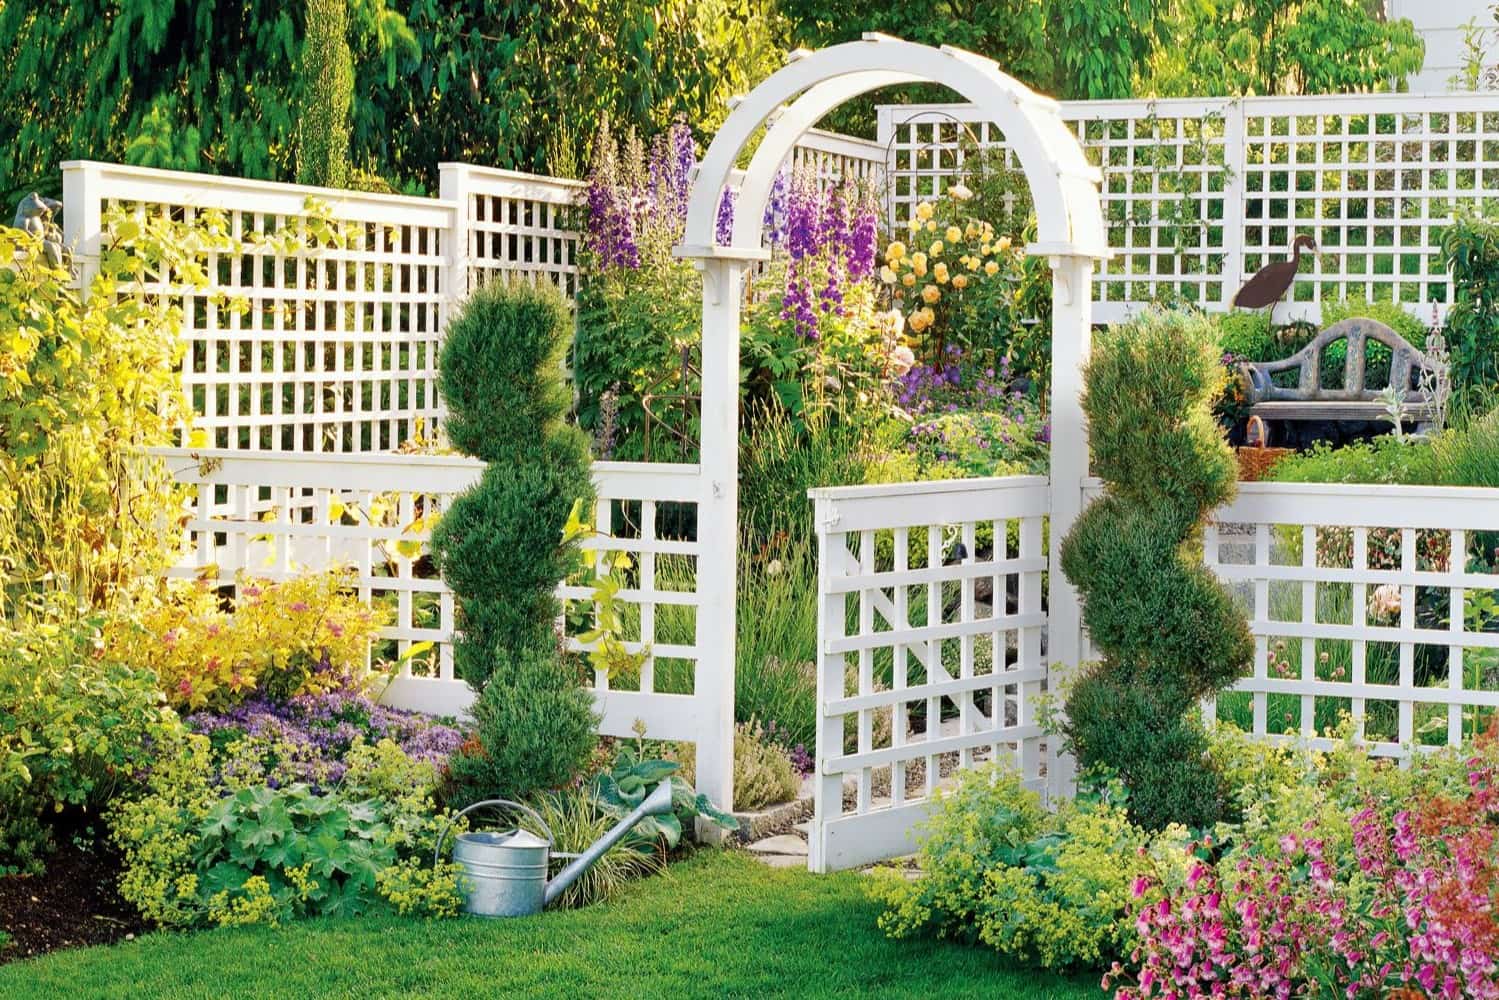
Project 3: Build a Pergola
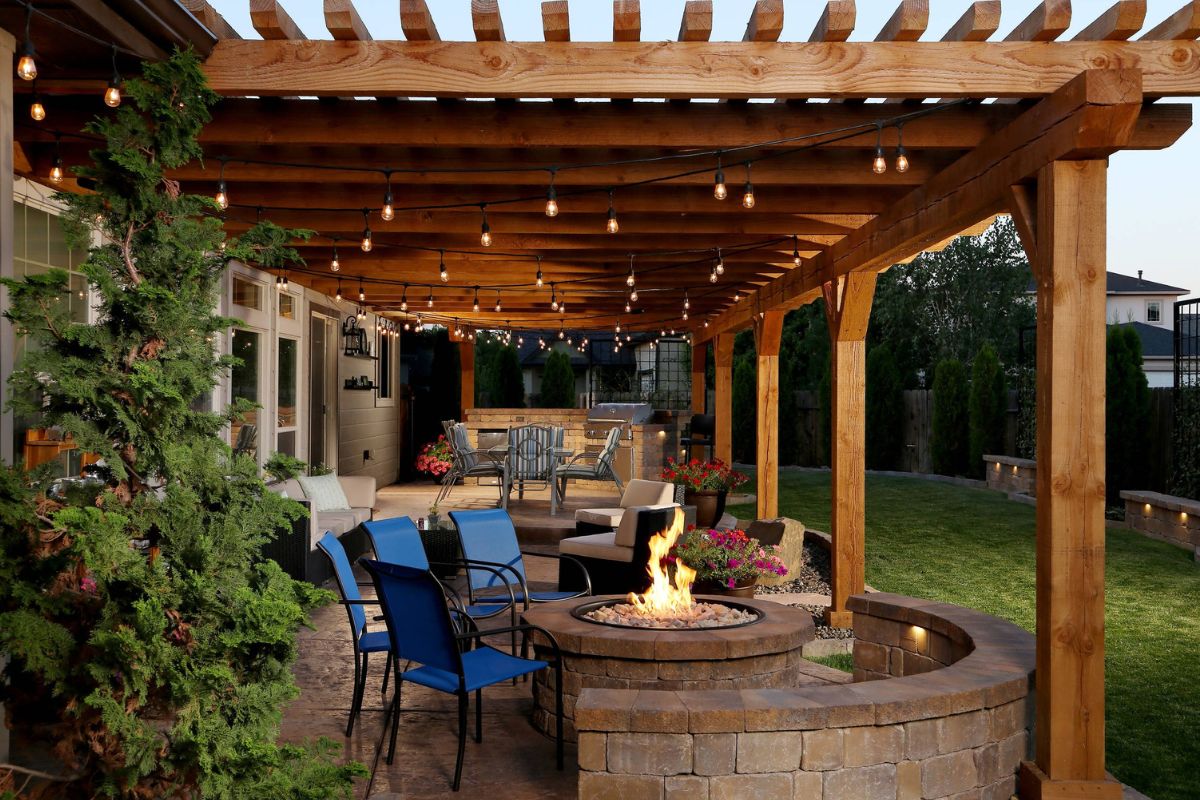
A pergola is a beautiful and versatile addition to any backyard. It not only provides shade and a comfortable outdoor space but also adds a touch of elegance and charm to your surroundings. Building a pergola may sound like a daunting task, but with the right materials and a little bit of effort, you can create a stunning focal point in your backyard.
Materials needed:
- Pressure-treated lumber or cedar beams
- Concrete mix
- Post anchors
- Galvanized screws or nails
- Drill or screwdriver
- Level
- Tape measure
- Saw
- Stain or paint (optional)
- Outdoor fabric or shade cloth (optional)
Step-by-step instructions:
- Determine the size and location of your pergola. Consider the available space and any existing structures in your backyard.
- Measure and mark the desired dimensions for your pergola on the ground. Ensure it is level and aligns with your vision.
- Dig holes for the pergola posts using a post hole digger. The depth of the holes will depend on the height and stability you desire for your pergola.
- Place the post anchors in the holes and secure them with concrete mix. Follow the manufacturer’s instructions for mixing and setting the concrete.
- Attach the posts to the post anchors using galvanized screws or nails. Make sure they are level and plumb in all directions.
- Cut the beams and rafters to the desired length. Use a saw to create the necessary notches for the beams to fit onto the posts.
- Attach the beams to the posts, using galvanized screws or nails. Secure them in place and check for levelness.
- Install the rafters across the beams, evenly spacing them apart. Use galvanized screws or nails to secure them in place.
- Optional: Stain or paint the pergola to protect it from the elements and enhance its appearance. Choose a color that complements your outdoor space.
- Optional: Install outdoor fabric or shade cloth on top of the pergola for added protection from the sun.
- Give your newly built pergola a final inspection, checking for any loose connections or adjustments that need to be made.
- Add comfortable outdoor furniture and accessories to create a cozy and inviting space beneath your pergola.
A pergola adds an element of sophistication to your backyard while providing a shaded area for relaxation or gatherings. It’s a perfect spot for outdoor dining, hosting parties, or simply enjoying the beauty of your surroundings.
Consider adding a DIY fire pit to your backyard to create a cozy gathering spot for friends and family. Use pavers or bricks to create a safe and stylish area for outdoor entertaining.
Project 4: Create a Herb Garden
Imagine stepping into your backyard and plucking fresh herbs to elevate the flavors of your meals. With a herb garden, you can have an abundant supply of aromatic and flavorful herbs right at your fingertips. Not only does it add beauty and fragrance to your backyard, but it also provides you with a sustainable source of culinary delights.
Materials needed:
- Planter boxes or pots
- Quality potting soil or compost
- Herb plants or seeds
- Trowel or small garden shovel
- Watering can or hose
- Organic fertilizer (optional)
- Garden markers or labels (optional)
Step-by-step instructions:
- Select a suitable location in your backyard for your herb garden. Most herbs thrive in a sunny area with well-draining soil.
- Choose the type of herb garden you would like to create: planter boxes, raised beds, or individual pots. Consider the space available and your personal preference.
- Prepare the planter boxes or pots by filling them with quality potting soil or compost. Ensure they have proper drainage to prevent waterlogging.
- Decide whether you want to start your herb garden with plants or seeds. Plants provide a head start, while seeds offer a more cost-effective option.
- If using plants, gently remove them from their containers and loosen the roots before placing them into the prepared planter boxes or pots. Space them according to their recommended growth requirements.
- If starting from seeds, follow the instructions on the seed packet to determine the proper planting depth and spacing. Lightly cover the seeds with soil and water gently.
- Water your herb garden regularly, keeping the soil evenly moist but not waterlogged. Herbs generally prefer well-drained soil, so avoid overwatering.
- Optional: Apply organic fertilizer according to the package instructions to promote healthy growth and enhance flavor.
- Place garden markers or labels in each planter box or pot, indicating the type of herb planted. This will make it easier to identify and care for your herbs.
- Monitor the growth of your herbs and prune them regularly to encourage bushier and more productive plants. Harvest the leaves as needed for culinary use.
- Enjoy the flavors and aromas of your freshly picked herbs in your favorite recipes. Experiment with different combinations and culinary creations.
- Continue to nurture and care for your herb garden, providing it with water, sunlight, and occasional fertilization to ensure its continued growth and productivity.
A herb garden not only enhances the taste of your dishes but also adds a touch of greenery and fragrance to your backyard. It’s a delightful project that brings you closer to nature and allows you to appreciate the wonders of fresh, homegrown herbs.
Project 5: Construct a DIY Water Feature
Add a touch of tranquility and serenity to your backyard with a DIY water feature. The soothing sound of flowing water creates a peaceful ambiance and becomes a focal point for relaxation. Building your own water feature is easier than you might think and can be customized to fit your backyard aesthetic.
Materials needed:
- Container or basin for the water feature
- Water pump with tubing
- Rock or stone materials
- Aquatic plants (optional)
- Level
- Waterproof liner
- Shovel
- Decorative accessories (optional)
Step-by-step instructions:
- Choose a suitable location for your water feature. Consider factors such as sunlight exposure, accessibility to a power source, and the overall landscape design.
- Select a container or basin that will serve as the base of your water feature. It can be a pre-made water feature reservoir or a repurposed item such as a large ceramic pot or plastic tub.
- Place the container in the desired location and use a level to ensure it is perfectly balanced.
- Install the water pump according to the manufacturer’s instructions. Connect the tubing to the pump, ensuring it reaches the top of the container.
- If using rocks or stones, arrange them around the container to create a visually pleasing design. Stack them in layers, using mortar if necessary, to create various heights and cascades for the water to flow over.
- Dig a small trench in the ground to bury the tubing, making sure it runs from the pump to the top of the water feature.
- Line the inside of the container with a waterproof liner, ensuring it extends over the edges and folds neatly into the container without any wrinkles.
- Fill the container with water, ensuring the water level is below the top edge to prevent overflow.
- Test the water flow by turning on the pump. Adjust the flow rate or the positioning of the rocks to achieve the desired effect.
- Optional: Add aquatic plants such as water lilies or water hyacinths to enhance the natural look of the water feature.
- Finish off your DIY water feature by adding decorative accessories such as floating candles, pebbles, or statues to suit your personal style.
- Maintain your water feature by regularly checking the water level and cleaning the pump to prevent debris from affecting its performance.
- Enjoy the serene and calming atmosphere created by your DIY water feature. Spend some quiet moments in your backyard oasis and let the gentle sound of flowing water wash away the stresses of the day.
A DIY water feature adds a touch of elegance and tranquility to your backyard. It not only creates a stunning visual focal point but also provides a relaxing atmosphere that can be enjoyed year-round.
Conclusion
Your backyard is more than just an outdoor space; it’s a canvas waiting to be transformed into a personal oasis. By taking on these five weekend projects, you can bring character, functionality, and charm to your backyard while enjoying the satisfaction of DIY craftsmanship.
From the warmth and ambiance of a DIY fire pit to the cinematic experience of an outdoor movie theater, these projects offer endless possibilities for relaxation and entertainment. Building a pergola creates a shaded retreat, while a herb garden provides fresh flavors and aromatic scents. And let’s not forget the tranquility of a DIY water feature, adding a touch of serenity to your outdoor space.
Throughout these projects, make sure to embrace your creativity and personalize each endeavor to suit your taste and style. Infuse your backyard with your unique flair by choosing materials, colors, and designs that resonate with you. These projects are not just about functionality; they’re an opportunity to express yourself and make your backyard a true reflection of your personality.
Remember, these weekend projects are meant to be enjoyable and approachable for everyone, whether you’re a seasoned DIY enthusiast or just starting out. Take your time, follow the step-by-step instructions, and don’t be afraid to ask for help when needed. The reward of a beautifully transformed backyard is well worth the effort.
So, roll up your sleeves, gather your tools, and embark on these weekend projects to bring character and life to your backyard. Create a space where memories are made, laughter is shared, and relaxation is found. Your backyard is waiting to be your personal oasis – go out there and make it shine!
Frequently Asked Questions about Bring Character To Your Backyard: 5 Weekend Projects
Was this page helpful?
At Storables.com, we guarantee accurate and reliable information. Our content, validated by Expert Board Contributors, is crafted following stringent Editorial Policies. We're committed to providing you with well-researched, expert-backed insights for all your informational needs.


0 thoughts on “Bring Character To Your Backyard: 5 Weekend Projects”