Home>Garden Essentials>Garden Storage>How To Build A Concrete Wall For Your Private Backyard Retreat
Garden Storage
How To Build A Concrete Wall For Your Private Backyard Retreat
Modified: August 27, 2024
Learn how to build a durable and stylish concrete wall for your backyard retreat. Create additional storage space while enhancing the privacy of your outdoor space.
(Many of the links in this article redirect to a specific reviewed product. Your purchase of these products through affiliate links helps to generate commission for Storables.com, at no extra cost. Learn more)
Introduction
Welcome to your private backyard retreat! Building a concrete wall can be a great addition to your outdoor space, providing privacy, security, and a touch of elegance. Whether you’re looking to create a cozy oasis or a stylish backdrop for your backyard, a concrete wall can be the perfect solution.
In this article, we will guide you through the process of building a concrete wall step by step. From planning and preparation to the final touches, we’ll cover everything you need to know to ensure a successful project.
Before we dive into the details, it’s important to understand that building a concrete wall requires careful planning, adequate preparation, and the right materials and tools. It’s not a job that can be rushed or taken lightly. So, if you’re ready to roll up your sleeves and embark on this rewarding project, let’s get started!
First and foremost, it’s crucial to have a clear vision of what you want to achieve with your concrete wall. Are you looking to create a complete enclosure for your backyard, or do you simply want to add a decorative element to an existing structure? The purpose and desired outcome will dictate the size, shape, and design of your wall.
Consider the practical functionalities of the wall as well, such as the desired height, any necessary access points or gates, and any specific structural requirements. Additionally, think about how the wall will fit into the overall landscape design of your backyard and ensure it complements the existing elements.
Once you have a solid plan in place, it’s time to move on to the preparation phase. This involves gathering all the necessary materials and tools, as well as preparing the construction site.
Stay tuned for the next section, where we’ll dive into the details of planning and preparation for building your concrete wall. Get ready to transform your backyard into a private retreat!
Key Takeaways:
- Proper planning, preparation, and site setup are crucial for building a durable and visually appealing concrete wall. Attention to detail and adherence to local regulations ensure a successful project.
- Caring for the concrete wall post-construction is essential. Regular maintenance, including cleaning, sealing, and addressing any imperfections, will help preserve its beauty and functionality for years to come.
Read more: Create A Tropical Retreat In Your Backyard
Planning and Preparation
Before diving into the construction process, taking the time to properly plan and prepare will ensure a smooth and successful project. Here are some key steps to consider during the planning and preparation phase of building your concrete wall:
- Evaluate Your Needs: Assess your specific needs and determine the purpose of the wall. Are you looking for privacy, security, noise reduction, or simply adding a decorative element to your backyard?
- Check Local Building Codes: Research your local building codes and regulations regarding the construction of concrete walls. Ensure you comply with any permits, setbacks, or height restrictions that may be in place.
- Measure and Mark: Measure and mark the desired dimensions and location of your concrete wall. Use stakes, string lines, or spray paint to outline the boundaries and ensure accurate placement.
- Consider Drainage: Take into account the drainage requirements of your wall. Ensure proper water flow and drainage channels to prevent any potential water damage or accumulation behind the wall.
- Find Utilities: Before digging, determine the location of underground utilities such as pipes, cables, or wires. Contact your local utility companies or use a utility locator service to avoid any accidents or disruptions.
- Create a Material List: Make a detailed list of all the materials and tools you will need for the construction. This may include concrete mix, rebar, formwork, gravel, and various construction tools.
- Set a Budget: Determine your budget for the project and allocate funds accordingly. Consider the cost of materials, labor (if applicable), and any additional expenses that may arise.
By taking the time to plan and prepare, you’ll minimize potential issues and ensure a smoother construction process. It’s always better to be well-prepared than to encounter unexpected setbacks midway through the project.
In the next section, we’ll delve into gathering the materials and tools required for building your concrete wall. Stay tuned!
Gathering Materials and Tools
Now that you have a solid plan in place, it’s time to gather all the necessary materials and tools for building your concrete wall. Having everything you need at the start will help streamline the construction process and prevent unnecessary delays. Here’s a list of essential items you’ll need:
- Concrete Mix: Choose the type of concrete mix that best suits your project’s needs. Consider factors such as strength, durability, and workability. Consult with a local supplier or hardware store for guidance.
- Rebar: Reinforcing bars, or rebar, provide additional strength and stability to your concrete wall. Determine the necessary size and quantity based on the dimensions and design of your wall.
- Formwork Materials: Formwork serves as a mold for the concrete, giving it shape and structure. You’ll need materials such as plywood, lumber, nails, and screws to construct the formwork.
- Gravel or Crushed Stone: Prepare the base for your concrete wall by filling the trench with a layer of gravel or crushed stone. This will provide stability and help with proper drainage.
- Construction Tools: Ensure you have the right tools on hand for the job. These may include a shovel, wheelbarrow, concrete mixer, hammer, level, tape measure, trowel, and a saw for cutting formwork materials.
- Protective Gear: Safety should be a top priority. Wear appropriate protective gear such as gloves, safety glasses, and a mask to protect yourself during the construction process.
Take the time to shop around and compare prices from different suppliers to ensure you get the best quality materials at a reasonable price. It’s also worth considering renting any specialized tools or equipment if you don’t already have them.
Once you have gathered all the necessary materials and tools, you’ll be ready to move on to the next phase: site preparation. Stay tuned for the next section, where we’ll guide you through the process of preparing the construction site for your concrete wall.
Site Preparation
Before you can start building your concrete wall, proper site preparation is essential. This step ensures a stable foundation and sets the stage for a successful construction project. Here’s a guide on how to prepare the construction site for your concrete wall:
- Clear the Area: Begin by clearing the area where the wall will be constructed. Remove any vegetation, rocks, debris, or obstacles that may hinder the construction process.
- Mark the Boundaries: Use stakes and string lines to mark the boundaries of the wall. This will serve as a visual guide and ensure accurate placement during the construction process.
- Excavate the Trench: Dig a trench along the marked boundaries to accommodate the depth and width of your wall. The depth will depend on the desired height of the wall and any local building codes or regulations.
- Compact the Soil: After excavating the trench, use a compactor or tamper to compact the soil at the bottom of the trench. This will create a stable base for your wall.
- Install Drainage Pipes: If necessary, install drainage pipes in the trench to ensure proper water flow and prevent water buildup behind the wall. Be sure to connect the pipes to an appropriate drainage system.
- Add a Layer of Gravel: Fill the trench with a layer of gravel or crushed stone. This will further improve drainage and provide a stable base for your concrete wall.
- Compact the Gravel: Using a compactor or tamper, compact the layer of gravel to ensure it is evenly distributed and firmly in place.
By properly preparing the construction site, you’ll create a solid foundation for your concrete wall, ensuring long-term stability and durability. Remember to consult any local building codes or regulations regarding excavation depths and required drainage systems.
Next, we’ll move on to setting up level lines, an important step to ensure a straight and even wall. Stay tuned for the next section, where we’ll guide you through this process.
Setting up Level Lines
Setting up level lines is a crucial step in building a concrete wall. This helps ensure that your wall is straight and even throughout the construction process. Here’s a step-by-step guide on how to set up level lines for your project:
- Start with a Reference Point: Choose a reference point, such as an existing structure or a stake in the ground, that will serve as the starting point for your level lines.
- Drive in Stakes: Pound wooden stakes into the ground at regular intervals along the length of your wall, ensuring they are firmly secure. These stakes will act as reference points for your level lines.
- Tie a String Line: Attach a string line to one of the end stakes, making sure it is taut and level. This will serve as your baseline for the rest of the level lines.
- Transfer the Level: Using a level, transfer the level of the string line to the remaining stakes. Adjust the height of each stake until the string is level with the reference point.
- Check for Accuracy: Double-check the level lines by measuring the vertical distance from the string line to the ground at each stake. Make any necessary adjustments to ensure accuracy.
- Repeat the Process: If your wall has multiple sections or if you’re building a retaining wall, repeat the process of setting up level lines for each section using the same reference point.
Setting up accurate and level lines is crucial for achieving a straight and professionally finished concrete wall. Take your time during this step to ensure precision, as any discrepancies in the level lines can impact the overall quality of the wall.
Now that you have the level lines set up, it’s time to move on to the next phase – mixing and pouring the concrete. Stay tuned for the next section, where we’ll guide you through this important step of the construction process.
Read more: How To Build A Concrete Retaining Wall
Mixing and Pouring Concrete
Now that you have your level lines set up, it’s time to move on to the exciting part: mixing and pouring the concrete for your wall. This step requires careful preparation and attention to detail to ensure a strong and durable finished product. Here’s a step-by-step guide on how to mix and pour concrete:
- Prepare the Concrete Mix: Read the instructions provided by the manufacturer on the concrete mix packaging. Follow the recommended ratio of water to concrete mix to achieve the desired consistency.
- Wear Protective Gear: Before starting the mixing process, put on your protective gear, including gloves and a mask, to protect yourself from any potential hazards.
- Use a Concrete Mixer: If you have access to a concrete mixer, use it to mix the concrete. Follow the manufacturer’s instructions on how to operate the machine and gradually add the concrete mix and water as directed.
- Mix Manually: If a concrete mixer is not available, you can mix the concrete manually. In a wheelbarrow or large container, combine the concrete mix and water, and use a shovel or hoe to thoroughly mix them together until you achieve a uniform consistency.
- Start Pouring: With the concrete mixed and ready, start pouring it into the formwork along the trench. Work in small sections at a time to ensure even distribution of the concrete.
- Distribute the Concrete: Use a shovel or rake to distribute the concrete evenly within the formwork. Ensure that it reaches all corners and edges, and avoid leaving any gaps or voids.
- Compact the Concrete: After pouring each section, use a vibrating compactor or a tamper to remove any air bubbles and settle the concrete. This will improve its stability and strength.
- Continue Pouring: Repeat the process of mixing and pouring concrete, working your way along the trench until all sections are filled and the formwork is complete.
- Smooth the Surface: Use a screed board or a long, straight piece of wood to level and smooth the surface of the concrete. Move the screed board back and forth in a sawing motion to achieve a flat and even surface.
Keep in mind that concrete work should be done efficiently to ensure proper curing and prevent premature drying. Be mindful of the weather conditions, as extreme heat or cold can affect the setting and curing process of the concrete.
In the next section, we’ll guide you through building the formwork, an important step to give your concrete wall its shape and structure. Stay tuned!
When building a concrete wall for your backyard retreat, make sure to properly prepare the ground by compacting the soil and using a level to ensure the wall is straight and sturdy.
Building the Formwork
Building the formwork is a critical step in creating the shape and structure of your concrete wall. The formwork serves as a mold, containing the poured concrete until it sets and hardens. Properly constructed formwork ensures that the concrete wall maintains its desired dimensions and finishes. Here’s a step-by-step guide on how to build the formwork:
- Measure and Mark: Measure the desired dimensions of your concrete wall on the ground, and mark these measurements along the trench.
- Cut the Formwork Panels: Using a saw or circular saw, cut the plywood or lumber into panels that match the height and length of your concrete wall.
- Attach Risers: Cut and attach riser boards to the bottom edge of the formwork panels. These risers will elevate the formwork slightly off the ground, allowing space for the concrete to settle.
- Secure the Formwork: Place the formwork panels along the trench, ensuring they are aligned with the marked dimensions. Secure the panels by hammering stakes into the ground alongside the formwork, approximately every 2-3 feet.
- Level the Formwork: Use a level to ensure that the formwork is perfectly vertical and level. Adjust the position of the formwork or stakes as necessary to achieve this.
- Connect the Formwork: Connect multiple formwork panels together using nails, screws, or clamps. This will provide stability and prevent any movement or shifting during the pouring process.
- Add Bracing: Install diagonal or horizontal bracing inside the formwork to provide additional support and prevent bulging or deformation of the formwork during the concrete pour.
- Seal the Joints: Seal any gaps or joints in the formwork using silicone caulk or duct tape. This will prevent any leakage of concrete during the pouring process.
Remember to refer to your design plan and ensure that the formwork matches the desired shape and dimensions of your concrete wall. Take your time during the formwork construction process to ensure accuracy and durability.
In the next section, we’ll guide you through the process of pouring and leveling the concrete, a crucial step to achieve a smooth and even finished surface. Stay tuned!
Pouring and Leveling the Concrete
Now that the formwork is in place, it’s time to pour and level the concrete for your wall. This step requires careful attention to detail to ensure a smooth and even finished surface. Here’s a step-by-step guide on how to pour and level the concrete:
- Prepare for Pouring: Before pouring the concrete, ensure that the formwork is clean and free of any debris or obstructions. Spray the interior of the formwork with a release agent to make it easier to remove after the concrete has cured.
- Mix the Concrete: Follow the instructions on the concrete mix packaging to prepare the appropriate amount of concrete. Use a concrete mixer or mix manually in a wheelbarrow, ensuring a consistent and workable mixture.
- Pour the Concrete: Starting from one end of the formwork, pour the concrete into the trench. Use a shovel or a bucket to transfer the concrete, working in small sections at a time to ensure even distribution.
- Distribute and Consolidate the Concrete: Use a shovel or rake to evenly distribute the poured concrete within the formwork. Then, use a vibrating compactor or a tamper to consolidate the concrete, removing any air bubbles and ensuring proper compaction.
- Level the Surface: Use a straight board, such as a screed or a 2×4, to level the surface of the concrete. Place the board on the top edges of the formwork and move it back and forth in a sawing motion to level the concrete.
- Smooth the Surface: After leveling, use a concrete float or a trowel to smooth the surface of the concrete. Work in small circular motions, gradually moving across the entire surface to achieve a consistent and finished appearance.
- Check for Levelness: Use a level to ensure that the concrete surface is completely level. Adjust as necessary by adding or removing concrete and using the straight board to achieve the desired levelness.
- Finish the Edges: Use an edging tool or a trowel to create rounded or beveled edges along the sides of the concrete wall. This will provide a clean and polished appearance.
Take your time during the pouring and leveling process to ensure that the concrete is properly distributed and leveled. Be mindful of the weather conditions, as extreme heat or cold can impact the setting and curing of the concrete.
In the next section, we’ll guide you through the process of finishing the surface of the concrete, adding the final touches to your wall. Stay tuned!
Finishing the Concrete Surface
Once the concrete is poured and leveled, it’s time to give the surface a finishing touch. This step involves enhancing the appearance and texture of the concrete, as well as addressing any imperfections. Here’s a step-by-step guide on how to finish the surface of your concrete wall:
- Wait for Initial Set: Allow the concrete to set for a certain period of time before starting the finishing process. This typically takes a few hours and allows the concrete to firm up.
- Remove Excess Water: Once the concrete has set slightly, use a brush or a broom to remove any excess water from the surface. This helps in achieving a better finish and reduces the risk of cracking.
- Create Texture: Use a texture tool, such as a broom or a brush, to create texture on the surface of the concrete. This improves traction and adds visual interest to the wall.
- Smooth the Surface: If a smooth finish is desired, use a steel trowel to smooth the surface of the concrete. Work in overlapping circular motions to eliminate any lines or grooves from the initial finishing.
- Add Decorative Patterns: If desired, you can create decorative patterns or designs on the concrete surface using stamps, stencils, or other tools. This adds a unique and personalized touch to your wall.
- Seal the Surface: Consider applying a concrete sealer to enhance the durability and appearance of the finished surface. Follow the manufacturer’s instructions for proper application and drying time.
- Protect the Surface: Once the finishing is complete, protect the surface from drying too quickly by covering it with plastic sheeting or damp burlap. This helps in proper hydration and prevents cracking.
- Allow for Curing: Give the concrete enough time to cure and gain strength. This typically takes around 28 days, but it’s important to follow the specific recommendations provided by the concrete manufacturer.
Properly finishing the concrete surface ensures a visually appealing and long-lasting result. Take your time during this step and pay attention to detail for a professional finish.
In the next section, we’ll talk about the curing and drying period of the concrete, which is crucial for its strength and durability. Stay tuned!
Curing and Drying Period
After the concrete surface has been finished, it’s crucial to allow it to properly cure and dry. Curing is the process of maintaining adequate moisture and temperature conditions to ensure the concrete achieves optimal strength and durability. Here’s what you need to know about the curing and drying period:
1. Maintain Moisture: During the curing process, it’s essential to keep the concrete moist to prevent it from drying out too quickly. This can be done by lightly spraying the surface with water or covering it with moist burlap or plastic sheeting. The moisture helps the cement particles bond and harden, resulting in a stronger concrete wall.
2. Control Temperature: Temperature plays a crucial role in the curing process. Higher temperatures can expedite the curing, but it’s important to prevent rapid drying. Avoid exposing the concrete to direct sunlight or extreme heat, as it can cause cracking or weaken the structure. If necessary, use shading or temporary covers to regulate the temperature.
3. Allow Sufficient Time: The curing period can vary depending on several factors, including the type of concrete mix, temperature, humidity, and thickness of the wall. In general, it’s recommended to allow the concrete to cure for at least 28 days. However, always refer to the specific recommendations provided by the concrete manufacturer for the optimal curing time.
4. Monitor Moisture Levels: Regularly monitor the moisture levels of the concrete during the curing period. The surface should remain damp but not excessively wet. Adjust the moisture content as needed to ensure the proper curing process.
5. Avoid Heavy Loads and Traffic: During the curing period, keep heavy loads and foot traffic off the concrete wall. Premature use or excessive weight can compromise the strength and integrity of the concrete. It’s best to wait until the curing process is complete before subjecting the wall to any significant pressure or stress.
6. Gradual Drying: After the curing period, the concrete will continue to dry. Gradually reduce the moisture exposure by removing the covering and allowing the surface to air dry. This slow drying process helps prevent internal stresses and cracking.
By properly curing and drying the concrete, you ensure that it reaches its maximum strength and durability. This step is essential for the long-term performance of the concrete wall.
In the next section, we’ll discuss the process of removing the formwork and revealing the finished concrete. Stay tuned!
Removing the Formwork
Once the concrete has sufficiently cured and dried, it’s time to remove the formwork and reveal the finished concrete wall. Removing the formwork requires careful handling to avoid damaging the concrete or disrupting its structure. Here’s a step-by-step guide on how to remove the formwork:
- Ensure Proper Curing: Before attempting to remove the formwork, make sure the concrete has completed the recommended curing period. This typically takes around 28 days, but refer to the specific recommendations provided by the concrete manufacturer.
- Inspect the Concrete: Carefully examine the surface of the concrete for any signs of cracking, weakness, or other issues. If any concerns are identified, consult with a professional before proceeding with the formwork removal.
- Loosen the Formwork: Start by removing any nails, screws, or clamps that are securing the formwork to the stakes. Use a rubber mallet or a hammer with a wooden block to gently tap along the edges of the formwork to loosen it from the concrete.
- Remove the Stakes: Once the formwork is loosened, carefully remove the stakes from the ground. Use a pry bar or a shovel as necessary to lift the stakes without damaging the surrounding concrete.
- Release the Formwork: Slowly and carefully pry or release the formwork panels away from the concrete. Start from one end and work your way along the length of the wall. Take your time and use caution to prevent any accidental damage to the concrete surface.
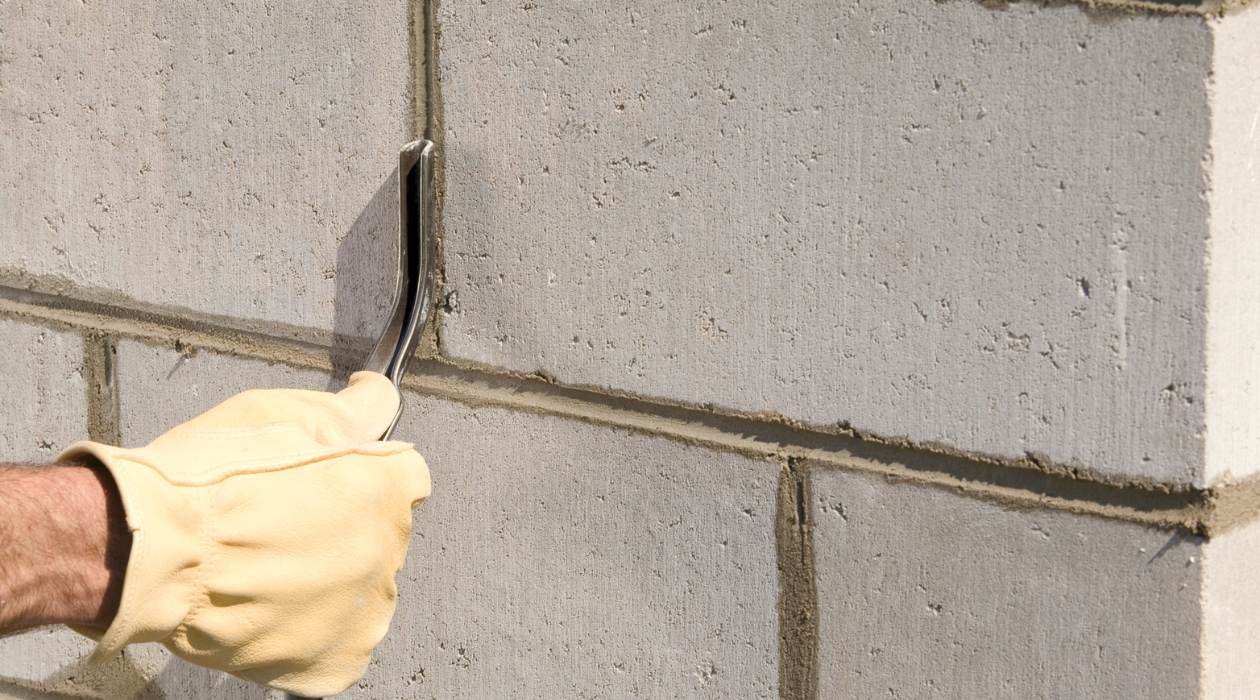
- Check for Residue: After removing the formwork, inspect the concrete surface for any residue or marks left by the formwork materials. Use a wire brush or a gentle abrasive pad to remove any residue or rough spots, ensuring a smooth and finished appearance.
- Clean and Protect: Thoroughly clean the concrete surface from any debris, dust, or dirt that may have accumulated during the formwork removal process. Consider applying a concrete sealer to further enhance the durability and appearance of the concrete wall.
Take your time and handle the formwork removal with care to avoid any damage to the newly revealed concrete surface. If you encounter any difficulties during the process, consult with a professional to ensure the best outcome.
In the final section, we’ll discuss some final touches and maintenance tips to keep your concrete wall looking its best. Stay tuned!
Final Touches and Maintenance
With the formwork removed, and your concrete wall beautifully revealed, there are a few final touches and ongoing maintenance tasks to consider. These steps will help preserve the appearance and longevity of your concrete wall. Here’s what you should do:
- Inspect for Imperfections: Take a close look at the concrete wall for any imperfections, such as cracks, chips, or uneven areas. If you notice any issues, consult with a professional to address them promptly.
- Seal the Concrete: Consider applying a high-quality concrete sealer to protect the surface from water damage, stains, and fading. Follow the manufacturer’s instructions for application and reapplication intervals.
- Perform Regular Cleaning: Regularly clean the concrete wall to remove dirt, debris, and stains. Use a mild detergent and a soft-bristle brush or a pressure washer to maintain its appearance. Avoid harsh chemicals that may damage the concrete surface.
- Address Stains and Discoloration: If you notice any stubborn stains or discoloration on the concrete, use a specialized concrete cleaner to treat the affected areas. Follow the product instructions and rinse thoroughly.
- Prevent Water Accumulation: Ensure proper drainage around the concrete wall to prevent the accumulation of water. Clear any debris or obstructions that may block the flow of water and lead to potential damage or erosion.
- Inspect and Repair Cracks: Periodically inspect the concrete wall for any new cracks that may appear over time. Small cracks can usually be repaired with a concrete patching compound. However, larger or structural cracks may require professional assessment and repair.
- Protect from Extreme Conditions: Take precautions to protect the concrete wall during extreme weather conditions. Freezing temperatures, excessive heat, and prolonged exposure to sunlight can affect the integrity and appearance of the concrete. Consider using temporary covers, shading, or other protective measures as needed.
By following these final touches and maintenance practices, you can ensure that your concrete wall remains in excellent condition for years to come. Regular care and proactive attention will help preserve its functionality and visual appeal.
Congratulations on successfully building your concrete wall and transforming your backyard into a private retreat! Enjoy the beauty and benefits that it brings to your outdoor space.
If you have any further questions or concerns, don’t hesitate to consult with a professional or seek guidance from experienced contractors who specialize in concrete construction and maintenance.
Frequently Asked Questions about How To Build A Concrete Wall For Your Private Backyard Retreat
Was this page helpful?
At Storables.com, we guarantee accurate and reliable information. Our content, validated by Expert Board Contributors, is crafted following stringent Editorial Policies. We're committed to providing you with well-researched, expert-backed insights for all your informational needs.


0 thoughts on “How To Build A Concrete Wall For Your Private Backyard Retreat”