Home>Garden Essentials>Garden Storage>How To Build Wide Deck Steps For A Grand Backyard Entrance

Garden Storage
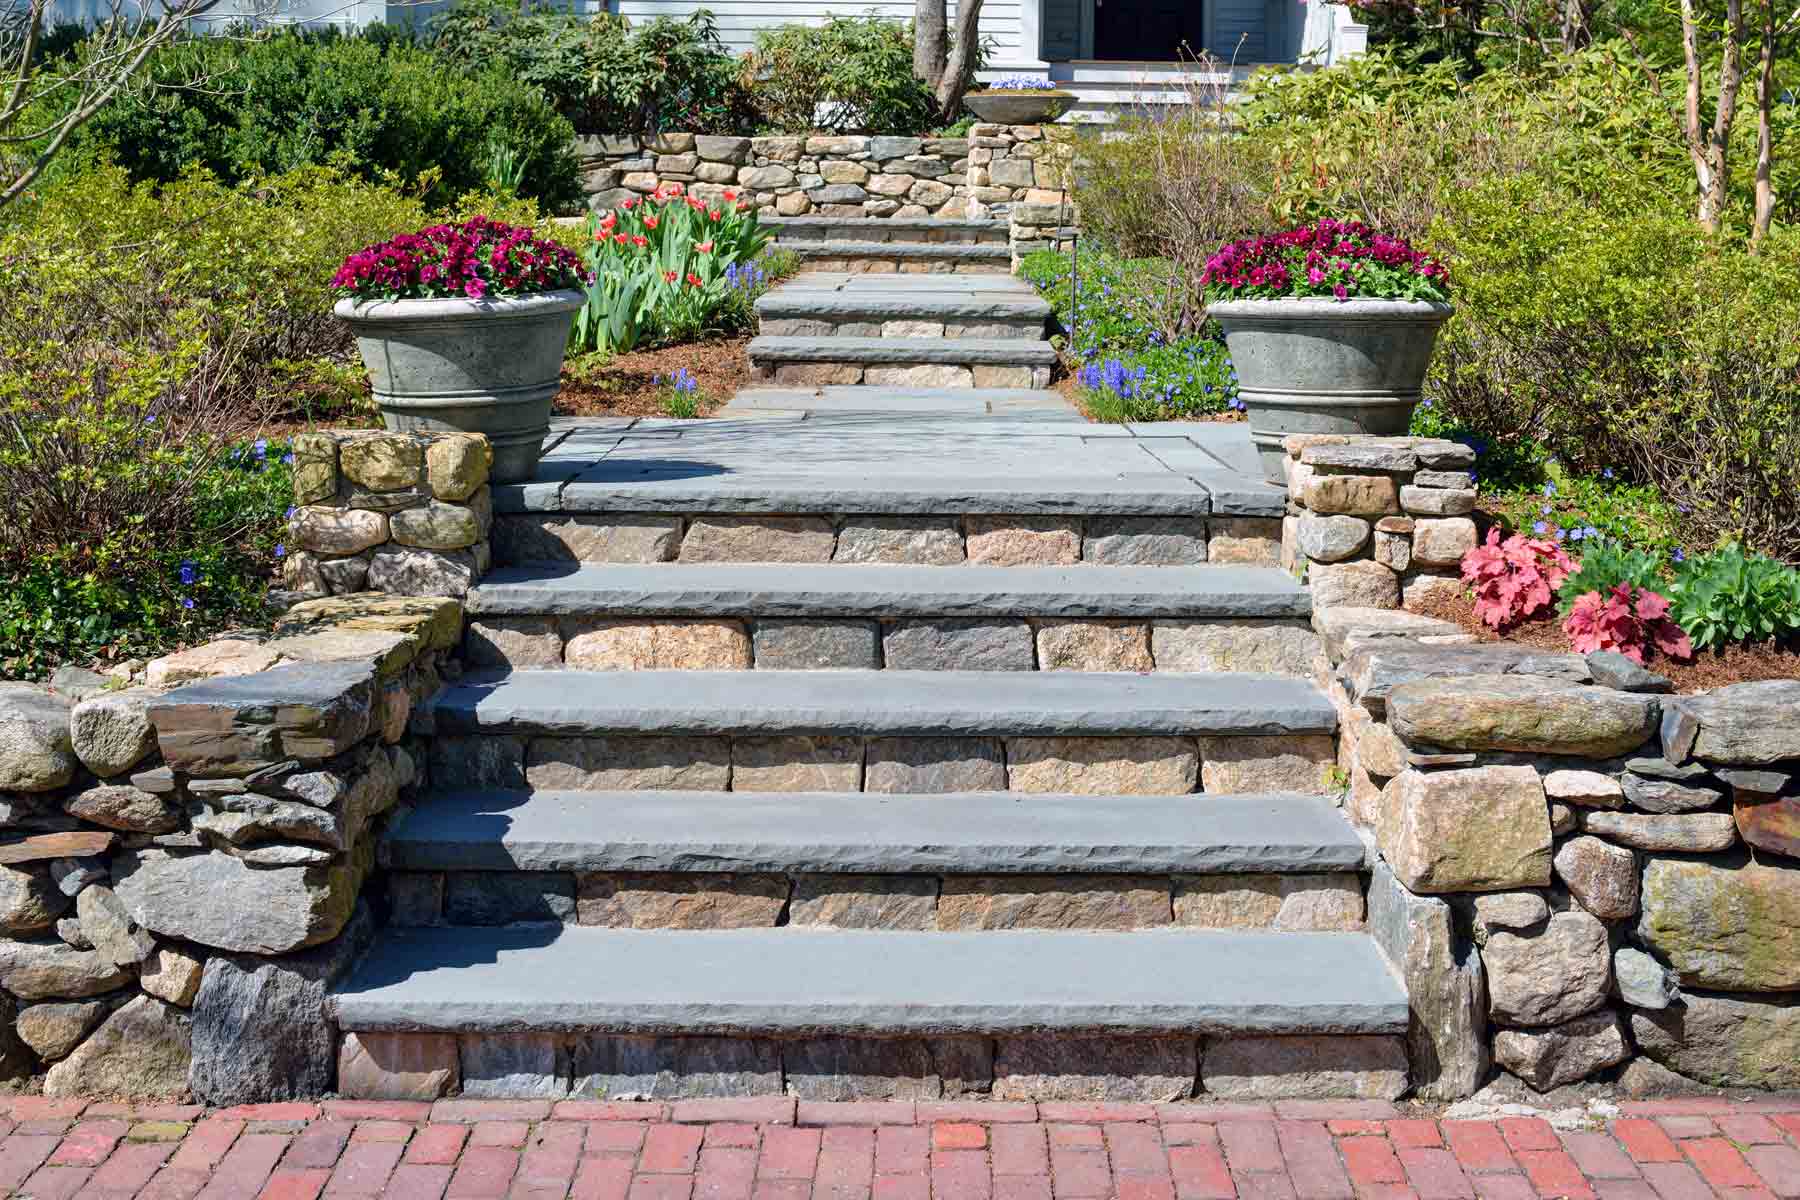
How To Build Wide Deck Steps For A Grand Backyard Entrance
Modified: August 27, 2024
Learn how to create wide deck steps to make a grand entrance to your backyard. Enhance your outdoor space with these stylish and functional storage solutions.
(Many of the links in this article redirect to a specific reviewed product. Your purchase of these products through affiliate links helps to generate commission for Storables.com, at no extra cost. Learn more)
Introduction
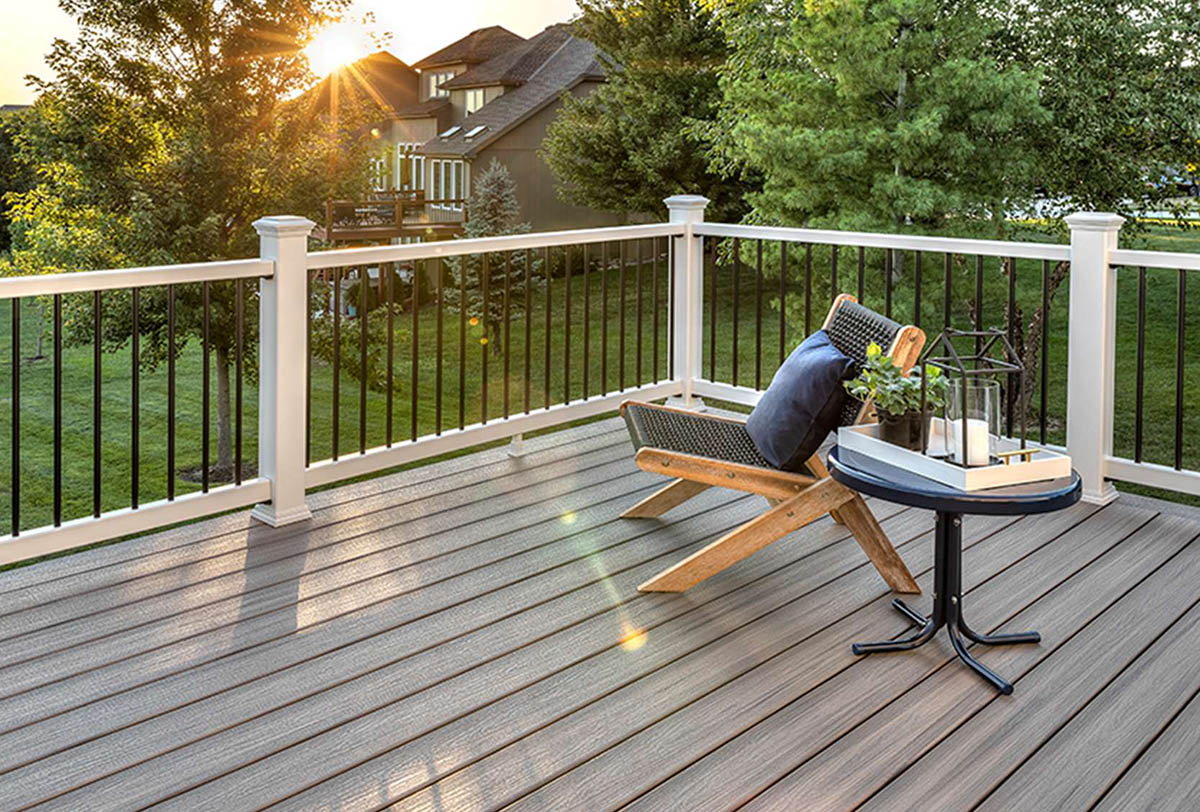
Welcome to the ultimate guide on how to build wide deck steps for a grand backyard entrance. Whether you’re looking to add functionality to your outdoor space or enhance its visual appeal, constructing wide deck steps can be a game-changer. Not only do they provide a safe and convenient way to access your deck, but they also create an impressive entrance that adds a touch of grandeur to your backyard.
Building wide deck steps may seem like a daunting task, but with the right tools, materials, and guidance, it can be achieved with relative ease. In this step-by-step guide, we will walk you through each stage of the process, from gathering materials and tools to installing railings and handrails. By the end of this article, you’ll have all the knowledge you need to create a stunning and functional entrance to your deck.
Whether you’re a seasoned DIY enthusiast or a beginner tackling your first deck project, this guide is designed to provide you with a comprehensive understanding of the process. So, let’s roll up our sleeves, gather our tools, and embark on this exciting journey of building wide deck steps.
Key Takeaways:
- Building wide deck steps requires precise measurements, sturdy foundation holes, and secure support posts. Proper framing, deck board attachment, and railing installation are essential for creating a safe and visually appealing entrance to your backyard.
- By following this comprehensive guide, you can transform your outdoor space with stunning wide deck steps. From gathering materials to adding finishing touches, this step-by-step process ensures a grand and functional entrance that enhances the beauty of your backyard.
Read more: How To Build An Angled Deck Step-by-Step
Step 1: Gather Materials and Tools
Before you begin construction, it’s essential to gather all the necessary materials and tools. Having everything in place will save you time and ensure a smooth building process. Here’s a list of materials and tools you’ll need:
Materials:
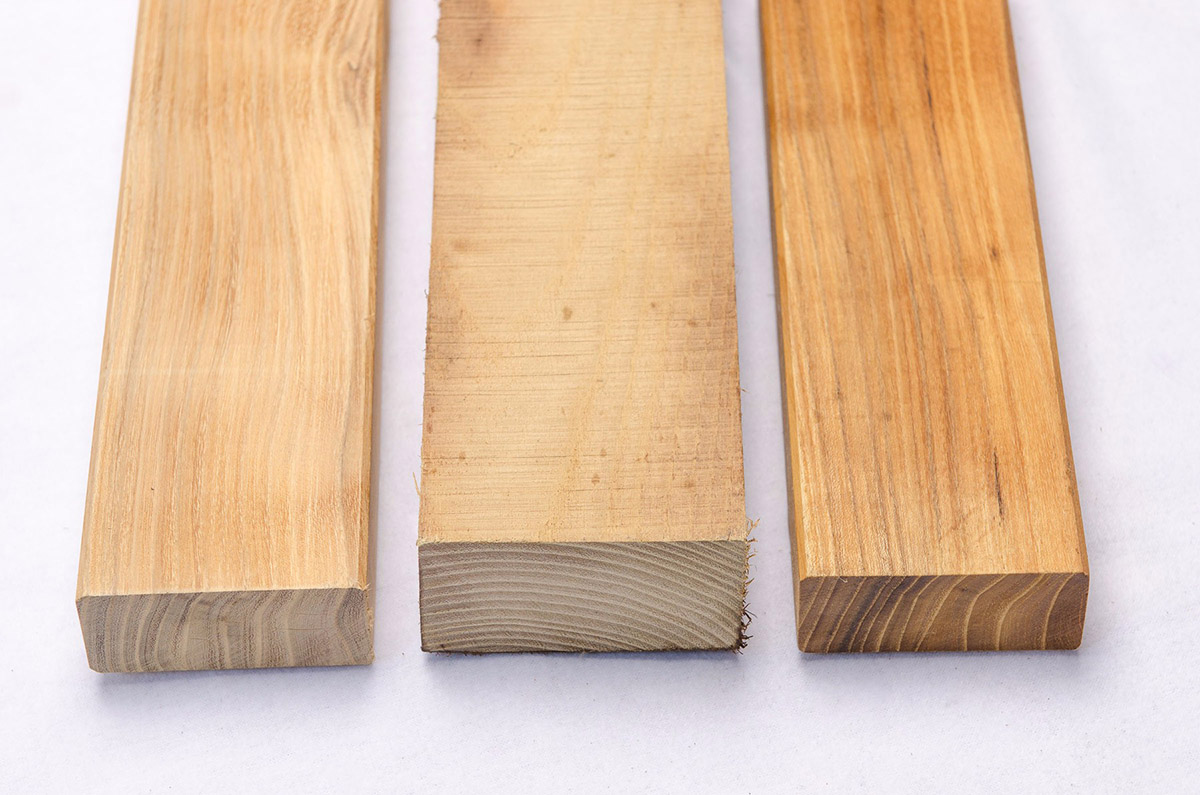
- Pressure-treated lumber for framing
- Pressure-treated decking boards
- Concrete mix for footings
- Post anchors
- Galvanized screws or nails
- Gravel or crushed stone
- Wood sealer or stain
- Railings and handrails (optional, based on your design)
Tools:
- Tape measure
- Level
- Post hole digger or auger
- Shovel
- Hammer
- Drill
- Miter saw or circular saw
- Screwdriver or screw gun
- Safety glasses and gloves
Double-check your materials list to ensure you have everything you need before starting the project. Making a trip to the hardware store in the middle of construction can be frustrating and delay your progress.
It’s important to select high-quality materials, especially pressure-treated lumber, to ensure the durability and longevity of your deck steps. Pressure-treated wood is resistant to rot and decay, making it ideal for outdoor structures.
After gathering your materials and tools, you’re now ready to move on to the next step: measuring and marking the location of the steps.
Step 2: Measure and Mark the Location of the Steps
Accurate measurements and proper marking are crucial when it comes to building wide deck steps. This step ensures that your steps are correctly aligned and spaced, resulting in a sturdy and visually appealing entrance. Follow these steps to measure and mark the location of your deck steps:
- Measure the height: Start by determining the overall height of your deck steps. Measure from the ground level to the top of your deck surface. This measurement will help you calculate the number of steps needed.
- Calculate the step height: Divide the total height by an ideal riser height (usually around 6-8 inches) to determine the number of steps required. Round the result up to the nearest whole number.
- Divide the total width: Measure the total width available for your steps. Divide this width by the number of desired steps calculated in the previous step. This will give you the approximate width of each step.
- Mark the start and end points: Begin by marking the start and end points of your steps using stakes or spray paint. Ensure that the distance between these two points matches the total width calculated in the previous step.
- Mark the tread depth: Measure and mark the depth of each step, considering a comfortable tread depth (usually 10-12 inches). Use a level to ensure that the markings are straight and even.
- Mark the rise: Measure and mark the rise for each step, ensuring that the riser height is consistent (as calculated earlier).
- Double-check the measurements: Take one final look at your measurements and markings to ensure accuracy before proceeding to the next step.
Remember, precise measurements and markings are vital in creating safe and easy-to-navigate deck steps. Take your time during this step to ensure everything is properly aligned. Once you’re satisfied with the measurements and markings, it’s time to move on to digging the foundation holes in Step 3.
Step 3: Dig the Foundation Holes
Now that you have measured and marked the location of your deck steps, it’s time to start digging the foundation holes. The foundation holes provide the necessary support and stability for your steps. Follow these steps to dig the foundation holes:
- Clear the area: Begin by clearing the area of any vegetation, rocks, or debris. Make sure the ground is level and smooth.
- Mark the hole locations: Use your markings from Step 2 as a guide to indicate the center of each foundation hole.
- Choose the hole size: The size and depth of the foundation holes depend on the size and length of your deck steps. Consult local building codes for the specific requirements in your area.
- Start digging: Use a post hole digger or an auger to dig the foundation holes. Make sure to dig deep enough to reach below the frost line, especially in colder climates.
- Check the hole depth: Use a tape measure or a level to ensure that the holes are of the correct depth. Adjust if necessary.
- Remove excess soil: Clear out any loose soil or debris from the bottom of the foundation holes.
- Compact the soil: Use a tamper or a piece of wood to compact the soil at the bottom of each hole. This will provide a solid base for your footings.
It’s important to dig the foundation holes to the proper depth and width to ensure the stability of your deck steps. The exact dimensions may vary depending on your specific project and local regulations. Consult with a professional if you are uncertain about the requirements for your area.
Once you have successfully dug the foundation holes, you are ready to move on to Step 4: preparing and pouring the concrete footings to provide a solid base for your steps.
Step 4: Prepare and Pour Concrete Footings
Concrete footings are essential for providing a strong and stable foundation for your deck steps. In this step, we will guide you through the process of preparing and pouring the concrete footings. Follow these steps to ensure a proper installation:
- Calculate the amount of concrete needed: Determine the amount of concrete required based on the size and number of footings. Consult a concrete calculator or speak to a professional to get accurate measurements.
- Assemble the footing forms: Create forms using 2×4 lumber or pre-made footing forms. Cut the boards to the desired height and length, ensuring they are securely connected.
- Level the forms: Place the forms into the foundation holes and use a level to ensure they are straight and level.
- Mix the concrete: Follow the instructions on the concrete mix to prepare the appropriate amount of concrete. Use a mixing container and a drill with a mixing attachment to achieve a consistent mixture.
- Pour the concrete: Carefully pour the mixed concrete into each footing form, filling it to the top. Avoid overfilling the forms as the concrete will expand slightly as it cures.
- Smooth the surface: Use a trowel to smooth the surface of the concrete and create a level finish. Remove any excess or uneven areas to ensure a clean look.
- Allow the concrete to cure: Follow the curing time recommended by the concrete manufacturer. Typically, it takes about 24-48 hours for the concrete to reach its full strength.
- Remove the forms: Once the concrete has cured, carefully remove the forms using a hammer or pry bar. Be cautious not to damage the concrete while removing the forms.
- Inspect the footings: Check the footings for any cracks or imperfections. If needed, patch or repair any minor issues before proceeding to the next step.
Properly prepared and poured concrete footings are essential for the stability and longevity of your deck steps. Take your time to ensure the footings are level, smooth, and adequately cured before moving on to the next step.
In Step 5, we will guide you through the process of installing the support posts to secure your deck steps to the footings.
When building wide deck steps for a grand backyard entrance, make sure to use sturdy and durable materials such as pressure-treated lumber or composite decking to ensure longevity and safety. Additionally, consider adding handrails for added support and safety.
Read more: Make A Grand Entrance With Entryway Design
Step 5: Install the Support Posts
Support posts play a crucial role in providing structural integrity and support to your deck steps. In this step, we will guide you through the process of installing the support posts securely. Follow these steps to ensure a proper installation:
- Measure and cut the support posts: Measure the desired height for the support posts, taking into account the overall height of your deck steps. Use a miter saw or a circular saw to cut the posts to the appropriate length.
- Attach post anchors: Securely attach post anchors to the concrete footings using concrete screws or anchors specified for this purpose. Make sure the post anchors are level and aligned with the markings from Step 2.
- Insert the support posts: Place the cut support posts into the post anchors, ensuring they are straight and plumb. Use a level to check for proper alignment.
- Secure the support posts: Attach the support posts to the post anchors using galvanized screws or nails. Make sure the connections are tight and secure, providing a stable base for your deck steps.
- Double-check the alignment: Use a level to verify that the support posts are perfectly vertical and aligned with the desired position of the steps.
- Add additional support: If your steps are wide or require additional support, consider adding cross beams between the support posts. This will enhance the structural integrity of your steps.
It’s crucial to ensure the support posts are securely installed and properly aligned. This will contribute to the stability and durability of your deck steps. Take your time during this step to double-check the measurements and alignment before proceeding.
In Step 6, we will guide you through framing the steps, which is a key aspect of creating a sturdy and functional structure.
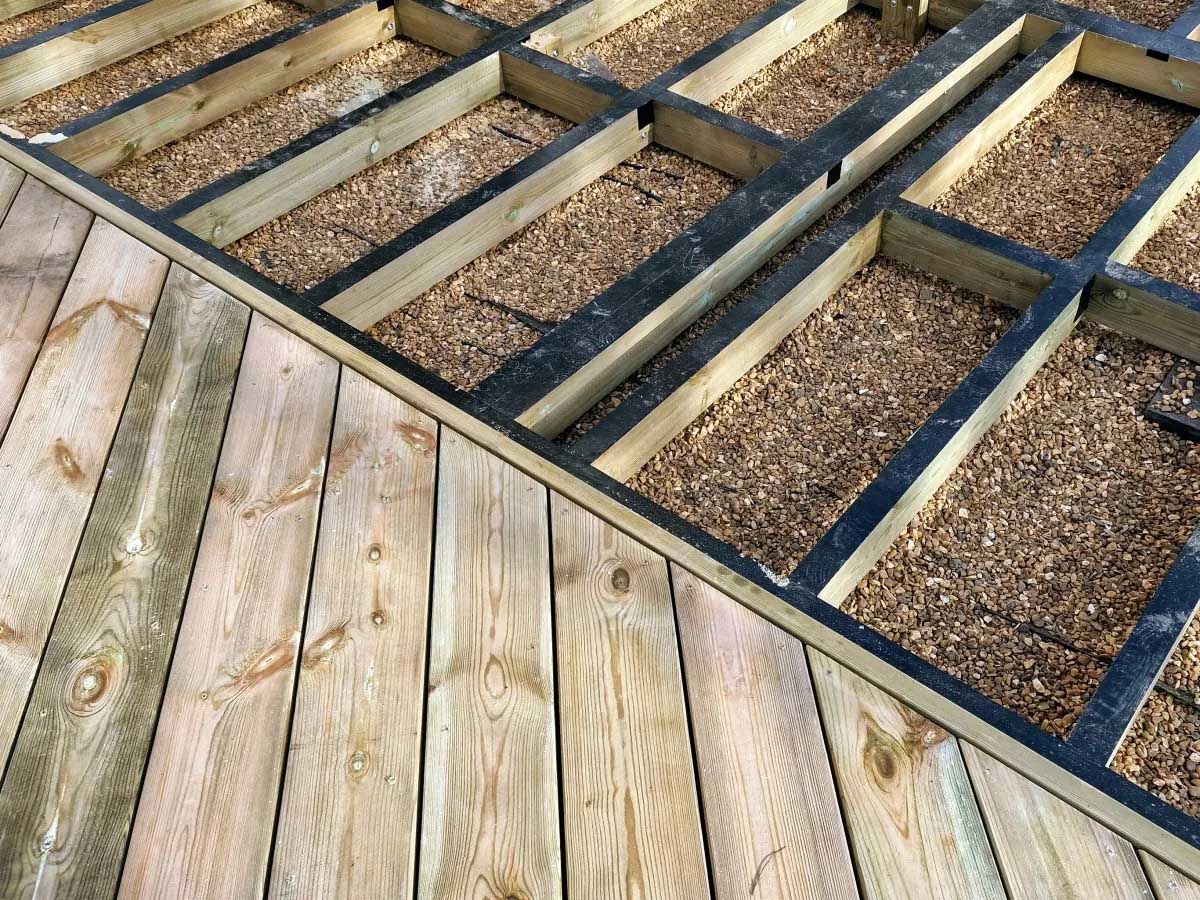
Step 6: Frame the Steps
The framing of your deck steps provides the structural framework that supports the weight and ensures the overall stability of the steps. In this step, we will guide you through framing the steps. Follow these steps to create a sturdy and functional structure:
- Measure and cut the frame boards: Determine the dimensions of each step’s frame by measuring the tread depth and riser height. Use a miter saw or circular saw to cut the frame boards to the appropriate lengths.
- Start with the bottom step: Begin by framing the bottom step. Attach the frame boards to the support posts using galvanized screws or nails. Make sure the frame is level and securely fastened.
- Continue with the remaining steps: Move upward, framing each subsequent step. Use a level to ensure each frame is level and in alignment with the desired tread depth and riser height.
- Add support braces: To enhance the structural integrity of the steps, add support braces between the frame boards. These braces will prevent any sagging or shifting of the steps over time.
- Secure the frames: Double-check the stability and alignment of each frame before securing it in place. Make any necessary adjustments and ensure the frames are securely fastened to the support posts.
- Treat the frame: Apply a wood sealer or stain to protect the frame boards from moisture and prolong their lifespan. Allow the treatment to dry completely before moving on to the next steps.
Properly framed steps provide the necessary support and stability for safe usage. Take your time during this step to ensure the frames are level, aligned, and securely fastened. Once the framing is complete, you are ready to move on to Step 7, which involves attaching deck boards to the steps.
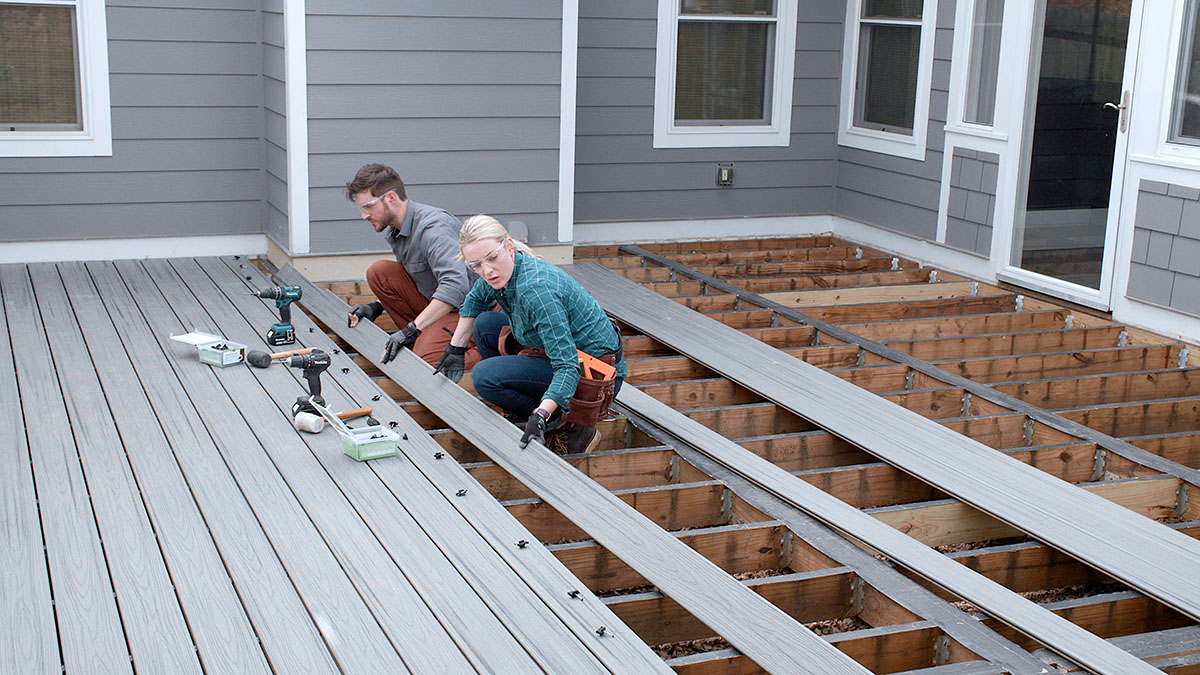
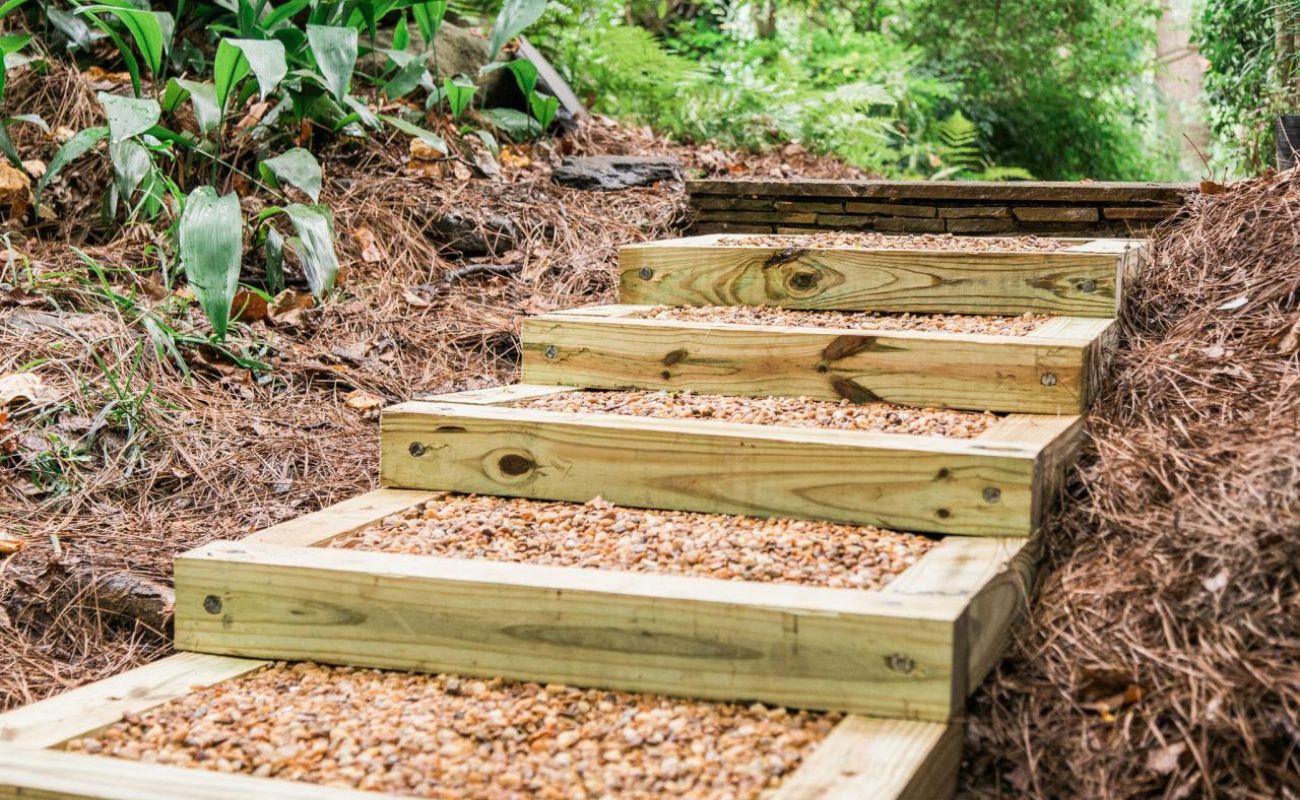
Step 7: Attach Deck Boards to the Steps
Attaching deck boards to the steps not only enhances the visual appeal of your deck but also provides a secure and durable walking surface. In this step, we will guide you through the process of attaching deck boards to the steps. Follow these steps to ensure a proper installation:
- Choose the deck boards: Select high-quality pressure-treated decking boards that are suitable for outdoor use. Ensure that the boards are wide enough to cover the entire step surface.
- Start from the bottom: Begin by placing the first deck board on the bottom step, ensuring it is flush with the front edge of the step. Use galvanized screws or nails to secure the board in place.
- Continue with the remaining boards: Move upward, attaching the deck boards to each subsequent step. Ensure equal spacing between the boards for a consistent and visually appealing look.
- Secure the boards: Ensure that each deck board is securely fastened to the step frame. Use two screws or nails on each end of the board, ensuring they penetrate the frame beneath.
- Check for any gaps or inconsistencies: After attaching all the deck boards, inspect the steps for any gaps or inconsistencies between the boards. Make any necessary adjustments to ensure a smooth and even surface.
- Treat the deck boards: Apply a wood sealer or stain to protect the deck boards from the elements and enhance their longevity. Follow the manufacturer’s instructions for application and drying times.
Properly attached deck boards provide a safe and durable walking surface, ensuring the longevity of your deck steps. Take your time during this step to ensure the boards are securely fastened and evenly spaced. Once the deck boards are attached, you can move on to installing railings and handrails, which is covered in Step 8.
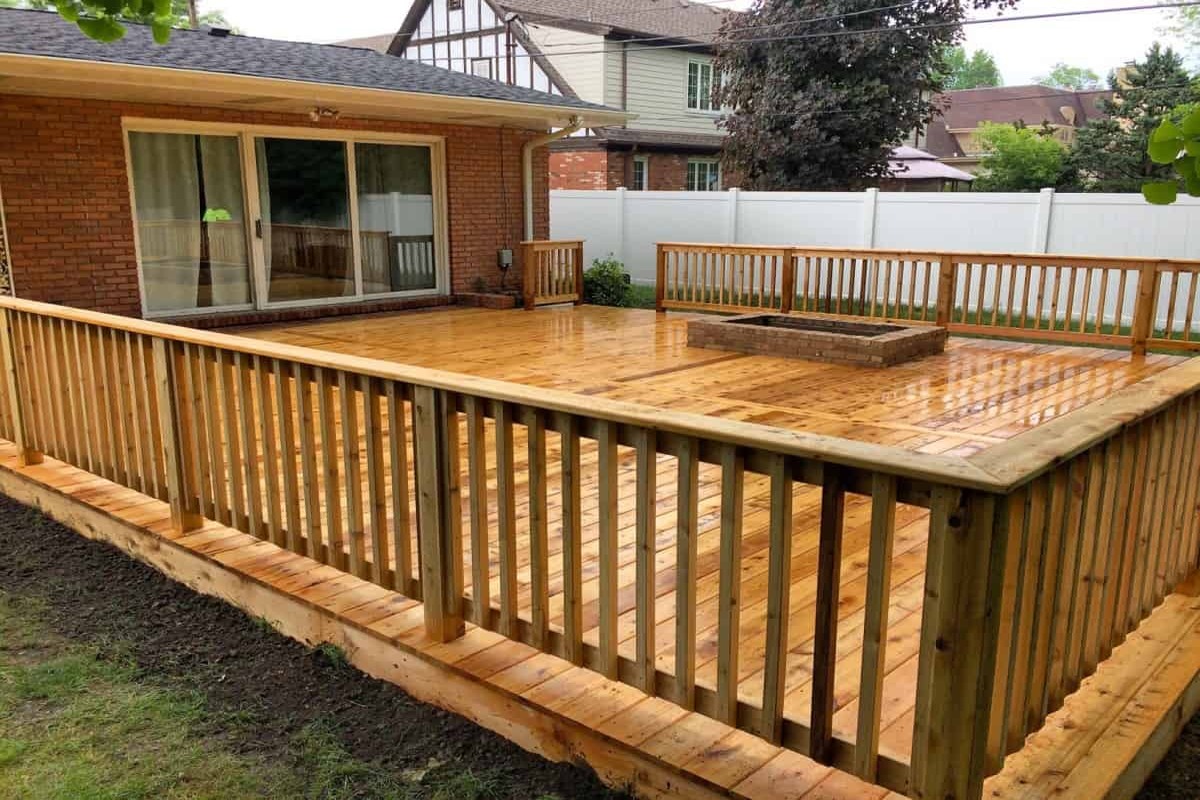
Step 8: Install Railings and Handrails
Installing railings and handrails is the final step in building wide deck steps. Railings and handrails not only provide safety and support but also add a finishing touch to the overall appearance of your deck steps. Follow these steps to install railings and handrails:
- Check local building codes: Before proceeding with the installation, familiarize yourself with the local building codes and regulations regarding the height, spacing, and construction materials for railings and handrails.
- Measure and mark the railing height: Determine the desired height of the railings and mark this height on the support posts or frame of the deck steps.
- Attach railing brackets: Use railing brackets designed for outdoor use and secure them to the support posts or frame at the marked height. Ensure the brackets are level and securely attached.
- Insert the railing posts: Slide the railing posts into the installed brackets, ensuring they fit securely. Use screws or nails to secure the posts into the brackets, providing stability.
- Measure and cut the railing sections: Measure the distance between the installed posts and cut the railing sections to fit. Use a miter saw or a circular saw for accurate cuts.
- Attach the railing sections: Secure the railing sections between the posts using screws or nails. Ensure they are level and properly aligned.
- Install handrails: Attach handrails to the top portion of the railing sections, providing additional support and safety. Secure them using screws or nails.
- Test the stability: Once all the railing and handrail sections are installed, test the stability of the entire railing system. Apply pressure and make sure it is securely fastened and provides the necessary support.
Installing railings and handrails is an important step in ensuring the safety of your deck steps. Make sure to follow the guidelines set by your local building codes and regulations. Additionally, choose materials that are resistant to weathering and suitable for outdoor use. With the railings and handrails in place, your wide deck steps are now complete and ready to be enjoyed.
Congratulations on completing the construction of your wide deck steps! By following these steps and paying close attention to details, you have successfully built a grand entrance to your backyard. Whether you’re hosting summer gatherings, enjoying a peaceful morning coffee, or simply admiring the beauty of your outdoor space, your wide deck steps will leave a lasting impression on anyone who steps foot on them.
Read more: How Wide Are Deck Stairs
Conclusion
Congratulations on successfully building wide deck steps for a grand backyard entrance! By following the step-by-step guide in this article, you’ve created a stunning and functional addition to your outdoor space. Not only do these wide deck steps provide a safe and convenient way to access your deck, but they also add a touch of elegance and charm to your backyard.
Throughout the process, you’ve learned how to gather the necessary materials and tools, measure and mark the location of the steps, dig foundation holes, prepare and pour concrete footings, install support posts, frame the steps, attach deck boards, and finally, install railings and handrails. Each step plays a critical role in creating a sturdy, durable, and visually appealing set of deck steps.
Remember, safety should always be a top priority when working on any construction project. Take your time, double-check your measurements, and follow local building codes and regulations. Additionally, choose high-quality materials that are suitable for outdoor use to ensure the longevity of your deck steps.
Now, it’s time to enjoy your beautifully crafted wide deck steps. Create lasting memories with friends and family as you gather on your deck, or simply take a moment to appreciate the breathtaking view from your backyard. Your wide deck steps have transformed your outdoor space into a welcoming, grand entrance that sets the stage for unforgettable moments.
Thank you for using this guide, and happy deck stepping!
Now that you've mastered building grand deck steps, why not expand your woodworking skills with some fresh outdoor projects? Whether you're looking to jazz up your entryway or tackle engaging woodworking projects, our upcoming articles have you covered. Dive into our guide on constructing outdoor wooden steps to keep your entry vibrant, or discover a variety of exciting woodworking projects poised to challenge and satisfy your crafting desires in 2024.
Frequently Asked Questions about How To Build Wide Deck Steps For A Grand Backyard Entrance
Was this page helpful?
At Storables.com, we guarantee accurate and reliable information. Our content, validated by Expert Board Contributors, is crafted following stringent Editorial Policies. We're committed to providing you with well-researched, expert-backed insights for all your informational needs.


0 thoughts on “How To Build Wide Deck Steps For A Grand Backyard Entrance”