Home>Gardening & Outdoor>Landscaping Ideas>How To Fill In Patches Of Grass
Landscaping Ideas
How To Fill In Patches Of Grass
Modified: September 1, 2024
Learn effective landscaping ideas for filling in patches of grass and improving your lawn. Discover expert tips and techniques for a lush, green yard.
(Many of the links in this article redirect to a specific reviewed product. Your purchase of these products through affiliate links helps to generate commission for Storables.com, at no extra cost. Learn more)
Introduction
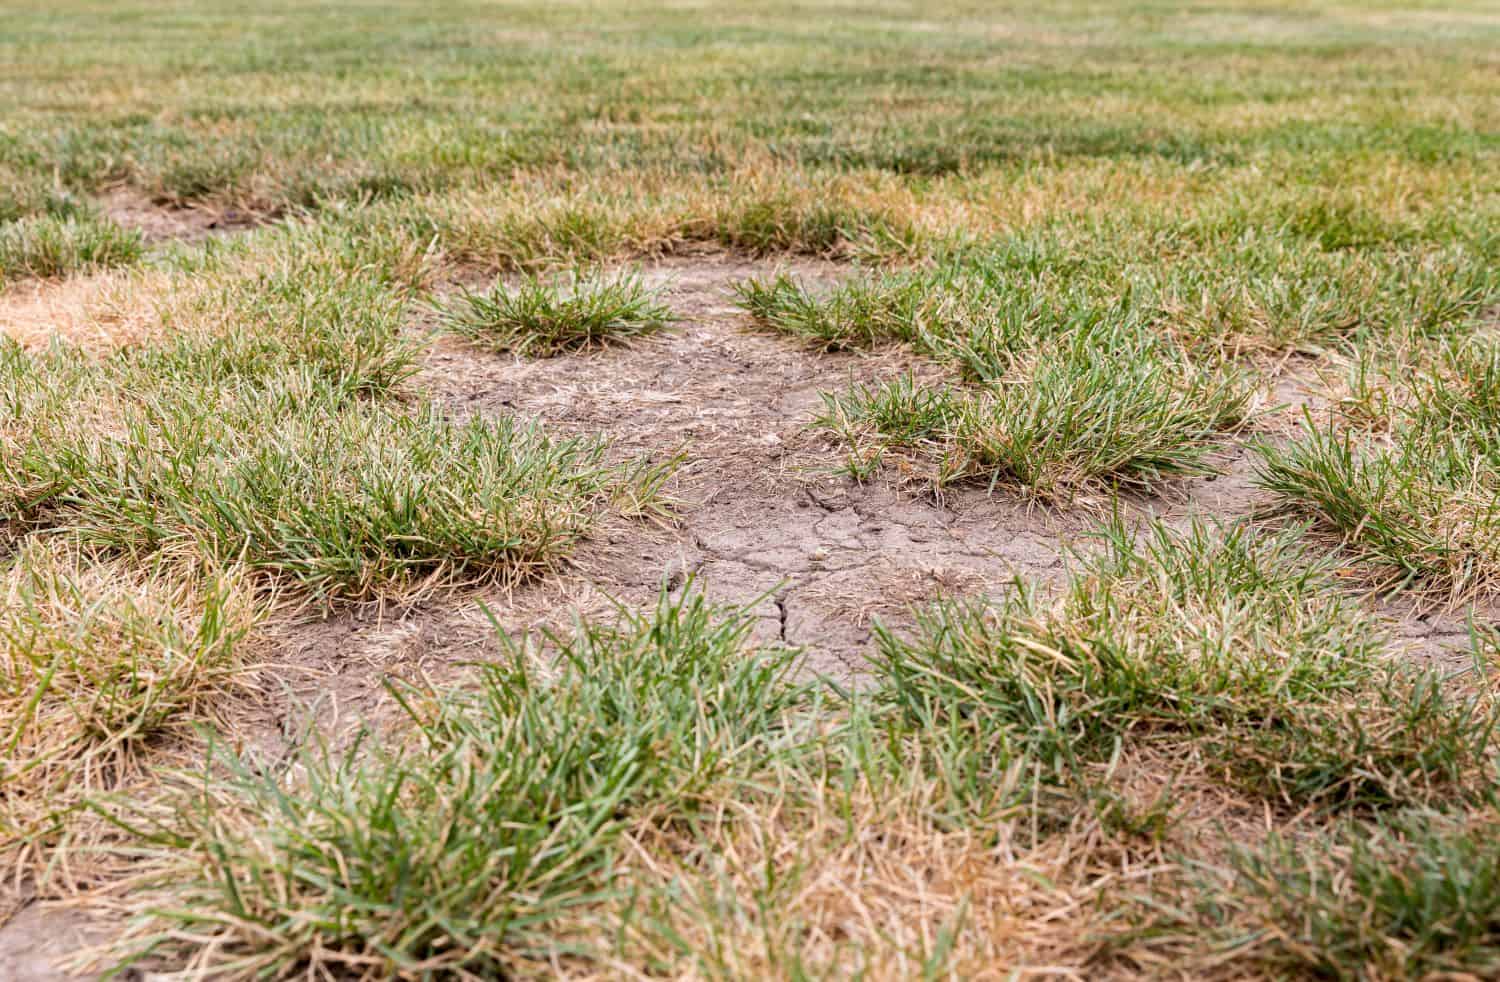
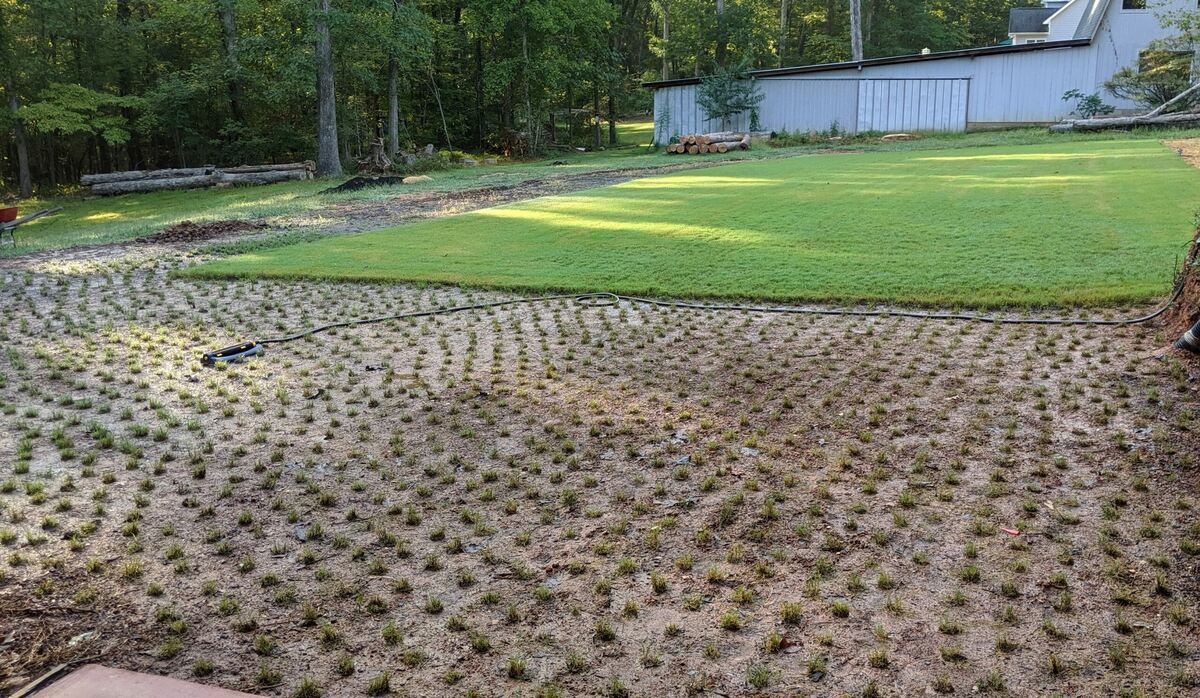
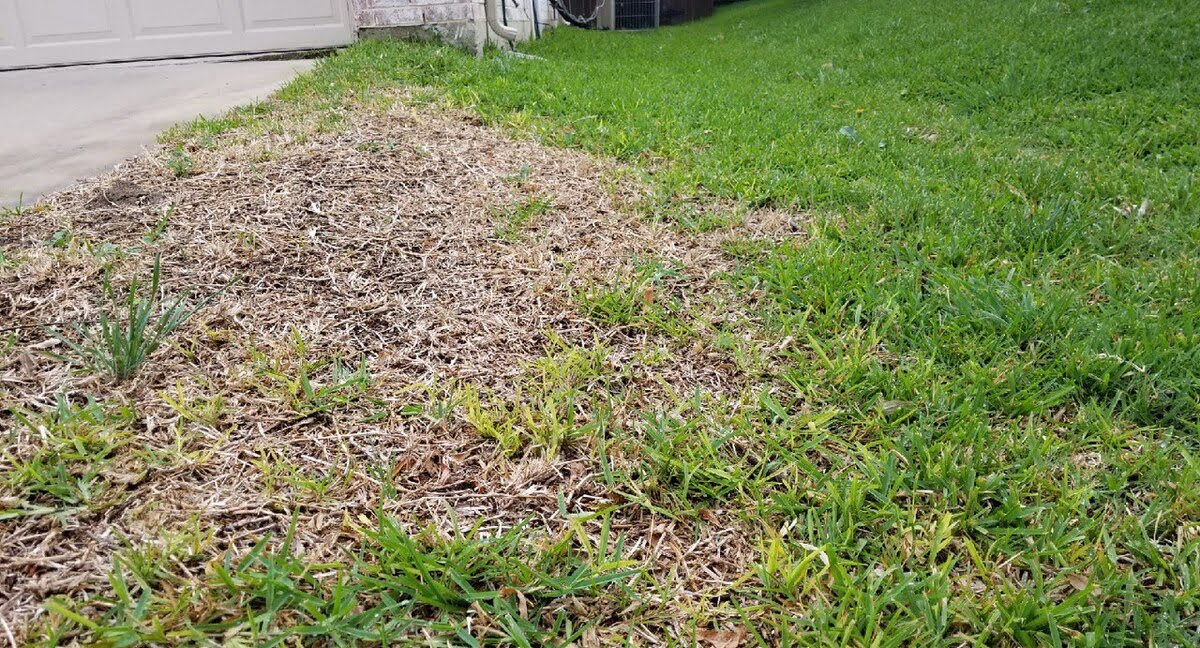
Are you tired of looking at those unsightly patches of bare soil in your otherwise lush lawn? Whether caused by heavy foot traffic, pet damage, or environmental stress, bare patches can detract from the beauty of your outdoor space. The good news is that you can easily restore the green expanse of your lawn by filling in those patches with new grass. With the right approach and a little bit of patience, you can have your lawn looking full and vibrant once again.
In this comprehensive guide, we will walk you through the process of filling in patches of grass, from assessing the area to choosing the right grass seed and ensuring proper maintenance. By following these steps, you can achieve a seamless and uniform lawn that will be the envy of your neighborhood. So, let's roll up our sleeves and get ready to transform those bare spots into a flourishing carpet of greenery!
Key Takeaways:
- Restore your lawn’s lushness by assessing, preparing, and planting grass seed to fill in bare patches. Patience and consistent care are key to achieving a vibrant and uniform lawn.
- Choose the right grass seed based on climate, sunlight, soil type, and area use to ensure successful grass establishment. Proper watering and ongoing maintenance are essential for nurturing the newly planted grass seed.
Read more: How To Treat Dead Grass Patches
Assessing the Area
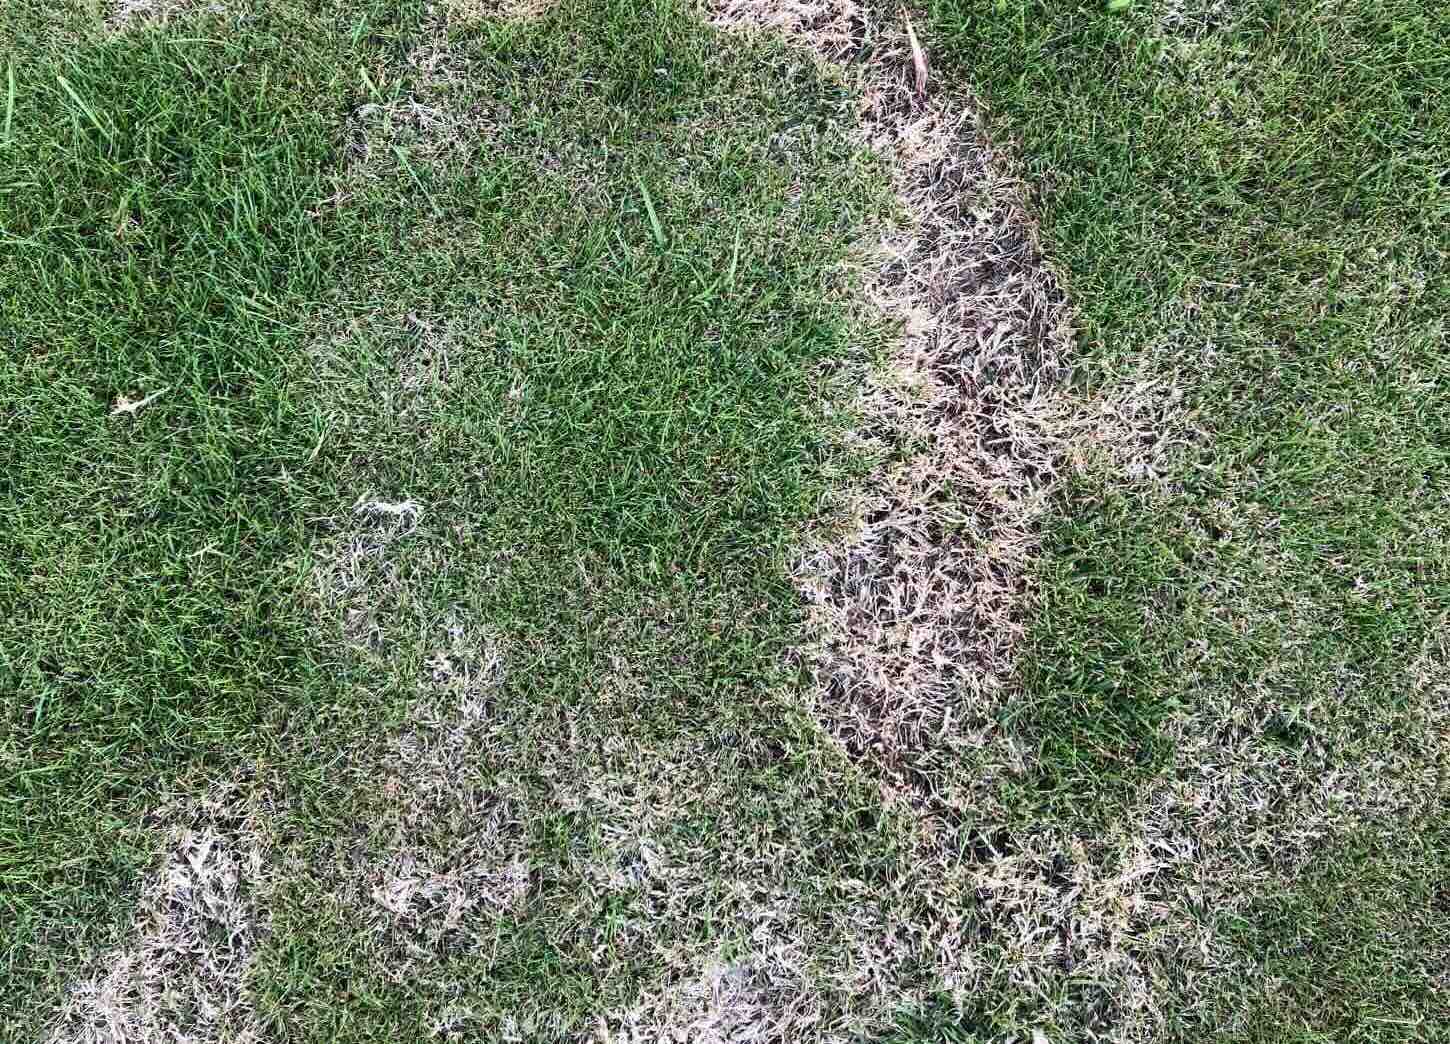
Before diving into the process of filling in patches of grass, it’s crucial to assess the area to understand the underlying causes of the bare spots. Take a close look at the patches and consider the possible reasons for the grass’s failure to thrive. Common factors contributing to bare patches include heavy foot traffic, pet urine damage, soil compaction, inadequate sunlight, or underlying issues such as pests or diseases.
Start by examining the soil in the affected areas. Is it compacted and hard, or does it drain poorly? Compacted soil can hinder grass growth, while poor drainage can lead to waterlogged conditions that suffocate the grass roots. Additionally, assess the level of sunlight the area receives throughout the day. Most grass species require ample sunlight to flourish, so inadequate light exposure could be a contributing factor.
Furthermore, consider the presence of any underlying issues such as pests or diseases. Look for signs of insect activity, such as grub damage, or symptoms of fungal or bacterial infections. Identifying and addressing these issues is crucial for the success of the grass filling process.
Once you have thoroughly assessed the area and identified potential causes of the bare patches, you can develop a targeted plan to address each specific issue. This may involve soil amendment, pest control measures, or adjustments to the lawn maintenance routine to promote healthy grass growth. By understanding the underlying factors contributing to the bare patches, you can tailor your approach to effectively restore the health and vitality of your lawn.
Preparing the Soil
Preparing the soil is a crucial step in the process of filling in patches of grass, as it sets the foundation for successful grass growth. Start by clearing the bare patches of any debris, such as dead grass, rocks, or other obstacles that could hinder the establishment of new grass. Use a rake to loosen the top layer of soil, allowing for better seed-to-soil contact and improving the overall soil structure.
Next, consider soil amendment to ensure that the soil provides an optimal environment for grass germination and growth. If the soil is compacted, aerating the area can help improve its structure and promote better root development. Aeration involves perforating the soil with small holes to allow air, water, and nutrients to penetrate the root zone more effectively.
Additionally, consider incorporating organic matter into the soil to enhance its fertility and moisture retention capabilities. This can be achieved by spreading a thin layer of compost or well-decomposed manure over the bare patches and gently working it into the soil with a rake. Organic matter not only provides essential nutrients for the grass but also improves the soil’s texture and water-holding capacity.
Before proceeding with seeding, it’s essential to ensure that the soil surface is level and smooth. Use a garden rake to create a uniform surface, removing any large clumps or bumps that could impede the establishment of new grass. A level surface promotes even seed distribution and helps prevent water runoff, ensuring that the seeds remain in place for successful germination.
By taking the time to prepare the soil adequately, you create an optimal environment for the new grass seed to take root and thrive. Proper soil preparation sets the stage for healthy and vigorous grass growth, ultimately leading to a lush and uniform lawn that enhances the beauty of your outdoor space.
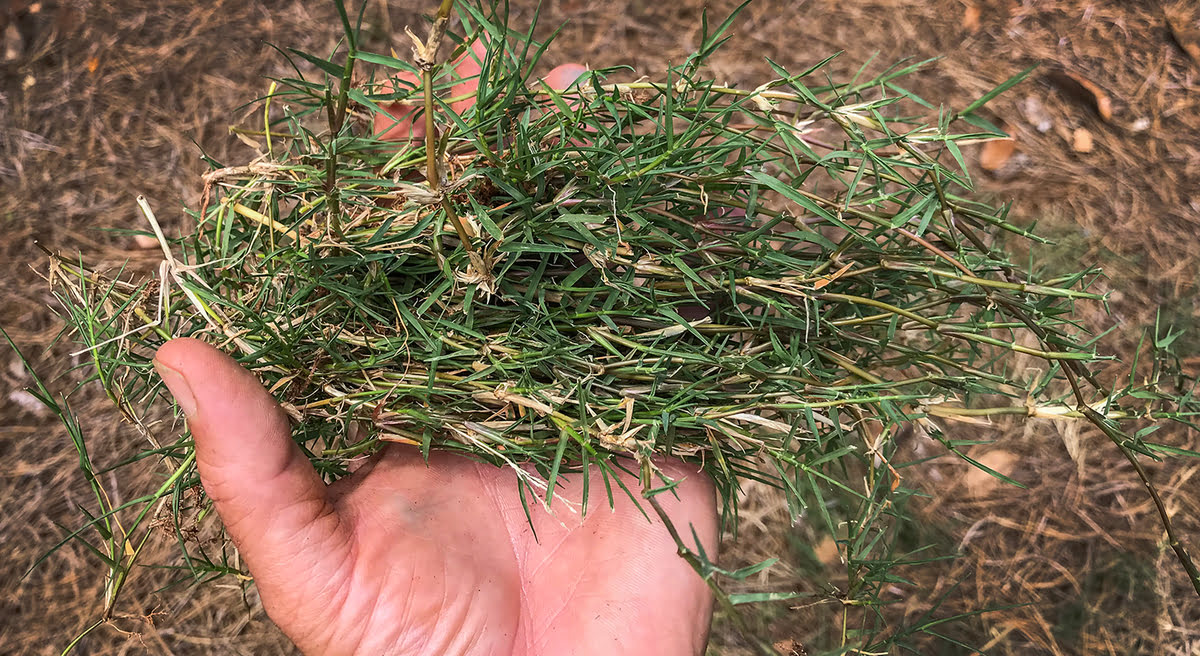
Choosing the Right Grass Seed
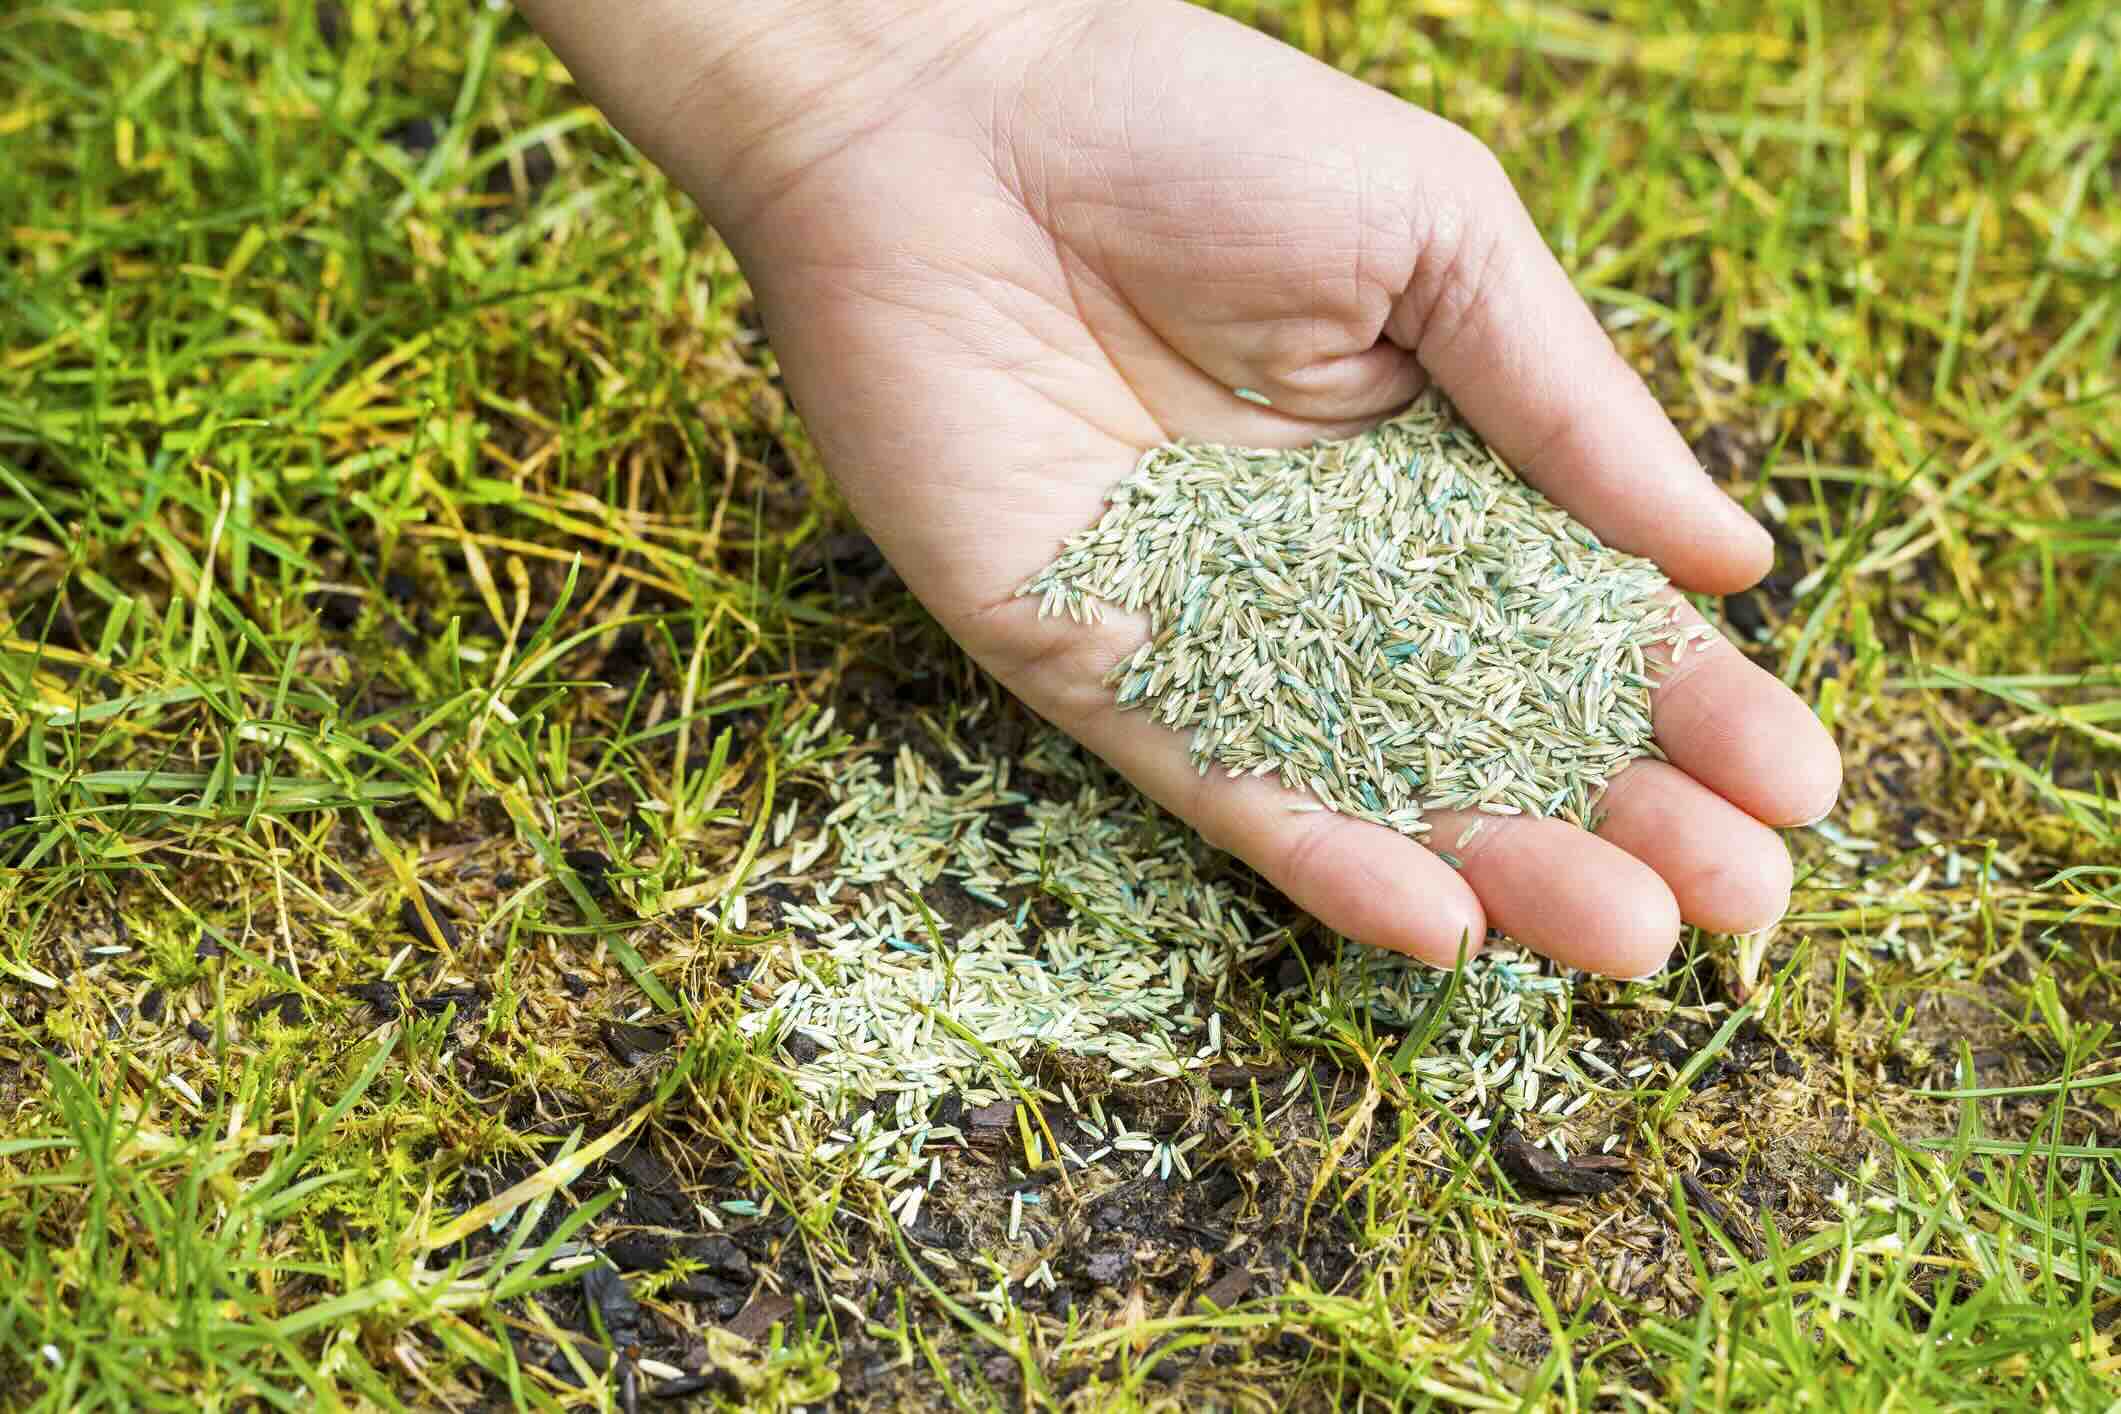
When it comes to filling in patches of grass, selecting the right grass seed is a critical decision that can significantly impact the success of your lawn restoration efforts. Several factors should be considered when choosing grass seed, including the local climate, sunlight exposure, soil type, and intended use of the area.
Start by identifying the grass species that are well-suited to your specific climate and growing conditions. Cool-season grasses, such as Kentucky bluegrass and fescue, thrive in regions with moderate temperatures and are well-adapted to cool, moist environments. In contrast, warm-season grasses like Bermuda grass and Zoysia grass are better suited to hot and humid climates.
Consider the amount of sunlight the area receives throughout the day. Some grass species are more shade-tolerant than others, making them ideal for areas with limited sunlight. If the bare patches are in shaded areas, opt for shade-tolerant grass seed blends that are specifically formulated to thrive in low-light conditions.
Another crucial factor to consider is the soil type in the affected areas. Different grass species have varying soil preferences, with some being more adaptable to clay soils, while others thrive in sandy or loamy soils. Select grass seed varieties that are well-matched to the soil type present in your lawn to ensure optimal growth and resilience.
Furthermore, consider the intended use of the area when choosing grass seed. For high-traffic areas, select durable grass varieties that can withstand frequent foot activity and pet play. Additionally, if the patches are near flower beds or other landscape features, opt for grass seed blends that blend seamlessly with the existing lawn for a cohesive and uniform appearance.
By carefully considering these factors and selecting grass seed that aligns with your specific growing conditions and needs, you can set the stage for successful grass establishment. Choosing the right grass seed sets the foundation for a healthy and resilient lawn that will enhance the beauty and functionality of your outdoor space.
When filling in patches of grass, loosen the soil, spread grass seed evenly, and lightly cover with soil. Water regularly to keep the soil moist for new grass to grow.
Planting the Grass Seed
Once you have assessed the area, prepared the soil, and selected the appropriate grass seed, it’s time to proceed with planting the grass seed to fill in the bare patches. Follow these steps to ensure successful grass establishment:
- Even Seed Distribution: Begin by spreading the grass seed evenly over the bare patches. Use a handheld spreader or broadcast spreader to achieve uniform seed distribution, ensuring that the seeds are not concentrated in one area.
- Raking and Pressing: After spreading the grass seed, gently rake the soil surface to incorporate the seeds into the soil at a depth of about 1/4 inch. Avoid burying the seeds too deeply, as this can hinder germination. Once the seeds are raked in, lightly press the soil to ensure good seed-to-soil contact.
- Protective Mulch: Consider applying a thin layer of straw or mulch over the seeded areas to help retain soil moisture and protect the seeds from birds and other potential disturbances. The mulch also provides a stable microclimate for germination and early growth.
- Watering: Proper watering is crucial for seed germination and early growth. Keep the seeded areas consistently moist but not waterlogged. Use a gentle spray or mist setting on a garden hose to avoid dislodging the seeds. Water the newly seeded areas at least once a day, adjusting the frequency based on weather conditions and soil moisture levels.
It’s important to monitor the seeded areas regularly to ensure that the soil remains consistently moist during the germination period. Depending on the grass species, germination typically occurs within 7 to 21 days. Once the grass seedlings have established and reached a height of about 3 inches, gradually transition to a less frequent but deeper watering schedule to promote deep root development.
By following these planting guidelines and providing the necessary care and attention, you can encourage strong and healthy grass growth in the previously bare patches. Patience and consistent maintenance are key to achieving a lush and uniform lawn that enhances the overall appeal of your outdoor landscape.
Read more: How To Apply A Grass Patch
Watering and Maintenance
Proper watering and ongoing maintenance are essential for nurturing the newly planted grass seed and ensuring its successful establishment. Follow these guidelines to promote healthy growth and maintain the vitality of your lawn:
- Watering Schedule: After planting the grass seed, maintain a consistent watering schedule to keep the soil evenly moist. Avoid allowing the soil to dry out, as this can hinder germination and seedling growth. Water the newly seeded areas in the early morning to allow sufficient time for the soil to dry before nightfall, reducing the risk of fungal diseases.
- Monitoring Soil Moisture: Regularly check the soil moisture levels in the seeded areas. Adjust the watering frequency based on weather conditions, taking into account factors such as temperature, humidity, and rainfall. Aim to keep the soil consistently moist but not waterlogged.
- Mowing: Once the new grass reaches a height of approximately 3 to 4 inches, it is time to mow it for the first time. Set the mower blade to a height that removes no more than one-third of the grass blade’s length. Avoid mowing newly seeded areas too short, as this can stress the young grass plants.
- Fertilization: As the newly planted grass seedlings mature, consider fertilizing the lawn to provide essential nutrients for healthy growth. Choose a high-quality, slow-release fertilizer specifically formulated for new grass establishment. Follow the manufacturer’s recommendations for application rates and timing.
- Weed Control: Keep an eye out for weeds that may compete with the newly planted grass for resources. Promptly remove any emerging weeds to prevent them from overtaking the seeded areas. Consider using a pre-emergent herbicide to suppress weed growth while avoiding harm to the developing grass seedlings.
- Pest and Disease Management: Monitor the newly seeded areas for signs of pests or diseases. Address any issues promptly to prevent damage to the young grass plants. Consider implementing cultural practices, such as proper mowing and watering, to promote overall lawn health and resilience to potential threats.
By adhering to a consistent watering schedule and implementing proper maintenance practices, you can support the healthy establishment of the newly planted grass seed and encourage robust growth. With diligent care and attention, the bare patches will be transformed into a lush and vibrant lawn that enhances the beauty of your outdoor environment.
Conclusion
Transforming bare patches of soil into thriving green spaces is a rewarding endeavor that can elevate the overall beauty of your lawn. By following the steps outlined in this guide, you can successfully fill in patches of grass and restore the lushness of your outdoor landscape. From assessing the area and preparing the soil to selecting the right grass seed, planting, and ongoing maintenance, each step plays a crucial role in achieving a vibrant and uniform lawn.
Remember that patience and consistent care are key to the success of your lawn restoration efforts. While the process of filling in patches of grass requires time and attention, the end result—a lush, healthy lawn—is well worth the investment. By addressing the underlying causes of bare patches, selecting appropriate grass seed, and providing diligent maintenance, you can create an inviting outdoor space that brings joy and beauty to your surroundings.
As you witness the new grass seedlings emerge and develop into a flourishing carpet of greenery, take pride in knowing that your efforts have contributed to the rejuvenation of your lawn. Whether it’s enjoying leisurely strolls, hosting outdoor gatherings, or simply admiring the natural splendor of your rejuvenated lawn, the benefits of a well-maintained and uniform lawn are plentiful.
By embracing the process of filling in patches of grass and nurturing the growth of new grass seed, you are not only enhancing the aesthetics of your outdoor space but also fostering a healthier and more vibrant environment for yourself and those around you. So, roll up your sleeves, get ready to sow the seeds of transformation, and watch as your lawn blossoms into a picturesque and inviting retreat.
With dedication, care, and a touch of green-thumb magic, you can turn those bare patches into a flourishing testament to the beauty of nature.
Frequently Asked Questions about How To Fill In Patches Of Grass
Was this page helpful?
At Storables.com, we guarantee accurate and reliable information. Our content, validated by Expert Board Contributors, is crafted following stringent Editorial Policies. We're committed to providing you with well-researched, expert-backed insights for all your informational needs.


0 thoughts on “How To Fill In Patches Of Grass”