Home>Garden Essentials>How To Install Astro Turf On Dirt
Garden Essentials
How To Install Astro Turf On Dirt
Modified: October 20, 2024
Looking to transform your garden? Learn how to easily install astro turf on dirt with our step-by-step guide and create a beautiful, low-maintenance outdoor space.
(Many of the links in this article redirect to a specific reviewed product. Your purchase of these products through affiliate links helps to generate commission for Storables.com, at no extra cost. Learn more)
Introduction
Welcome to our step-by-step guide on how to install astro turf on dirt. If you’re longing for a lush, green lawn but don’t want the hassle of maintaining natural grass, astro turf is an excellent alternative. Whether you have a small backyard or a larger outdoor space, astro turf provides a low-maintenance and durable option for creating a beautiful and functional area.
Installing astro turf on dirt may seem like a daunting task, but with proper preparation and the right techniques, you can achieve professional-looking results. In this guide, we will walk you through each step of the installation process, from clearing and preparing the area to securing the turf and adding infill material. So let’s get started and transform your dirt area into a gorgeous, hassle-free synthetic grass landscape.
Key Takeaways:
- Transform your outdoor space into a low-maintenance synthetic grass landscape by following our step-by-step guide to installing astro turf on dirt. From clearing and leveling the area to securing the turf, each step is crucial for achieving a professional-looking installation.
- Enjoy a lush and vibrant lawn all year round with astro turf, a durable and low-maintenance alternative to natural grass. By properly grooming and maintaining the turf, you can ensure a beautiful and functional outdoor space for years to come.
Read more: How To Install Turf On Dirt
Step 1: Clearing and Preparing the Area
The first step in installing astro turf on dirt is to clear and prepare the area. Start by removing any existing vegetation, rocks, or debris from the site. Use a garden rake or shovel to loosen and remove any weeds or grass that may be present. Additionally, ensure that the area is free from any large roots or obstacles that could affect the evenness of the turf.
After clearing the area, it’s essential to level the soil. Use a landscape rake or a sturdy board to smooth out any uneven patches or bumps. This step is crucial for achieving a uniform and professional-looking turf installation. Take your time during this process to ensure that the ground is as level as possible.
Once the area is clear and leveled, it’s a good idea to perform a soil test. This will help determine the pH and nutrient levels of the soil, allowing you to make any necessary amendments before proceeding with the installation. Adjustments can be made by adding topsoil, compost, or other soil amendments as recommended by the soil test results.
Finally, consider installing an edging material along the perimeter of the area. This will help contain the astro turf and prevent any shifting or spreading. Edging can be made of materials such as plastic, metal, or concrete. Dig a shallow trench along the perimeter, insert the edging material, and secure it in place with stakes or screws.
By taking the time to clear and properly prepare the area, you will ensure a solid foundation for your astro turf installation. This will contribute to the longevity and overall appearance of your synthetic grass.
Step 2: Leveling the Dirt Surface
Once the area is cleared and prepared, the next step in installing astro turf on dirt is to level the dirt surface. An even and smooth surface is essential for achieving a professional-looking turf installation.
To begin, use a garden rake or a leveling tool to break up any clumps of dirt and remove any debris that may be present on the surface. This will help create a more uniform and level base. Pay attention to any low spots or high areas and make adjustments as needed.
If there are significant uneven areas, you may need to consider adding or removing soil to achieve a smooth surface. Use a shovel or wheelbarrow to add soil to low spots and compact it down with a tamping tool or the back of a rake. Similarly, if there are high areas, remove excess soil and fill in the gaps with the surrounding soil.
Once you have addressed any leveling issues, use a landscape rake or a sturdy board to smooth out the dirt surface. Start from one end and work your way across the entire area, ensuring that the soil is evenly distributed. Take your time during this process to achieve the desired levelness.
After leveling the dirt surface, it is a good idea to take measurements to ensure that the area is ready for the astro turf installation. Use a measuring tape or a laser level to check the height and slope of the dirt surface. It is important to have a slight slope of about 1-2% to ensure proper drainage.
Remember to compact the soil gently before moving on to the next step. This can be done by walking or rolling a lawn roller over the area. Compact the soil in multiple directions to create a stable and firm base for the astro turf.
By taking the time to level the dirt surface, you will create a solid foundation for your astro turf. This will help ensure proper installation and enhance the aesthetics and longevity of your synthetic grass.
Step 3: Adding a Weed Barrier
Adding a weed barrier is an important step in installing astro turf on dirt as it helps prevent the growth of weeds, which can compromise the appearance and integrity of your synthetic grass. A weed barrier acts as a barrier between the dirt and the turf, minimizing the chances of weeds penetrating through.
To add a weed barrier, start by measuring and cutting the landscape fabric or geotextile to fit the dimensions of your designated turf area. It is best to use a high-quality, permeable fabric that allows water to pass through while preventing weed growth.
Once you have the weed barrier material ready, carefully roll it out over the leveled dirt surface. Ensure that it covers the entire area, extending beyond the perimeter by a few inches. Overlapping the edges of the fabric by about 6-8 inches will provide additional protection against weed growth.
Secure the weed barrier in place by using landscape fabric staples or anchor pins. These can be inserted into the ground at regular intervals and along the edges of the fabric to hold it firmly in place. Make sure the fabric is taut and without any wrinkles or folds.
It is important to note that while weed barriers significantly reduce the chances of weed growth, they are not foolproof. Seeds from airborne weeds or existing weed seeds in the soil can still find their way onto the surface and germinate. Regularly inspect your turf area and remove any weeds that manage to push through the barrier to keep your astro turf looking pristine.
Adding a weed barrier is an effective way to protect your astro turf from unwanted weed growth. By taking this step in the installation process, you will ensure the long-term beauty and functionality of your synthetic grass.
Step 4: Adding a Base Material
Adding a base material is a crucial step in the installation of astro turf on dirt. The base material helps to provide stability, improve drainage, and create a solid foundation for the synthetic grass.
The base material typically consists of crushed gravel or crushed stone. It is important to choose a material that is well-draining and compacts easily. This will help prevent the accumulation of water and ensure that the surface remains firm and stable.
Before adding the base material, make sure that the area is well-prepared and the weed barrier has been properly secured. This will help to avoid any future issues that may arise from the base material settling or shifting.
Spread a layer of the chosen base material over the entire area, making sure that it is even and about 2-3 inches in depth. Use a rake or a shovel to distribute the material evenly, paying special attention to any low or uneven areas. It is important to have a consistent base depth to ensure a level and uniform surface.
Once the base material is spread, use a vibrating plate compactor or a hand tamper to compact the material. This will help to create a solid and stable base for the astro turf. Start from one end of the area and gradually work your way across the entire surface. Repeat this process multiple times, making sure to compact the material evenly.
Regularly check the levelness of the base surface using a level or a straight edge. Adjust as needed to ensure a smooth and level base across the entire area. Remember that a properly compacted and leveled base is essential for a professional-looking astro turf installation.
After completing this step, the base material is ready for the next stage of the installation process. In step 5, we will focus on compacting and leveling the base to prepare it for the astro turf.
Adding a base material provides essential support for your astro turf. By following this step, you will ensure a stable and durable surface for your synthetic grass to thrive.
Read more: How To Lay Astro Turf For Dogs On Dirt
Step 5: Compact and Level the Base
Once the base material has been added, the next step in installing astro turf on dirt is to compact and level the base. This crucial step helps to create a solid and even surface for the synthetic grass to be laid on, ensuring a professional-looking installation.
There are a few tools you can use to compact and level the base material, such as a plate compactor or a hand tamper. These tools help to compress the base material, removing any air gaps and creating a dense and stable foundation.
If using a plate compactor, start from one end of the area and slowly move the compactor over the base material. Make multiple passes in different directions to ensure even compaction. For smaller areas, a hand tamper can be used by repeatedly pressing and compacting the material.
As you compact the base material, periodically check the levelness using a straight edge or a level. Adjust any low or uneven areas by adding or removing base material and repeating the compacting process until the entire base is even and level.
It is essential to take your time during this step and pay close attention to detail. The more effort you put into compacting and leveling the base, the better the final result will be.
Once the base is properly compacted and leveled, it’s important to recheck the drainage of the area. Ensure that any low spots have proper slope for water runoff. This is crucial for maintaining the longevity and integrity of your astro turf.
By properly compacting and leveling the base, you are setting the stage for a successful installation of astro turf. The compacted base provides stability and ensures that the synthetic grass will be laid on a smooth and even surface, resulting in a stunning and long-lasting lawn.
Before installing astro turf on dirt, make sure to properly prepare the area by removing any rocks, roots, and debris. Then, compact the soil and add a layer of crushed rock for drainage before laying down the astro turf.
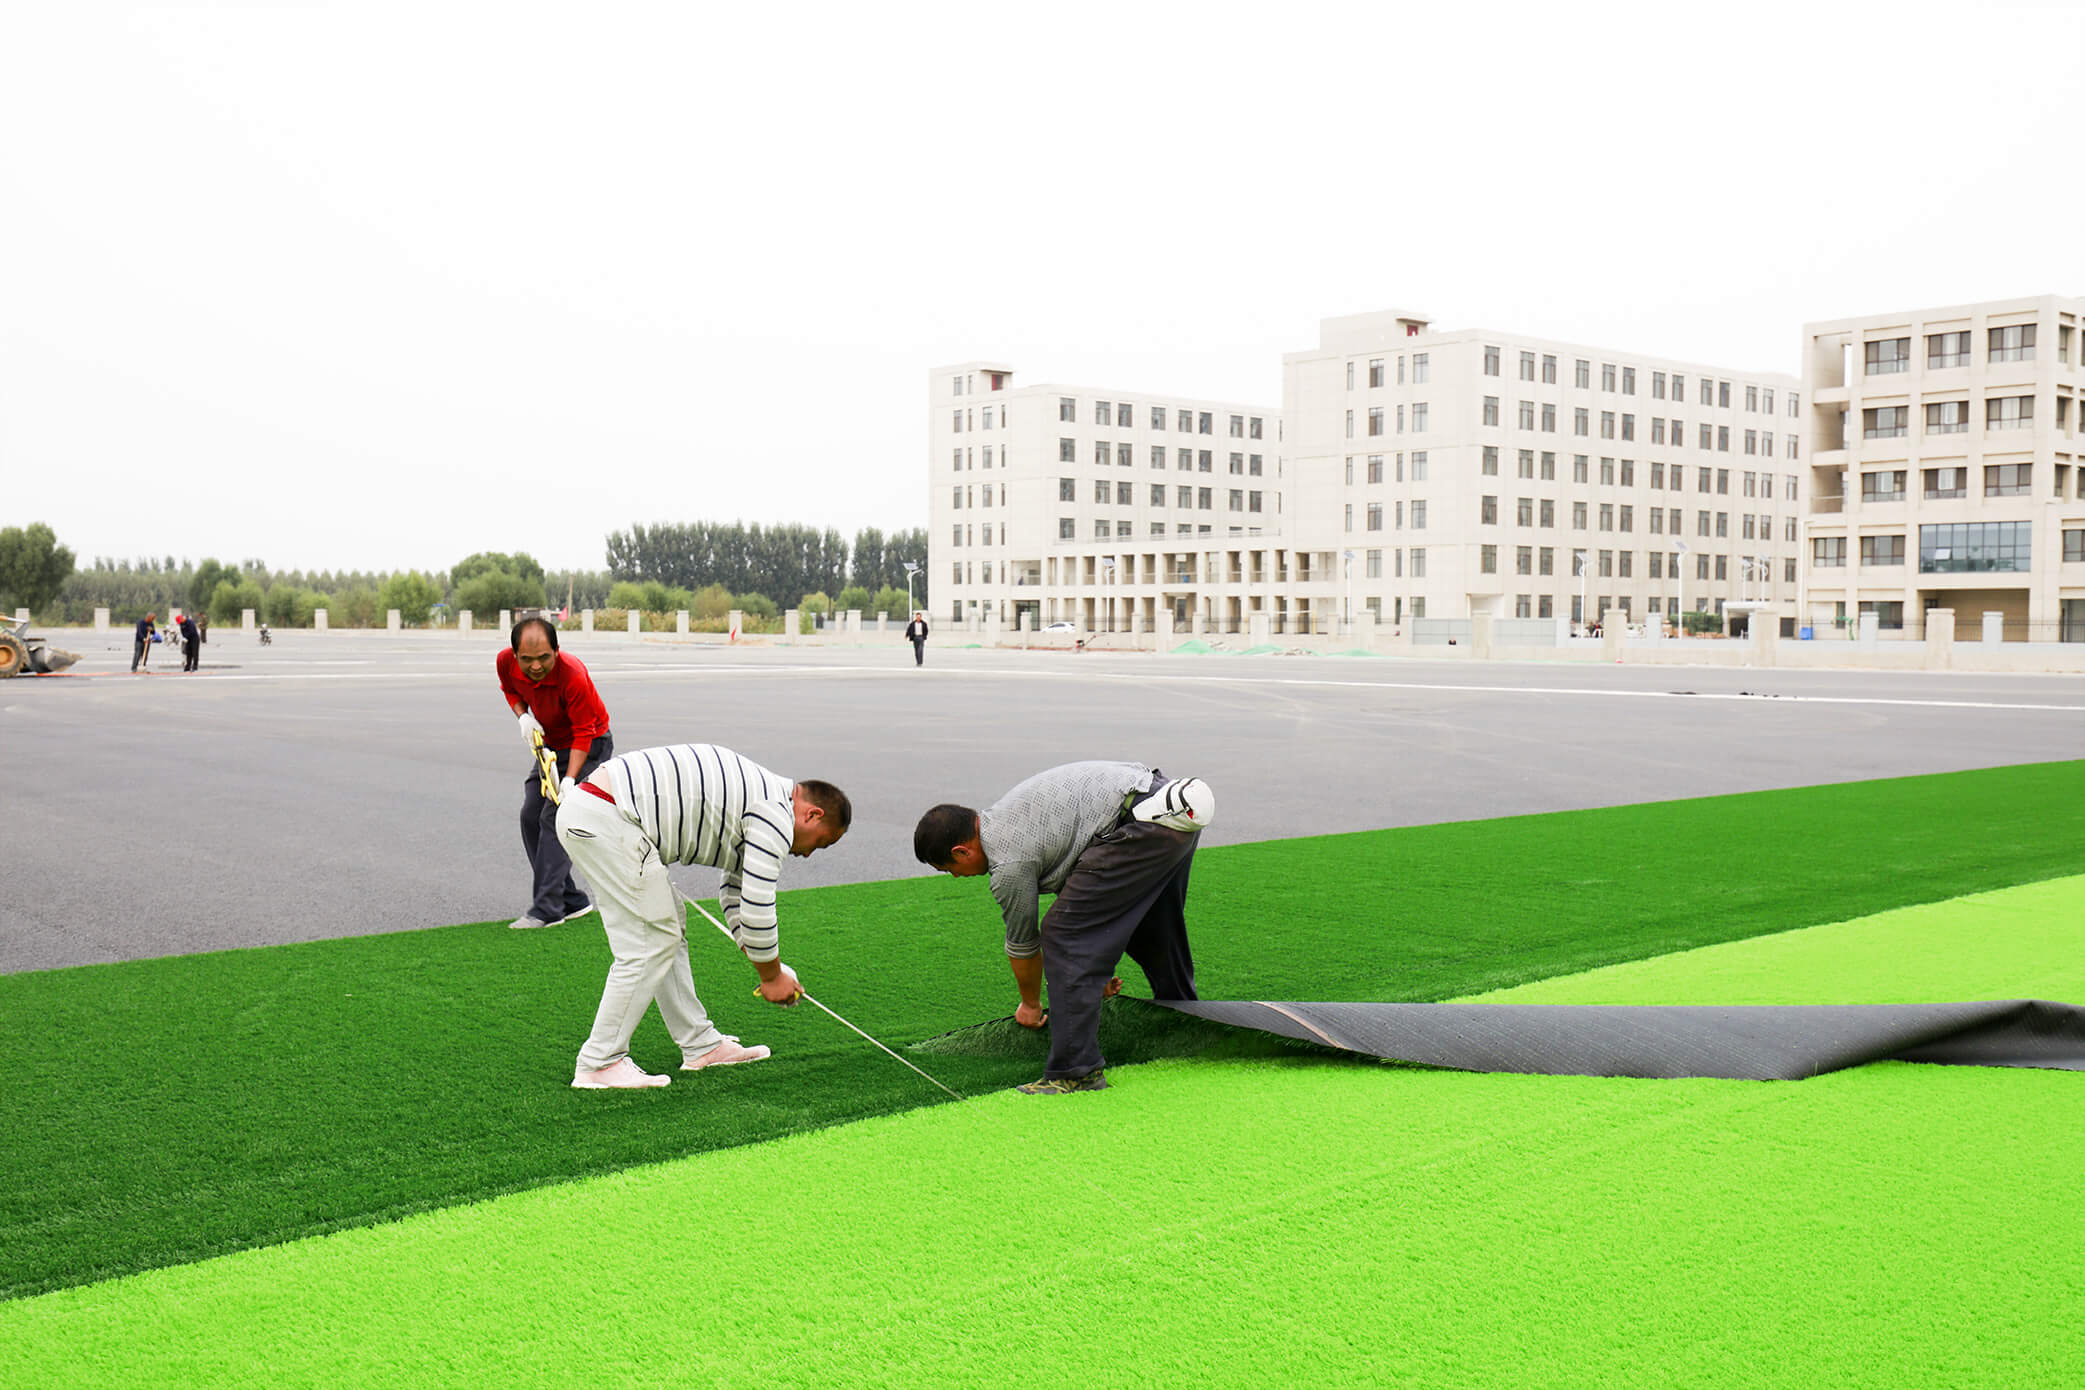
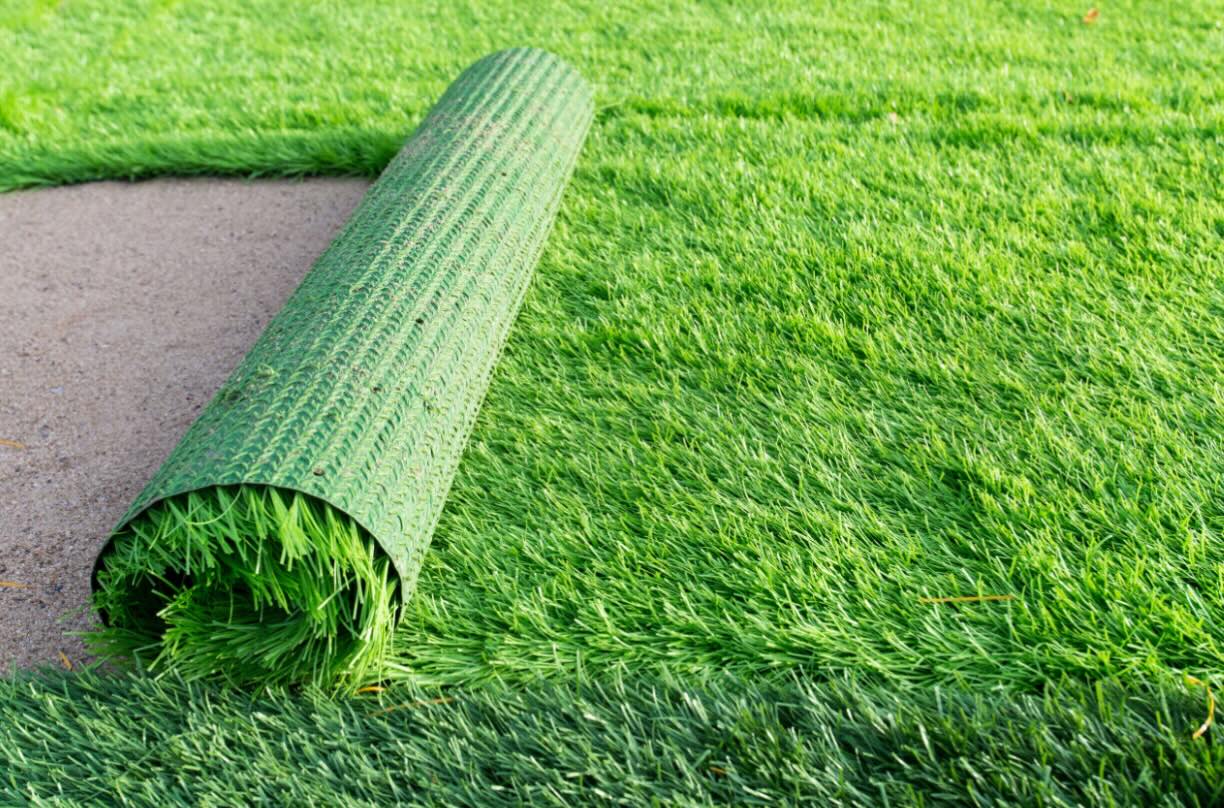
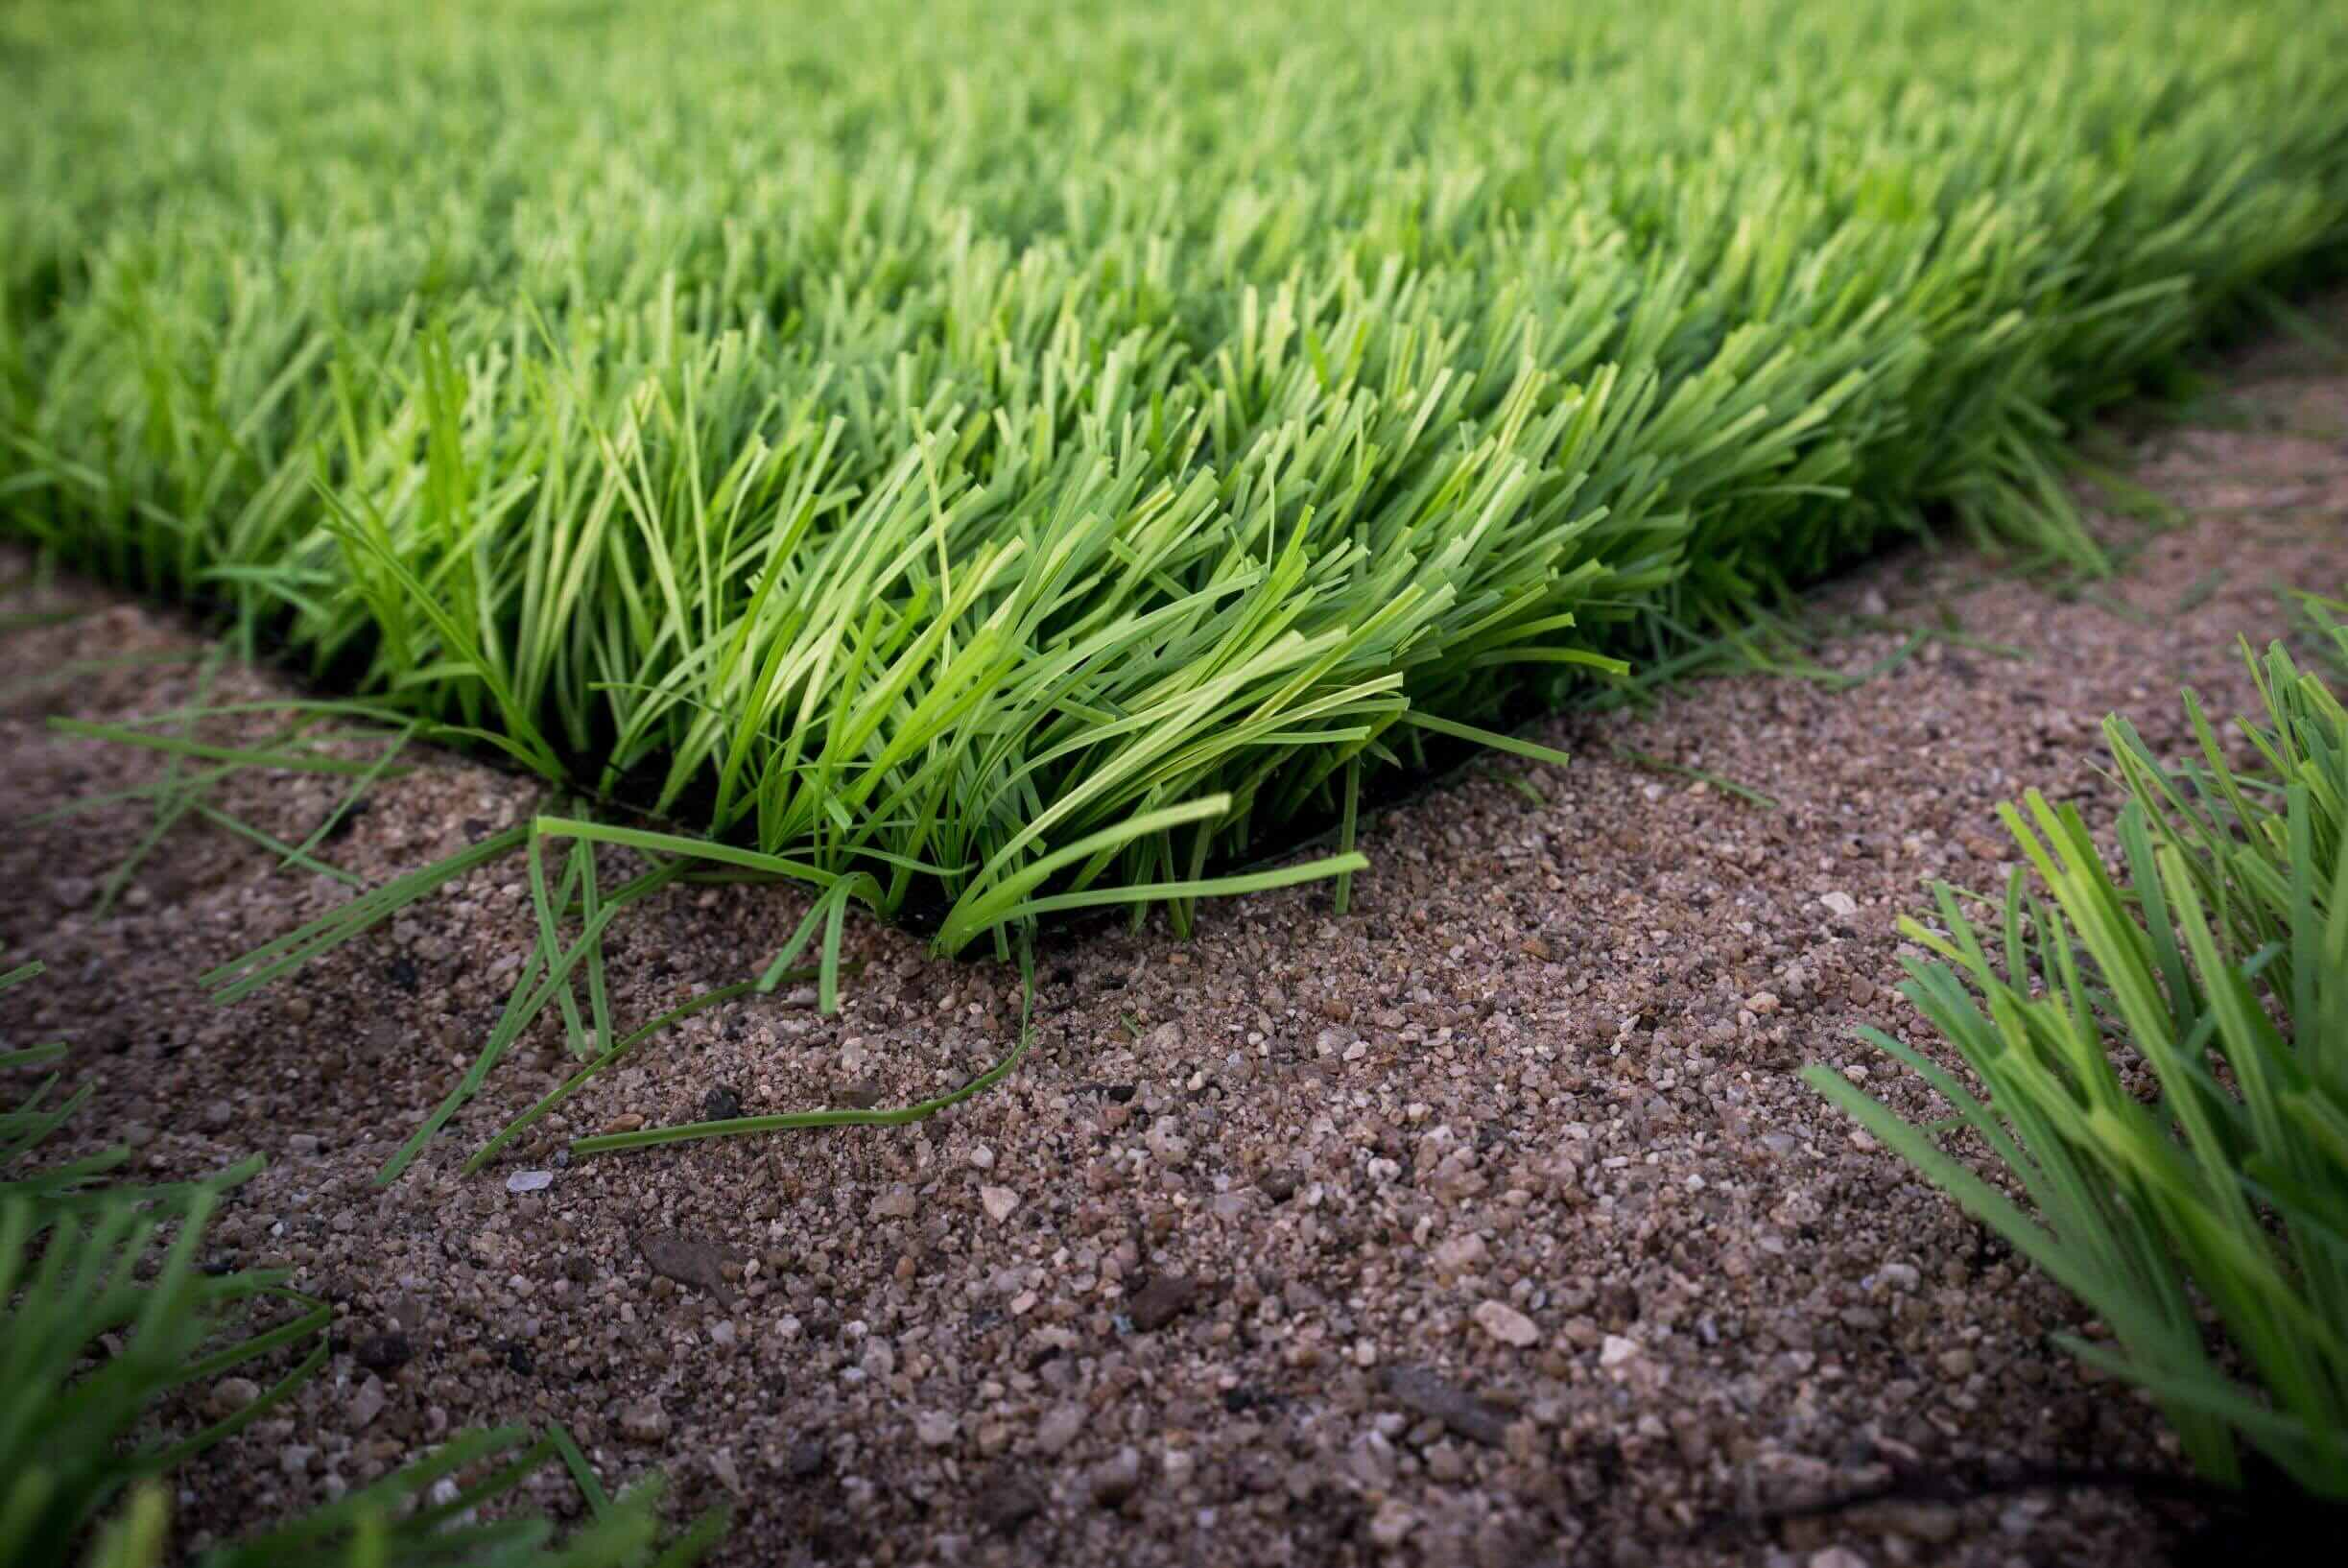
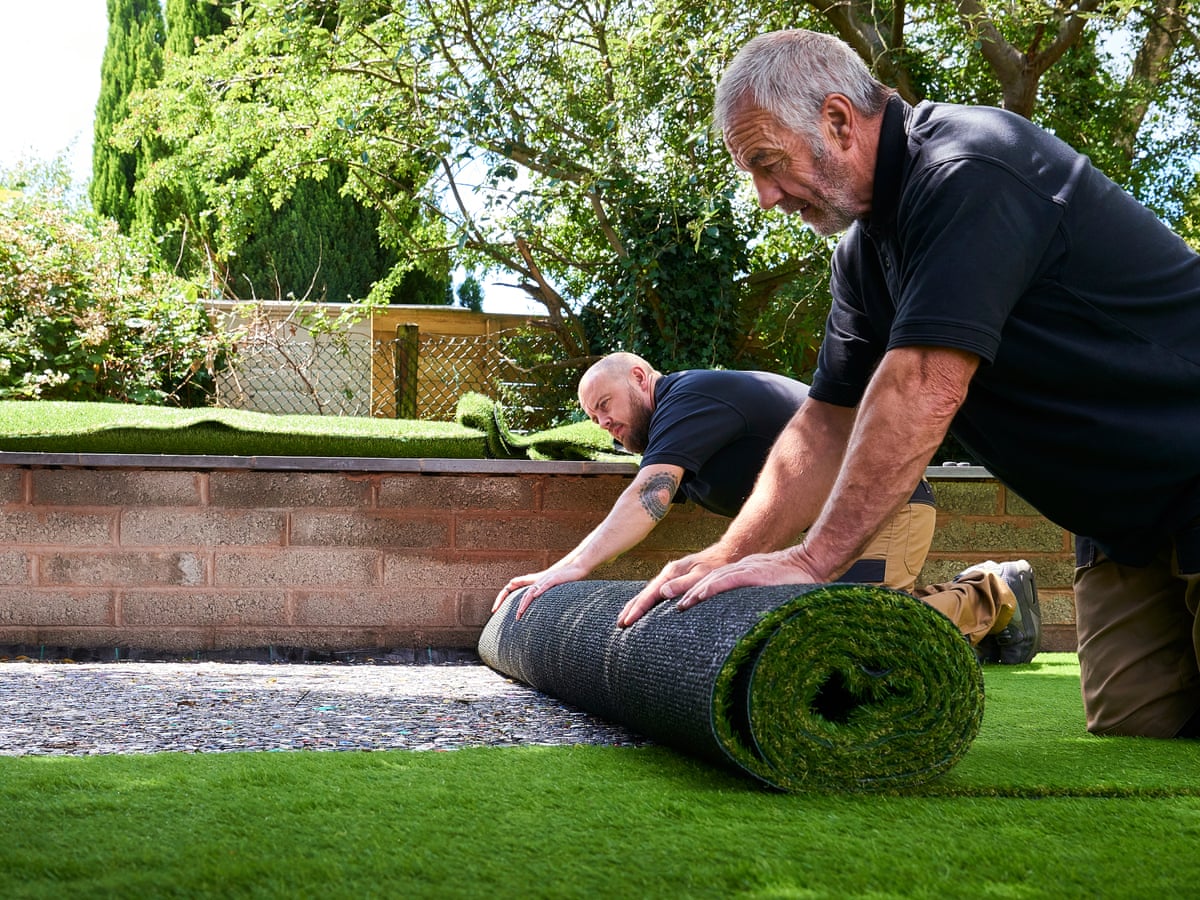
Step 6: Unrolling and Cutting the Astro Turf
Once the base is compacted and leveled, it’s time to move on to the exciting step of unrolling and cutting the astro turf. This is where you’ll start to see your synthetic grass taking shape and transforming your outdoor space.
Begin by unrolling the astro turf over the prepared base. Start from one end and gradually work your way across the area, ensuring that the turf is aligned and positioned correctly. Make adjustments as needed to achieve the desired placement.
As you unroll the turf, be mindful of the direction of the grass blades. Typically, the fibers should be pointing towards the area where you’ll be looking at the turf most frequently. This will ensure a natural and visually appealing appearance.
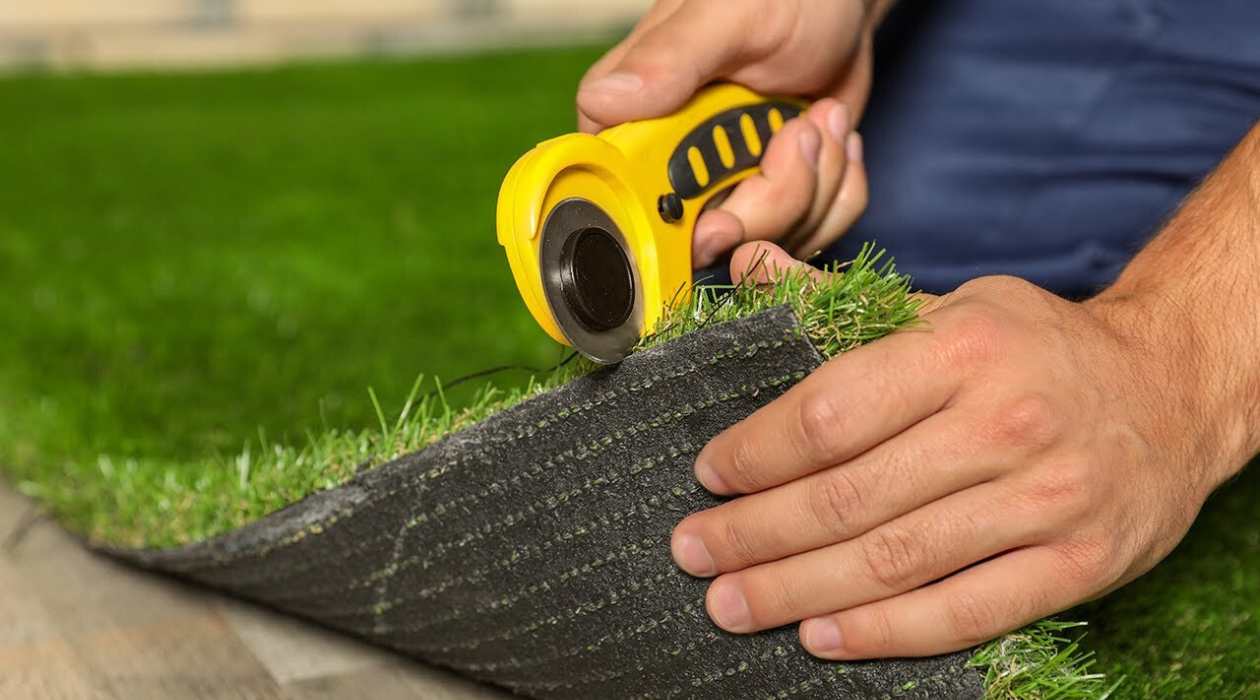
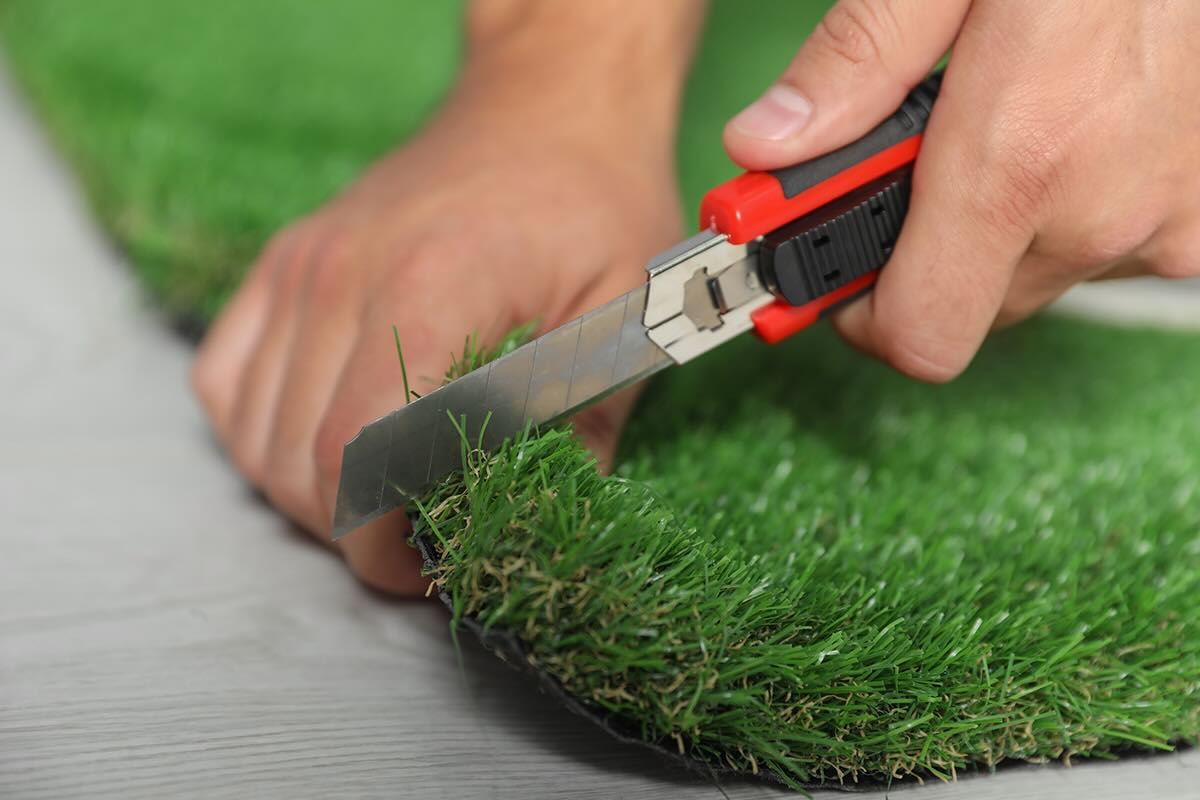
Once the turf is in place, overlap any edges or seams as required. Use scissors or a utility knife to cut the turf along the edges, following the shape of the area. Take your time and make clean, straight cuts to achieve a professional finish.
When cutting along edges or around obstacles such as trees or flowerbeds, leave a small gap between the edge of the turf and the object. This will allow for slight movement and prevent the turf from lifting or buckling over time.
If you’re working with multiple pieces of astro turf, make sure that the seams are aligned properly. Use seaming tape and adhesive specifically designed for synthetic grass to join the pieces together. Follow the manufacturer’s instructions for the best results.
Throughout the process of unrolling and cutting the astro turf, ensure that the turf is kept taut and free from wrinkles or folds. Smooth out any irregularities or bumps as you go along to create a seamless and visually appealing surface.
By carefully unrolling and cutting the astro turf, you are laying the foundation for a beautiful and pristine synthetic grass installation. This step sets the stage for the final stages of securing and grooming the turf, bringing you one step closer to enjoying your low-maintenance and gorgeous outdoor space.
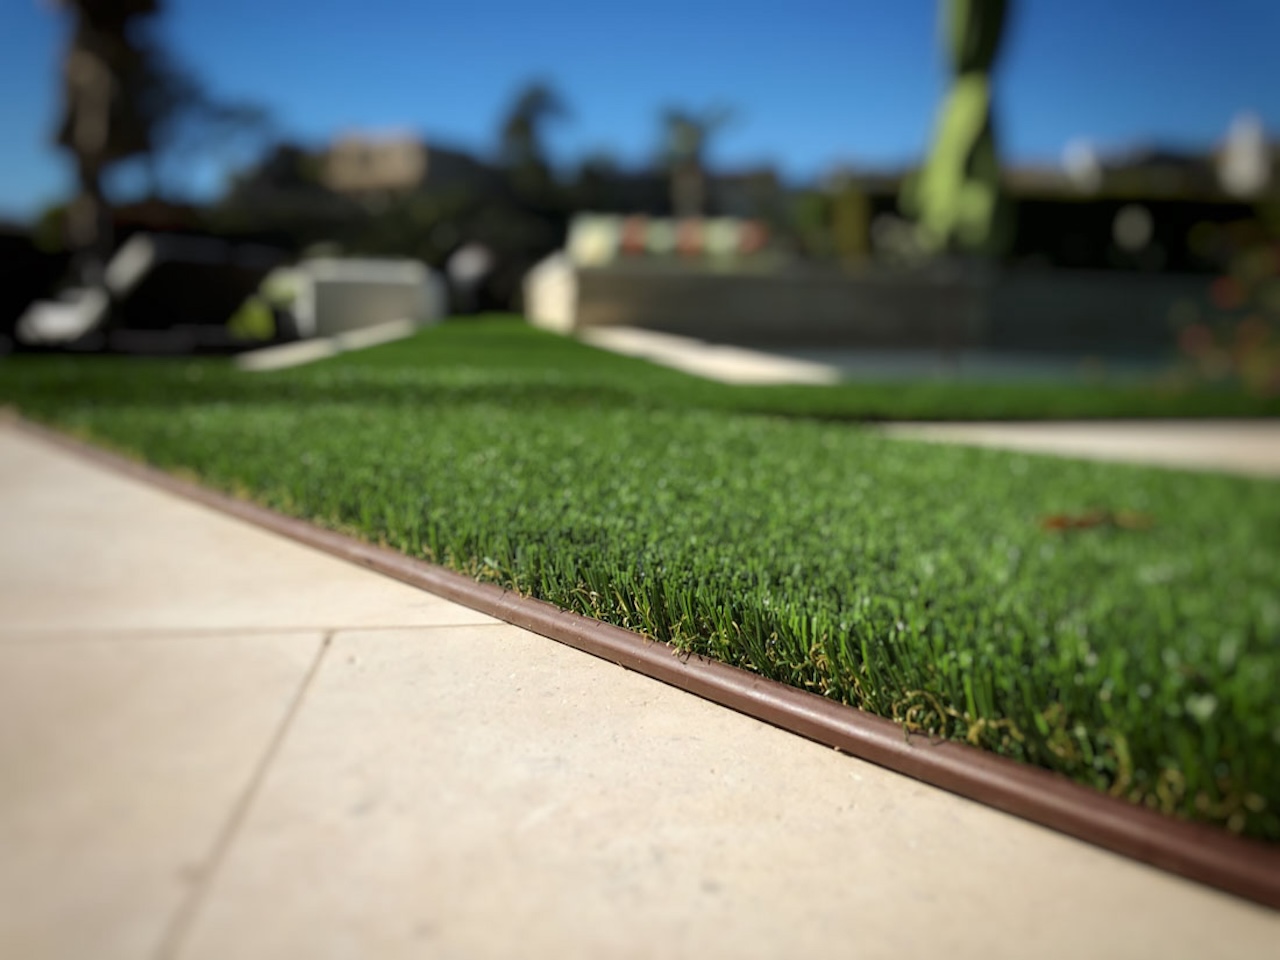
Step 7: Securing the Turf Edges
With the astro turf unrolled and cut to fit your desired area, the next step in the installation process is to secure the edges of the turf. This is crucial for maintaining a neat and seamless appearance, as well as preventing the turf from shifting or lifting over time.
There are several methods you can use to secure the edges of the astro turf:
- Use landscape spikes or nails: Position the spikes or nails around the perimeter of the turf, leaving a few inches of space between each one. Insert them into the ground through the edge of the turf, ensuring that they penetrate the base material beneath for a secure hold.
- Utilize adhesive: If you prefer a more discreet and permanent method of securing the edges, you can use a specially formulated adhesive designed for astro turf. Apply the adhesive along the edge of the turf, ensuring a consistent and even application. Press the turf firmly into place to create a strong bond.
- Install landscape edging: Another option is to install landscape edging along the perimeter of the turf. This can be done using materials such as plastic or metal edging. Dig a shallow trench along the edge, insert the edging, and secure it in place with stakes or screws.
Whichever method you choose, make sure to secure the edges evenly and at regular intervals to avoid any bulges or unevenness in the turf. Pay special attention to corners and curves, where the turf may require extra anchoring to maintain a smooth appearance.
After securing the edges, walk along the perimeter and make any final adjustments as needed. Smooth out any wrinkles or folds in the turf and ensure that it lays flat and even. Take the time to visually inspect the area to ensure a neat and professional-looking installation.
By securing the edges of the astro turf, you are ensuring a secure and long-lasting synthetic grass surface. This step is essential for maintaining the integrity and appearance of your new lawn.
Step 8: Securing the Turf in the Middle
Once the edges of the astro turf are secured, the next step in the installation process is to secure the turf in the middle. This is important to prevent the turf from shifting or bunching up, ensuring a smooth and seamless appearance throughout the entire area.
There are a couple of techniques you can use to secure the turf in the middle:
- Use turf spikes or nails: Place the spikes or nails in a grid-like pattern across the turf, spacing them out at regular intervals. Insert them into the base material underneath, ensuring that they are securely in place. This method is especially useful for larger areas of astro turf.
- Use turf adhesive: Apply the adhesive to the base material in the middle of the astro turf. Using a trowel or notched spreader, spread the adhesive evenly, covering the designated area. Carefully press down the turf onto the adhesive, ensuring proper adhesion. Follow the manufacturer’s instructions for the specific adhesive being used.
When securing the turf in the middle, be mindful to work in small sections at a time to achieve the best results. Smooth out any wrinkles or folds as you go along to ensure a flat and seamless surface.
After securing the turf in the middle, walk across the entire area to check for any unevenness or potential tripping hazards. Make any necessary adjustments and ensure the turf is firmly in place.
It’s important to note that the method chosen for securing the turf in the middle may vary depending on the size of the area and personal preference. Evaluate the specific needs of your project and choose the method that best suits your needs.
By securely anchoring the turf in the middle, you are ensuring a stable and visually appealing installation. This step contributes to the longevity and integrity of your astro turf, providing you with a beautiful and low-maintenance outdoor space.
Read more: How Was Astro Turf Named
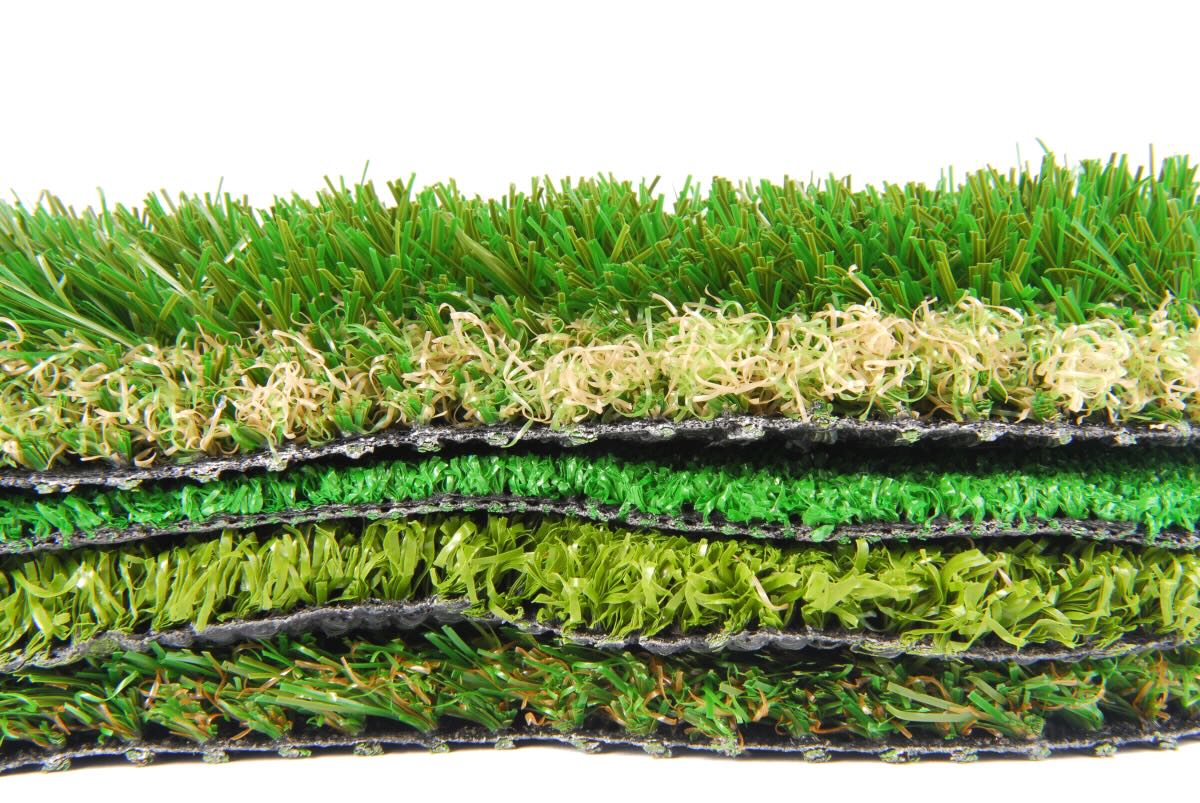
Step 9: Adding Infill Material
Adding infill material is a crucial step in the installation of astro turf on dirt. Infill helps to provide stability, support the turf blades, improve drainage, and enhance the overall performance and appearance of the synthetic grass.
There are different types of infill materials available, including silica sand, rubber crumb, and organic infills. The choice of infill material depends on factors such as desired playability, foot traffic, and personal preference. Follow the manufacturer’s recommendations for the specific type of astro turf you are installing.
To add infill material, start by evenly spreading it over the entire turf surface. Use a drop spreader, a brush, or your hands to distribute the infill in a way that evenly covers the turf fibers. Work in small sections at a time to ensure thorough coverage.
Once the infill is spread, use a stiff-bristled brush or a power broom to work the infill into the turf. This will help the infill settle between the fibers and provide stability. Brush against the grain of the turf to ensure the infill reaches the base of the fibers.
Continue brushing and working the infill into the turf until it is well-distributed and evenly settled. Take care not to overfill or compact the infill, as this can affect the performance and appearance of the astro turf.
After adding the infill, it is important to water the turf lightly. This will help the infill settle and ensure proper distribution. Avoid excessive watering that may cause the infill to wash away or create an unstable surface.
Regularly groom the turf using a broom or a power brush to maintain the distribution and aesthetics of the infill. This will help prevent matting and ensure the longevity of your synthetic grass.
Adding infill material is essential for achieving a realistic and durable astro turf installation. It improves performance, enhances comfort, and provides a visually stunning synthetic grass landscape.
Step 10: Brushing and Grooming the Turf
The final step in the installation of astro turf on dirt is to brush and groom the turf. This step helps to enhance the appearance, longevity, and performance of your synthetic grass.
Start by using a broom or a power brush to gently brush against the grain of the turf. This will help to straighten the blades and create a natural-looking appearance. Pay special attention to areas that may have flattened during the installation process, such as high-traffic areas or where heavy objects were placed.
Regular brushing helps to prevent matting and maintain the resilience and aesthetics of the turf. It also helps to distribute the infill material evenly and ensure it settles between the fibers.
In addition to regular brushing, you may also consider periodically using a power broom or a leaf blower to remove any debris, leaves, or organic matter that may accumulate on the turf. This will help to maintain a clean and vibrant surface.
If you notice any areas that appear flat or heavily compacted, use a rake or a power broom to fluff up the fibers and restore their natural appearance. Take care not to overbrush or over-fluff the turf, as it can cause damage or unevenness.
It’s important to establish a routine for brushing and grooming your astro turf. The frequency may vary depending on factors such as foot traffic and weather conditions. Generally, aim to brush the turf at least once a month to keep it in optimal condition.
Finally, periodically inspect your astro turf for any signs of wear or damage. Address any issues promptly to ensure the longevity of your synthetic grass. Repair any small tears or damaged sections using synthetic grass repair kits or consult a professional for larger repairs.
By regularly brushing and grooming your astro turf, you are maintaining its appearance and performance. This step helps to ensure a beautiful, low-maintenance outdoor space that can be enjoyed for years to come.
Conclusion
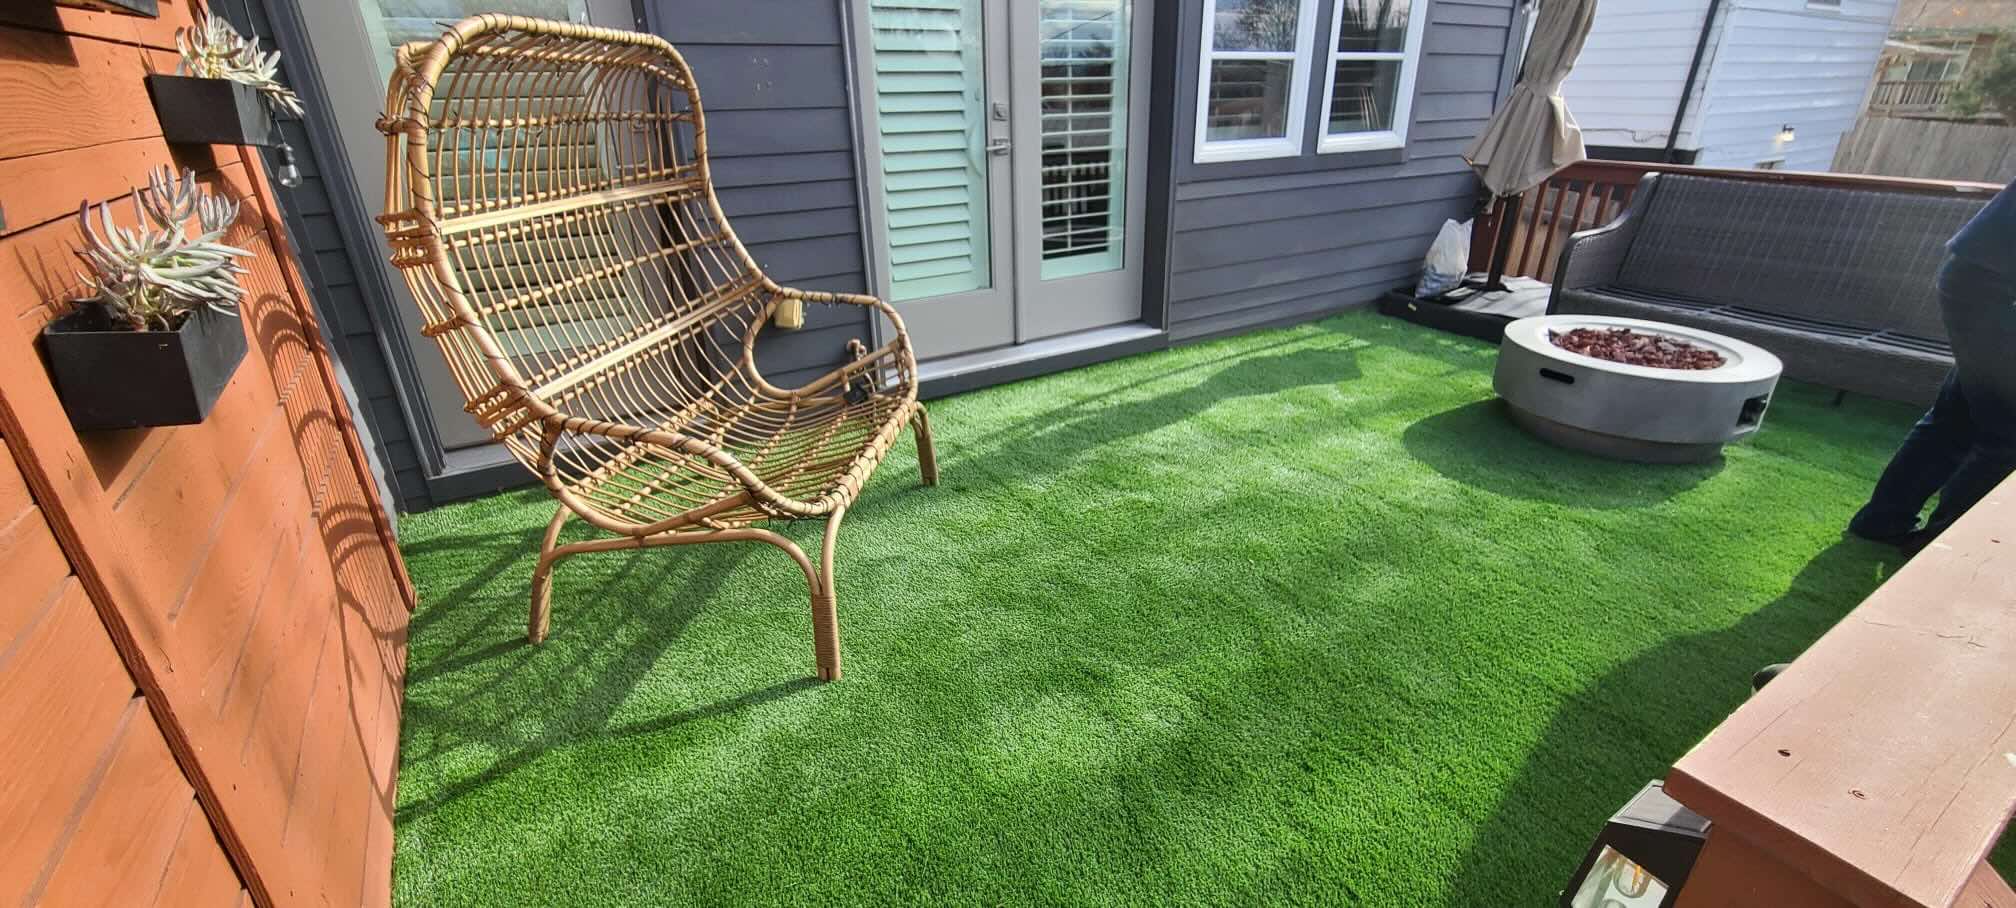
Congratulations, you have successfully completed the installation of astro turf on dirt! By following the step-by-step guide outlined in this article, you have transformed your outdoor space into a beautiful, low-maintenance synthetic grass landscape.
From clearing and preparing the area to securing the turf edges and adding infill, each step plays a crucial role in achieving a professional-looking installation. By taking the time to properly level the dirt surface, add a weed barrier, and create a stable base, you have created a solid foundation for your synthetic grass.
The process of unrolling, cutting, and securing the astro turf ensures a seamless and visually pleasing surface. Brushing and grooming the turf not only enhances its appearance but also helps maintain its durability and performance over time.
With astro turf, you can now enjoy a lush and vibrant lawn all year round, without the hassle of mowing, watering, or pesticides. The synthetic grass provides a low-maintenance solution that can withstand varying weather conditions and heavy foot traffic.
Remember to periodically inspect the turf for any signs of damage or wear and address them promptly. With proper care and maintenance, your astro turf will continue to provide a beautiful and functional outdoor space for years to come.
We hope this comprehensive guide has been helpful in your astro turf installation journey. Enjoy your new synthetic grass landscape, and revel in the beauty and convenience it brings to your outdoor living space!
Frequently Asked Questions about How To Install Astro Turf On Dirt
Was this page helpful?
At Storables.com, we guarantee accurate and reliable information. Our content, validated by Expert Board Contributors, is crafted following stringent Editorial Policies. We're committed to providing you with well-researched, expert-backed insights for all your informational needs.


0 thoughts on “How To Install Astro Turf On Dirt”