Home>Gardening & Outdoor>Landscaping Ideas>How To Lay Artificial Grass On Dirt
Landscaping Ideas
How To Lay Artificial Grass On Dirt
Modified: August 18, 2024
Learn how to transform your outdoor space with our landscaping ideas. Discover the best techniques for laying artificial grass on dirt. Achieve a beautiful and low-maintenance lawn today!
(Many of the links in this article redirect to a specific reviewed product. Your purchase of these products through affiliate links helps to generate commission for Storables.com, at no extra cost. Learn more)
Preparing the Ground
Before embarking on the exciting journey of laying artificial grass on dirt, it's crucial to prepare the ground properly. This foundational step sets the stage for a successful and long-lasting installation. Here's a comprehensive guide to help you navigate through the preparation process:
-
Clear the Area: Begin by clearing the designated area of any debris, rocks, or existing vegetation. Use a rake or shovel to remove these obstacles, ensuring a smooth and even surface for the artificial grass.
-
Measure and Mark: Once the area is clear, measure and mark the boundaries where the artificial grass will be laid. This step helps visualize the layout and ensures accurate placement during the installation process.
-
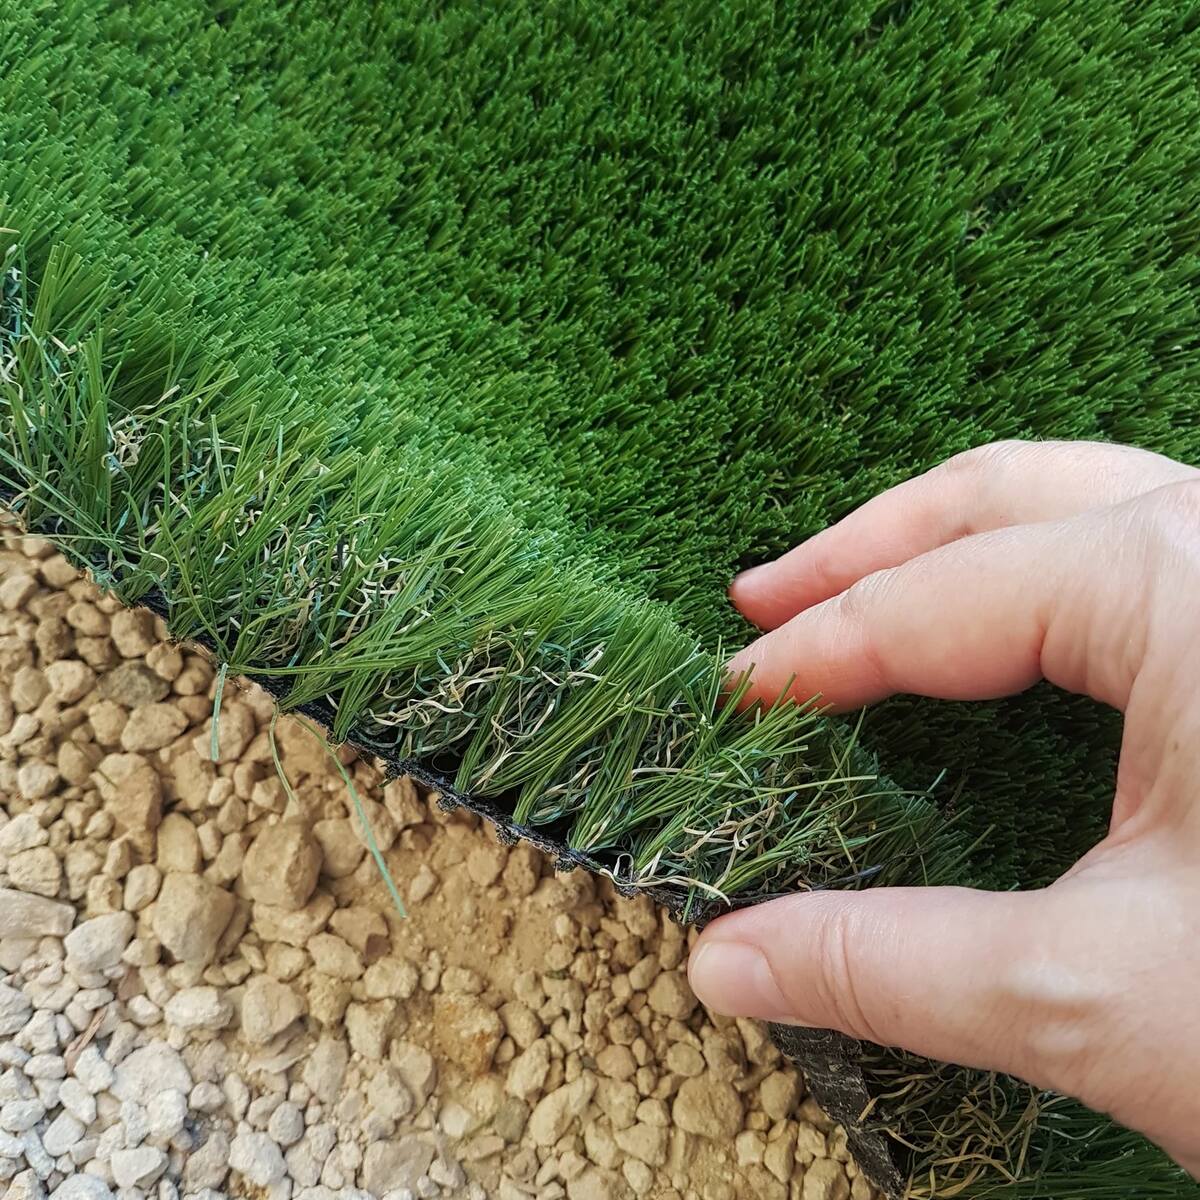
Excavate the Soil: With the boundaries marked, it's time to excavate the soil to a depth of around 3 to 4 inches. This allows ample space for the base material and ensures proper drainage, preventing water from pooling on the surface.
-
Level the Ground: After excavating the soil, use a compactor or tamper to level the ground thoroughly. This step is essential for creating a stable foundation and preventing unevenness beneath the artificial grass.
-
Install a Weed Barrier: To deter weed growth and maintain the integrity of the installation, lay a weed barrier fabric over the leveled ground. This protective layer acts as a shield, preventing unwanted vegetation from penetrating the artificial grass.
-
Add a Layer of Crushed Rock: Once the weed barrier is in place, add a layer of crushed rock or decomposed granite to the excavated area. This material serves as a sturdy base, promoting proper drainage and enhancing the overall stability of the artificial grass.
By meticulously preparing the ground according to these steps, you'll establish a solid foundation for the subsequent stages of the installation process. This thoughtful groundwork sets the stage for a seamless and visually stunning artificial grass transformation.
Key Takeaways:
- Prepare the ground by clearing debris, measuring, excavating, leveling, adding a weed barrier, and crushed rock for a stable base. This sets the stage for a successful artificial grass installation.
- Lay the artificial grass by unrolling, trimming, securing seams, aligning, smoothing, nailing, and inspecting for a visually stunning and enduring transformation. Don’t forget to secure the edges for stability and longevity.
Read more: How To Lay Astro Turf For Dogs On Dirt
Installing the Base Material
With the ground meticulously prepared, the next pivotal step in laying artificial grass on dirt involves the installation of the base material. This crucial layer serves as the backbone of the entire installation, providing stability, drainage, and a supportive surface for the artificial grass. Here's a detailed exploration of the process:
-
Selecting the Right Base Material: The choice of base material plays a significant role in the performance and longevity of the artificial grass. Common options include decomposed granite, crushed rock, or a specific type of aggregate designed for artificial grass installations. Each material offers unique benefits, such as superior drainage, stability, and compaction properties.
-
Even Distribution: Once the base material is selected, distribute it evenly over the prepared ground. Use a rake or shovel to spread the material uniformly, ensuring consistent coverage across the entire area. This step sets the stage for a level and well-supported surface for the artificial grass.
-
Compaction: After the base material is evenly distributed, it's essential to compact it thoroughly. A compactor or tamper can be used to achieve the desired level of compaction, promoting a solid foundation that minimizes the risk of uneven settling over time. Proper compaction is critical for preventing dips or bumps beneath the artificial grass.
-
Assessing the Surface: Once the base material is compacted, take the time to assess the surface for any irregularities. Address any areas that may require additional material or compaction to ensure a uniformly stable base for the artificial grass.
-
Ensuring Proper Drainage: Proper drainage is paramount for preserving the integrity of the artificial grass installation. The base material should facilitate efficient water runoff, preventing water from accumulating on the surface and promoting a dry and resilient foundation.
By meticulously following these steps, the installation of the base material sets the stage for a robust and enduring artificial grass foundation. This essential layer provides the necessary support and stability for the subsequent installation of the artificial grass, ensuring a visually striking and long-lasting transformation of the outdoor space.
Laying the Artificial Grass
With the ground meticulously prepared and the base material expertly installed, the eagerly anticipated stage of laying the artificial grass on dirt is finally at hand. This pivotal phase is where the transformation truly takes shape, as the lush green expanse of synthetic turf comes to life. Here's a comprehensive guide to navigating this crucial step with finesse and precision:
-
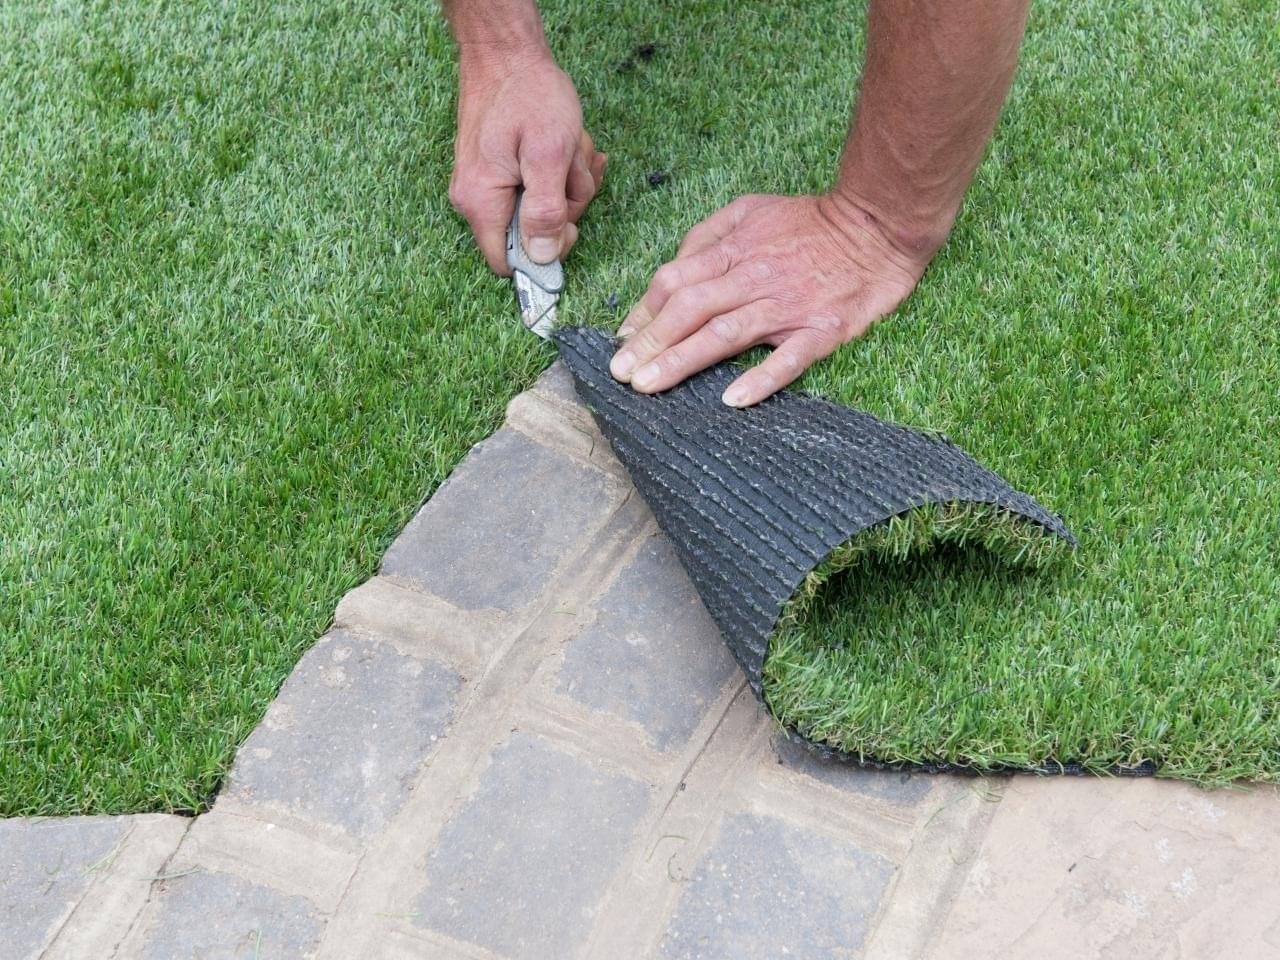
Unrolling the Artificial Grass: Begin by unrolling the artificial grass across the prepared area, ensuring that the blades of grass are facing in the desired direction. Take care to position the grass in a manner that minimizes seams and ensures a seamless, natural appearance.
-
Trimming and Customization: As the artificial grass is laid out, it may be necessary to trim and customize certain sections to achieve a perfect fit. Use a sharp utility knife to carefully trim the edges, ensuring a precise and tailored fit that aligns seamlessly with the contours of the installation area.
-
Securing the Seams: In instances where multiple sections of artificial grass are required to cover the entire area, it's essential to secure the seams effectively. Utilize high-quality seam tape and adhesive to join the sections seamlessly, creating an imperceptible transition that maintains the natural aesthetic of the synthetic turf.
-
Ensuring Proper Alignment: Throughout the process of laying the artificial grass, meticulous attention to alignment is paramount. Verify that the edges and seams align seamlessly, creating a cohesive and visually appealing expanse of synthetic turf.
-
Smoothing and Flattening: Once the artificial grass is positioned and the seams are secured, use a stiff bristle broom or brush to smooth and flatten the surface. This step helps to eliminate any wrinkles or imperfections, ensuring a pristine and uniform appearance across the entire installation area.
-
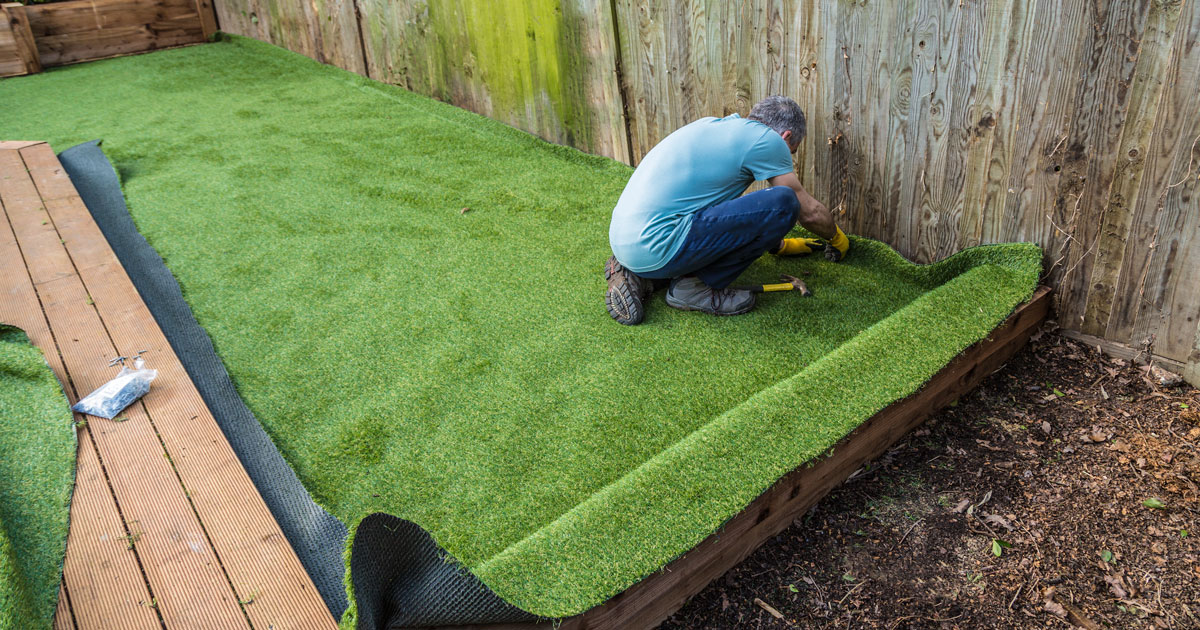
Nailing and Securing: To anchor the artificial grass firmly in place, utilize galvanized nails or landscape staples around the perimeter and at strategic intervals within the installation area. This secures the synthetic turf, preventing shifting or movement over time.
-
Final Inspection: With the artificial grass laid out and secured, conduct a thorough final inspection of the entire installation. Look for any areas that may require additional adjustments or finishing touches, ensuring that the synthetic turf exudes a flawless and natural allure.
By meticulously following these steps, the process of laying artificial grass on dirt unfolds with precision and finesse, culminating in a visually stunning and enduring transformation. This meticulous attention to detail ensures that the synthetic turf installation achieves a seamless and natural appearance, elevating the outdoor space with its vibrant green splendor.
Securing the Edges
Securing the edges of the artificial grass installation is a critical step that contributes to the overall stability, longevity, and visual appeal of the synthetic turf. By effectively anchoring the edges, you ensure that the artificial grass remains steadfast and pristine, with minimal risk of shifting or displacement over time. Here's a detailed exploration of the meticulous process involved in securing the edges with precision and finesse.
Utilizing Galvanized Nails or Landscape Staples
To begin the process of securing the edges, it's essential to utilize galvanized nails or landscape staples, which serve as reliable anchors for the artificial grass. These corrosion-resistant fasteners are strategically placed along the perimeter of the installation area, effectively securing the edges and preventing any potential movement or shifting.
Read more: How To Install Turf On Dirt
Strategic Placement for Optimal Stability
The placement of galvanized nails or landscape staples is a deliberate and strategic endeavor, aimed at ensuring optimal stability and resilience along the edges of the artificial grass. These fasteners are positioned at regular intervals, typically spaced approximately 6 to 8 inches apart, to create a robust and uniform anchoring system that fortifies the periphery of the synthetic turf.
Ensuring a Seamless Transition
As the edges of the artificial grass are secured, meticulous attention is given to ensuring a seamless transition between the synthetic turf and the surrounding landscape. This seamless integration is achieved through precise placement of the fasteners, allowing the edges of the synthetic turf to blend harmoniously with the adjacent surfaces, such as walkways, patios, or natural grass areas.
Minimizing Undesirable Movement
By securing the edges of the artificial grass installation with precision and care, you effectively minimize the risk of undesirable movement or displacement. This steadfast anchoring not only preserves the immaculate appearance of the synthetic turf but also provides peace of mind, knowing that the installation remains resilient and steadfast in the face of varying weather conditions and usage.
Enhancing Long-Term Durability
The meticulous process of securing the edges significantly contributes to the long-term durability of the artificial grass installation. By fortifying the periphery with reliable anchors, you ensure that the synthetic turf maintains its pristine allure and structural integrity, withstanding the test of time and preserving its visual splendor for years to come.
In essence, the process of securing the edges of the artificial grass installation is a meticulous and essential endeavor that underpins the stability, resilience, and enduring beauty of the synthetic turf. Through strategic placement of galvanized nails or landscape staples, this critical step ensures that the edges remain steadfast and seamless, contributing to a visually stunning and enduring transformation of the outdoor space.
Read more: How To Install Astro Turf On Dirt
Adding Infill (Optional)
The addition of infill to an artificial grass installation serves as an optional yet valuable enhancement, offering a range of benefits that contribute to the overall performance, aesthetics, and longevity of the synthetic turf. Infill, typically composed of materials such as silica sand, rubber granules, or a combination of both, is applied within the synthetic turf fibers to provide support, resilience, and a natural underfoot feel. Here's a detailed exploration of the process and advantages of adding infill to an artificial grass installation.
Enhancing Resilience and Stability
One of the primary benefits of adding infill to artificial grass is the enhancement of resilience and stability. The infill material effectively supports the synthetic turf fibers, preventing them from matting down and maintaining an upright position. This resilience ensures that the artificial grass retains its lush and vibrant appearance, withstanding foot traffic, play activities, and varying weather conditions without compromising its visual allure.
Improving Drainage and Durability
Infill plays a crucial role in improving the drainage capabilities of the artificial grass installation. By filling the spaces between the synthetic turf fibers, the infill material facilitates efficient water permeation, preventing the accumulation of moisture and promoting rapid drainage. This enhanced drainage not only safeguards the integrity of the synthetic turf but also contributes to its long-term durability, minimizing the risk of water-related damage and prolonging its lifespan.
Mitigating Odors and Bacteria Growth
Infill serves as a valuable deterrent against unwanted odors and the growth of bacteria within the artificial grass. The porous nature of certain infill materials, coupled with their antimicrobial properties, helps mitigate the development of unpleasant odors and the proliferation of bacteria. This proactive measure ensures that the synthetic turf remains fresh, hygienic, and conducive to recreational activities and leisurely enjoyment.
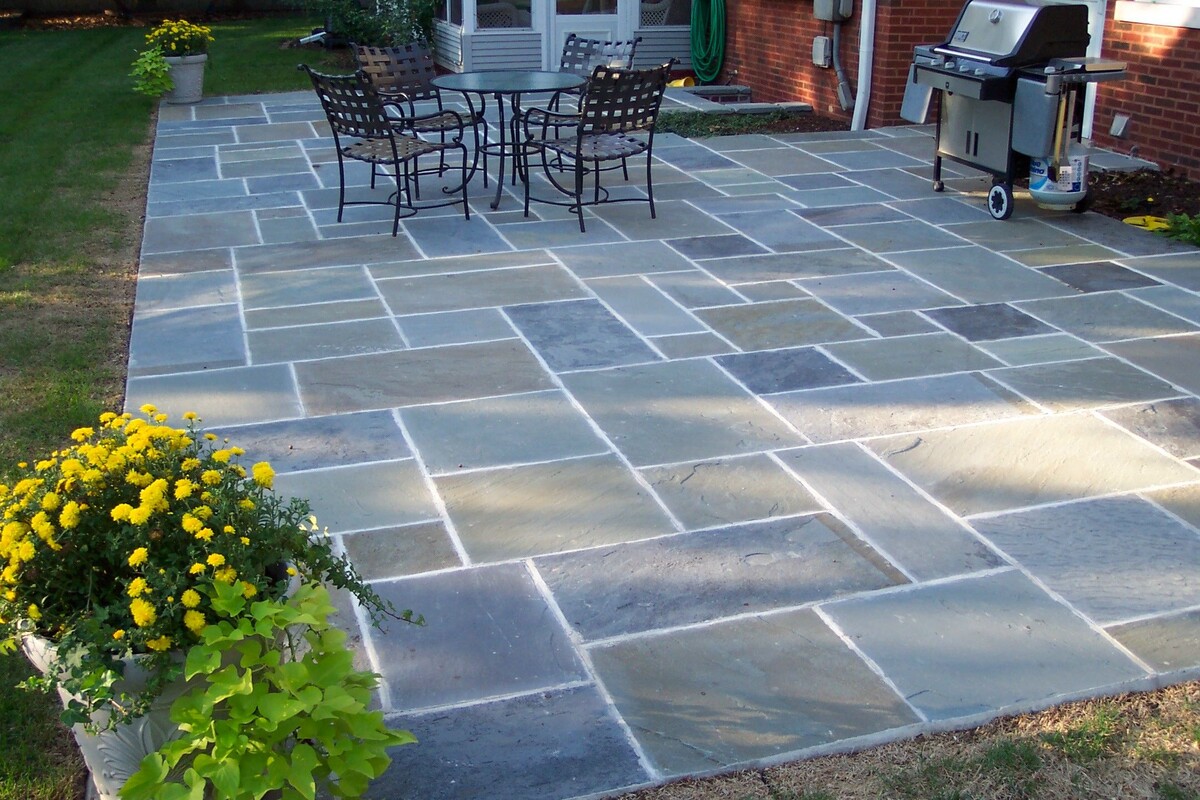
Read more: How To Lay A Cobblestone Patio
Enhancing Safety and Comfort
The application of infill contributes to the safety and comfort of the artificial grass surface, particularly in areas where play activities or sports are prevalent. The cushioning effect of the infill material provides a soft and supportive underfoot sensation, reducing the risk of impact-related injuries and enhancing the overall comfort of the synthetic turf. Additionally, infill can contribute to the shock-absorbing properties of the artificial grass, further enhancing its safety features.
Achieving a Natural Aesthetic and Feel
Infill plays a pivotal role in achieving a natural aesthetic and feel for the artificial grass, closely resembling the characteristics of natural grass. The addition of infill creates a more realistic and inviting surface, replicating the softness and resilience typically associated with natural turf. This attention to detail elevates the overall visual appeal and tactile experience of the synthetic turf, creating an inviting and authentic outdoor environment.
In essence, while the addition of infill to an artificial grass installation is optional, it offers a multitude of advantages that significantly enhance the performance, aesthetics, and user experience of the synthetic turf. From bolstering resilience and drainage to promoting safety and comfort, infill serves as a valuable complement to the artificial grass, elevating its overall quality and appeal.
Frequently Asked Questions about How To Lay Artificial Grass On Dirt
Was this page helpful?
At Storables.com, we guarantee accurate and reliable information. Our content, validated by Expert Board Contributors, is crafted following stringent Editorial Policies. We're committed to providing you with well-researched, expert-backed insights for all your informational needs.


0 thoughts on “How To Lay Artificial Grass On Dirt”