Home>Gardening & Outdoor>Outdoor Recreation & Activities>How To Install A Trampoline Mat
Outdoor Recreation & Activities
How To Install A Trampoline Mat
Modified: October 21, 2024
Learn how to install a trampoline mat with our step-by-step guide for outdoor recreation and activities. Ensure a safe and enjoyable trampoline experience.
(Many of the links in this article redirect to a specific reviewed product. Your purchase of these products through affiliate links helps to generate commission for Storables.com, at no extra cost. Learn more)
Introduction
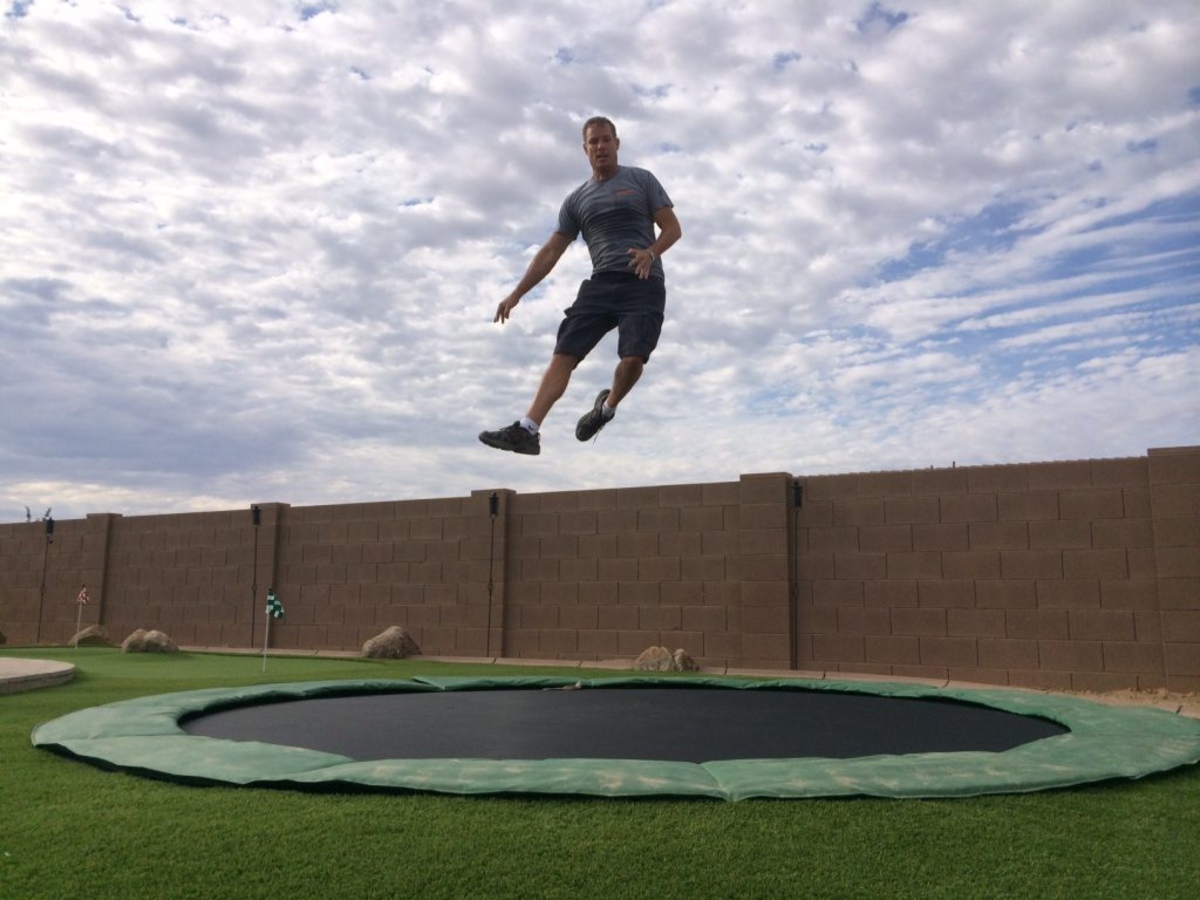
Welcome to the exciting world of trampolining! Installing a trampoline mat can be a rewarding and enjoyable experience, whether you’re setting up a brand-new trampoline or replacing the mat on an existing one. A trampoline mat is a crucial component of the trampoline, as it provides the surface for bouncing and jumping, making it essential to ensure proper installation for safety and optimal performance.
In this comprehensive guide, we will walk you through the step-by-step process of installing a trampoline mat with ease and precision. By following these instructions and tips, you’ll be able to enjoy a safe and exhilarating trampolining experience in no time.
Key Takeaways:
- Installing a trampoline mat requires gathering tools, preparing the frame, and securing the mat. It’s crucial for safety and a fun trampolining experience.
- After installation, testing the trampoline ensures stability and safety. Regular maintenance and responsible usage are essential for long-lasting enjoyment.
Read more: How To Install A Net On A Trampoline
Step 1: Gather Necessary Tools and Equipment
Before you begin the installation process, it’s essential to gather all the necessary tools and equipment to ensure a smooth and efficient setup. Here’s a list of items you’ll need:
- Trampoline mat (new or replacement)
- Trampoline frame and springs
- Measuring tape
- Spring pulling tool (optional, but recommended for ease of installation)
- Assistance from another person, if possible, for assistance in handling the trampoline mat and frame
- Clear, open space for assembly
- Comfortable, sturdy footwear
- Gloves for hand protection
Ensuring that you have all the necessary tools and equipment at your disposal will streamline the installation process and minimize potential delays or interruptions. Once you have everything ready, you’ll be well-prepared to move on to the next step and begin the installation of your trampoline mat.
Step 2: Prepare the Trampoline Frame
With all the necessary tools and equipment at hand, the next crucial step is to prepare the trampoline frame for the installation of the new mat. Follow these steps to ensure that the frame is ready for the next phase:
- Inspect the Frame: Before proceeding, carefully inspect the trampoline frame for any signs of damage, rust, or wear and tear. It’s important to address any issues with the frame before installing the new mat to ensure the safety and stability of the trampoline.
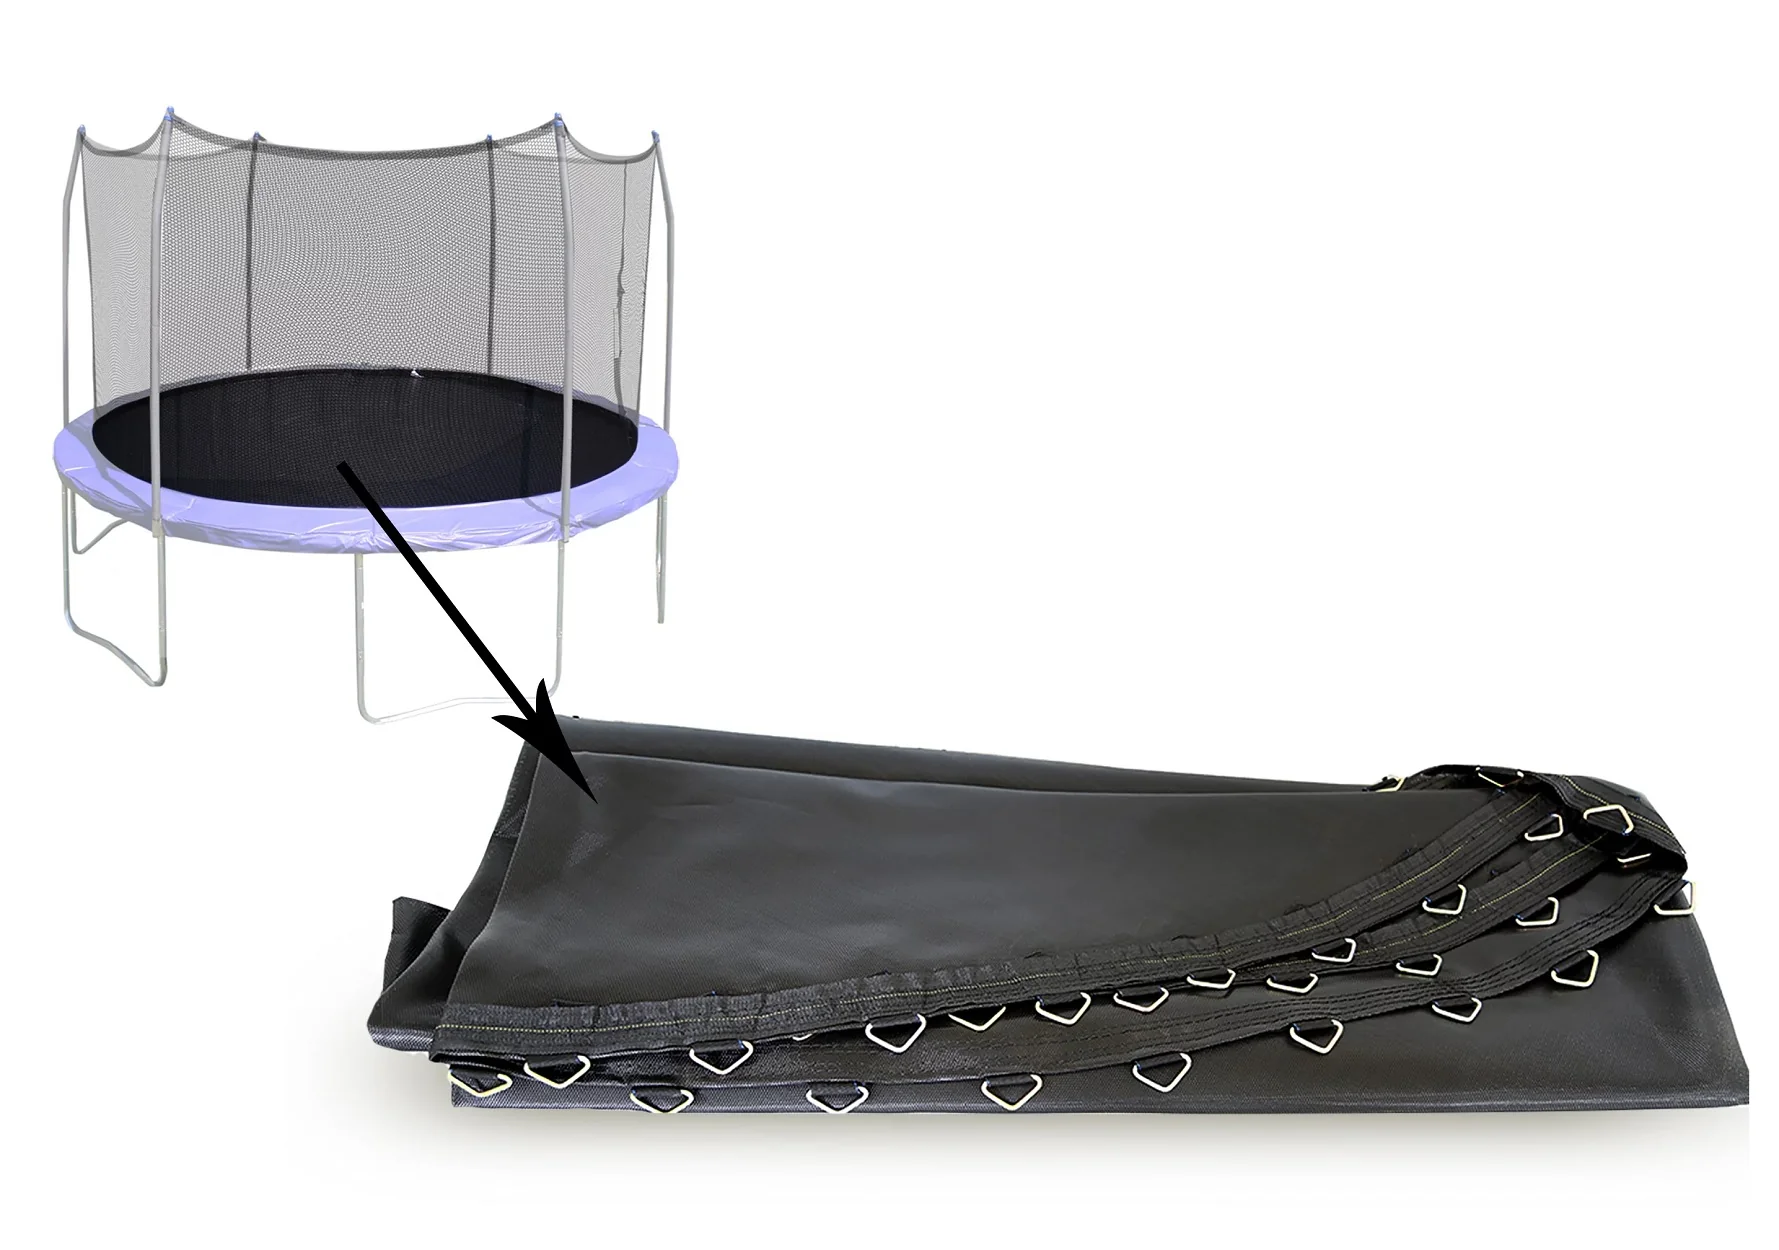
- Remove the Old Mat: If you’re replacing an existing trampoline mat, carefully remove the old mat from the frame. Take note of the placement of the springs and any other attachments, as this will serve as a helpful reference during the installation of the new mat.
- Clean the Frame: Once the old mat has been removed, take the time to clean the trampoline frame thoroughly. Remove any debris, dirt, or rust that may have accumulated, ensuring that the frame is clean and free from any obstructions that could affect the installation of the new mat.
- Check Spring Condition: Inspect the condition of the springs on the trampoline frame. Ensure that the springs are intact, free from damage, and securely attached to the frame. If any springs show signs of wear or damage, consider replacing them before proceeding with the installation of the new mat.
By carefully preparing the trampoline frame, you’ll create a solid foundation for the installation of the new mat, setting the stage for a successful and safe trampolining experience. With the frame ready, you’re now well-equipped to move on to the next step and install the trampoline mat with confidence.
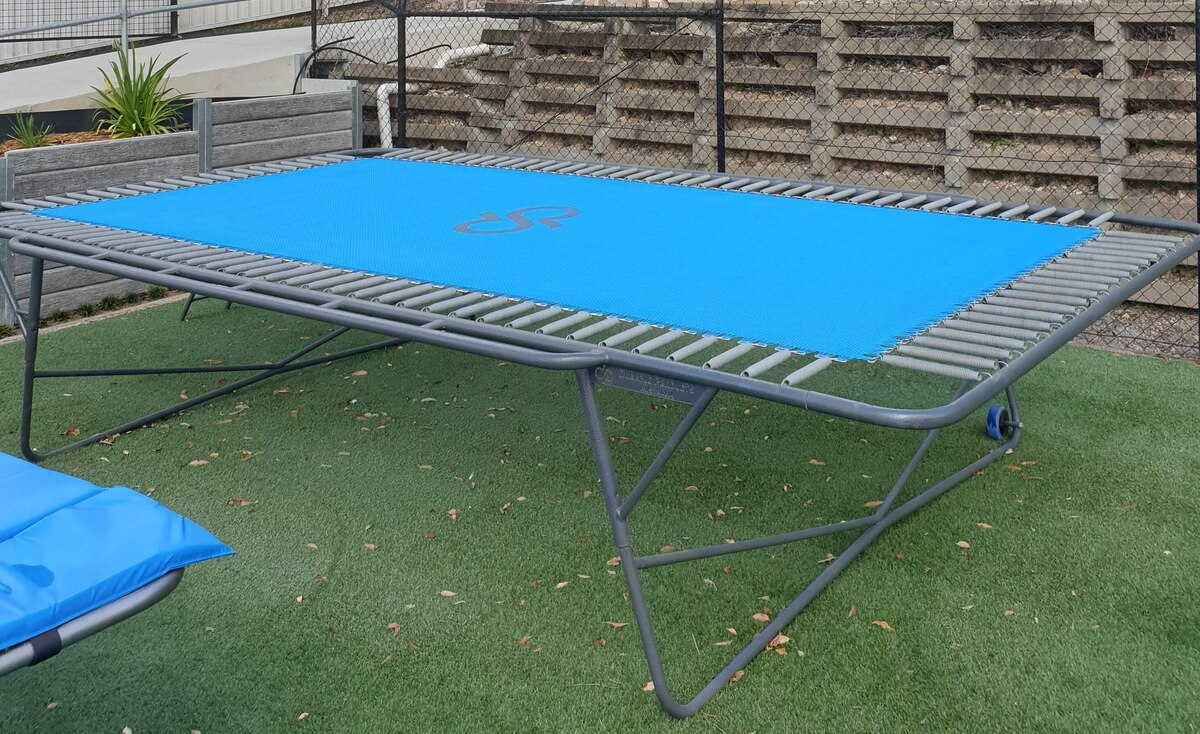
Step 3: Install the Trampoline Mat
Now that the trampoline frame is prepared, it’s time to proceed with the installation of the new trampoline mat. Follow these detailed steps to ensure a smooth and effective installation process:
- Position the Mat: Lay the new trampoline mat out flat next to the trampoline frame, ensuring that it is positioned correctly with the springs and attachment points aligned with those on the frame. It’s essential to verify that the mat is oriented in the right direction, as indicated by any markings or labels.
- Attach the Mat to the Frame: Starting at one end of the trampoline, begin attaching the mat to the frame by securing the springs in place. Using a spring pulling tool can make this process more manageable, allowing you to hook the springs onto the frame with ease. Work your way around the perimeter of the trampoline, attaching the mat securely to the frame with each spring.
- Ensure Proper Tension: As you attach the mat to the frame, pay close attention to the tension of the springs. It’s important to achieve an even and balanced tension across the entire mat, ensuring that it is securely and uniformly attached to the frame. This step is crucial for the safety and performance of the trampoline.
- Verify Attachment: Once all the springs are in place, carefully inspect the attachment of the mat to the frame. Double-check each spring to ensure that it is securely fastened, and confirm that the mat is evenly positioned and taut across the frame.
By following these steps, you’ll be able to install the trampoline mat accurately and securely, setting the stage for a safe and enjoyable trampolining experience. With the mat in place, you’re ready to move on to the next step and secure the mat to the frame, ensuring its stability and durability.
When installing a trampoline mat, make sure to carefully follow the manufacturer’s instructions to ensure proper installation and safety. Check for any tears or damage before installation.
Step 4: Secure the Mat in Place
After successfully installing the trampoline mat, the next critical step is to secure it in place to ensure stability and safety. Follow these essential guidelines to properly secure the mat to the trampoline frame:
- Double-Check Spring Attachment: Before proceeding, double-check the attachment of the springs to the frame. Ensure that each spring is securely fastened, providing a strong and reliable connection between the mat and the frame.
- Verify Tension and Alignment: Once the springs are in place, verify the tension and alignment of the mat. It’s crucial to ensure that the mat is evenly tensioned and aligned across the frame, minimizing the risk of uneven bouncing or potential hazards.
- Inspect Attachment Points: Take the time to inspect the attachment points of the mat to the frame, ensuring that there are no loose or improperly secured areas. Address any issues promptly to guarantee the overall stability and integrity of the trampoline mat.
- Secure Additional Fastenings: Depending on the design of the trampoline and the manufacturer’s recommendations, there may be additional fastenings or securing mechanisms to ensure the stability of the mat. Follow the manufacturer’s guidelines to secure any additional fastenings as needed.
- Test the Mat’s Stability: With the mat securely in place, perform a gentle test to ensure its stability and resilience. Apply light pressure to various areas of the mat to verify that it remains securely attached to the frame and that the tension is evenly distributed.
By meticulously securing the trampoline mat in place, you’ll establish a solid foundation for safe and enjoyable trampolining activities. With the mat properly secured, you’re now ready to move on to the final step and test the trampoline to ensure its functionality and safety.
Read more: How To Install A Ground Trampoline
Step 5: Test the Trampoline
With the trampoline mat securely installed and in place, it’s time to perform a thorough test to ensure that the trampoline is functioning optimally and is safe for use. Follow these essential steps to test the trampoline and verify its performance:
- Visual Inspection: Begin by conducting a visual inspection of the entire trampoline, including the frame, springs, and the newly installed mat. Look for any signs of misalignment, loose components, or potential hazards that may affect the trampoline’s performance and safety.
- Functional Testing: With the visual inspection complete, it’s time to perform functional testing of the trampoline. Test the mat’s resilience and tension by applying gentle pressure in various areas to ensure that it remains securely attached to the frame and offers uniform support for bouncing and jumping.
- Bounce Test: Carefully perform a bounce test by applying light and controlled pressure on the mat. Pay attention to the responsiveness and stability of the mat, ensuring that it provides a consistent and safe bouncing experience without any unexpected movements or instability.
- Weight Capacity Test: If applicable, verify the trampoline’s weight capacity by testing it with individuals within the recommended weight range. Ensure that the trampoline can support the intended users without compromising its stability or safety.
- Final Inspection: Conclude the testing phase with a final inspection of the trampoline and the newly installed mat. Verify that all components are functioning as intended and that the trampoline is safe and ready for use.
By thoroughly testing the trampoline, you can confirm its safety, stability, and performance, providing peace of mind and ensuring a rewarding trampolining experience for users of all ages. With the trampoline successfully tested and verified, you can look forward to enjoying countless hours of fun and excitement on your newly installed trampoline mat.
Conclusion
Congratulations on successfully installing and testing your trampoline mat! By following the comprehensive steps outlined in this guide, you’ve taken a significant step toward creating a safe and enjoyable trampolining experience for yourself, your family, and friends. Proper installation and testing of the trampoline mat are essential for ensuring its stability, safety, and longevity.
It’s important to remember that regular maintenance and periodic inspections of the trampoline and its components are crucial for preserving its performance and safety. Keep an eye on the tension of the mat, the condition of the frame and springs, and any signs of wear or damage that may require attention.
As you embark on your trampolining adventures, always prioritize safety and responsible usage. Encourage users to follow recommended guidelines for trampoline use, including limiting the number of individuals on the trampoline at a time, avoiding stunts or risky maneuvers, and providing supervision, especially for younger users.
With the proper installation and care, your trampoline mat will continue to provide countless hours of exhilarating fun and physical activity. Whether it’s for recreational bouncing, fitness routines, or simply enjoying the outdoors, your trampoline is a valuable addition to your recreational space.
Thank you for entrusting us with the guidance for installing your trampoline mat. We hope this comprehensive guide has been informative and helpful, and we wish you many memorable and enjoyable moments on your trampoline for years to come.
Frequently Asked Questions about How To Install A Trampoline Mat
Was this page helpful?
At Storables.com, we guarantee accurate and reliable information. Our content, validated by Expert Board Contributors, is crafted following stringent Editorial Policies. We're committed to providing you with well-researched, expert-backed insights for all your informational needs.


0 thoughts on “How To Install A Trampoline Mat”