Home>Gardening & Outdoor>Outdoor Recreation & Activities>How To Make A Collapsible Beer Pong Table
Outdoor Recreation & Activities
How To Make A Collapsible Beer Pong Table
Published: January 20, 2024
Learn how to create a collapsible beer pong table for outdoor recreation and activities. Follow our step-by-step guide for a fun DIY project.
(Many of the links in this article redirect to a specific reviewed product. Your purchase of these products through affiliate links helps to generate commission for Storables.com, at no extra cost. Learn more)
Introduction
Welcome to the world of outdoor entertainment and DIY projects! If you're a fan of tailgating, backyard barbecues, or simply enjoying the great outdoors with friends, then you're in the right place. In this comprehensive guide, we'll delve into the exciting realm of creating your very own collapsible beer pong table. This project is not only a testament to your craftsmanship but also a game-changer for any social gathering.
Imagine the convenience of being able to transport and set up a sturdy beer pong table wherever your adventures take you. Whether it's a camping trip, a beach day, or a neighborhood block party, this collapsible beer pong table will be your go-to accessory for endless fun and camaraderie.
By following the detailed steps and tips in this guide, you'll be able to construct a high-quality, foldable beer pong table that's not only functional but also customizable to your preferences. From selecting the right materials and tools to adding personalized features, this project allows you to unleash your creativity while honing your DIY skills.
So, grab your tools, prepare to get your hands dirty, and let's embark on this exciting journey of crafting a collapsible beer pong table that will undoubtedly elevate your outdoor social gatherings to a whole new level!
Key Takeaways:
- Crafting a collapsible beer pong table is a fun DIY project that combines woodworking skills with outdoor entertainment. The table’s portability and customization options make it a game-changer for social gatherings.
- Adding optional features like custom graphics and LED lighting can personalize the beer pong table, enhancing its functionality and visual appeal. The finishing touches, such as wood finish and quality checks, ensure durability and quality craftsmanship.
Read more: How To Make A Beer Pong Table
Materials and Tools
Before diving into the construction process, it’s essential to gather all the necessary materials and tools. Here’s a comprehensive list to ensure you’re well-prepared for this DIY endeavor:
Materials:
- 3/4-inch plywood sheets
- 2×4 lumber (for the frame)
- Wood glue
- Wood screws
- Hinges
- Wood putty
- Sandpaper
- Wood finish or paint
- Optional: Vinyl decal or graphic for customization
Tools:
- Circular saw or table saw
- Power drill with screwdriver bits
- Clamps
- Measuring tape
- Pencil or marker for marking cuts
- Sandpaper or electric sander
- Paintbrushes or paint sprayer
These materials and tools will be the building blocks of your collapsible beer pong table. It’s crucial to ensure that you have everything on hand before you begin, as it will streamline the construction process and minimize interruptions.
Now that you’re equipped with the necessary items, it’s time to roll up your sleeves and move on to the exciting phase of bringing your beer pong table to life!
Step 1: Cutting the Wood
With your materials and tools at the ready, it’s time to kick off the construction process by cutting the wood to the required dimensions. The plywood sheets will form the tabletop, while the 2×4 lumber will be used to construct the frame.
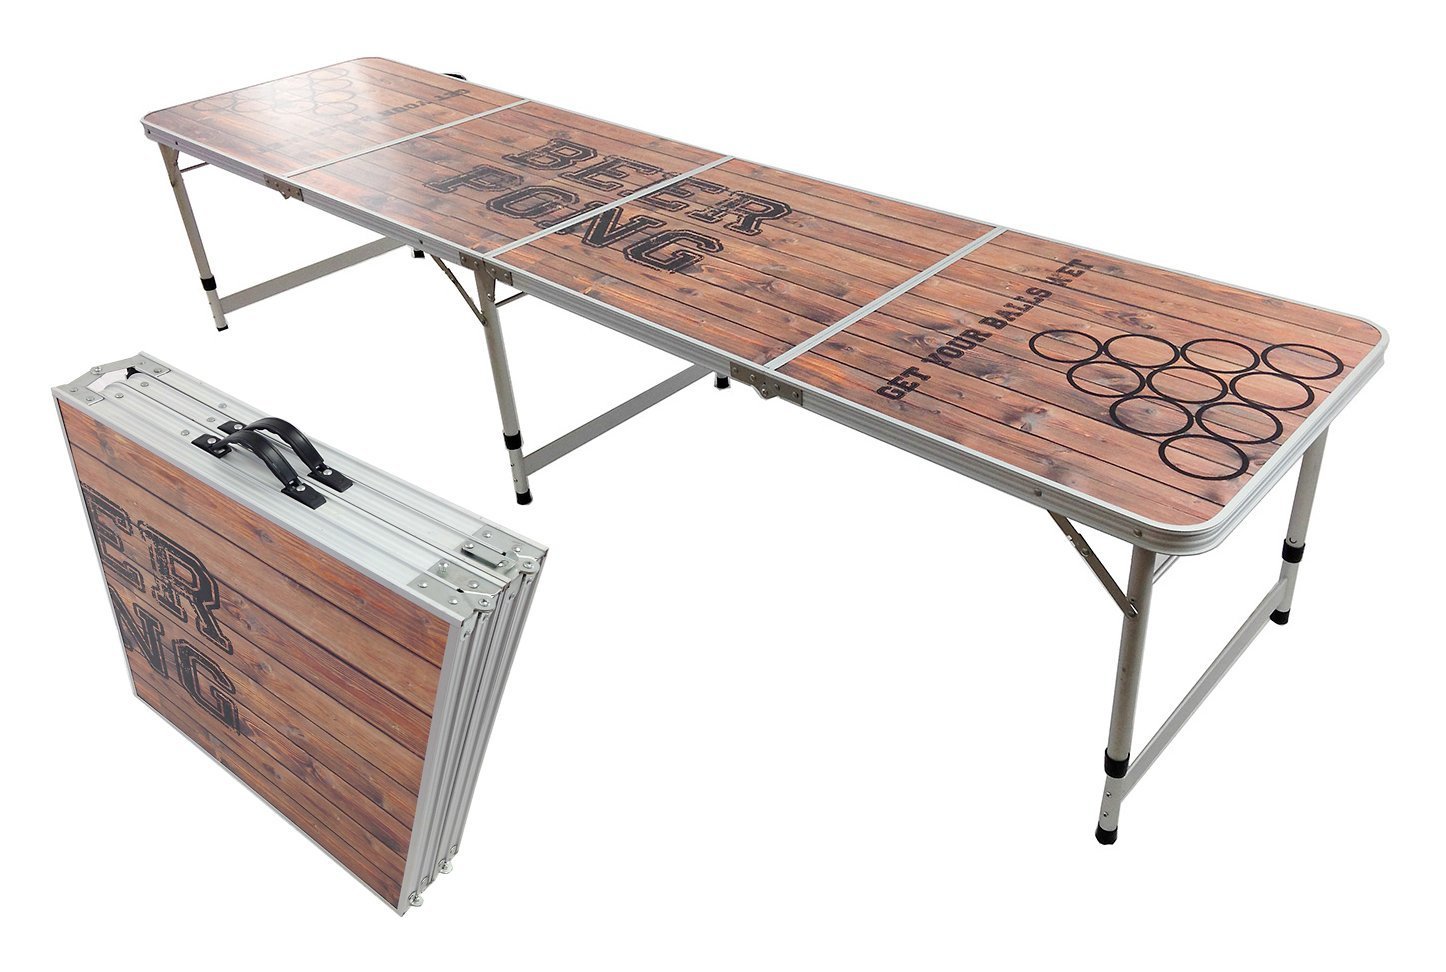
Begin by measuring and marking the plywood for the tabletop. The standard beer pong table dimensions are 8 feet in length and 2 feet in width. Use a circular saw or table saw to carefully cut the plywood to these measurements. If you prefer a smaller or larger table, adjust the dimensions accordingly.
Next, it’s time to cut the 2×4 lumber to create the frame that will provide stability and support to the tabletop. Cut the lumber into four pieces for the table’s length and three pieces for the width. These pieces will be assembled to form a rectangular frame that matches the dimensions of the tabletop.
Precision is key during this step, so take your time with the measurements and cuts to ensure that the pieces fit together seamlessly. Once all the wood is cut to size, you’re ready to move on to the next phase of assembling the frame.
Remember, safety should always be a top priority when using power tools. Be sure to wear appropriate safety gear, such as goggles and gloves, and work in a well-ventilated area. With the wood cut to perfection, you’re now one step closer to bringing your collapsible beer pong table to fruition!
Read more: How To Make A Light-Up Beer Pong Table
Step 2: Assembling the Frame
With the wood pieces cut to the required dimensions, it’s time to assemble the frame of your collapsible beer pong table. The frame serves as the foundation, providing stability and structure to the tabletop.
Begin by laying out the cut 2×4 lumber pieces to form the rectangular frame. The longer pieces should be positioned parallel to each other, while the shorter pieces will be placed at the ends to complete the perimeter. Use clamps to hold the pieces together securely during assembly.
Once the pieces are aligned, apply wood glue along the edges where the pieces will join. This will enhance the strength of the frame by creating a solid bond between the wood pieces. After applying the wood glue, use wood screws to secure the joints, ensuring that the frame is rigid and stable.
It’s important to double-check the squareness of the frame by measuring the diagonals. If the measurements are equal, the frame is perfectly square. Making any necessary adjustments at this stage will ensure that the tabletop sits flawlessly on the frame once it’s attached.
With the frame assembled and squared, allow the wood glue to dry completely before proceeding to the next step. This will ensure that the frame is solid and ready to support the tabletop as you continue building your collapsible beer pong table.
As you progress through this step, take pride in the craftsmanship and precision of your work. A sturdy and well-constructed frame is the cornerstone of a reliable and long-lasting beer pong table, setting the stage for the exciting steps that lie ahead.
Step 3: Attaching the Hinges
As you venture further into the construction of your collapsible beer pong table, the next crucial step involves attaching the hinges. These hinges will enable the tabletop to fold, allowing for convenient storage and transportation.
Begin by positioning the frame upside down to prepare for attaching the hinges. Place the hinges along the length of the frame, ensuring equal spacing between each hinge. The number of hinges required will depend on the size of your table, but a typical recommendation is to use three evenly spaced hinges for optimal support.
Once the hinge placement is determined, mark the locations for the screw holes on both the frame and the tabletop. Pre-drill pilot holes to prevent the wood from splitting when the screws are inserted. With the pilot holes in place, secure the hinges to the frame using wood screws, ensuring that they are flush and firmly attached.
After securing the hinges to the frame, it’s time to attach the corresponding halves of the hinges to the underside of the tabletop. Align the hinges with the pre-marked locations and secure them in place using wood screws. This step is crucial in ensuring that the tabletop folds and unfolds smoothly without any resistance.
Once the hinges are securely fastened to both the frame and the tabletop, test the folding mechanism to ensure that it operates seamlessly. The tabletop should fold and unfold with ease, allowing for effortless setup and storage of your collapsible beer pong table.
With the hinges in place, your beer pong table is beginning to take shape, offering the versatility and convenience of collapsibility. This transformative feature will undoubtedly elevate the functionality of your table, making it a standout addition to your outdoor gatherings and adventures.
Step 4: Adding the Tabletop
With the frame and folding mechanism in place, it’s time to add the tabletop to your collapsible beer pong table. The tabletop serves as the playing surface, providing a smooth and sturdy area for the beer pong action to unfold.
Position the tabletop over the assembled frame, ensuring that it aligns perfectly with the edges of the frame. With the help of a partner or clamps, carefully flip the tabletop and lower it onto the frame, allowing the hinges to connect the two components seamlessly.
Once the tabletop is in position, secure it to the frame using wood screws. Drive the screws through the tabletop and into the frame, ensuring a strong and stable connection. Be mindful of evenly spacing the screws along the perimeter to maintain uniform support across the entire tabletop.
After attaching the tabletop, inspect the entire assembly to confirm that the tabletop sits flush and level with the frame. This step is crucial in ensuring a consistent and professional finish that enhances the overall functionality and aesthetic appeal of your beer pong table.
As the tabletop becomes an integral part of your collapsible beer pong table, take a moment to appreciate the progress you’ve made. The addition of the tabletop brings your creation one step closer to being a centerpiece of entertainment and enjoyment during your outdoor escapades.
When making a collapsible beer pong table, use lightweight and durable materials like plywood and aluminum. Consider using hinges and latches for easy folding and unfolding.
Step 5: Adding the Cup Holes
Creating the cup holes on the tabletop is a pivotal step in perfecting your collapsible beer pong table. These cup holes not only serve as targets during the game but also add a professional and polished touch to the overall design.
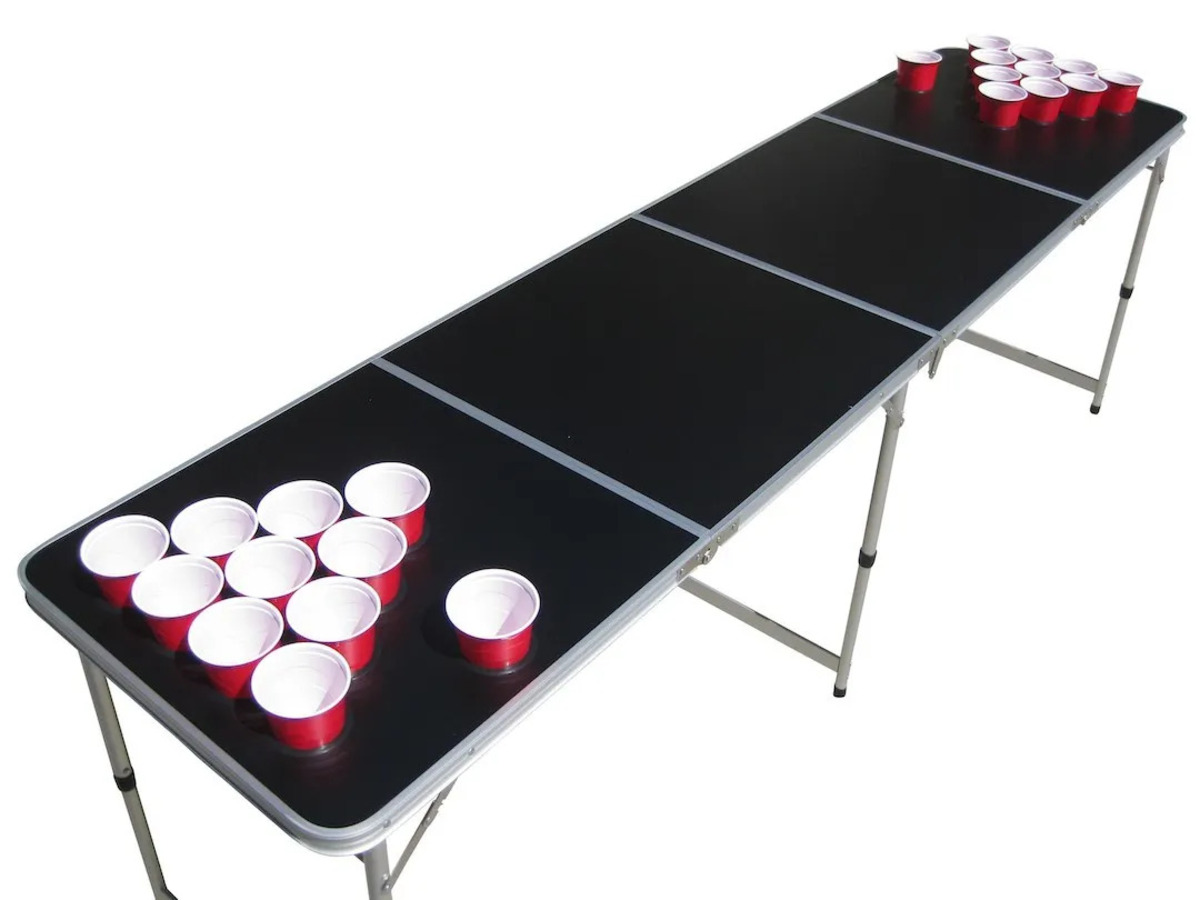
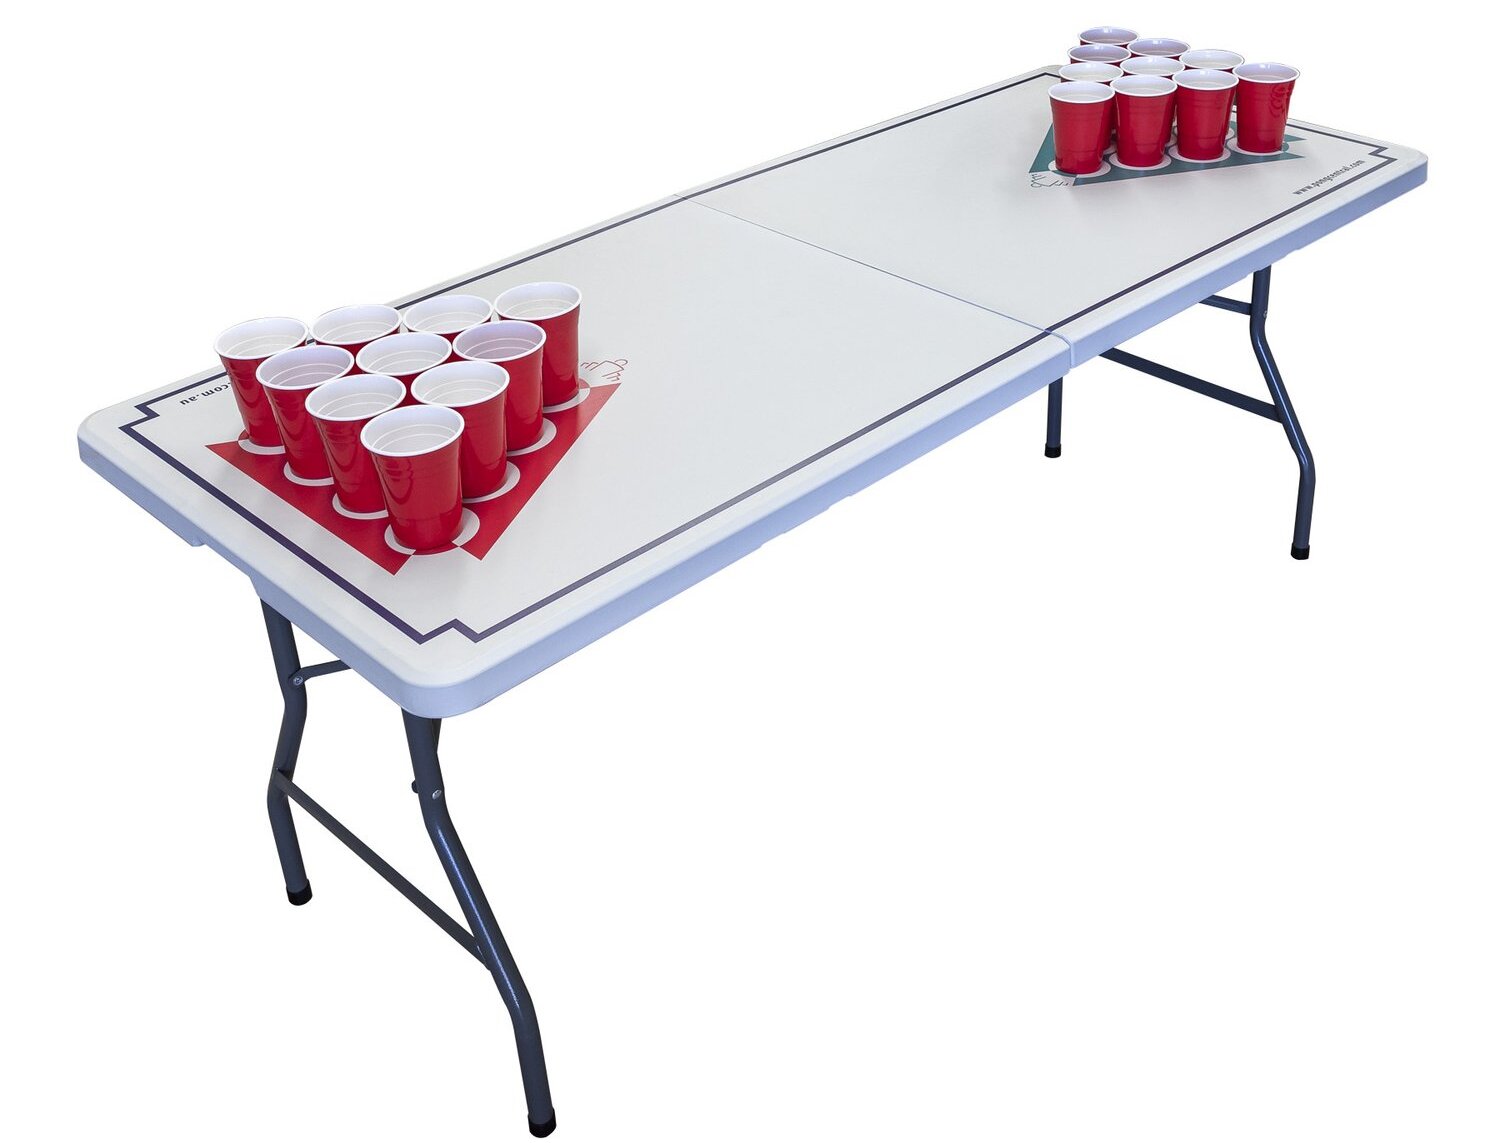
Begin by measuring and marking the positions for the cup holes on the tabletop. The standard beer pong cup layout consists of ten cups arranged in a pyramid formation at each end of the table. Use precise measurements to ensure that the cup holes are evenly spaced and aligned for a symmetrical and balanced appearance.
Once the positions are marked, use a hole saw or spade bit to carefully drill the cup holes into the tabletop. The diameter of the holes should be just large enough to accommodate the base of a standard 16-ounce plastic cup, allowing for a secure fit during gameplay.
After drilling the cup holes, use sandpaper to smooth the edges of each hole, ensuring a clean and professional finish. This step is essential for creating a seamless playing surface and preventing any rough edges that could interfere with the movement of the cups during the game.
As you add the cup holes to your beer pong table, envision the countless memorable moments and friendly competitions that will unfold around this meticulously crafted playing surface. The attention to detail in creating the cup holes underscores your commitment to constructing a beer pong table that embodies both functionality and visual appeal.
Read more: How Large Is A Ping Pong Table
Step 6: Optional: Adding Features
As you near the completion of your collapsible beer pong table, consider the opportunity to personalize and enhance its features to align with your preferences and style. While the core structure of the table is in place, adding optional features can elevate its functionality and visual appeal.
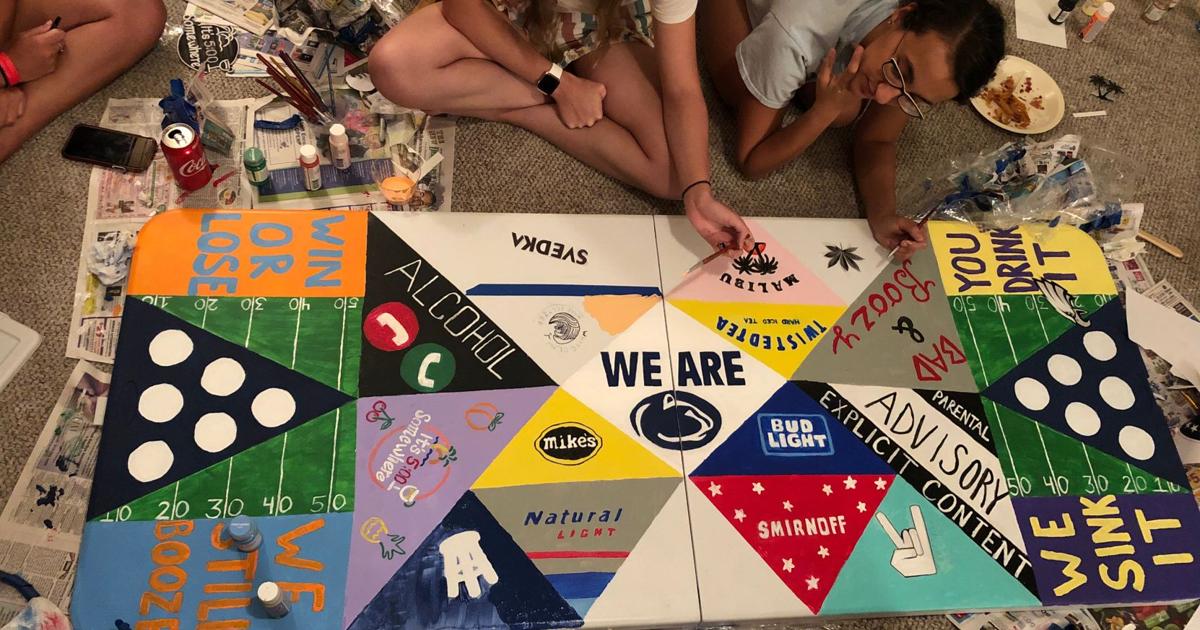
Custom Graphics: Consider incorporating custom graphics or decals on the tabletop to infuse personality and character into your beer pong table. Whether it’s your favorite sports team’s logo, a vibrant pattern, or personalized artwork, custom graphics can transform the tabletop into a unique and eye-catching focal point.
LED Lighting: For evening gatherings or indoor settings, integrating LED lighting along the edges of the tabletop can create a captivating ambiance. The soft glow of the lights not only enhances the table’s visibility but also adds an element of sophistication to the gaming experience.
Integrated Bottle Opener: Adding a built-in bottle opener to the side of the table provides added convenience during social gatherings. It ensures that refreshments are readily accessible, further enhancing the functionality of the beer pong table as a central hub for entertainment.
Folding Legs with Locking Mechanism: If portability is a top priority, consider incorporating folding legs with a secure locking mechanism. This feature enables the table to be easily set up and folded away, making it a versatile and space-efficient addition to your outdoor and recreational activities.
While these optional features can enrich the functionality and aesthetics of your beer pong table, feel free to explore other creative enhancements that resonate with your vision. The ability to tailor the table to your preferences underscores the versatility and adaptability of this DIY project.
By embracing the opportunity to add optional features, you’re not only customizing the beer pong table to suit your needs but also infusing it with elements that reflect your individuality and style. These features serve as the finishing touches that elevate your creation from a standard beer pong table to a personalized and exceptional centerpiece of entertainment.
Step 7: Finishing Touches
As you approach the culmination of your collapsible beer pong table project, the final step involves adding finishing touches that will enhance its durability, visual appeal, and overall longevity. These touches will elevate your creation from a functional game surface to a standout piece that embodies craftsmanship and attention to detail.
Wood Finish or Paint: Applying a protective wood finish or paint not only adds a layer of protection to the table but also enhances its aesthetic appeal. Choose a finish that complements your outdoor setting or reflects your personal style, whether it’s a natural wood stain for a rustic look or a vibrant color that makes a bold statement.
Wood Putty and Sanding: Fill any visible screw holes or imperfections with wood putty to achieve a smooth and seamless surface. Once the putty dries, sand the tabletop and frame to ensure a uniform and blemish-free finish. This meticulous attention to detail will result in a professional and polished appearance.
Sealing the Wood: If your beer pong table will be exposed to outdoor elements, consider sealing the wood with a weather-resistant sealant. This additional layer of protection will safeguard the table from moisture, UV rays, and other environmental factors, prolonging its lifespan and maintaining its structural integrity.
Quality Assurance Check: Before deeming the project complete, conduct a thorough quality assurance check. Ensure that all screws are tightened, hinges operate smoothly, and the table stands level and stable. Address any minor adjustments or touch-ups to guarantee that your beer pong table is in prime condition for countless hours of enjoyment.
By attending to these finishing touches, you’re not only enhancing the functionality and visual appeal of your collapsible beer pong table but also reinforcing its resilience and longevity. These final steps are a testament to your dedication to creating a high-quality and enduring piece that will be cherished for years to come.
Conclusion
Congratulations on successfully crafting your very own collapsible beer pong table! This DIY endeavor has not only honed your woodworking skills but has also equipped you with a versatile and portable game surface that will undoubtedly be the focal point of countless social gatherings and outdoor adventures.
As you reflect on the journey from raw materials to a fully functional beer pong table, consider the pride and satisfaction that come with creating a piece that embodies both craftsmanship and entertainment. Your collapsible beer pong table represents more than just a gaming surface; it symbolizes the spirit of camaraderie, laughter, and shared experiences that will unfold around it.
With its foldable design, your beer pong table is ready to accompany you on a myriad of escapades, from tailgating parties and beach outings to camping trips and backyard barbecues. Its adaptability and convenience make it an indispensable addition to your outdoor recreation arsenal.
Embrace the memories that will be created as friends and family gather around the table, engaging in friendly competition and forming lasting bonds. The collaborative spirit that fueled the construction of this table will undoubtedly extend to the joy and laughter that emanate from the spirited games played upon it.
As you bask in the sense of accomplishment that comes with completing this project, remember that the journey doesn’t end here. Your collapsible beer pong table is a canvas for countless unforgettable moments, representing the heart of social interaction and lighthearted fun.
So, raise a toast to your craftsmanship and creativity, and revel in the knowledge that your collapsible beer pong table will be a cherished companion on your outdoor escapades, fostering laughter, camaraderie, and cherished memories for years to come.
Frequently Asked Questions about How To Make A Collapsible Beer Pong Table
Was this page helpful?
At Storables.com, we guarantee accurate and reliable information. Our content, validated by Expert Board Contributors, is crafted following stringent Editorial Policies. We're committed to providing you with well-researched, expert-backed insights for all your informational needs.
0 thoughts on “How To Make A Collapsible Beer Pong Table”