Home>Gardening & Outdoor>Outdoor Structures>How To Build An 8X10 Shed
Outdoor Structures
How To Build An 8X10 Shed
Modified: October 18, 2024
Learn how to build an 8x10 shed and create the perfect outdoor structure for your home. Get step-by-step guidance and tips for constructing durable and functional sheds.
(Many of the links in this article redirect to a specific reviewed product. Your purchase of these products through affiliate links helps to generate commission for Storables.com, at no extra cost. Learn more)
Introduction
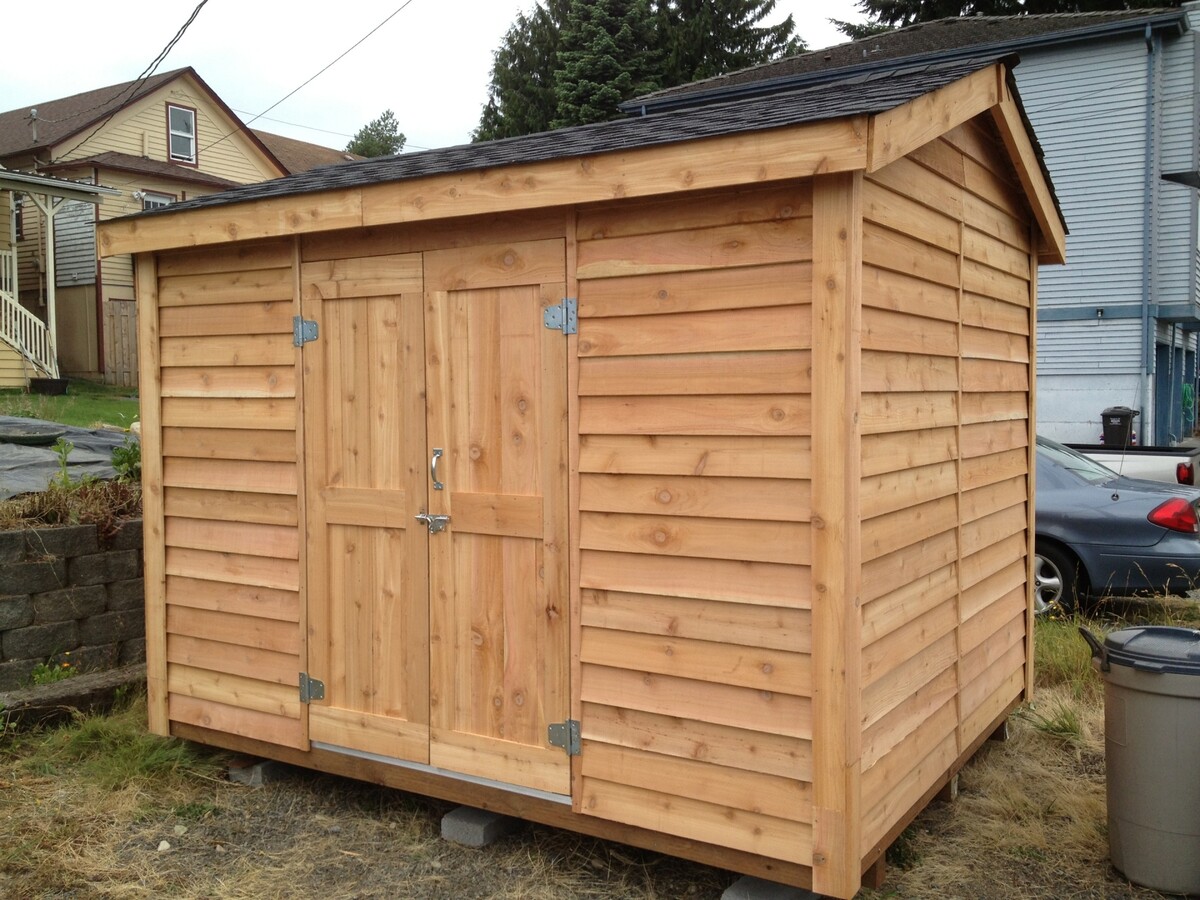
Welcome to the exciting world of DIY shed building! Whether you're a seasoned craftsman or a novice do-it-yourself enthusiast, constructing your own 8×10 shed can be a fulfilling and rewarding project. Not only does it provide practical storage space for your outdoor tools, equipment, and supplies, but it also adds a charming and functional element to your property.
In this comprehensive guide, we'll walk you through the step-by-step process of building an 8×10 shed from the ground up. From planning and preparation to the finishing touches, you'll gain valuable insights and practical tips to help you tackle this project with confidence.
Building a shed is not just about assembling wooden planks and driving nails; it's about creating a space that reflects your unique style and meets your specific needs. Whether you envision a rustic retreat nestled in your backyard or a sleek storage unit that complements your home's architecture, this guide will empower you to bring your vision to life.
So, roll up your sleeves, gather your tools, and get ready to embark on a journey of creativity, craftsmanship, and accomplishment. By the end of this guide, you'll have the knowledge and inspiration to build a sturdy and stylish 8×10 shed that will stand the test of time. Let's dive in and unleash your inner builder!
Key Takeaways:
- Building an 8×10 shed is a rewarding DIY project that requires careful planning, precise construction, and thoughtful finishing touches. It adds practical storage space and enhances your outdoor environment.
- From choosing the right location to adding doors and windows, each step in building a shed contributes to its functionality and visual appeal. The process empowers you to create a versatile and enduring outdoor structure.
Read more: How To Build An 8×10 Shed Floor
Planning and Preparation
Before diving into the construction of your 8×10 shed, careful planning and preparation are essential to ensure a smooth and successful building process. Here are the key steps to consider:
- Design Considerations: Begin by envisioning the purpose of your shed. Will it primarily serve as a storage space, a workshop, or a combination of both? Consider the items you plan to store or the activities you intend to pursue within the shed. This vision will guide the design and layout of the structure.
- Permit and Zoning: Check with your local building department to determine if you need a permit for the construction of your shed. Additionally, familiarize yourself with any zoning regulations or homeowner’s association guidelines that may impact the size, location, or appearance of the shed.
- Site Preparation: Choose a level area in your yard for the shed’s location. Clear any debris, rocks, or vegetation from the site, and ensure that it provides easy access for construction and future use.
- Budget and Materials: Create a detailed budget that accounts for all necessary materials, tools, and potential labor costs. Research and procure high-quality lumber, roofing materials, fasteners, and any additional components required for the construction.
- Tools and Equipment: Take inventory of the tools needed for the project, including a circular saw, hammer, level, tape measure, drill, and safety gear. Ensure that all tools are in good working condition and that you have access to a reliable power source.
- Timeline and Assistance: Establish a realistic timeline for the construction process, factoring in any potential setbacks or delays. Consider enlisting the help of family members or friends to assist with certain stages of the build, especially when lifting heavy materials or assembling large components.
By meticulously planning and preparing for the construction of your 8×10 shed, you’ll set the stage for a smooth and efficient building experience. With a clear vision, a well-equipped toolbox, and a solid plan in place, you’re ready to take the next steps toward bringing your shed to life.
Choosing the Right Location
The location of your 8×10 shed is a critical decision that can significantly impact its functionality, longevity, and visual appeal. Consider the following factors when selecting the ideal placement for your shed:
- Accessibility: Choose a location that provides convenient access to your shed. This will make it easier to retrieve and store items, as well as perform maintenance tasks in the future. Additionally, ensure that the site allows for the transportation of construction materials and equipment.
- Ground Stability: Opt for a level and well-drained area for your shed’s foundation. Avoid low-lying spots that are prone to flooding or areas with poor soil drainage. A stable and dry foundation will help prevent moisture-related issues and ensure the longevity of your shed.
- Sunlight and Ventilation: Position the shed in an area that receives ample natural light and ventilation. Adequate sunlight can help prevent mold and mildew growth, while proper ventilation can regulate the shed’s internal temperature and air quality.
- Property Boundaries and Regulations: Be mindful of property lines and local regulations when determining the shed’s location. Ensure that the chosen site complies with setback requirements and does not encroach on neighboring properties. Additionally, consider any aesthetic guidelines that may impact the shed’s visibility from different vantage points.
- Landscaping and Aesthetics: Integrate the shed into your property’s landscaping and overall aesthetics. Consider how the shed will complement the existing structures, trees, and outdoor features. You may choose to incorporate landscaping elements, such as shrubs or flower beds, around the shed to enhance its visual appeal.
- Future Land Use: Anticipate future changes to your property and how they might affect the shed’s location. Consider potential landscaping projects, additions to your home, or other developments that could impact the shed’s surroundings. Choosing a location with foresight can help ensure the shed remains functional and visually harmonious in the long term.
By carefully evaluating these factors and selecting a location that aligns with your practical and aesthetic preferences, you’ll lay the groundwork for a well-positioned and harmonious 8×10 shed. The chosen location will not only influence the shed’s performance and durability but also contribute to the overall visual appeal of your outdoor space.
Gathering Materials and Tools
As you prepare to embark on the construction of your 8×10 shed, assembling the necessary materials and tools is a crucial initial step. Here’s a comprehensive list of the essential items you’ll need to acquire:
Materials:
- Lumber: Procure high-quality pressure-treated lumber for the shed’s frame, floor joists, and exterior cladding. Select lumber that is suitable for outdoor use and resistant to decay, rot, and insect damage.
- Roofing Materials: Choose durable and weather-resistant roofing materials, such as asphalt shingles, metal roofing panels, or corrugated fiberglass sheets. Ensure that the selected roofing materials provide adequate protection from the elements and complement the shed’s design.
- Fasteners: Stock up on galvanized nails, screws, and other fasteners that are designed for outdoor applications. Consider the specific fastening requirements for different components of the shed, including framing, sheathing, and trim work.
- Foundation Components: Depending on your chosen foundation type, gather concrete blocks, gravel, or precast piers to support the shed’s base. Ensure that the foundation materials are suitable for the soil conditions and provide a stable footing for the structure.
- Exterior Siding: Select siding materials, such as plywood panels, T1-11 siding, or vinyl siding, to enclose the shed’s exterior walls. Choose siding that complements your property’s architectural style and withstands the local climate.
- Insulation and Sheathing: If you plan to insulate the shed for year-round use, acquire insulation batts or rigid foam insulation, along with sheathing materials to enclose the insulated spaces.
Read more: How To Store 8X10 Photos
Tools:
- Power Tools: Ensure that you have access to essential power tools, including a circular saw, cordless drill, and reciprocating saw, for cutting lumber, drilling holes, and making precise adjustments during the construction process.
- Hand Tools: Stock your toolbox with a hammer, tape measure, level, framing square, utility knife, and pry bar for various assembly and finishing tasks. Having a comprehensive set of hand tools will streamline the construction workflow.
- Safety Gear: Prioritize safety by acquiring personal protective equipment, such as safety glasses, work gloves, hearing protection, and a dust mask. These items are essential for safeguarding yourself during the construction process.
- Ladders and Scaffolding: Depending on the shed’s height and design, ensure that you have sturdy ladders or scaffolding to access elevated areas safely. This will facilitate the installation of roofing materials and high-reaching components.
- Measuring and Marking Tools: Include a chalk line, carpenter’s pencil, and measuring tape in your toolkit to accurately measure, mark, and layout the shed’s components and openings.
By carefully sourcing the required materials and ensuring that your toolbox is equipped with the essential tools, you’ll be well-prepared to commence the construction of your 8×10 shed. With the right materials and tools at your disposal, you’ll set the stage for a productive and efficient building experience.
Building the Foundation
The foundation serves as the sturdy base upon which your 8×10 shed will rest, providing stability and protection against ground moisture. Depending on your site’s characteristics and personal preferences, you can choose from several foundation options:
Concrete Slab Foundation:
A concrete slab foundation offers a durable and low-maintenance base for your shed. To construct a concrete slab, the following steps are typically involved:
- Site Preparation: Clear the designated area and excavate the soil to the required depth, ensuring a level surface for the concrete slab.
- Formwork Installation: Construct formwork using lumber and stakes to define the perimeter of the slab. Ensure that the formwork is square and level to achieve a uniform slab thickness.
- Reinforcement and Pouring: Install a grid of rebar or wire mesh within the formwork to reinforce the concrete. Once the reinforcement is in place, pour and level the concrete to create a smooth and even surface.
- Curing and Finishing: Allow the concrete to cure properly, following the manufacturer’s recommendations. Once the concrete has cured, apply a sealant or finishing treatment to enhance its durability and resistance to moisture.
Wooden Skid or Concrete Block Foundation:
If you prefer a less permanent foundation option, you can utilize pressure-treated wooden skids or concrete blocks to support the shed’s floor joists. Here’s a basic outline of the process:
- Site Preparation: Clear and level the area where the skids or blocks will be positioned, ensuring that they are adequately spaced to support the shed’s floor joists.
- Skid or Block Placement: Position the pressure-treated skids or concrete blocks at the designated locations, ensuring that they are level and stable. Use a spirit level to verify the evenness of the supports.
- Floor Joist Installation: Once the skids or blocks are in place, install the shed’s floor joists on top of the supports, providing a secure framework for the shed’s flooring.
Regardless of the foundation type you choose, it’s crucial to ensure that the base is level, stable, and adequately protected against moisture. A well-constructed foundation forms the backbone of your shed, contributing to its structural integrity and long-term performance.
By meticulously executing the foundation construction process, you’ll establish a solid and reliable base for your 8×10 shed, setting the stage for the subsequent stages of the build.
Read more: How To Build A 10×10 Shed
Constructing the Frame
The frame of your 8×10 shed forms the structural skeleton that supports the walls, roof, and overall integrity of the structure. Constructing a sturdy and well-aligned frame is essential for the shed’s durability and stability. Here’s a step-by-step overview of the frame construction process:
1. Laying the Groundwork:
Begin by laying out the treated lumber components for the shed’s floor frame, ensuring that they are square and level. Secure the floor joists to the foundation, providing a robust base for the shed’s flooring materials.
2. Wall Framing:
Erect the wall frames by assembling the vertical studs, top and bottom plates, and headers. Ensure that the wall frames are plumb and aligned, using temporary braces to hold them in position until they are secured to the floor frame and each other.
3. Adding Door and Window Openings:
If your shed design incorporates doors and windows, frame the respective openings within the wall frames, ensuring that they are precisely sized and positioned. This step allows for the seamless installation of doors and windows during the later stages of the construction process.
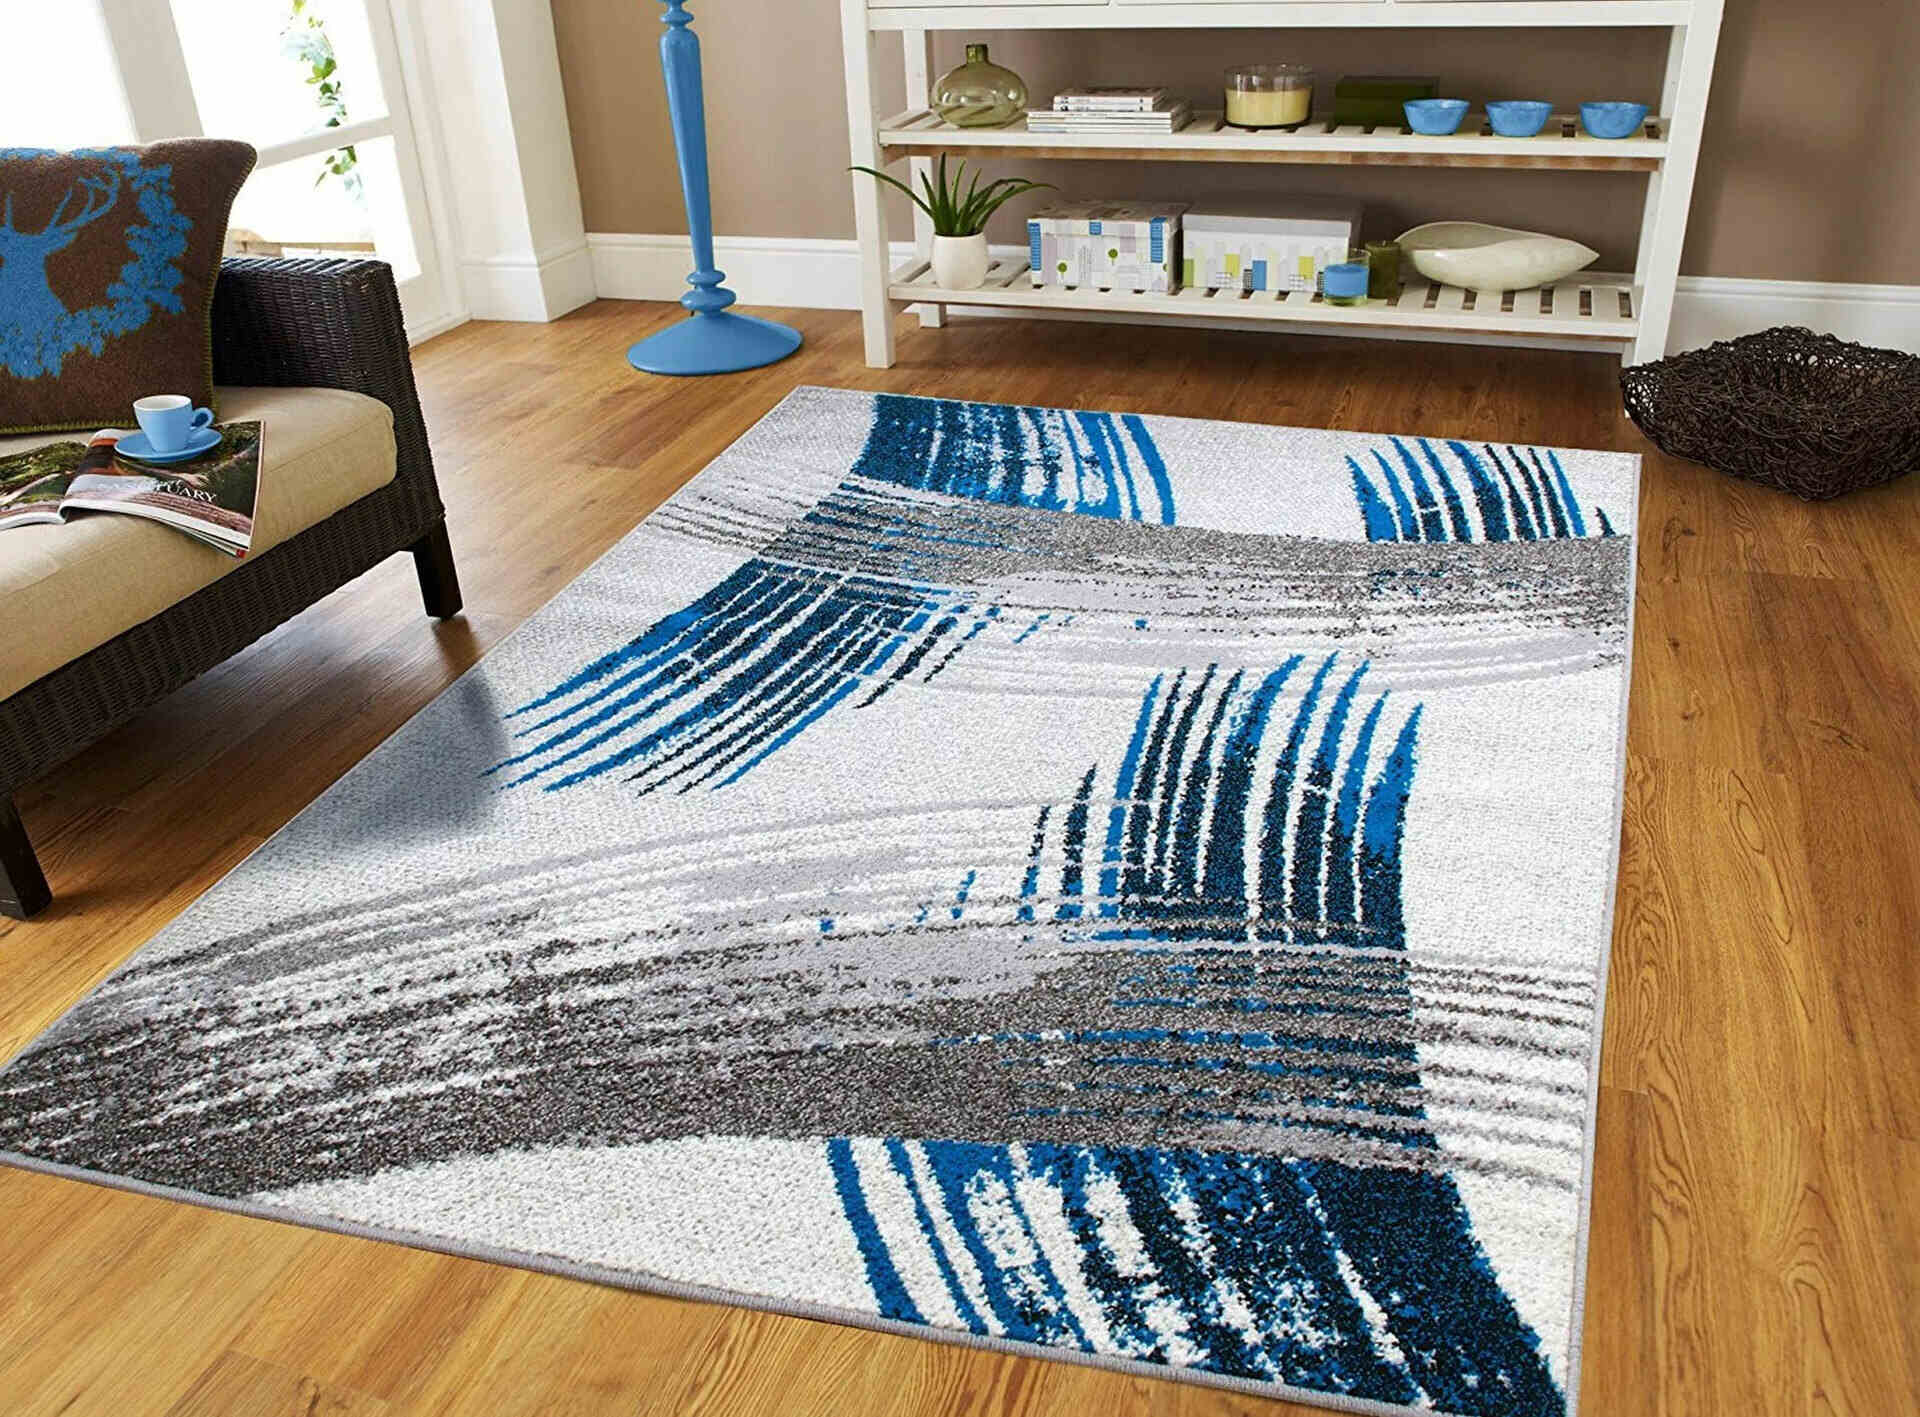
Read also: 8 Unbelievable Outdoor Rugs 8X10 for 2025
4. Roof Truss Assembly:
Construct or procure pre-built roof trusses that are designed to span the width of the shed. Position the trusses on top of the wall frames, ensuring that they are evenly spaced and aligned. Secure the trusses to the walls, providing the framework for the shed’s roof structure.
5. Bracing and Reinforcement:
Install diagonal bracing within the wall frames and roof trusses to enhance the structural stability of the shed. Additionally, incorporate hurricane ties or metal connectors to reinforce the connections between the frame components, safeguarding the shed against strong winds and external forces.
Throughout the frame construction process, meticulous attention to detail and precision is crucial. Ensuring that the frame is accurately assembled and securely fastened will contribute to the overall strength and longevity of your 8×10 shed.
By methodically executing the frame construction steps, you’ll lay the foundation for the shed’s walls and roof, bringing the structure one step closer to completion.
Adding Siding and Roofing
Once the frame of your 8×10 shed is in place, the addition of siding and roofing materials plays a pivotal role in enhancing the structure’s durability, weather resistance, and visual appeal. Here’s a comprehensive overview of the process of adding siding and roofing to your shed:
Siding Installation:
Choose the appropriate siding material based on your aesthetic preferences, climate considerations, and maintenance requirements. Common siding options include T1-11 plywood panels, vinyl siding, or composite cladding. Here are the key steps for siding installation:
- Preparation: Ensure that the exterior surface of the shed’s frame is clean, dry, and free from protruding nails or debris. Apply a weather-resistant barrier, such as building wrap or house wrap, to provide an additional layer of protection against moisture.
- Siding Application: Begin installing the siding panels from the bottom of the shed, working your way upwards. Use appropriate fasteners, such as galvanized nails or screws, to secure the siding to the frame, ensuring that the panels are aligned and properly spaced.
- Trim and Detailing: Complete the siding installation by adding trim pieces, corner moldings, and other decorative elements to achieve a polished and professional appearance. Pay attention to the details, ensuring that the siding is securely fastened and sealed against the elements.
Read more: How To Build A 10X12 Shed
Roofing Installation:
Select a roofing material that offers reliable protection against rain, snow, and UV exposure. Common roofing options for sheds include asphalt shingles, metal roofing panels, or corrugated fiberglass sheets. Here’s an overview of the roofing installation process:
- Underlayment Application: Begin by applying a suitable roofing underlayment, such as roofing felt or synthetic underlayment, to the roof deck. This underlayment serves as a secondary barrier against moisture and enhances the roof’s weather resistance.
- Shingle or Panel Installation: Install the selected roofing material according to the manufacturer’s guidelines, ensuring proper overlap, fastening, and alignment. Whether you’re using shingles, metal panels, or fiberglass sheets, precision and attention to detail are essential for a watertight roof.
- Flashing and Edge Detailing: Complete the roofing installation by adding flashing around roof penetrations, such as vents and chimneys, and detailing the roof edges with drip edge and fascia trim. These components contribute to the roof’s longevity and weatherproofing.
By diligently executing the siding and roofing installation process, you’ll enhance the structural integrity and weather resistance of your 8×10 shed while adding a touch of visual sophistication. These exterior elements not only protect the shed from the elements but also contribute to its overall aesthetic appeal.
With the siding and roofing in place, your shed will begin to take on its final form, moving one step closer to becoming a functional and visually appealing outdoor structure.
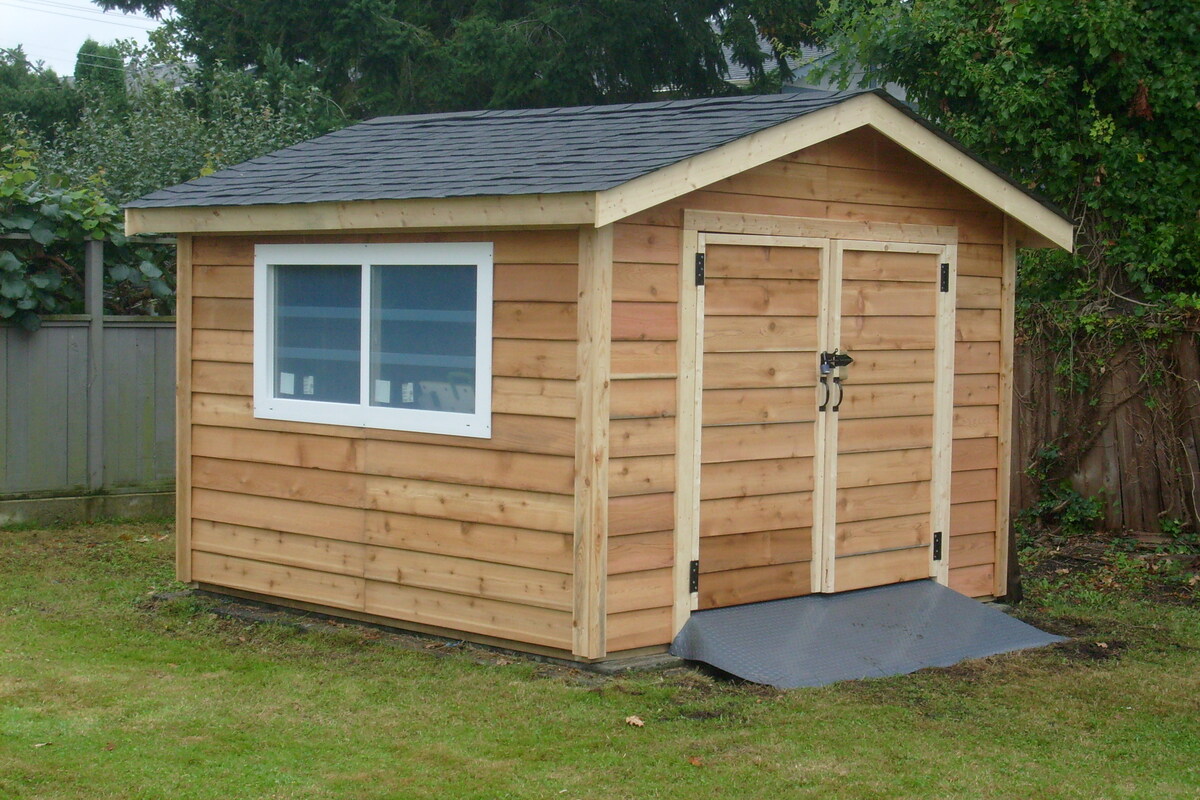
Installing Doors and Windows
As your 8×10 shed nears completion, the installation of doors and windows adds functionality, natural light, and ventilation to the structure. Here’s a detailed guide on the process of installing doors and windows in your shed:
Door Installation:
Choose a sturdy and weather-resistant door that suits the shed’s design and usage requirements. Common options include pre-hung exterior doors or custom-built shed doors. Here are the essential steps for installing a shed door:
- Frame Preparation: Ensure that the door frame is plumb, level, and square within the opening. Make any necessary adjustments to the frame to achieve a precise fit for the door.
- Hinge and Hardware Installation: Attach the door hinges to the frame and the door, ensuring that they are properly aligned and securely fastened. Install the door handle, latch, and any additional hardware according to the manufacturer’s instructions.
- Weathertight Sealing: Apply weatherstripping around the door frame to create a tight seal against drafts and moisture infiltration. Test the door for smooth operation and adjust the hardware as needed to ensure proper functionality.
Window Installation:
Select windows that provide adequate natural light and ventilation while complementing the shed’s design. Consider factors such as window size, style, and operability based on your preferences. Here’s an overview of the window installation process:
- Rough Opening Preparation: Ensure that the rough openings for the windows are accurately sized and squared within the wall frames. Install a sill pan or flashing to prevent water intrusion at the base of the window.
- Window Placement: Position the window within the opening, ensuring that it is centered and level. Secure the window in place using appropriate fasteners, such as screws or nails, and verify that it operates smoothly.
- Weathertight Sealing: Apply a bead of exterior-grade caulk around the perimeter of the window to create a watertight seal. Install interior trim or casing to finish the window opening and enhance its visual appeal.
By meticulously installing doors and windows, you’ll transform your 8×10 shed into a functional and inviting space that accommodates easy access and natural illumination. These elements not only enhance the shed’s usability but also contribute to its overall aesthetic charm.
With the doors and windows in place, your shed will be poised to serve as a versatile and welcoming outdoor structure, ready to fulfill a variety of storage, workshop, or recreational needs.
Read more: How To Build A 10×20 Shed
Finishing Touches
As the construction of your 8×10 shed nears completion, attention to detail and thoughtful finishing touches will elevate the overall functionality, aesthetics, and longevity of the structure. Here’s a comprehensive overview of the final steps and finishing touches to consider:
1. Interior and Exterior Treatments:
Apply a protective finish to the shed’s exterior surfaces, such as paint, stain, or weather-resistant sealant, to safeguard the wood from moisture, UV exposure, and natural wear. Consider colors and finishes that harmonize with your property’s aesthetics while providing durable protection against the elements.
For the shed’s interior, consider adding insulation if you plan to use the space year-round. Insulating the walls and ceiling will help regulate the interior temperature, making the shed more comfortable and energy-efficient. Additionally, install interior wall and ceiling coverings, such as plywood or drywall, to create a polished and clean appearance.
2. Flooring and Trim Work:
Complete the shed’s interior by installing a durable and visually appealing flooring material, such as treated plywood, vinyl plank flooring, or interlocking floor tiles. Ensure that the flooring is level, stable, and able to withstand foot traffic and the storage of heavy items.
Add trim details, such as baseboards, crown molding, and window casings, to refine the interior and exterior appearance of the shed. These finishing touches not only conceal seams and gaps but also add a touch of elegance to the structure.
3. Organization and Storage Solutions:
Integrate practical storage solutions, such as shelving, pegboards, and tool racks, to optimize the shed’s interior space. Customizing the storage layout based on your specific needs will enhance the shed’s functionality and help keep tools and equipment neatly organized.
Read more: How To Build An 8X12 Shed
4. Landscaping and Access Pathways:
Enhance the shed’s surroundings by incorporating landscaping elements, such as flower beds, shrubs, or decorative stones, around its perimeter. Create well-defined pathways and access points leading to the shed, ensuring ease of navigation and visual appeal within your outdoor space.
5. Security and Access Control:
Consider adding security features, such as sturdy locks, motion-activated lighting, and window bars, to protect the shed’s contents and enhance its security. Additionally, install a reliable access ramp or steps to facilitate easy entry and exit from the shed.
By meticulously attending to these finishing touches, you’ll transform your 8×10 shed into a well-appointed and functional outdoor structure that seamlessly integrates with your property and meets your specific needs.
With the completion of these final steps, your shed will stand as a testament to your craftsmanship and attention to detail, ready to serve as a versatile and enduring addition to your outdoor space.
Conclusion
Congratulations on successfully completing the construction of your 8×10 shed! From the initial planning stages to the meticulous finishing touches, you’ve embarked on a journey of creativity, craftsmanship, and accomplishment. As you stand back and admire the sturdy and stylish structure you’ve built, it’s important to reflect on the significance of this project and the value it adds to your property and lifestyle.
Building a shed is not just about assembling wood and fasteners; it’s about creating a space that reflects your vision, meets your practical needs, and enhances your outdoor environment. Your new shed is a versatile asset, providing storage for tools and equipment, a workshop for DIY projects, or a retreat for relaxation and creativity.
Through this endeavor, you’ve honed your skills as a builder, problem-solver, and visionary. You’ve navigated through challenges, made design decisions, and brought your vision to life with determination and ingenuity. The shed stands as a testament to your dedication and resourcefulness, embodying the spirit of self-reliance and creativity.
As you integrate the shed into your property, consider the ways in which it enhances your outdoor space. It adds a touch of charm and functionality, complementing your home and landscape while providing a dedicated space for your hobbies and activities. Whether it’s organizing gardening tools, pursuing DIY projects, or simply enjoying a quiet retreat, the shed offers a space of personal expression and utility.
Furthermore, the completion of this project signifies the fulfillment of a vision and the realization of a goal. Your shed stands as a tangible symbol of your ability to plan, execute, and accomplish a meaningful project. It’s a testament to your creativity and determination, reminding you of the satisfaction that comes from creating something with your own hands.
As you move forward, take pride in the shed you’ve built and the skills you’ve developed along the way. Embrace the opportunities and possibilities that this new space offers, and continue to infuse it with your personal touch and ingenuity. Whether it’s adding decorative touches, organizing the interior, or embarking on new projects within its walls, the shed is a canvas for your creativity and a reflection of your craftsmanship.
With the completion of this project, you’ve not only built a shed but also cultivated a sense of empowerment, creativity, and accomplishment. As you enjoy the fruits of your labor, may the shed stand as a reminder of your ability to turn vision into reality and your capacity to create meaningful and enduring spaces.
Frequently Asked Questions about How To Build An 8X10 Shed
Was this page helpful?
At Storables.com, we guarantee accurate and reliable information. Our content, validated by Expert Board Contributors, is crafted following stringent Editorial Policies. We're committed to providing you with well-researched, expert-backed insights for all your informational needs.


0 thoughts on “How To Build An 8X10 Shed”