Home>Gardening & Outdoor>Outdoor Structures>How To Build An 8×8 Shed
Outdoor Structures
How To Build An 8×8 Shed
Published: January 19, 2024
Learn how to build an 8x8 shed with our comprehensive guide. Find expert tips and advice for creating durable outdoor structures.
(Many of the links in this article redirect to a specific reviewed product. Your purchase of these products through affiliate links helps to generate commission for Storables.com, at no extra cost. Learn more)
Introduction
Welcome to the world of DIY shed building! Whether you're a seasoned DIY enthusiast or just starting to explore the joys of hands-on construction, building an 8×8 shed can be a rewarding and practical project. A well-built shed not only provides valuable storage space for your outdoor equipment, tools, and supplies but also adds aesthetic appeal to your property.
In this comprehensive guide, we'll walk you through the step-by-step process of constructing a sturdy 8×8 shed. From planning and preparation to the finishing touches, you'll learn the essential techniques and considerations to make your shed-building endeavor a success.
Building a shed is a fantastic way to unleash your creativity and craftsmanship while adding functional value to your outdoor space. Whether you envision a traditional wooden shed nestled in your backyard or a modern, stylish structure that complements your home's architecture, this guide will equip you with the knowledge and confidence to bring your vision to life.
So, roll up your sleeves, gather your tools, and get ready to embark on an exciting journey of building your very own 8×8 shed. With careful planning, attention to detail, and a sprinkle of DIY spirit, you'll soon have a beautiful and practical outdoor structure that you can proudly call your own. Let's dive into the planning and preparation phase to set the stage for a successful shed-building adventure!
Key Takeaways:
- Planning and preparation are crucial for building a sturdy 8×8 shed. From obtaining permits to choosing the right location and materials, careful planning sets the stage for a successful DIY project.
- Attention to detail and precision are essential when constructing the frame, installing walls and roof, and adding doors and windows. These steps bring your shed-building vision to life, creating a functional and visually appealing outdoor space.
Read more: How Build A Shed
Planning and Preparation
Before diving into the construction phase, meticulous planning and thorough preparation are crucial for ensuring a smooth and successful shed-building project. Here are the key steps to consider:
- Obtain Necessary Permits: Check with your local building department to determine if any permits are required for constructing a shed on your property. Compliance with local regulations is essential to avoid potential issues down the road.
- Choose an Ideal Location: Select a suitable spot for your shed, considering factors such as accessibility, drainage, and landscaping. Ensure that the location complies with any setback requirements and does not encroach on utility easements.
- Determine Shed Purpose: Define the intended use of the shed, whether it’s for storing gardening tools, housing outdoor equipment, or serving as a workshop. This will influence the design and layout of the interior space.
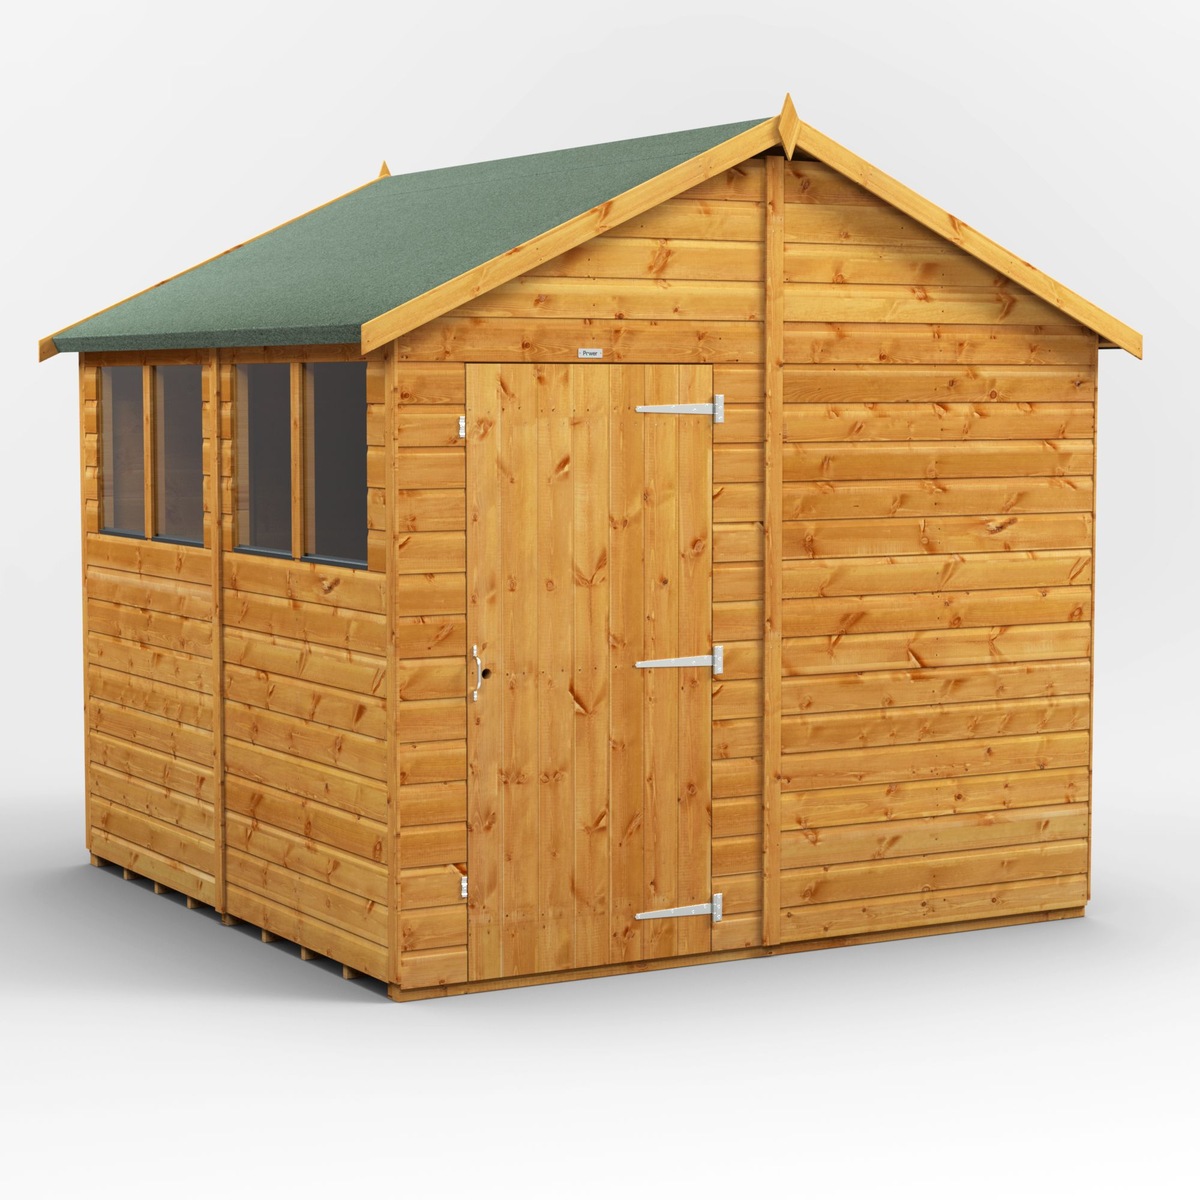
- Select Shed Design and Materials: Explore various shed designs and materials to find the style and construction method that aligns with your preferences and budget. Consider factors such as durability, maintenance requirements, and aesthetic appeal.
- Create a Detailed Plan: Develop a comprehensive plan for your 8×8 shed, including precise measurements, a materials list, and a construction timeline. This plan will serve as a roadmap throughout the building process.
- Prepare the Construction Site: Clear the designated area of any debris, vegetation, or obstacles. Level the ground and address any drainage concerns to create a stable and suitable foundation for the shed.
By investing time and effort in the planning and preparation phase, you’ll lay a solid foundation for the construction of your 8×8 shed. With a clear vision, adherence to local regulations, and a well-defined plan, you’ll be ready to move on to the next exciting phase: gathering materials and tools.
Gathering Materials and Tools
With your shed plans in hand and the construction site prepared, it’s time to gather the essential materials and tools needed to bring your 8×8 shed to life. Here’s a rundown of the items you’ll need:
- Lumber: Purchase high-quality lumber for framing, siding, and trim. Opt for pressure-treated wood for the foundation and any components in direct contact with the ground to prevent rot and decay.
- Fasteners: Stock up on nails, screws, and other fasteners required for securing the structural components and attaching the siding and roofing materials.
- Roofing Materials: Depending on your design preferences, acquire shingles, metal roofing panels, or other roofing materials to protect your shed from the elements.
- Doors and Windows: If your shed design includes doors and windows, purchase these components or gather the materials needed to construct them from scratch.
- Hardware and Accessories: Collect hinges, handles, latches, and any additional hardware necessary for assembling the doors, windows, and other functional elements of the shed.
- Foundation Materials: Acquire concrete blocks, gravel, or other suitable materials for creating a stable and level foundation for your shed.
- Tools: Ensure you have the necessary tools on hand, including a circular saw, hammer, level, tape measure, drill/driver, and other carpentry and construction tools. Additionally, consider renting or purchasing a nail gun to expedite the framing process.
- Personal Protective Equipment (PPE): Prioritize safety by obtaining PPE such as goggles, work gloves, hearing protection, and a dust mask to safeguard yourself during the construction process.
By procuring the right materials and tools, you’ll set the stage for a seamless and efficient construction process. With everything in place, you’re ready to embark on the exciting journey of building the foundation for your 8×8 shed. Let’s delve into the next phase and lay the groundwork for your outdoor structure!
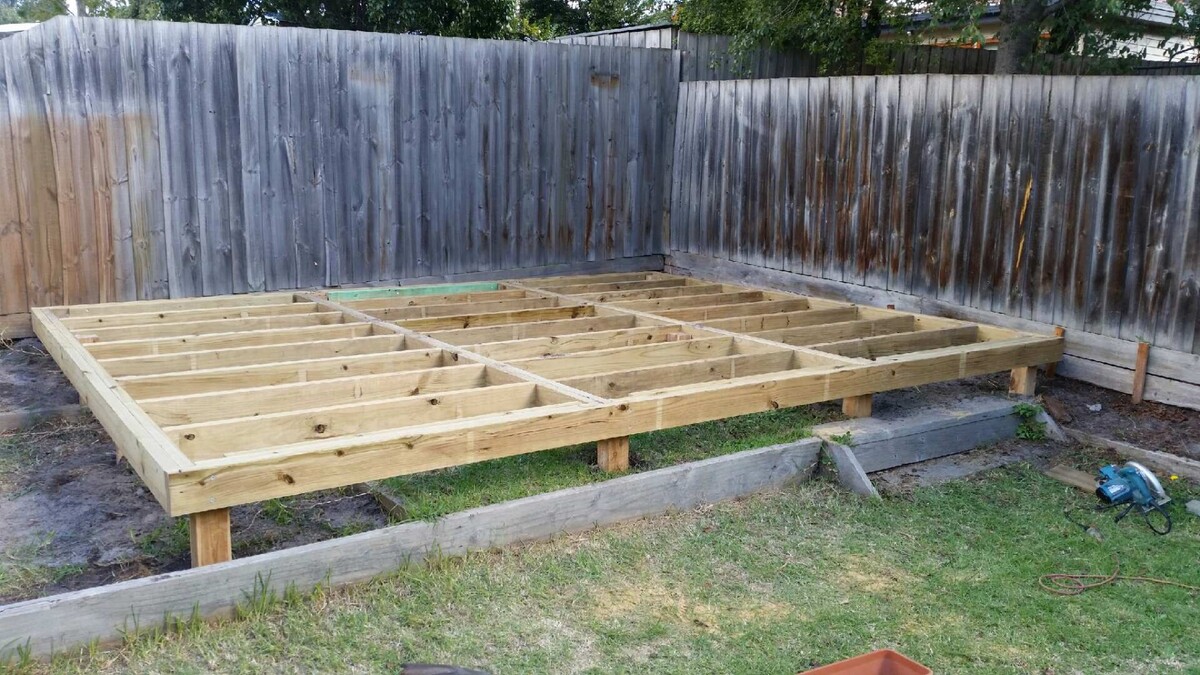
Building the Foundation
The foundation serves as the anchor of your shed, providing stability and structural support. A solid foundation is essential for ensuring the longevity and structural integrity of your 8×8 shed. Here’s a step-by-step guide to building a sturdy foundation:
- Mark the Foundation Layout: Use stakes and string to outline the perimeter of the shed foundation, ensuring the dimensions match your 8×8 shed plans.
- Excavate the Site: Dig a level trench for the foundation, removing any organic matter and debris to create a clean and level base. The depth of the trench will depend on the type of foundation you choose.
- Choose the Foundation Type: Select the most suitable foundation option for your shed, such as a concrete slab, concrete blocks, or a skid foundation. Consider factors such as soil composition, local building codes, and the intended use of the shed.
- Pour Concrete or Install Blocks: If you opt for a concrete foundation, pour and level the concrete within the prepared trench. Alternatively, position and level concrete blocks to create a stable base for the shed.
- Ensure Level and Square Alignment: Use a level and square to verify that the foundation is precisely aligned and level in all directions. This step is crucial for the structural integrity of the entire shed.
- Allow for Proper Curing: If you pour a concrete foundation, allow sufficient time for the concrete to cure and achieve its full strength before proceeding with the construction of the shed superstructure.
By meticulously executing the foundation-building process, you’ll establish a solid and reliable base for your 8×8 shed. With the foundation in place, you’re ready to move on to the exciting phase of constructing the frame, where the structure of your shed will begin to take shape. Let’s explore the next steps in bringing your shed-building vision to fruition!
When building an 8×8 shed, make sure to start with a level foundation to ensure the structure is stable. Use pressure-treated lumber for the base to prevent rot and decay.
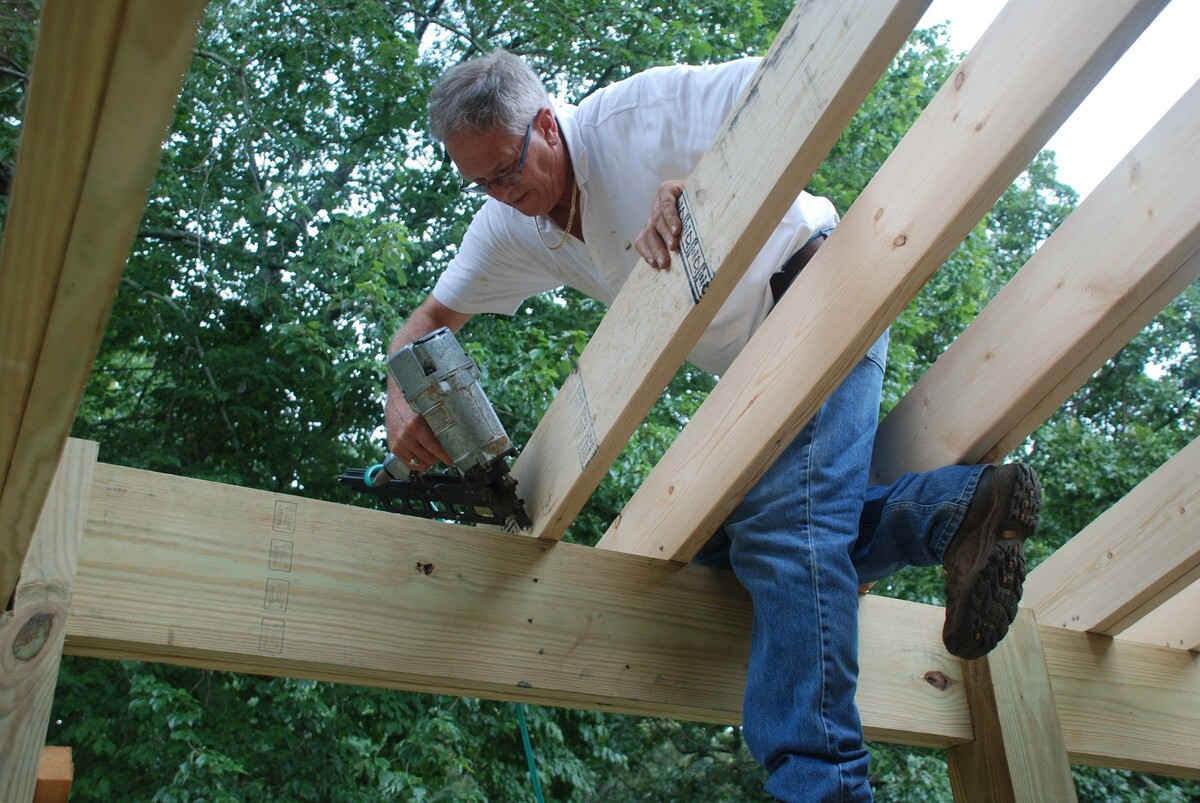
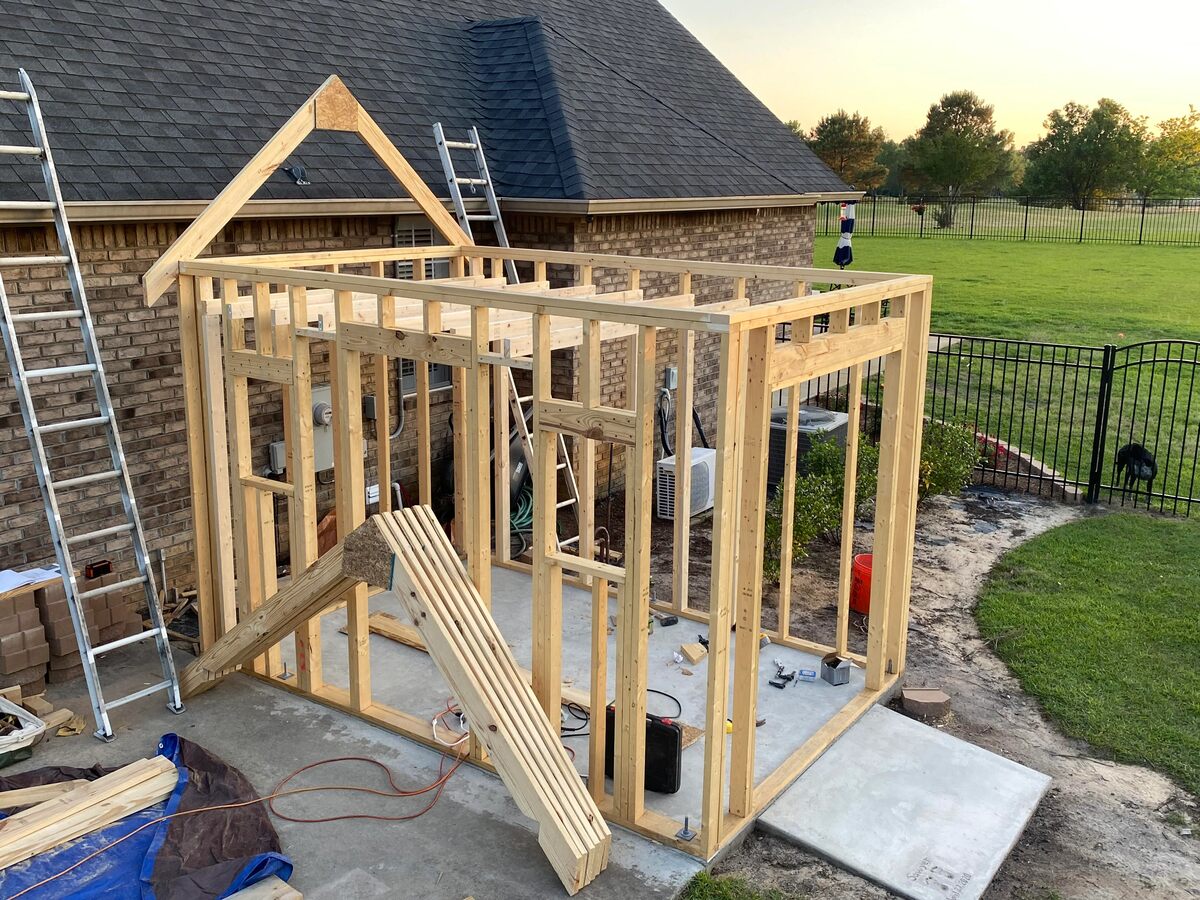
Constructing the Frame
The frame of your 8×8 shed forms the skeleton of the structure, providing support for the walls, roof, and doors. Constructing a sturdy and precisely aligned frame is essential for the overall stability and durability of your shed. Here’s a detailed guide to framing your 8×8 shed:
- Measure and Cut the Lumber: Use your shed plans to measure and cut the lumber according to the specified dimensions for the floor joists, wall studs, and rafters. Accuracy in cutting the lumber is crucial for ensuring a precise and square frame.
- Assemble the Floor Frame: Lay out the pressure-treated 2×6 or 2×8 floor joists on the foundation, spaced according to your shed plans. Secure the joists in place using joist hangers and galvanized nails, creating a sturdy base for the shed floor.
- Erect the Wall Frames: Construct the wall frames using 2×4 or 2×6 lumber, following the measurements and layout specified in your shed plans. Ensure that the wall frames are plumb and square before securing them to the floor frame.
- Add Window and Door Openings: If your shed design includes windows and doors, frame out the openings accordingly, leaving adequate space for the installation of windows and doors at a later stage.
- Install the Roof Rafters: Cut and position the roof rafters atop the wall frames, ensuring proper alignment and pitch according to your shed design. Use ridge boards and collar ties to secure the rafters and establish the roof structure.
- Secure Frame Components: Use galvanized nails or screws to secure the frame components at all joints and connections, ensuring a robust and stable frame structure.
As you meticulously construct the frame of your 8×8 shed, attention to detail and precision will be key in achieving a strong and reliable structure. With the frame in place, you’re ready to progress to the next phase: installing the walls and roof, where your shed will begin to take shape as a complete and functional outdoor structure. Let’s explore the next steps in bringing your shed-building vision to life!
Read more: How To Build A Shed
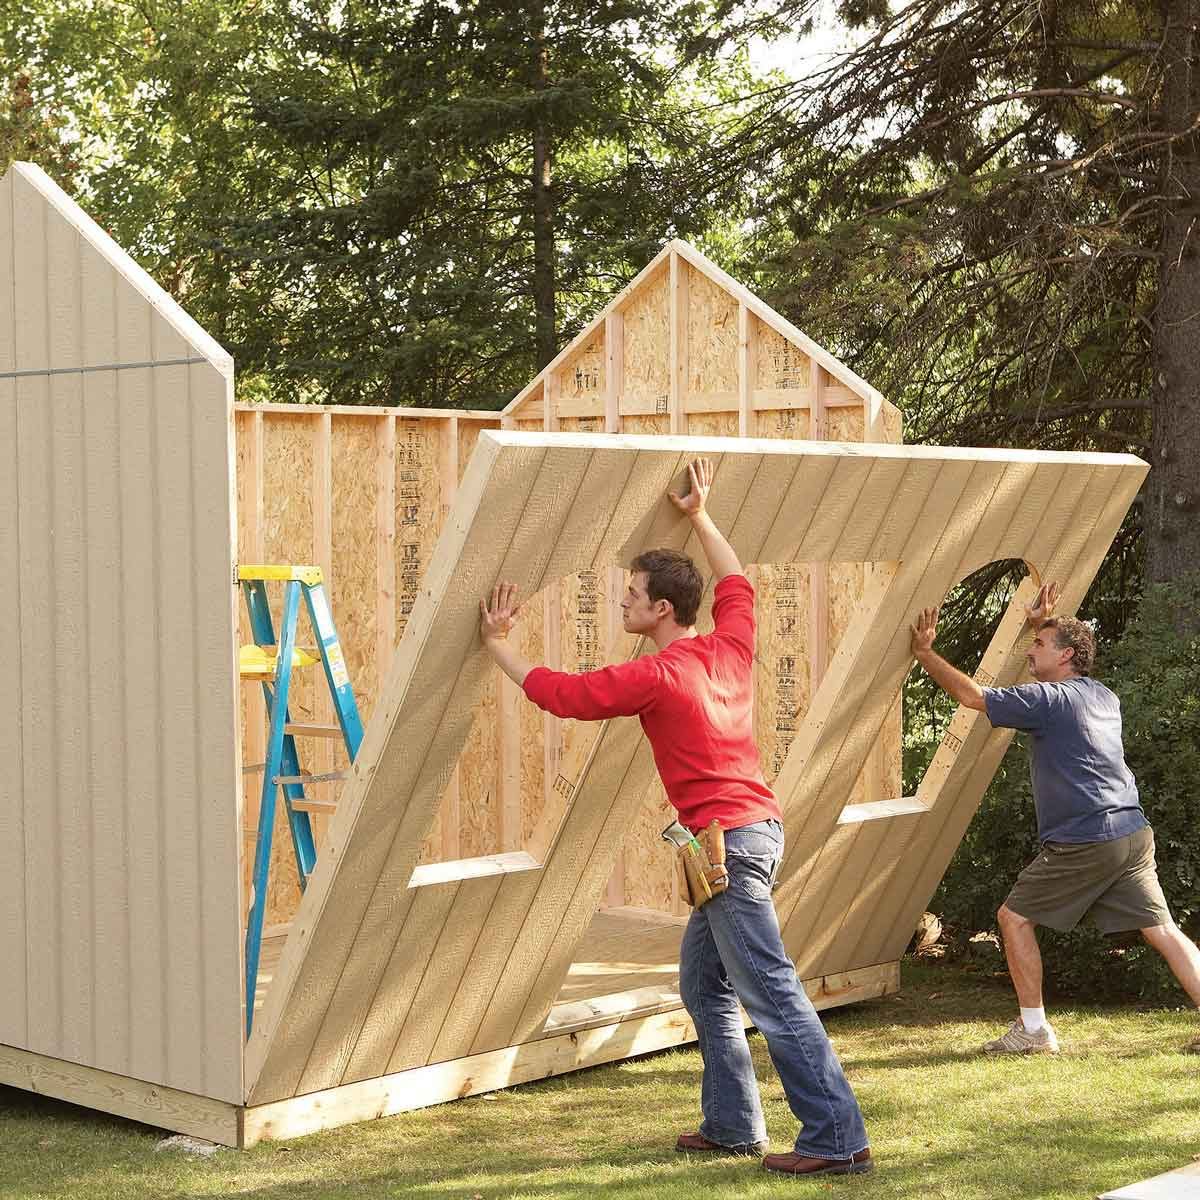
Installing the Walls and Roof
With the frame of your 8×8 shed standing tall, it’s time to enclose the structure by installing the walls and roof. This phase marks a significant milestone in the shed-building process, as your shed will begin to take shape as a complete and functional outdoor space. Here’s a comprehensive guide to installing the walls and roof of your shed:
- Attach Exterior Sheathing: Cover the exterior of the framed walls with plywood or oriented strand board (OSB), securing the sheathing with galvanized nails or screws. This sheathing provides structural strength and serves as a base for siding installation.
- Apply Siding Material: Choose and install the siding material of your choice, such as wood siding, vinyl siding, or fiber cement panels. Follow the manufacturer’s guidelines for proper installation and weatherproofing techniques.
- Install Windows and Doors: If your shed design includes windows and doors, carefully position and install these components, ensuring a snug fit and proper sealing to prevent air and water infiltration.
- Add Roofing Underlayment: Lay down roofing underlayment or felt paper on the sheathed roof surface, providing a protective barrier against moisture before installing the final roofing material.
- Apply Roofing Material: Install the chosen roofing material, whether it’s asphalt shingles, metal panels, or another roofing option. Follow industry best practices for proper installation and weatherproofing to ensure a durable and watertight roof for your shed.
- Address Exterior Finishing Touches: Add trim, fascia, and soffit elements to complete the exterior aesthetics of your shed, providing a polished and cohesive look to the structure.
As you install the walls and roof of your 8×8 shed, attention to detail and precision will be crucial in achieving a weatherproof and visually appealing exterior. With the walls and roof in place, you’re ready to progress to the next phase: adding doors and windows, where the functionality and character of your shed will truly come to life. Let’s explore the next steps in bringing your shed-building vision to fruition!
Adding Doors and Windows
As your 8×8 shed nears completion, the addition of doors and windows brings functionality, natural light, and ventilation to the interior space. This phase marks the transition from a framed structure to a fully enclosed and accessible outdoor building. Here’s a detailed guide to adding doors and windows to your shed:
- Select and Position Doors: Choose a suitable entry door for your shed, considering factors such as size, material, and style. Position the door in the designated opening, ensuring proper alignment and smooth operation.
- Install Door Hardware: Attach hinges, handles, and a locking mechanism to the door, ensuring secure and effortless functionality. Consider weatherproofing measures to protect the door from the elements.
- Position and Secure Windows: Select and install windows that complement the design and functionality of your shed. Ensure proper sealing and weatherproofing to prevent air and water infiltration.
- Add Window Trim: Install trim around the exterior of the windows, providing a finished and polished look while enhancing weather resistance and durability.
- Enhance Security and Functionality: Consider adding window locks, latches, and hardware to ensure the security and usability of the windows while maintaining a cohesive aesthetic with the overall shed design.
- Address Interior Finishing: Complete the interior trim and detailing around the doors and windows, creating a clean and professional appearance inside the shed.
As you add doors and windows to your 8×8 shed, attention to functionality, aesthetics, and weatherproofing will contribute to a welcoming and versatile outdoor space. With the doors and windows in place, you’re ready to progress to the final phase: finishing touches and maintenance, where you’ll put the last strokes on your shed-building masterpiece. Let’s explore the next steps in bringing your shed-building vision to fruition!
Finishing Touches and Maintenance
As the construction of your 8×8 shed draws to a close, attention to detail during the finishing touches and a proactive approach to maintenance will ensure that your shed remains a functional and visually appealing asset for years to come. Here’s a comprehensive guide to the final steps of completing your shed and maintaining its longevity:
- Apply Exterior Finishes: Consider painting or staining the exterior of your shed to enhance its visual appeal and provide protection against the elements. Choose high-quality exterior finishes that are designed to withstand weathering and UV exposure.
- Implement Weatherproofing Measures: Seal gaps, joints, and penetrations with caulk or weatherstripping to prevent water infiltration and air leaks, enhancing the energy efficiency and durability of your shed.
- Establish a Maintenance Routine: Develop a regular maintenance schedule that includes tasks such as inspecting the roof for damage, checking and resealing windows and doors, and addressing any signs of wear or deterioration.
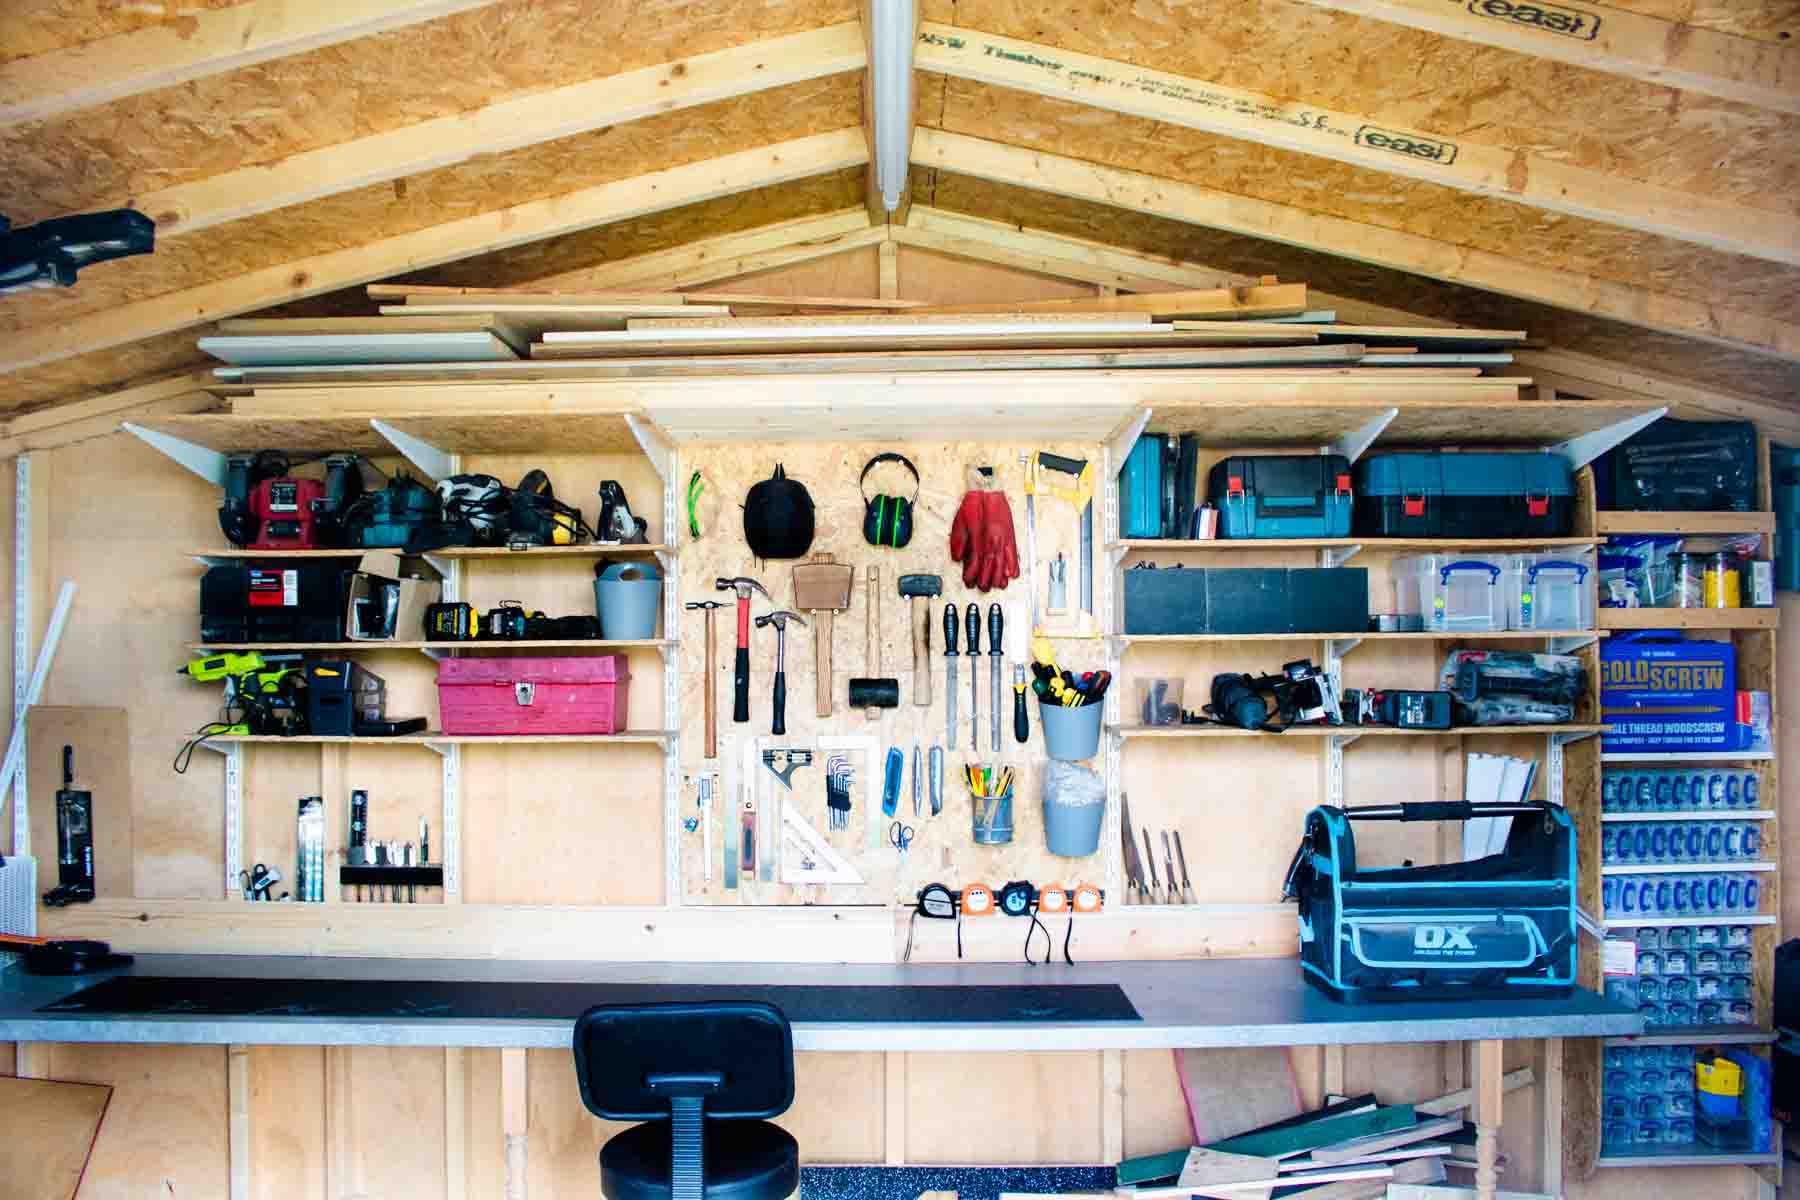
- Organize Interior Storage: Install shelving, hooks, and storage solutions to optimize the interior space of your shed, making it easy to keep tools, equipment, and supplies organized and accessible.
- Enhance Security Measures: Consider installing a secure locking mechanism and, if desired, a motion-activated lighting system to enhance the security of your shed and its contents.
- Landscaping and Integration: Integrate your shed into the surrounding landscape by adding pathways, planting shrubs or flowers, and incorporating it seamlessly into your outdoor living space.
By attending to the finishing touches and implementing a proactive maintenance approach, you’ll ensure that your 8×8 shed remains a valuable and enduring addition to your property. With the completion of these final steps, you can take pride in your craftsmanship and enjoy the functional and aesthetic benefits of your newly constructed outdoor structure. Congratulations on successfully building your 8×8 shed!
Frequently Asked Questions about How To Build An 8x8 Shed
Was this page helpful?
At Storables.com, we guarantee accurate and reliable information. Our content, validated by Expert Board Contributors, is crafted following stringent Editorial Policies. We're committed to providing you with well-researched, expert-backed insights for all your informational needs.


0 thoughts on “How To Build An 8×8 Shed”