Home>Gardening & Outdoor>Outdoor Structures>How To Build An 8×10 Shed Floor
Outdoor Structures
How To Build An 8×10 Shed Floor
Modified: August 27, 2024
Learn how to build a sturdy 8x10 shed floor for your outdoor structures with our step-by-step guide. Ensure durability and stability for your shed.
(Many of the links in this article redirect to a specific reviewed product. Your purchase of these products through affiliate links helps to generate commission for Storables.com, at no extra cost. Learn more)
Introduction
Building a shed can be a fulfilling and practical project, providing valuable storage space for tools, equipment, and outdoor gear. One of the essential components of constructing a durable and stable shed is building a solid floor. The 8×10 shed floor serves as the foundation for the entire structure, supporting the walls, roof, and everything stored inside. In this comprehensive guide, we will walk you through the step-by-step process of building an 8×10 shed floor, from measuring and marking the area to weatherproofing the floor for long-term durability.
Constructing a shed floor requires careful planning, accurate measurements, and the use of quality materials and tools. By following the detailed instructions provided in this guide, you can ensure that your shed floor is not only structurally sound but also capable of withstanding the elements for years to come.
Whether you are a seasoned DIY enthusiast or a novice builder, this guide will equip you with the knowledge and confidence to tackle the task of building an 8×10 shed floor. From selecting the right materials to executing each construction phase with precision, this article will serve as your trusted companion throughout the project. So, roll up your sleeves, gather your tools, and let's dive into the rewarding process of creating a sturdy and reliable foundation for your 8×10 shed.
Key Takeaways:
- Building a sturdy 8×10 shed floor requires precise measurements, proper ground preparation, and careful installation of materials. Attention to detail and thorough weatherproofing ensure a durable and reliable foundation for your shed.
- By following the step-by-step guide, you can create a solid and long-lasting shed floor. The use of quality materials, accurate construction, and proactive weatherproofing will result in a stable base for your shed.
Read more: How To Build A Shed Floor
Materials and Tools
Before embarking on the construction of an 8×10 shed floor, it is crucial to gather all the necessary materials and tools to ensure a smooth and efficient building process. Here is a comprehensive list of the items you will need:
Materials:
- Pressure-Treated Lumber: 4×4 or 6×6 posts for the foundation, 2×6 or 2×8 boards for the floor joists, and 3/4-inch thick plywood for the sheathing.
- Gravel or Crushed Stone: For creating a stable and well-drained base for the shed floor.
- Concrete Blocks or Pavers: To support the foundation posts and elevate them above the ground level.
- Galvanized Nails or Screws: For securing the lumber and plywood.
- Weatherproofing Membrane: To protect the floor from moisture and prolong its lifespan.
- Shims: For leveling the foundation and floor joists.
- Concrete Mix: If a concrete foundation is preferred over using concrete blocks or pavers.
- Anchor Brackets (Optional): For securing the floor joists to the foundation posts.
Tools:
- Tape Measure: For taking accurate measurements of the shed floor area and materials.
- Level: To ensure the foundation and floor joists are perfectly horizontal.
- Circular Saw: For cutting lumber and plywood to the required dimensions.
- Hammer or Nail Gun: For fastening the boards and sheathing.
- Drill/Driver: For pre-drilling holes and driving screws.
- Shovel: For excavating and leveling the ground.
- Wheelbarrow: For transporting gravel or concrete mix.
- Work Gloves and Safety Glasses: For personal protection during construction.
By ensuring that you have all the required materials and tools at your disposal, you can streamline the building process and minimize interruptions, allowing you to focus on the task at hand and achieve professional results.
Step 1: Measure and Mark the Area
Before commencing the construction of the 8×10 shed floor, it is essential to accurately measure and mark the designated area where the shed will be situated. Follow these steps to ensure precision and efficiency:
- Clear the Site: Begin by clearing any debris, vegetation, or obstacles from the area where the shed will be built. This will provide a clean and unobstructed workspace for the construction process.
- Measure the Dimensions: Use a tape measure to mark out an 8×10 foot area, ensuring that the corners form right angles and the sides are parallel and equal in length. Double-check the measurements to guarantee accuracy.
- Mark the Corners: Once the dimensions are determined, mark the corners of the shed floor area using stakes or spray paint. This will create a visual guide for the subsequent construction steps.
- Verify the Squareness: To ensure that the shed floor will be perfectly square, measure the diagonals of the marked area. The diagonals should be equal in length, confirming that the corners are at right angles to each other.
Accurately measuring and marking the shed floor area is a critical first step that lays the groundwork for a well-aligned and structurally sound foundation. Taking the time to verify the dimensions and squareness of the designated space will contribute to the overall stability and aesthetics of the completed shed.
Read more: How Build A Shed
Step 2: Prepare the Ground
Once the area for the 8×10 shed floor is measured and marked, the next crucial step is to prepare the ground to create a stable and level foundation. Proper ground preparation is essential for ensuring the longevity and structural integrity of the shed. Follow these steps to prepare the ground effectively:
- Excavate the Site: Use a shovel to excavate the marked area to a depth of approximately 4 to 6 inches. Remove any organic matter, rocks, or debris from the excavated space to create a clean and uniform surface.
- Add Gravel or Crushed Stone: Spread a layer of gravel or crushed stone evenly across the excavated area. This will provide drainage and prevent moisture from accumulating under the shed floor, helping to mitigate potential issues such as rot and decay.
- Compact the Base: Use a hand tamper or a rented plate compactor to compact the gravel or crushed stone base thoroughly. This step is crucial for creating a stable and level foundation that can support the weight of the shed and its contents.
- Check for Levelness: Utilize a long straight board or a level to ensure that the prepared base is level in all directions. Make any necessary adjustments by adding or removing gravel to achieve a uniformly level surface.
By meticulously preparing the ground for the shed floor, you are laying the groundwork for a durable and secure foundation. Taking the time to properly excavate, add a suitable base material, and ensure levelness will contribute to the long-term stability and performance of the shed.
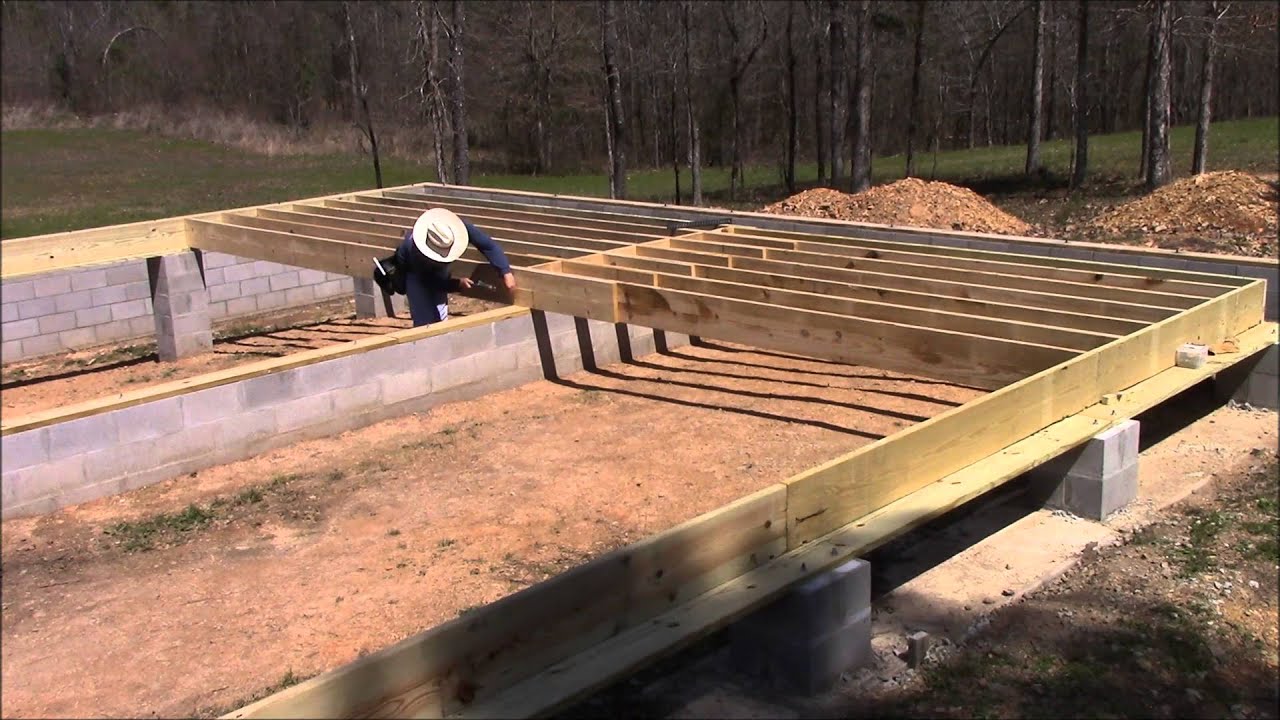
Step 3: Build the Foundation
With the ground prepared, the next vital phase in constructing the 8×10 shed floor is building a solid foundation to support the structure. The foundation serves as the base upon which the floor joists and sheathing will be installed. Follow these steps to construct a reliable foundation for your shed:
- Position Concrete Blocks or Pavers: Place concrete blocks or pavers at strategic intervals within the excavated area to serve as supports for the foundation posts. Ensure that the blocks are level and evenly spaced to provide stable support for the shed floor.
- Install Pressure-Treated Posts: Position pressure-treated 4×4 or 6×6 posts on top of the concrete blocks or pavers, ensuring that they are spaced according to the shed floor design. Use a level to confirm that the posts are plumb and adjust them as needed.
- Secure the Posts: To secure the posts in place, use shims and galvanized nails or screws. Additionally, anchor brackets can be utilized to fasten the floor joists to the foundation posts, providing extra stability and structural support.
- Verify Levelness and Stability: Once the posts are in position, recheck for levelness and stability. Make any necessary adjustments to ensure that the foundation is solid and capable of supporting the weight of the shed and its contents.
Constructing a sturdy foundation is a critical aspect of building a reliable shed floor. By carefully positioning and securing the foundation posts, you are laying the groundwork for a stable and durable base that will serve as the backbone of the entire shed structure.
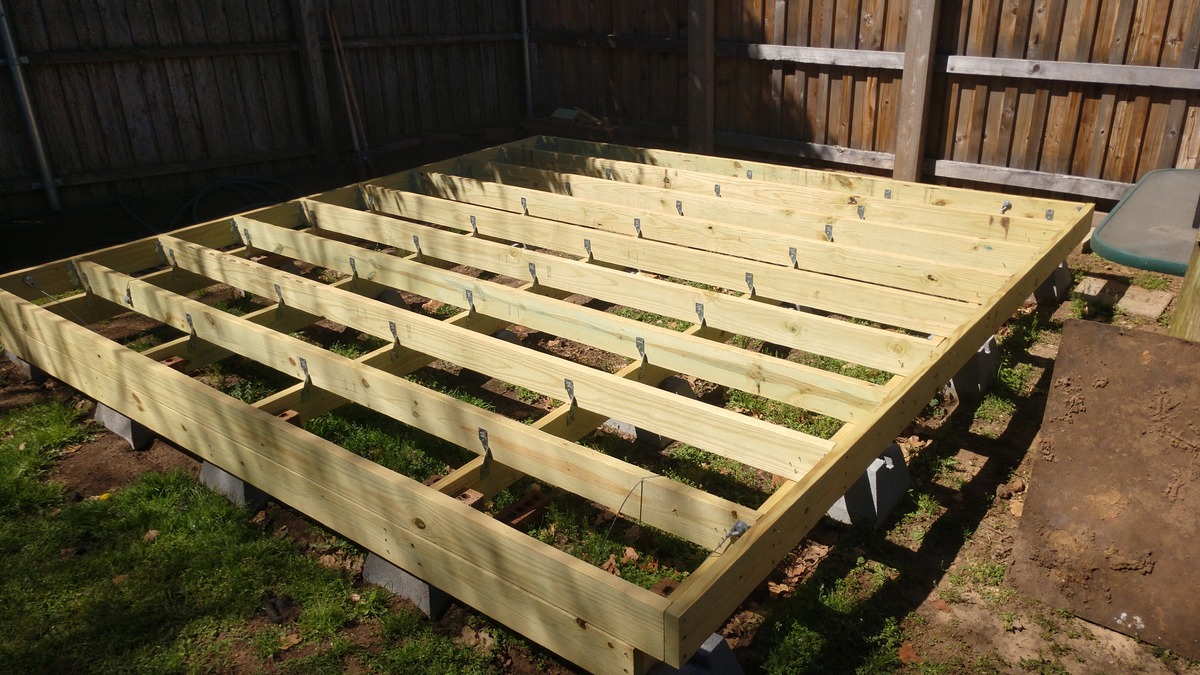
Step 4: Install the Floor Joists
With the foundation in place, the next pivotal stage in constructing the 8×10 shed floor is the installation of the floor joists. These horizontal structural members will provide crucial support for the plywood sheathing that forms the actual floor surface. Follow these steps to effectively install the floor joists:
- Measure and Cut the Joists: Using pressure-treated 2×6 or 2×8 lumber, measure and cut the floor joists to the appropriate length to fit the dimensions of the shed floor. Ensure that the joists are cut precisely to achieve a snug and uniform fit.
- Position the Joists: Place the cut floor joists perpendicular to the foundation posts, ensuring that they are spaced according to the shed floor design and are supported by the foundation. Use a level to confirm that the joists are horizontal and make adjustments as necessary.
- Secure the Joists: Attach the floor joists to the foundation posts using galvanized nails or screws. If anchor brackets were installed during the foundation phase, secure the joists to the brackets to enhance stability and structural integrity.
- Check for Alignment and Levelness: After securing the floor joists, verify that they are aligned and level. This step is crucial for ensuring that the shed floor will be flat and stable, providing a reliable surface for the subsequent installation of the plywood sheathing.
By meticulously installing the floor joists, you are establishing a strong and supportive framework for the shed floor. The proper positioning and secure attachment of the joists will contribute to the overall stability and load-bearing capacity of the completed shed floor.
When building an 8×10 shed floor, make sure to use pressure-treated lumber to prevent rot and decay. Also, use joist hangers for extra support and stability.
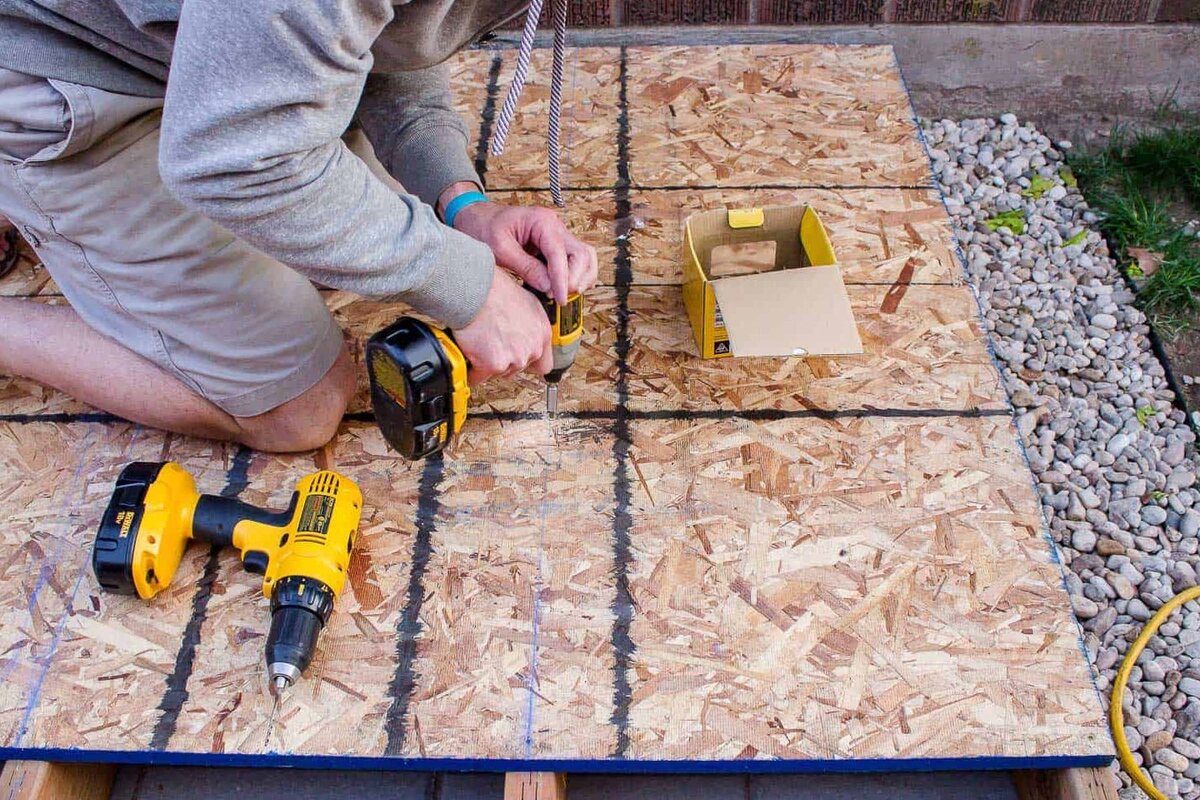
Step 5: Lay the Plywood Sheathing
Once the floor joists are securely in place, the next crucial step in building the 8×10 shed floor is to lay the plywood sheathing, which will form the surface of the floor. This sheathing provides a solid and stable base for walking, storing items, and supporting the walls of the shed. Follow these steps to effectively lay the plywood sheathing:
- Measure and Cut the Plywood: Using 3/4-inch thick plywood, measure and cut the sheets to fit the dimensions of the shed floor. Ensure that the plywood sheets are cut accurately to achieve a seamless and uniform surface.
- Position the Sheathing: Place the cut plywood sheets on top of the installed floor joists, ensuring that the edges are aligned and the sheets are oriented perpendicular to the joists. Leave a small gap between the sheets to account for potential expansion due to moisture.
- Secure the Sheathing: Use galvanized nails or screws to fasten the plywood sheets to the floor joists, ensuring that the sheathing is firmly attached and does not have any noticeable flex or movement.
- Verify Stability and Uniformity: After securing the plywood sheathing, walk across the entire surface to confirm that it feels stable and even. Check for any protruding nails or screws and make any necessary adjustments to ensure a smooth and uniform floor surface.
By laying the plywood sheathing with precision and care, you are creating a durable and reliable floor for your 8×10 shed. The securely attached sheathing will provide a stable and solid surface that can withstand the demands of everyday use and provide a dependable foundation for the shed’s walls and roof.
Read more: How To Build A Shed
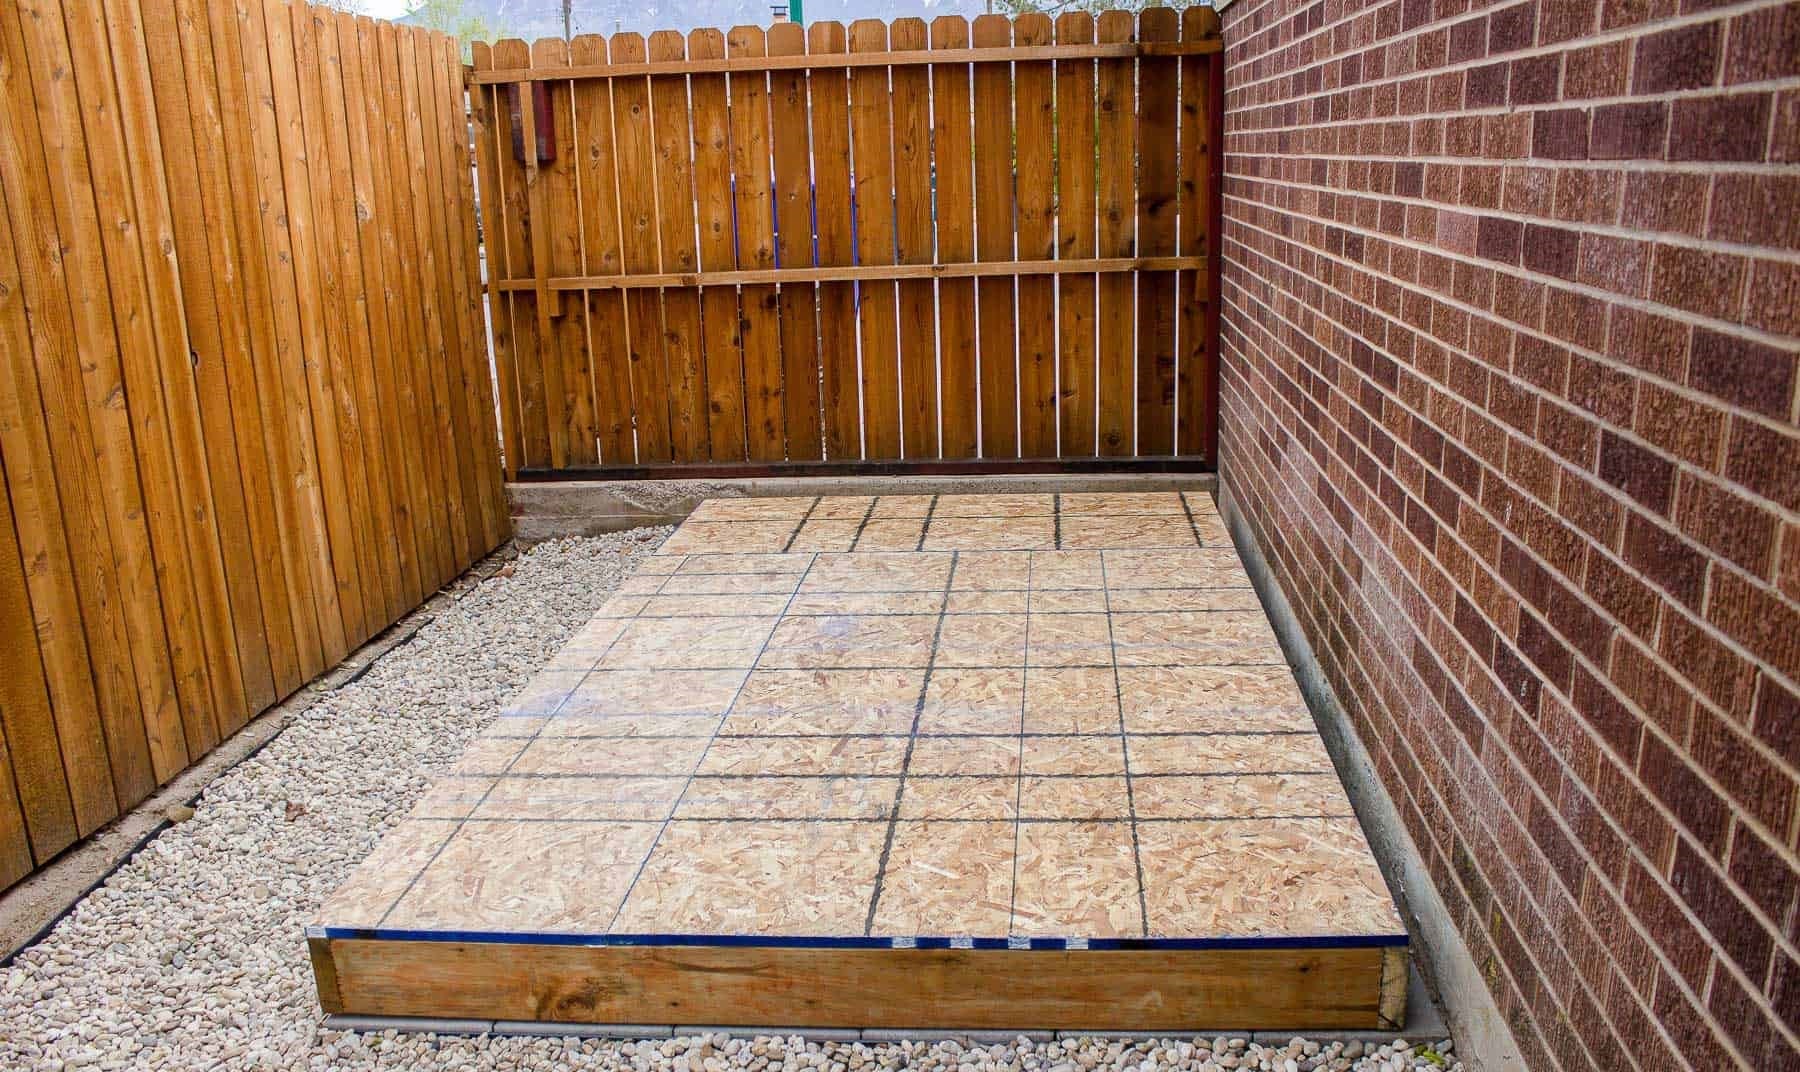
Step 6: Weatherproofing the Floor
After laying the plywood sheathing, it is essential to take measures to weatherproof the 8×10 shed floor, protecting it from moisture, decay, and other environmental factors. Proper weatherproofing will contribute to the longevity and durability of the floor, ensuring that it can withstand the elements and provide reliable performance for years to come. Follow these steps to effectively weatherproof the shed floor:
- Apply a Weatherproofing Membrane: Utilize a weatherproofing membrane or a high-quality wood sealer to coat the entire surface of the plywood sheathing. This membrane will create a protective barrier, preventing moisture from penetrating the wood and causing damage such as warping, rot, or decay.
- Seal the Edges and Gaps: Pay special attention to sealing the edges and any gaps between the plywood sheets to prevent water intrusion. Use a silicone-based sealant or specialized seam tape to create a watertight seal along the perimeter and between the individual sheets of plywood.
- Elevate the Shed Floor: If feasible, consider elevating the shed floor slightly above the surrounding ground level to enhance drainage and minimize direct contact with moisture. This can be achieved by using additional concrete blocks or pavers to elevate the floor.
- Inspect and Maintain Regularly: After weatherproofing the floor, perform regular inspections to ensure that the weatherproofing membrane remains intact and effective. Address any signs of wear, damage, or water infiltration promptly to maintain the floor’s protective qualities.
By diligently weatherproofing the shed floor, you are taking proactive steps to safeguard it against the detrimental effects of moisture and environmental exposure. The application of a weatherproofing membrane and the sealing of edges and gaps will contribute to the long-term resilience and structural integrity of the shed floor.
Conclusion
Congratulations on successfully completing the construction of the 8×10 shed floor! By following the comprehensive steps outlined in this guide, you have laid the groundwork for a sturdy, reliable, and long-lasting foundation that will support your shed and its contents for years to come.
Building a shed floor requires careful planning, precision, and attention to detail, and your commitment to executing each step with diligence has resulted in a high-quality finished product. The solid foundation, secure floor joists, and weatherproofed plywood sheathing collectively form a durable and stable base that will serve as the cornerstone of your shed.
As you move forward with the construction of your shed, remember that the quality of the floor sets the stage for the overall performance and longevity of the entire structure. With a well-built floor in place, you can proceed with confidence, knowing that your shed is founded on a solid and dependable base.
Whether you plan to use the shed for storage, as a workshop, or for any other purpose, the carefully constructed floor will provide a reliable and functional surface for your activities. As you continue with the construction process, be sure to maintain the floor’s weatherproofing and perform routine inspections to preserve its integrity over time.
With the completion of the shed floor, you are one step closer to realizing your vision of a functional and practical outdoor space. Your dedication to craftsmanship and attention to detail will undoubtedly contribute to the overall success and satisfaction of your shed-building endeavor.
As you embark on the next phases of your shed construction project, may the solid foundation you have created serve as a testament to your commitment to quality and durability. Best wishes for the remainder of your building journey, and may your shed bring you years of utility and enjoyment.
If you're thrilled with your new shed floor, why stop there? Dive into our latest guide on 14 Best Woodworking for 2024, packed with innovative ideas to enhance your crafting skills. Or, if you're curious about more hands-on activities, our discussion on What Is So Great About DIY Projects might just spark your next big adventure. Both articles are brimming with insights and tips to keep your creative juices flowing and your hands busy!
Frequently Asked Questions about How To Build An 8x10 Shed Floor
Was this page helpful?
At Storables.com, we guarantee accurate and reliable information. Our content, validated by Expert Board Contributors, is crafted following stringent Editorial Policies. We're committed to providing you with well-researched, expert-backed insights for all your informational needs.


0 thoughts on “How To Build An 8×10 Shed Floor”