Home>Gardening & Outdoor>Outdoor Structures>How To Build An 8X12 Shed
Outdoor Structures
How To Build An 8X12 Shed
Modified: October 20, 2024
Learn how to build your own 8X12 shed for your outdoor space with our comprehensive guide. Get expert tips and advice on outdoor structures.
(Many of the links in this article redirect to a specific reviewed product. Your purchase of these products through affiliate links helps to generate commission for Storables.com, at no extra cost. Learn more)
Introduction
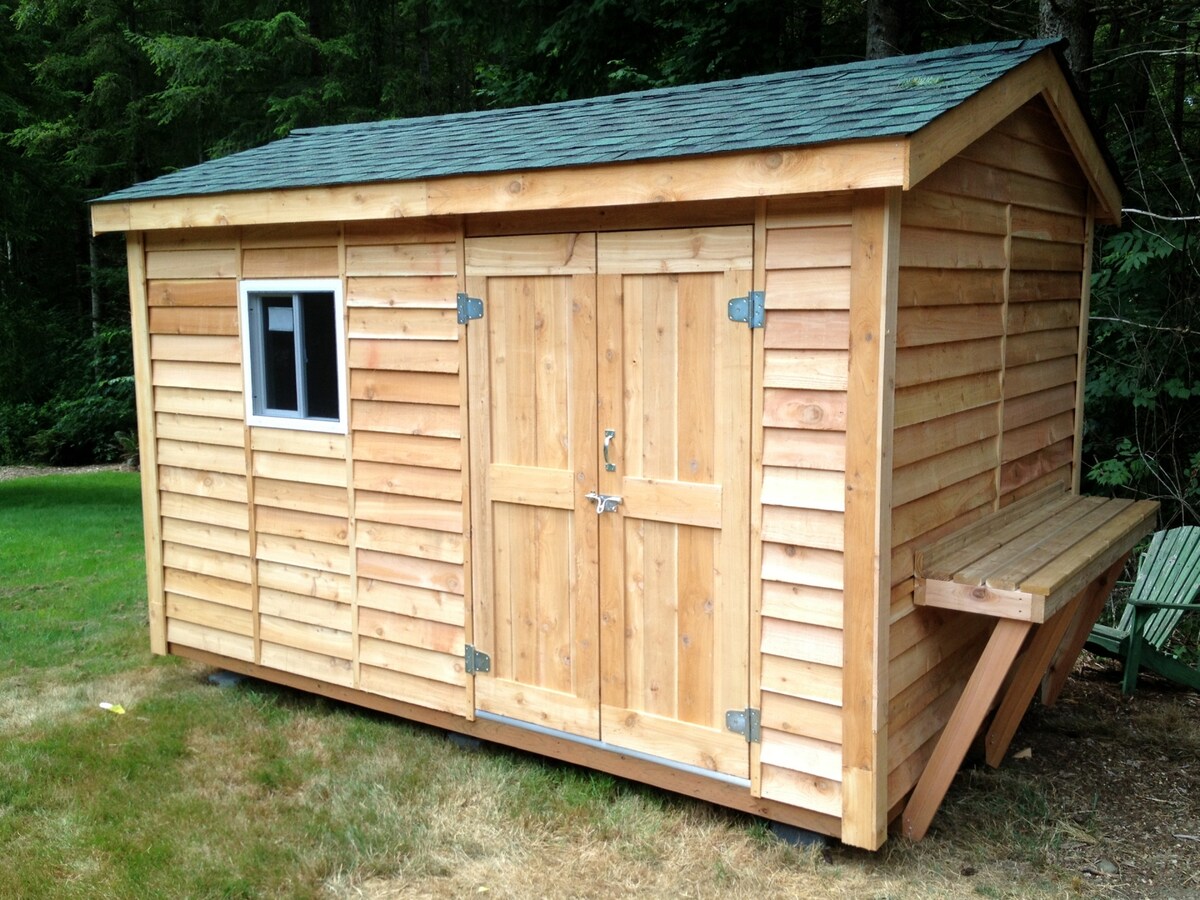
Welcome to the world of DIY shed building! Whether you need extra storage space, a workshop, or a cozy retreat in your backyard, constructing an 8×12 shed can be a rewarding and practical project. By following this comprehensive guide, you'll learn how to build a sturdy and functional outdoor structure that suits your needs.
Building a shed from scratch allows you to customize every aspect, from the materials used to the layout and design. Not only does it provide a sense of accomplishment, but it can also save you money compared to purchasing a pre-built shed. Additionally, the skills and knowledge gained from this endeavor can be applied to future woodworking and construction projects.
Throughout this guide, you'll be introduced to each step of the building process, from gathering the necessary materials and tools to adding the finishing touches. By breaking down the construction into manageable stages, you'll gain a clear understanding of the tasks involved and be well-equipped to tackle each phase with confidence.
Whether you're a seasoned DIY enthusiast or a novice looking to embark on your first major building project, this guide is designed to provide valuable insights and practical tips. So, roll up your sleeves, gather your tools, and let's dive into the rewarding journey of building your very own 8×12 shed.
Key Takeaways:
- Building a shed from scratch allows for customization, cost savings, and skill development. It’s a rewarding DIY project that provides practical benefits and a sense of accomplishment.
- Each step, from gathering materials to adding finishing touches, contributes to a sturdy and visually appealing shed. The process offers valuable hands-on experience and the satisfaction of creating a personalized outdoor space.
Read more: How To Build A 12×12 Shed
Step 1: Gather Materials and Tools
Before diving into the construction process, it’s essential to gather all the necessary materials and tools. This step sets the foundation for a smooth and efficient building experience. Here’s a comprehensive list of what you’ll need:
Materials:
- Lumber: Purchase high-quality lumber for framing, flooring, and trusses. Opt for pressure-treated wood to enhance durability and resistance to decay.
- Plywood: Select sturdy plywood for the flooring and roof sheathing. Oriented Strand Board (OSB) is a cost-effective option for sheathing.
- Shingles or Metal Roofing: Choose roofing materials that complement the overall design of your shed while providing excellent weather protection.
- Fasteners: Stock up on nails, screws, and other fasteners required for various construction tasks.
- Concrete Blocks or Pavers: These will form the foundation of your shed, providing stability and preventing moisture from seeping into the structure.
- Doors and Windows: If your shed design includes windows and doors, ensure you have the necessary components ready for installation.
- Insulation and Vapor Barrier: Depending on your shed's purpose, insulation and a vapor barrier may be essential for temperature regulation and moisture control.
- Siding and Trim: Choose siding materials that offer both aesthetic appeal and protection from the elements. Common options include wood, vinyl, and engineered wood.
- Primer and Paint: If you plan to paint your shed, select high-quality exterior primer and paint to safeguard the wood from weather damage.
Tools:
- Measuring Tape and Square: Accurate measurements are crucial for ensuring precise cuts and proper alignment during construction.
- Saw: A circular saw or a miter saw will be indispensable for cutting lumber and plywood to the required dimensions.
- Hammer and Screwdrivers: These basic hand tools are essential for driving nails, assembling framing components, and installing hardware.
- Level: A level is indispensable for ensuring that the shed's foundation, flooring, walls, and roof are all perfectly horizontal and vertical.
- Power Drill: A cordless drill with screwdriver bits and drill bits will expedite the assembly process and facilitate the installation of fasteners.
- Roofing Tools: If you're using shingles or metal roofing, specific tools such as a roofing nail gun, utility knife, and roofing adhesive will be necessary.
- Work Gloves and Safety Gear: Prioritize safety by equipping yourself with work gloves, safety goggles, and hearing protection.
By ensuring that you have all the required materials and tools on hand, you’ll be prepared to progress seamlessly to the next phase of construction. With everything in place, you’re ready to embark on the fulfilling journey of building your 8×12 shed.
Step 2: Prepare the Foundation
The foundation serves as the anchor of your shed, providing stability and ensuring longevity. Properly preparing the foundation is crucial for a structurally sound and durable outdoor structure. Here’s a detailed guide on how to prepare the foundation for your 8×12 shed:
Read more: How To Build A 10X12 Shed
1. Site Preparation:
Begin by selecting a level area in your backyard for the shed’s placement. Clear the site of any debris, rocks, and vegetation, ensuring that the ground is even and free from obstructions. Use a measuring tape and stakes to outline the shed’s perimeter, allowing for a slight overhang to prevent water from seeping under the walls.
2. Excavation and Leveling:
Once the site is cleared, excavate the marked area to the required depth for your foundation. Common foundation types for sheds include concrete piers, concrete blocks, or a poured concrete slab. Ensure that the foundation is level by using a long straight board and a level to screed the surface of the concrete if you opt for a concrete slab.
3. Install Footings or Blocks:
If you’re using concrete piers or blocks, carefully place them at designated intervals to support the shed’s floor framing. Ensure that the footings or blocks are level and aligned according to the shed’s floor plan. This step is critical for distributing the shed’s weight evenly and preventing settling over time.
4. Add Moisture Barrier:
Before proceeding to the next phase, consider adding a moisture barrier, such as a layer of gravel or a plastic vapor barrier, to inhibit moisture from seeping into the shed’s flooring. This precaution helps safeguard the wood components of your shed from potential water damage.
By meticulously preparing the foundation, you’re laying the groundwork for a stable and resilient structure. A well-constructed foundation not only ensures the structural integrity of your shed but also provides a level and secure base for the subsequent construction phases. With the foundation in place, you’re ready to advance to the next stage of building your 8×12 shed.
Read more: How To Build A 12×16 Shed
Step 3: Build the Floor
With the foundation prepared, it’s time to construct the floor of your 8×12 shed. The floor serves as the base for the entire structure, providing stability and a secure platform for the walls and roof. Here’s a detailed guide on how to build the floor of your shed:
1. Frame the Floor:
Begin by framing the floor using pressure-treated lumber to resist decay and ensure longevity. Cut the floor joists and rim joists to the specified dimensions, then assemble them according to your shed’s floor plan. Use a framing square to ensure the corners are perfectly square, and secure the joists in place with galvanized nails or screws.
2. Install the Subfloor:
Once the floor frame is in place, lay the plywood subfloor over the joists, ensuring that the edges align with the framing members. Secure the subfloor to the joists using screws or nails, creating a solid and stable base for the shed’s interior. Consider applying construction adhesive between the joists and subfloor for added strength.
3. Weatherproofing:
Protect the floor from moisture and potential water damage by applying a weatherproofing sealant or primer to the exposed edges of the plywood subfloor. This extra layer of protection helps safeguard the floor from the elements and prolongs its lifespan.
Read more: How To Build A 12X20 Shed
4. Position the Floor:
With the floor assembly complete, carefully position it onto the prepared foundation, ensuring that it rests securely on the footings or blocks. Use a level to confirm that the floor is perfectly horizontal, making any necessary adjustments to achieve a level surface. Once positioned correctly, anchor the floor to the foundation using anchor bolts or screws, further enhancing its stability.
By diligently following these steps, you’ll successfully construct a robust and level floor for your 8×12 shed. The completed floor provides a solid base for the subsequent phases of construction, bringing you one step closer to realizing your vision of a functional and reliable outdoor structure. With the floor in place, you’re ready to proceed to the next stage of building your shed.
Step 4: Construct the Walls
As you progress with the construction of your 8×12 shed, the next crucial phase involves building the walls. The walls form the enclosure of the shed, providing structural support and defining the overall shape of the structure. Here’s a detailed guide on how to construct the walls of your shed:
1. Cut the Wall Framing:
Using the specified dimensions from your shed plans, cut the wall studs, plates, and headers from high-quality lumber. Ensure that the studs are spaced according to the design specifications, typically 16 inches on center, to provide adequate support for the exterior sheathing and interior finishes.
2. Assemble the Wall Frames:
Lay out the wall framing components on a flat surface and assemble them according to the shed plans. Use a framing square to ensure the corners are square, and secure the framing members together using nails or screws. Incorporate openings for doors and windows as per the shed design, ensuring precise measurements for a seamless fit during installation.
Read also: 13 Incredible Picture Frames 8X12 for 2025
3. Install Exterior Sheathing:
Once the wall frames are assembled, apply exterior sheathing, such as plywood or oriented strand board (OSB), to the outer surface of the frames. Secure the sheathing with nails or screws, ensuring a solid and uniform attachment that reinforces the structural integrity of the walls.
4. Raise and Secure the Walls:
With the wall frames and sheathing in place, carefully raise each wall section into position on the shed’s floor. Enlist the help of assistants to ensure the walls are positioned accurately and stand plumb. Secure the walls to each other and to the floor framing using nails or screws, creating a stable and secure enclosure for the shed.
5. Add Door and Window Openings:
If your shed design incorporates doors and windows, carefully cut out the openings in the wall sheathing, following the specified dimensions. Install the door and window frames according to the manufacturer’s instructions, ensuring they are securely anchored within the wall framing.
By meticulously following these steps, you’ll successfully construct the walls of your 8×12 shed, bringing the structure one step closer to completion. The completed walls provide the framework for the roof and serve as the boundary that defines the interior space. With the walls in place, you’re ready to advance to the next stage of building your shed.
Step 5: Install the Roof
As the construction of your 8×12 shed progresses, the installation of the roof marks a significant milestone in completing the structure. The roof provides essential protection from the elements and contributes to the shed’s overall structural integrity. Here’s a comprehensive guide on how to install the roof of your shed:
Read more: How To Build An 8X10 Shed
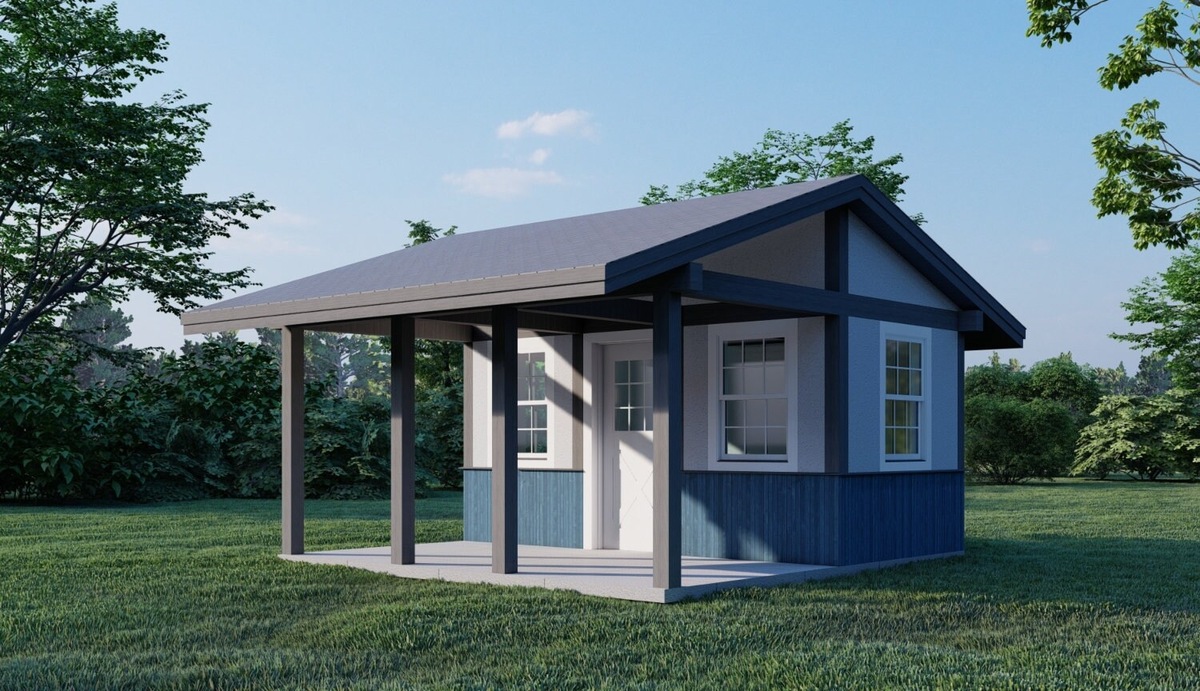
1. Determine the Roof Design:
Prior to installing the roof, decide on the specific design and materials for your shed’s roof. Common options include gable, gambrel, or skillion roofs, each offering distinct advantages in terms of aesthetics and functionality. Additionally, select the roofing materials, such as shingles or metal panels, that best suit your climate and preferences.
2. Construct Roof Trusses or Rafters:
If your shed design incorporates roof trusses, assemble them according to the specified dimensions and layout. Alternatively, if you opt for traditional rafters, cut and assemble them to form the framework for the roof. Ensure that the trusses or rafters are securely fastened and aligned to provide the necessary support for the roof structure.
3. Install Roof Sheathing:
With the trusses or rafters in place, apply plywood or OSB roof sheathing to the framework, securing it with nails or screws. The sheathing serves as the base for the roof covering and contributes to the overall stability of the roof structure. Ensure the sheathing is installed uniformly and extends over the entire roof surface.
4. Apply Roofing Materials:
Once the sheathing is in place, proceed to install the selected roofing materials, whether it’s asphalt shingles, metal panels, or another roofing option. Follow the manufacturer’s guidelines for proper installation, including the use of underlayment, flashing, and fasteners. Pay careful attention to the alignment and overlap of the roofing materials to ensure effective water shedding and weatherproofing.
Read more: How To Build An 8×10 Shed Floor
5. Add Roofing Accessories:
Complete the roof installation by adding essential accessories, such as ridge caps, drip edge, and venting components. These elements not only enhance the visual appeal of the roof but also contribute to its functionality by promoting proper ventilation and weather resistance.
By diligently following these steps, you’ll successfully install the roof of your 8×12 shed, culminating in a completed and weather-resistant structure. The installed roof provides essential protection and contributes to the overall aesthetic appeal of the shed. With the roof in place, you’re ready to progress to the next stage of building your shed.
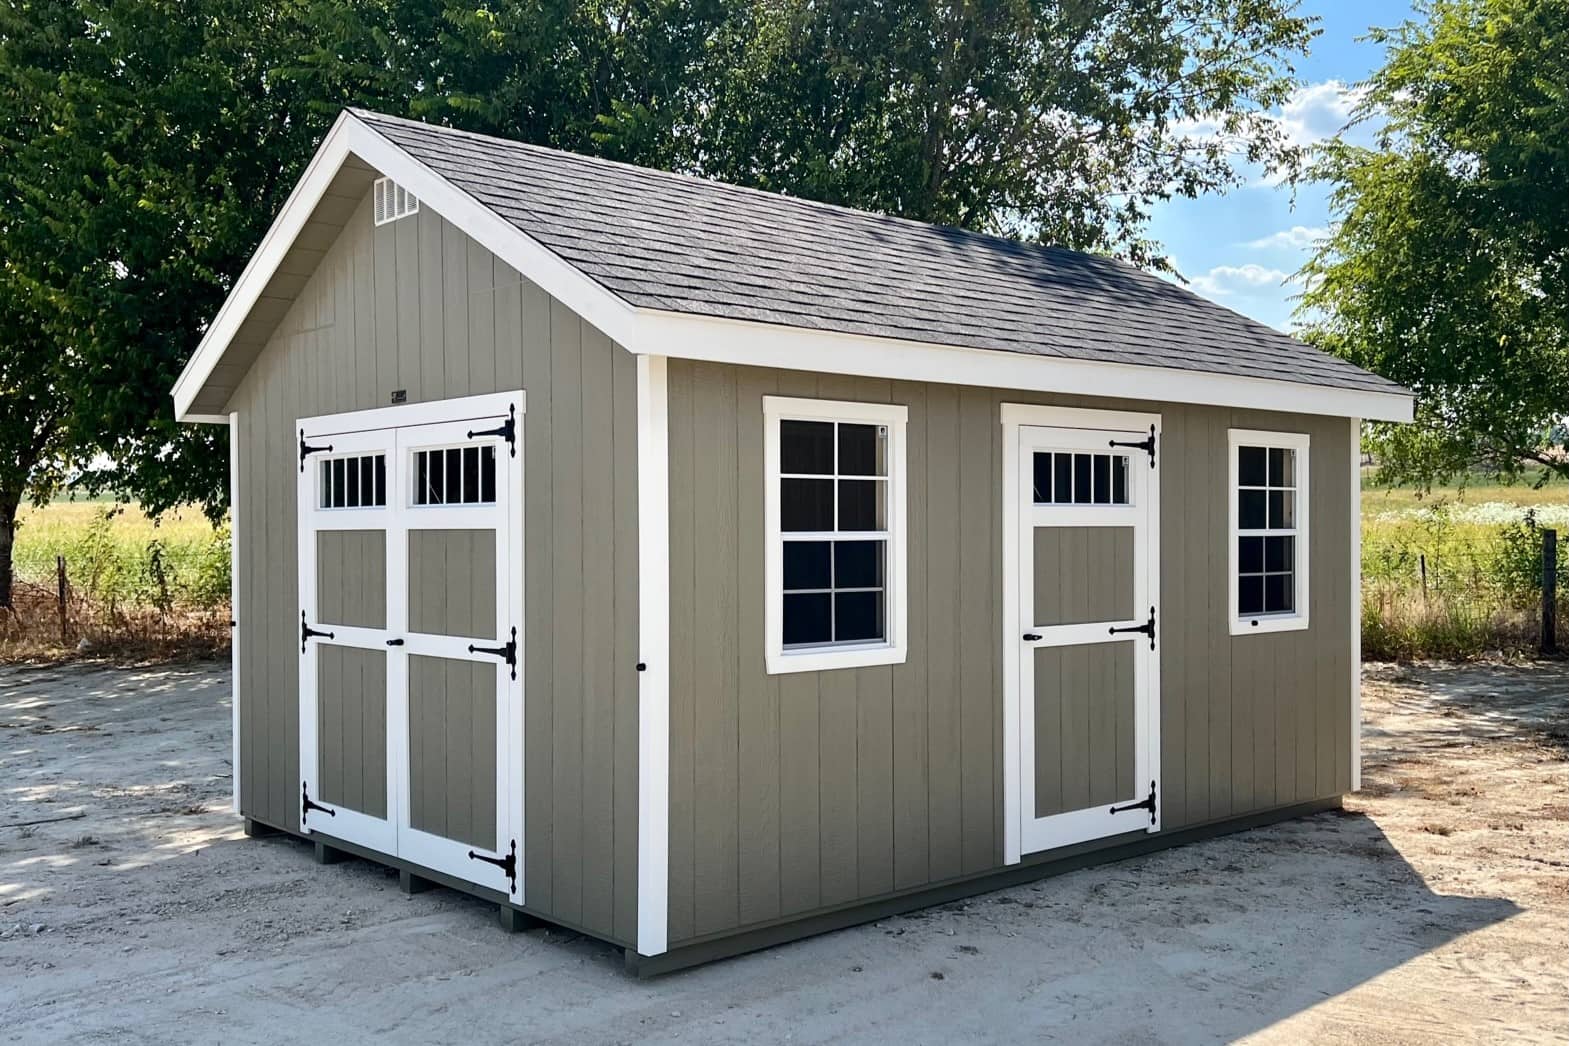
Step 6: Add Doors and Windows
As you near the completion of your 8×12 shed, the addition of doors and windows not only enhances the functionality of the structure but also contributes to its aesthetic appeal. Proper installation of doors and windows ensures accessibility, natural light, and ventilation within the shed. Here’s a detailed guide on how to add doors and windows to your shed:
1. Install the Doors:
Begin by installing the shed doors according to the manufacturer’s instructions. Ensure that the door frame is securely anchored within the wall framing, providing a snug and weather-tight fit. If your shed design includes double doors, align them accurately to ensure smooth operation and a uniform gap between the doors.
2. Add Door Hardware:
Once the doors are in place, install the necessary hardware, including hinges, handles, and locking mechanisms. Verify that the doors open and close smoothly, and adjust the hardware as needed to achieve proper alignment and functionality. Consider adding a door threshold to prevent water infiltration and enhance the durability of the shed’s entryway.
Read more: How Many 2x4s To Build A 10×12 Shed
3. Install Windows:
If your shed design incorporates windows, carefully position and install them within the designated openings in the wall framing. Secure the window frames in place, ensuring they are plumb and level. Apply weatherproofing sealant around the window frames to prevent air and water infiltration, enhancing the energy efficiency and durability of the shed.
4. Enhance Security and Weatherproofing:
After installing the doors and windows, verify that they provide a secure and weathertight seal. Adjust the fit and hardware as necessary to ensure proper closure and locking. Consider adding weather-stripping and caulking around the door and window frames to enhance insulation and prevent drafts and moisture intrusion.
5. Consider Ventilation Options:
To promote adequate airflow within the shed, consider incorporating ventilation options such as louvered vents or operable windows. Proper ventilation helps regulate temperature and humidity levels inside the shed, safeguarding stored items and ensuring a comfortable environment for various activities.
By meticulously following these steps, you’ll successfully add doors and windows to your 8×12 shed, enhancing its functionality, accessibility, and visual appeal. The installed doors and windows contribute to the shed’s overall usability and comfort, bringing you one step closer to completing your outdoor structure. With the doors and windows in place, you’re ready to advance to the final stage of building your shed.
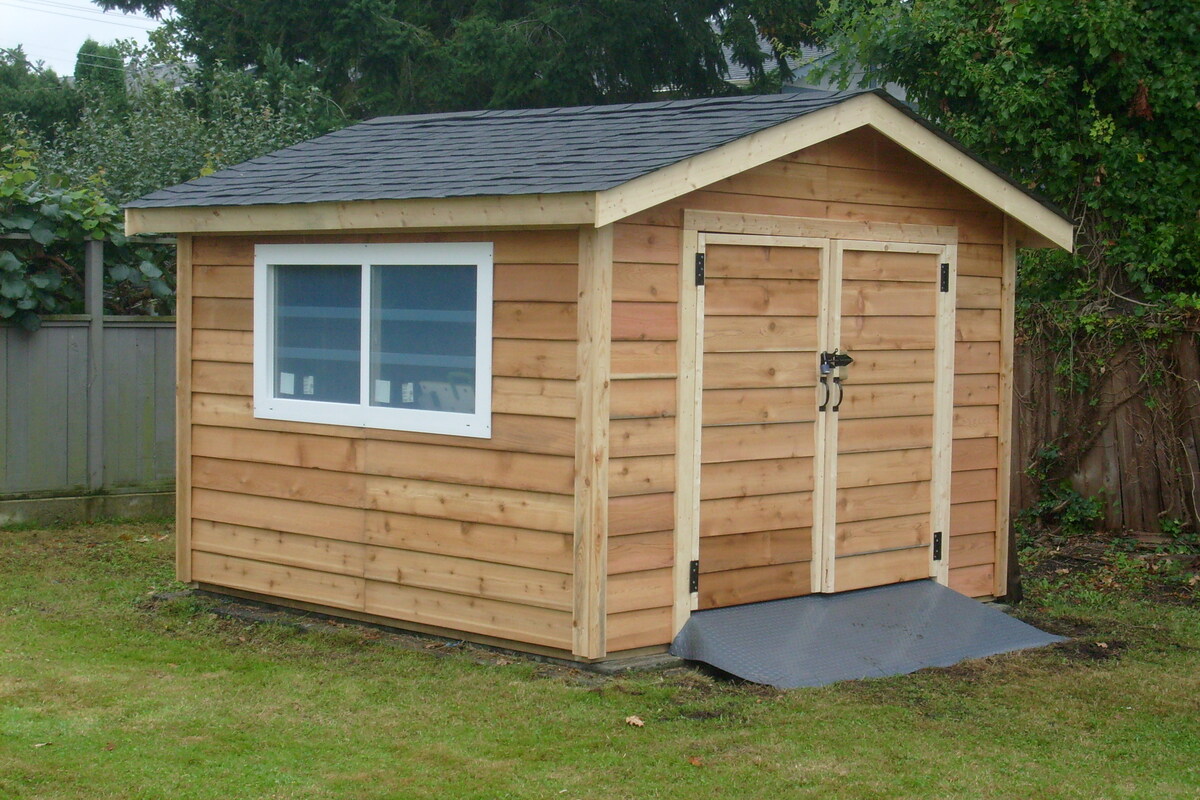
Step 7: Finish with Siding and Trim
As you approach the final phase of building your 8×12 shed, the installation of siding and trim adds the finishing touches that enhance the shed’s durability, weather resistance, and visual appeal. The siding protects the shed’s exterior from the elements, while the trim provides a polished and cohesive look. Here’s a comprehensive guide on how to finish your shed with siding and trim:
Read more: How To Build A 10×10 Shed
1. Select Siding Materials:
Choose the siding materials that best suit your preferences and climate conditions. Common options include wood, vinyl, engineered wood, or metal siding. Consider the visual impact, maintenance requirements, and longevity of the materials when making your selection.
2. Install the Siding:
Begin by applying the siding to the shed’s exterior, starting from the bottom and working your way up. Follow the manufacturer’s guidelines for proper installation, ensuring that the siding is securely fastened and overlaps correctly to prevent water infiltration. Pay attention to the alignment and spacing of the siding panels to achieve a uniform and visually appealing finish.
3. Add Corner and Edge Trim:
Install corner trim pieces at the vertical corners of the shed, providing a clean and finished look while protecting the edges of the siding. Additionally, add edge trim along the eaves and rake edges to conceal the cut edges of the siding and enhance the shed’s overall appearance.
4. Apply Soffit and Fascia:
Complete the exterior finish by adding soffit panels to the underside of the roof overhangs and fascia boards along the roof edges. These components not only contribute to the shed’s aesthetics but also provide essential protection and ventilation for the roof structure.
Read more: How To Build A 10×20 Shed
5. Finish with Paint or Stain:
If you’ve chosen wood siding, consider applying a coat of high-quality exterior paint or stain to protect the wood from weather damage and enhance its longevity. Select a color that complements your backyard landscape and coordinates with any existing structures for a cohesive and visually appealing finish.
By diligently following these steps, you’ll successfully finish your 8×12 shed with siding and trim, culminating in a completed and visually striking outdoor structure. The installed siding and trim not only protect the shed from the elements but also contribute to its overall aesthetic appeal and durability. With the siding and trim in place, you’ve successfully completed the construction of your shed, ready to enjoy its functionality and visual charm.
Conclusion
Congratulations on successfully completing the construction of your 8×12 shed! Throughout this comprehensive guide, you’ve embarked on a fulfilling journey, from gathering materials and tools to adding the finishing touches that bring your vision to life. Building a shed from the ground up is a rewarding endeavor, offering practical benefits and the satisfaction of creating a functional and personalized outdoor space.
By meticulously following each step of the building process, you’ve not only gained valuable hands-on experience but also honed your skills in woodworking, construction, and project management. The knowledge and confidence acquired from this project can be applied to future endeavors, whether it’s expanding your outdoor living space, tackling home improvement projects, or venturing into new DIY ventures.
As you admire the completed 8×12 shed in your backyard, take pride in the craftsmanship and attention to detail that went into every stage of construction. The sturdy foundation, solid floor, well-constructed walls, and meticulously installed roof, doors, windows, siding, and trim all contribute to a durable and visually appealing outdoor structure.
Whether you intend to use the shed for storage, as a workshop, or as a tranquil retreat, its versatile design and sturdy construction ensure it will serve you well for years to come. The sense of accomplishment and the practical benefits of having a dedicated outdoor space are invaluable rewards for your dedication and hard work.
As you reflect on the journey of building your 8×12 shed, remember the satisfaction of overcoming challenges, the joy of creating with your own hands, and the pride in bringing your vision to fruition. Embrace the opportunities for creativity and personalization that a DIY project offers, and let your shed stand as a testament to your ingenuity and determination.
Now, as you enjoy the functional and visually appealing addition to your property, may your 8×12 shed be a source of inspiration for future projects and a space where memories are made and passions are pursued. Cheers to your successful shed-building adventure, and may it bring you years of fulfillment and practicality in your outdoor endeavors.
Frequently Asked Questions about How To Build An 8X12 Shed
Was this page helpful?
At Storables.com, we guarantee accurate and reliable information. Our content, validated by Expert Board Contributors, is crafted following stringent Editorial Policies. We're committed to providing you with well-researched, expert-backed insights for all your informational needs.


0 thoughts on “How To Build An 8X12 Shed”