Home>Gardening & Outdoor>Outdoor Structures>How To Wire A Subpanel In A Shed
Outdoor Structures
How To Wire A Subpanel In A Shed
Published: January 20, 2024
Learn how to wire a subpanel in your shed for safe and efficient power distribution. Our guide covers the essentials for outdoor structures.
(Many of the links in this article redirect to a specific reviewed product. Your purchase of these products through affiliate links helps to generate commission for Storables.com, at no extra cost. Learn more)
Introduction
Setting up a subpanel in a shed is a crucial step in creating a functional and safe electrical system for your outdoor workspace. Whether you plan to power tools, lighting, or other electrical devices, a well-executed subpanel installation ensures that your shed is equipped to meet your needs.
In this comprehensive guide, we will walk you through the step-by-step process of wiring a subpanel in your shed. From gathering the necessary materials to testing the electrical system, we will cover every aspect of the installation. By following these instructions, you can ensure a reliable and efficient power supply to your shed while prioritizing safety and compliance with electrical codes.
Let's dive into the details of how to wire a subpanel in a shed, empowering you to take on this project with confidence and skill.
Key Takeaways:
- Planning and preparation are crucial for wiring a shed subpanel. Gathering materials, planning the layout, and ensuring compliance with codes sets the stage for a successful and safe installation.
- Prioritizing safety and meticulous attention to detail are essential when wiring a shed subpanel. From installation to testing, a proactive approach ensures a reliable and compliant electrical system.
Read more: How To Wire A Shed For Electricity
Step 1: Gather the Necessary Materials
Before embarking on the installation of a subpanel in your shed, it is essential to gather all the required materials and tools. This ensures that you have everything on hand to complete the project efficiently. Here’s a comprehensive list of materials you will need:
- Subpanel: Select a subpanel that meets the power requirements of your shed. Consider factors such as the number of circuits you plan to install and the maximum electrical load.
- Wire: Choose the appropriate gauge of wire for the electrical load and distance from the main panel to the shed. This typically includes hot, neutral, and ground wires.
- Circuit Breakers: Acquire circuit breakers of the correct amperage rating to fit the subpanel and accommodate the electrical devices you intend to power.
- Conduit and Fittings: Depending on local electrical codes, you may need conduit and fittings to protect and route the wiring from the main panel to the subpanel.
- Grounding Rod and Clamp: If not already present, you will need a grounding rod and clamp to establish a proper grounding system for the subpanel.
- Tools: Gather essential tools such as a screwdriver, wire cutter/stripper, level, hammer, and drill to facilitate the installation process.
- Protective Gear: Prioritize safety by obtaining personal protective equipment, including gloves, safety glasses, and appropriate footwear.
By ensuring that you have all the necessary materials and tools at the outset, you can streamline the installation process and minimize the risk of delays or interruptions.
Step 2: Plan the Electrical Layout
Before diving into the physical installation of the subpanel and wiring, it’s crucial to plan the electrical layout for your shed. This step involves determining the placement of the subpanel, identifying the location of electrical devices, and creating a schematic for the wiring.
Start by selecting an optimal location for the subpanel within the shed. Consider accessibility, visibility, and proximity to the main power source. Additionally, ensure that the chosen location complies with local building codes and regulations.
Next, map out the placement of electrical outlets, lighting fixtures, and any other devices that will require power. Take into account the specific power requirements of each device and plan the circuitry accordingly. This may involve allocating separate circuits for power tools, lighting, and other equipment to prevent overloading the electrical system.
Once the placement of the subpanel and electrical devices is determined, create a detailed schematic of the electrical layout. This schematic should illustrate the intended wiring connections, including the routing of wires from the main panel to the subpanel and from the subpanel to individual devices. Consider factors such as wire paths, conduit placement, and the location of junction boxes.
During the planning phase, it’s essential to consult local electrical codes and regulations to ensure compliance with safety standards and installation requirements. Adhering to these guidelines not only promotes safety but also avoids potential issues during inspections or future renovations.
By meticulously planning the electrical layout, you can streamline the installation process and minimize the likelihood of errors or rework. This proactive approach sets the stage for a successful subpanel installation in your shed.
Step 3: Install the Subpanel
With the electrical layout meticulously planned, it’s time to proceed with the physical installation of the subpanel in your shed. This step involves mounting the subpanel, connecting it to the power source, and ensuring proper grounding.
Begin by selecting a suitable location for the subpanel, ensuring that it complies with local building codes and allows for convenient access. Once the location is determined, mount the subpanel securely to the wall using appropriate fasteners and a level to ensure proper alignment.
Next, establish the connection between the subpanel and the main power source. This typically involves running the appropriate gauge of wires from the main panel to the subpanel, following the planned electrical layout. If required by local codes, use conduit to protect and route the wiring, ensuring that it is securely fastened and properly grounded.
As part of the installation process, it’s crucial to establish a robust grounding system for the subpanel. This often involves driving a grounding rod into the earth near the shed and connecting it to the subpanel using a grounding clamp. Adequate grounding is essential for the safety and proper functioning of the electrical system.
Throughout the installation of the subpanel, prioritize safety by following best practices for working with electrical components. Ensure that the power source is disconnected, use appropriate personal protective equipment, and adhere to all relevant safety guidelines.
Upon completing the installation, carefully inspect the subpanel and its connections to verify that everything is securely in place and properly aligned. This meticulous approach sets the stage for the subsequent steps of running the wiring and connecting the electrical components.
By methodically installing the subpanel in your shed, you lay the foundation for a reliable and efficient electrical system that meets your specific needs while adhering to safety standards and regulatory requirements.
When wiring a subpanel in a shed, make sure to use the correct gauge of wire for the distance and amperage needed. Also, be sure to install a grounding rod for safety.
Step 4: Run the Wiring
Once the subpanel is securely installed, the next crucial step is to run the wiring to connect the subpanel to the electrical devices in your shed. This process involves routing the appropriate gauge of wires from the subpanel to the designated locations for outlets, lighting, and other electrical components.
Begin by carefully planning the routing of the wiring, ensuring that it aligns with the schematic created during the electrical layout phase. Consider factors such as the distance of the wiring run, the use of conduit for protection, and the segregation of circuits to prevent overloading.
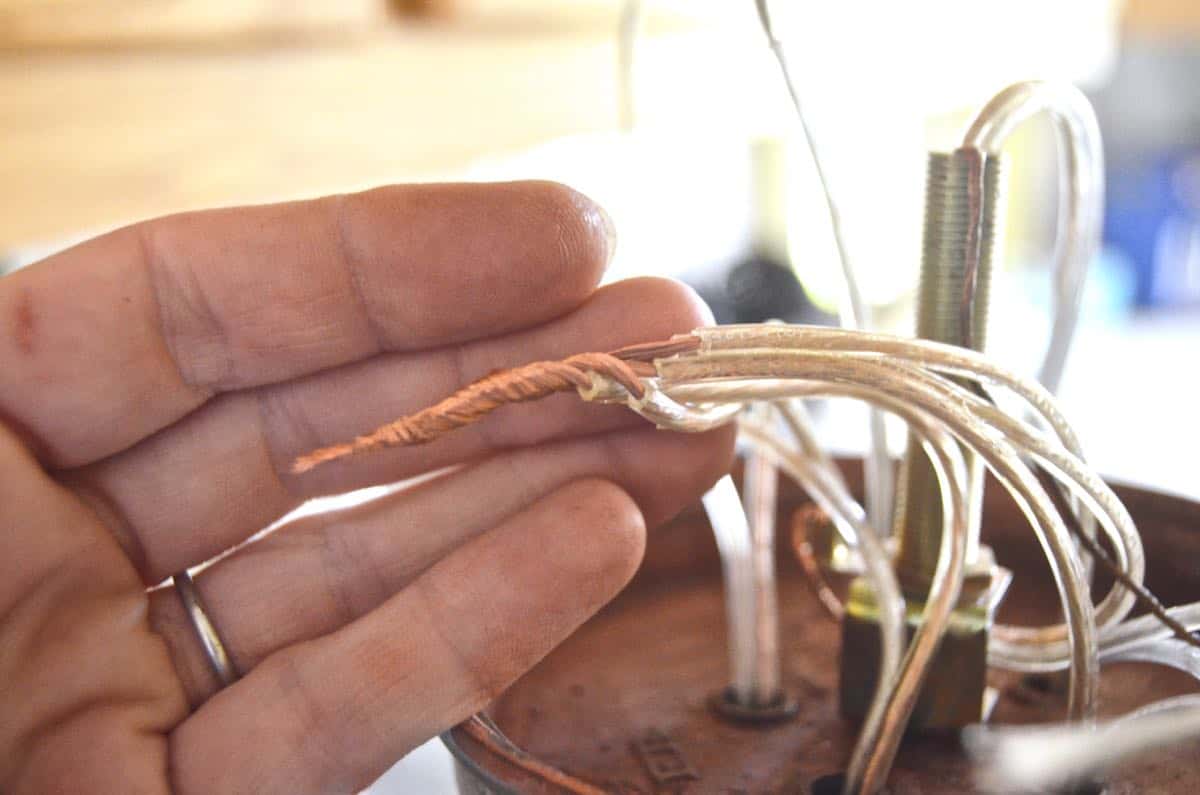
Using the planned schematic as a guide, measure and cut the necessary lengths of wire, ensuring that each wire is accurately sized and labeled for its intended purpose. Exercise caution and precision when stripping the wire insulation to avoid damage to the conductors.
With the wires prepared, proceed to route them from the subpanel to the designated locations within the shed. If required by local codes, use conduit to protect and secure the wiring, taking care to follow best practices for conduit installation and support.
As you run the wiring, pay close attention to the segregation of circuits, ensuring that each electrical device is appropriately connected to the subpanel. This may involve the installation of junction boxes, receptacles, and switches as specified in the electrical layout schematic.
Throughout the process of running the wiring, prioritize safety by adhering to best practices for working with electrical components. Verify that the power source is disconnected, and use appropriate personal protective equipment to mitigate the risk of electrical hazards.
By methodically running the wiring from the subpanel to the electrical devices in your shed, you establish a robust electrical infrastructure that supports the reliable and safe operation of all connected equipment and fixtures.
Read more: How To Wire A Shed From The House
Step 5: Connect the Wiring to the Subpanel
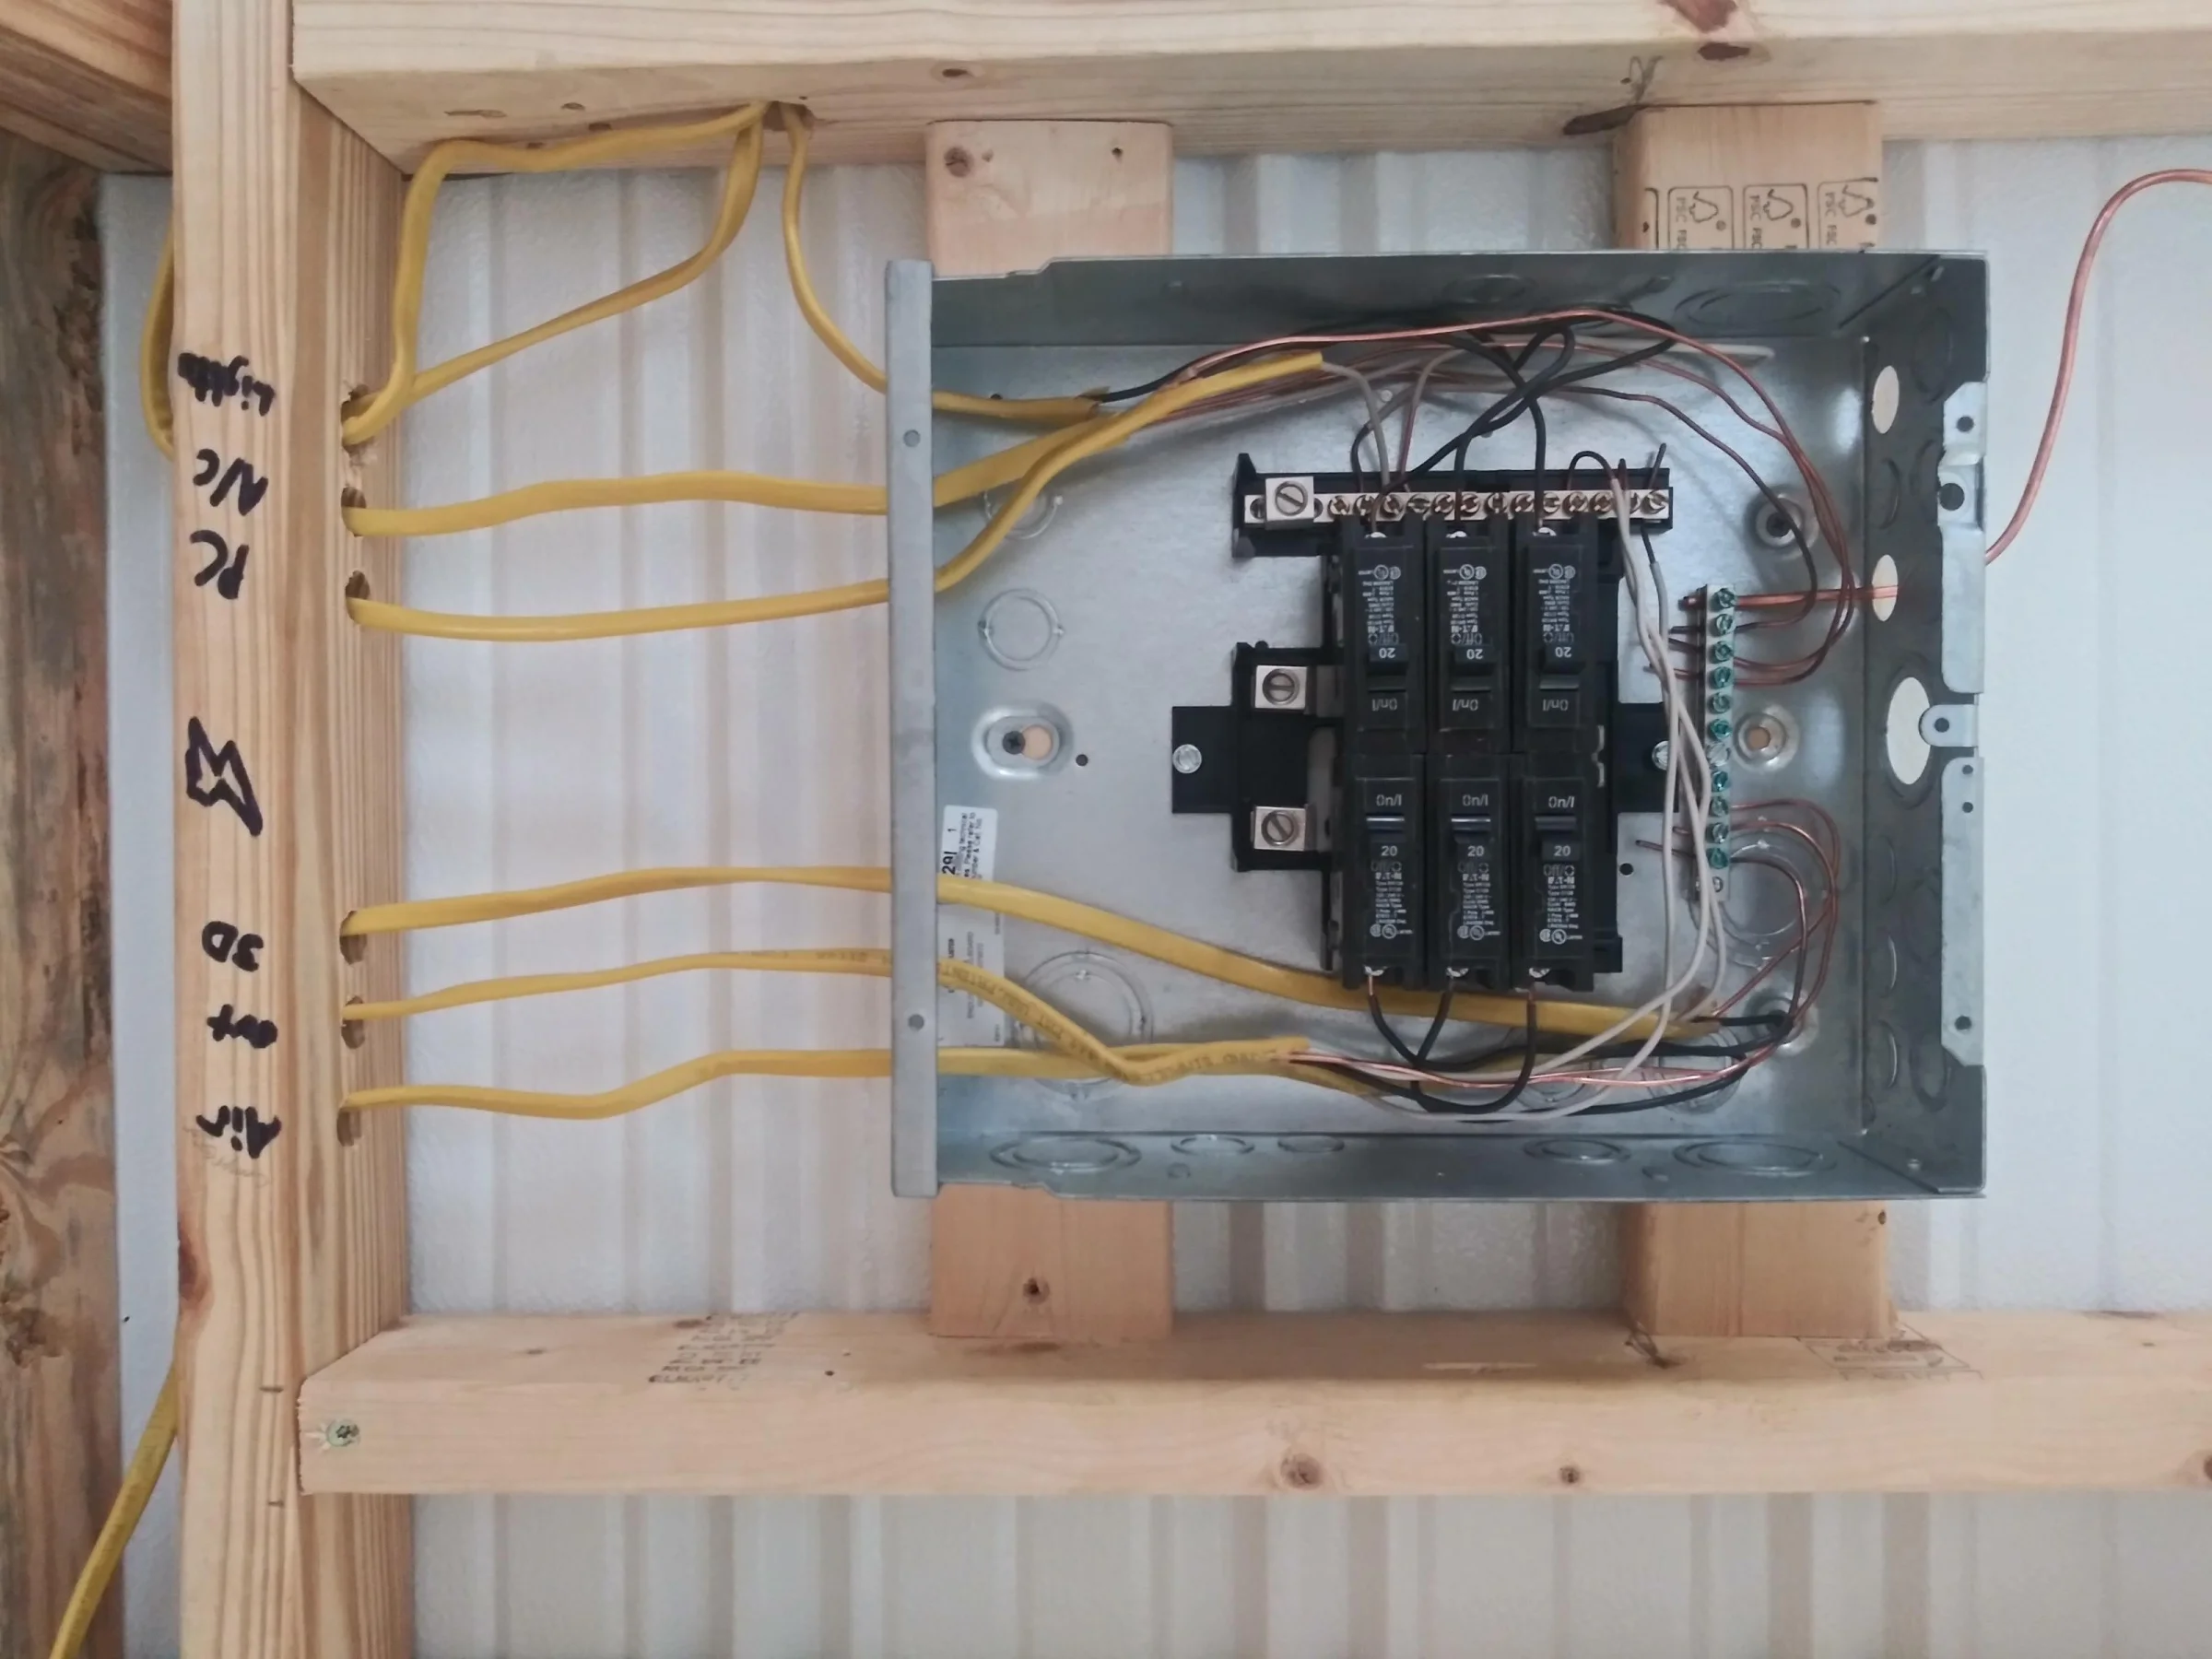
With the wiring run to the designated locations within the shed, the next critical step is to connect the wiring to the subpanel. This process involves carefully and methodically securing the wires to the appropriate terminals in the subpanel, ensuring proper connections and adherence to electrical codes.
Begin by identifying the designated terminals in the subpanel for connecting the hot, neutral, and ground wires. Exercise caution and precision when handling the wires, ensuring that they are accurately sized and stripped to the appropriate length to facilitate secure connections.
Using the labeled and prepared wires, connect the hot wires to the designated circuit breaker terminals in the subpanel, ensuring that they are firmly secured and properly aligned. Take care to maintain the segregation of circuits, avoiding any overlapping or crossing of wires that could compromise safety and functionality.
Next, connect the neutral wires to the corresponding bus bar or terminal block in the subpanel, maintaining proper alignment and securing the connections to establish a reliable neutral pathway for the electrical system.
Finally, connect the ground wires to the designated grounding bar or terminal in the subpanel, ensuring that they are securely fastened and providing a robust grounding path for the electrical circuit. Proper grounding is essential for safety and the effective operation of the electrical system.
Throughout the process of connecting the wiring to the subpanel, prioritize safety by adhering to best practices for working with electrical components. Verify that the power source is disconnected, and use appropriate personal protective equipment to mitigate the risk of electrical hazards.
By meticulously connecting the wiring to the subpanel, you establish a vital link in the electrical circuit that supports the safe and reliable distribution of power to the various devices and fixtures in your shed.
Step 6: Test the Electrical System
After completing the installation of the subpanel and connecting the wiring, it is essential to thoroughly test the electrical system to ensure its proper functionality and safety. This step involves a series of tests and inspections to validate the integrity of the installation and identify any potential issues that require attention.
Begin by conducting a visual inspection of the entire electrical system, including the subpanel, wiring connections, and all electrical devices within the shed. Look for any signs of damage, loose connections, or irregularities that could indicate a potential safety hazard or operational issue.
Next, verify the integrity of the wiring connections within the subpanel, ensuring that all terminals are securely fastened and that there are no visible signs of overheating or damage to the conductors.
Proceed to perform a comprehensive series of electrical tests, including continuity checks, voltage measurements, and ground-fault circuit interrupter (GFCI) testing where applicable. These tests help identify any wiring faults, irregularities in voltage supply, or potential safety risks within the electrical system.
If the shed is equipped with lighting fixtures, switches, or outlets, test each electrical device to ensure proper functionality and adherence to safety standards. Verify that all connections are secure, and that the devices operate as intended without any signs of malfunction or electrical hazards.
As part of the testing process, it is crucial to verify that the subpanel and the entire electrical system comply with local electrical codes and regulations. This may involve consulting with a qualified electrician or inspector to ensure that the installation meets all safety and compliance requirements.
By meticulously testing the electrical system, you can identify and address any potential issues before putting the system into regular use. This proactive approach promotes safety, reliability, and peace of mind, ensuring that your shed’s electrical infrastructure operates as intended.
Conclusion
Wiring a subpanel in a shed is a significant undertaking that demands careful planning, meticulous execution, and a steadfast commitment to safety and compliance. By following the step-by-step process outlined in this guide, you can confidently navigate the complexities of subpanel installation, empowering you to create a functional and reliable electrical system for your outdoor workspace.
From gathering the necessary materials and planning the electrical layout to installing the subpanel, running the wiring, connecting the electrical components, and testing the system, each step is integral to the successful implementation of a robust electrical infrastructure in your shed.
Throughout the entire process, it is paramount to prioritize safety and adherence to local electrical codes and regulations. By doing so, you ensure that your subpanel installation meets the highest standards of electrical safety and reliability, providing a secure and efficient power supply for your shed’s diverse needs.
As you embark on this endeavor, consider consulting with a qualified electrician, especially for guidance on local codes and regulations, ensuring that your installation aligns with best practices and industry standards.
By embracing the knowledge and skills required to wire a subpanel in a shed, you not only enhance the functionality of your outdoor workspace but also gain a deeper understanding of electrical systems, empowering you to undertake future projects with confidence and proficiency.
With a steadfast commitment to safety, meticulous attention to detail, and a comprehensive understanding of the installation process, you can embark on the journey of wiring a subpanel in your shed, transforming it into a well-equipped and reliable space for your creative and practical pursuits.
Frequently Asked Questions about How To Wire A Subpanel In A Shed
Was this page helpful?
At Storables.com, we guarantee accurate and reliable information. Our content, validated by Expert Board Contributors, is crafted following stringent Editorial Policies. We're committed to providing you with well-researched, expert-backed insights for all your informational needs.


0 thoughts on “How To Wire A Subpanel In A Shed”