Home>Gardening & Outdoor>Outdoor Structures>How To Wire A Shed For Electricity
Outdoor Structures
How To Wire A Shed For Electricity
Modified: August 16, 2024
Learn how to properly wire your outdoor shed for electricity with our step-by-step guide. Ensure safety and functionality for your outdoor structures.
(Many of the links in this article redirect to a specific reviewed product. Your purchase of these products through affiliate links helps to generate commission for Storables.com, at no extra cost. Learn more)
Introduction
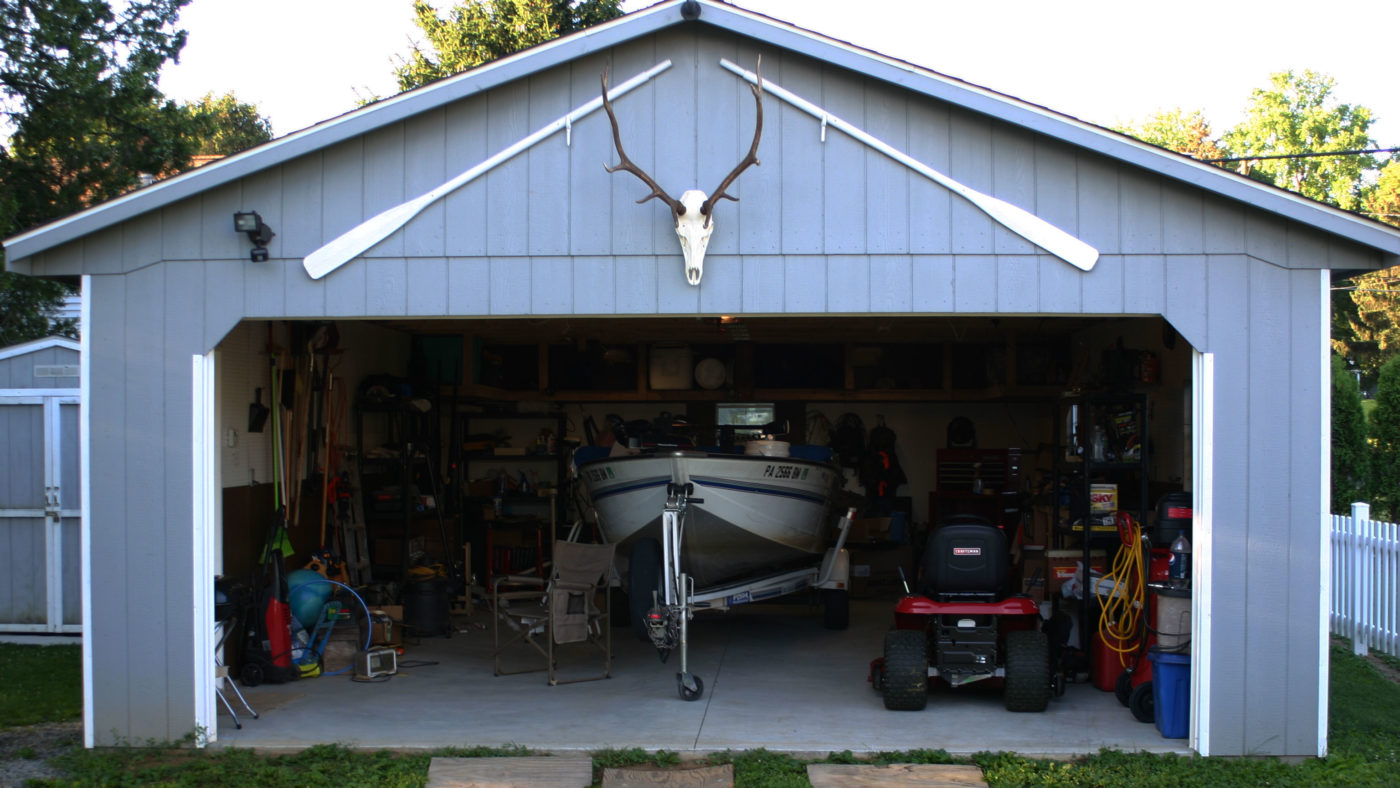
Embarking on the journey of wiring a shed for electricity can open up a world of possibilities. Whether you envision it as a cozy workshop, a serene retreat, or a functional storage space, having a reliable electrical system in your shed can transform it into a versatile and comfortable environment. From powering tools and machinery to creating a well-lit and inviting atmosphere, electricity can significantly enhance the functionality and usability of your outdoor structure.
However, it's essential to approach this project with careful planning, attention to detail, and a commitment to safety. By following the proper steps and guidelines, you can ensure that your shed's electrical system is not only functional but also compliant with building codes and regulations. This comprehensive guide will walk you through the process of wiring a shed for electricity, covering everything from initial planning to the final testing phase.
As we delve into each step, you'll gain a deeper understanding of the technical aspects of electrical wiring while also learning practical tips and best practices. Whether you're a seasoned DIY enthusiast or a newcomer to electrical work, this guide is designed to equip you with the knowledge and confidence to tackle this project effectively.
So, roll up your sleeves, gather your tools, and get ready to bring power to your shed in a safe, efficient, and professional manner. Let's embark on this electrifying journey together and unlock the full potential of your outdoor space.
Key Takeaways:
- Planning and designing the electrical layout of your shed is crucial for safety and functionality. Consider the shed’s purpose, local building codes, and gather the right materials for a successful wiring project.
- Testing the electrical system in your shed is essential for safety and compliance. Verify wiring integrity, grounding, and proper functionality of outlets and lighting fixtures to ensure a reliable and code-compliant setup.
Read more: How To Wire A Subpanel In A Shed
Step 1: Plan and Design
Before diving into the physical aspects of wiring your shed for electricity, it’s crucial to lay a solid foundation through meticulous planning and thoughtful design. Start by envisioning how you intend to use the space. Will it primarily serve as a workshop, a storage area, or a multifunctional retreat? Understanding the shed’s intended purpose will guide your electrical layout and determine the number of outlets, lighting fixtures, and potential power requirements.
Next, sketch a rough floor plan of the shed, marking the locations for outlets, switches, and lighting. Consider the placement of workbenches, storage units, and any potential machinery or tools that will require power. This visual representation will serve as a roadmap for your electrical installation, ensuring that you allocate resources efficiently and accommodate your specific needs.
When designing the electrical layout, prioritize safety and convenience. Aim to minimize the use of extension cords, as they can pose tripping hazards and are not a permanent solution. Instead, strategically position outlets to provide easy access to power sources throughout the shed. Additionally, plan for adequate lighting to create a well-lit and functional environment, enhancing both productivity and safety.
As part of the planning phase, familiarize yourself with local building codes and regulations pertaining to electrical installations in outdoor structures. Compliance with these standards is paramount for the safety and legality of your electrical system. If necessary, consult with a licensed electrician or building inspector to ensure that your design aligns with the applicable codes.
Lastly, create a comprehensive list of materials and tools needed for the project, taking into account the specific requirements outlined in your design. By meticulously planning and designing the electrical layout of your shed, you’ll set the stage for a successful and efficient wiring process, laying the groundwork for a safe and functional electrical system.
Step 2: Gather Materials
With the electrical layout meticulously planned and the design considerations in place, it’s time to assemble the necessary materials and tools for wiring your shed. Ensuring that you have the right components and equipment at the outset will streamline the installation process and minimize disruptions once work begins.
Here’s a comprehensive list of materials and tools you’ll likely need for wiring your shed for electricity:
- Electrical Wire: Select the appropriate gauge and type of electrical wire based on the anticipated load and the distance from the main power source. Common options include NM (non-metallic) sheathed cable for indoor wiring and UF (underground feeder) cable for buried outdoor applications.
- Circuit Breaker Panel: Choose a panel with sufficient capacity to accommodate the planned electrical circuits, ensuring that it is rated for outdoor use if located in a shed.
- Conduit: If required by local codes, gather conduit suitable for outdoor use to protect and route the electrical wiring. This may include PVC conduit for above-ground installations or rigid metal conduit for buried applications.
- Outlet Boxes and Switches: Acquire weatherproof outlet boxes and switches designed for outdoor use, providing protection against the elements.
- Lighting Fixtures: Select suitable lighting fixtures, such as LED or fluorescent options, to illuminate the interior and exterior of the shed.
- Grounding Rod: If the shed is not connected to the main structure’s grounding system, consider installing a grounding rod to ensure electrical safety.
- Fasteners and Mounting Hardware: Stock up on screws, anchors, and other fasteners needed to secure electrical components and fixtures in place.
- Electrical Tools: Gather a comprehensive set of electrical tools, including wire cutters, wire strippers, a voltage tester, a drill with bits, and a fish tape for pulling wires through conduit.
Prior to purchasing materials, review your local building codes and regulations to confirm compliance with specific requirements, such as approved wire types, grounding specifications, and outdoor-rated components. Additionally, consider consulting with a qualified electrician to ensure that your material list aligns with industry best practices and safety standards.
By diligently gathering the essential materials and tools, you’ll lay the groundwork for a successful and code-compliant electrical installation in your shed, setting the stage for the subsequent phases of the wiring process.
Step 3: Install the Circuit Breaker Panel
The circuit breaker panel serves as the heart of your shed’s electrical system, distributing power to various circuits while providing crucial overload and short-circuit protection. Proper installation of the panel is essential for ensuring the safety and functionality of the electrical setup. Here’s a step-by-step guide to installing the circuit breaker panel in your shed:
- Choose the Location: Select a suitable location for mounting the circuit breaker panel, ensuring easy access and compliance with local building codes. Consider factors such as proximity to the main power source, interior space constraints, and the need for future expansion.
- Mounting the Panel: Securely mount the circuit breaker panel to a sturdy surface, such as a wall, using appropriate fasteners and mounting hardware. Ensure that the panel is positioned at a comfortable working height and that it complies with any clearance requirements specified by the manufacturer and local codes.
- Connect the Main Power: If the shed is being powered from a separate electrical service, connect the main power supply to the circuit breaker panel. This may involve running conduit or cable from the main power source to the panel, ensuring proper grounding and adherence to electrical codes.
- Install Circuit Breakers: Carefully install the circuit breakers in the panel, taking care to match the amperage ratings of the breakers with the corresponding electrical circuits. Label each breaker to clearly identify its associated circuit, facilitating future maintenance and troubleshooting.
- Grounding and Bonding: Establish proper grounding and bonding for the circuit breaker panel, ensuring that it is electrically safe and compliant with regulatory requirements. This may involve connecting the panel to a grounding electrode system and bonding metal components as per code specifications.
- Verify Compliance: Upon completing the installation, verify that the circuit breaker panel installation adheres to local building codes and electrical standards. Consider engaging a qualified electrician or arranging for a building inspection to ensure that the installation meets all regulatory requirements.
Throughout the installation process, prioritize safety by following best practices for working with electrical components and adhering to relevant safety guidelines. By methodically installing the circuit breaker panel, you’ll establish a robust and secure foundation for the subsequent wiring and electrical connections in your shed.
When wiring a shed for electricity, make sure to use outdoor-rated wiring and conduit to protect the wires from the elements. It’s also important to install a ground fault circuit interrupter (GFCI) outlet to prevent electrical shock.
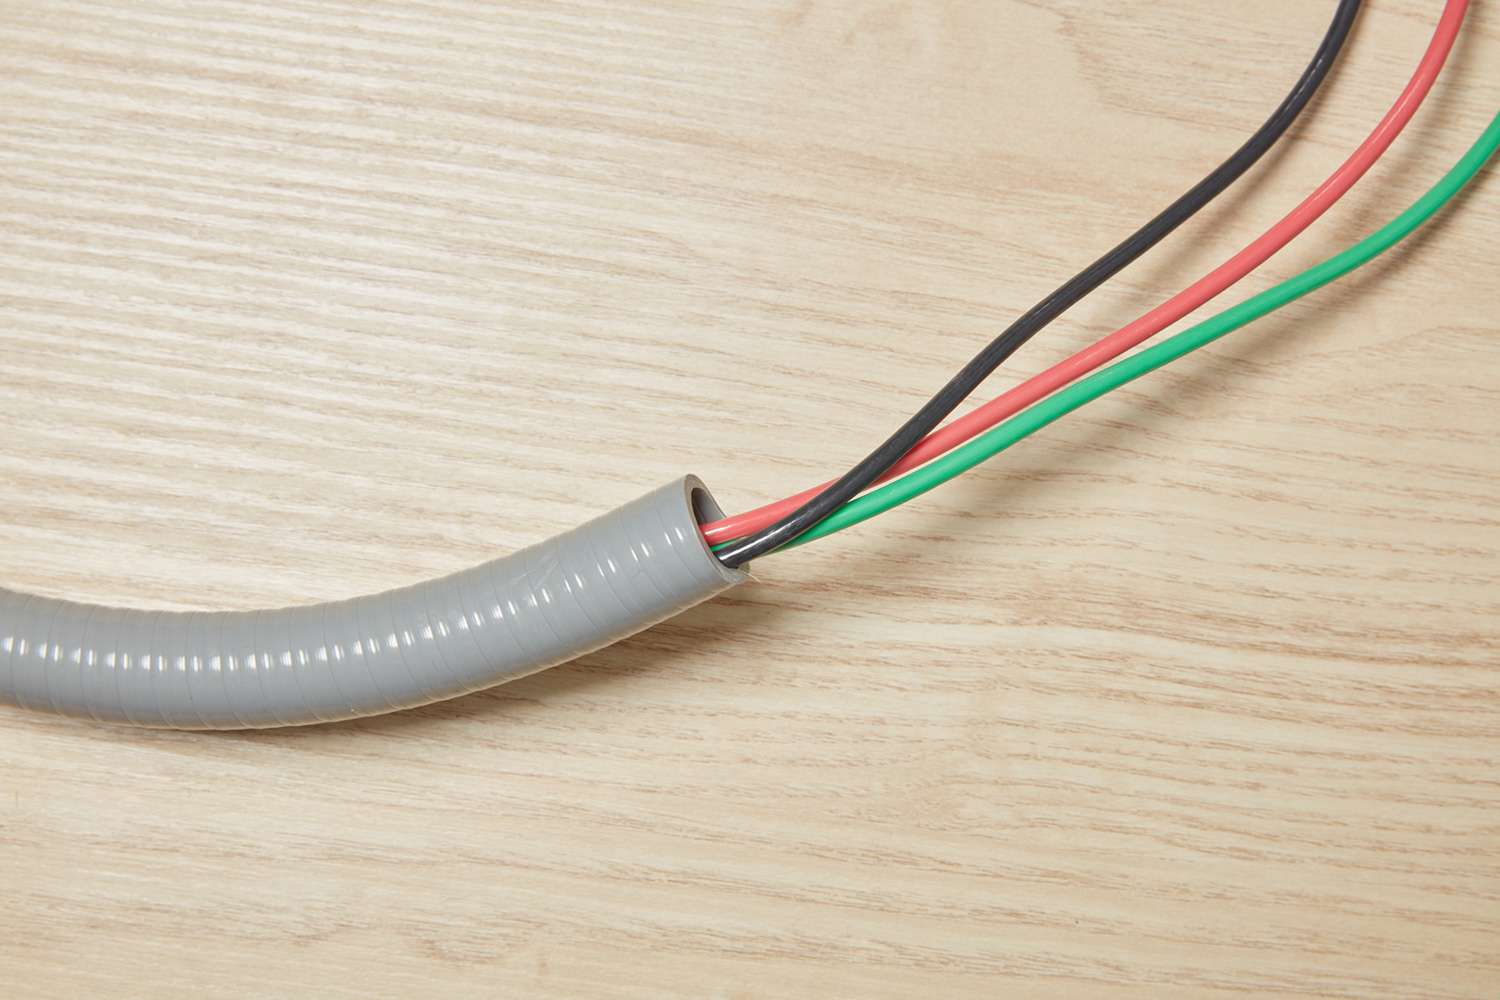
Step 4: Lay Conduit and Wiring
With the circuit breaker panel securely in place, the next critical phase involves laying conduit and wiring to establish the electrical pathways within your shed. Proper installation of conduit and wiring is essential for protecting the electrical conductors from physical damage and environmental factors while facilitating future maintenance and modifications. Here’s a comprehensive guide to laying conduit and wiring in your shed:
- Select the Conduit Type: Choose the appropriate conduit type based on the installation requirements and local codes. Options may include PVC conduit for above-ground applications or rigid metal conduit for buried or outdoor installations, providing mechanical protection and containment for the electrical wiring.
- Plan the Conduit Routes: Map out the conduit routes, considering the locations of outlets, switches, lighting fixtures, and any other electrical points. Ensure that the conduit paths are free from obstructions and obstacles, allowing for smooth and uninterrupted wire installation.
- Measure and Cut Conduit: Using appropriate tools, measure and cut the conduit sections to the required lengths, accounting for bends, junctions, and vertical or horizontal runs. Employ precise cutting techniques to ensure clean, burr-free conduit ends for seamless assembly.
- Assemble and Secure Conduit: Assemble the conduit sections, fittings, and connectors, ensuring a secure and watertight fit at junctions and bends. Use appropriate fastening methods to secure the conduit to the shed’s structure, maintaining proper support and alignment along the designated routes.
- Pull and Install Wiring: Carefully pull the electrical wiring through the installed conduit, employing fish tape or cable pulling tools as needed to navigate bends and longer runs. Organize and dress the wiring within the conduit, avoiding sharp bends or excessive tension that could compromise the conductors.
- Label and Identify Wiring: Methodically label and identify the individual wires within the conduit, clearly indicating their respective circuits and intended connections. This labeling will facilitate future maintenance, troubleshooting, and any potential modifications to the electrical system.
- Verify Conduit Integrity: Upon completing the conduit and wiring installation, verify the integrity of the conduit runs, ensuring that they are free from damage, obstructions, or any compromised sections. Conduct a visual inspection and, if applicable, test the continuity and insulation resistance of the installed wiring.
Throughout the process of laying conduit and wiring, prioritize precision, attention to detail, and compliance with electrical codes and standards. By meticulously installing conduit and wiring, you’ll establish a robust and organized electrical infrastructure within your shed, setting the stage for the subsequent phases of connecting outlets, switches, and lighting fixtures.
Read more: How To Wire A Shed From The House
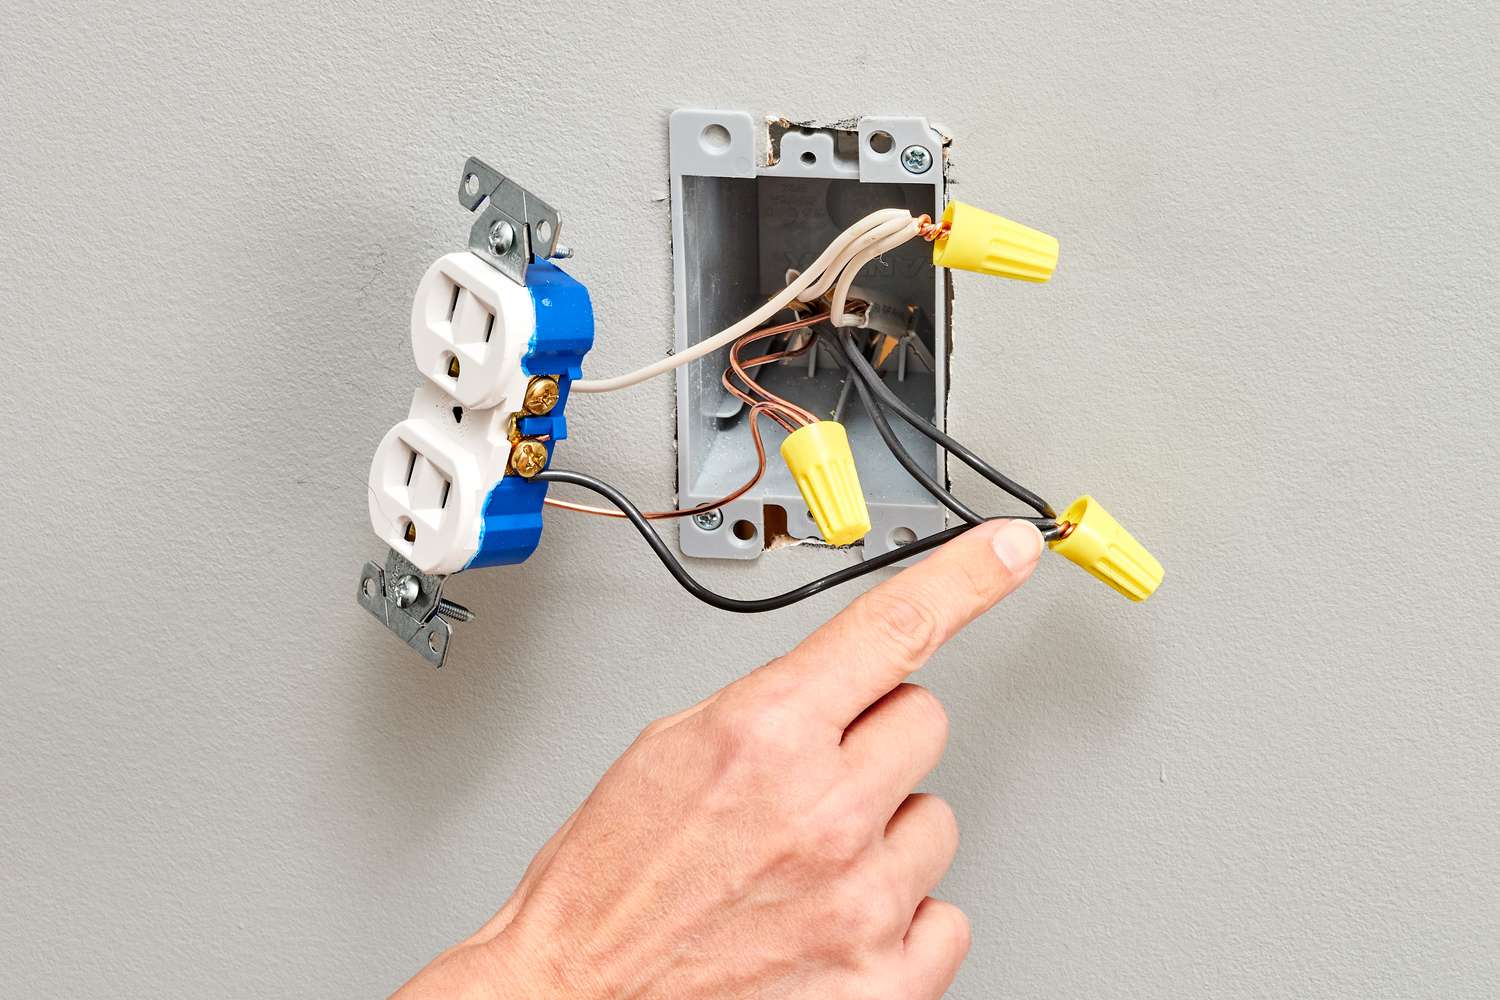
Step 5: Connect the Outlets and Lights
As you progress through the electrical installation in your shed, the pivotal step of connecting outlets and lights brings the space to life, providing essential power sources and illumination. This phase involves establishing the electrical connections for outlets, switches, and lighting fixtures, ensuring that they are not only functional but also strategically positioned to meet your specific needs. Here’s a comprehensive guide to connecting the outlets and lights in your shed:
- Position Outlets and Switches: Based on your initial design and layout, position the outlet boxes and switches at designated locations, considering factors such as accessibility, convenience, and the intended use of the space. Ensure that the placement aligns with electrical codes and regulations, providing adequate spacing and compliance with safety standards.
- Install Outlet Boxes: Securely install the outlet boxes at their designated positions, ensuring that they are mounted flush with the wall or surface and that they provide sufficient support for the electrical devices to be connected.
- Wire Connections: Establish the wiring connections for each outlet and switch, following the appropriate wiring diagrams and color-coding conventions. Utilize wire nuts or terminal screws to secure the connections, ensuring proper insulation and strain relief for the conductors.
- Connect Lighting Fixtures: Install the lighting fixtures at predetermined locations, ensuring that they are securely mounted and aligned with the overall lighting design. Make the necessary electrical connections, adhering to the fixture’s installation instructions and any specific requirements for outdoor or damp locations.
- Grounding and Polarization: Verify that all outlets, switches, and lighting fixtures are properly grounded and polarized, minimizing the risk of electrical hazards and ensuring the correct orientation of the electrical connections.
- Test Electrical Connections: Upon completing the wiring connections, perform a comprehensive test of the outlets, switches, and lighting fixtures to verify their functionality and safety. Use a voltage tester to confirm proper wiring and the absence of any electrical faults.
- Finalize Labeling and Documentation: Label each outlet, switch, and lighting fixture to clearly identify its associated circuit and intended use. Document the electrical connections and circuit assignments for future reference, maintenance, and any potential expansion of the electrical system.
Throughout the process of connecting outlets and lights, prioritize precision, attention to detail, and compliance with electrical codes and standards. By methodically establishing these essential electrical connections, you’ll bring the shed to life with reliable power sources and illumination, enhancing its functionality and usability.
Step 6: Test the Electrical System
As you near the completion of the electrical installation in your shed, the crucial step of testing the electrical system ensures that it operates safely, reliably, and in accordance with regulatory standards. Thorough testing and verification of the electrical components and circuits are essential for identifying and addressing any potential issues before the system is put into regular use. Here’s a comprehensive guide to testing the electrical system in your shed:
- Visual Inspection: Conduct a visual inspection of the entire electrical installation, including the circuit breaker panel, wiring, outlets, switches, and lighting fixtures. Verify that all components are securely mounted, free from damage, and compliant with applicable codes and regulations.
- Continuity and Insulation Testing: Utilize a multimeter or continuity tester to verify the integrity of the wiring and electrical connections. Test for continuity to ensure that conductors are properly connected and that there are no unintended paths for current flow. Additionally, perform insulation resistance testing to confirm that the wiring insulation is not compromised.
- Grounding and Bonding Verification: Verify the effectiveness of the grounding and bonding system, ensuring that the circuit breaker panel, metal components, and electrical enclosures are properly grounded and bonded as per regulatory requirements.
- Outlet and GFCI Testing: Test each outlet for proper wiring, polarity, and the functionality of ground fault circuit interrupters (GFCIs) where applicable. Confirm that GFCIs trip in response to simulated ground faults, providing crucial protection against electrical shocks.
- Lighting Fixture Operation: Verify the operation of all installed lighting fixtures, ensuring that they illuminate as intended and that any associated controls, such as switches or dimmers, function properly.
- Load Testing: Introduce a simulated load, such as a portable lamp or power tool, to the electrical circuits and outlets, verifying that they can sustain the anticipated power demand without overheating or exhibiting abnormal behavior.
- Voltage and Ground Testing: Use a voltage tester to confirm the presence of proper voltage levels at outlets and lighting fixtures. Additionally, verify the absence of any unintended voltage on grounding conductors and metal components.
- Compliance Verification: Verify that the entire electrical system complies with local building codes, electrical standards, and any specific requirements for outdoor or detached structures. Address any identified non-compliance issues promptly and thoroughly.
Throughout the testing process, prioritize meticulous attention to detail, methodical verification of electrical parameters, and a commitment to safety and compliance. By conducting comprehensive testing of the electrical system, you’ll ensure that your shed is equipped with a reliable and code-compliant electrical infrastructure, ready to support your intended activities and usage.
Conclusion
Congratulations on successfully navigating the intricate process of wiring your shed for electricity. By following the comprehensive steps outlined in this guide, you have not only brought power to your outdoor space but also gained valuable insights into electrical installation, safety considerations, and compliance with building codes. As you stand amidst the newly electrified shed, it’s important to reflect on the significance of this achievement and the transformative potential it holds for the space.
With a meticulously planned electrical layout, carefully selected materials, and methodical installation, you have created a versatile and functional environment within your shed. Whether it serves as a workshop, a storage area, or a cozy retreat, the addition of electricity has unlocked a world of possibilities, enabling you to power tools, illuminate workspaces, and enhance the overall usability of the structure.
Throughout this journey, you have not only acquired practical skills in electrical work but also demonstrated a commitment to safety, precision, and adherence to regulatory standards. Your dedication to meticulous planning, thoughtful design, and thorough testing has resulted in an electrical system that not only meets your specific needs but also upholds the highest standards of safety and functionality.
As you move forward, remember to maintain a proactive approach to electrical maintenance, periodically inspecting the system, checking for any signs of wear or damage, and promptly addressing any issues that may arise. Additionally, consider keeping detailed documentation of the electrical installation, including circuit assignments, wiring diagrams, and any relevant permits or inspection reports, for future reference and potential expansion.
By embracing this electrifying endeavor, you have not only enhanced the functionality of your shed but also embarked on a journey of skill development, creativity, and responsible craftsmanship. The electrified shed stands as a testament to your dedication, resourcefulness, and the transformative power of electrical knowledge.
As you continue to enjoy the benefits of a well-lit, powered space, may the experience of wiring your shed for electricity serve as a source of pride and inspiration, igniting your passion for DIY projects, craftsmanship, and the endless possibilities that come with bringing power to the places where you work, create, and find solace.
Frequently Asked Questions about How To Wire A Shed For Electricity
Was this page helpful?
At Storables.com, we guarantee accurate and reliable information. Our content, validated by Expert Board Contributors, is crafted following stringent Editorial Policies. We're committed to providing you with well-researched, expert-backed insights for all your informational needs.


0 thoughts on “How To Wire A Shed For Electricity”