Home>Gardening & Outdoor>Plant Care & Gardening Tips>How To Grow Mums From Seed
Plant Care & Gardening Tips
How To Grow Mums From Seed
Modified: October 20, 2024
Learn expert plant care and gardening tips for growing mums from seed. Discover the best practices for nurturing healthy and vibrant mum plants in your garden.
(Many of the links in this article redirect to a specific reviewed product. Your purchase of these products through affiliate links helps to generate commission for Storables.com, at no extra cost. Learn more)
Introduction
Growing mums from seeds can be a rewarding and fulfilling experience for any gardening enthusiast. Mums, also known as chrysanthemums, are vibrant and resilient flowers that can bring a burst of color to any garden or indoor space. While many gardeners opt for purchasing mature mum plants, starting from seeds allows for a deeper understanding of the plant's life cycle and the satisfaction of nurturing them from the very beginning.
In this comprehensive guide, we will walk you through the step-by-step process of growing mums from seeds, from selecting the right seeds to caring for mature mum plants. Whether you are a seasoned gardener or a beginner with a green thumb, this guide will equip you with the knowledge and confidence to successfully grow mums from seeds and witness the beautiful transformation from tiny seeds to blooming flowers.
By following these steps, you will not only cultivate a stunning display of mums but also gain valuable insights into the intricate journey of plant growth. So, roll up your sleeves, grab your gardening tools, and let's embark on this enriching horticultural adventure together.
Key Takeaways:
- Growing mums from seeds is a rewarding journey that starts with choosing the right seeds and preparing the soil. With care and attention, you can nurture tiny seeds into vibrant, resilient mum plants.
- Providing the optimal conditions for seedlings and caring for mature mums are essential for their growth and blooming. From planting to pruning, each step contributes to the beauty of your garden.
Step 1: Choosing the Right Seeds
Selecting the right seeds is the crucial first step in growing mums from scratch. When choosing mum seeds, it's essential to consider factors such as variety, quality, and source. Here's a detailed breakdown of the key considerations:
-
Variety: Mums come in a wide array of varieties, each boasting unique colors, shapes, and sizes. Whether you prefer the classic cushion mum, the daisy-like single mum, or the exotic spider mum, it's important to decide on the specific variety you want to cultivate. Consider the climate and growing conditions in your area to ensure that the chosen variety is well-suited for your location.
-
Quality: Opt for high-quality seeds from reputable suppliers or nurseries. Look for seeds that are plump, firm, and free from damage or signs of decay. High-quality seeds are more likely to germinate successfully and develop into healthy, robust plants.
-
Source: When sourcing mum seeds, explore a range of options, including local nurseries, online seed suppliers, or seed exchanges with fellow gardeners. Additionally, consider the seed's origin and whether it aligns with your sustainability and ethical preferences. Some gardeners may prioritize organic, non-GMO, or heirloom seeds for their environmental and biodiversity benefits.
-
Considerations for Beginners: For novice gardeners, it's advisable to start with easy-to-grow mum varieties that are resilient and forgiving. Look for seeds labeled as suitable for beginners or those that require minimal maintenance and are adaptable to various growing conditions.
By carefully selecting the right mum seeds, you set the stage for a successful and gratifying gardening journey. The process of choosing seeds allows you to personalize your gardening experience and lays the foundation for nurturing thriving mum plants from the very beginning.
Step 2: Preparing the Soil
Preparing the soil is a critical step in the journey of growing mums from seeds. The quality of the soil directly impacts the germination of seeds and the overall health of the plants as they mature. Here's a comprehensive guide to preparing the soil for successful mum cultivation:
Assessing Soil Quality
Before diving into soil preparation, it's essential to assess the quality of the soil in your chosen planting area. Conduct a simple soil test to determine its pH level and nutrient composition. Mums thrive in well-draining, slightly acidic soil with a pH range of 6.5 to 7.0. If the soil pH is outside this range, amendments may be necessary to create an optimal growing environment for the seeds.
Soil Amendment
Based on the results of the soil test, amend the soil as needed to achieve the ideal pH level and nutrient balance. Incorporate organic matter such as compost, well-rotted manure, or peat moss to improve soil structure and fertility. These organic amendments enhance moisture retention, promote root development, and provide essential nutrients for the growing seeds.
Read more: How To Grow Okra From Seed
Loosening the Soil
Loosen the soil to a depth of around 6 to 8 inches using a garden fork or tiller. This process improves aeration and allows the roots to penetrate the soil easily. Avoid compacted soil, as it hinders water infiltration and root growth, ultimately impacting the health and vigor of the mum plants.
Removing Debris and Weeds
Clear the planting area of any debris, rocks, or weeds that may impede the growth of the mum seeds. Weeds compete with the seeds for nutrients and sunlight, so it's crucial to eliminate them before planting. Additionally, removing debris minimizes the risk of pests and diseases that could harm the emerging seedlings.
Creating Planting Beds
Create well-defined planting beds or rows for sowing the mum seeds. Ensure that the planting area receives adequate sunlight, as mums thrive in full sun conditions. Proper spacing between the planting beds allows for air circulation and prevents overcrowding as the seedlings mature.
Mulching
Consider applying a layer of organic mulch, such as straw or shredded leaves, to the prepared soil. Mulch helps regulate soil temperature, retain moisture, and suppress weed growth, creating an optimal environment for the mum seeds to germinate and thrive.
By meticulously preparing the soil, you establish a nurturing foundation for the mum seeds to take root and flourish. The soil preparation process sets the stage for robust growth and bountiful blooms, laying the groundwork for a successful mum-growing endeavor.
Read more: How To Grow A Tree From A Seed
Step 3: Planting the Seeds
Planting the mum seeds with care and precision is a pivotal stage in the journey of growing mums from scratch. By following the proper planting techniques, you can maximize the chances of successful germination and establish a strong foundation for the growth of the seedlings. Here's a detailed guide to planting mum seeds effectively:
Sowing Depth and Spacing
When planting mum seeds, it's crucial to adhere to the recommended sowing depth and spacing guidelines. As a general rule, sow the seeds at a depth of approximately 1/8 inch in the prepared soil. Ensure that the seeds are not buried too deeply, as this may hinder their ability to sprout and emerge from the soil. Additionally, maintain a spacing of about 12 to 18 inches between each seed to allow ample room for the seedlings to develop and avoid overcrowding as they grow.
Seed Placement and Covering
Carefully place the mum seeds in the designated planting beds or rows, ensuring that they are evenly spaced and gently press them into the soil. Once the seeds are in place, lightly cover them with a thin layer of soil or vermiculite. This covering helps secure the seeds in position and provides the necessary protection for germination while allowing them to receive adequate light for sprouting.
Watering and Moisture Management
After planting the seeds, it's essential to water the soil gently to provide ample moisture for germination. Use a fine mist setting on a watering can or hose to avoid displacing the seeds or causing soil compaction. Ensure that the soil remains consistently moist but not waterlogged during the germination period. Regularly monitor the moisture levels and adjust the watering frequency as needed to support the seeds' germination and early growth stages.
Read more: How To Grow Zinnias From Seed
Sunlight and Temperature
Position the planting beds or containers in a location that receives ample sunlight, as mums thrive in full sun conditions. Ensure that the seeds are exposed to at least 6 to 8 hours of sunlight daily to facilitate healthy growth and robust seedling development. Additionally, maintain an optimal temperature range of 65 to 70°F (18 to 21°C) to promote successful germination and provide a favorable environment for the emerging seedlings.
By meticulously following these planting guidelines, you set the stage for the successful germination and emergence of the mum seeds. The careful placement, moisture management, and environmental considerations contribute to creating an ideal setting for the seeds to sprout and embark on their journey towards becoming flourishing mum plants.
Step 4: Providing the Right Conditions
Creating the optimal growing conditions is essential for nurturing healthy and robust mum seedlings as they progress through their early stages of development. By providing the right conditions, you can significantly enhance the chances of successful growth and ensure that the seedlings thrive as they transition into mature mum plants. Here's a detailed exploration of the key factors involved in providing the right conditions for growing mums from seeds:
Temperature and Humidity Control
Maintaining a consistent temperature and humidity level is crucial for the healthy development of mum seedlings. Aim to keep the growing environment within the range of 65 to 75°F (18 to 24°C) during the daytime and slightly cooler at night. This temperature range provides an ideal balance for seedling growth and minimizes the risk of stress or stunted development. Additionally, ensure that the humidity levels remain moderate, avoiding excessively dry or overly humid conditions that could impede the seedlings' progress.
Adequate Watering and Drainage
Proper watering is fundamental to the well-being of mum seedlings. It's essential to water the seedlings consistently, ensuring that the soil remains evenly moist but not waterlogged. Overwatering can lead to root rot and other moisture-related issues, while underwatering may cause the seedlings to wilt and suffer from dehydration. Additionally, prioritize well-draining soil and containers to prevent water accumulation and promote healthy root development.
Read more: How To Grow Begonia From Seed
Nutrient-Rich Soil and Fertilization
As the mum seedlings grow, they require a steady supply of nutrients to support their development. Ensure that the soil is rich in essential nutrients by incorporating a balanced, slow-release fertilizer specifically formulated for flowering plants. Follow the recommended application guidelines to avoid over-fertilization, which can harm the delicate seedlings. Regularly monitor the seedlings for any signs of nutrient deficiencies, such as yellowing leaves or stunted growth, and adjust the fertilization regimen accordingly.
Light Exposure and Air Circulation
Providing adequate light exposure is vital for the healthy growth of mum seedlings. Position the seedlings in a location that receives ample sunlight, ensuring they are exposed to at least 12 hours of light daily. If natural sunlight is limited, consider supplementing with grow lights to ensure the seedlings receive the necessary light energy for photosynthesis and overall vitality. Additionally, promote good air circulation around the seedlings to prevent the development of fungal diseases and encourage sturdy stem growth.
By meticulously attending to these critical factors and providing the right conditions, you create an environment that fosters the optimal growth and development of mum seedlings. The careful management of temperature, moisture, nutrients, and environmental factors sets the stage for the seedlings to flourish and progress towards becoming resilient and vibrant mature mum plants.
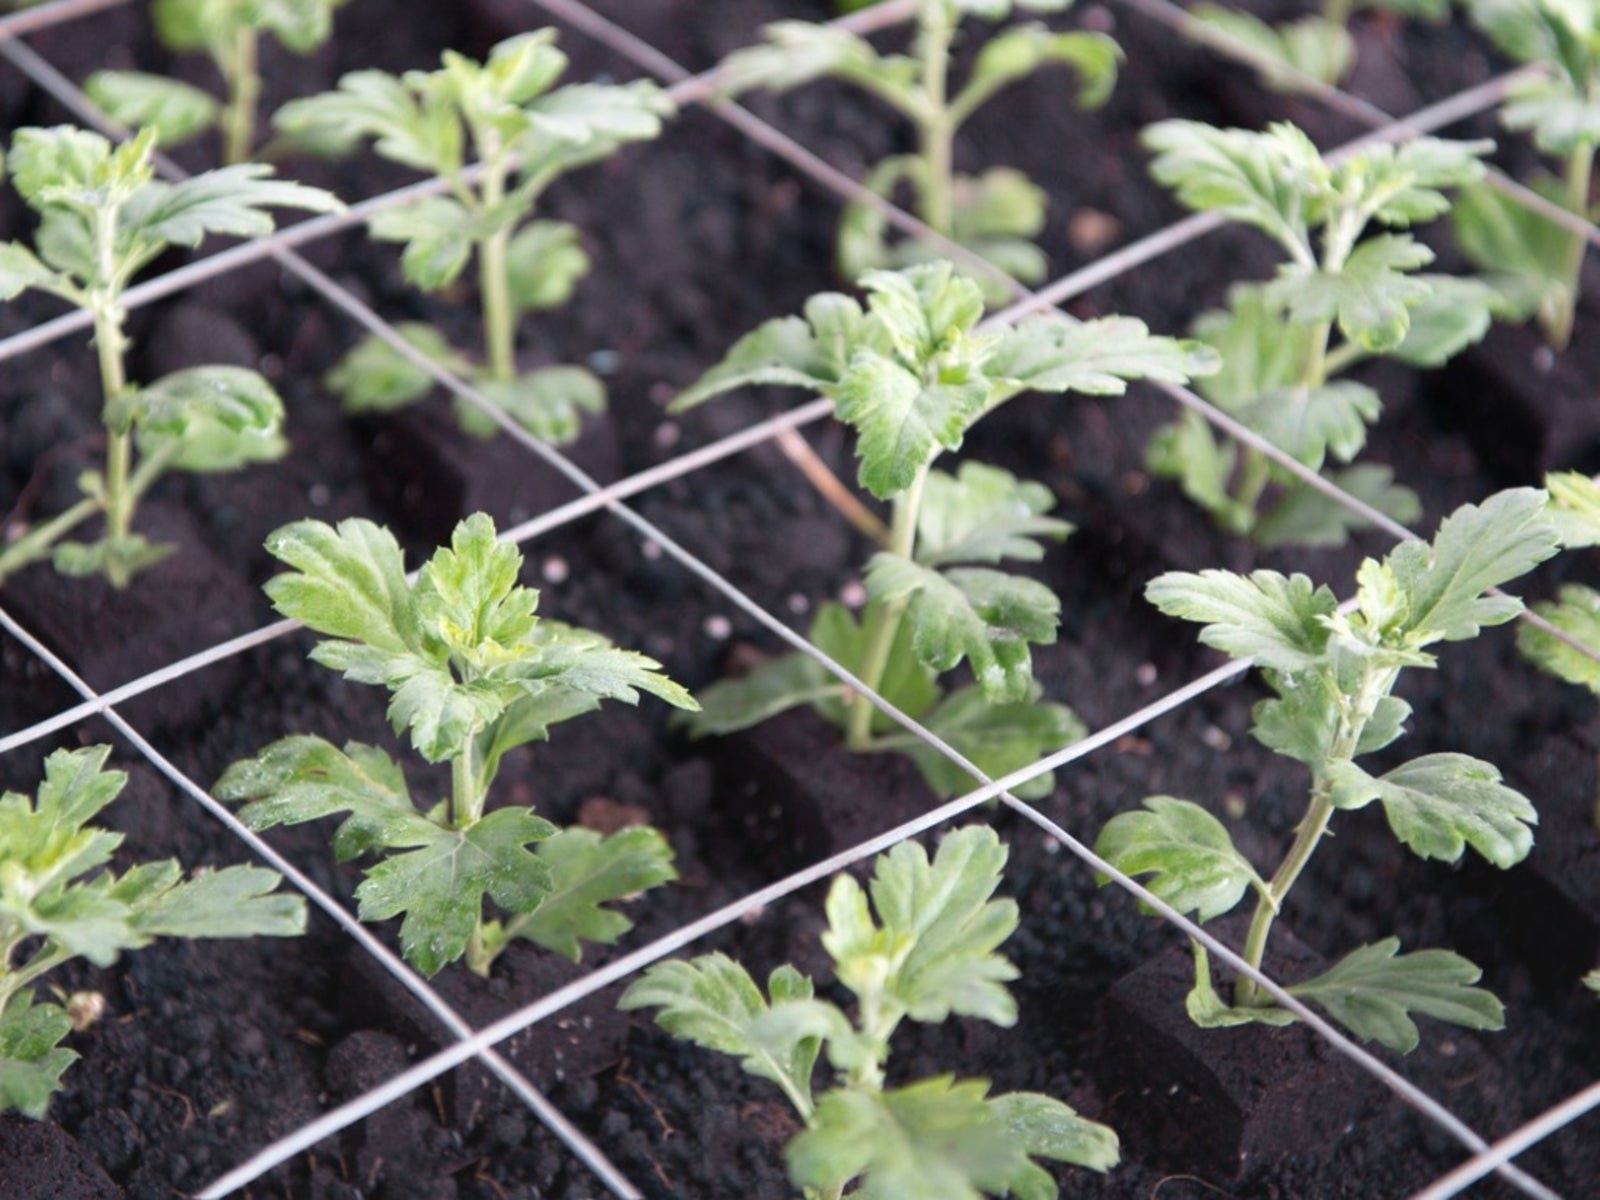
Step 5: Transplanting the Seedlings
Transplanting the seedlings marks a significant milestone in the journey of growing mums from seeds, signifying the transition from the initial growth phase to a more spacious and permanent growing environment. This crucial step requires careful handling and strategic timing to ensure the seamless acclimatization of the seedlings to their new surroundings. Here's a detailed exploration of the essential considerations and best practices for transplanting mum seedlings effectively:
Timing and Growth Stage Assessment
Before initiating the transplanting process, it's vital to assess the growth stage of the mum seedlings and determine the optimal timing for transplantation. Typically, seedlings are ready for transplanting when they have developed at least two sets of true leaves and sturdy stems. At this stage, they are better equipped to withstand the transplantation process and adapt to the changes in their growing conditions.
Read more: How To Grow Nectarine From Seed
Selecting the Transplanting Site
Choose a suitable transplanting site that provides the ideal growing conditions for mature mum plants. Ensure that the selected site offers ample sunlight, well-draining soil, and sufficient space for the mature plants to thrive. Whether you plan to transplant the seedlings into outdoor garden beds or containers, prioritize a location that aligns with the sunlight and soil requirements essential for the healthy growth of mums.
Transplanting Technique
Carefully remove the seedlings from their original containers or planting beds, taking care not to disturb the delicate roots. Gently loosen the soil around the seedlings and lift them out, holding the seedlings by their leaves to avoid damaging the stems or roots. If the seedlings are closely spaced, transplant them into individual containers or adequately spaced garden beds to allow for unrestricted growth and development.
Soil Preparation and Planting Depth
Prepare the transplanting site by ensuring the soil is well-amended with organic matter and free from debris or compacted areas. Dig holes at the appropriate spacing for the seedlings, ensuring that the planting depth matches the level at which the seedlings were previously growing. Carefully place the seedlings into the prepared holes, ensuring that the roots are spread out and covered with soil to secure them in place.
Watering and Aftercare
After transplanting the seedlings, water the soil thoroughly to promote root establishment and minimize transplant shock. Monitor the newly transplanted seedlings closely, ensuring that they receive adequate moisture and protection from extreme weather conditions. Implement a regular watering schedule and provide gentle care to support the seedlings as they adjust to their new growing environment.
By following these guidelines and best practices for transplanting mum seedlings, you facilitate a smooth and successful transition for the young plants as they progress towards maturation. The careful handling, strategic site selection, and attentive aftercare contribute to the seamless integration of the seedlings into their new surroundings, setting the stage for their continued growth and eventual blooming as vibrant and resilient mature mum plants.
Read more: How To Grow Vanilla From Seed
Step 6: Caring for Mature Mums
Caring for mature mums is a fulfilling and ongoing process that involves providing the necessary attention, maintenance, and support to ensure the continued health and vibrancy of the established plants. As the mum plants progress through their growth stages and transition into full maturity, diligent care and thoughtful cultivation practices play a pivotal role in fostering robust growth and abundant blooming. Here's an in-depth exploration of the essential aspects of caring for mature mums:
Pruning and Deadheading
Regular pruning and deadheading are essential practices for maintaining the vitality and appearance of mature mum plants. Pruning involves the removal of spent blooms, leggy growth, and damaged foliage to encourage new growth and maintain a compact, bushy form. Deadheading, the process of removing faded flowers, promotes continuous blooming and prevents the plants from expending energy on seed production. By incorporating these practices, you can prolong the blooming period and enhance the overall aesthetic appeal of the mum plants.
Watering and Moisture Management
Consistent and appropriate watering is crucial for the well-being of mature mum plants. Ensure that the soil remains evenly moist, avoiding both drought stress and waterlogging. During hot and dry periods, increase the frequency of watering to prevent the soil from drying out. Implement a watering schedule that allows the plants to thrive without succumbing to excessive moisture or dehydration, promoting healthy root development and robust foliage.
Fertilization and Nutrient Support
Providing adequate nutrients is vital for sustaining the vigor and blooming capacity of mature mum plants. Apply a balanced, water-soluble fertilizer formulated for flowering plants during the growing season to supplement the soil with essential nutrients. Avoid over-fertilization, as excessive nutrients can lead to lush foliage at the expense of blooming. Regularly monitor the plants for any signs of nutrient deficiencies and adjust the fertilization regimen as needed to support their ongoing growth and flowering.
Read more: How To Grow Blueberries From Seeds
Pest and Disease Management
Vigilant pest and disease management is essential for safeguarding the health and resilience of mature mum plants. Regularly inspect the plants for signs of pests such as aphids, mites, or caterpillars, and promptly address any infestations using organic pest control methods. Additionally, monitor the plants for symptoms of common mum diseases such as powdery mildew or leaf spot, taking proactive measures to prevent and manage any potential issues.
Winter Preparation and Protection
As the growing season comes to a close, it's crucial to prepare mature mum plants for the winter months. In regions with cold winters, provide adequate protection by applying a layer of mulch around the base of the plants to insulate the roots and protect them from freezing temperatures. Consider pruning the plants in late fall to remove any dead or diseased growth and promote healthy regrowth in the following season.
By attentively addressing these key aspects of caring for mature mums, you can nurture flourishing and resilient plants that continue to grace your garden with their vibrant blooms year after year. The dedication to ongoing care and maintenance ensures that mature mum plants thrive and remain a captivating centerpiece of any garden or landscape, rewarding both novice and seasoned gardeners with their enduring beauty and charm.
Conclusion
In conclusion, the journey of growing mums from seeds is a deeply rewarding and enriching experience that allows gardeners to witness the remarkable transformation of tiny seeds into vibrant, resilient plants. By following the comprehensive steps outlined in this guide, you can embark on a horticultural adventure that encompasses the careful selection of seeds, meticulous soil preparation, precise planting techniques, and attentive care for both seedlings and mature plants.
The process begins with the crucial step of choosing the right mum seeds, considering factors such as variety, quality, and source. This initial decision sets the stage for a personalized and fulfilling gardening experience, tailored to your preferences and growing conditions. As you carefully select the seeds, you lay the foundation for nurturing thriving mum plants from their earliest stages.
The subsequent steps delve into the essential aspects of soil preparation, planting techniques, and providing the optimal conditions for seed germination and early growth. By meticulously attending to these critical factors, you create an environment that fosters the optimal growth and development of mum seedlings, setting the stage for their successful transition into mature plants.
Furthermore, the guide explores the pivotal process of transplanting the seedlings, marking a significant milestone in the mum plants' journey towards full maturity. The careful handling, strategic site selection, and attentive aftercare contribute to the seamless integration of the seedlings into their new surroundings, ensuring their continued growth and eventual blooming as vibrant and resilient mature mum plants.
As the mum plants progress into their mature stage, the guide delves into the essential aspects of caring for them, encompassing practices such as pruning, watering, fertilization, pest and disease management, and winter preparation. These ongoing care and maintenance practices are fundamental for sustaining the vigor and blooming capacity of mature mum plants, ensuring that they continue to grace your garden with their enduring beauty and charm.
In essence, the journey of growing mums from seeds is a testament to the transformative power of nurturing and cultivating life from its earliest stages. It is a journey that not only yields stunning displays of colorful blooms but also fosters a deeper connection with nature and an appreciation for the intricate processes of plant growth. By embracing this journey, you can cultivate a flourishing garden filled with the vibrant beauty of mums, celebrating the cycle of life and the joy of nurturing living creations from seed to bloom.
Frequently Asked Questions about How To Grow Mums From Seed
Was this page helpful?
At Storables.com, we guarantee accurate and reliable information. Our content, validated by Expert Board Contributors, is crafted following stringent Editorial Policies. We're committed to providing you with well-researched, expert-backed insights for all your informational needs.


0 thoughts on “How To Grow Mums From Seed”