Home>Gardening & Outdoor>Plant Care & Gardening Tips>How To Make Wildflower Seed Paper
Plant Care & Gardening Tips
How To Make Wildflower Seed Paper
Modified: August 16, 2024
Learn how to make wildflower seed paper with our plant care and gardening tips. Create beautiful handmade paper embedded with wildflower seeds for a sustainable and eco-friendly touch to your projects.
(Many of the links in this article redirect to a specific reviewed product. Your purchase of these products through affiliate links helps to generate commission for Storables.com, at no extra cost. Learn more)
Introduction
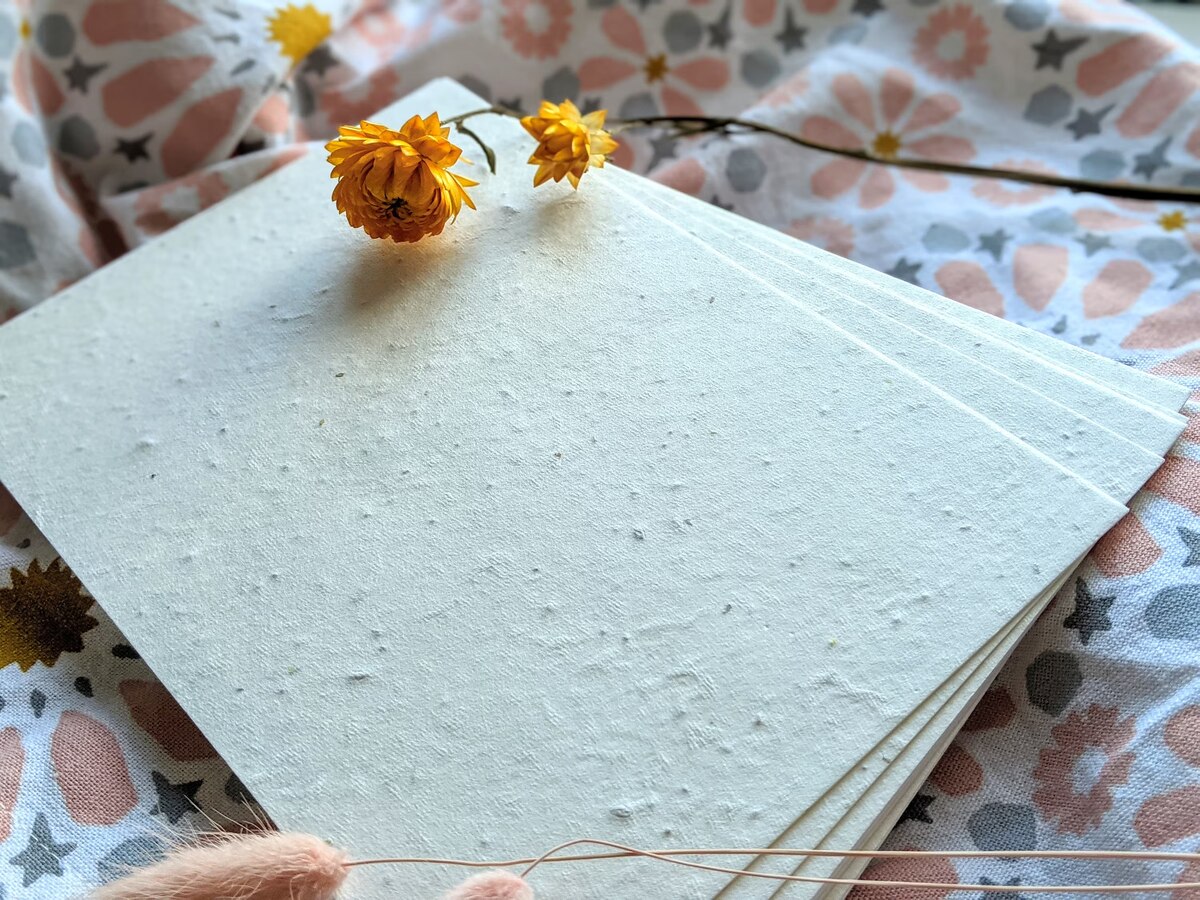
Creating your own wildflower seed paper is a delightful and eco-friendly way to add a touch of natural beauty to your stationery, crafts, or gifts. This unique handmade paper not only showcases the beauty of wildflowers but also provides an opportunity to spread the joy of gardening and the importance of nurturing our environment. Whether you're a seasoned gardener or a novice nature enthusiast, making wildflower seed paper is a rewarding and straightforward process that allows you to embrace your creativity while promoting sustainability.
By repurposing old paper and incorporating wildflower seeds into the pulp, you can produce charming, plantable paper that, when planted, will sprout into a colorful array of wildflowers. This sustainable and eco-conscious practice not only reduces waste but also encourages the growth of vibrant wildflower blooms, supporting local ecosystems and pollinators.
In this guide, we will explore the step-by-step process of creating your own wildflower seed paper, from collecting and preparing the seeds to pressing and drying the finished product. You will learn how to make the pulp, add the seeds, and transform the mixture into a beautiful, textured paper that is both environmentally friendly and visually stunning. With the right materials and a dash of creativity, you can craft personalized wildflower seed paper that makes for a thoughtful and sustainable gift or a charming addition to your own collection of handmade treasures. Let's embark on this enchanting journey of creativity and sustainability as we delve into the art of making wildflower seed paper.
Key Takeaways:
- Embrace sustainability and creativity by making your own wildflower seed paper, a fun and eco-friendly way to share the joy of gardening and support local ecosystems.
- Use your handmade wildflower seed paper for personalized stationery, creative crafts, sustainable gifts, educational activities, event decor, and personal gardening projects. Spread the joy of nature and sustainability!
Read more: How To Plant Wildflower Seed Paper
Materials Needed
Before diving into the process of creating wildflower seed paper, it’s essential to gather the necessary materials. Many of these items can be found around the house or easily sourced from local stores, making this a convenient and cost-effective DIY project. Here’s what you’ll need to get started:
- Recycled paper: Gather old newspapers, scrap paper, or unwanted printed materials. The paper will be used to create the pulp for your seed paper.
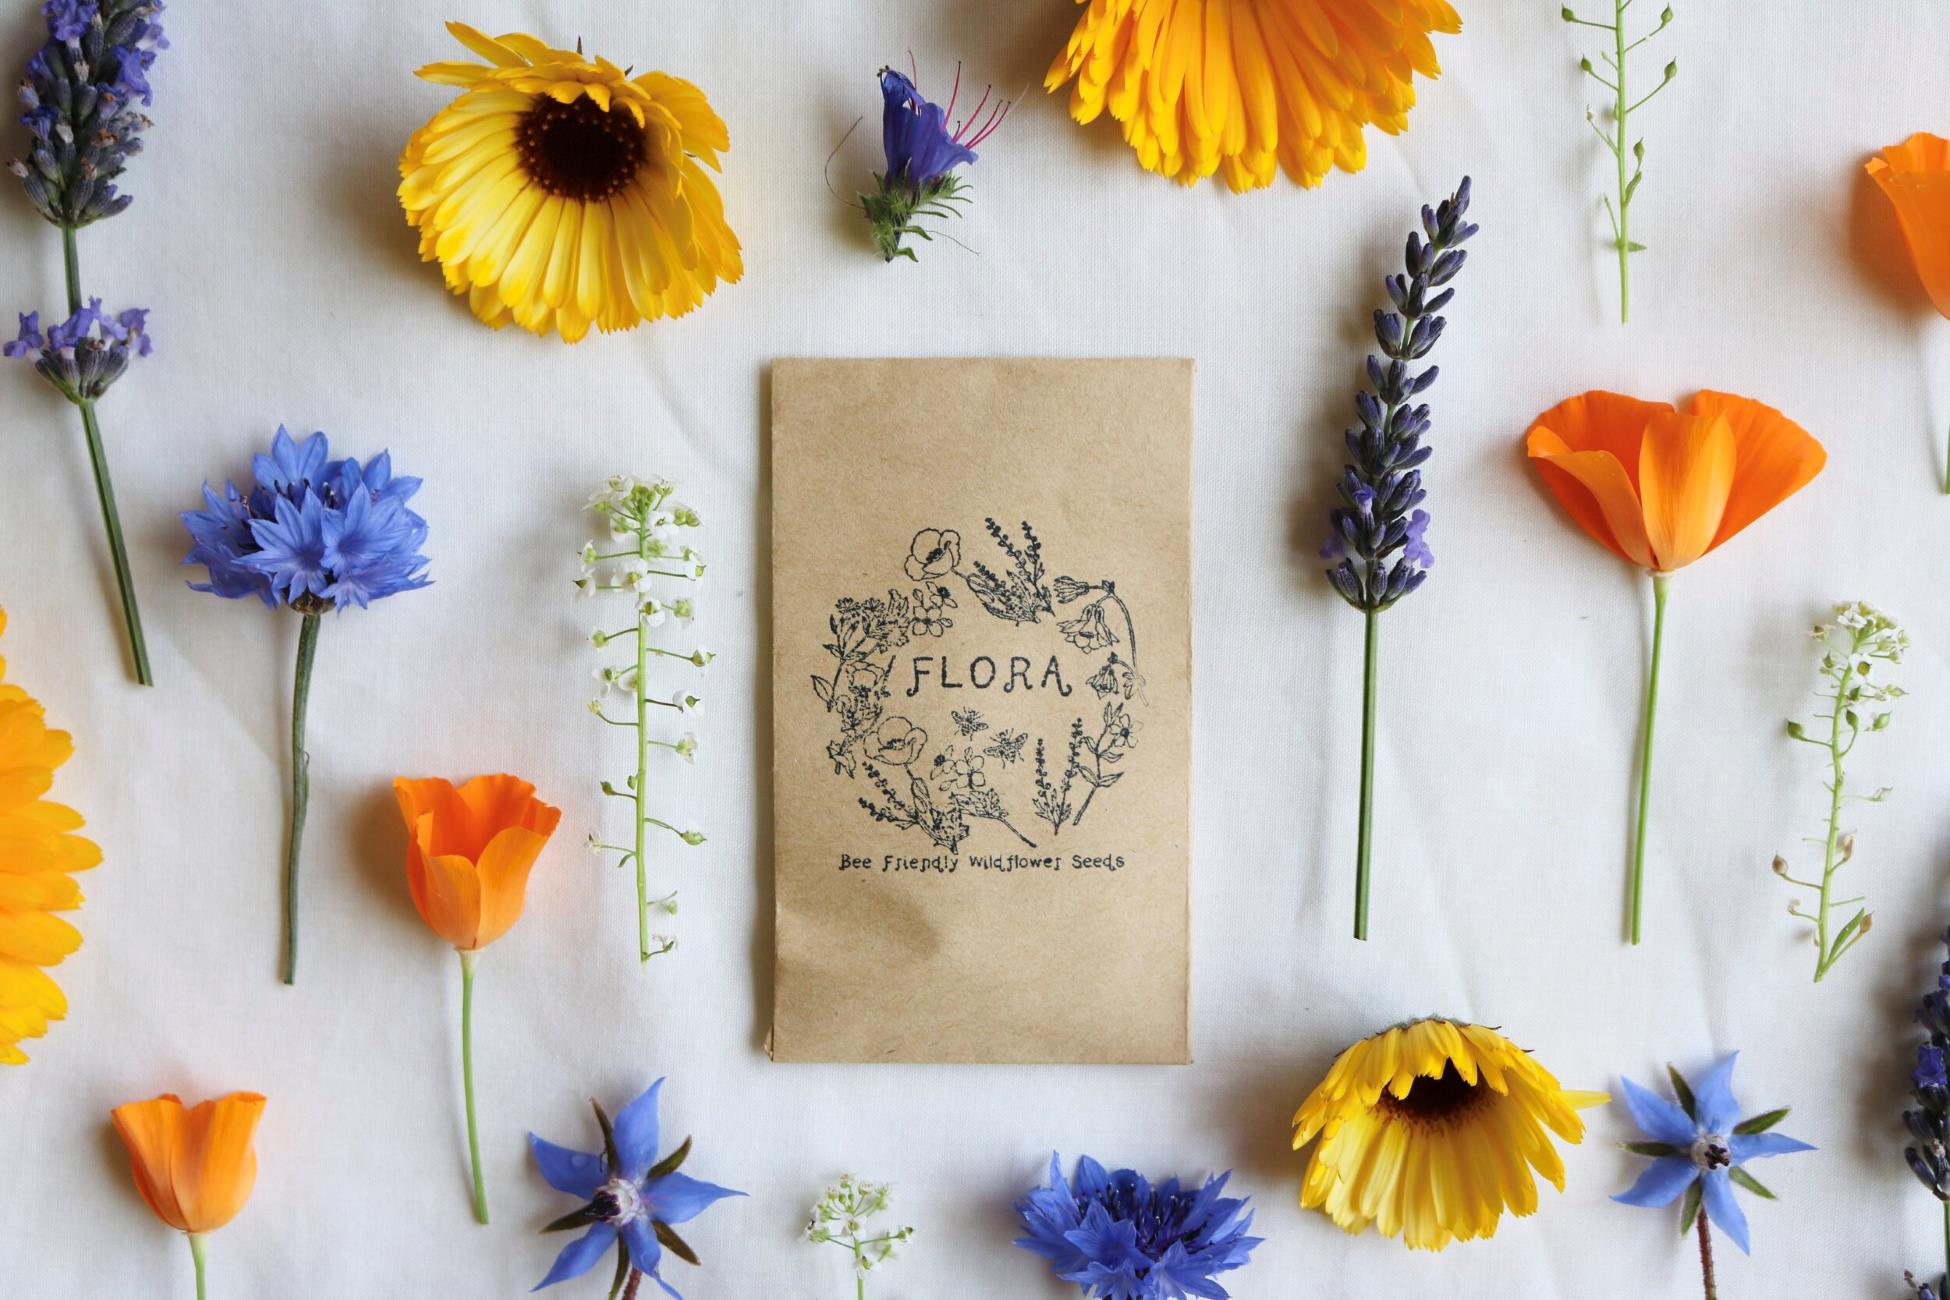
- Wildflower seeds: Choose a variety of wildflower seeds that are native to your region or well-suited to the local climate. Opt for a diverse mix of seeds to ensure a vibrant and dynamic display of blooms.
- Large bowl or basin: You’ll need a container to hold water for the paper-making process. A deep basin or bowl works well for this purpose.
- Blender or food processor: To create the pulp, you’ll need a blender or food processor capable of thoroughly blending the recycled paper and water into a smooth, consistent mixture.
- Cloth or fabric: Select a piece of fine mesh cloth or fabric to serve as the base for forming the seed paper sheets. This material will aid in draining excess water from the pulp.
- Rolling pin or flat board: A rolling pin or flat board will be used to evenly press the pulp and seeds into the fabric, ensuring a uniform thickness for the seed paper.
- Cookie cutters or molds (optional): If you wish to create shaped seed paper, various cookie cutters or molds can be used to form the paper into appealing shapes.
- Drying rack or flat surface: After pressing the seed paper, you’ll need a drying rack or a flat surface where the paper can air-dry thoroughly.
- Water: Clean, room-temperature water will be used in the paper-making process.
With these materials in hand, you’re ready to embark on the journey of crafting your own wildflower seed paper. The next steps will involve collecting and preparing wildflower seeds, making the pulp, adding the seeds, and pressing and drying the seed paper to perfection.
Collecting and Preparing Wildflower Seeds
Before you can begin the process of making wildflower seed paper, it’s essential to gather and prepare the seeds that will adorn your handmade paper. Collecting wildflower seeds can be an enjoyable and educational experience, allowing you to connect with nature and appreciate the intricate beauty of these delicate blooms. Here’s how to collect and prepare wildflower seeds for your seed paper:
1. Choose the Right Time:
Timing is crucial when collecting wildflower seeds. Wait until the flowers have bloomed and begun to fade, indicating that the seeds are mature and ready for harvest. This typically occurs in late summer or early autumn, depending on the flowering period of the specific wildflowers in your region.
2. Select Healthy Plants:
Identify healthy and robust wildflower plants from which to collect seeds. Look for plants with vibrant blooms and sturdy stems, as these are likely to produce high-quality seeds for your seed paper.
Read more: How To Make Seed Paper Without A Screen
3. Harvesting the Seeds:
Once the flowers have faded and the seed heads have formed, carefully snip the seed heads from the plants, ensuring that the seeds are fully developed and ready for collection. Use scissors or pruning shears to gather the seed heads, placing them in a paper bag or envelope to allow for proper air circulation and drying.
4. Drying the Seeds:
After collecting the seed heads, place them in a well-ventilated area with low humidity to dry. This can be indoors in a well-ventilated room or outdoors in a shaded, dry location. Allow the seeds to dry for approximately one to two weeks, ensuring that they are fully dry before moving on to the next step.
5. Removing Debris:
Once the seeds are thoroughly dry, gently rub the seed heads between your hands or against a fine mesh screen to separate the seeds from any remaining plant debris. Discard any damaged or unhealthy-looking seeds, retaining only the plump, viable seeds for your wildflower seed paper.
By following these steps, you’ll have a collection of carefully harvested and prepared wildflower seeds, ready to be incorporated into your handmade seed paper. The next stage involves creating the pulp, adding the seeds, and transforming the mixture into beautiful, plantable paper adorned with the promise of vibrant wildflowers.
Making the Pulp
Creating the pulp is a fundamental step in the process of making wildflower seed paper. This stage involves transforming recycled paper into a smooth, fibrous mixture that will serve as the base for your seed paper. Here’s how to make the pulp for your wildflower seed paper:
Read more: When To Seed Wildflowers
1. Prepare the Recycled Paper:
Begin by tearing the recycled paper into small pieces and placing them in a large bowl or basin. The paper can be sourced from old newspapers, discarded office paper, or any other unwanted paper materials. Ensure that the paper is torn into manageable pieces to facilitate the blending process.
2. Soak the Paper:
Add room-temperature water to the bowl, completely submerging the torn paper. Allow the paper to soak for several hours or overnight, ensuring that it becomes thoroughly saturated with water. This soaking process softens the paper and prepares it for blending.
3. Blend the Mixture:
Once the paper has soaked and softened, transfer the paper and water mixture to a blender or food processor. Blend the mixture on a low setting, gradually increasing the speed to create a smooth, pulpy consistency. Add small amounts of water as needed to achieve the desired texture, ensuring that the pulp is well blended and free of large chunks.
4. Strain the Pulp (Optional):
If the pulp appears excessively watery, you can strain it through a fine mesh cloth or sieve to remove excess water and achieve a thicker, more manageable consistency. This step is optional and can be adjusted based on the desired thickness of the pulp.
Read more: How To Get Seeds From Wildflowers
5. Prepare the Work Surface:
Lay out a clean, flat work surface and cover it with a piece of fine mesh cloth or fabric. This will serve as the base for forming the seed paper sheets and aid in draining excess water from the pulp.
6. Spread the Pulp:
Transfer the blended pulp onto the fabric, spreading it evenly to the desired thickness using a rolling pin or flat board. Ensure that the pulp covers the fabric in a uniform layer, providing a consistent base for adding the wildflower seeds.
With the pulp prepared and spread out, you’re now ready to add the wildflower seeds and begin the process of creating your one-of-a-kind wildflower seed paper. The next steps will involve adding the seeds, pressing and drying the seed paper, and ultimately enjoying the beauty of your handcrafted, plantable creations.
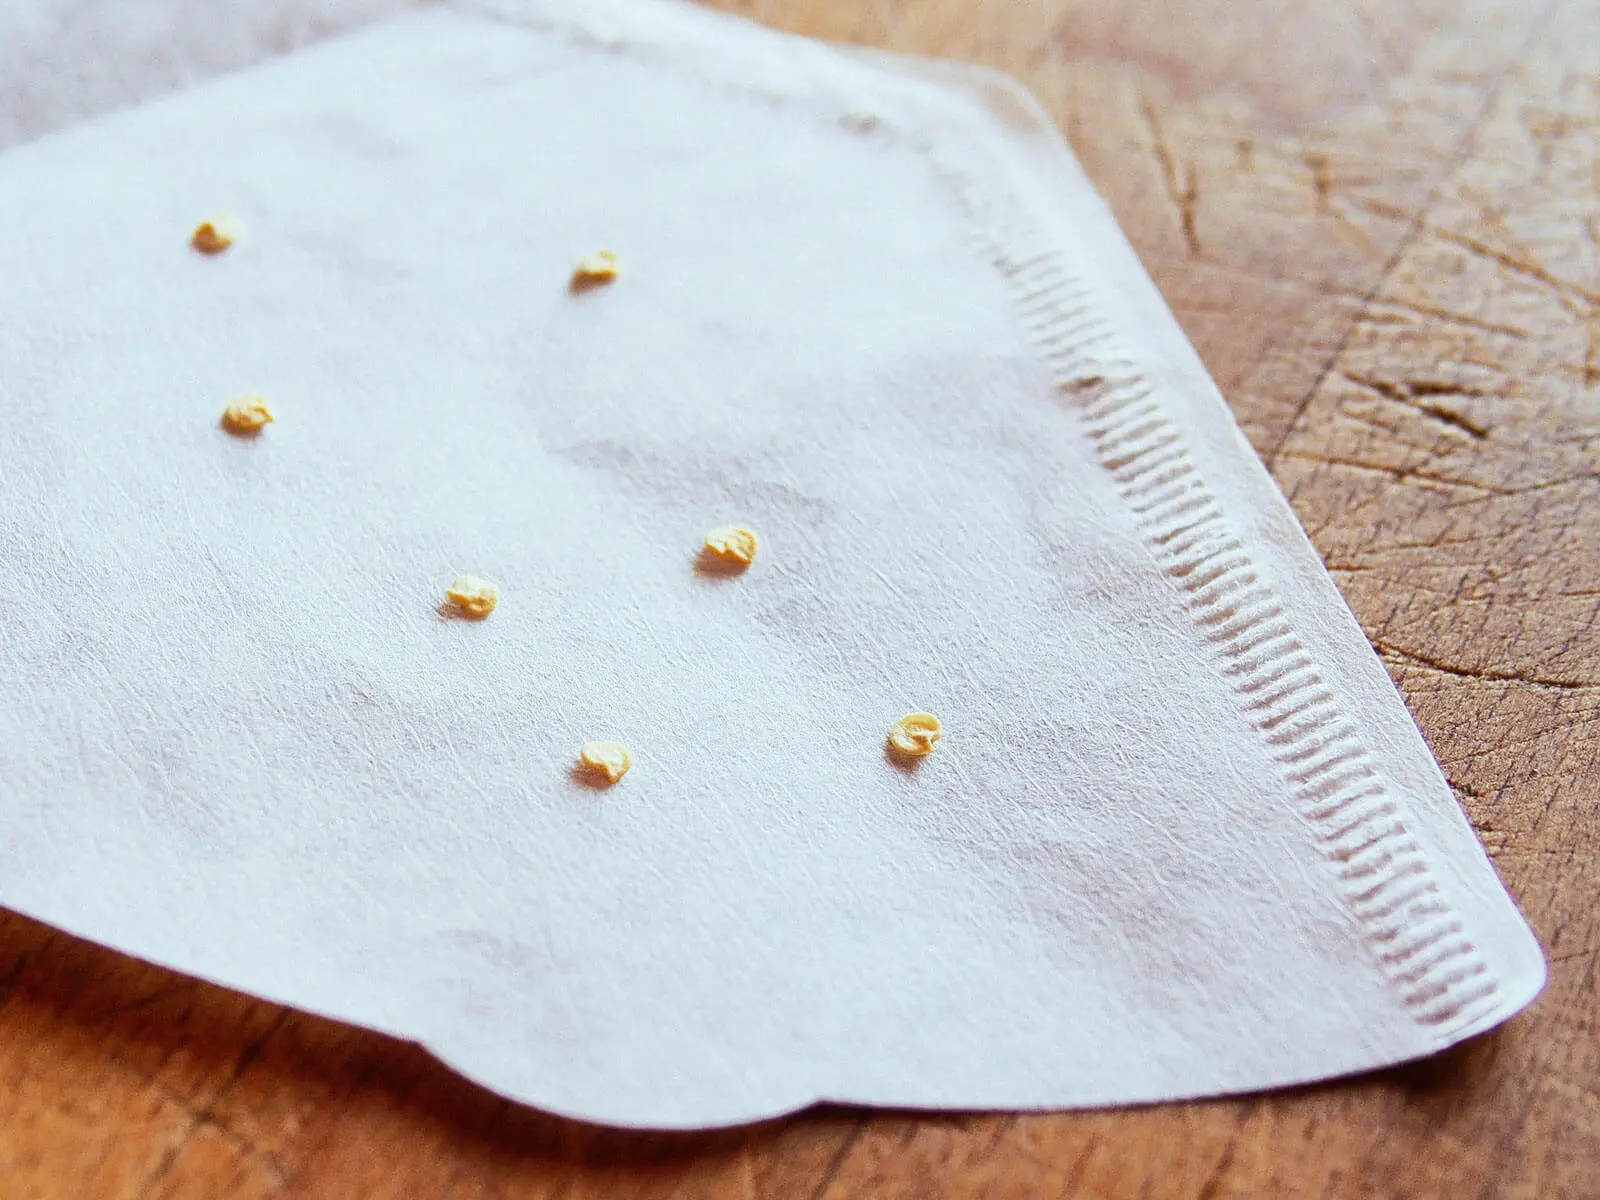
Adding the Seeds
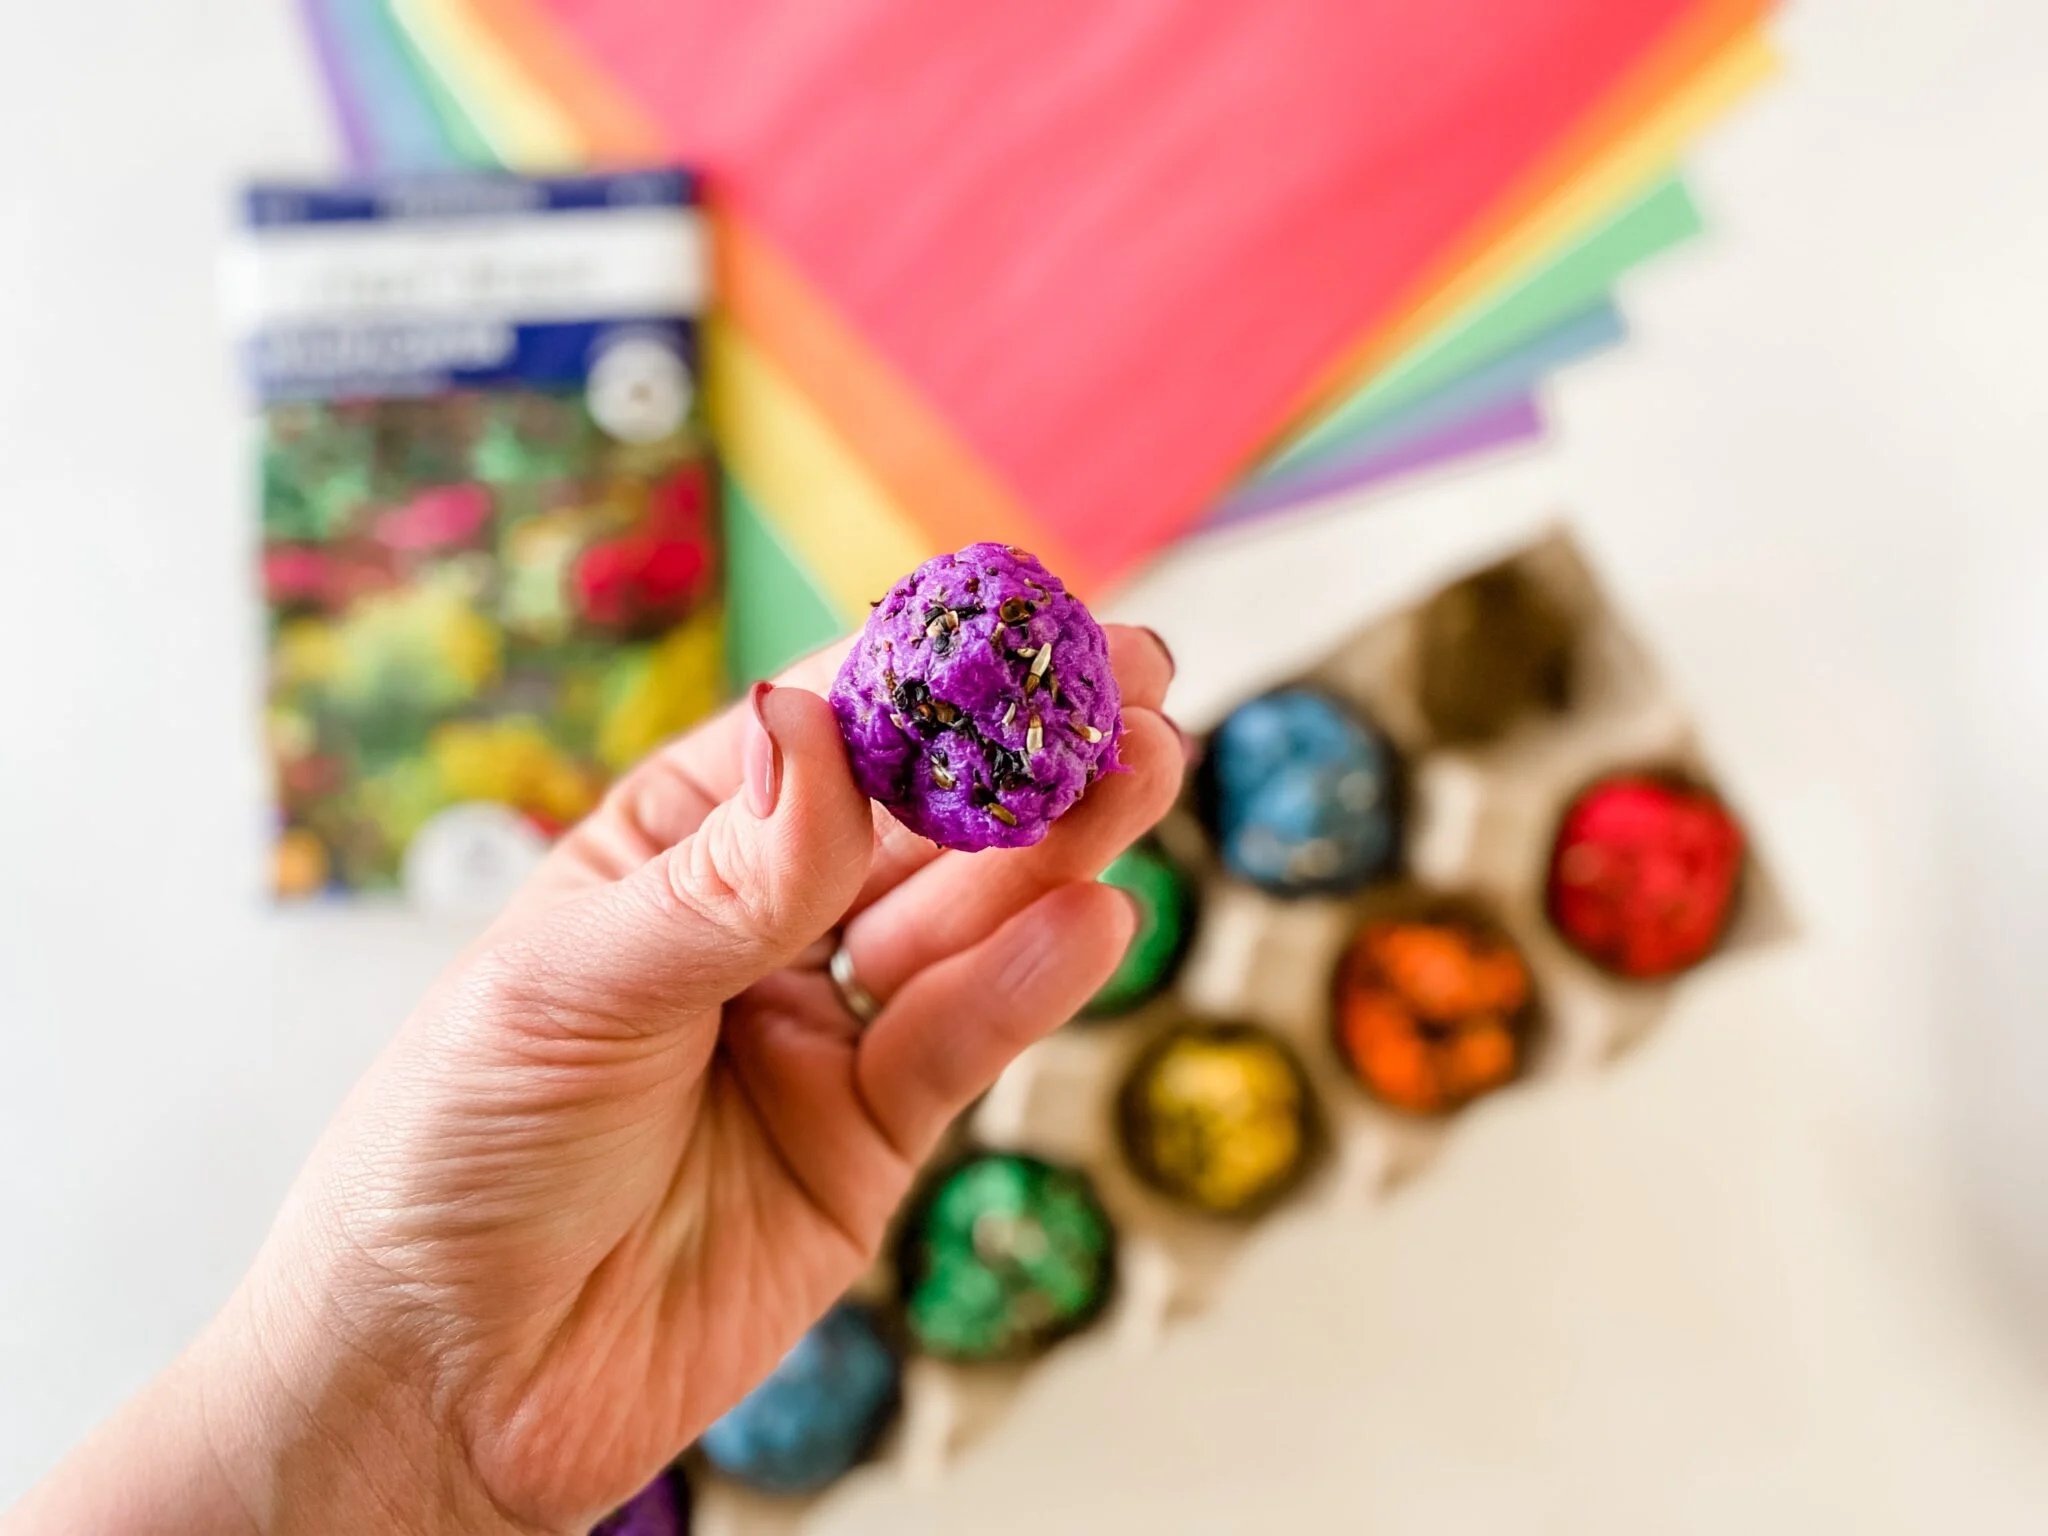
Adding wildflower seeds to the pulp is a pivotal step in creating captivating and plantable wildflower seed paper. By incorporating a diverse mix of wildflower seeds, you can infuse your handmade paper with the potential for a stunning array of blooms, delighting recipients with the promise of natural beauty. Here’s how to add the seeds to your wildflower seed paper:
1. Selecting the Seeds:
Choose a variety of wildflower seeds that are well-suited to your local climate and growing conditions. Opt for a diverse selection of seeds, including native wildflowers that thrive in your region. This ensures that your seed paper will yield a vibrant and ecologically beneficial display of blooms when planted.
Read more: How To Start Seeds In A Paper Towel
2. Sprinkle the Seeds:
Evenly sprinkle the selected wildflower seeds onto the spread pulp, ensuring thorough coverage across the entire surface. Use a gentle hand to disperse the seeds, aiming for a balanced distribution that will result in a harmonious blend of wildflowers when the paper is planted and nurtured.
3. Press the Seeds:
After adding the seeds, gently press them into the pulp using a rolling pin or flat board. This helps embed the seeds into the paper, ensuring that they are firmly nestled within the pulp and poised for germination when the paper is planted and cared for.
4. Consider Shaped Paper:
If you’re creating shaped seed paper using cookie cutters or molds, ensure that the seeds are evenly distributed within each shape. Carefully press the seeds into the pulp within the defined boundaries of the shapes, allowing for a seamless integration of seeds and pulp for each individual piece of seed paper.
5. Allow for Germination:
By adding wildflower seeds to your handmade paper, you’re not only creating a visually appealing product but also providing the opportunity for the seeds to germinate and flourish. When the seed paper is planted and nurtured with care, the embedded seeds will sprout and grow, bringing the joy of nature to those who receive or plant your unique creations.
With the seeds added, the next steps involve pressing and drying the seed paper, allowing it to take shape as a beautiful, textured canvas adorned with the promise of blossoming wildflowers. The final stage of the process will yield a collection of plantable seed paper, ready to be shared, gifted, or used to add a touch of natural elegance to your own projects and correspondence.
Read more: How To Make The Wildflower Drink
Pressing and Drying
Pressing and drying the wildflower seed paper is a crucial stage in the process, ensuring that the pulp and seeds meld together to form a sturdy, plantable canvas. This step sets the foundation for the paper to be used in a variety of creative projects or shared as thoughtful, eco-friendly gifts. Here’s how to press and dry your wildflower seed paper:
1. Evenly Press the Paper:
Once the seeds have been added to the pulp, carefully cover the mixture with another piece of fine mesh cloth or fabric. Using a rolling pin or flat board, gently press the layers together, ensuring that the pulp and seeds are compacted into a uniform thickness. This step helps create a cohesive and sturdy sheet of seed paper.
2. Remove Excess Water:
After pressing the paper, carefully peel away the top layer of fabric to reveal the pressed pulp and seeds. Blot the surface of the paper with a clean, dry cloth to absorb any excess moisture, promoting efficient drying and preventing the formation of mold or mildew during the drying process.
3. Air-Dry the Paper:
Place the pressed seed paper on a drying rack or a flat, dry surface in a well-ventilated area. Allow the paper to air-dry completely, ensuring that both sides dry evenly. Depending on environmental conditions, drying times may vary, but it’s essential to allow the paper to dry thoroughly to prevent warping or wrinkling.
Read more: How To Germinate With Paper Towel
4. Monitor the Drying Process:
During the drying period, periodically check the seed paper to ensure that it is drying uniformly and free of any signs of moisture. Gently flip the paper as needed to promote even drying and prevent the formation of any sticking or adhesion to the drying surface.
5. Test for Dryness:
To confirm that the seed paper is thoroughly dry, gently touch the surface to ensure that it feels firm and dry to the touch. The paper should exhibit a consistent texture and be free of any residual moisture before it is ready for use or gifting.
Once the wildflower seed paper has been pressed and dried, it is transformed into a beautiful, textured canvas adorned with the promise of blossoming wildflowers. This unique and eco-conscious creation is ready to be used in an array of projects or shared as a heartfelt and sustainable gift, bringing joy and the beauty of nature to those who receive it.
Using Your Wildflower Seed Paper
Now that you’ve successfully crafted your own wildflower seed paper, it’s time to explore the myriad of creative and eco-friendly uses for this delightful and sustainable creation. Whether you’re planning to share the seed paper as a thoughtful gift, incorporate it into your crafts, or simply revel in the joy of nurturing nature, there are countless ways to enjoy and showcase your handmade paper adorned with the promise of blossoming wildflowers. Here are some inspiring ideas for using your wildflower seed paper:
1. Eco-Friendly Stationery:
Transform your seed paper into personalized greeting cards, note cards, or stationery. Write heartfelt messages or notes of appreciation on the seed paper, allowing recipients to cherish the sentiment before planting the paper and watching the wildflowers bloom.
Read more: How Long Do Wildflowers Take To Germinate
2. Creative Crafts:
Explore your artistic side by incorporating the seed paper into various craft projects. Create unique bookmarks, decorative tags, or intricate paper sculptures, infusing your creations with the potential for natural beauty and growth.
3. Sustainable Gifts:
Share the joy of sustainability by gifting the seed paper to friends, family, or colleagues. Whether presented as part of a gift set or on its own, the seed paper serves as a meaningful and environmentally conscious token of appreciation.
4. Educational Endeavors:
Engage in educational activities with children or students by using the seed paper to teach about plant life cycles, environmental stewardship, and the importance of wildflowers. Plant the paper together and observe the magical process of seed germination and growth.
5. Event Favors and Decor:
Enhance special occasions such as weddings, baby showers, or garden parties by incorporating the seed paper into event favors, table decorations, or place cards. Infuse these gatherings with the symbolism of new beginnings and the beauty of nature.
Read more: How To Make A Wildflower Bouquet
6. Personal Gardening Projects:
Embrace the opportunity to plant the seed paper in your own garden or outdoor space. Create a dedicated wildflower patch or scatter the paper in areas that could benefit from a burst of natural color and biodiversity.
By embracing these creative and meaningful uses for your wildflower seed paper, you’ll not only spread the joy of sustainability and natural beauty but also inspire others to cherish and nurture the environment. Whether shared with loved ones, incorporated into artistic endeavors, or used to enhance your personal connection with nature, the seed paper serves as a tangible symbol of growth, renewal, and the enduring beauty of wildflowers.
Frequently Asked Questions about How To Make Wildflower Seed Paper
Was this page helpful?
At Storables.com, we guarantee accurate and reliable information. Our content, validated by Expert Board Contributors, is crafted following stringent Editorial Policies. We're committed to providing you with well-researched, expert-backed insights for all your informational needs.


0 thoughts on “How To Make Wildflower Seed Paper”