Home>Garden Essentials>How To Germinate A Seed In Paper Towel
Garden Essentials
How To Germinate A Seed In Paper Towel
Modified: April 23, 2024
Learn how to germinate seeds in a paper towel method for your garden. Step-by-step guide to ensure successful growth using this simple technique.
(Many of the links in this article redirect to a specific reviewed product. Your purchase of these products through affiliate links helps to generate commission for Storables.com, at no extra cost. Learn more)
Introduction
Welcome to this comprehensive guide on how to germinate a seed using a paper towel. Germinating seeds is an exciting and essential step in the gardening process, as it allows you to cultivate healthy plants from scratch. The paper towel method offers a simple and effective way to kickstart the germination process, ensuring a higher success rate for your seeds.
Whether you’re a seasoned gardener looking to experiment with new varieties or a beginner eager to start your green thumb journey, this technique is perfect for you. The paper towel method provides a clear view of the germination progress, making it a popular choice among gardening enthusiasts.
In this guide, we’ll walk you through each step of the process, from preparing the paper towel to transplanting the germinated seeds. We’ll discuss the materials you’ll need, the optimal conditions for germination, and tips for monitoring and caring for the germinating seeds. By following these instructions, you’ll increase your chances of successful germination and thrive in your gardening endeavors.
Key Takeaways:
- Germinating seeds in a paper towel is an easy way to start growing plants. Just follow the steps, keep the seeds moist, and watch them sprout!
- After the seeds have sprouted, transplant them carefully into new containers or the garden. Take good care of them, and enjoy watching your plants grow!
Read more: How To Germinate With Paper Towel
Materials Needed
Before getting started, gather the following materials to ensure a smooth and efficient seed germination process:
- A pack of high-quality seeds of your choice
- Two paper towels (preferably white) or coffee filters
- A sealable plastic bag or airtight container
- A spray bottle filled with water
- A plate or a shallow tray
- A marker for labeling
It’s important to choose good quality seeds to maximize the chances of successful germination. If you’re unsure about the quality of your seeds, consider purchasing from reputable seed suppliers or nurseries.
Using paper towels or coffee filters for germination provides an excellent medium for moisture retention and visibility. Ensure that the material is free from dyes or chemicals that may hinder germination.
Sealable plastic bags or airtight containers create a small, controlled environment for the seeds to germinate. The transparency of the container will allow you to monitor the progress without disturbing the seeds.
A spray bottle is crucial for maintaining moisture levels without oversaturating the paper towel or coffee filter. It allows you to apply water evenly without causing the seeds to float or get displaced.
A plate or shallow tray will serve as a base to hold the germination setup. Opt for a clean and waterproof surface to prevent any water damage or contamination.
Finally, use a waterproof marker to label the seeds or write down any additional information you may need when monitoring their progress. This will help you keep track of different varieties or planting dates.
Now that you have all the necessary materials at hand, let’s move on to the step-by-step process of germinating seeds using the paper towel method.
Step 1: Preparing the Paper Towel
To begin, start by preparing the paper towel or coffee filter that will serve as the germination medium for your seeds. Follow these simple steps:
- Take two paper towels or coffee filters and moisten them with water. Make sure they are damp but not dripping wet. Excess moisture can lead to mold growth and hinder germination.
- If using paper towels, fold one of the sheets in half to create a smaller square. This will provide a double layer for added moisture retention.
- If using coffee filters, you can use them as they are, without the need for folding.
- If you are germinating multiple varieties of seeds, label each paper towel or coffee filter with the name or type of seed using the waterproof marker. This will help you keep track of your progress and identify the germinating seeds later on.
By moistening the paper towel or coffee filter, you create a humid environment necessary for seed germination. The moisture provides the seeds with the necessary hydration to kickstart the germination process.
Remember that the moisture level should be sufficient to keep the seeds hydrated, but avoid over-saturating the paper towel or coffee filter, as this can cause the seeds to rot or mold.
Once you have properly prepared the paper towel or coffee filter, it’s time to move on to the next step — choosing and soaking the seeds.
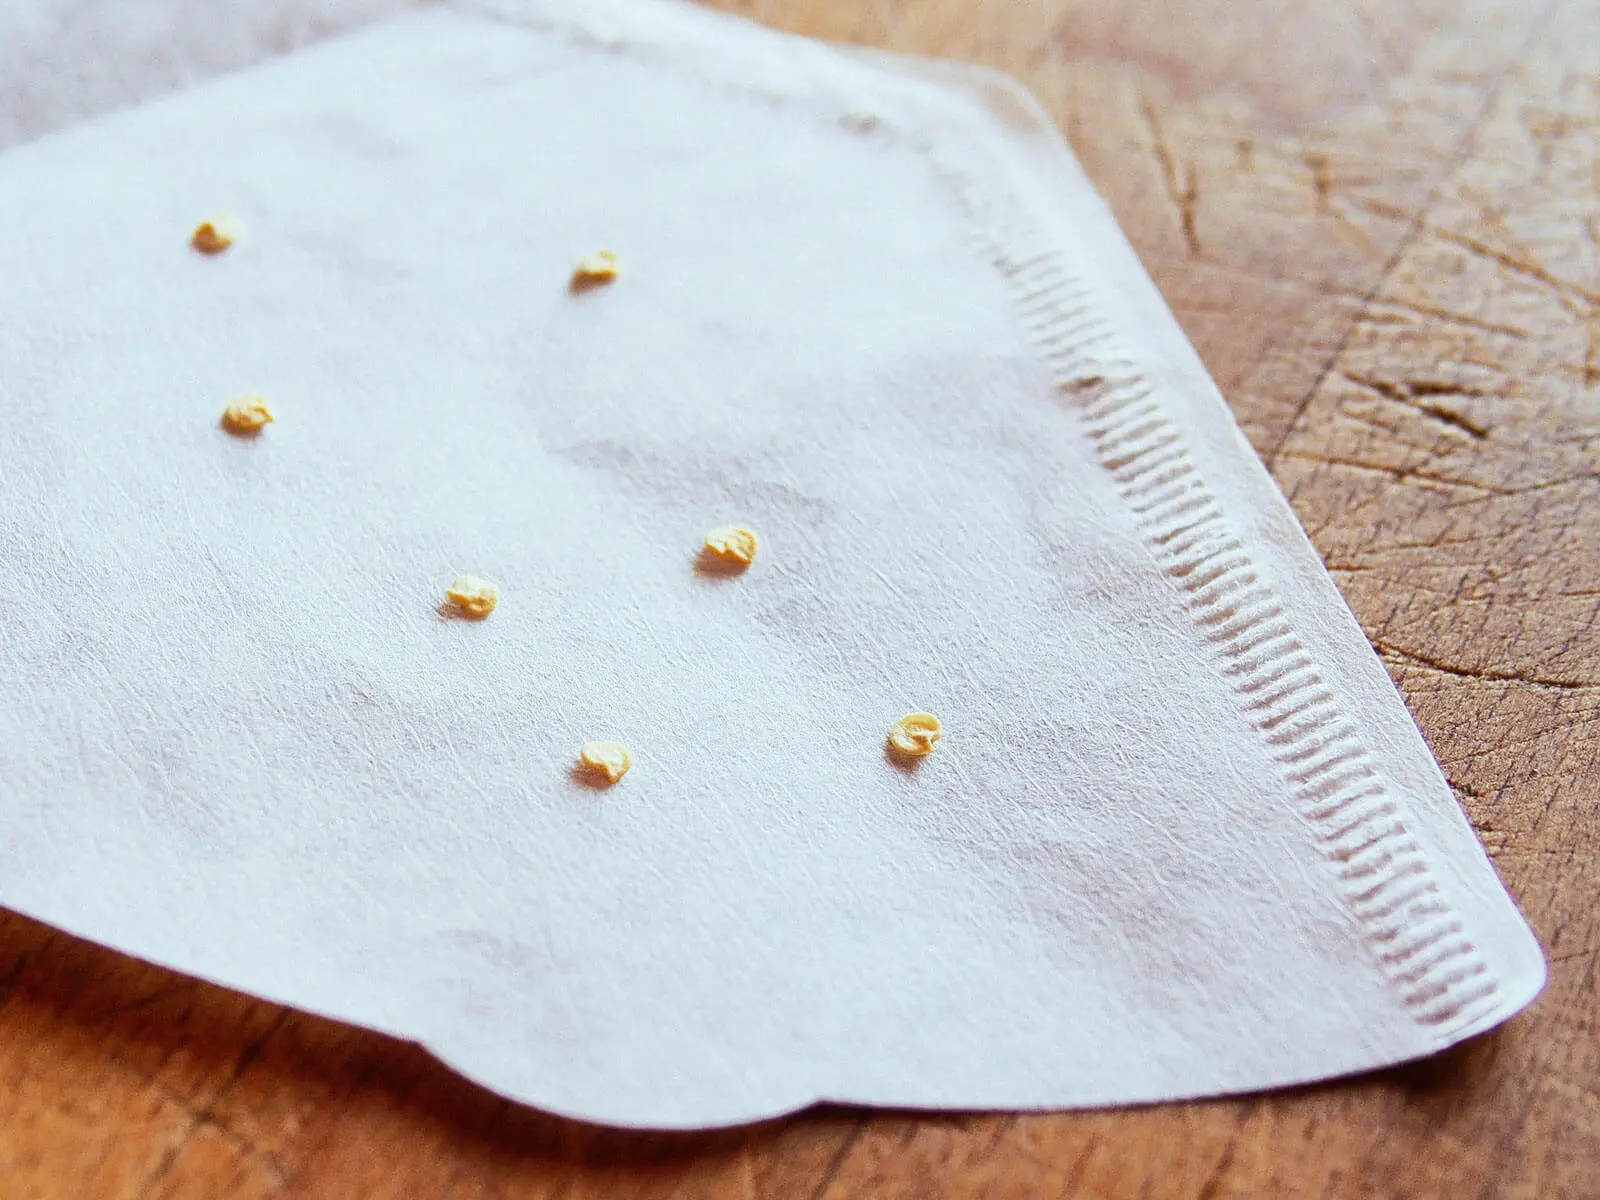
Step 2: Choosing and Soaking the Seeds
Choosing the right seeds for germination is crucial to ensure successful growth and healthy plants. Here’s how to select and soak your seeds:
- Choose high-quality seeds that are suitable for germination. You can find a wide variety of seeds available at gardening stores, nurseries, or online seed suppliers. Consider factors such as the type of plant, preferred growing conditions, and your own gardening goals.
- If you have collected seeds from your own plants, make sure they are mature and fully ripened. Immature seeds are less likely to germinate successfully.
- If you have already soaked the seeds prior to germination, skip this step. However, some seeds benefit from soaking to enhance germination rates. Soaking can help soften hard seed coatings and jumpstart the germination process.
- To soak the seeds, place them in a small container and cover them with room temperature water. The water level should be sufficient to submerge the seeds completely.
- Allow the seeds to soak for the recommended amount of time. This can vary depending on the type of seeds, so refer to the seed packet or do some research to determine the ideal soaking duration. Generally, soaking for 8-12 hours is sufficient for most seeds.
Soaking seeds prior to germination can be particularly beneficial for larger seeds or seeds with tough outer coatings. It helps to soften the coating, making it easier for the seed to absorb water and initiate the germination process.
However, not all seeds require soaking, so it’s important to refer to the specific recommendations for each seed variety. Some seeds may have specific requirements, such as stratification (exposure to cold temperatures) or scarification (breaking or weakening the seed coat).
After soaking the seeds, it’s time to move on to the next step — placing the seeds on the prepared paper towel or coffee filter.
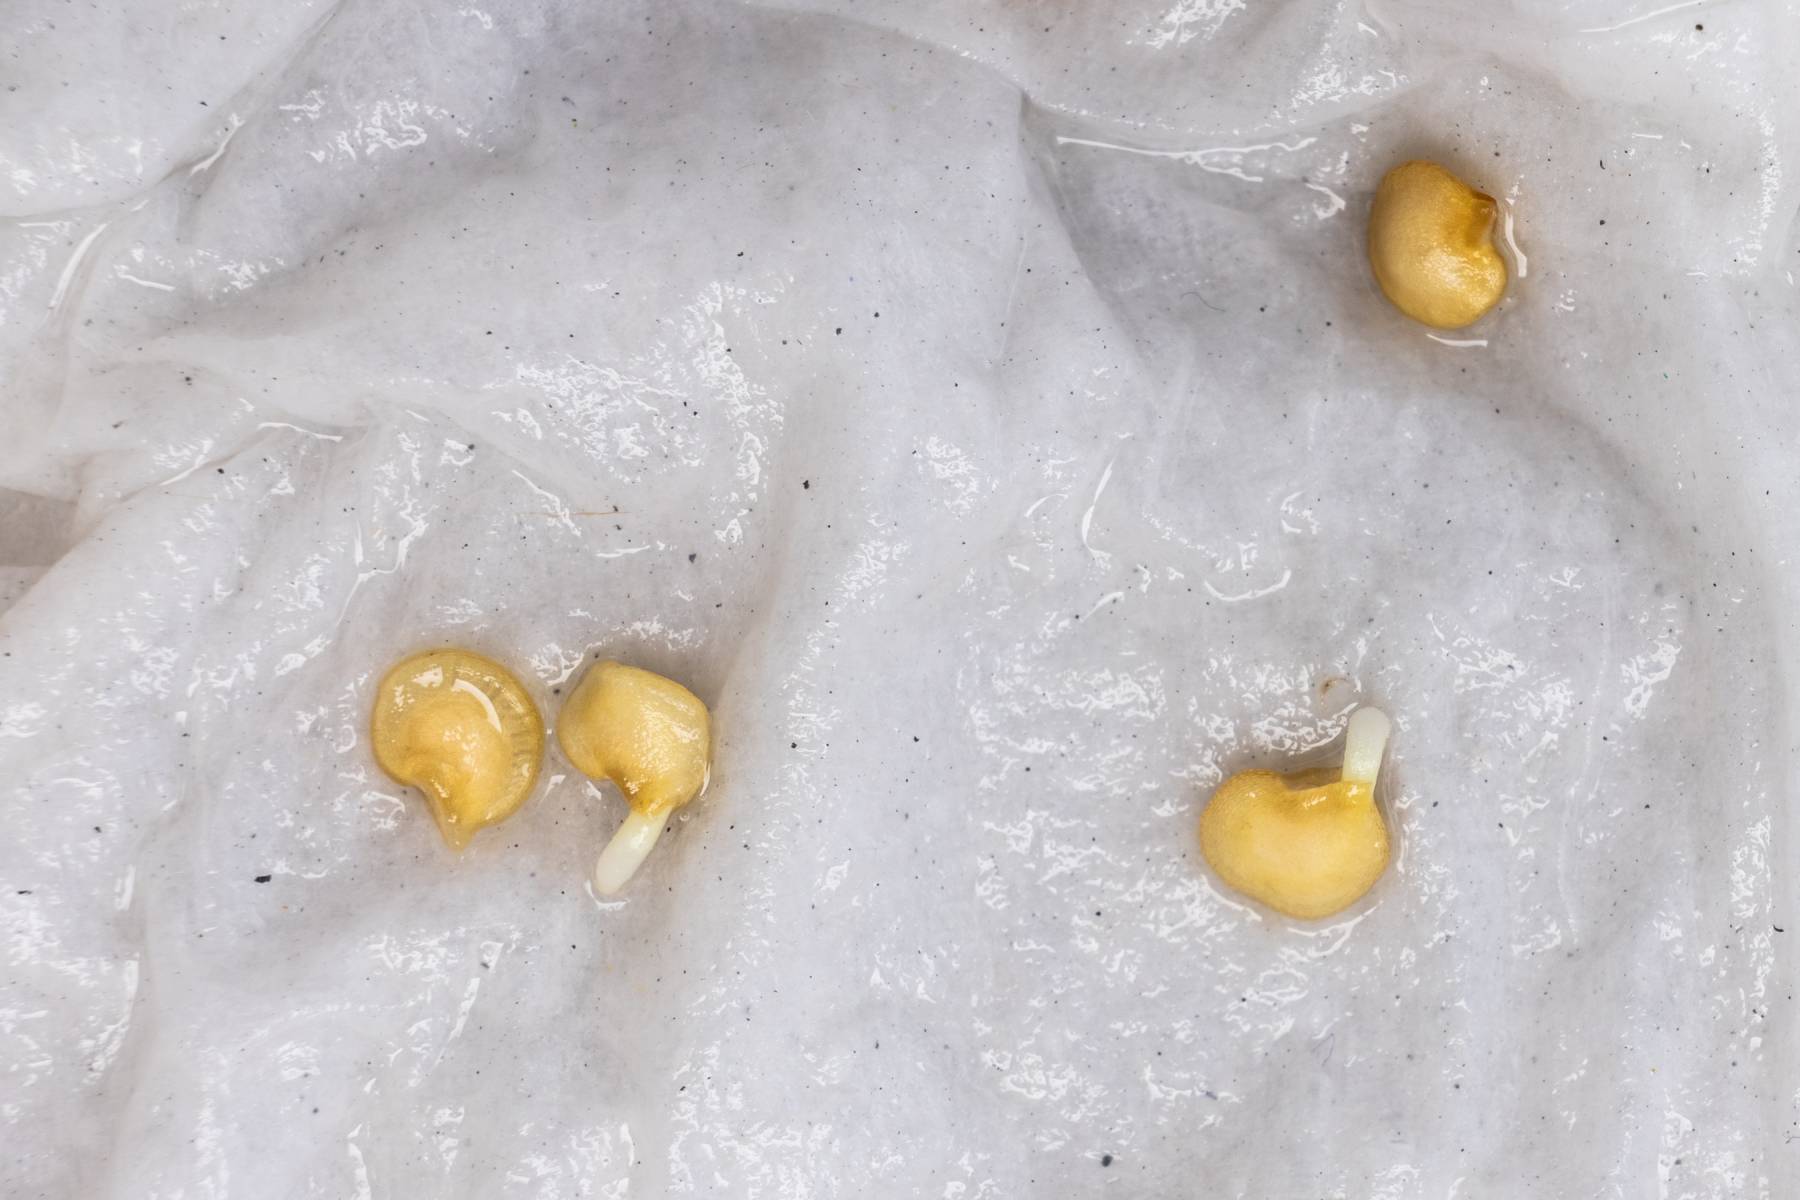
Step 3: Placing the Seeds on the Paper Towel
Now that you have prepared the paper towel or coffee filter and soaked the seeds, it’s time to carefully place the seeds onto the moistened material. Follow these steps:
- Start by gently removing the soaked seeds from the water, taking care not to damage them.
- Place the seeds evenly spaced on one half of the moistened paper towel or coffee filter. Make sure to leave enough space between each seed to allow room for growth.
- If you’re germinating different seed varieties, you can use separate paper towels or coffee filters for each type to avoid confusion.
- Once you have placed the seeds, fold the other half of the paper towel or coffee filter over the seeds, covering them completely.
- Gently press down on the folded paper towel or coffee filter to ensure good contact between the seeds and the moist medium. This helps to facilitate seed hydration and encourages germination.
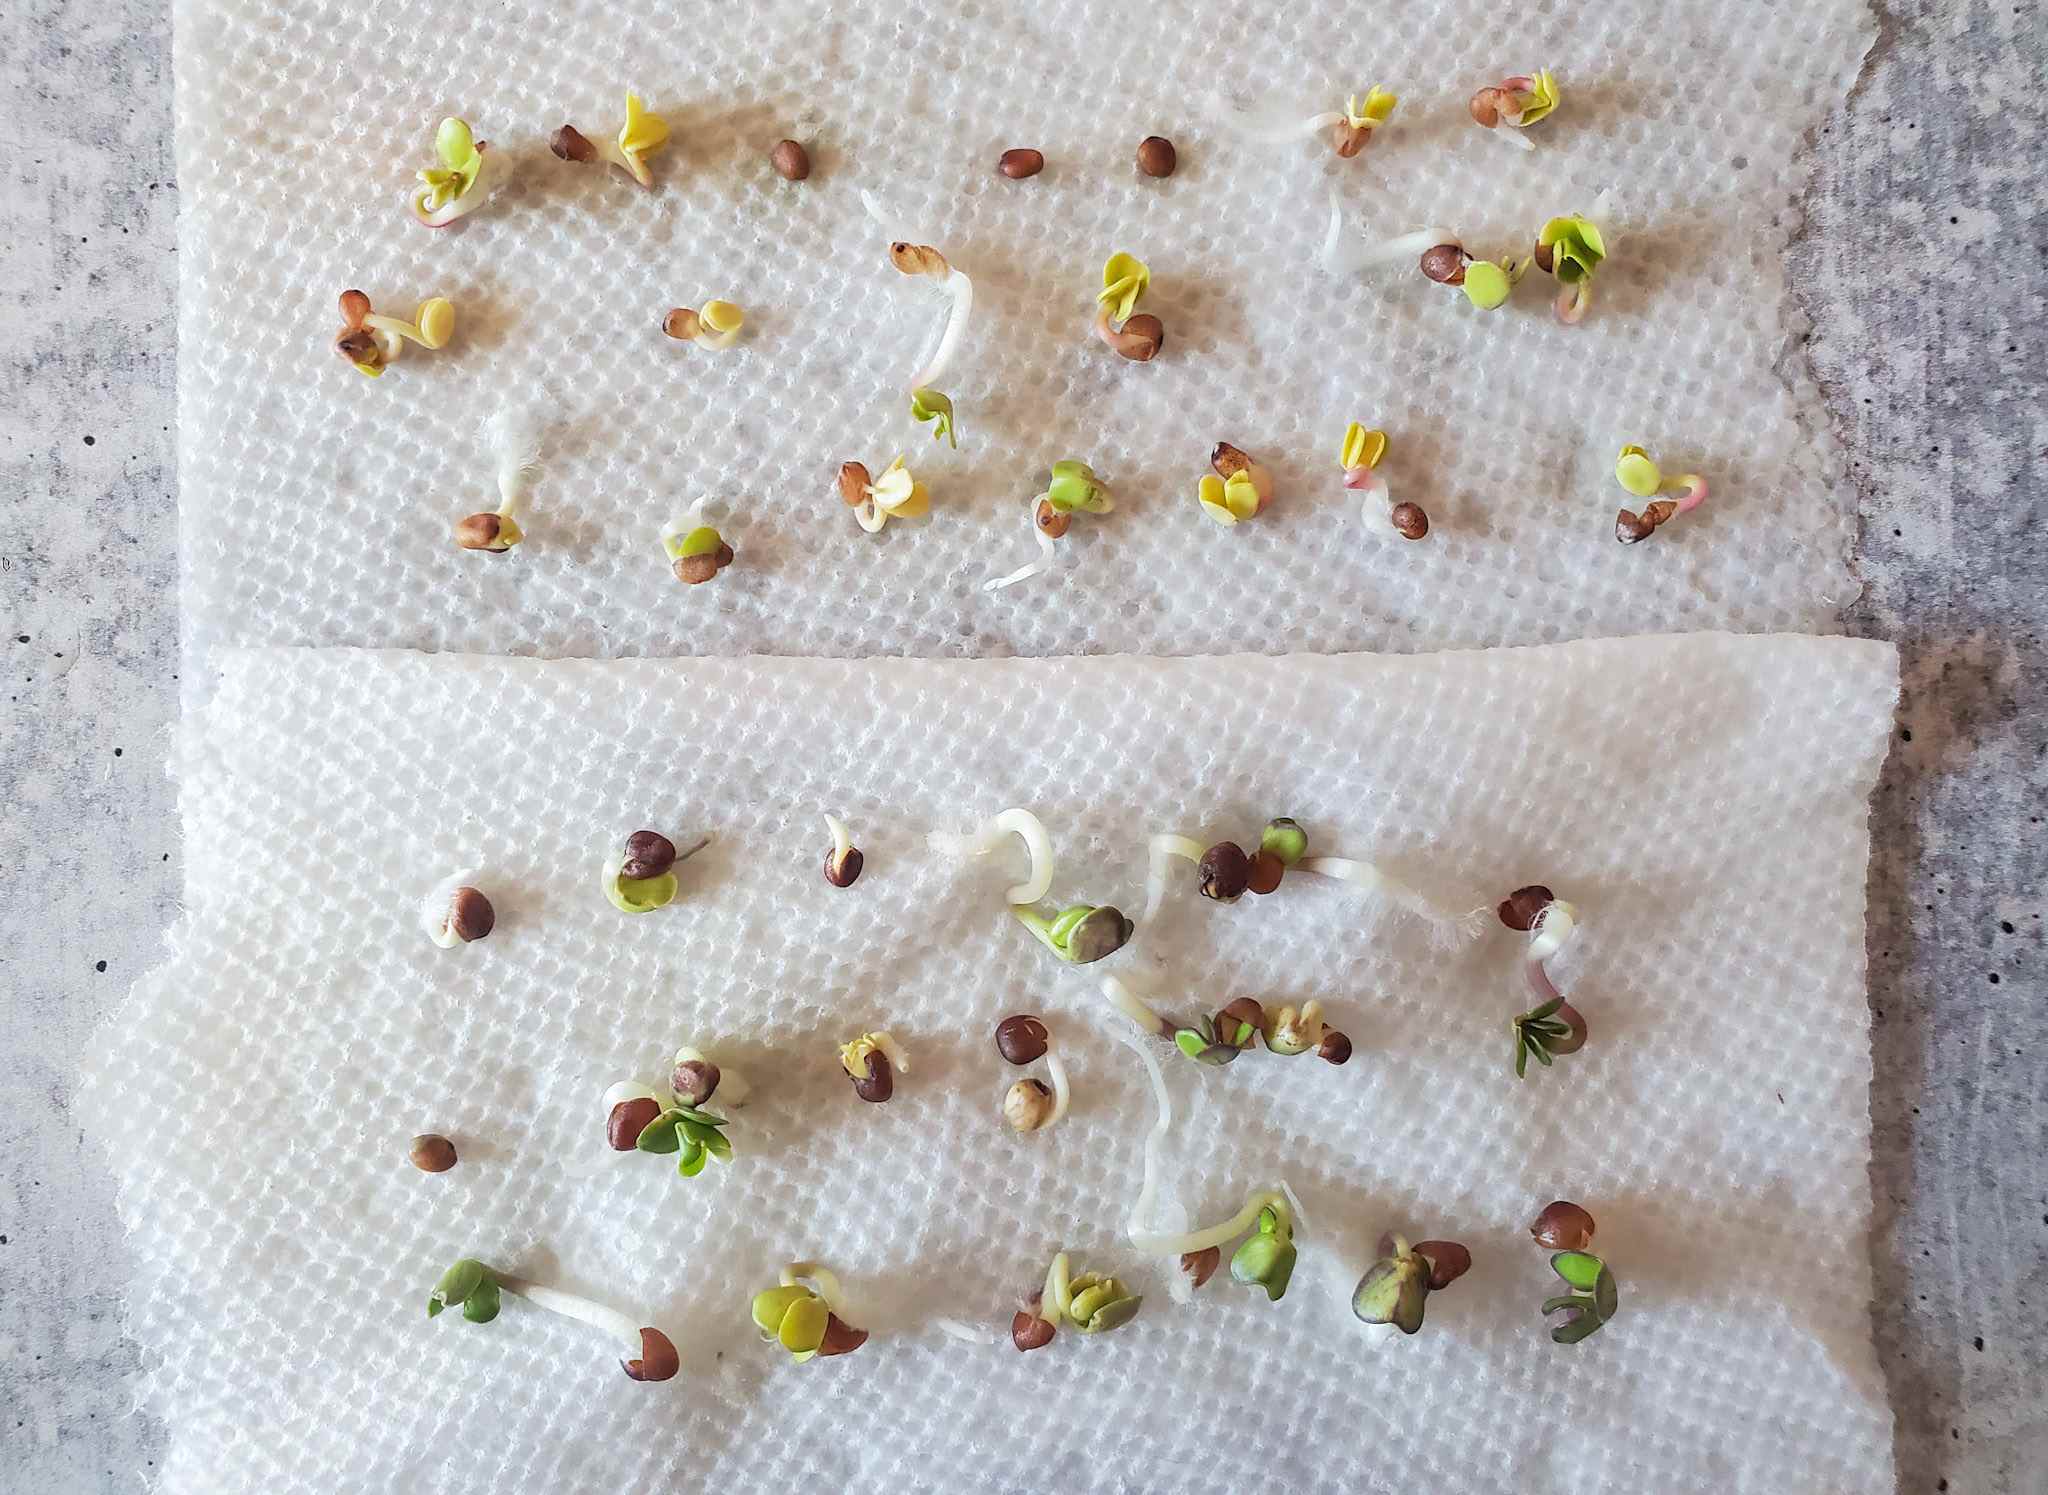
Placing the seeds onto the prepared paper towel or coffee filter allows for easy observation of the germination process. The transparent nature of the material allows you to monitor the seeds for any signs of germination, such as the emergence of roots or shoots.
Make sure to handle the seeds with care, as they can be delicate. Avoid squeezing or crushing them, as this may damage their viability. If you’re working with very small seeds, you can use a pair of tweezers for precise placement.
Once you have securely placed the seeds on the paper towel, it’s time to move on to the next step — folding the paper towel to create an ideal microenvironment for germination.
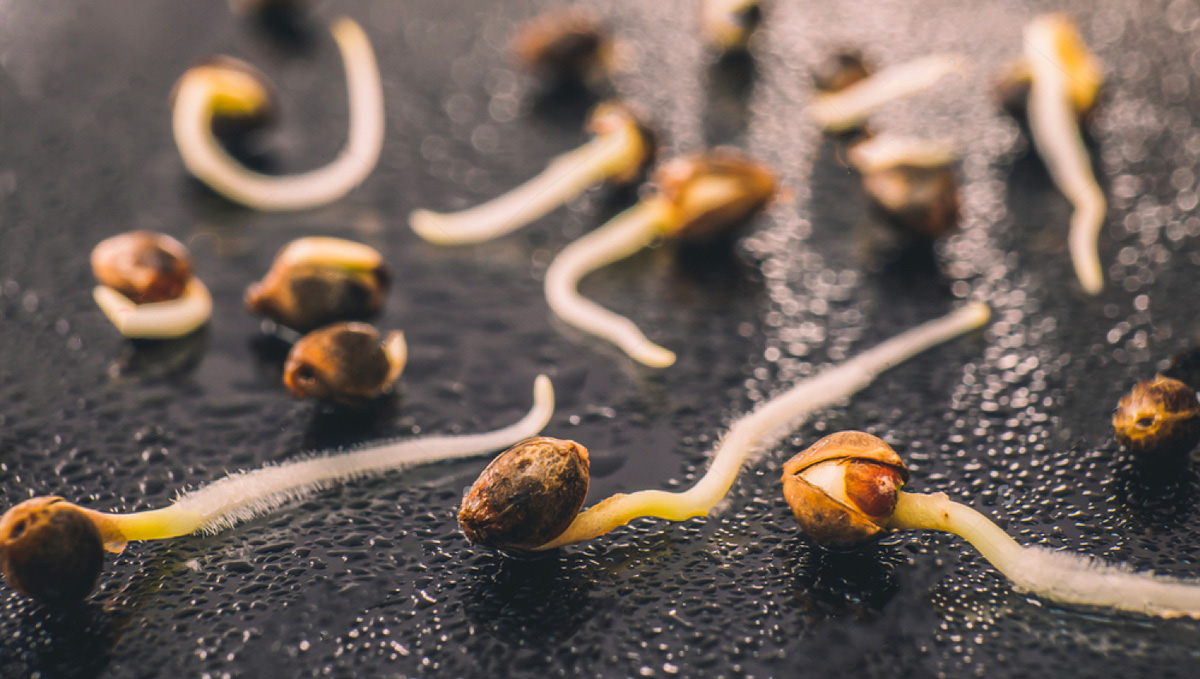
After wetting a paper towel, place the seed in the center and fold the towel over it. Keep the towel moist and in a warm place to encourage germination. Check daily for progress.
Read more: When Germinating Seeds In Paper Towel
Step 4: Folding the Paper Towel
After placing the seeds onto the moistened paper towel or coffee filter, the next step is to fold it to create a conducive microenvironment for seed germination. Follow these simple steps:
- Carefully fold the paper towel or coffee filter in half, covering the seeds completely.
- Ensure that the fold is securely in place, so the seeds are enclosed within the paper towel layers.
- Take extra caution not to press too hard while folding, as this can damage the seeds.
Folding the paper towel or coffee filter serves two important purposes. First, it creates a sealed environment that maintains the necessary moisture levels for seed germination. Second, it provides darkness, which can stimulate the germination process for certain types of seeds.
Keep in mind that the fold should be secure enough to prevent the seeds from falling out or getting displaced. However, it’s also important to avoid applying excessive pressure, as it can hinder seed germination or cause damage to the embryonic parts.
By folding the paper towel or coffee filter, you create a mini green space for the seeds, ensuring they have the ideal conditions for germination. Now, you can move on to the next step — providing the optimal germination conditions for your seeds.
Step 5: Providing the Optimal Germination Conditions
Creating the proper germination conditions is crucial for the success of your seeds. Here are the key factors to consider:
- Temperature: Most seeds require a consistent temperature range for germination. A temperature between 70-85°F (21-29°C) is generally ideal. However, different plant species have specific temperature preferences, so it’s important to research the optimal temperature for your seeds.
- Humidity: Maintaining a humid environment is essential for seed germination. The folded paper towel or coffee filter method helps retain moisture. However, it’s important to monitor the moisture level regularly to prevent it from drying out or becoming excessively wet, which can lead to fungal growth.
- Light: While some seeds require darkness to germinate, others need light. Research the light requirements for your specific seeds. If light is required, place the germinating seeds in a well-lit area or near a source of light, but avoid direct exposure to intense sunlight, as it can cause overheating or drying.
- Air circulation: Good airflow is essential to prevent the buildup of excess moisture. Ensure that the germination setup is not placed in a stagnant or humid location. However, avoid placing it in a drafty area that may cause rapid moisture evaporation.
- Consistency: It’s important to maintain a consistent environment throughout the germination process. Avoid moving or disturbing the germination setup as much as possible, as it can disrupt the growth of delicate sprouts.
By providing the optimal germination conditions, you create a favorable environment for your seeds to awaken and start their growth journey. Monitoring these factors and making any necessary adjustments will greatly increase the chances of successful germination.
Next, let’s move on to step 6, where we’ll discuss how to monitor and care for the germinating seeds during this critical stage.
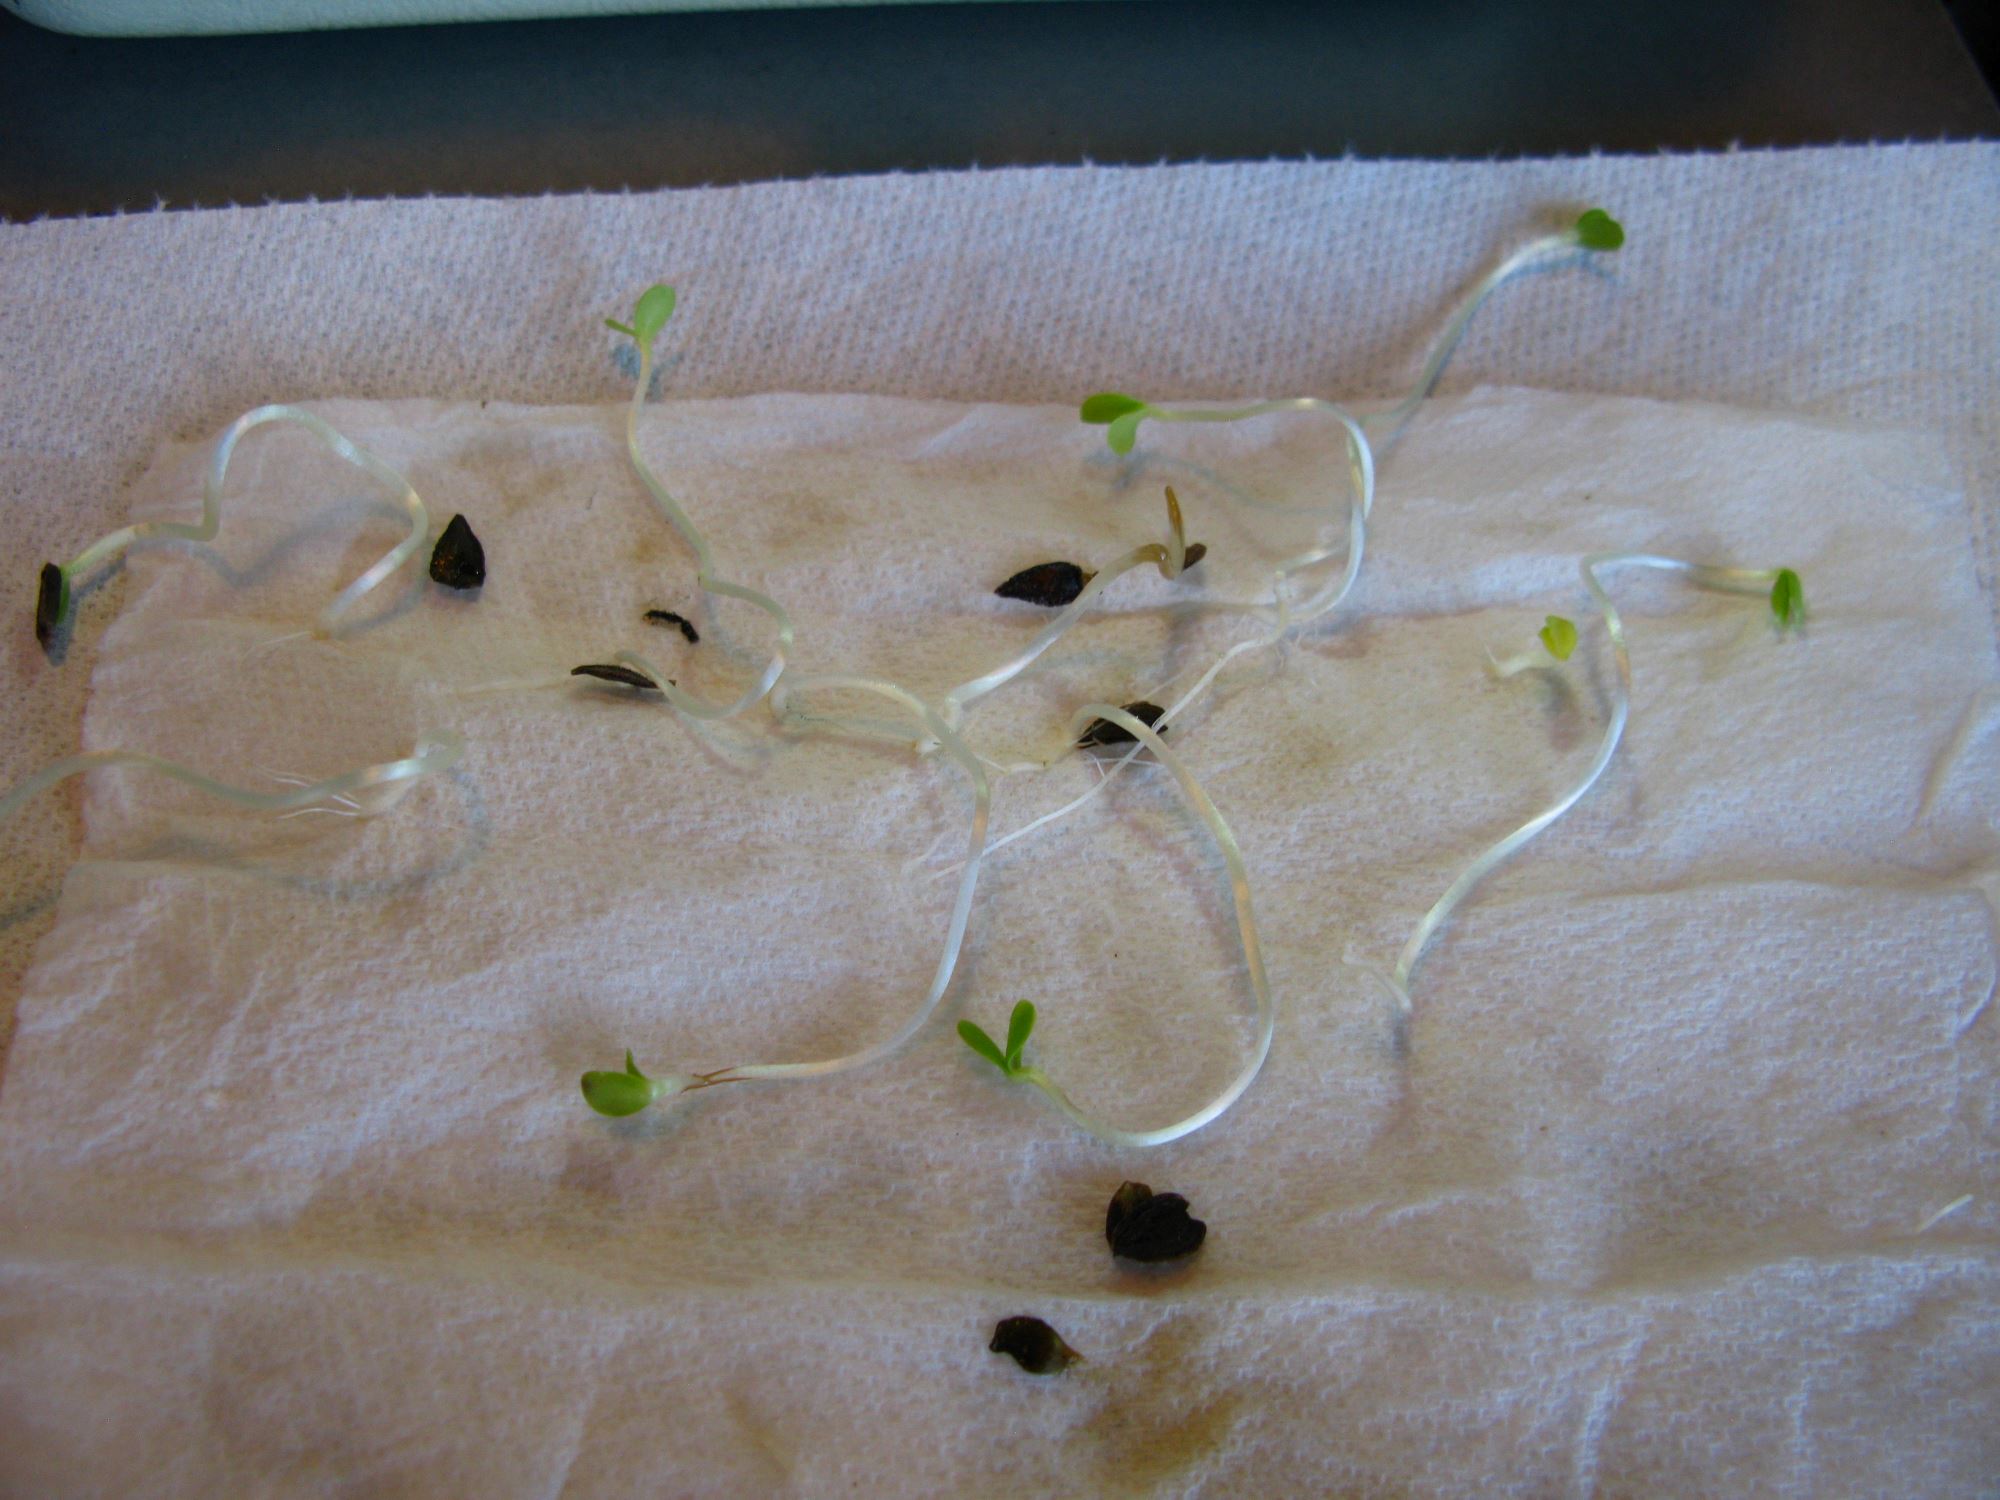
Step 6: Monitoring and Caring for the Germinating Seeds
Once you have set up the ideal germination conditions, it’s important to monitor and care for the germinating seeds to ensure their healthy growth. Here’s what you need to do:
- Check the moisture level regularly: Gently touch the folded paper towel or coffee filter to assess its moisture content. If it feels dry, use a spray bottle to mist it with water. Be careful not to oversaturate the medium, as excessive moisture can lead to mold or rot.
- Monitor for signs of germination: Over the next few days, keep a close eye on the seeds. Look for any changes, such as the emergence of roots or shoots. Different seeds may have different germination times, so be patient and refer to the specific instructions for your seeds.
- Provide appropriate lighting: If your seeds require light for germination, ensure they are placed in a well-lit area or under a grow light. Monitor the intensity of the light to prevent overheating or excessive drying.
- Maintain the ideal temperature: Continue to provide a consistent temperature within the recommended range for your seeds. Avoid exposing the germinating seeds to drastic temperature fluctuations, as it can hinder their growth.
- Handle with care: If you need to check on the progress of the germinating seeds, do so gently and avoid unnecessarily disturbing the delicate growth. Any accidental damage can impact their development.
During this stage, it’s important to be patient and allow the seeds to germinate at their own pace. Not all seeds will sprout at the same time, so continue to monitor and care for them until all viable seeds have germinated.
By providing the necessary care and attention, you’ll give your seeds the best chance of successful germination and ensure healthy growth for your future plants.
Once the majority of your seeds have germinated, it’s time to move on to the final step — transplanting the germinated seeds.
Step 7: Transplanting the Germinated Seeds
After the germinated seeds have developed roots and shoots, it’s time to transplant them into their new growing containers or directly into the garden. Follow these steps to ensure a successful transplant:
- Prepare the growing containers: If you’re transplanting the germinated seeds into individual containers, ensure they are clean and have proper drainage holes. This will help prevent waterlogging and promote healthy root development.
- Fill the containers with potting soil: Use a well-draining potting mix that is suitable for the specific plant species. Fill the containers up to about two-thirds full, leaving enough space for the root systems.
- Create a planting hole: Make a small indentation in the center of the soil in each container. The depth of the hole should accommodate the length of the roots without burying the seedling too deeply.
- Gently lift the germinated seedlings: Carefully handle the germinated seeds, holding them by the leaves or true leaves (not the fragile stems). Try to minimize root disturbance to ensure the best chance of successful transplanting.
- Place the seedlings in the planting holes: Position the seedling, ensuring that the roots are fully covered with soil and that the seedling is upright and straight.
- Lightly firm the soil around the seedling: Gently press the soil around the base of the seedling to provide stability and promote good soil-to-root contact.
- Water the newly transplanted seedlings: Give the seedlings a thorough but gentle watering to help settle the soil around the roots. Be careful not to overwater, as it can lead to root rot.
- Provide appropriate post-transplant care: Place the newly transplanted seedlings in a suitable location, considering factors such as sunlight requirements and protection from harsh weather conditions. Monitor the soil moisture levels and provide adequate water as needed.
Transplanting the germinated seeds allows them to continue their growth journey in a more spacious and suitable environment. Ensure that the new growing containers or garden beds provide the necessary nutrients, water, and light for healthy growth.
Remember to gradually acclimate the seedlings to their new environment by exposing them to increasing amounts of sunlight and adjusting watering frequency. This will help reduce stress and increase their chances of survival.
With proper care and attention, your transplanted seedlings will grow into robust and flourishing plants, ready to bring beauty and bounty to your garden.
Now that you’ve successfully transplanted the germinated seeds, you can sit back and marvel at the wonders of nature and the joy of growing your own plants from scratch. Happy gardening!
Conclusion
Germinating seeds using the paper towel method is a simple and effective way to kickstart the growth of your plants. By following the steps outlined in this guide and providing the optimal germination conditions, you can increase your chances of successful seed germination and achieve healthy and thriving plants.
Remember to choose high-quality seeds, prepare the paper towel or coffee filter, soak the seeds if necessary, and carefully place them onto the moistened material. Folding the paper towel creates a favorable microenvironment for the seeds to germinate. Monitoring and caring for the germinating seeds by maintaining the ideal temperature, moisture level, and lighting conditions are crucial for their healthy development.
Once the seeds have germinated and produced roots and shoots, it’s time to transplant them into their new growing containers or directly into the garden. Take care to handle the seedlings gently and provide the appropriate post-transplant care to ensure their successful establishment.
Throughout the entire process, practice patience and attentiveness. Gardening is a journey that requires nurturing and commitment. With each successfully germinated seed, you’ll deepen your understanding of plants and enjoy the satisfaction of seeing new life emerge.
So, whether you’re a seasoned gardener or a beginner, try germinating seeds using the paper towel method and unlock the joy of cultivating your own plants. Happy gardening!
Frequently Asked Questions about How To Germinate A Seed In Paper Towel
Was this page helpful?
At Storables.com, we guarantee accurate and reliable information. Our content, validated by Expert Board Contributors, is crafted following stringent Editorial Policies. We're committed to providing you with well-researched, expert-backed insights for all your informational needs.


0 thoughts on “How To Germinate A Seed In Paper Towel”