Home>Gardening & Outdoor>Pool & Spa Care>How To Build A Hot Tub Enclosure
Pool & Spa Care
How To Build A Hot Tub Enclosure
Modified: August 23, 2024
Learn how to build a hot tub enclosure to protect your pool and spa with our expert tips and advice for pool and spa care. Create a relaxing oasis in your backyard!
(Many of the links in this article redirect to a specific reviewed product. Your purchase of these products through affiliate links helps to generate commission for Storables.com, at no extra cost. Learn more)
Introduction
So, you've finally decided to take the plunge and build a hot tub enclosure. Congratulations! This project will not only enhance the aesthetics of your outdoor space but also provide a cozy and private retreat for year-round relaxation. Whether you want to shield your hot tub from the elements, create a secluded oasis, or simply add a touch of luxury to your backyard, a well-designed enclosure can make a world of difference.
In this comprehensive guide, we will walk you through the step-by-step process of building a hot tub enclosure that suits your style, complements your landscape, and meets your specific needs. From initial planning and design considerations to selecting the right materials and executing the construction, we've got you covered.
By the time you've finished reading this article, you'll have the knowledge and confidence to embark on this exciting project. So, roll up your sleeves, gather your tools, and let's dive into the wonderful world of hot tub enclosures!
Key Takeaways:
- Create a personalized hot tub retreat that reflects your style and lifestyle, offering year-round enjoyment and enhancing outdoor living with a long-term investment in your property.
- Building a hot tub enclosure provides a cozy and private oasis for relaxation, rejuvenation, and enjoyment, expanding the possibilities for outdoor living and entertaining.
Read more: How To Build In-Ground Hot Tub
Planning and Design
Before you start swinging hammers and sawing lumber, it’s crucial to lay a solid foundation for your hot tub enclosure by carefully planning and designing the structure. This phase sets the stage for a successful and visually appealing project, so take your time to consider the following key aspects:
- Location: Begin by identifying the ideal location for your hot tub enclosure. Consider factors such as privacy, sunlight exposure, proximity to your home, and the existing landscape. This will help you determine the size and orientation of the enclosure.
- Permits and Regulations: Check with your local building department to understand the zoning regulations, building codes, and permit requirements for constructing a hot tub enclosure. Compliance with these regulations is essential to avoid potential legal issues down the road.
- Design Concept: Think about the overall design concept that best suits your outdoor space and complements your home’s architecture. Whether you prefer a sleek and modern look, a rustic and natural feel, or something in between, your design concept will guide the selection of materials and construction methods.
- Functionality: Consider how you intend to use the enclosure. Will it serve as a year-round retreat, a seasonal shelter, or a combination of both? Factor in elements such as ventilation, insulation, and access to utilities to ensure that the enclosure meets your functional needs.
- Budget and Timeline: Establish a realistic budget for the project, taking into account materials, labor, and any additional features you wish to incorporate. Set a timeline that aligns with your availability and the complexity of the construction process.
By carefully addressing these planning and design considerations, you’ll be well-equipped to move on to the next phase of the project: selecting the materials that will bring your hot tub enclosure to life.
Selecting Materials
With the planning and design phase complete, it’s time to turn your attention to selecting the materials that will form the foundation of your hot tub enclosure. The materials you choose will not only contribute to the structure’s durability and visual appeal but also play a crucial role in achieving the desired level of comfort and functionality. Here are some key considerations when selecting materials for your hot tub enclosure:
- Frame and Supports: Opt for sturdy, weather-resistant materials for the frame and supports of the enclosure. Pressure-treated lumber, cedar, or composite materials are popular choices due to their durability and ability to withstand outdoor conditions.
- Roofing Materials: Consider the various roofing materials available, such as polycarbonate panels, metal roofing, or traditional shingles. Each option offers distinct advantages in terms of insulation, light transmission, and aesthetic appeal.
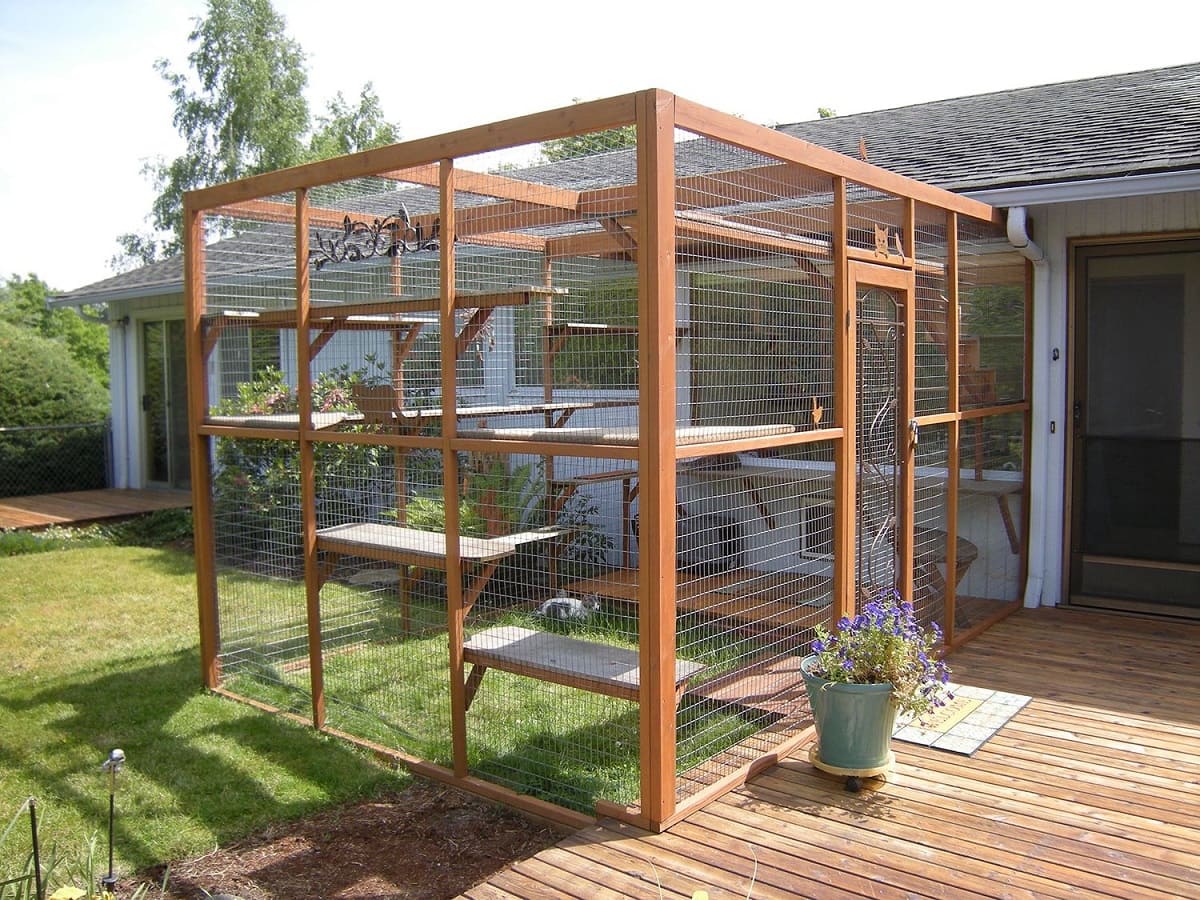
- Wall Panels: Depending on the design concept and desired level of privacy, you can choose from options like clear tempered glass, privacy glass, lattice panels, or weather-resistant fabric screens. Each material offers a unique blend of transparency, durability, and visual appeal.
- Doors and Entryways: Select doors that provide a secure and weather-tight seal while complementing the overall design of the enclosure. Options range from hinged wooden doors to sliding glass doors, each offering its own set of advantages in terms of accessibility and style.
- Finishing Touches: Don’t overlook the importance of finishing touches such as trim, hardware, and decorative elements. These details can elevate the visual appeal of the enclosure and tie together the overall aesthetic.
While considering these materials, keep in mind factors such as maintenance requirements, compatibility with your local climate, and the overall longevity of the materials. By carefully evaluating these considerations, you can make informed decisions that align with your design concept, budget, and long-term vision for your hot tub enclosure.
Building the Frame
With the materials selected and ready for use, it’s time to roll up your sleeves and start building the frame of your hot tub enclosure. The frame serves as the structural backbone of the entire structure, providing support for the roof, walls, and any additional features you plan to incorporate. Here’s a step-by-step guide to building the frame:
- Prepare the Site: Clear the designated area of any debris, vegetation, or obstacles that may impede the construction process. Ensure that the ground is level and stable to provide a solid foundation for the frame.
- Mark the Layout: Use stakes and string to outline the footprint of the enclosure, taking into account the desired dimensions and any allowances for overhangs or additional features.
- Set the Corner Posts: Install the corner posts of the frame, ensuring that they are plumb and securely anchored to the ground. Depending on your chosen materials, you may need to use concrete footings or anchors to provide stability.
- Construct the Frame: Assemble the horizontal and vertical members of the frame according to your design plans, ensuring that all connections are secure and level. Use appropriate fasteners and reinforcement techniques to enhance the structural integrity of the frame.
- Install Roof Supports: If your design includes a pitched or flat roof, install the necessary supports and rafters to accommodate the roofing materials. Ensure that the roof structure is adequately braced and capable of withstanding the anticipated loads.
- Verify Measurements: Double-check all measurements and alignments to confirm that the frame is true to your design plans and specifications. Making adjustments at this stage will prevent issues during the installation of roofing and wall materials.
Throughout the construction of the frame, prioritize precision, stability, and adherence to local building codes and regulations. By laying a strong foundation with a well-constructed frame, you’ll set the stage for the successful completion of your hot tub enclosure.
Consider using durable and weather-resistant materials such as cedar or redwood for your hot tub enclosure to ensure longevity and minimal maintenance.
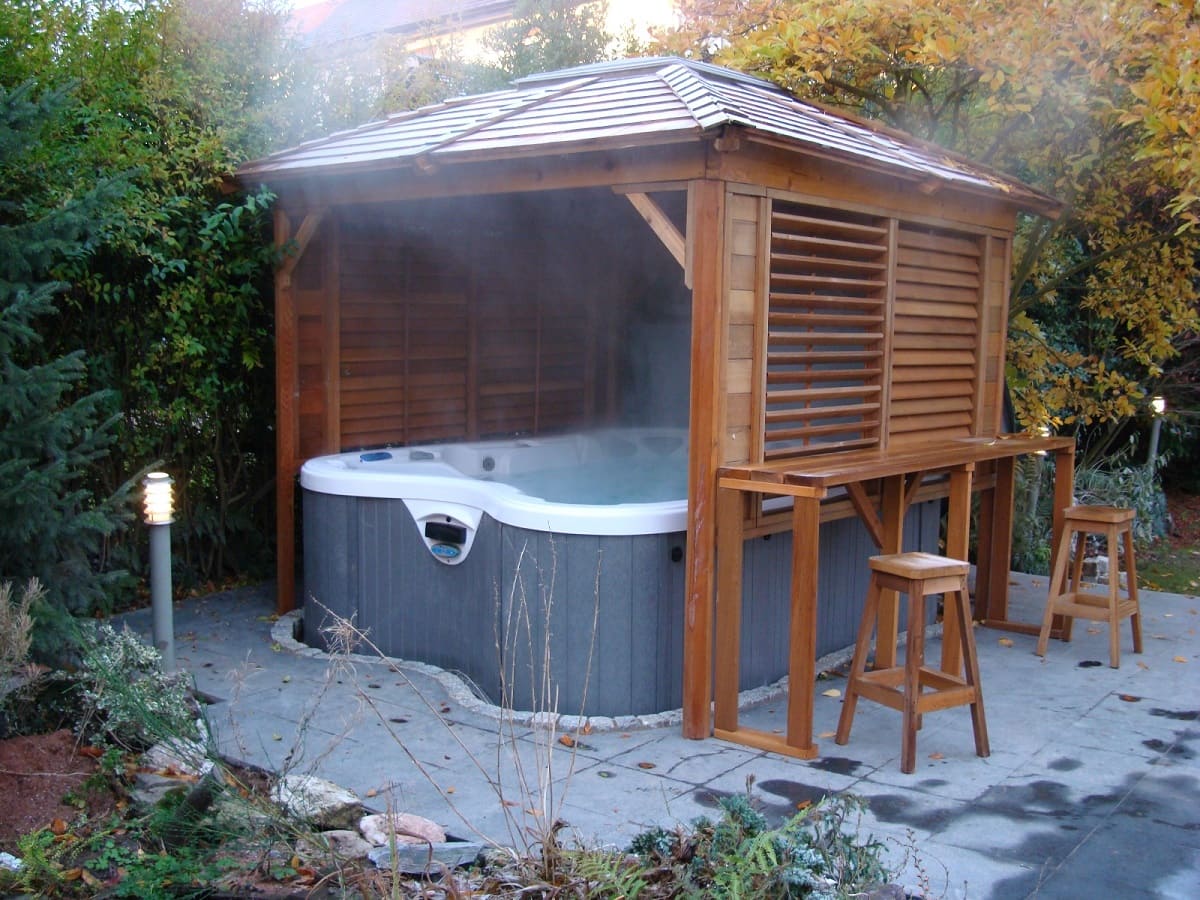
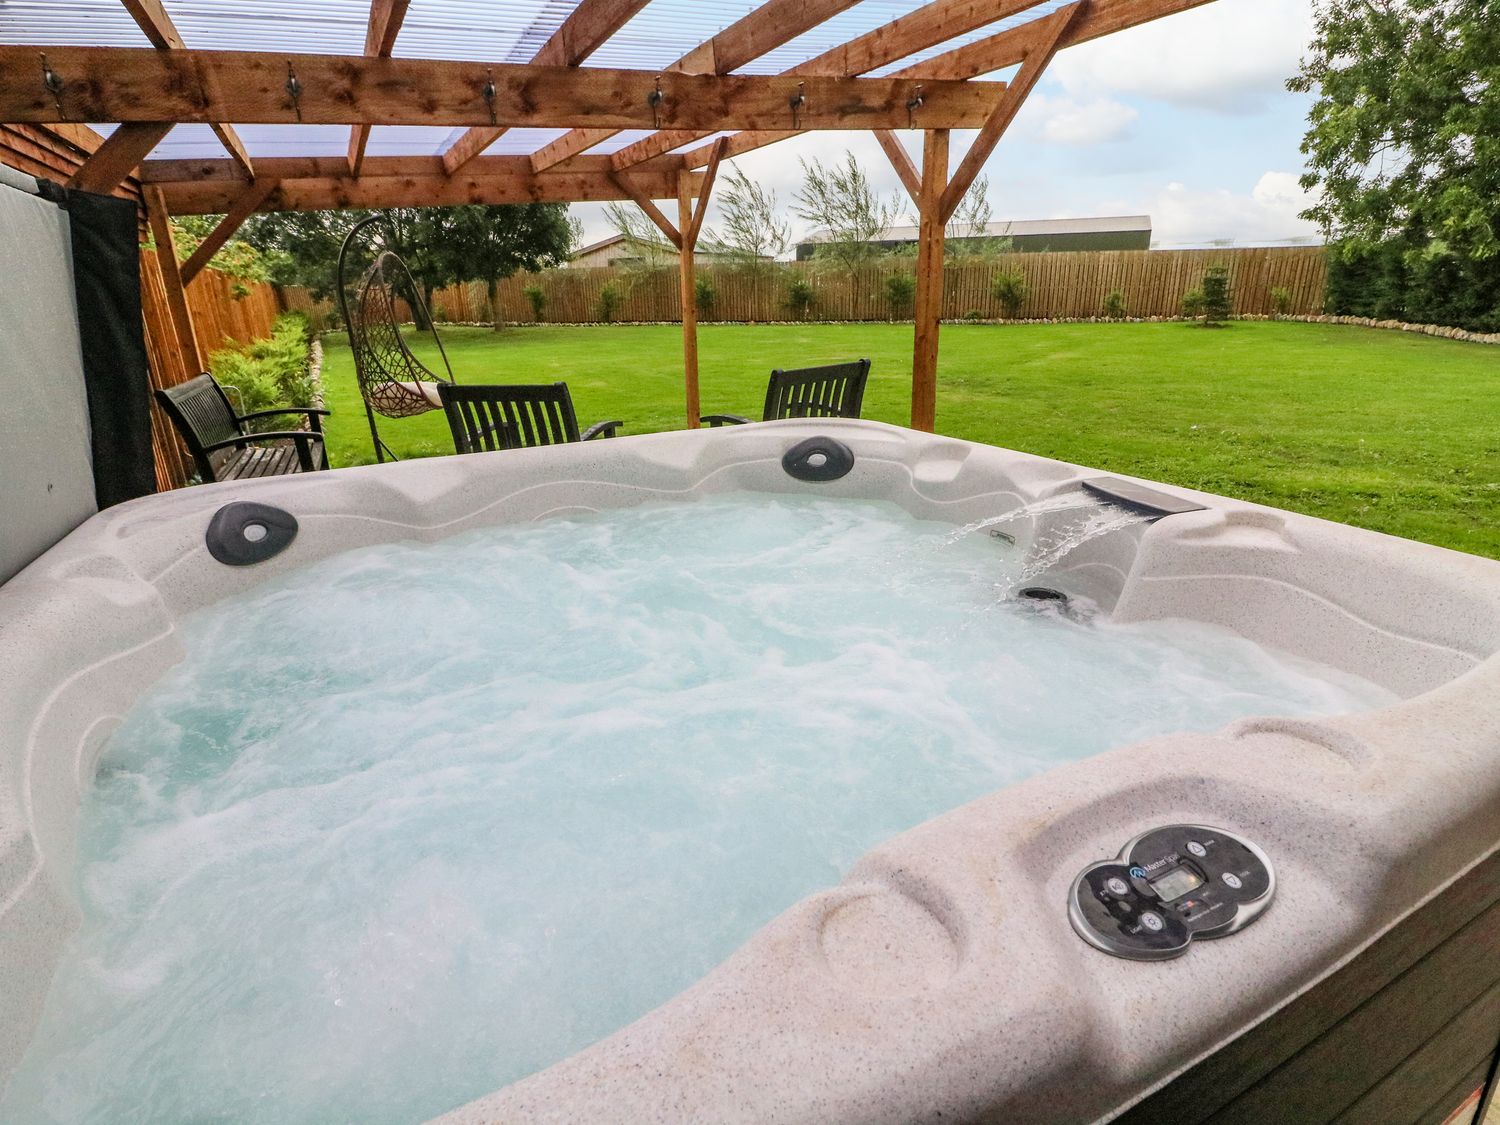
Installing the Roof
With the frame in place, it’s time to focus on one of the most critical elements of your hot tub enclosure: the roof. The roof not only provides protection from the elements but also contributes significantly to the overall aesthetic and functionality of the structure. Whether you opt for a traditional pitched roof, a sleek flat roof, or a stylish pergola-style canopy, the installation process requires careful attention to detail. Here’s a guide to installing the roof for your hot tub enclosure:
- Prepare the Roofing Materials: If you’re using traditional shingles, metal panels, or other roofing materials, ensure that they are cut to the appropriate dimensions and ready for installation. For transparent roofing materials like polycarbonate panels, handle them with care to avoid scratches and damage.
- Start at the Bottom: Begin the installation at the lowest point of the roof, whether it’s the eaves, the lowest edge of a pitched roof, or the perimeter of a flat roof. Properly align the first row of roofing materials to ensure a straight and level starting point.
- Secure the Roofing Materials: Use the recommended fasteners and installation methods for the specific roofing materials you’ve chosen. Whether it involves nails, screws, or specialized clips, follow the manufacturer’s guidelines to achieve a secure and weather-tight installation.
- Address Roof Penetrations: If your hot tub enclosure includes features such as skylights, ventilation openings, or support posts that penetrate the roof, take extra care to seal these areas effectively. Proper flashing and weatherproofing will prevent leaks and ensure long-term durability.
- Ensure Proper Drainage: For pitched roofs, confirm that the slope and layout allow for adequate drainage of rainwater and snowmelt. Properly installed gutters and downspouts can further enhance the roof’s ability to manage water runoff.
- Inspect and Test: Once the roof is installed, conduct a thorough inspection to check for any gaps, loose fasteners, or imperfections. Perform a water test, if possible, to verify that the roof effectively sheds water and remains leak-free.
By approaching the roof installation with precision and attention to detail, you’ll ensure that your hot tub enclosure not only looks stunning but also provides reliable protection from the elements for years to come.
Read more: How To Build Deck For Hot Tub
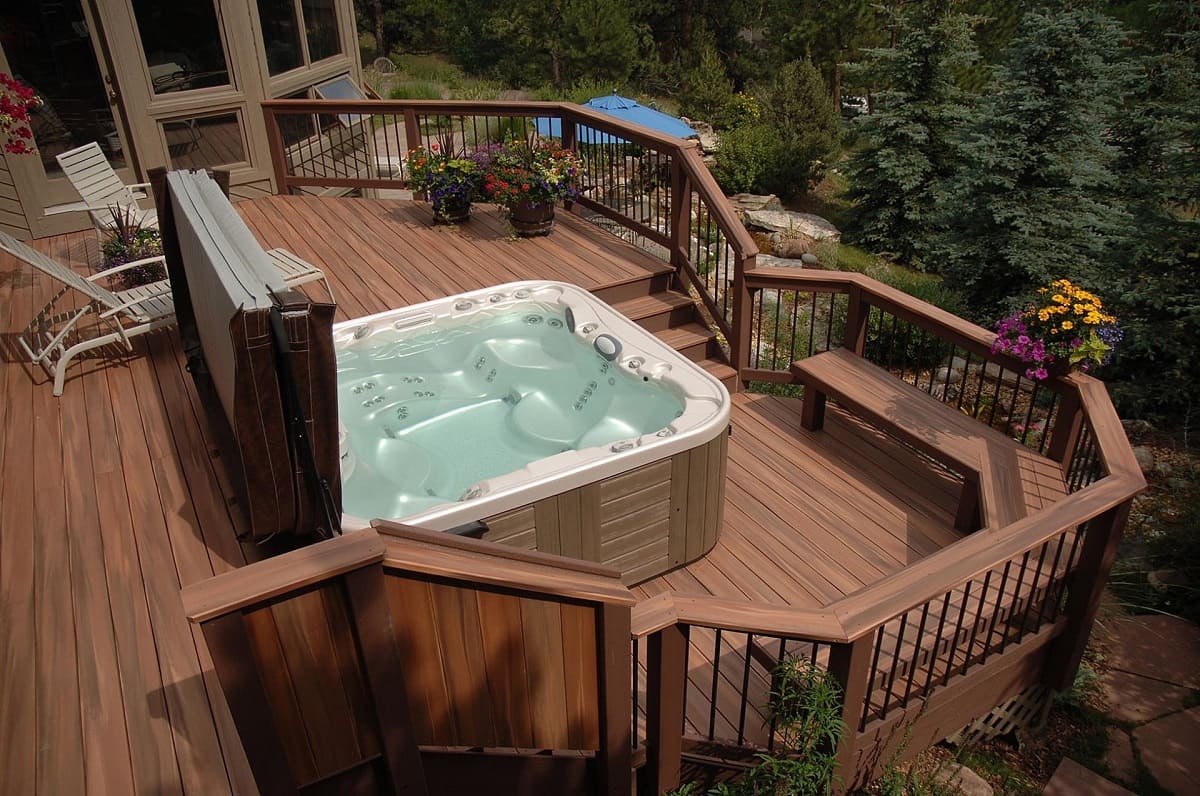
Adding Walls and Doors
With the roof securely in place, it’s time to enclose your hot tub retreat with walls and doors that provide privacy, protection, and a seamless connection to the surrounding environment. Whether you envision clear panoramic views, a cozy and intimate setting, or a blend of both, the selection and installation of walls and doors play a pivotal role in shaping the ambiance of your hot tub enclosure. Here’s how to add walls and doors to complete the space:
- Select Wall Materials: Choose the appropriate materials for your desired level of transparency, privacy, and weather resistance. Options range from clear tempered glass panels and weather-resistant fabric screens to solid wood or composite panels. Consider how each material contributes to the desired aesthetic and functionality.
- Install Wall Panels: Securely install the chosen wall materials to the frame of the enclosure, ensuring a snug fit and weatherproof seals. Pay careful attention to the alignment and levelness of the panels to achieve a polished and professional appearance.
- Address Ventilation Needs: If your hot tub enclosure requires ventilation for air circulation and temperature control, incorporate operable windows, vents, or louvered panels into the wall design. Balancing privacy with adequate airflow is essential for creating a comfortable environment.
- Select and Install Doors: Choose doors that complement the overall design of the enclosure while providing secure access and weather protection. Whether you opt for hinged, sliding, or folding doors, ensure that they seal tightly and operate smoothly for effortless entry and exit.
- Enhance Security and Convenience: Consider features such as locks, handles, and integrated lighting to enhance the security and usability of the doors. Motion-activated lighting or built-in sidelites can further elevate the functionality and safety of the entryways.
- Add Personal Touches: Incorporate decorative elements, such as trellises, planters, or artistic accents, to infuse personality and charm into the walls and doors of your hot tub enclosure. These details can tie the space into your overall landscape design and create a welcoming atmosphere.
By thoughtfully integrating walls and doors into your hot tub enclosure, you’ll create a harmonious and inviting space that strikes the perfect balance between openness and seclusion, allowing you to fully enjoy the benefits of your private outdoor retreat.
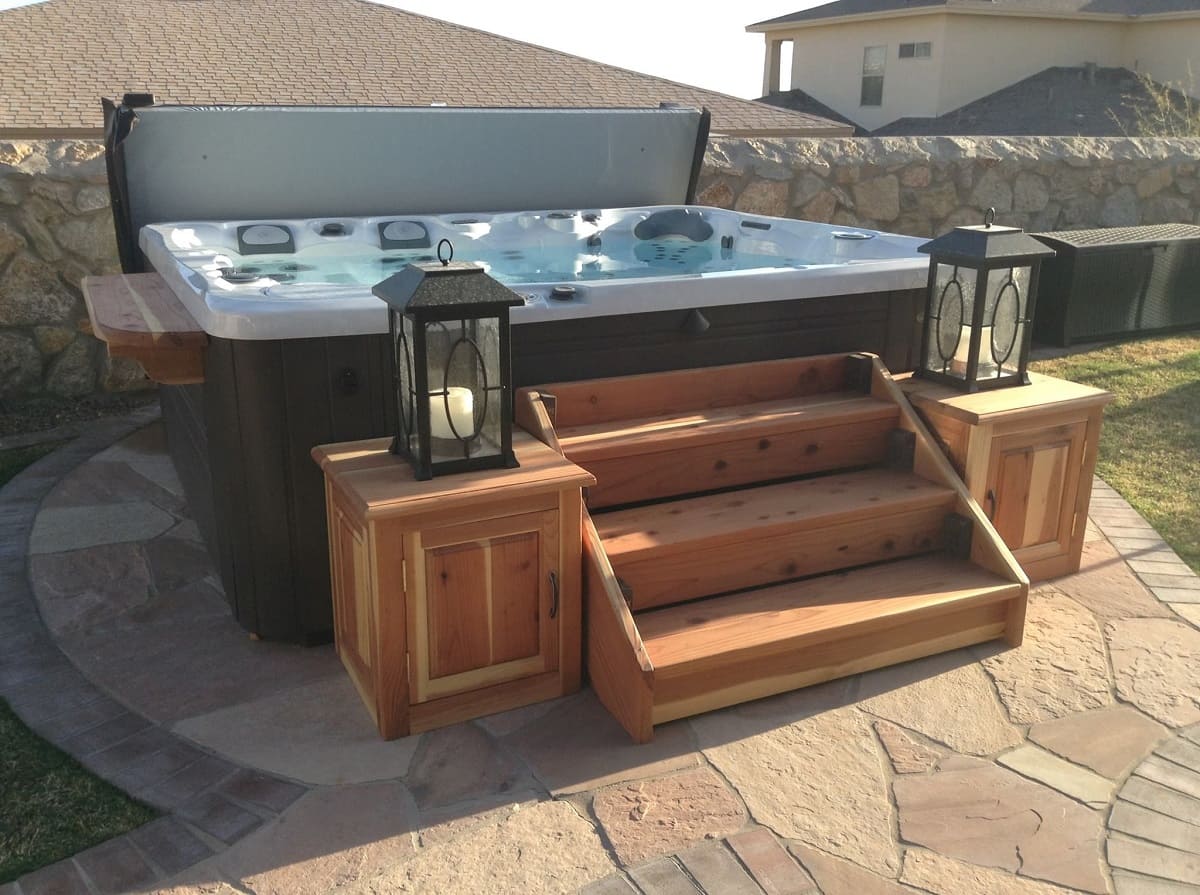
Finishing Touches
As you near the completion of your hot tub enclosure, it’s time to focus on the finishing touches that will elevate the space from a functional structure to a captivating retreat. These final details not only enhance the visual appeal of the enclosure but also contribute to its comfort, convenience, and overall ambiance. Here are some essential finishing touches to consider:
- Lighting: Illuminate your hot tub enclosure with carefully placed lighting to create a welcoming and safe environment, especially during evening use. Consider options such as soft overhead lighting, LED strips, or solar-powered pathway lights to enhance visibility and ambiance.
- Furnishings: Select outdoor furniture and accessories that complement the style and purpose of the enclosure. Comfortable seating, side tables, and storage solutions can transform the space into a functional and inviting relaxation area.
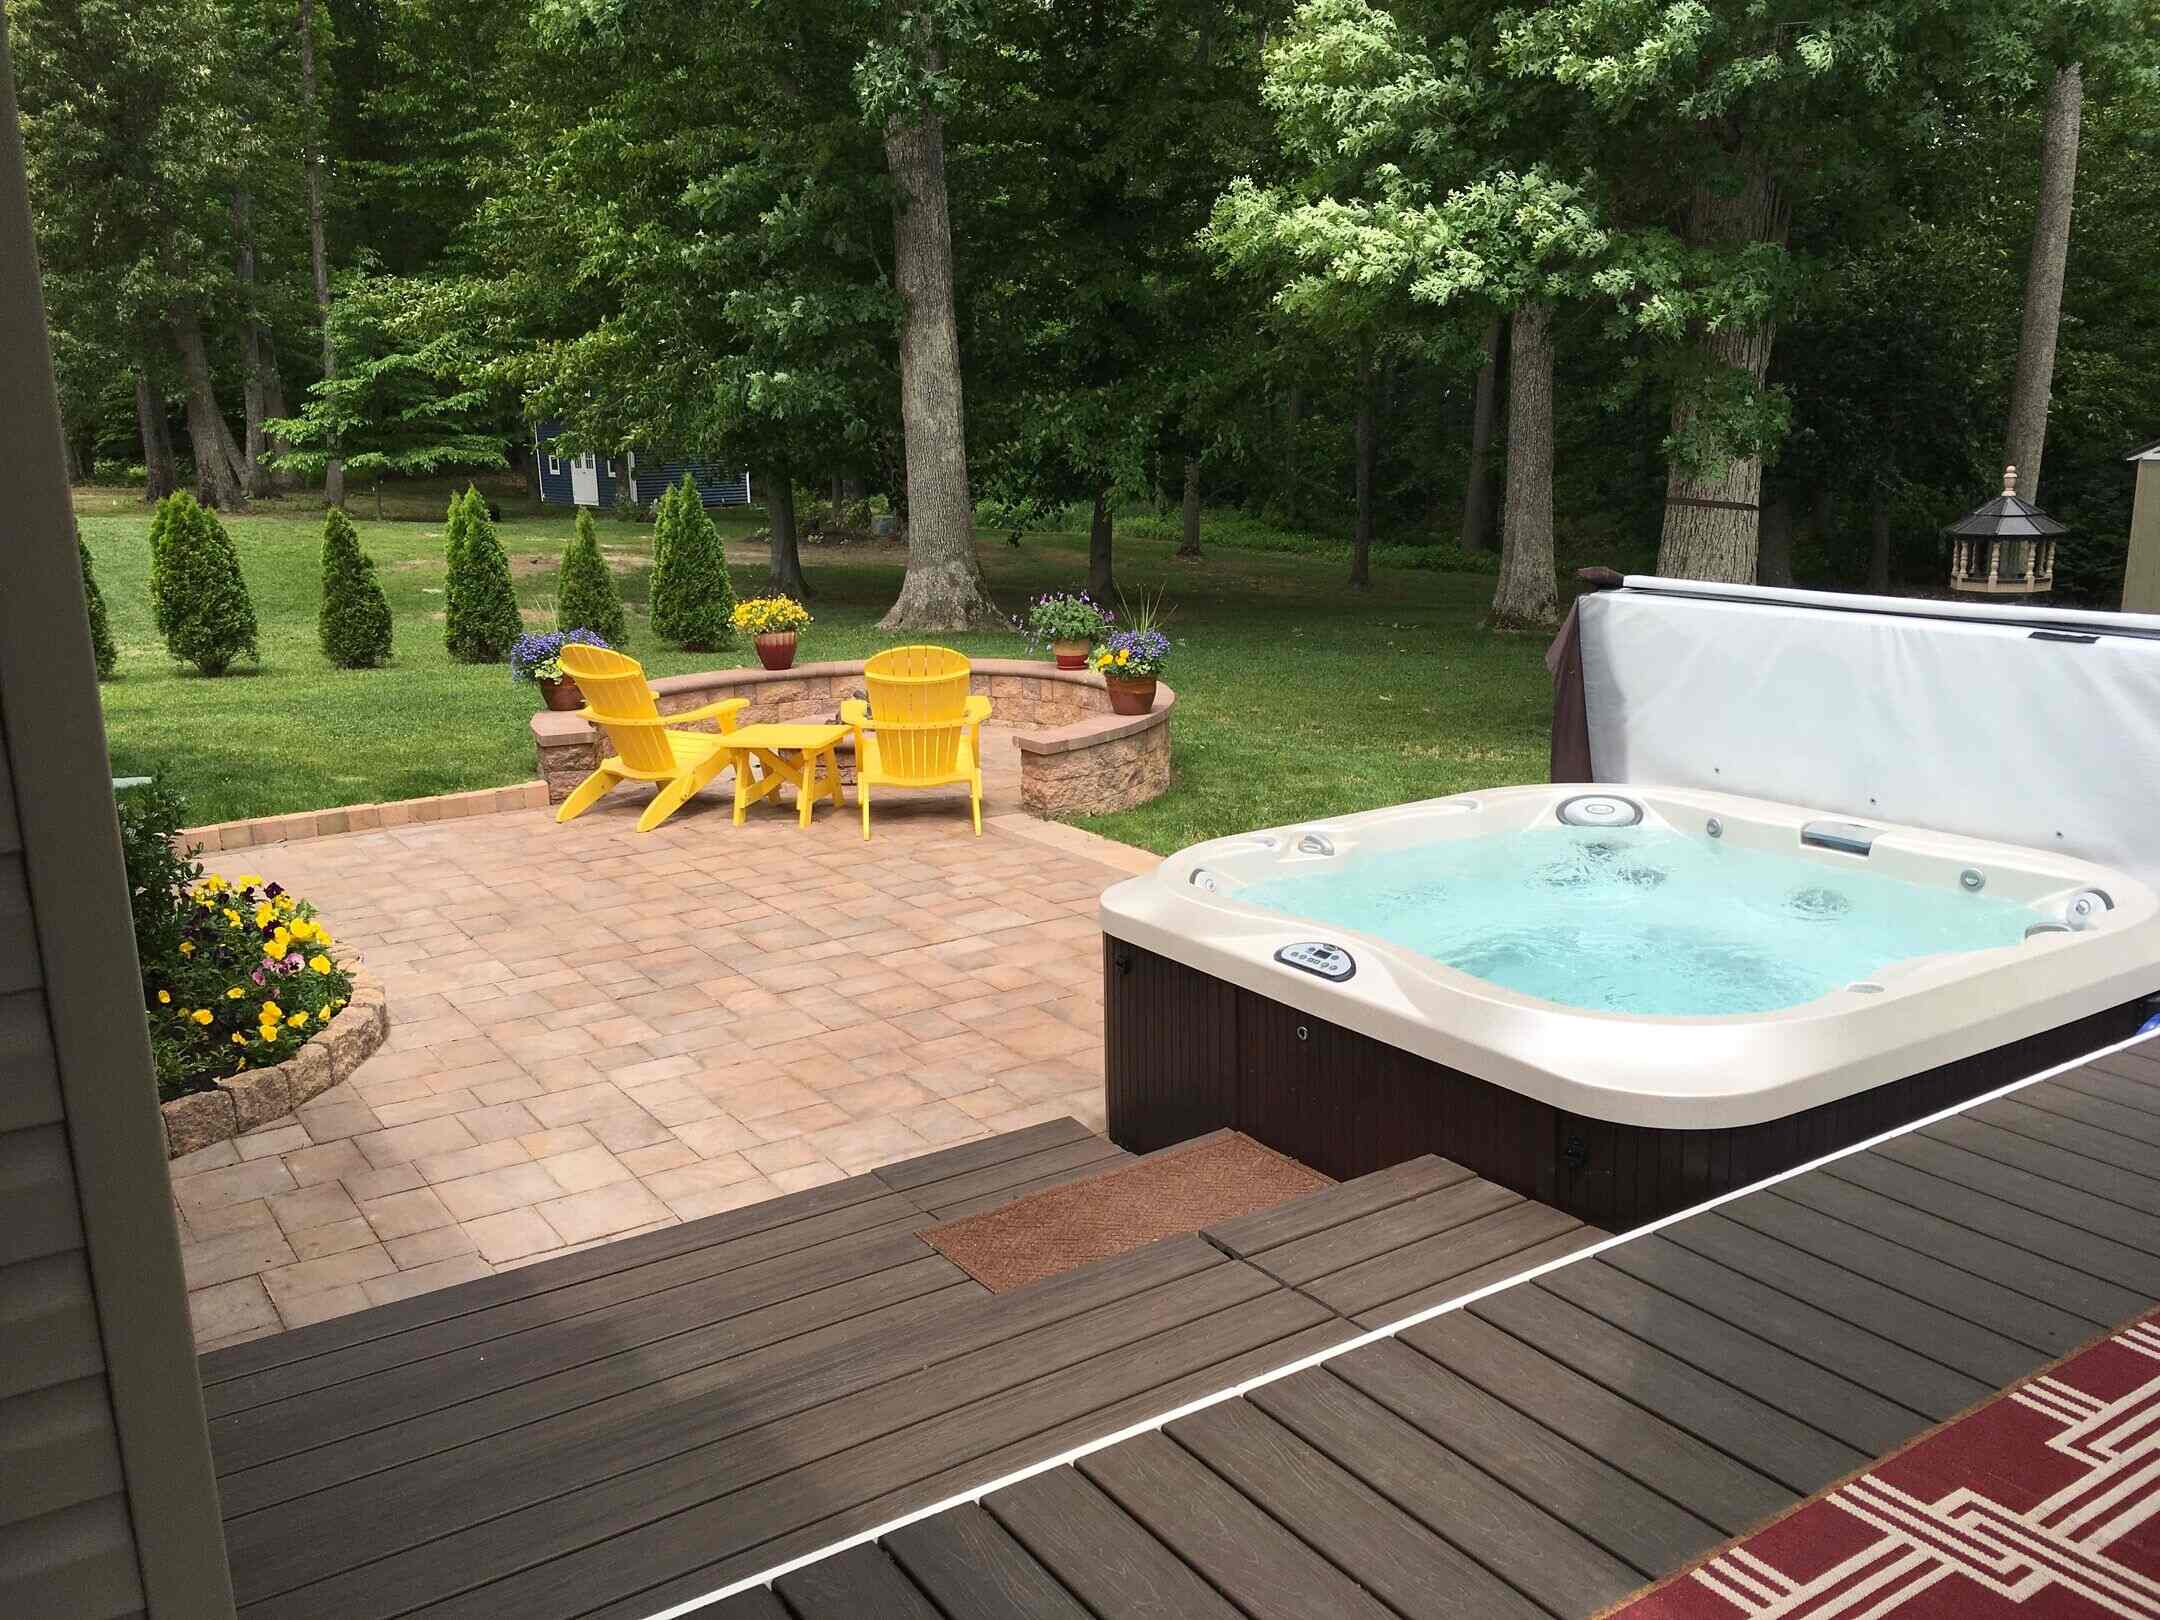
- Privacy Screening: If additional privacy is desired, consider incorporating decorative privacy screens, trellises, or strategically placed plants to create secluded areas within the enclosure without compromising airflow and natural light.
- Greenery and Landscaping: Integrate lush greenery, potted plants, and landscaping features to soften the edges of the enclosure and seamlessly blend it into the surrounding outdoor space. Thoughtful landscaping enhances the natural appeal of the retreat.
- Personalized Décor: Add personal touches such as artwork, decorative accents, and weather-resistant textiles to infuse the space with your unique style and create a welcoming atmosphere for relaxation and entertainment.
- Maintenance Considerations: Implement practical solutions for maintaining the enclosure, such as easy-to-clean surfaces, storage for maintenance tools, and a plan for seasonal upkeep to preserve the beauty and functionality of the structure.
By attending to these finishing touches, you’ll transform your hot tub enclosure into a captivating and inviting space that reflects your personal taste and enhances your outdoor living experience. With the project now complete, it’s time to step back, immerse yourself in the comfort of your private retreat, and savor the satisfaction of bringing your vision to life.
Conclusion
Congratulations on successfully completing the construction of your hot tub enclosure! This transformative project has not only added a stunning focal point to your outdoor space but has also created a private oasis for relaxation, rejuvenation, and enjoyment. As you reflect on the journey from initial planning to the final finishing touches, it’s clear that the effort and attention to detail have yielded a remarkable addition to your home. Here are a few key takeaways to consider as you bask in the satisfaction of your accomplishment:
- Personalized Retreat: Your hot tub enclosure is more than just a structure; it’s a personalized retreat that reflects your unique style, preferences, and lifestyle. Whether you’ve created a sleek modern sanctuary, a rustic nature-inspired haven, or a harmonious blend of elements, the enclosure is a true reflection of your vision.
- Year-Round Enjoyment: With the protection and comfort provided by the enclosure, you now have the opportunity to enjoy your hot tub throughout the year, regardless of the weather or time of day. The space offers a seamless connection to nature while providing shelter from the elements, making it a versatile and inviting retreat.
- Enhanced Outdoor Living: Your hot tub enclosure has expanded the possibilities for outdoor living, entertaining, and relaxation. It has become a focal point for gatherings, intimate conversations, and tranquil moments, enriching the overall experience of your outdoor space.
- Long-Term Investment: The careful selection of materials, meticulous construction, and thoughtful finishing touches have resulted in a long-term investment in your property. The durability, functionality, and visual appeal of the enclosure will continue to enhance your home for years to come.
As you immerse yourself in the comfort and luxury of your hot tub enclosure, take pride in the craftsmanship and creativity that have brought this project to fruition. Whether you’re unwinding after a long day, hosting gatherings with loved ones, or simply savoring moments of solitude, the enclosure stands as a testament to your dedication to creating a space that enriches your lifestyle and brings joy to those who experience it.
So, raise a toast to your achievement, revel in the beauty of your outdoor retreat, and embrace the countless moments of relaxation and rejuvenation that await within the captivating confines of your hot tub enclosure.
Frequently Asked Questions about How To Build A Hot Tub Enclosure
Was this page helpful?
At Storables.com, we guarantee accurate and reliable information. Our content, validated by Expert Board Contributors, is crafted following stringent Editorial Policies. We're committed to providing you with well-researched, expert-backed insights for all your informational needs.

0 thoughts on “How To Build A Hot Tub Enclosure”