Home>Construction & Tools>Building Materials>How To Build A Brick Mailbox
Building Materials
How To Build A Brick Mailbox
Modified: October 19, 2024
Learn how to build a brick mailbox using durable and high-quality building materials. Follow our step-by-step guide for a sturdy and long-lasting structure.
(Many of the links in this article redirect to a specific reviewed product. Your purchase of these products through affiliate links helps to generate commission for Storables.com, at no extra cost. Learn more)
Introduction
Welcome to the world of DIY brick mailbox construction! Building a brick mailbox can be a rewarding and practical project that adds a touch of elegance to your property. Not only does it provide a secure and weather-resistant home for your mail, but it also serves as a charming addition to your curb appeal. In this comprehensive guide, we will walk you through the step-by-step process of constructing a sturdy and visually appealing brick mailbox. Whether you are a seasoned DIY enthusiast or a novice looking to embark on your first masonry project, this article will equip you with the knowledge and confidence to tackle this endeavor.
Before we roll up our sleeves and dive into the nitty-gritty details of bricklaying, it’s essential to emphasize the importance of safety and precision in every phase of construction. From gathering the necessary materials and tools to adding the finishing touches, we will underscore the significance of adhering to best practices and local building codes. So, grab your work gloves and let’s get started on this exciting journey to create a durable and eye-catching brick mailbox that will stand the test of time.
Key Takeaways:
- Building a brick mailbox is a rewarding DIY project that adds elegance to your property. Safety, precision, and gathering the right materials and tools are essential for a successful construction.
- Constructing a brick mailbox involves preparing the site, laying a solid foundation, building the walls, adding the mailbox door and roof, and finishing with personalized accents. It’s a fulfilling expression of craftsmanship and personal style.
Read more: How To Replace A Mailbox In Brick
Step 1: Gather Materials and Tools
Before you begin the construction of your brick mailbox, it’s crucial to assemble all the essential materials and tools. By ensuring that you have everything at your disposal, you can streamline the building process and minimize interruptions. Here’s a comprehensive list of the items you’ll need:
Materials:
- Bricks: Opt for high-quality, weather-resistant bricks that complement the aesthetic of your property.
- Mortar: Choose a durable mortar mix specifically designed for masonry projects.
- Concrete: You’ll need concrete for the foundation and footing of the mailbox.
- Rebar: Reinforcing bars will provide structural support for the foundation and walls.
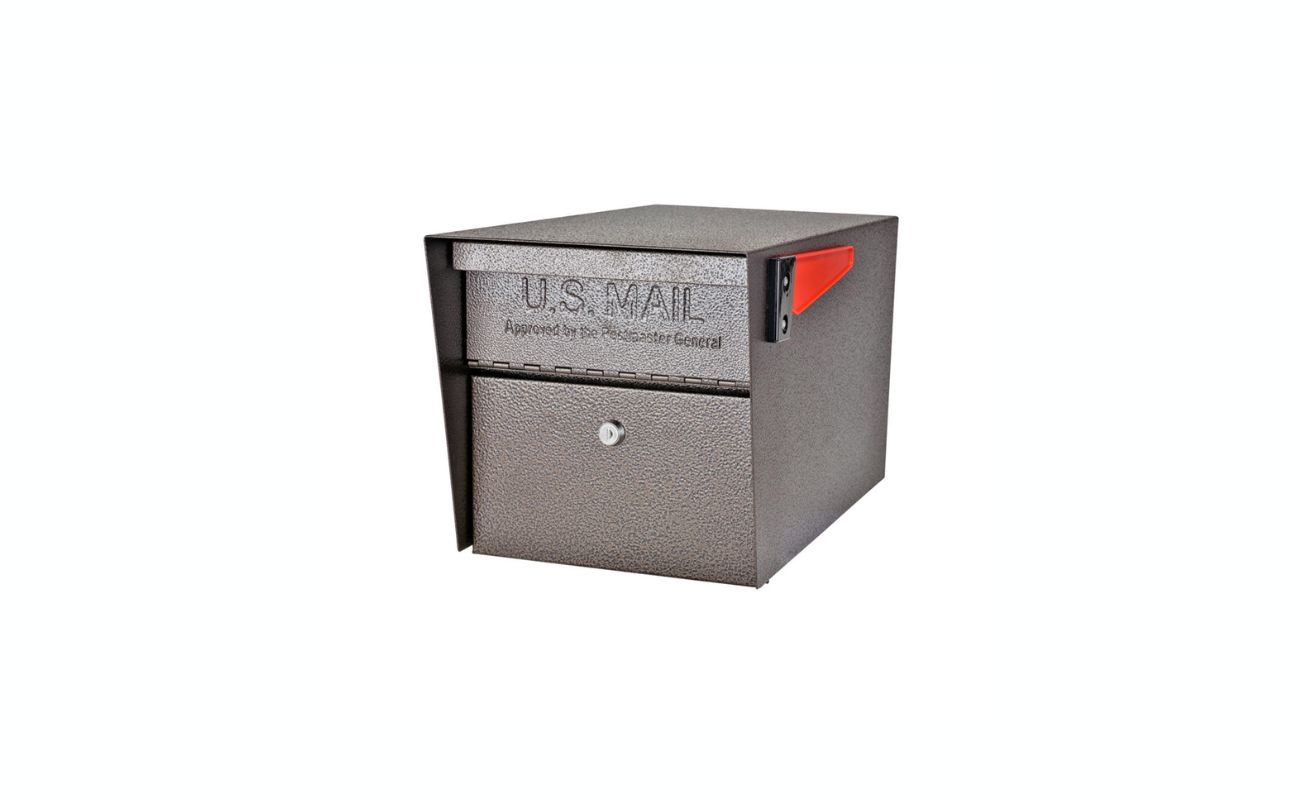
- Mailbox Door: Select a sturdy and visually appealing mailbox door that suits your personal style.
- Mailbox Insert: Ensure you have the appropriate insert to secure your mail within the mailbox.
- Roofing Materials: Depending on your design preference, gather materials for the mailbox roof, such as metal or shingles.
- Waterproofing Sealant: Invest in a high-quality sealant to protect the bricks from moisture and prolong the lifespan of your mailbox.
Tools:
- Trowel: A pointed or flat trowel is essential for applying mortar and leveling bricks.
- Level: To ensure the bricks are laid evenly and plumb, a reliable level is indispensable.
- Masonry Saw: This tool will come in handy for cutting bricks to the required dimensions.
- Mixing Tools: Depending on the scale of your project, you may need a wheelbarrow, hoe, or mixer for preparing mortar and concrete.
- Work Gloves and Safety Glasses: Prioritize safety by wearing protective gloves and eyewear throughout the construction process.
- Measuring Tape: Accurate measurements are key to achieving a precise and stable structure.
- String and Stakes: These are essential for marking the layout and ensuring straight lines during construction.
- Brushes and Sponges: Use these tools for cleaning excess mortar and achieving a polished finish.
By gathering these materials and tools in advance, you’ll set the stage for a smooth and efficient building experience. With your arsenal of supplies ready, you’re well-prepared to move on to the next phase: preparing the site for your brick mailbox construction.
Step 2: Prepare the Site
Preparing the site for your brick mailbox is a crucial preliminary step that lays the foundation for a sturdy and visually appealing structure. Before you embark on the actual construction, it’s essential to assess the location, gather the necessary permits, and ensure that the site is conducive to supporting a brick mailbox.
Read more: How To Build A Custom Mailbox
Assess the Location:
Begin by selecting an ideal location for your brick mailbox. Consider factors such as visibility from the road, accessibility for mail delivery, and proximity to utilities. It’s important to adhere to local regulations and postal service guidelines regarding mailbox placement to avoid any future issues. Additionally, assess the soil composition and drainage in the chosen area to ensure that it can support the weight of the mailbox and withstand environmental factors.
Obtain Permits:
Depending on your local jurisdiction, you may need to obtain permits for constructing a brick mailbox. Check with your municipal building department to determine the specific requirements and acquire the necessary permits before commencing any work. Adhering to local regulations and obtaining permits will ensure that your project is compliant with building codes and zoning ordinances.
Clear and Level the Ground:
Once you’ve identified the site and obtained the required permits, it’s time to clear the ground and create a level foundation for your brick mailbox. Remove any vegetation, rocks, or debris from the area, and use a shovel and rake to level the ground. Ensuring a flat and stable surface is essential for the structural integrity of the mailbox.
Mark the Layout:
Using stakes and string, mark the layout of the mailbox foundation and walls. This step will provide a visual guide for the dimensions and positioning of the mailbox, ensuring that the construction proceeds with precision and accuracy. Double-check the measurements and layout to guarantee that the mailbox will align harmoniously with the surrounding landscape and meet your aesthetic preferences.
By meticulously preparing the site, obtaining necessary permits, and marking the layout, you will set the stage for a seamless transition to the next phase: laying the foundation of your brick mailbox.
Read more: How To Build Brick Steps
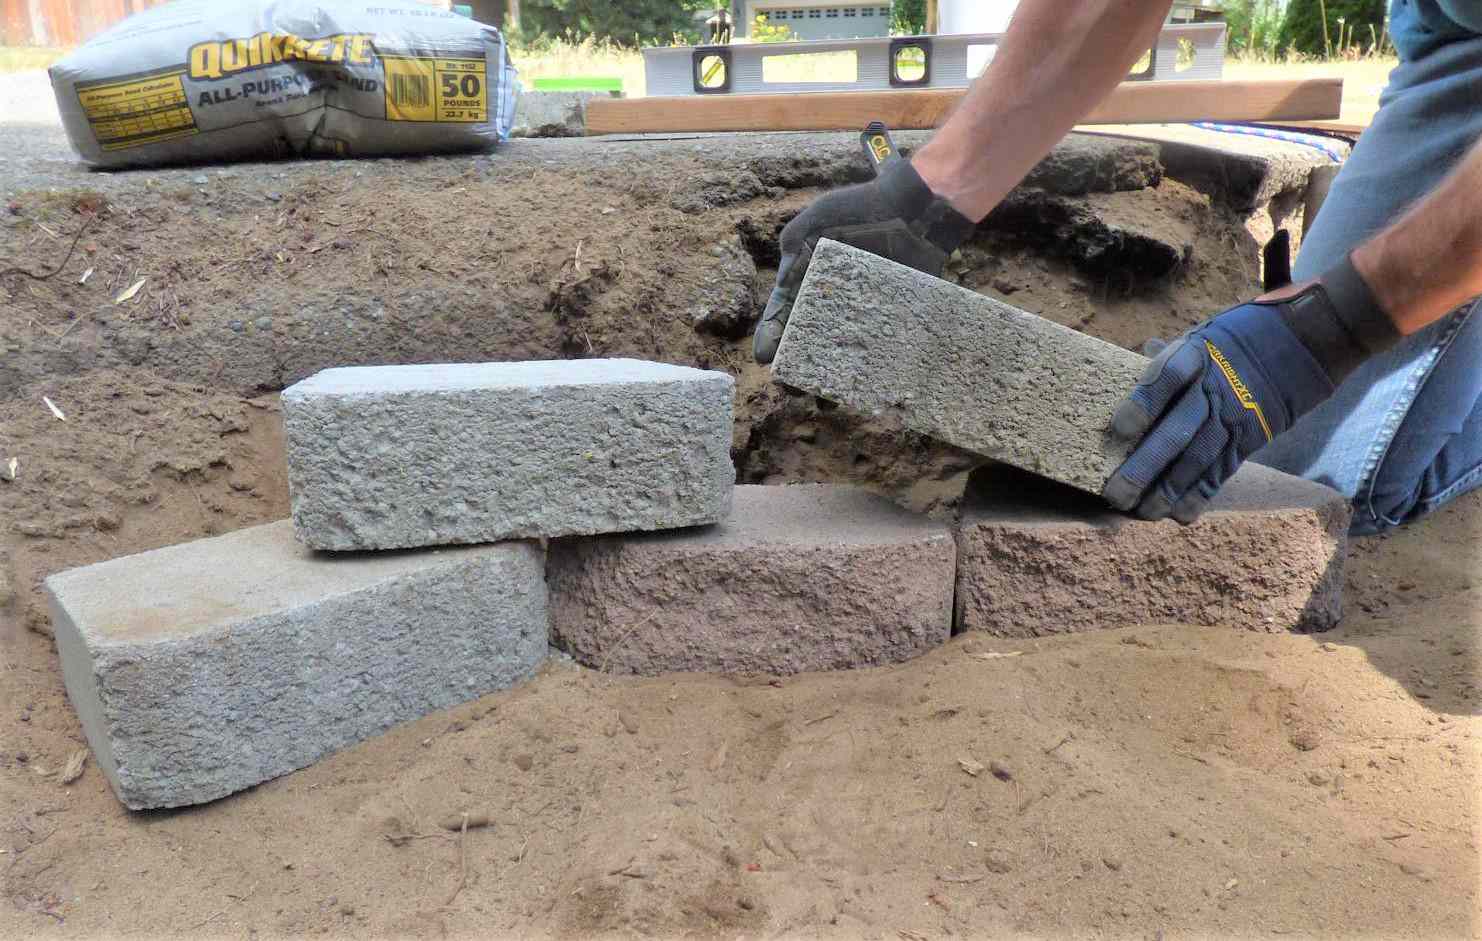
Step 3: Lay the Foundation
With the site prepared and the necessary permits secured, you are ready to embark on the foundational stage of building your brick mailbox. The foundation serves as the backbone of the structure, providing stability and support for the ensuing construction. Here’s a detailed guide on how to lay a solid foundation for your brick mailbox:
Excavate the Footing:
Using a shovel and digging tools, excavate the area where the foundation will be laid. The depth of the footing will depend on local building codes and the soil composition. Typically, a depth of 12 to 18 inches is recommended to ensure a stable and durable foundation. Remove any excess soil and debris from the excavation site to create a clean and uniform space for the next steps.
Install Rebar and Formwork:
Once the footing is excavated, place rebar within the trench to reinforce the foundation. The rebar will enhance the structural integrity of the foundation, providing additional strength to withstand external pressures. Additionally, construct formwork using wooden boards to contain the concrete and shape the foundation according to the desired dimensions. Ensure that the formwork is securely positioned and level to facilitate the pouring of concrete.
Pour and Level the Concrete:
Prepare a high-quality concrete mix according to the manufacturer’s instructions, ensuring the proper ratio of cement, aggregate, and water. Carefully pour the concrete into the formwork, distributing it evenly to achieve a uniform foundation. Use a screed or leveling tool to smooth the surface of the concrete and eliminate any air pockets or irregularities. Allow the concrete to cure and set according to the recommended timeframe specified by the product guidelines.
Read more: How To Make A Stucco Mailbox
Verify Alignment and Levelness:
Once the concrete has set, verify that the foundation is aligned and level. Use a level and measuring tools to confirm that the foundation is uniformly positioned and meets the specified dimensions. This critical step ensures that the subsequent construction phases, including building the walls, will proceed smoothly and result in a structurally sound brick mailbox.
By meticulously following these steps to lay a solid foundation, you will establish a robust base for your brick mailbox, setting the stage for the next phase: constructing the walls that will define the structure’s form and function.
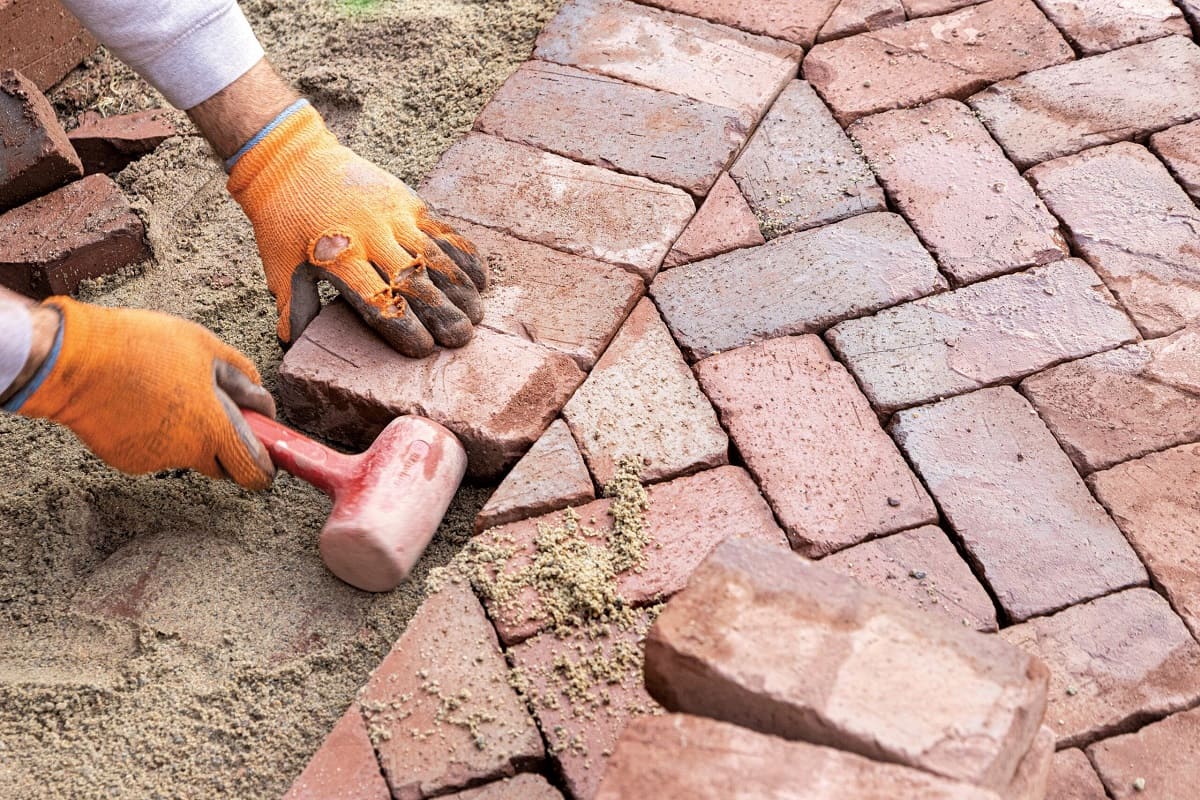
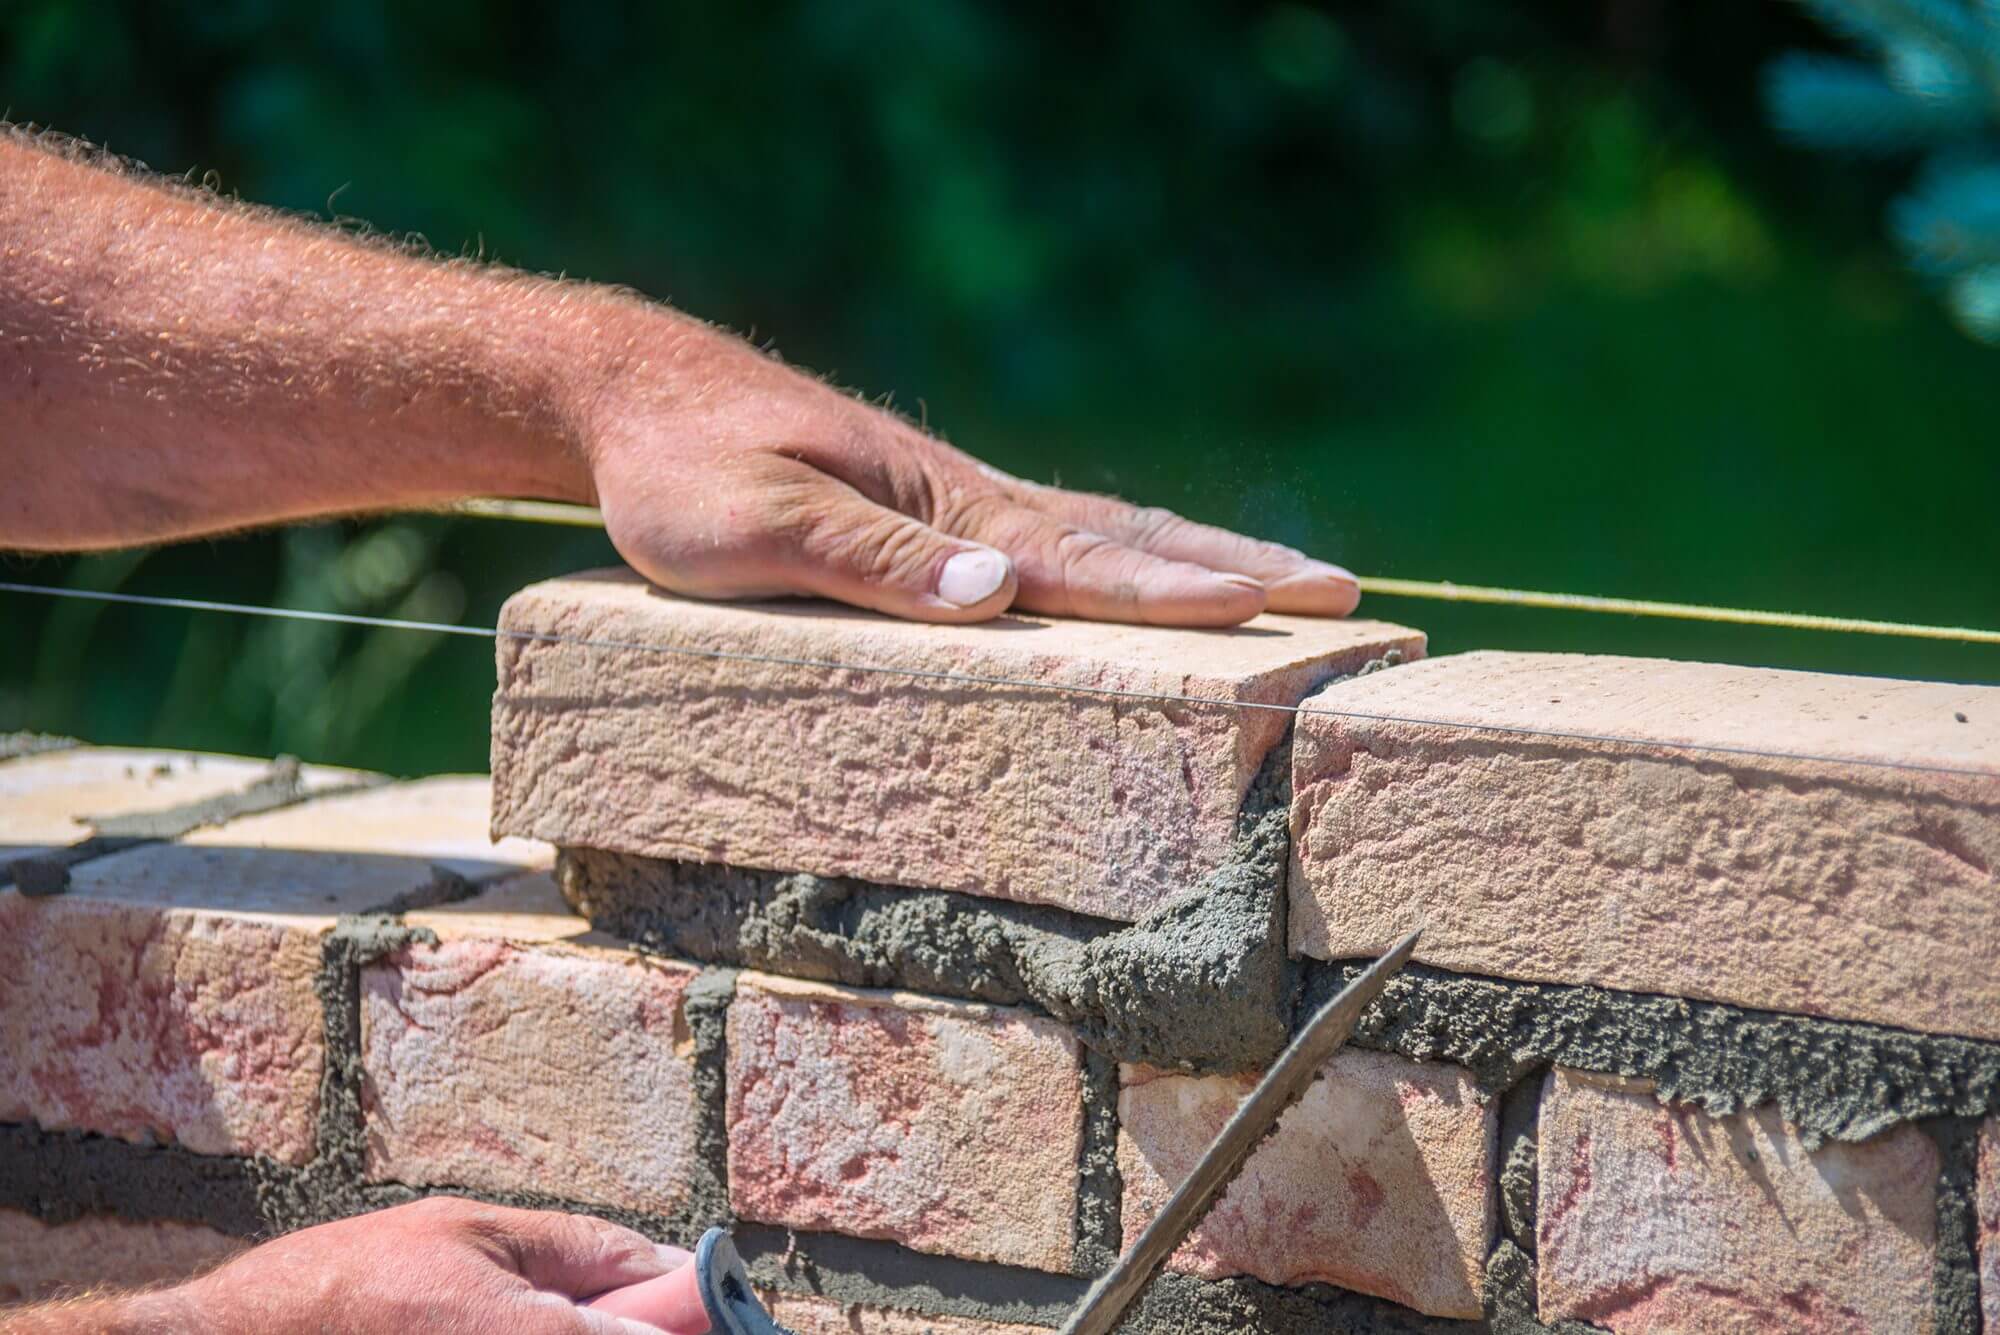
Step 4: Build the Walls
As the foundation of your brick mailbox sets and cures, it’s time to transition to the exciting phase of building the walls. The walls not only define the structure’s form but also contribute to its durability and visual appeal. Here’s a comprehensive guide on how to construct the walls of your brick mailbox:
Prepare the Mortar:
Begin by preparing a high-quality mortar mix according to the manufacturer’s specifications. The mortar should possess excellent adhesion properties and workability, ensuring that the bricks bond securely and form a resilient structure. Consistency in mortar preparation is key to achieving uniform and stable walls.
Lay the First Course:
Using a trowel, apply a generous amount of mortar to the footing and begin laying the first course of bricks. Ensure that the bricks are level, aligned, and properly spaced, using a level and spacing tools to maintain precision. The initial course serves as the foundation for the subsequent layers, so meticulous attention to detail is crucial at this stage.
Read more: How To Build A Brick Grill
Employ Proper Bonding Techniques:
Utilize bonding techniques such as staggering the joints and overlapping the bricks to enhance the structural integrity of the walls. This approach, often referred to as “running bond,” ensures that the bricks interlock and distribute the load evenly, minimizing the risk of cracking and instability in the structure.
Continue Layering and Bonding:
Progressively add additional courses of bricks, applying mortar between each layer and maintaining consistent spacing and alignment. As the walls ascend, periodically check for plumb and level to guarantee that the structure remains true and uniform. Attention to detail in each layer contributes to the overall strength and aesthetic appeal of the brick mailbox.
Integrate Openings and Features:
Depending on the design and functionality of your mailbox, incorporate openings for the mailbox door and any additional features, such as decorative elements or address plaques. Carefully plan and execute these integrations to ensure that they seamlessly blend with the overall design and contribute to the functionality of the mailbox.
By diligently following these steps to construct the walls of your brick mailbox, you will witness the structure taking shape and embodying the timeless charm of brick masonry. With the walls in place, the next phase will focus on adding the mailbox door and roof, bringing functionality and character to the completed structure.
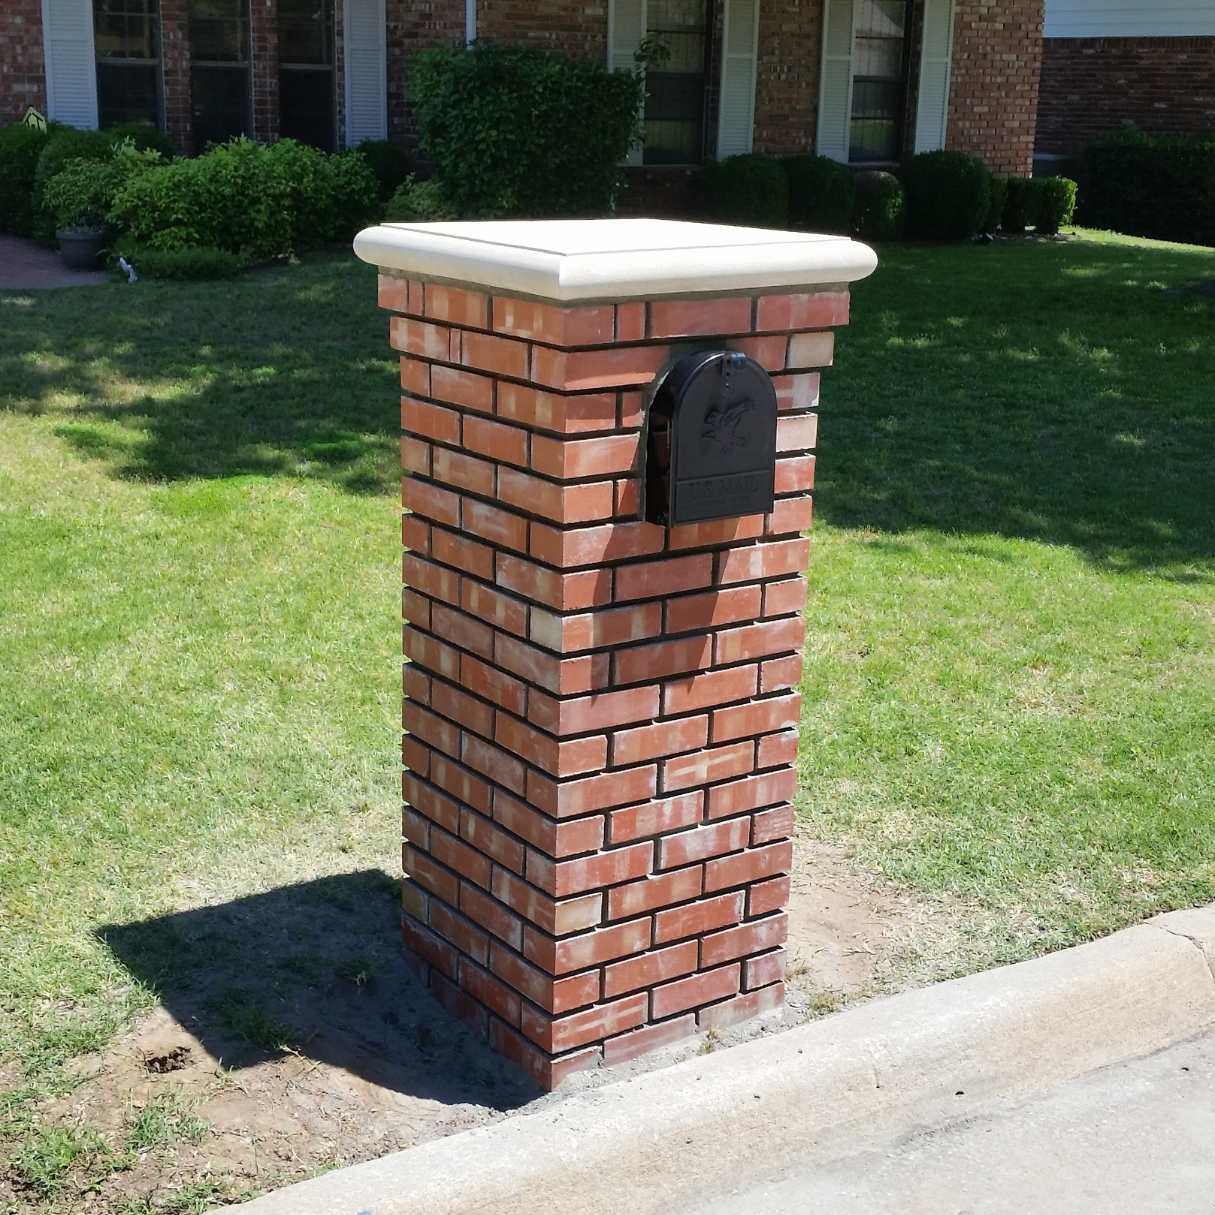
Step 5: Add the Mailbox Door and Roof
With the walls of your brick mailbox standing tall and sturdy, it’s time to infuse functionality and character into the structure by adding the mailbox door and roof. These elements not only serve practical purposes but also contribute to the visual appeal of the finished mailbox. Here’s a detailed guide on integrating the mailbox door and roof into your brick masterpiece:
Read more: How To Build A Brick Column
Install the Mailbox Door:
Begin by selecting a durable and aesthetically pleasing mailbox door that complements the design of your brick mailbox. Ensure that the door is appropriately sized to accommodate standard mail delivery and retrieval. Following the manufacturer’s instructions, install the mailbox door securely within the designated opening in the brick wall. Verify that the door operates smoothly and aligns seamlessly with the surrounding brickwork.
Add a Weather-Resistant Roof:
Depending on your design preferences and local climate considerations, select a suitable roofing material to protect the mailbox contents from the elements. Common options include metal roofing, asphalt shingles, or other weather-resistant materials. Construct and install the roof according to the specific requirements of the chosen material, ensuring that it provides effective shelter for the mailbox and complements the overall aesthetic of the structure.
Apply Waterproofing Sealant:
Prior to completing the installation of the mailbox door and roof, apply a high-quality waterproofing sealant to the exterior surfaces of the brick mailbox. The sealant will safeguard the bricks from moisture infiltration, prolonging the lifespan of the structure and preserving its visual appeal. Thoroughly coat the brick surfaces with the sealant, paying particular attention to joints and potential points of water ingress.
Ensure Proper Functionality and Security:
Verify that the installed mailbox door operates smoothly, latches securely, and provides adequate protection for the mail contents. Additionally, assess the stability and weatherproofing of the roof to ensure that it effectively shields the mailbox from rain, snow, and other environmental factors. Functionality and security are paramount considerations in this phase of the construction process.
By integrating the mailbox door and roof into your brick mailbox with precision and attention to detail, you will elevate the structure from a decorative element to a practical and resilient fixture on your property. With these essential components in place, the final phase of adding finishing touches will bring the project to its completion, culminating in a stunning and functional brick mailbox.
Read more: How To Build A Brick Hearth
Step 6: Finishing Touches
As your brick mailbox nears completion, it’s time to focus on the finishing touches that will enhance its visual appeal and ensure its longevity. From cleaning and sealing the brick surfaces to adding personalized accents, these final steps will elevate your mailbox from a construction project to a standout feature of your property. Here’s a guide to the essential finishing touches for your brick mailbox:
Clean and Detail the Brickwork:
Once the construction phase is complete, thoroughly clean the exterior surfaces of the brick mailbox to remove any mortar residue, dirt, or debris. Use a stiff brush or sponge and a mild cleaning solution to gently scrub the bricks, ensuring that they regain their luster and natural beauty. Pay special attention to mortar joints and crevices to achieve a polished and uniform appearance.
Apply a Protective Sealant:
After cleaning the brickwork, apply a final coat of waterproofing sealant to safeguard the entire structure from moisture and environmental wear. The sealant will create a protective barrier, preventing water infiltration and minimizing the effects of weathering. By sealing the brick surfaces, you’ll ensure that your mailbox maintains its integrity and aesthetics for years to come.
Add Personalized Accents:
Consider adding personalized accents to your brick mailbox to imbue it with character and reflect your unique style. This could include affixing address numbers or decorative elements that harmonize with the overall design of your property. Personalized accents not only enhance the visual appeal of the mailbox but also contribute to its functionality by aiding mail delivery personnel and visitors in identifying your home.
Read more: How To Build A Brick Arch
Landscaping and Integration:
Integrate the completed brick mailbox into your property’s landscaping by ensuring that it harmonizes with the surrounding environment. Consider planting foliage or incorporating hardscape elements around the mailbox to create an inviting and cohesive aesthetic. Thoughtful integration of the mailbox into your property’s landscape enhances its overall visual impact and contributes to the curb appeal of your home.
By attending to these finishing touches, you will bring your brick mailbox project to its full realization, transforming it into a resilient, visually striking, and personalized fixture on your property. With the completion of these essential steps, your brick mailbox will stand as a testament to your craftsmanship and attention to detail, leaving a lasting impression on visitors and passersby.
Conclusion
Congratulations on successfully completing the construction of your brick mailbox! Through meticulous planning, precise execution, and a touch of creativity, you have transformed a simple structure into an enduring and captivating feature of your property. As you reflect on the journey from gathering materials to adding the finishing touches, it’s evident that building a brick mailbox is not just a practical endeavor but also a fulfilling expression of craftsmanship and personal style.
By following the step-by-step guide outlined in this article, you have gained valuable insights into the art of bricklaying and the intricacies of constructing a durable and visually appealing mailbox. Each phase of the construction process, from laying the foundation to integrating personalized accents, has contributed to the creation of a structure that seamlessly blends functionality with timeless charm.
As your brick mailbox now stands proudly on your property, it serves as a testament to your dedication to quality craftsmanship and attention to detail. It not only provides a secure and weather-resistant home for your mail but also adds a touch of elegance to your curb appeal, leaving a lasting impression on visitors and enhancing the overall aesthetic of your home.
Remember that the completion of your brick mailbox is just the beginning of its journey. As it weathers the seasons and becomes an integral part of your property, periodic maintenance and care will ensure that it continues to stand the test of time. Regular inspections, cleaning, and resealing will preserve the beauty and functionality of your mailbox for years to come.
Whether you embarked on this project as a seasoned DIY enthusiast or a novice eager to explore the world of masonry, the construction of your brick mailbox has undoubtedly left an indelible mark on your property and your personal sense of accomplishment. As you admire the finished structure, take pride in the craftsmanship and dedication that have brought this project to fruition, and revel in the enduring beauty and functionality of your newly constructed brick mailbox.
May your brick mailbox stand as a symbol of craftsmanship, durability, and timeless appeal, enriching your property and leaving a lasting impression on all who encounter it.
Frequently Asked Questions about How To Build A Brick Mailbox
Was this page helpful?
At Storables.com, we guarantee accurate and reliable information. Our content, validated by Expert Board Contributors, is crafted following stringent Editorial Policies. We're committed to providing you with well-researched, expert-backed insights for all your informational needs.


0 thoughts on “How To Build A Brick Mailbox”