Home>Home Appliances>Home Automation Appliances>How To Add Camera To Google Home
Home Automation Appliances
How To Add Camera To Google Home
Published: December 23, 2023
Learn how to easily add a camera to your Google Home for seamless monitoring and control of your home automation appliances. Enhance your smart home experience today!
(Many of the links in this article redirect to a specific reviewed product. Your purchase of these products through affiliate links helps to generate commission for Storables.com, at no extra cost. Learn more)
Introduction
Welcome to the exciting world of home automation, where the convenience of modern technology seamlessly integrates with everyday living. Adding a camera to your Google Home setup not only enhances your home security but also offers a new level of control and awareness. Whether you're a tech enthusiast or simply seeking ways to make your home smarter, this guide will walk you through the process of adding a camera to your Google Home system with ease and confidence.
With the ever-increasing advancements in smart home technology, integrating a camera into your Google Home ecosystem provides a comprehensive solution for monitoring and securing your living space. By following the steps outlined in this guide, you'll be able to seamlessly connect your camera to Google Home, giving you the ability to access live feeds, receive alerts, and even utilize voice commands for added convenience.
So, let's dive into the exciting world of home automation and discover how to effortlessly integrate a camera into your Google Home environment. Whether you're a seasoned tech-savvy individual or a newcomer to the world of smart home devices, this comprehensive guide will equip you with the knowledge and confidence to enhance your living space with the power of Google Home and a compatible camera.
Key Takeaways:
- Ensure your camera is compatible with Google Home before setting it up. Check the manufacturer’s website or the Google Home app for compatibility. This proactive step avoids potential issues and ensures a smooth integration process.
- After setting up and connecting your camera to Google Home, customize its settings to fit your needs. Adjust motion detection, video quality, and explore advanced features for a personalized and seamless smart home experience.
Read more: How To Add Nest Camera To Google Home
Step 1: Check Compatibility
Before embarking on the process of adding a camera to your Google Home, it’s essential to ensure that the camera you intend to use is compatible with the Google Home ecosystem. Google Home is designed to work seamlessly with a variety of smart home devices, including cameras that support integration with the platform.
Start by researching the compatibility of your camera with Google Home. Visit the official website of the camera’s manufacturer or refer to the product documentation to verify its compatibility with Google Home. Many leading camera brands explicitly state their compatibility with Google Home, making it easier for consumers to identify suitable options.
If you’re unsure about the compatibility of your camera, you can also explore the Google Home app, which provides a comprehensive list of compatible devices. Simply navigate to the app’s settings and select “Home Control” to view the available devices and confirm whether your camera is supported.
Additionally, it’s important to ensure that your camera meets the technical requirements for integration with Google Home. This may include specific connectivity protocols, firmware versions, or other technical specifications that enable seamless communication between the camera and the Google Home platform.
By verifying the compatibility of your camera with Google Home, you can proceed with confidence, knowing that the integration process will be smooth and successful. This proactive approach helps to avoid potential compatibility issues and ensures that your camera will effectively complement your Google Home setup, providing a cohesive and integrated smart home experience.
Step 2: Set Up Camera
Once you’ve confirmed the compatibility of your camera with Google Home, it’s time to proceed with the setup process. Setting up your camera involves several key steps to ensure that it’s ready for integration with your Google Home ecosystem.
Begin by unboxing your camera and carefully reviewing the manufacturer’s instructions. These instructions typically outline the initial setup process, including the necessary steps to power on the camera, connect it to your home network, and configure any essential settings.
Most modern cameras feature intuitive setup procedures, often involving the use of a dedicated mobile app provided by the manufacturer. This app enables you to connect the camera to your Wi-Fi network, create user accounts, and customize settings such as motion detection, video quality, and storage options.
During the setup process, it’s important to position the camera strategically to ensure optimal coverage of the intended area. Consider factors such as the camera’s field of view, mounting options, and any specific features that enhance its functionality, such as pan-tilt-zoom capabilities or night vision.
As you progress through the setup steps, take the time to explore the camera’s settings and features, customizing them to align with your preferences and security requirements. This may include setting up motion detection zones, adjusting video recording settings, and configuring notifications for events such as motion or sound detection.
By meticulously setting up your camera and familiarizing yourself with its capabilities, you’ll be well-prepared to integrate it seamlessly into your Google Home environment. A well-configured camera not only enhances your home security but also ensures a smooth and reliable integration with Google Home, allowing you to maximize its functionality within your smart home ecosystem.
To add a camera to Google Home, open the Google Home app, tap “Add,” then “Set up device,” and select “Have something already set up?” Choose your camera brand and follow the on-screen instructions to link it to your Google Home.
Step 3: Connect Camera to Google Home
With your camera set up and ready for integration, the next crucial step is to connect it to your Google Home system. This process enables you to access live camera feeds, receive alerts, and even control the camera using voice commands via your Google Home devices.
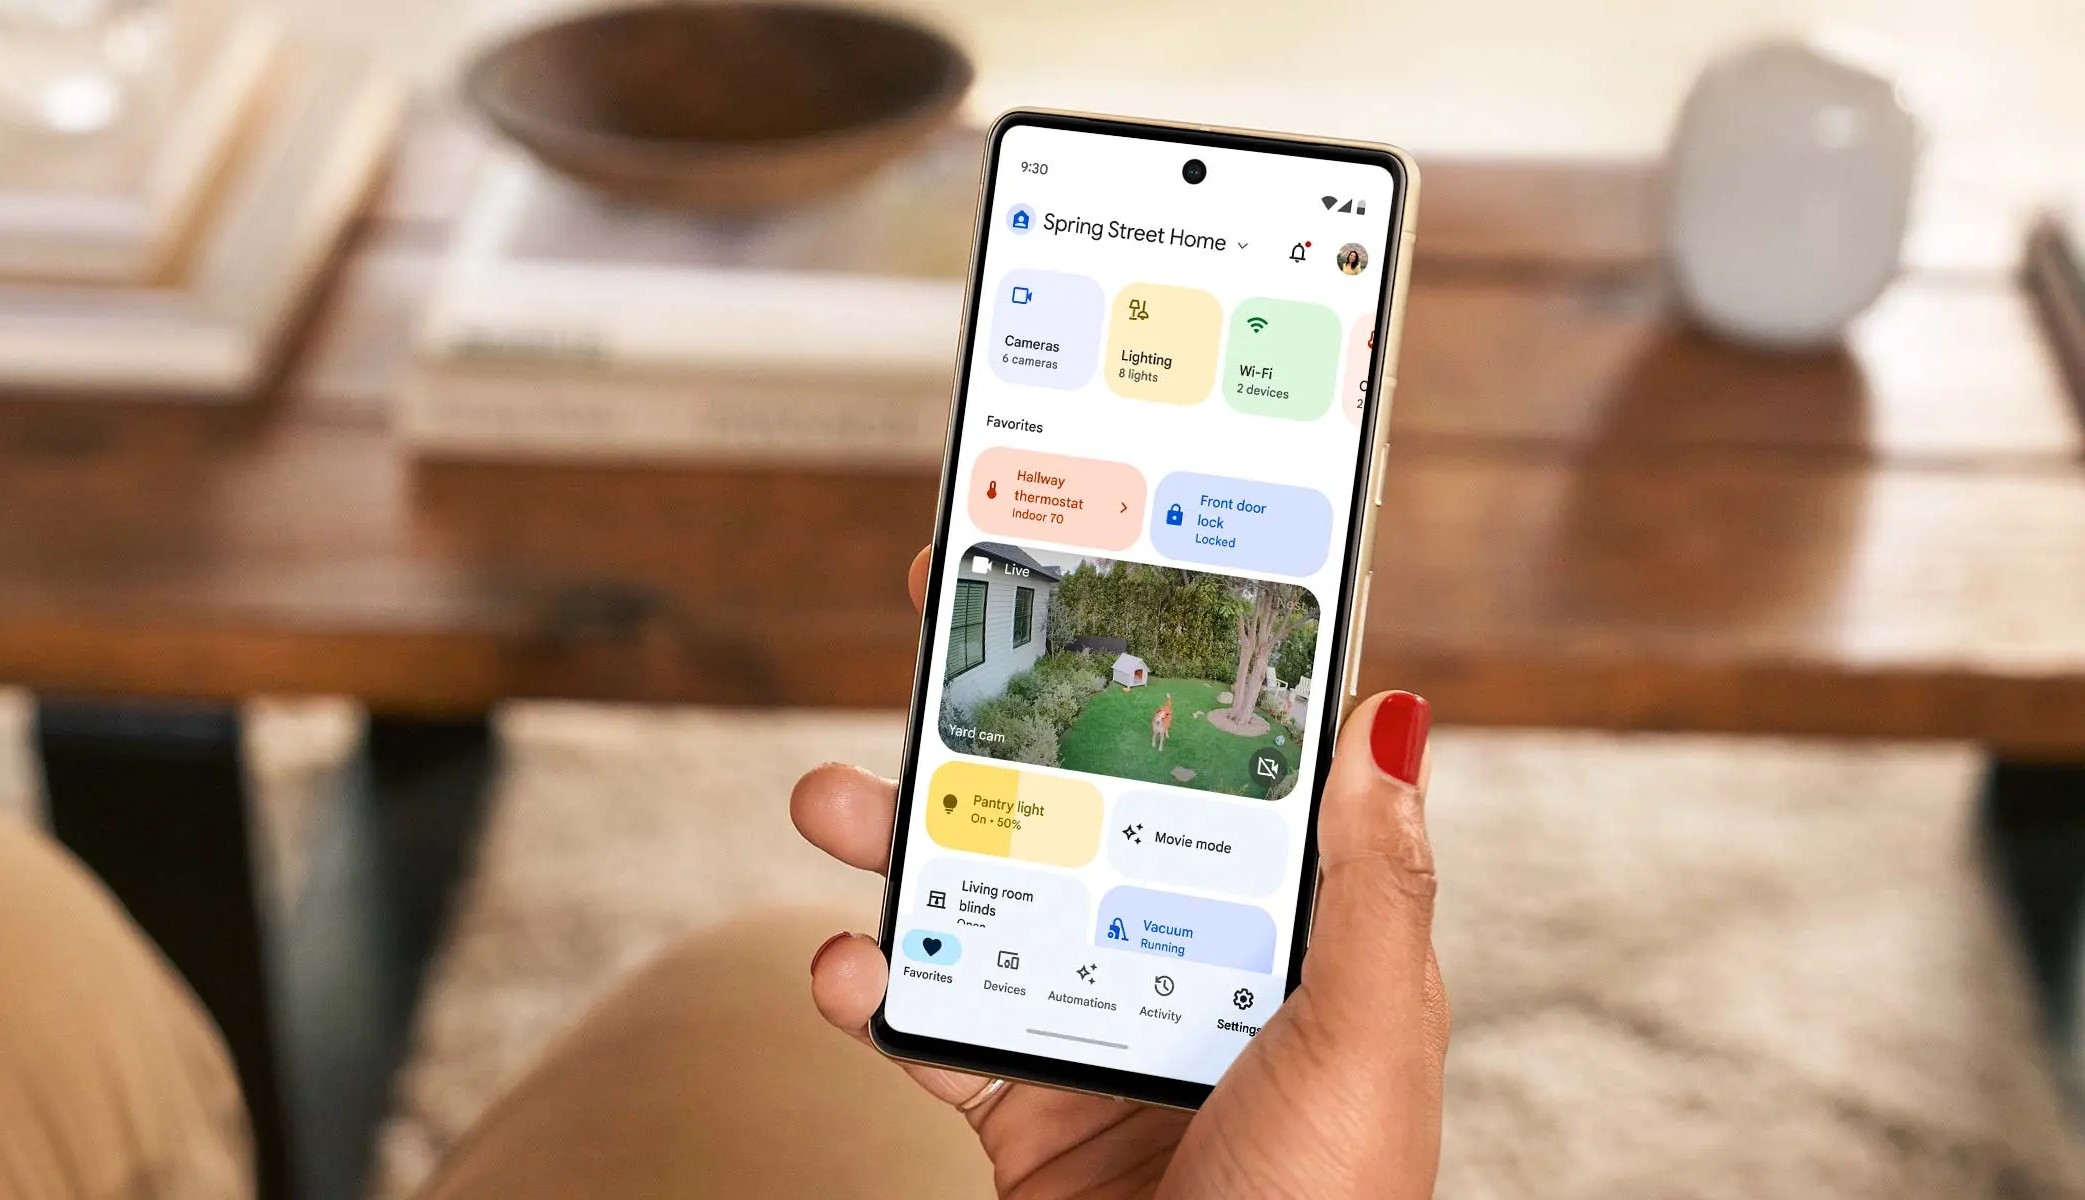
Start by opening the Google Home app on your mobile device and navigating to the “Add” or “Set up device” section. Here, you’ll find the option to add a new device to your Google Home ecosystem. Select the appropriate category for your camera, such as “Security Cameras” or “Cameras,” and proceed with the setup process.
Follow the on-screen instructions within the Google Home app to identify and connect your camera to the platform. This typically involves linking your camera’s account or associated app with your Google Home account, allowing for seamless communication and integration between the two systems.
Once your camera is successfully added to your Google Home environment, take the time to explore the available settings and customization options. You may have the opportunity to assign specific names to your camera, organize it within rooms or zones, and configure additional preferences related to its integration with Google Home.
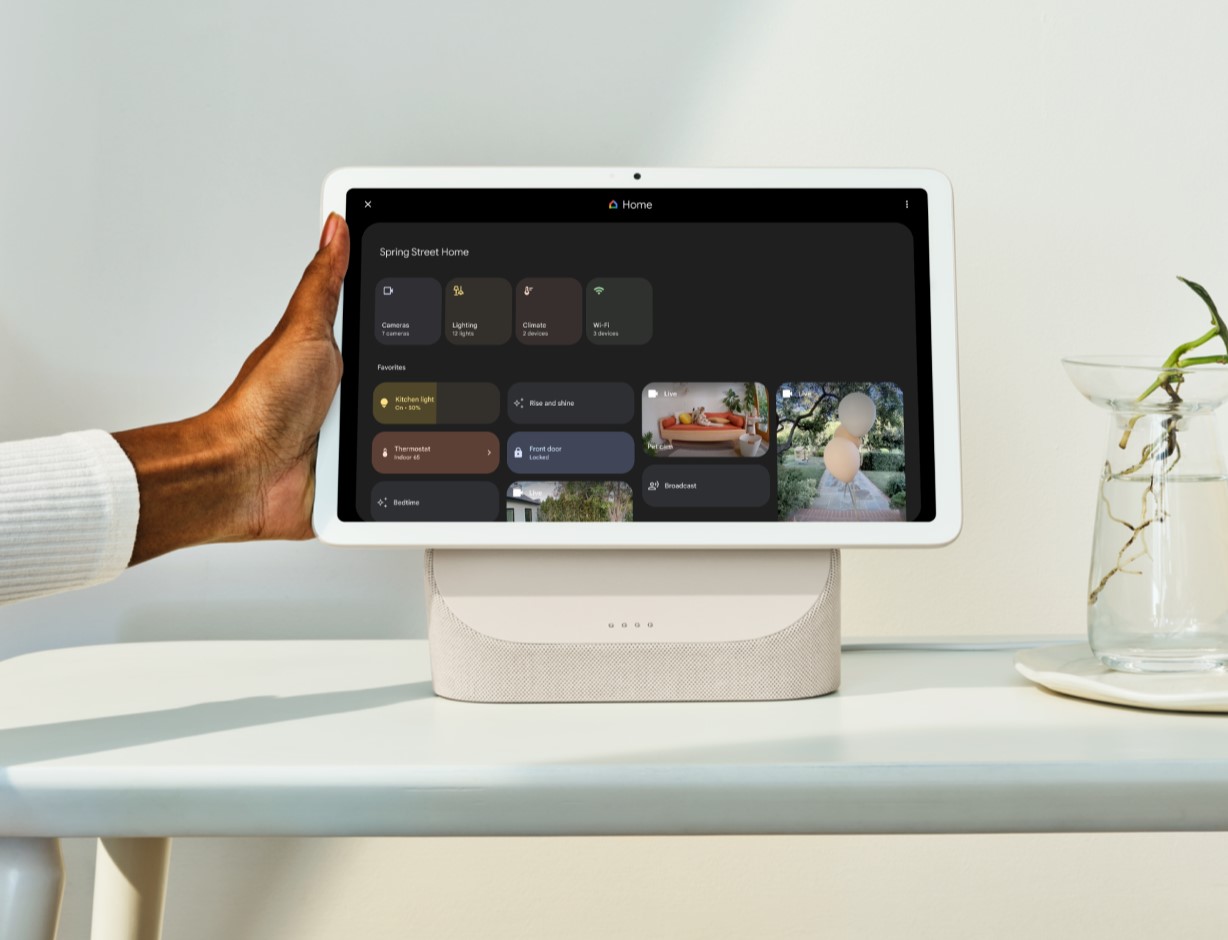
After the initial setup is complete, you’ll be able to access your camera’s live feeds directly from the Google Home app, providing you with a convenient centralized platform for monitoring your home environment. Additionally, you can leverage the power of Google Assistant to issue voice commands for controlling and accessing your camera, further enhancing the seamless integration between your camera and Google Home.
By connecting your camera to Google Home, you’re not only expanding the capabilities of your smart home ecosystem but also creating a more streamlined and intuitive experience for managing and monitoring your home security and surveillance devices.
Step 4: Customize Camera Settings
Once your camera is successfully integrated with Google Home, it’s essential to customize its settings to align with your specific preferences, security requirements, and home environment. Customizing your camera settings allows you to maximize its functionality and tailor its behavior to suit your individual needs.
Begin by accessing the settings or configuration options within the camera’s associated mobile app or web interface. This interface provides a comprehensive range of customization options, empowering you to fine-tune the camera’s performance and behavior.
One crucial aspect of customizing your camera settings is configuring motion detection and notification preferences. By defining specific motion detection zones and adjusting sensitivity settings, you can ensure that the camera captures relevant events while minimizing false alerts. Additionally, customize notification settings to receive timely alerts on your mobile device or through the Google Home app when motion or other specified events are detected.
Explore the video and image quality settings to optimize the camera’s performance based on your preferences and available network bandwidth. Adjust parameters such as resolution, frame rate, and compression to achieve the ideal balance between image clarity and bandwidth utilization, ensuring smooth and high-quality video streaming.
Depending on the features supported by your camera, consider enabling advanced functionalities such as two-way audio communication, night vision mode, and cloud storage options. These features enhance the versatility and utility of your camera, allowing you to engage in real-time communication, capture clear footage in low-light conditions, and securely store video recordings for future reference.
As you customize your camera settings, take advantage of any additional integrations or features that enhance its compatibility with Google Home. Some cameras offer specific integrations with Google Assistant, enabling voice commands for initiating specific actions or accessing camera feeds through your Google Home devices.
By customizing your camera settings, you’re not only optimizing its performance but also tailoring its behavior to seamlessly integrate with your Google Home environment, creating a cohesive and personalized smart home experience.
Read more: How To Add Google Wi-Fi To Google Home
Conclusion
Congratulations! By following the steps outlined in this guide, you’ve successfully added a camera to your Google Home system, enhancing your home security and expanding the capabilities of your smart home ecosystem. The seamless integration of your camera with Google Home empowers you to monitor and manage your home environment with ease and convenience.
Integrating a compatible camera into your Google Home setup not only provides you with live video feeds and alerts but also enables voice control and automation through Google Assistant. This integration allows you to leverage the power of voice commands to access camera feeds, check on specific areas of your home, and ensure peace of mind, all from the convenience of your Google Home devices.
As you continue to explore the possibilities of your integrated camera and Google Home system, consider further customization options and additional features that can further enhance your smart home experience. Whether it’s optimizing motion detection settings, exploring advanced camera functionalities, or integrating with other smart home devices, the flexibility and versatility of your integrated system offer a wealth of possibilities.
Remember to regularly review and update your camera’s settings to ensure that it remains aligned with your evolving security needs and home environment. By staying proactive and attentive to your camera’s performance, you can maximize its potential and maintain a reliable and effective surveillance solution within your smart home ecosystem.
With your camera seamlessly integrated into your Google Home environment, you’ve taken a significant step toward creating a more connected, secure, and intelligent living space. Embrace the convenience and peace of mind that comes with effortless home monitoring and control, and continue to explore the ever-expanding world of smart home technology with confidence and enthusiasm.
Enjoy the enhanced security, convenience, and control that your integrated camera and Google Home system provide, and relish in the seamless fusion of modern technology and everyday living within your home.
Frequently Asked Questions about How To Add Camera To Google Home
Was this page helpful?
At Storables.com, we guarantee accurate and reliable information. Our content, validated by Expert Board Contributors, is crafted following stringent Editorial Policies. We're committed to providing you with well-researched, expert-backed insights for all your informational needs.


0 thoughts on “How To Add Camera To Google Home”