Home>Home Appliances>Kitchen Appliances>How To Repair Glass Stove Top
Kitchen Appliances
How To Repair Glass Stove Top
Modified: October 20, 2024
Learn how to repair your glass stove top with our expert tips and tricks. Keep your kitchen appliances in top condition with our easy-to-follow guide.
(Many of the links in this article redirect to a specific reviewed product. Your purchase of these products through affiliate links helps to generate commission for Storables.com, at no extra cost. Learn more)
Introduction
A glass stove top is a sleek and modern addition to any kitchen, offering a smooth and easy-to-clean cooking surface. However, accidents happen, and the glass can become damaged, leading to the need for repairs. Whether it's a small chip or a significant crack, addressing the issue promptly is essential to ensure the safety and functionality of your stove.
In this comprehensive guide, we will walk you through the step-by-step process of repairing a glass stove top. From assessing the damage to installing a replacement glass, we will cover everything you need to know to restore your stove top to its former glory. By following these instructions, you can save time and money by tackling the repair yourself, all while gaining a sense of accomplishment from revitalizing an essential appliance in your kitchen.
So, if you've noticed a crack, chip, or any other form of damage on your glass stove top, don't fret. With the right tools, materials, and guidance, you can successfully address the issue and have your stove top looking and functioning as good as new. Let's dive into the process and get your glass stove top on the path to recovery.
Key Takeaways:
- Safety First!
When repairing a glass stove top, always prioritize safety by disconnecting the power, allowing cooling time, wearing protective gear, securing the work area, and ensuring proper ventilation. Safety ensures a smooth and efficient repair process. - Clean and Careful
Thoroughly clean the stove top before removing the broken glass and installing the replacement. A clean surface promotes optimal adhesion and contributes to the overall hygiene and visual appeal of your kitchen.
Read more: How To Fix Samsung Glass Top Stove Burners
Safety Precautions
When it comes to repairing a glass stove top, prioritizing safety is paramount. The process involves handling delicate materials and utilizing tools that require careful attention. By adhering to the following safety precautions, you can minimize risks and ensure a secure environment for carrying out the repair.
-
Power Off: Before initiating any repair work, it is crucial to disconnect the power supply to the stove. This can typically be achieved by unplugging the stove from the electrical outlet or switching off the circuit breaker connected to the appliance. Verifying that the stove is completely powered down is essential to prevent any electrical accidents during the repair process.
-
Allow Cooling Time: If the stove has been in use prior to the repair, it's important to allow sufficient time for it to cool down. The glass surface retains heat and can remain hot for a significant period after cooking. Attempting to repair a hot stove top not only poses a burn risk but also increases the likelihood of the glass shattering during the repair process.
-
Protective Gear: When handling broken glass or utilizing tools, wearing appropriate protective gear is essential. Safety goggles and gloves should be worn to shield your eyes and hands from potential injury. Additionally, wearing long sleeves and closed-toe shoes can provide added protection against sharp edges and debris.
-
Secure Work Area: Clear the work area of any unnecessary items and ensure that it is well-lit and spacious enough to maneuver comfortably. By creating a clutter-free and organized workspace, you can minimize the risk of accidents and enhance your ability to focus on the repair task at hand.
-
Proper Ventilation: Repairing a glass stove top may involve the use of cleaning agents or adhesives. It's important to ensure that the repair area is well-ventilated to prevent the inhalation of fumes. Opening windows and using fans can help to dissipate any odors and maintain a healthy environment during the repair process.
By adhering to these safety precautions, you can create a secure and controlled environment for repairing your glass stove top. Prioritizing safety not only safeguards you from potential hazards but also contributes to a smooth and efficient repair process.
Tools and Materials Needed
Repairing a glass stove top requires specific tools and materials to ensure a successful and efficient repair process. By gathering the following items, you can equip yourself with everything necessary to address the damage and restore the functionality of your stove top.
Tools:
-
Safety Gloves and Goggles: Prioritize safety by wearing protective gloves and goggles to shield your hands and eyes from potential injury while handling broken glass and using tools.
-
Flathead Screwdriver: This tool will be essential for removing any screws or fastenings securing the glass stove top in place.
-
Putty Knife: A putty knife can aid in carefully prying and lifting the damaged glass from the stove top.
-
Vacuum Cleaner with Hose Attachment: Use a vacuum cleaner with a hose attachment to effectively remove any glass fragments and debris from the stove top and its surroundings.
-
Razor Blade Scraper: This tool can assist in scraping off any residual adhesive or debris from the stove top surface.
-
Measuring Tape: Ensure accurate measurements for the replacement glass by using a measuring tape to determine the dimensions of the damaged area.
-
Adhesive Applicator: Depending on the repair method chosen, an adhesive applicator may be required to apply the adhesive evenly and securely.
Materials:
-
Replacement Glass: Acquire a suitable replacement glass specifically designed for your stove model. Ensure that the dimensions and specifications match the original glass to guarantee a proper fit.
-
Glass Cleaner: Use a non-abrasive glass cleaner to thoroughly clean the stove top surface before installing the replacement glass.
-
Adhesive: Depending on the repair method chosen, select a high-temperature adhesive that is compatible with glass surfaces to secure the replacement glass in place.
-
Protective Padding: Consider adding protective padding or adhesive bumpers to the replacement glass to prevent direct contact with the stove top and minimize the risk of future damage.
-
Rubbing Alcohol: Use rubbing alcohol to clean the edges of the stove top and ensure a clean and dry surface for adhesive application.
-
Lint-Free Cloth: Have a lint-free cloth on hand to wipe down the stove top and remove any residual cleaning agents or debris.
By ensuring that you have the necessary tools and materials at your disposal, you can approach the glass stove top repair process with confidence and efficiency. With these items in hand, you are well-prepared to assess the damage, remove the broken glass, and install the replacement glass, ultimately restoring your stove top to its optimal condition.
Read more: How To Set Clock On GE Glass Top Stove
Step 1: Assess the Damage
The first crucial step in repairing a glass stove top is to thoroughly assess the extent of the damage. By carefully examining the affected area, you can determine the best course of action for addressing the issue and restoring the functionality of your stove.
Begin by visually inspecting the glass surface for any signs of damage, such as cracks, chips, or shattered areas. Take note of the size and location of the damage, as well as any potential underlying causes that may have led to the issue. It's important to assess whether the damage is confined to the surface of the glass or if it extends to the underlying structure of the stove top.
Next, gently run your fingers over the damaged area to check for any sharp edges or loose glass fragments. Be cautious during this process to avoid injury, and if necessary, wear protective gloves to minimize the risk of cuts or abrasions.
If the damage is minimal, such as a small chip or hairline crack, it may be possible to repair the glass stove top without replacing the entire surface. However, if the damage is extensive, with large cracks or significant structural compromise, replacing the glass may be the most effective solution.
Additionally, consider the impact of the damage on the functionality and safety of the stove top. If the damage poses a risk of heat loss during cooking or compromises the stability of pots and pans on the surface, immediate repair or replacement is essential to maintain the stove's usability and safety.
By thoroughly assessing the damage, you can gain a clear understanding of the repair requirements and determine the most appropriate approach for restoring the glass stove top. Whether it involves minor repairs or complete replacement, a comprehensive assessment sets the foundation for a successful repair process, ensuring that your stove top can once again serve as a reliable and functional centerpiece in your kitchen.
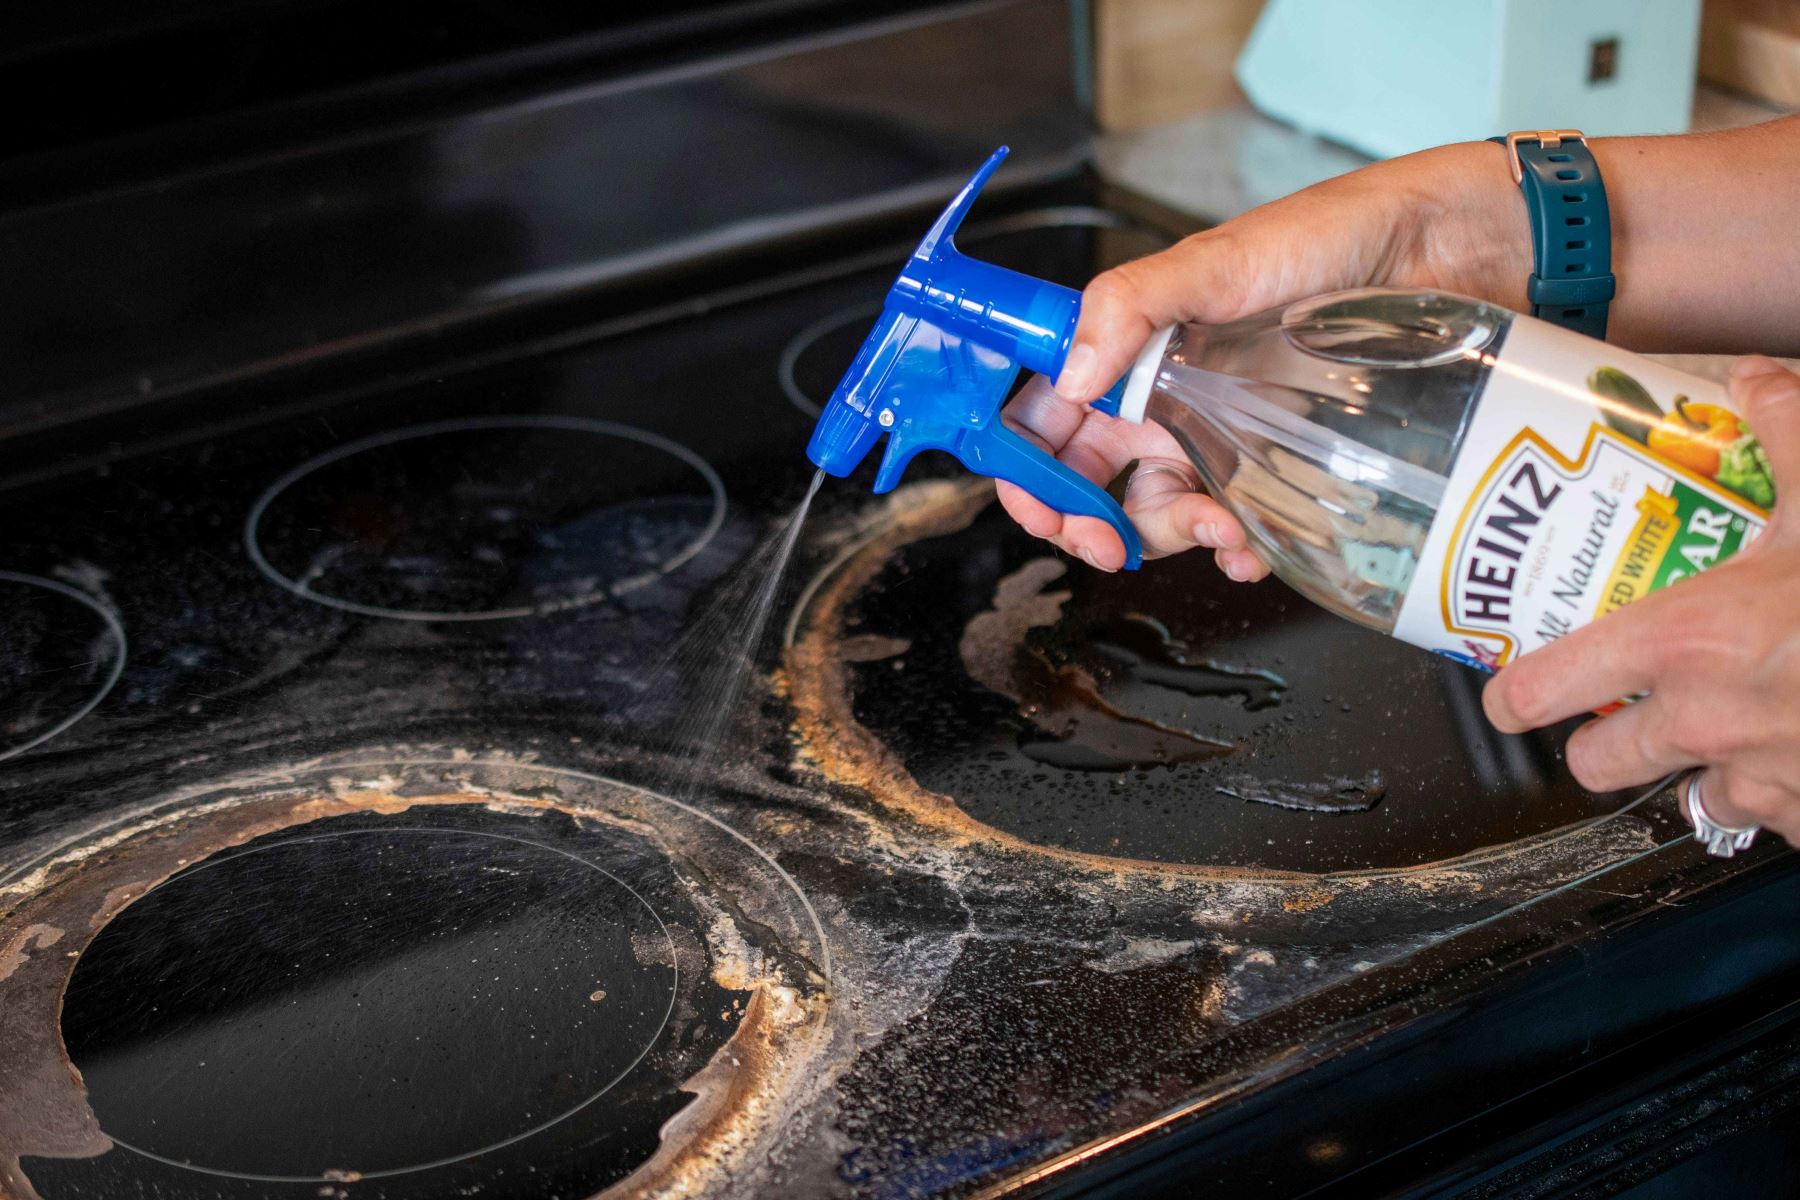
Step 2: Clean the Stove Top
After assessing the damage to the glass stove top, the next crucial step in the repair process is to thoroughly clean the surface in preparation for the removal of the broken glass and the installation of the replacement glass. Cleaning the stove top not only ensures a pristine and debris-free surface for the repair but also promotes optimal adhesion of the replacement glass and any adhesive used during the installation.
To begin the cleaning process, gather the necessary materials, including a non-abrasive glass cleaner, rubbing alcohol, a lint-free cloth, and a razor blade scraper if there are stubborn residues on the surface. Start by applying the glass cleaner generously onto the stove top, ensuring that the entire surface is covered. Using a lint-free cloth, carefully wipe the glass surface in circular motions, effectively removing any dirt, grease, or residue that may have accumulated.
For stubborn residues or adhesive remnants from the previous glass, utilize the razor blade scraper to gently scrape away the debris, taking care not to apply excessive pressure that could scratch the surface. Once the residues are removed, use rubbing alcohol and a clean cloth to thoroughly wipe down the edges of the stove top, ensuring that any remaining traces of debris or cleaning agents are eliminated.
After the initial cleaning, inspect the stove top surface to ensure that it is free from any particles or streaks. Any remaining debris or residue can compromise the adhesion of the replacement glass, leading to potential issues in the future. Therefore, it is essential to achieve a clean and dry surface before proceeding with the removal of the broken glass and the installation of the replacement.
By meticulously cleaning the stove top, you are not only preparing the surface for the subsequent repair steps but also contributing to the overall aesthetic appeal and hygiene of your kitchen. A clean and well-maintained glass stove top not only enhances the visual appeal of the appliance but also promotes a healthy and inviting cooking environment. With the surface thoroughly cleaned and prepped, you are now ready to proceed to the next step of removing the broken glass from the stove top, bringing you closer to the successful repair and restoration of your essential kitchen appliance.
Step 3: Remove the Broken Glass
With the glass stove top thoroughly cleaned and prepped, the next critical step in the repair process is to delicately remove the broken glass from the surface. This step requires precision and caution to prevent any further damage to the stove top and ensure a safe and effective removal of the damaged glass.
Begin by donning safety gloves and goggles to protect your hands and eyes from potential injury. It's essential to prioritize safety throughout this process, given the fragile nature of the broken glass and the risk of sharp edges.
Using a flathead screwdriver, carefully locate and remove any screws or fastenings securing the damaged glass to the stove top. Exercise patience and attentiveness to avoid applying excessive force, as this could lead to unintended damage to the surrounding components.
Once the fastenings are removed, gently lift the broken glass from the stove top using a putty knife. Approach this step with caution, ensuring that any loose glass fragments are carefully contained and that the surrounding area remains free from debris.
As you lift the broken glass, be mindful of any adhesive or residual materials that may be adhering to the underside. If necessary, utilize a razor blade scraper to gently detach any remaining adhesive, taking care to avoid scratching the surface of the stove top.
After successfully removing the broken glass, thoroughly inspect the stove top surface to ensure that it is free from any remaining shards or debris. Utilize a vacuum cleaner with a hose attachment to carefully remove any loose glass fragments and clean the surrounding area, minimizing the risk of potential hazards during the subsequent steps of the repair process.
By delicately removing the broken glass from the stove top, you have taken a significant stride towards restoring the functionality and aesthetic appeal of your kitchen appliance. With the damaged glass safely removed, you are now prepared to proceed to the next step of installing the replacement glass, bringing you closer to the successful repair and revitalization of your essential glass stove top.
Use a glass stove top cleaner and a non-abrasive sponge to remove any stains or burnt-on food. For scratches, use a glass polishing compound and a soft cloth to buff them out. Always follow the manufacturer’s instructions.
Step 4: Install the Replacement Glass
With the broken glass successfully removed from the stove top, the next pivotal step in the repair process is to install the replacement glass. This step requires precision, attention to detail, and a methodical approach to ensure a seamless and secure fit of the new glass, ultimately restoring the functionality and visual appeal of your glass stove top.
Begin by carefully measuring the dimensions of the damaged area to ensure that the replacement glass aligns perfectly with the stove top surface. Utilize a measuring tape to obtain accurate measurements, taking into account the length, width, and any specific contours or edges that need to be accommodated. It's crucial to verify that the replacement glass matches the original specifications to guarantee a proper fit and optimal functionality.
Before placing the replacement glass onto the stove top, thoroughly clean the surface to remove any residual debris or adhesive remnants. Use a non-abrasive glass cleaner to ensure that the surface is pristine and free from any particles that could compromise the adhesion of the replacement glass.
Once the surface is clean and dry, carefully position the replacement glass onto the stove top, ensuring that it aligns precisely with the dimensions of the damaged area. Exercise caution and attentiveness during this step to prevent any undue pressure or misalignment that could lead to potential issues with the fit of the replacement glass.
Depending on the specific repair method chosen, apply a high-temperature adhesive to the underside of the replacement glass, ensuring even coverage and secure adhesion to the stove top surface. Utilize an adhesive applicator to achieve a uniform application of the adhesive, promoting a strong and reliable bond between the replacement glass and the stove top.
After applying the adhesive, gently lower the replacement glass onto the stove top, ensuring that it aligns accurately with the surrounding edges and contours. Apply gentle pressure to the surface to facilitate proper adhesion, taking care to avoid excessive force that could lead to misalignment or damage to the replacement glass.
Once the replacement glass is securely in place, allow the adhesive to cure according to the manufacturer's instructions, ensuring that the bond is fully established before proceeding to the next steps. This may involve allowing the adhesive to set for a specified duration and refraining from subjecting the stove top to excessive heat or pressure during the curing process.
By methodically installing the replacement glass, you have taken a significant stride towards restoring the functionality and aesthetic appeal of your glass stove top. With the new glass securely in place, you are now prepared to proceed to the final step of testing the stove top, bringing you closer to the successful repair and revitalization of this essential kitchen appliance.
Read more: How To Make Oatmeal On Stove Top
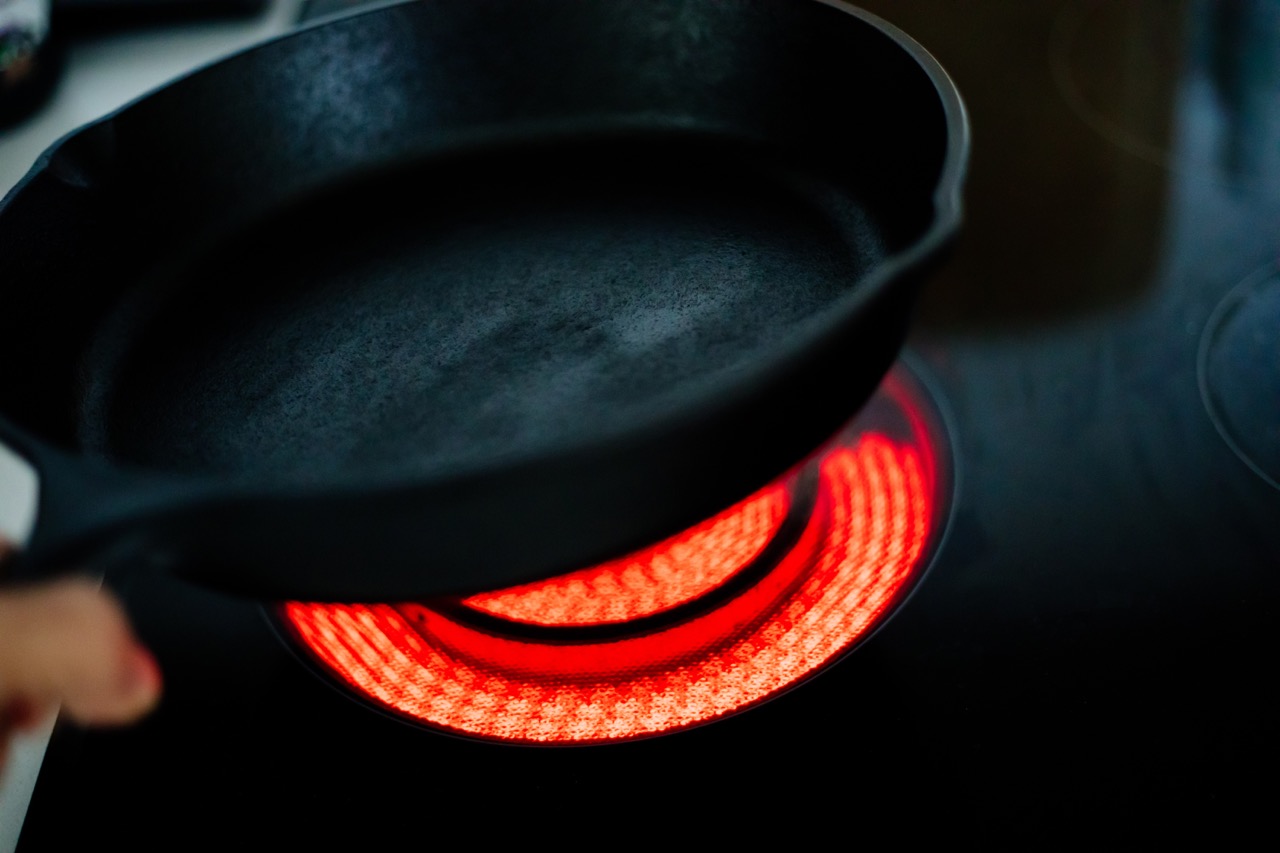
Step 5: Test the Stove Top
With the replacement glass securely installed on the stove top, the final crucial step in the repair process is to test the functionality and integrity of the appliance. This step serves as a pivotal validation of the repair work, ensuring that the stove top operates as intended and that the replacement glass is securely in place, ready to withstand the rigors of everyday cooking.
To begin the testing process, carefully reconnect the power supply to the stove, either by plugging it back into the electrical outlet or restoring the circuit breaker connection. Exercise caution and attentiveness during this step, ensuring that the power connection is established securely and without any issues.
Once the power is restored, activate the stove burners to verify that they heat up evenly and effectively. Observe the replacement glass closely, checking for any signs of instability, unusual noises, or malfunctions during the heating process. It's essential to monitor the stove top closely during this initial testing phase to identify any potential issues that may require further attention.
As the burners heat up, place a pot or pan on the replacement glass surface to assess its stability and the overall functionality of the stove top. Ensure that the cookware sits securely on the surface without any wobbling or slippage, indicating that the replacement glass is properly aligned and securely adhered to the stove top.
Throughout the testing process, pay close attention to any unusual odors or sounds that may emanate from the stove top, as these could indicate underlying issues with the repair or the functionality of the appliance. Additionally, observe the replacement glass for any signs of stress or instability, particularly as the heat from the burners is transmitted to the surface.
As the burners continue to operate, assess the heat distribution across the replacement glass, ensuring that it remains consistent and uniform. An even distribution of heat indicates that the replacement glass is functioning effectively and that the repair has been successful in restoring the stove top to its optimal state.
After completing the initial testing phase, allow the stove top to cool down and then perform a visual inspection of the replacement glass. Check for any signs of adhesive failure, misalignment, or other issues that may have arisen during the testing process. Address any concerns promptly to ensure that the replacement glass is securely in place and that the stove top operates reliably.
By meticulously testing the stove top, you can validate the success of the repair process and gain confidence in the functionality and stability of the appliance. With the replacement glass securely in place and the stove top operating as intended, you have successfully revitalized this essential kitchen appliance, ensuring that it can continue to serve as a reliable and functional centerpiece in your culinary endeavors.
Conclusion
In conclusion, repairing a glass stove top is a task that demands attention to detail, precision, and a commitment to safety. By following the comprehensive steps outlined in this guide, you have embarked on a journey to restore the functionality and aesthetic appeal of your essential kitchen appliance. From assessing the damage to delicately removing the broken glass and installing the replacement, each step has been instrumental in revitalizing your glass stove top.
The process began with a thorough assessment of the damage, allowing you to gain a clear understanding of the repair requirements and determine the most appropriate approach. This initial step set the foundation for the subsequent tasks, ensuring that the repair process was tailored to the specific needs of your stove top.
As you progressed to cleaning the stove top, meticulous attention was given to preparing the surface for the removal of the broken glass and the installation of the replacement. By achieving a pristine and debris-free surface, you not only promoted optimal adhesion of the replacement glass but also contributed to the overall hygiene and visual appeal of your kitchen.
Delicately removing the broken glass from the stove top was a pivotal step that required precision and caution. By prioritizing safety and attentiveness, you successfully navigated this task, paving the way for the seamless installation of the replacement glass.
Installing the replacement glass marked a significant milestone in the repair process, as you methodically ensured a precise fit and secure adhesion to the stove top surface. Your commitment to accuracy and attention to detail during this step has culminated in the successful restoration of your glass stove top.
Finally, testing the stove top served as a validation of the repair work, allowing you to verify the functionality and integrity of the appliance. By closely monitoring the stove top and assessing its performance, you have gained confidence in the reliability and stability of the replacement glass, ensuring that your stove top is ready to resume its role as a dependable centerpiece in your culinary endeavors.
In embracing the repair process, you have not only revitalized your glass stove top but also gained valuable insights and skills that can be applied to future maintenance and repair tasks. By prioritizing safety, precision, and attention to detail, you have demonstrated a commitment to the care and maintenance of your kitchen appliances, fostering a welcoming and efficient culinary environment.
As you reflect on the journey of repairing your glass stove top, may you take pride in the accomplishment of restoring an essential component of your kitchen. With the repair process now complete, your glass stove top stands as a testament to your dedication to maintaining a functional and inviting culinary space, ready to support your culinary endeavors for years to come.
Frequently Asked Questions about How To Repair Glass Stove Top
Was this page helpful?
At Storables.com, we guarantee accurate and reliable information. Our content, validated by Expert Board Contributors, is crafted following stringent Editorial Policies. We're committed to providing you with well-researched, expert-backed insights for all your informational needs.


0 thoughts on “How To Repair Glass Stove Top”