Home>Home Appliances>Laundry Appliances>How To Clean The Inside Of A Washing Machine
Laundry Appliances
How To Clean The Inside Of A Washing Machine
Published: February 22, 2024
Learn how to effectively clean the inside of your washing machine to keep your laundry appliances in top condition. Follow these simple steps for a sparkling clean machine.
(Many of the links in this article redirect to a specific reviewed product. Your purchase of these products through affiliate links helps to generate commission for Storables.com, at no extra cost. Learn more)
Introduction
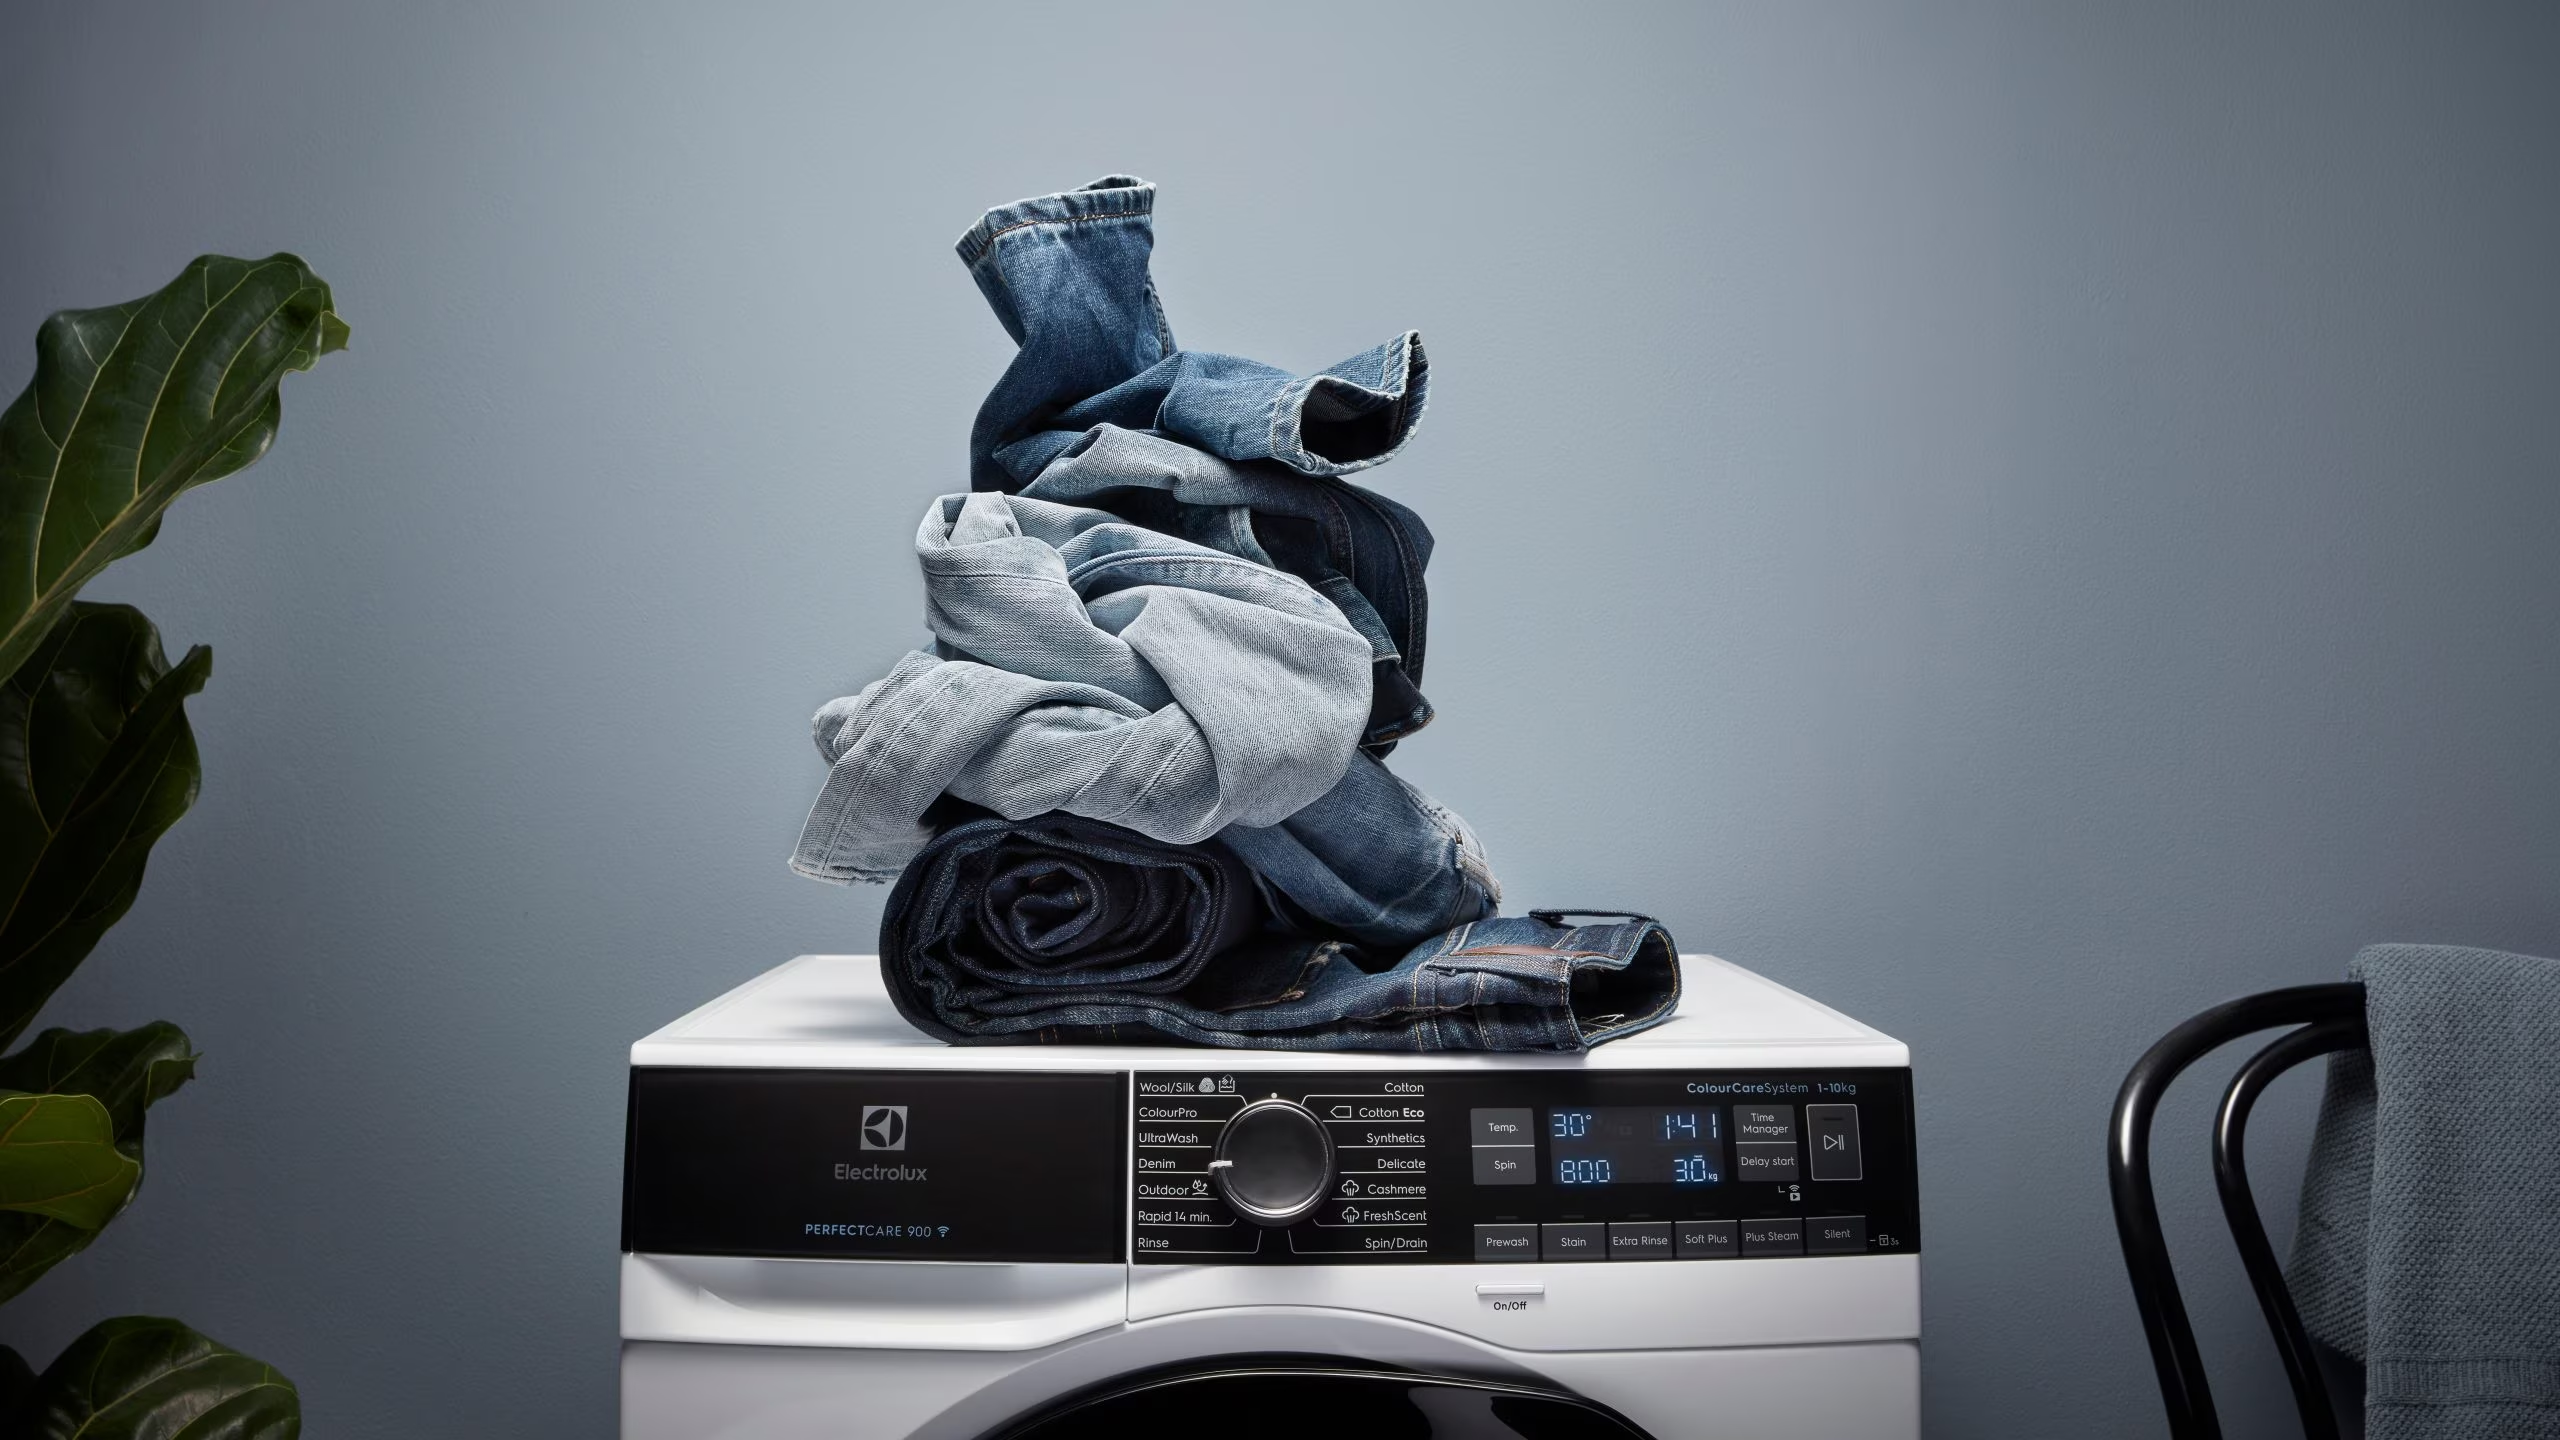
A washing machine is an indispensable appliance in any household, tirelessly tackling the never-ending pile of laundry. However, while it diligently cleans our clothes, it is often overlooked when it comes to cleaning itself. Over time, soap scum, dirt, and bacteria can accumulate inside the machine, leading to unpleasant odors and potentially affecting the cleanliness of our laundry. Therefore, it's essential to regularly clean the inside of your washing machine to maintain its efficiency and ensure that your clothes come out fresh and clean every time.
In this comprehensive guide, we will walk you through the step-by-step process of cleaning the interior of your washing machine. From the detergent dispenser to the rubber seal and the drum, we will cover every nook and cranny that requires attention. Additionally, we will discuss the necessary supplies for this cleaning task, as well as the importance of running a cleaning cycle to eliminate any lingering residue.
By following these cleaning procedures and incorporating them into your regular home maintenance routine, you can extend the lifespan of your washing machine and keep it in optimal working condition. So, let's roll up our sleeves and delve into the world of washing machine maintenance to ensure that your laundry emerges fresh and clean every time!
Key Takeaways:
- Regularly clean your washing machine using white vinegar, baking soda, and hot water to eliminate residue, mold, and bacteria, ensuring fresh and clean laundry with every wash.
- Maintain a hygienic washing machine by cleaning the detergent dispenser, drum, rubber seal, and filter regularly, and running a cleaning cycle to prevent odors and prolong the appliance’s lifespan.
Necessary Supplies
To effectively clean the inside of your washing machine, you'll need a few essential supplies to ensure thorough and efficient cleaning. Here's a list of the necessary supplies you'll need:
-
White Vinegar: This versatile household staple is a powerful natural cleaner that effectively dissolves soap scum, mineral deposits, and bacteria buildup inside the washing machine.
-
Baking Soda: Known for its deodorizing and abrasive properties, baking soda is excellent for scrubbing away grime and neutralizing odors within the machine.
-
Microfiber Cloth or Sponge: A soft microfiber cloth or sponge is ideal for gentle scrubbing and wiping down the interior surfaces of the washing machine without causing damage.
-
Toothbrush or Soft Bristle Brush: These tools are perfect for reaching tight spaces, such as the detergent dispenser and rubber seal, and for dislodging stubborn residue.
-
Hot Water: Hot water is an effective solvent that aids in dissolving and flushing out detergent buildup and grime from the machine's interior.
-
Rubber Gloves: Protect your hands from coming into direct contact with cleaning solutions and potential allergens by wearing rubber gloves during the cleaning process.
-
Clean Cloth: Use a clean cloth for drying and polishing the interior surfaces of the washing machine after cleaning.
By having these supplies readily available, you'll be well-equipped to tackle the task of cleaning the inside of your washing machine thoroughly and effectively. These simple yet essential items will help you maintain a hygienic and odor-free washing machine, ensuring that your laundry emerges fresh and clean with every wash.
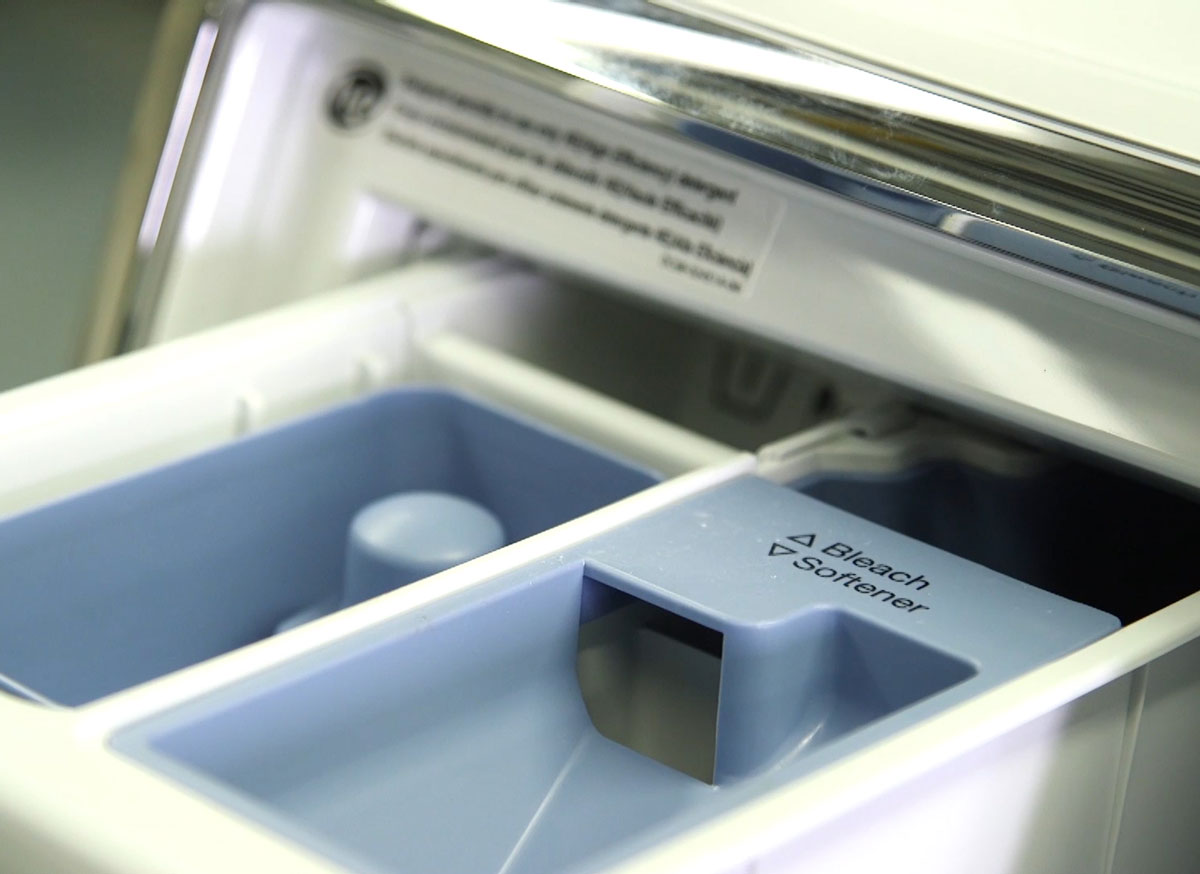
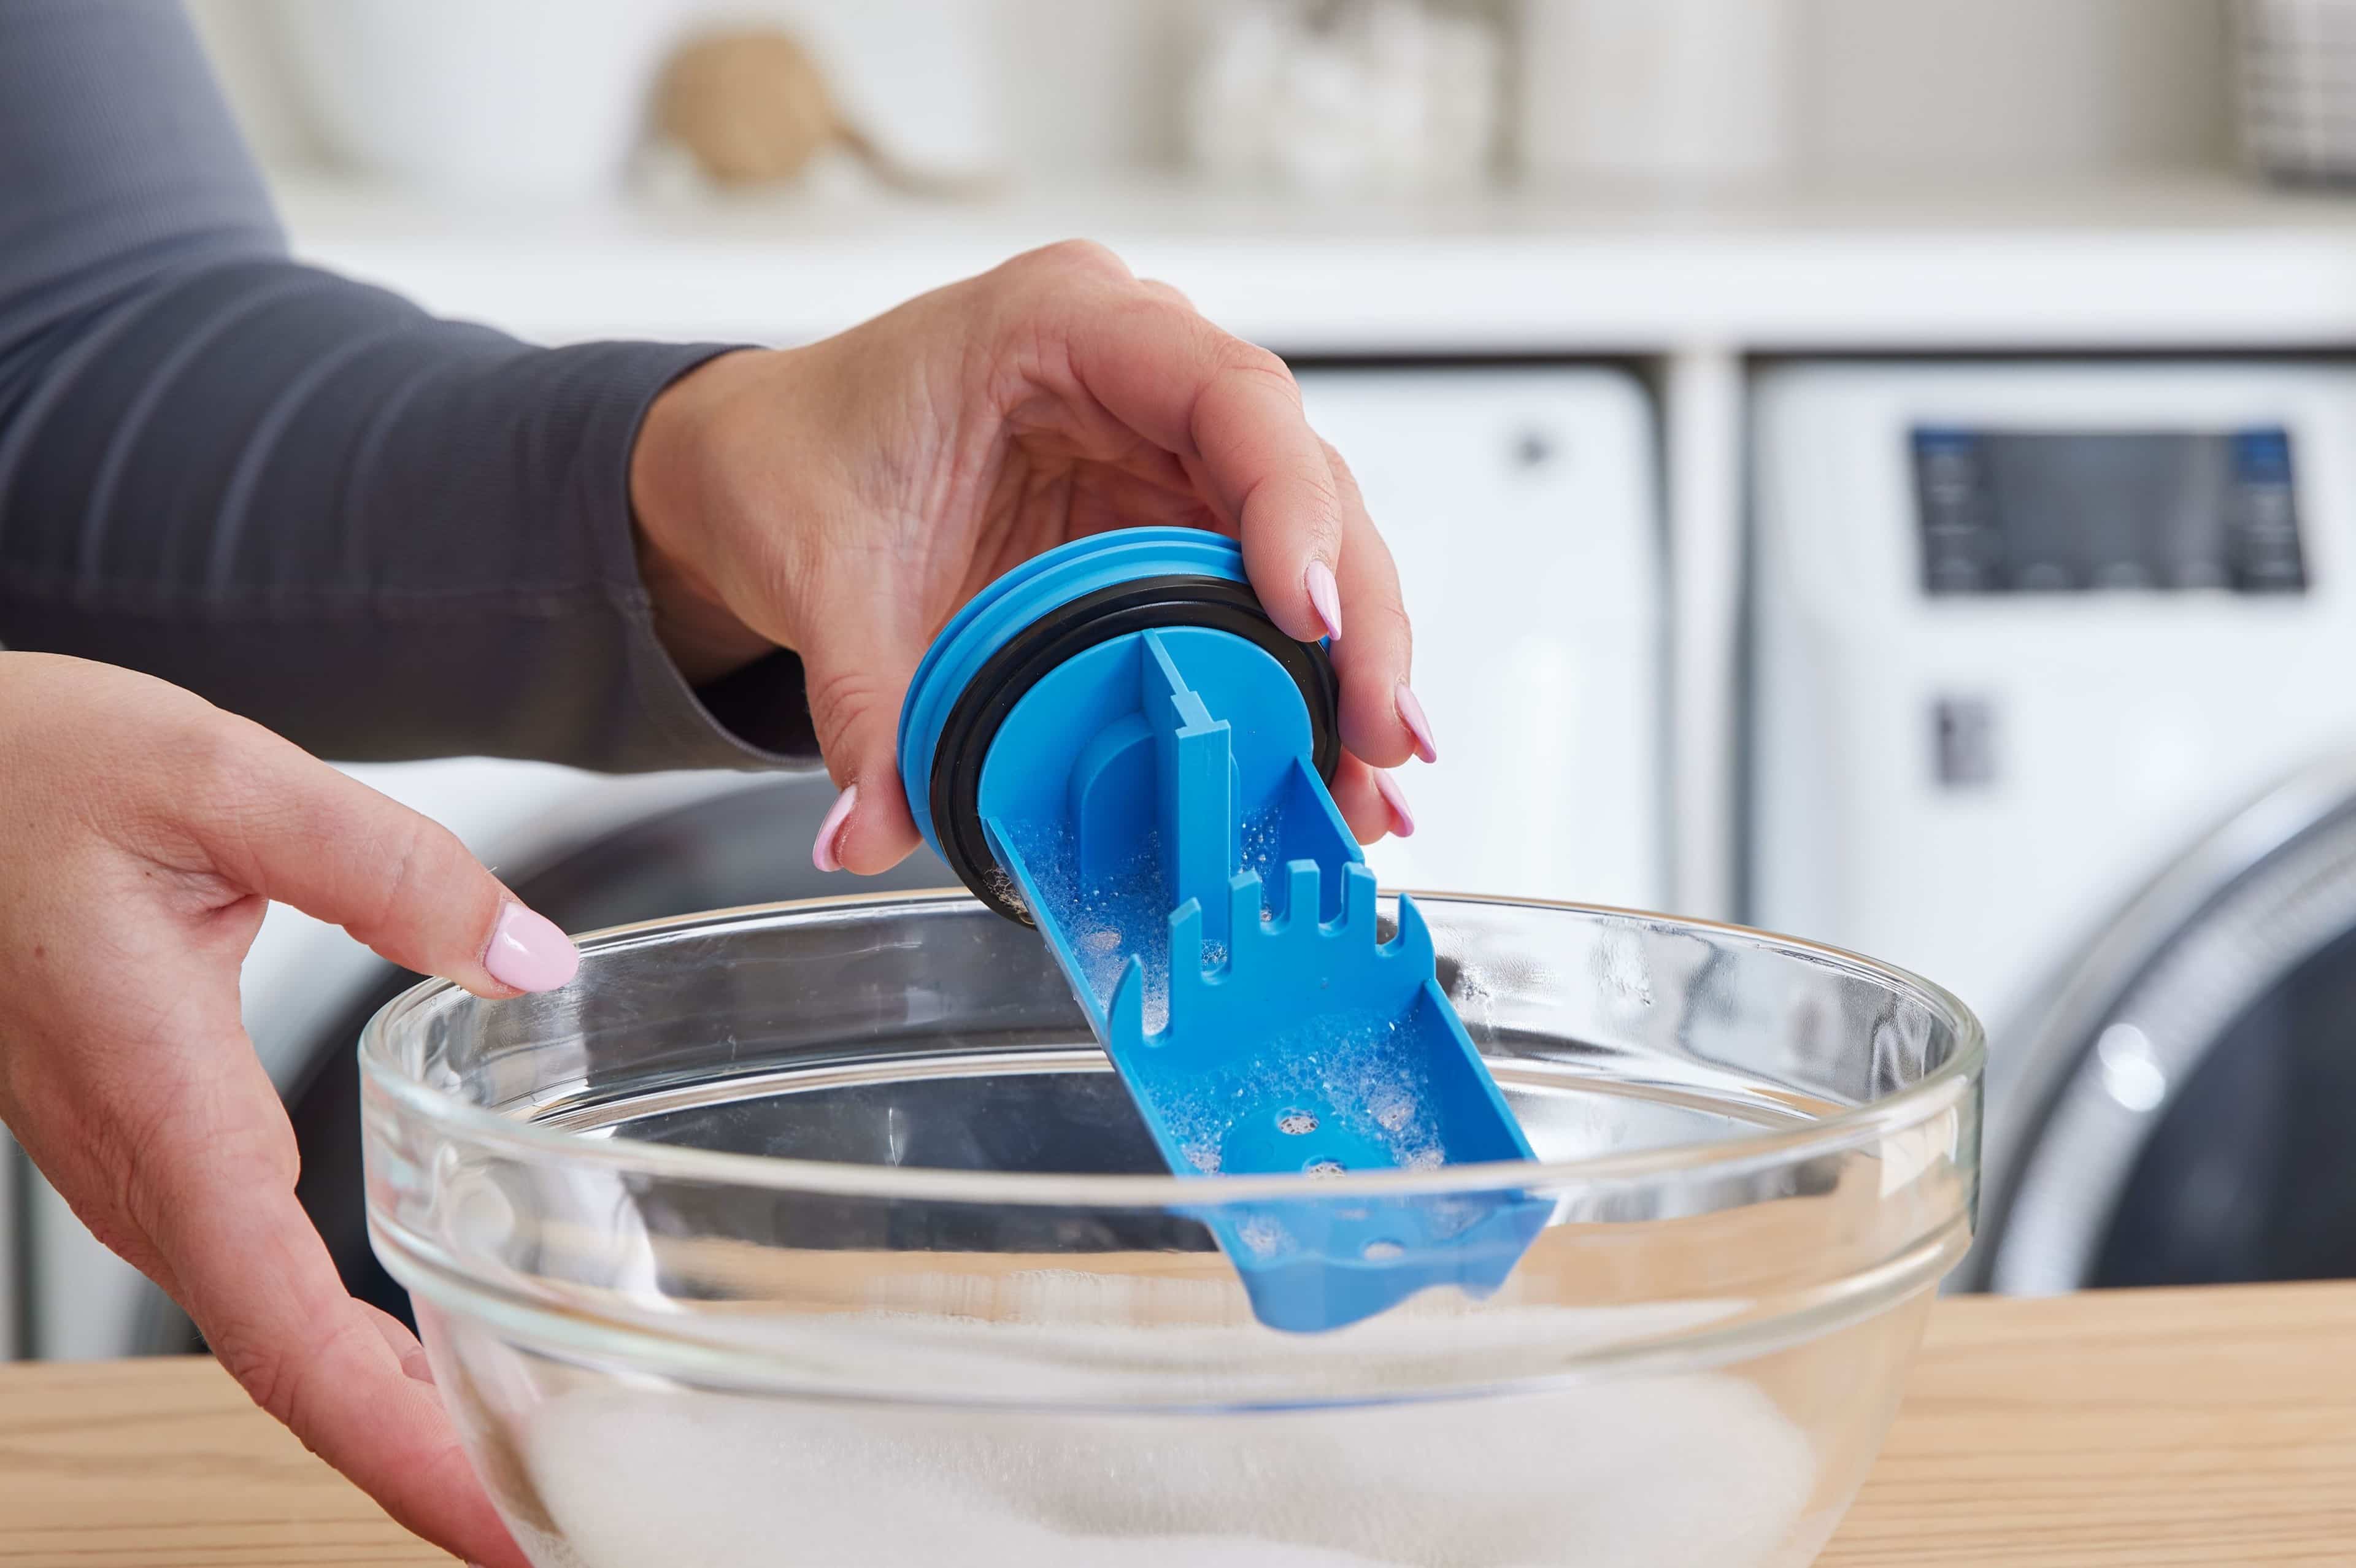
Cleaning the Detergent Dispenser
The detergent dispenser in a washing machine is a prime location for the accumulation of residue, mold, and mildew. Over time, the combination of detergent, fabric softener, and water can create a sticky, grimy buildup within the dispenser, leading to unpleasant odors and potentially affecting the cleanliness of your laundry. Therefore, regular cleaning of the detergent dispenser is crucial to maintain a hygienic washing machine and ensure that your clothes are thoroughly cleaned with each wash.
To begin the cleaning process, start by removing the detergent dispenser drawer from the washing machine. Most dispensers can be easily removed by pressing a release button or simply pulling it out. Once removed, disassemble the dispenser by separating the individual compartments, including those designated for detergent, fabric softener, and bleach.
Next, prepare a cleaning solution using equal parts of white vinegar and hot water. The acidic properties of white vinegar make it an effective natural cleaner that can dissolve stubborn residue and eliminate mold and mildew. Submerge the detergent dispenser components in the vinegar and water solution, ensuring that they are fully immersed. Allow the dispenser to soak for at least 30 minutes to loosen the buildup and kill any lingering bacteria.
After soaking, use a toothbrush or soft bristle brush to scrub the individual compartments of the detergent dispenser, paying close attention to any visible residue or mold. The bristles of the brush will help dislodge the buildup, while the vinegar solution works to break it down. For stubborn or hard-to-reach areas, such as narrow channels or crevices, a toothbrush can be particularly effective in ensuring thorough cleaning.
Once the dispenser components have been scrubbed, rinse them thoroughly with hot water to remove any loosened residue and vinegar solution. Inspect each compartment to ensure that all traces of buildup have been eliminated. If necessary, repeat the soaking and scrubbing process to achieve a pristine, odor-free detergent dispenser.
Finally, dry the detergent dispenser components with a clean cloth before reassembling and reinstalling them into the washing machine. This step is crucial to prevent the accumulation of moisture, which can contribute to the growth of mold and mildew. By maintaining a clean detergent dispenser, you can ensure that your washing machine operates efficiently and that your laundry emerges fresh and clean with every wash.
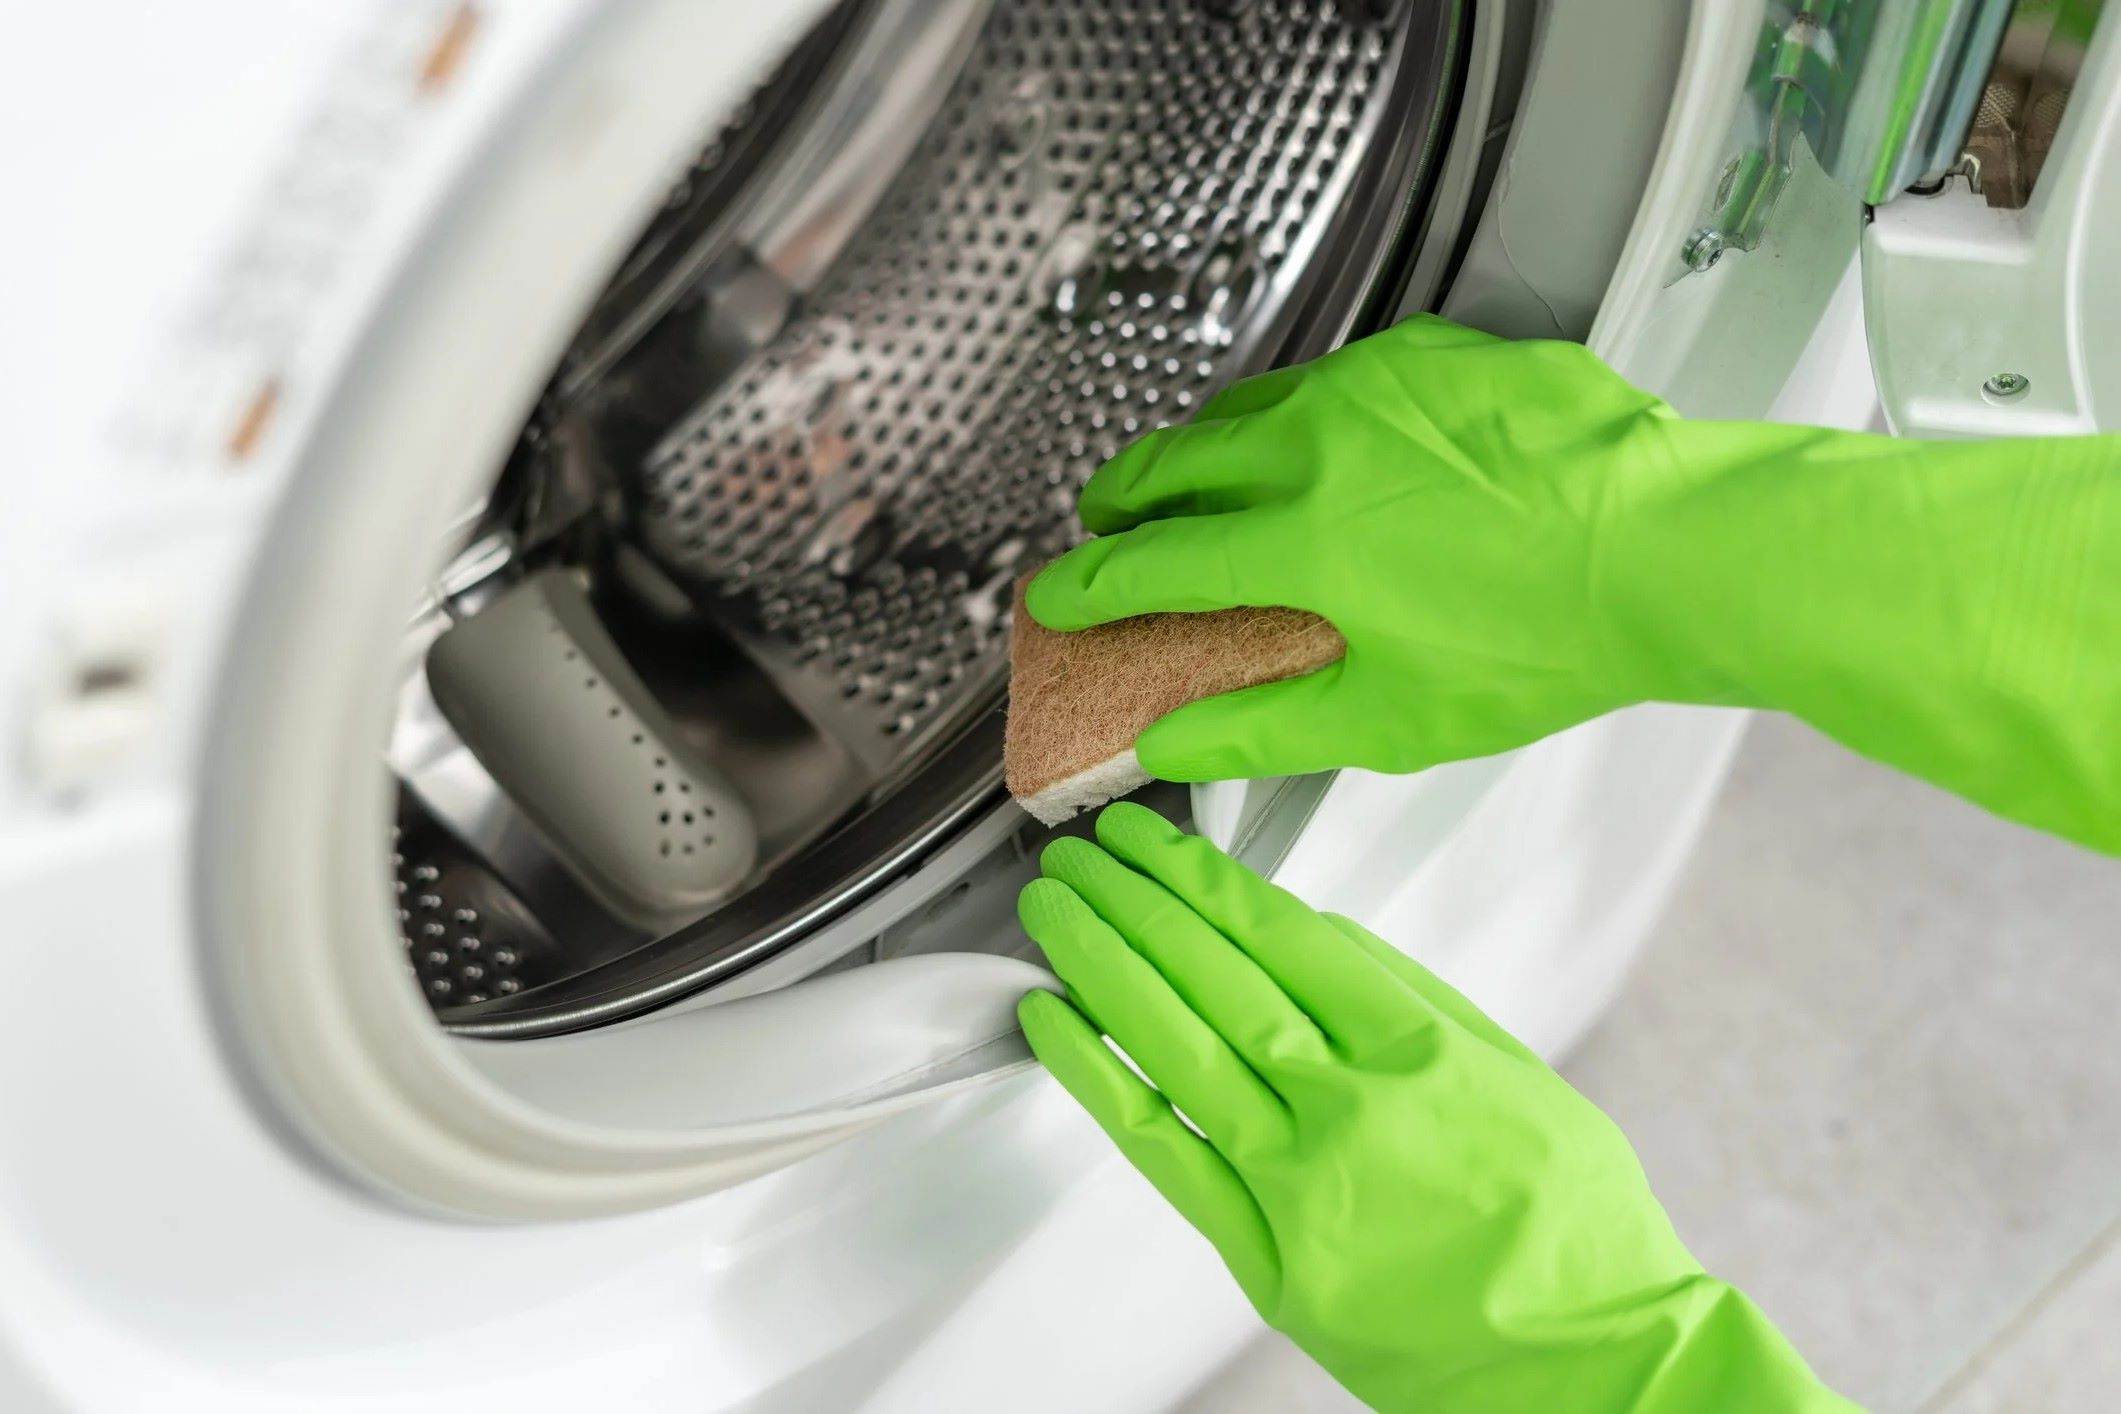
Cleaning the Drum
Cleaning the drum of your washing machine is a vital step in maintaining its performance and ensuring that your laundry emerges fresh and clean. Over time, the interior of the drum can accumulate dirt, grime, and detergent residue, leading to unpleasant odors and potentially affecting the cleanliness of your clothes. By incorporating regular drum cleaning into your maintenance routine, you can prolong the lifespan of your washing machine and preserve its efficiency.
To begin the cleaning process, start by running an empty hot water cycle in your washing machine. Hot water is effective in loosening and dissolving detergent buildup and grime inside the drum. If your washing machine has a cleaning cycle or a tub clean function, utilize this feature to optimize the cleaning process. Alternatively, you can set the machine to the highest water temperature setting and allow it to run through a complete cycle.
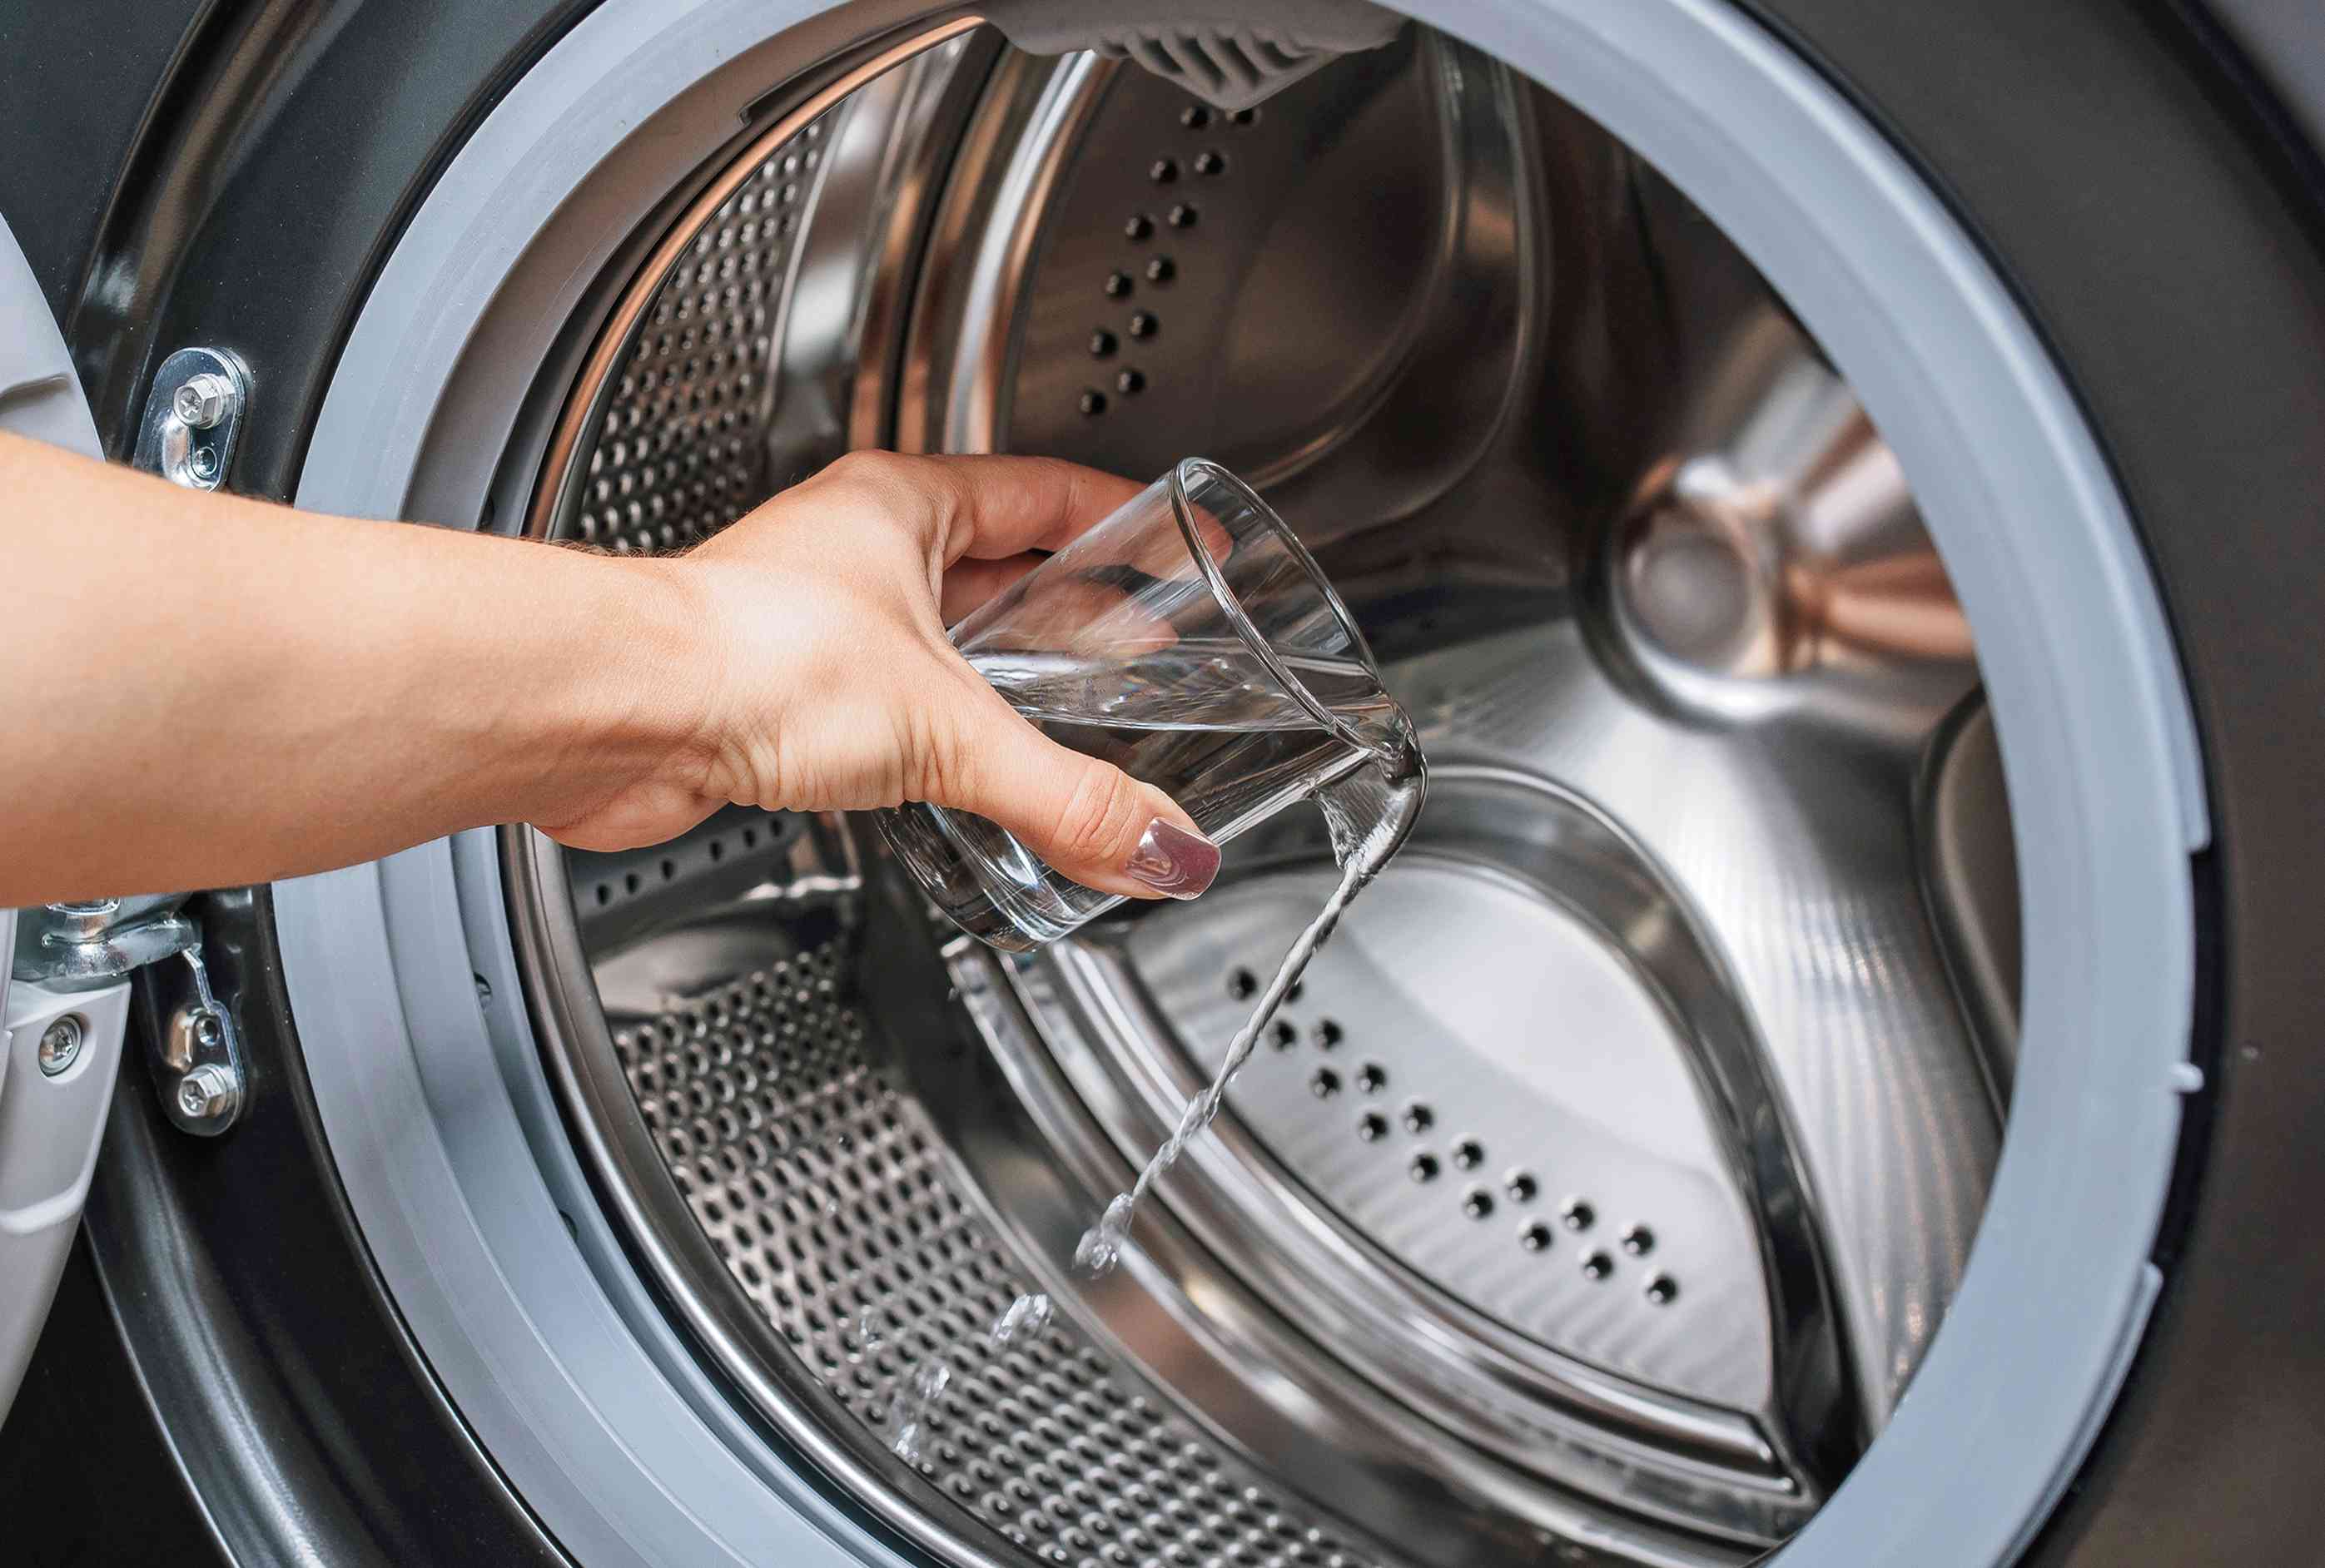
Once the hot water cycle is complete, it's time to introduce a powerful yet natural cleaning agent: white vinegar. Pour two cups of white vinegar directly into the drum of the washing machine. The acidic properties of vinegar make it an excellent natural cleaner that can effectively dissolve soap scum, mineral deposits, and bacteria buildup inside the drum.
After adding the white vinegar, allow the washing machine to agitate for a few minutes to ensure that the vinegar is distributed throughout the drum. Then, pause the cycle and let the vinegar solution soak for approximately one hour. This soaking period allows the vinegar to penetrate and break down any stubborn residue and odors inside the drum.
Following the soaking period, resume the cycle and allow the washing machine to complete the full wash cycle. The combination of hot water and vinegar will work together to flush out the dissolved residue and bacteria, leaving the interior of the drum clean and odor-free.
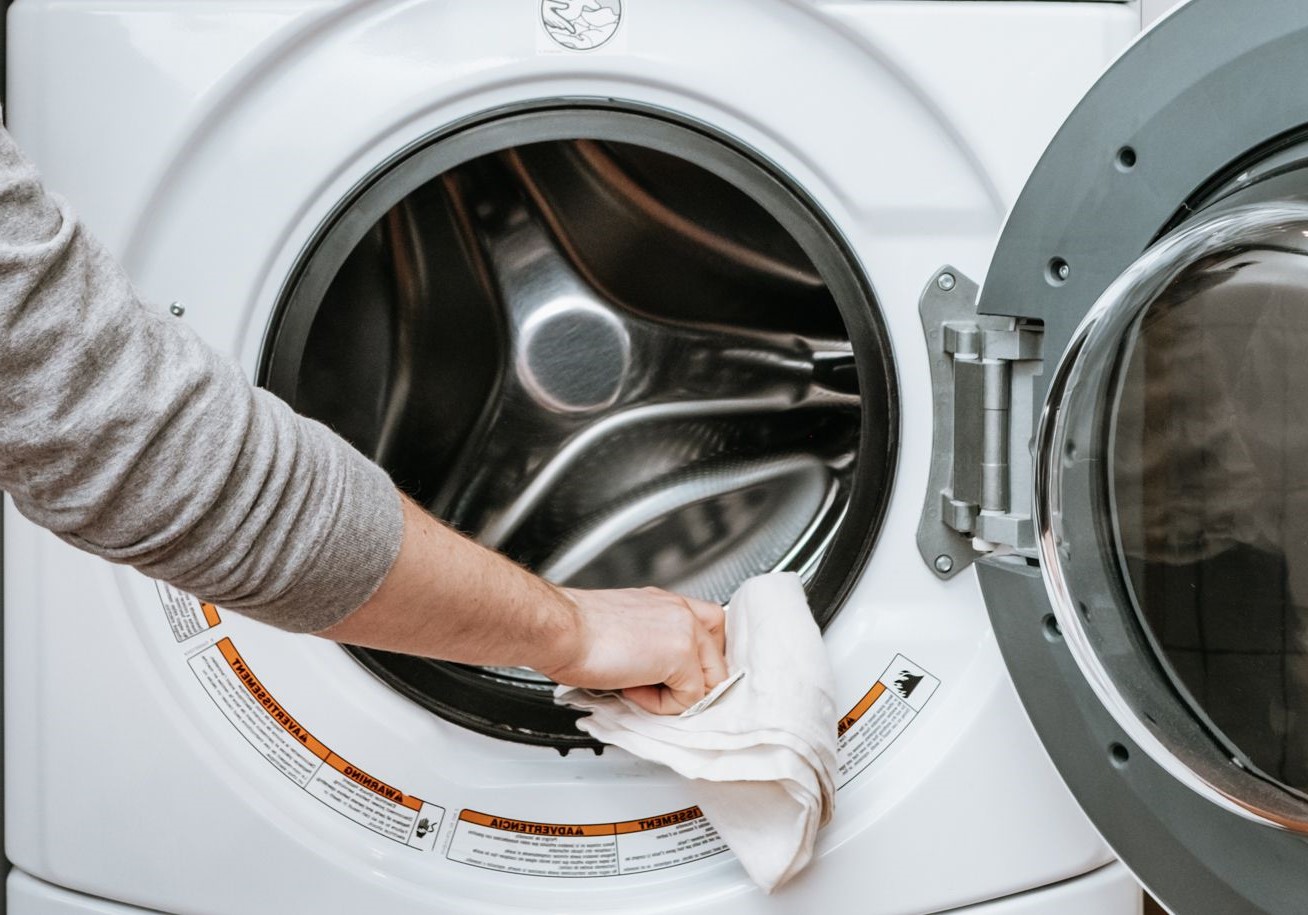
Once the cycle is complete, inspect the interior of the drum to ensure that it is free from any remaining residue or odors. If necessary, wipe down the interior surfaces of the drum with a microfiber cloth or sponge to remove any lingering buildup.
By incorporating regular drum cleaning using white vinegar, you can effectively maintain a hygienic and odor-free washing machine. This simple yet essential maintenance task will ensure that your laundry emerges fresh and clean with every wash, while also prolonging the lifespan of your washing machine.
Add 2 cups of white vinegar to the detergent dispenser and run a hot water cycle. Then, sprinkle 1/2 cup of baking soda into the drum and run another hot water cycle. Wipe down the inside with a damp cloth.
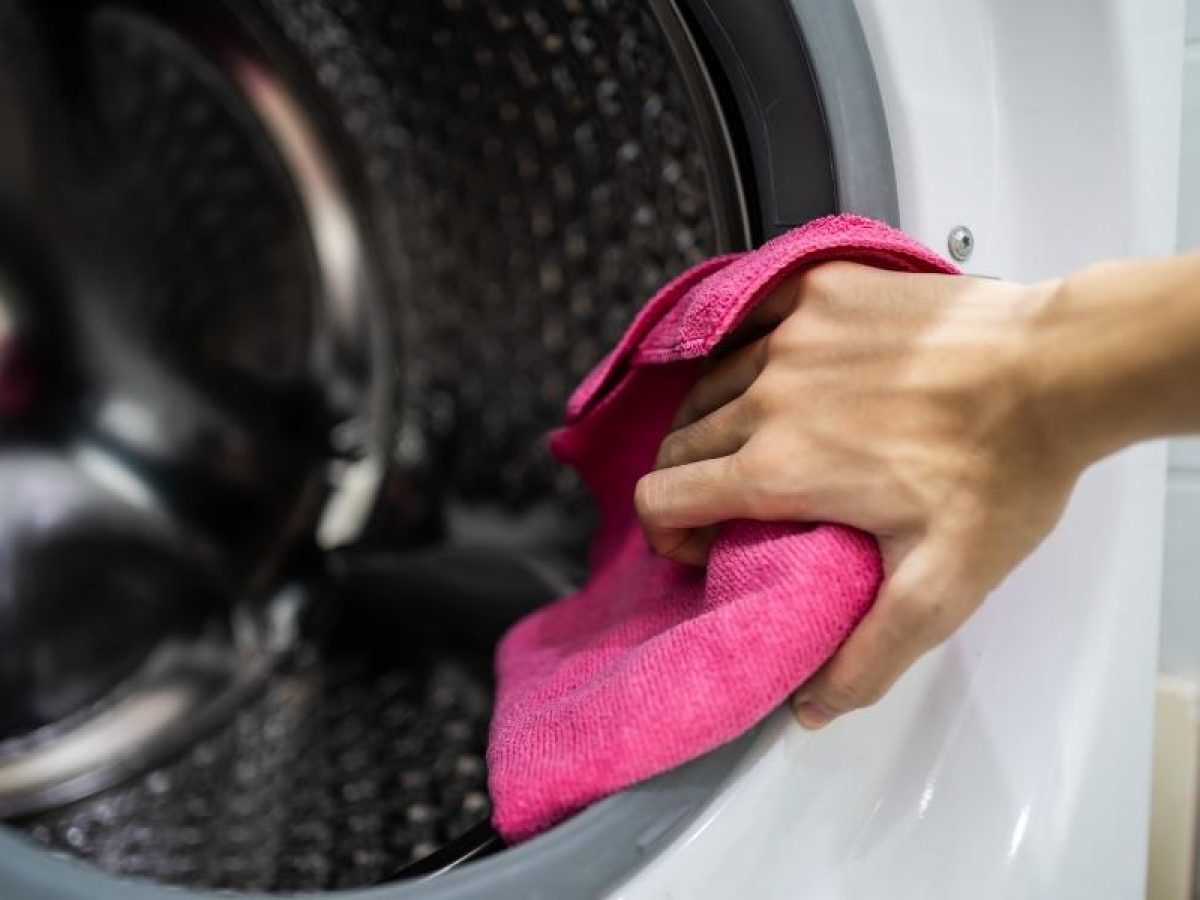
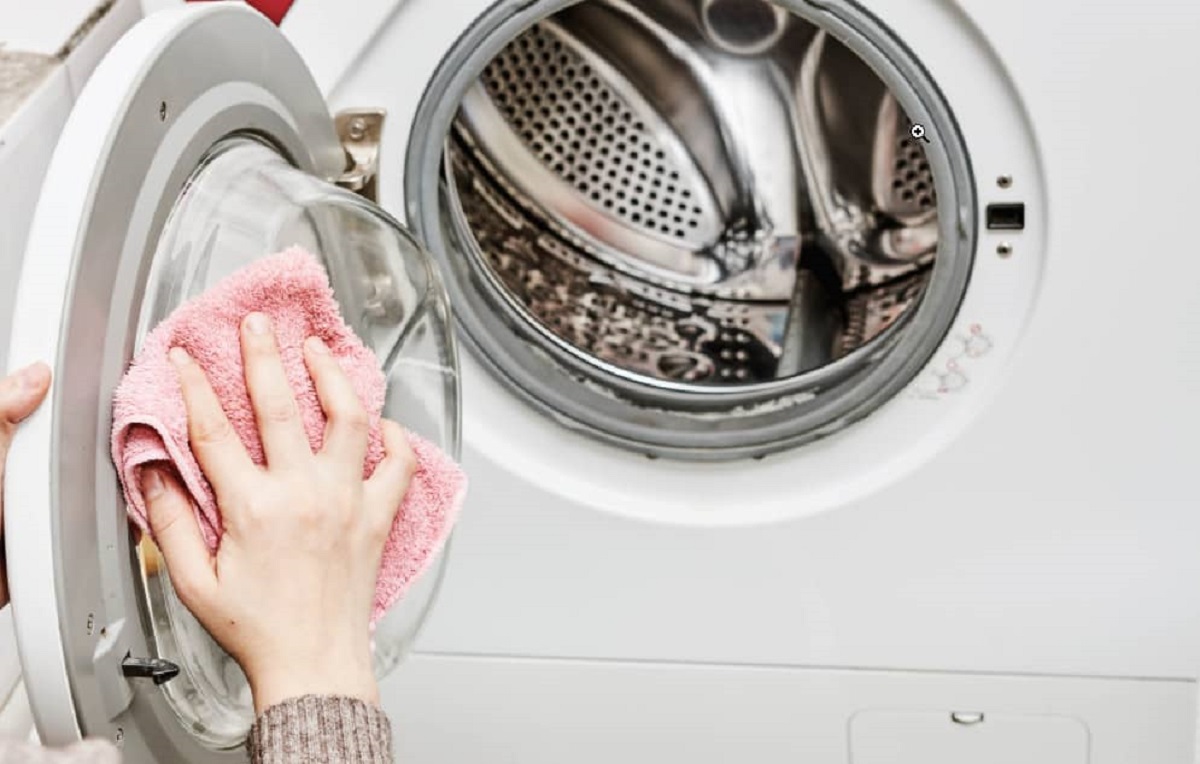
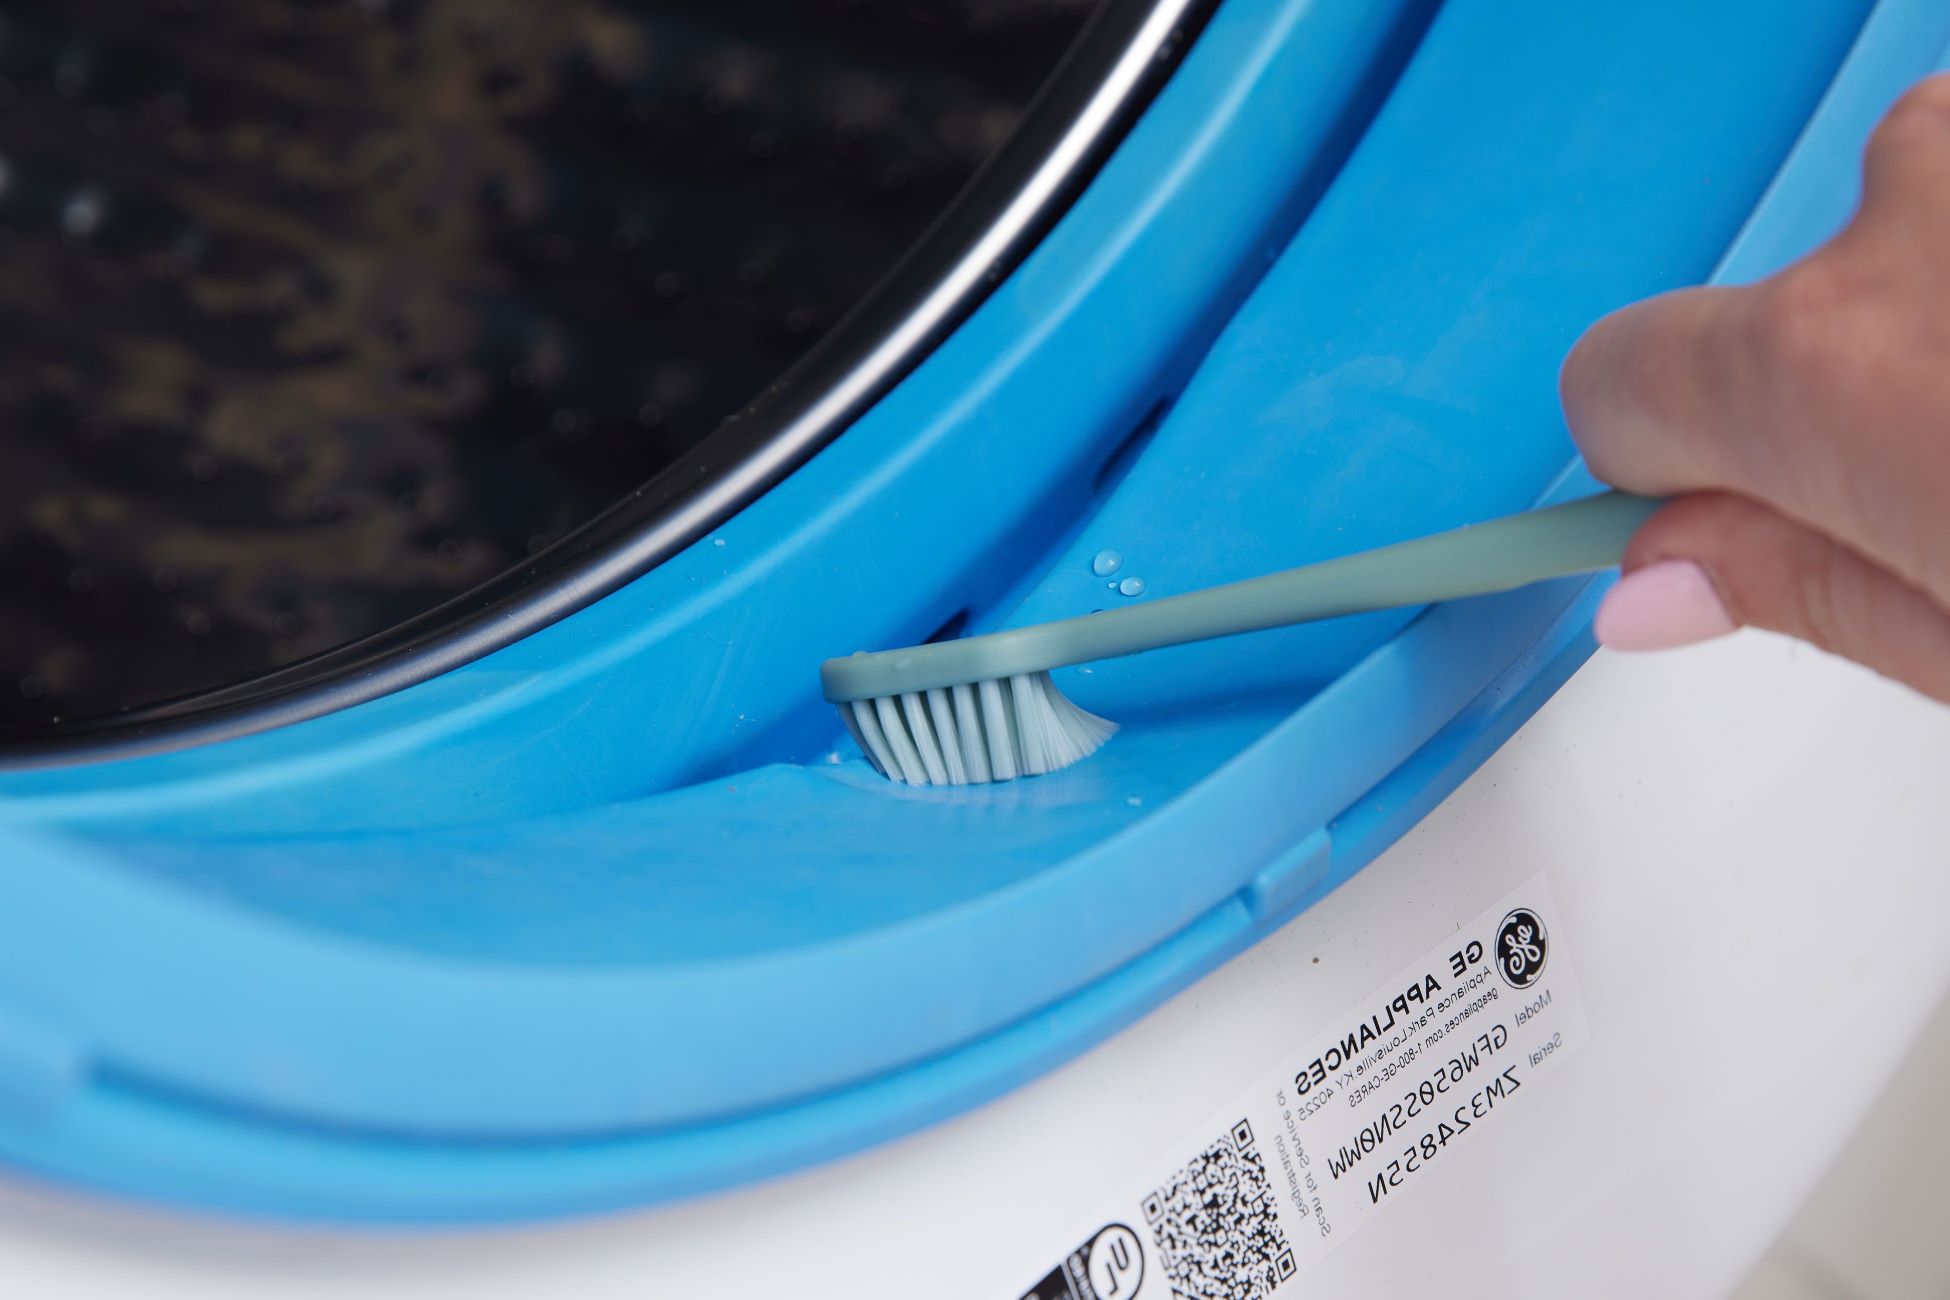
Cleaning the Rubber Seal
The rubber seal, also known as the door gasket, plays a crucial role in ensuring that your washing machine operates efficiently and effectively. However, this often-overlooked component is prone to accumulating dirt, grime, and moisture, creating an ideal environment for mold and mildew growth. Cleaning the rubber seal is essential not only for maintaining the hygiene of your washing machine but also for preventing potential issues such as leaks and unpleasant odors.
To commence the cleaning process, start by inspecting the rubber seal for any visible residue, mold, or mildew. Due to its flexible and ribbed nature, the rubber seal can harbor trapped moisture and detergent residue, providing a breeding ground for mold and mildew. If you notice any buildup or discoloration, it's crucial to address it promptly to prevent further deterioration.
To effectively clean the rubber seal, prepare a cleaning solution using equal parts of white vinegar and hot water. The acidic properties of white vinegar make it an excellent natural cleaner that can dissolve mold, mildew, and stubborn residue while eliminating unpleasant odors. Dip a microfiber cloth or sponge into the vinegar solution and thoroughly wipe down the entire surface of the rubber seal, paying particular attention to the folds and crevices where moisture and residue tend to accumulate.
For stubborn mold or mildew spots that may be deeply embedded in the rubber seal, utilize a toothbrush or soft bristle brush to gently scrub the affected areas. The bristles of the brush will help dislodge the buildup, while the vinegar solution works to break it down. Take care to be gentle yet thorough to avoid damaging the rubber seal during the cleaning process.
After scrubbing, allow the vinegar solution to sit on the rubber seal for approximately 15-30 minutes to effectively penetrate and dissolve any remaining mold or mildew. This soaking period is crucial for ensuring comprehensive cleaning and odor elimination.
Following the soaking period, rinse the rubber seal thoroughly with hot water to remove any loosened residue and vinegar solution. Ensure that all traces of mold, mildew, and cleaning solution have been completely eliminated from the rubber seal.
Finally, use a clean, dry cloth to wipe down the rubber seal and remove any excess moisture. Pay attention to drying the folds and crevices to prevent the accumulation of moisture, which can contribute to the growth of mold and mildew.
By incorporating regular cleaning of the rubber seal into your washing machine maintenance routine, you can effectively prevent mold and mildew growth, maintain a hygienic washing machine, and ensure that your laundry emerges fresh and clean with every wash.
Read more: How To Clean Amana Washer
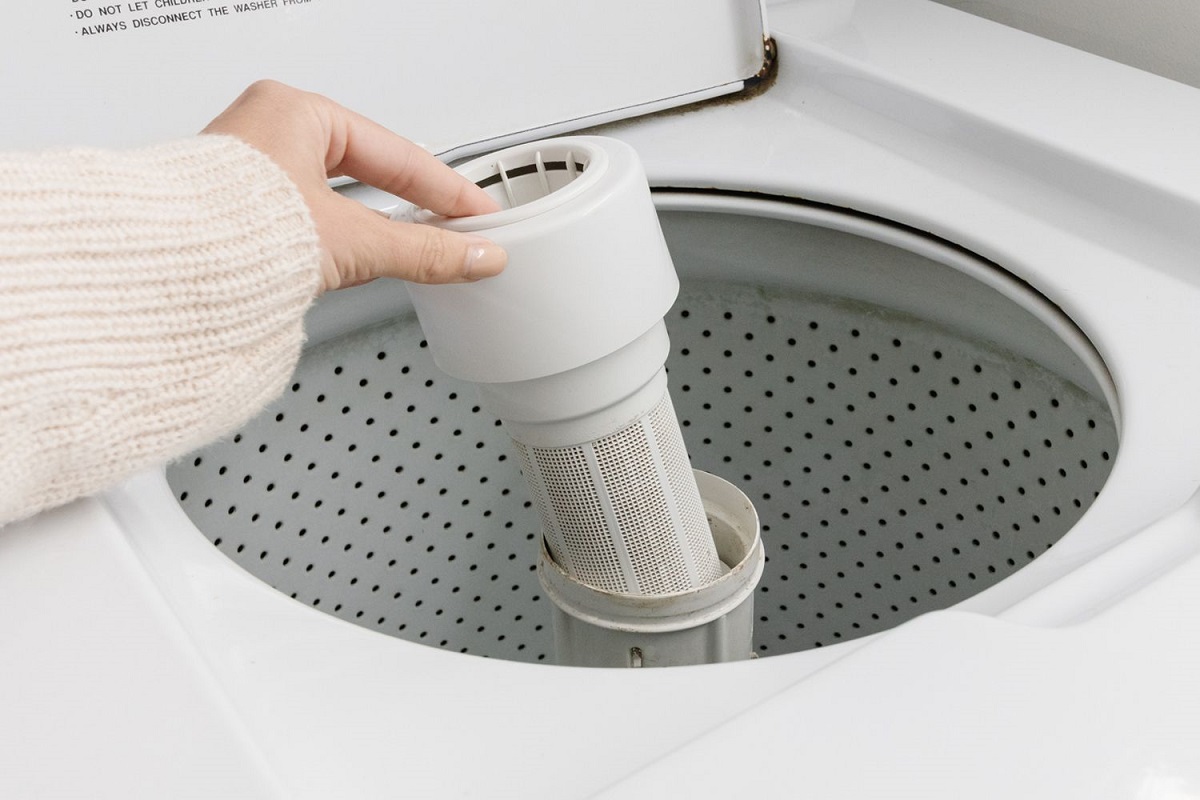
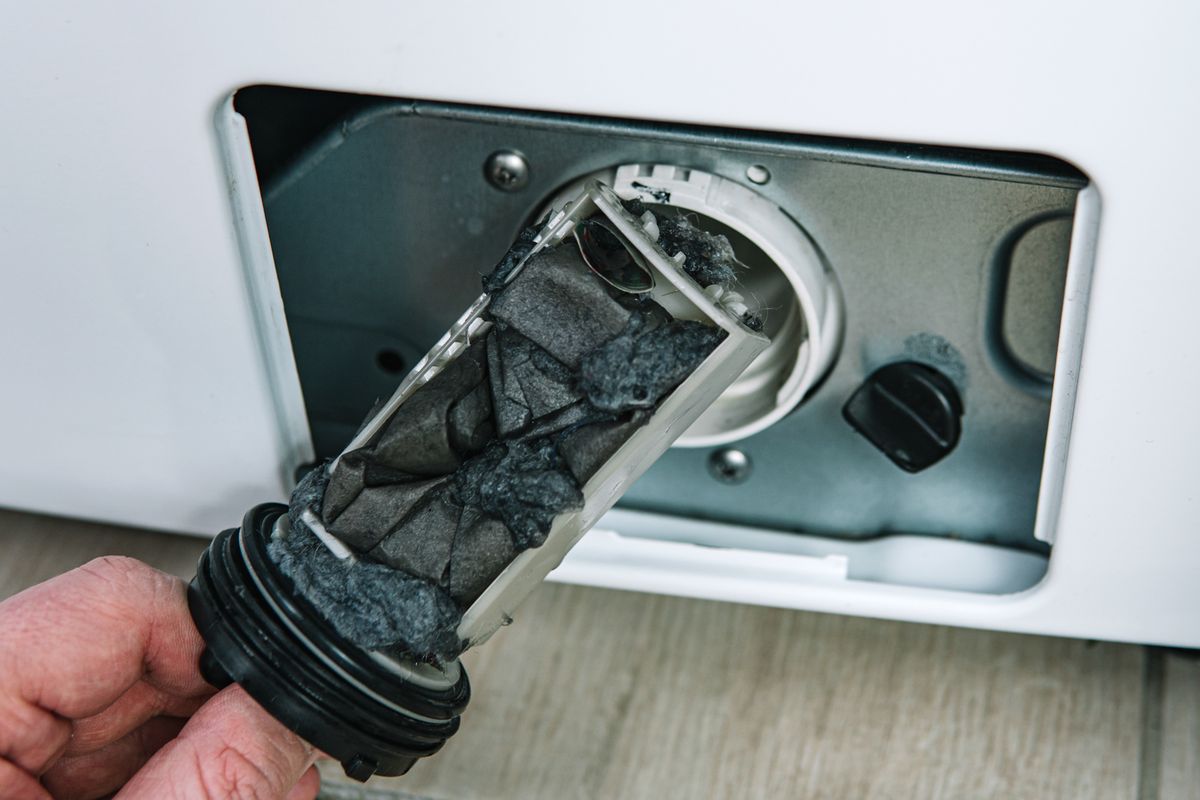
Cleaning the Filter
The filter in a washing machine is a vital component that plays a crucial role in trapping lint, debris, and other particles from the laundry during the wash cycle. Over time, the filter can become clogged with accumulated lint, hair, and other residues, leading to reduced water drainage, potential malfunctions, and even unpleasant odors emanating from the washing machine. Therefore, regular cleaning of the filter is essential to maintain the efficiency and performance of your washing machine.
To begin the cleaning process, locate the filter access panel on your washing machine. The location of the filter may vary depending on the make and model of the machine, but it is commonly found at the front or rear of the appliance. Once you have located the filter access panel, carefully open or remove it to gain access to the filter.
Before proceeding with the cleaning, it is advisable to place a towel or shallow container beneath the filter access area to catch any residual water that may be released during the process. This precaution helps prevent potential spills and messes, ensuring a smooth and tidy cleaning experience.
Once the access panel is open, carefully remove the filter from its housing. Depending on the design of the washing machine, the filter may be a twist-off type, a pull-out cartridge, or a simple debris trap that can be lifted out. Take care to handle the filter gently to avoid damaging it or causing any spillage of trapped debris.
With the filter in hand, visually inspect it for any visible lint, debris, or residue that may have accumulated. Use a soft-bristled brush or a microfiber cloth to gently remove the trapped particles from the filter. Take care to clean both the filter and its housing thoroughly, ensuring that all debris is dislodged and removed.
For stubborn or hard-to-reach debris, consider rinsing the filter under running water to flush out any remaining particles. Avoid using harsh chemicals or abrasive cleaners, as these can damage the filter and compromise its functionality.
Once the filter and its housing are clean and free from debris, carefully reinsert the filter into its housing and secure it in place. Ensure that the filter is properly seated and that the access panel is securely closed to prevent any leaks or malfunctions during the next wash cycle.
By incorporating regular cleaning of the filter into your washing machine maintenance routine, you can ensure optimal water drainage, prevent potential malfunctions, and maintain a hygienic washing machine. This simple yet essential maintenance task will contribute to the longevity and efficiency of your washing machine, ensuring that your laundry emerges fresh and clean with every wash.
Running a Cleaning Cycle
Running a cleaning cycle in your washing machine is a crucial step in maintaining its cleanliness and efficiency. This process involves using specific cleaning agents and settings to eliminate built-up residue, mold, and bacteria from the interior components of the machine. By incorporating a regular cleaning cycle into your maintenance routine, you can ensure that your washing machine operates at its best, delivering fresh and clean laundry with every wash.
To initiate the cleaning cycle, start by ensuring that the washing machine is empty and free from any laundry or items. Running the cleaning cycle with an empty drum allows the cleaning agents to effectively target and eliminate residue and odors without interference from clothing or other items.
Next, select the appropriate cleaning cycle setting on your washing machine. Many modern washing machines feature a dedicated cleaning cycle or a tub clean function specifically designed to flush out residue and bacteria from the interior components. If your machine does not have a designated cleaning cycle, opt for the hottest water setting and a long wash cycle to ensure thorough cleaning.
Once the cleaning cycle setting is selected, it's time to introduce the cleaning agents. White vinegar, known for its natural cleaning properties, is an excellent choice for this purpose. Pour two cups of white vinegar directly into the washing machine drum. The acidic nature of vinegar effectively dissolves soap scum, mineral deposits, and bacteria, leaving the interior of the machine clean and odor-free.
In addition to white vinegar, consider adding a half cup of baking soda to the cleaning cycle. Baking soda acts as a natural abrasive and deodorizer, effectively scrubbing away grime and neutralizing odors within the machine. When combined with white vinegar, baking soda creates a powerful cleaning solution that targets and eliminates built-up residue and odors.
Once the cleaning agents are added, allow the washing machine to run through the complete cleaning cycle. The combination of hot water, white vinegar, and baking soda works together to dissolve and flush out residue, mold, and bacteria from the interior components of the machine, leaving it clean and fresh.
After the cleaning cycle is complete, open the door of the washing machine and allow the interior to air dry. This step helps to eliminate any remaining moisture and ensures that the machine is ready for the next use.
By incorporating a regular cleaning cycle using white vinegar and baking soda, you can effectively maintain a hygienic and odor-free washing machine. This simple yet essential maintenance task will contribute to the longevity and efficiency of your washing machine, ensuring that your laundry emerges fresh and clean with every wash.
Maintaining a Clean Washing Machine
Maintaining a clean washing machine is essential for ensuring its longevity, optimal performance, and the delivery of fresh, clean laundry. By incorporating simple yet effective maintenance practices into your routine, you can prevent the buildup of residue, mold, and bacteria, ultimately prolonging the lifespan of your appliance.
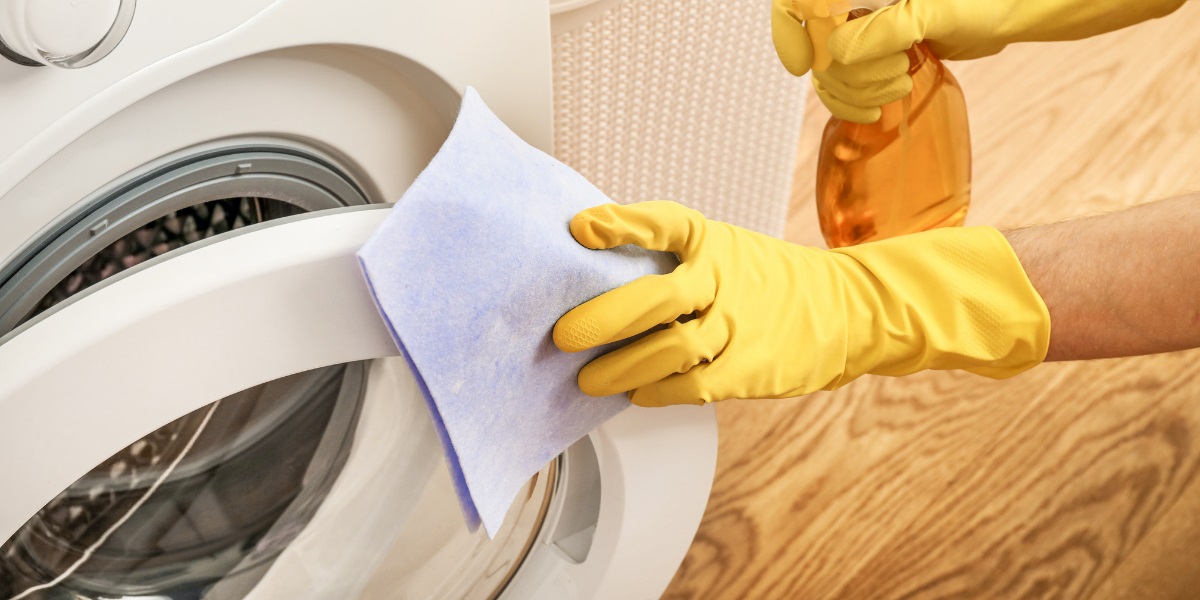
Regularly wiping down the exterior of the washing machine with a damp cloth and mild detergent helps to remove dust, dirt, and spills, keeping the appliance looking clean and well-maintained. Additionally, paying attention to the door seal and gasket, ensuring they are free from moisture and residue, can prevent the growth of mold and mildew, which can lead to unpleasant odors and potential leaks.
Furthermore, leaving the door of the washing machine ajar between uses allows air to circulate inside the drum, preventing the accumulation of moisture and inhibiting the growth of mold and mildew. This simple practice also helps to eliminate any lingering odors and ensures that the interior of the machine remains fresh and clean.
In addition to regular surface cleaning, it's important to address any detergent or fabric softener spills promptly. Wiping down the detergent dispenser and the surrounding areas after each use prevents the buildup of sticky residue, which can harbor bacteria and contribute to unpleasant odors.
Moreover, being mindful of the type and quantity of detergent used in each wash can significantly impact the cleanliness of the washing machine. Using the appropriate amount of high-quality detergent and avoiding overloading the machine with laundry can prevent excessive suds and residue buildup, ultimately contributing to a cleaner washing machine and fresher laundry.
Lastly, incorporating a monthly maintenance routine, such as running a cleaning cycle with white vinegar and baking soda, can effectively dissolve and flush out any residual buildup, mold, and bacteria from the interior components of the machine. This proactive approach ensures that your washing machine remains hygienic and odor-free, providing clean and fresh laundry with every wash.
By implementing these simple yet impactful maintenance practices, you can maintain a clean and efficient washing machine, prolong its lifespan, and enjoy the peace of mind that comes with knowing that your laundry is being cared for in a clean and hygienic environment.
Frequently Asked Questions about How To Clean The Inside Of A Washing Machine
Was this page helpful?
At Storables.com, we guarantee accurate and reliable information. Our content, validated by Expert Board Contributors, is crafted following stringent Editorial Policies. We're committed to providing you with well-researched, expert-backed insights for all your informational needs.


0 thoughts on “How To Clean The Inside Of A Washing Machine”