Articles
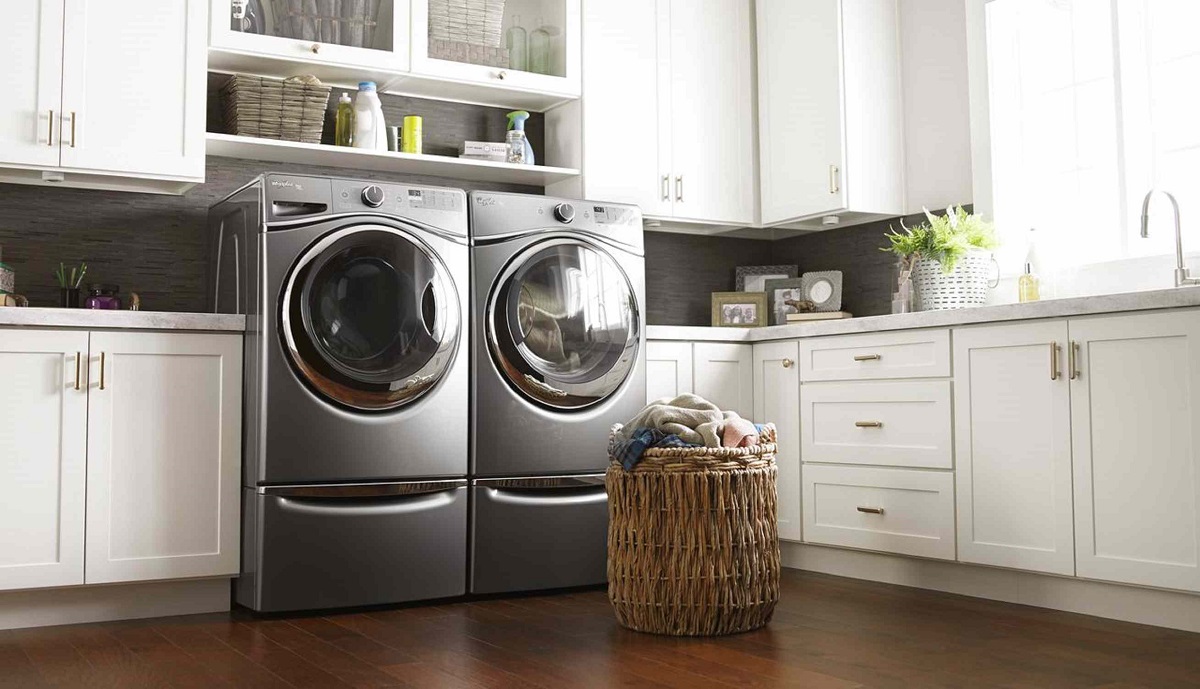
How To Clean Whirlpool Washer Filter
Modified: October 18, 2024
Learn effective methods of cleaning the filter in your Whirlpool washer with our informative articles. Keep your appliance running smoothly!
(Many of the links in this article redirect to a specific reviewed product. Your purchase of these products through affiliate links helps to generate commission for Storables.com, at no extra cost. Learn more)
Introduction
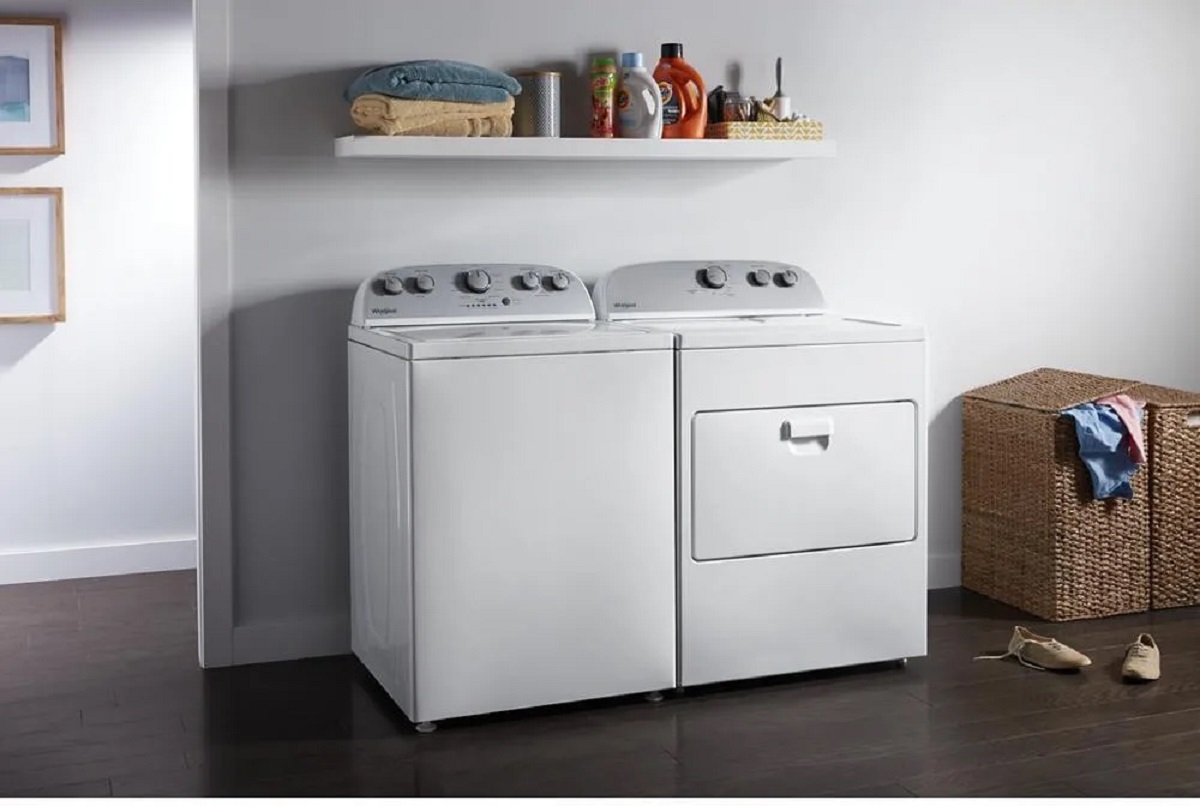
Welcome to our comprehensive guide on how to clean the whirlpool washer filter. If you own a whirlpool washing machine, you may have noticed a decrease in its performance or a lingering odor. This could be due to a clogged or dirty washer filter. The washer filter plays a crucial role in trapping lint, debris, and other particles that may accumulate during the laundry cycle. Regularly cleaning the washer filter will help maintain the efficiency and longevity of your whirlpool washer.
In this article, we will walk you through the step-by-step process of cleaning the whirlpool washer filter. We will also provide you with valuable tips and tricks to ensure your cleaning process is a success. So, let’s dive in and rejuvenate your whirlpool washer!
Key Takeaways:
- Regularly cleaning the whirlpool washer filter with simple tools and materials can improve its performance and longevity, ensuring optimal functionality and efficient laundry cycles.
- Disconnecting the power supply, locating and cleaning the washer filter, and restoring the power are essential steps to maintain a clean and efficient whirlpool washer.
Read more: How To Clean Filter On Whirlpool Dishwasher
Step 1: Gathering the necessary tools and materials
Before diving into the process of cleaning the whirlpool washer filter, it’s important to gather all the necessary tools and materials. This will ensure a smooth and efficient cleaning experience. Here’s a list of items you’ll need:
- A screwdriver (make sure it matches the type of screws used to secure the washer filter cover)
- A pair of gloves to protect your hands
- A small brush or toothbrush for scrubbing
- A bucket or a basin to collect any water or debris that may come out during the cleaning process
- A clean cloth or sponge for wiping down the filter
- Mild detergent or vinegar for cleaning
- A flashlight or a mobile phone with a flashlight feature to help illuminate the filter area, if needed
Once you have gathered all these tools and materials, you’ll be well-prepared to tackle the cleaning process effectively.
Step 2: Disconnecting the power supply
Before starting any maintenance or cleaning tasks on your whirlpool washer, it’s essential to ensure your safety. To do this, you need to disconnect the power supply to the washing machine. This step will prevent any accidental starts or electrical hazards during the cleaning process.
Here’s how you can disconnect the power supply:
- Locate the power cord of your whirlpool washer. It is usually located at the back of the machine, near the bottom.
- Unplug the power cord from the electrical outlet. If the outlet is not easily accessible, you may need to turn off the power at the circuit breaker panel.
- Double-check that the power is completely disconnected by trying to turn on the washer. If it doesn’t turn on, you have successfully disconnected the power supply.
Ensuring the power supply is disconnected will prevent any accidents and allow you to work on your whirlpool washer with peace of mind.
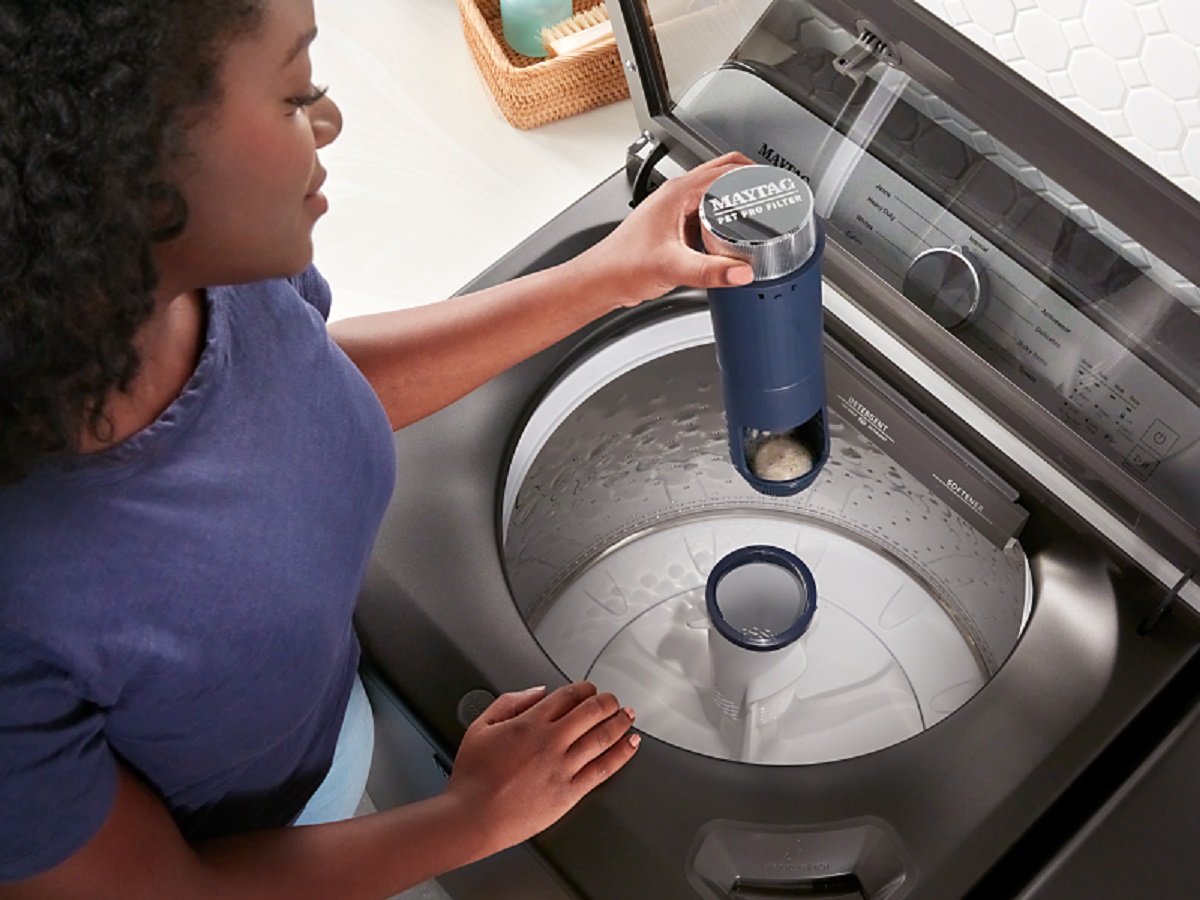
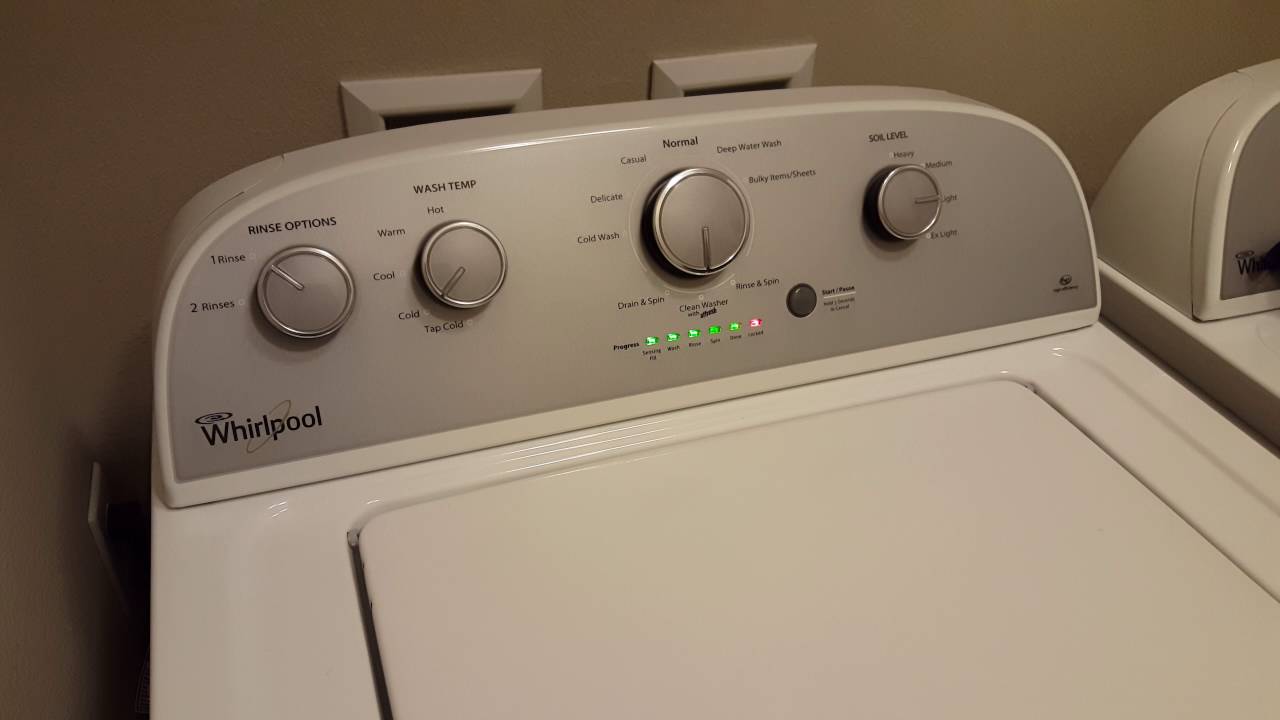
Step 3: Locating the washer filter
Once the power supply is disconnected, it’s time to locate the washer filter in your whirlpool washing machine. The specific location of the filter may vary from model to model, so it’s important to consult your owner’s manual for precise instructions. However, in most whirlpool washers, you can find the filter behind the access panel.
Here are the general steps to locate the washer filter:
- Refer to your owner’s manual to identify the location of the access panel. It is often located at the bottom front of the washing machine.
- Using a screwdriver, carefully remove the screws that secure the access panel in place.
- Once the screws are removed, gently pull the access panel away from the washing machine to reveal the interior.
- Now, look for the washer filter. It is typically a small, cylindrical or rectangular-shaped component located near the bottom of the machine.
If you’re having trouble locating the washer filter, refer to your owner’s manual or consult the manufacturer’s website for specific instructions pertaining to your whirlpool washer model.
Now that you have found the washer filter, you’re ready to move on to the next step – removing the washer filter cover.
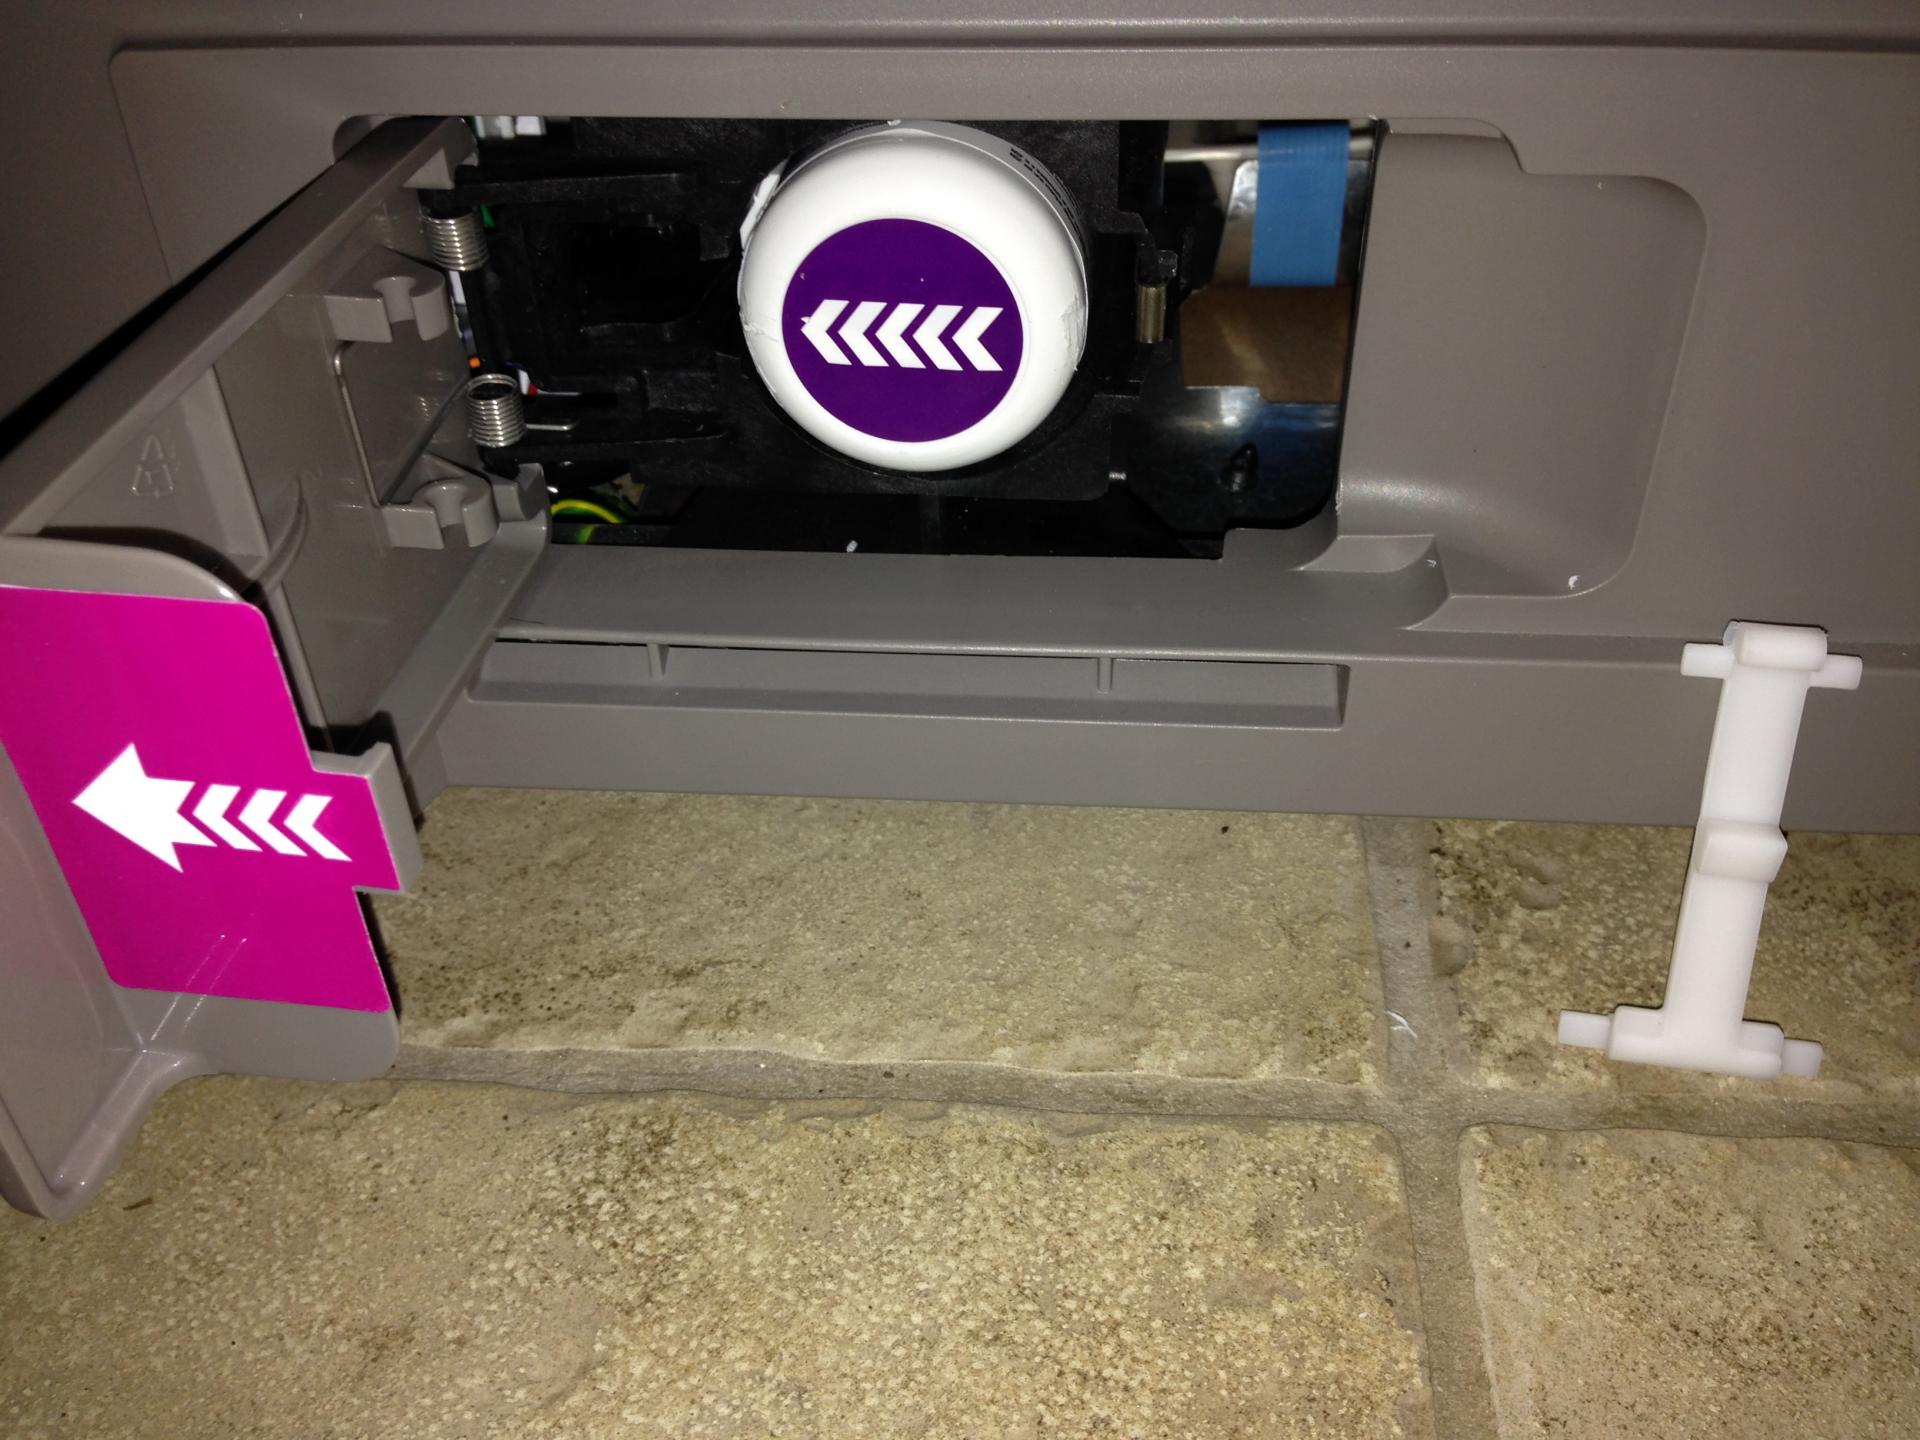
Step 4: Removing the washer filter cover
With the location of the washer filter identified, the next step in the cleaning process is to remove the washer filter cover. Removing the cover will give you access to the filter for cleaning and removal of any trapped debris. Here’s how you can do it:
- Make sure you have the screwdriver handy, as you’ll need it to remove the screws securing the washer filter cover.
- Using the screwdriver, carefully remove the screws from the washer filter cover. Place the screws in a safe location, as you’ll need them later for reinstallation.
- Once the screws are removed, gently lift and remove the washer filter cover.
- Set the cover aside in a safe place where it won’t get dirty or misplaced.
Now that the washer filter cover is removed, you’ll have a clear view of the filter itself. Take a moment to inspect the filter for any visible debris or clogs. If you notice significant build-up, it’s a good indication that a thorough cleaning is necessary.
With the washer filter cover out of the way, you’re ready to move on to the next step – cleaning the washer filter.
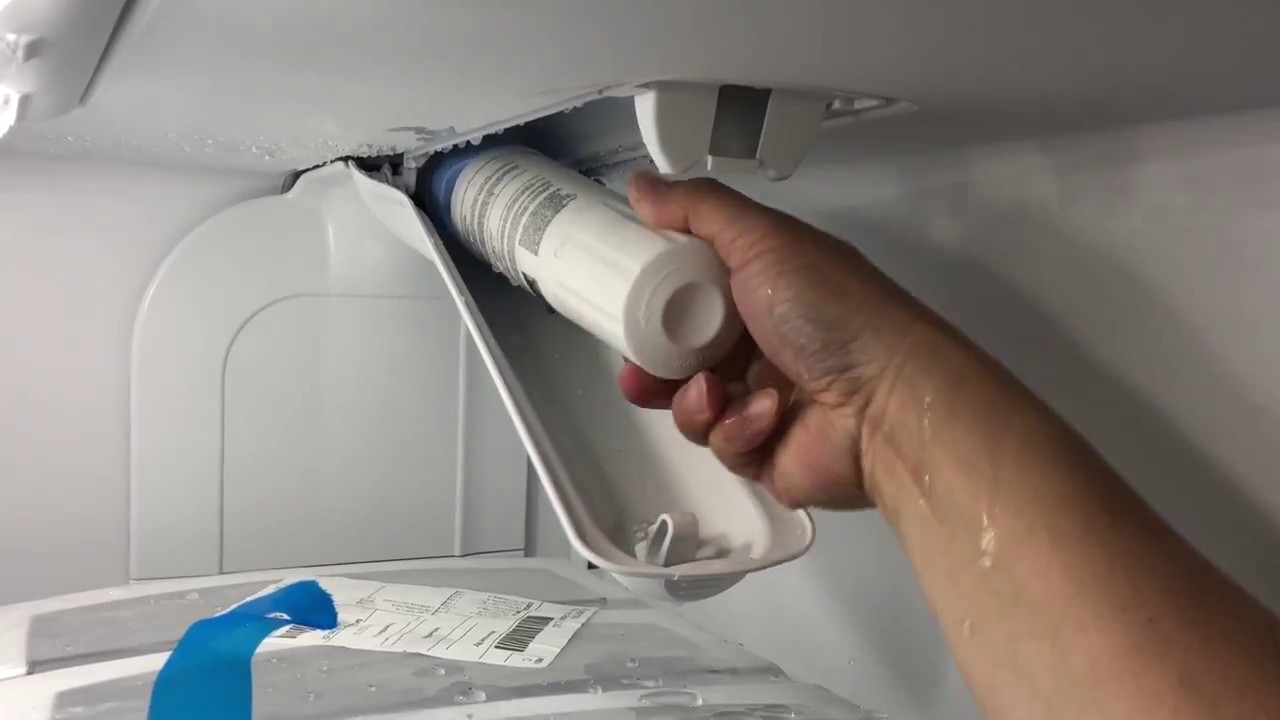
To clean the Whirlpool washer filter, locate the filter at the bottom front of the machine. Twist the filter cap counterclockwise to remove it, then clean any debris or lint from the filter. Rinse the filter and reinsert it back into the washer.
Read more: How To Clean A Whirlpool Duet Washer
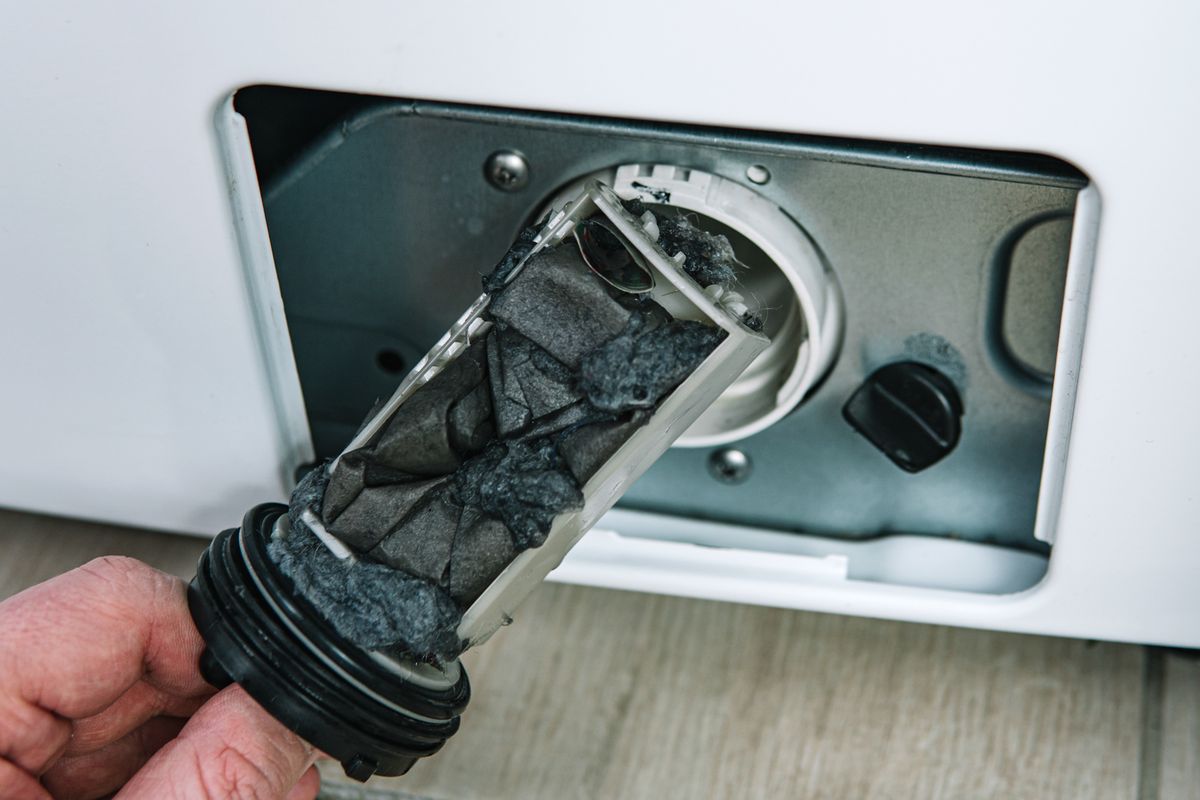
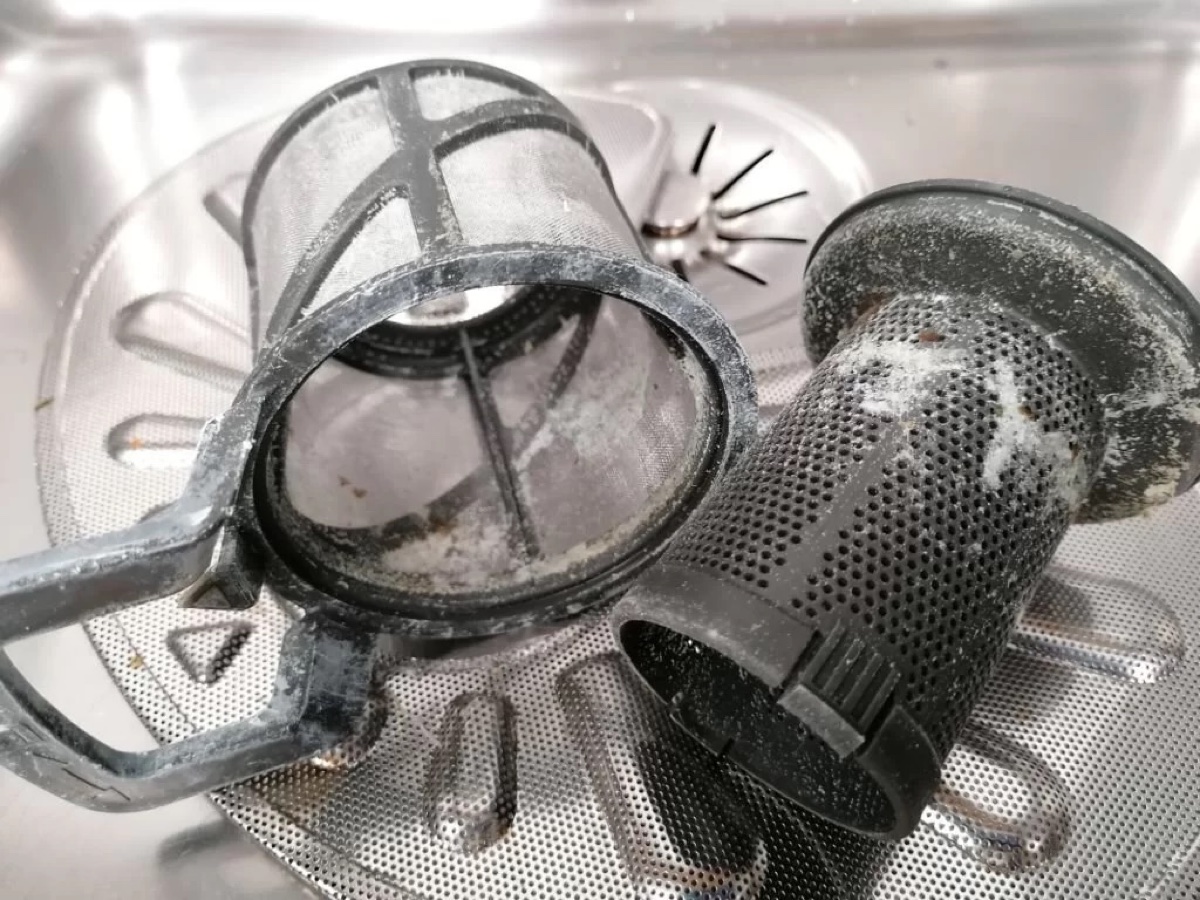
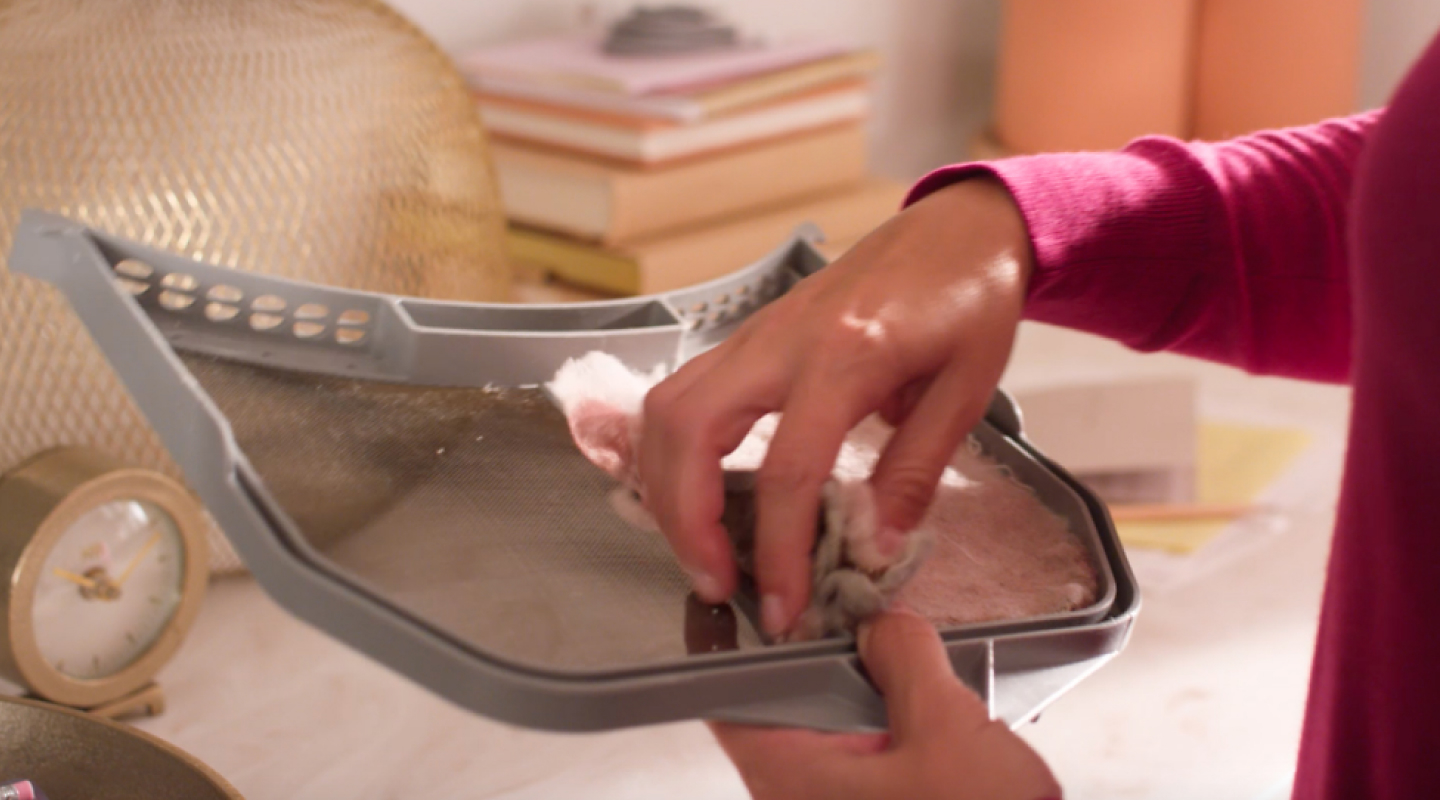
Step 5: Cleaning the washer filter
Now that you have removed the washer filter cover and have a clear view of the filter, it’s time to clean it. Cleaning the washer filter is essential to remove any trapped debris, lint, or residue that may hinder the performance of your whirlpool washer. Here’s how you can effectively clean the washer filter:
- Start by inspecting the filter for any visible debris or clogs. Use a small brush or toothbrush to gently remove any loose particles.
- Once you have cleared the surface debris, fill a bucket or basin with warm water. Add a small amount of mild detergent or vinegar to create a cleaning solution. Alternatively, you can use a specialized washing machine cleaner, following the manufacturer’s instructions.
- Submerge the washer filter in the cleaning solution and let it soak for a few minutes. This will help to loosen any stubborn residue or build-up.
- Using a brush or cloth, scrub the washer filter gently to remove any remaining dirt or grime. Pay close attention to the corners and crevices of the filter.
- Rinse the washer filter thoroughly under running water to remove any soap residue. Ensure that all the dirt and cleaner have been washed away.
- If necessary, repeat the cleaning process to ensure a thorough and effective cleaning.
Once the washer filter is clean, take a moment to inspect it again for any lingering debris or clogs. If it appears clean and free from obstructions, you can proceed to the next step of reinstalling the washer filter cover.
Congratulations! You have successfully cleaned the washer filter and are now ready to reassemble the whirlpool washer.
Step 6: Reinstalling the washer filter cover
With the washer filter thoroughly cleaned, it’s time to reinstall the washer filter cover. Properly reinstalling the cover will ensure that the filter is securely in place and that the washing machine is fully operational. Here’s how you can do it:
- Retrieve the washer filter cover that you set aside earlier.
- Align the cover with the opening where it was removed, ensuring that it fits snugly in place.
- Hold the cover firmly against the washer and insert the screws back into their respective holes.
- Using the screwdriver, tighten the screws until they are securely fastened, but be careful not to overtighten them, as it may cause damage to the cover or washer.
- Once all the screws are in place, double-check that the cover is properly aligned and securely fastened.
Now that the washer filter cover is reinstalled, your whirlpool washer is one step closer to being fully operational. But before you can start using it again, there’s one more important step to complete – restoring the power supply.
Let’s move on to the final step of the cleaning process – restoring the power supply to your whirlpool washer.
Step 7: Restoring the power supply
After successfully reinstalling the washer filter cover, the final step in the cleaning process is to restore the power supply to your whirlpool washer. Restoring power will allow you to test the washer and ensure that it is functioning properly. Here’s how you can restore the power supply:
- If you turned off the power at the circuit breaker panel, go back to the panel and switch the corresponding breaker back on.
- If you unplugged the power cord from the electrical outlet, carefully plug it back in.
- Ensure that the power cord is securely connected and that there are no loose or damaged parts.
- Once the power supply is restored, go to the control panel of your whirlpool washer and turn it on.
- Allow the washer to go through a normal wash cycle to ensure that everything is working correctly.
- Observe the washer during the cycle to check for any unusual noises, leaks, or malfunctions. If you notice anything out of the ordinary, consult the owner’s manual or seek professional assistance.
Congratulations! You have successfully cleaned and restored your whirlpool washer’s power supply. Your washer is now ready to be used again, with improved performance and efficiency.
Remember, it’s a good practice to clean the washer filter regularly to keep your whirlpool washer running smoothly. Depending on your usage and the frequency of laundry cycles, it is recommended to clean the washer filter at least once every three to six months.
Thank you for following our comprehensive guide on how to clean the whirlpool washer filter. We hope this article has been helpful in revitalizing your washer and ensuring its optimal performance. Happy washing!
Conclusion
Cleaning the whirlpool washer filter is a crucial maintenance task that helps to improve the performance and longevity of your washing machine. By following the step-by-step guide outlined in this article, you can easily and effectively clean the washer filter to remove debris and ensure optimal functionality.
We began by emphasizing the importance of gathering the necessary tools and materials before starting the cleaning process. Having the right equipment, such as a screwdriver, gloves, brush, and cleaning agents, ensures a smooth and successful cleaning experience.
We then walked through the steps of disconnecting the power supply to ensure your safety during the cleaning process. Once the power is disconnected, we learned how to locate the washer filter behind the access panel of the whirlpool washing machine.
After locating the filter, we moved on to removing the washer filter cover using a screwdriver and provided tips on inspecting the filter for any visible debris or clogs.
Following that, we delved into the process of cleaning the washer filter. This involves soaking the filter in a cleaning solution, scrubbing away dirt and grime, and rinsing it thoroughly. Proper cleaning ensures that the filter is free from any trapped particles that can affect the washer’s performance.
Next, we discussed the crucial step of reinstalling the washer filter cover. We highlighted the importance of aligning the cover correctly, securely fastening the screws, and double-checking that it is properly in place.
Lastly, we covered the final step: restoring the power supply. We learned how to safely reconnect the power to the washer and tested its functionality during a normal wash cycle. This step ensures that the washer is working correctly before resuming regular use.
In conclusion, cleaning the whirlpool washer filter is a straightforward process that can significantly improve the efficiency and performance of your washing machine. Regularly maintaining and cleaning the washer filter will contribute to the longevity of your appliance and ensure that your clothes continue to be washed effectively.
Thank you for following along with our comprehensive guide. We hope this article has provided you with the knowledge and confidence to tackle the task of cleaning your whirlpool washer filter. Happy washing!
If you found tips on cleaning your Whirlpool washer filter helpful, don't miss our comprehensive guide on washer filter maintenance. Whether tackling a different brand or seeking general advice, this article offers practical, easy-to-follow steps to ensure your washing machine remains in peak condition. Dive into our detailed cleaning strategies to keep every wash fresh and efficient.
Frequently Asked Questions about How To Clean Whirlpool Washer Filter
Was this page helpful?
At Storables.com, we guarantee accurate and reliable information. Our content, validated by Expert Board Contributors, is crafted following stringent Editorial Policies. We're committed to providing you with well-researched, expert-backed insights for all your informational needs.

0 thoughts on “How To Clean Whirlpool Washer Filter”