Home>Home Maintenance>How To Connect A Dryer Vent

Home Maintenance
How To Connect A Dryer Vent
Modified: August 28, 2024
Learn how to properly connect a dryer vent in your home with this helpful home maintenance guide. Ensure safe and efficient airflow for your dryer.
(Many of the links in this article redirect to a specific reviewed product. Your purchase of these products through affiliate links helps to generate commission for Storables.com, at no extra cost. Learn more)
Introduction
Welcome to our comprehensive guide on how to connect a dryer vent. If you’re a homeowner or renter, it’s crucial to ensure that your dryer is properly vented to prevent potential hazards and improve its overall efficiency. A well-connected dryer vent helps remove hot air and moisture from your home, preventing mold growth, reducing energy consumption, and prolonging the lifespan of your dryer.
In this article, we will walk you through the step-by-step process of connecting a dryer vent. Whether you’re installing a new dryer or replacing an existing vent, this guide will provide you with all the necessary information to successfully complete the task.
Before we dive into the specific steps, let’s cover some important safety considerations. Venting your dryer incorrectly can have serious consequences, including fire hazards and potential damage to your dryer. It’s essential to follow the manufacturer’s instructions and local building codes to ensure a safe and effective installation.
Additionally, it’s worth noting that different types of dryers require different venting systems. Make sure you know the specific requirements for your dryer before getting started. Now, let’s get started with step 1: choosing the correct vent type.
Key Takeaways:
- Properly connecting your dryer vent is crucial for safety, energy efficiency, and preventing mold growth. Choose the correct vent type, position the dryer carefully, and regularly test the connection for optimal performance.
- Regular maintenance, including inspecting for blockages and cleaning the vent system, is essential for a safe and efficient drying process. If in doubt, consult a professional to ensure correct installation and compliance with local building codes.
Read more: How To Connect A Dryer Vent Hose
Step 1: Choose the Correct Vent Type
When it comes to choosing the correct vent type for your dryer, there are a few options to consider. The most common types of dryer vents are flexible foil, rigid metal, and semi-rigid metal.
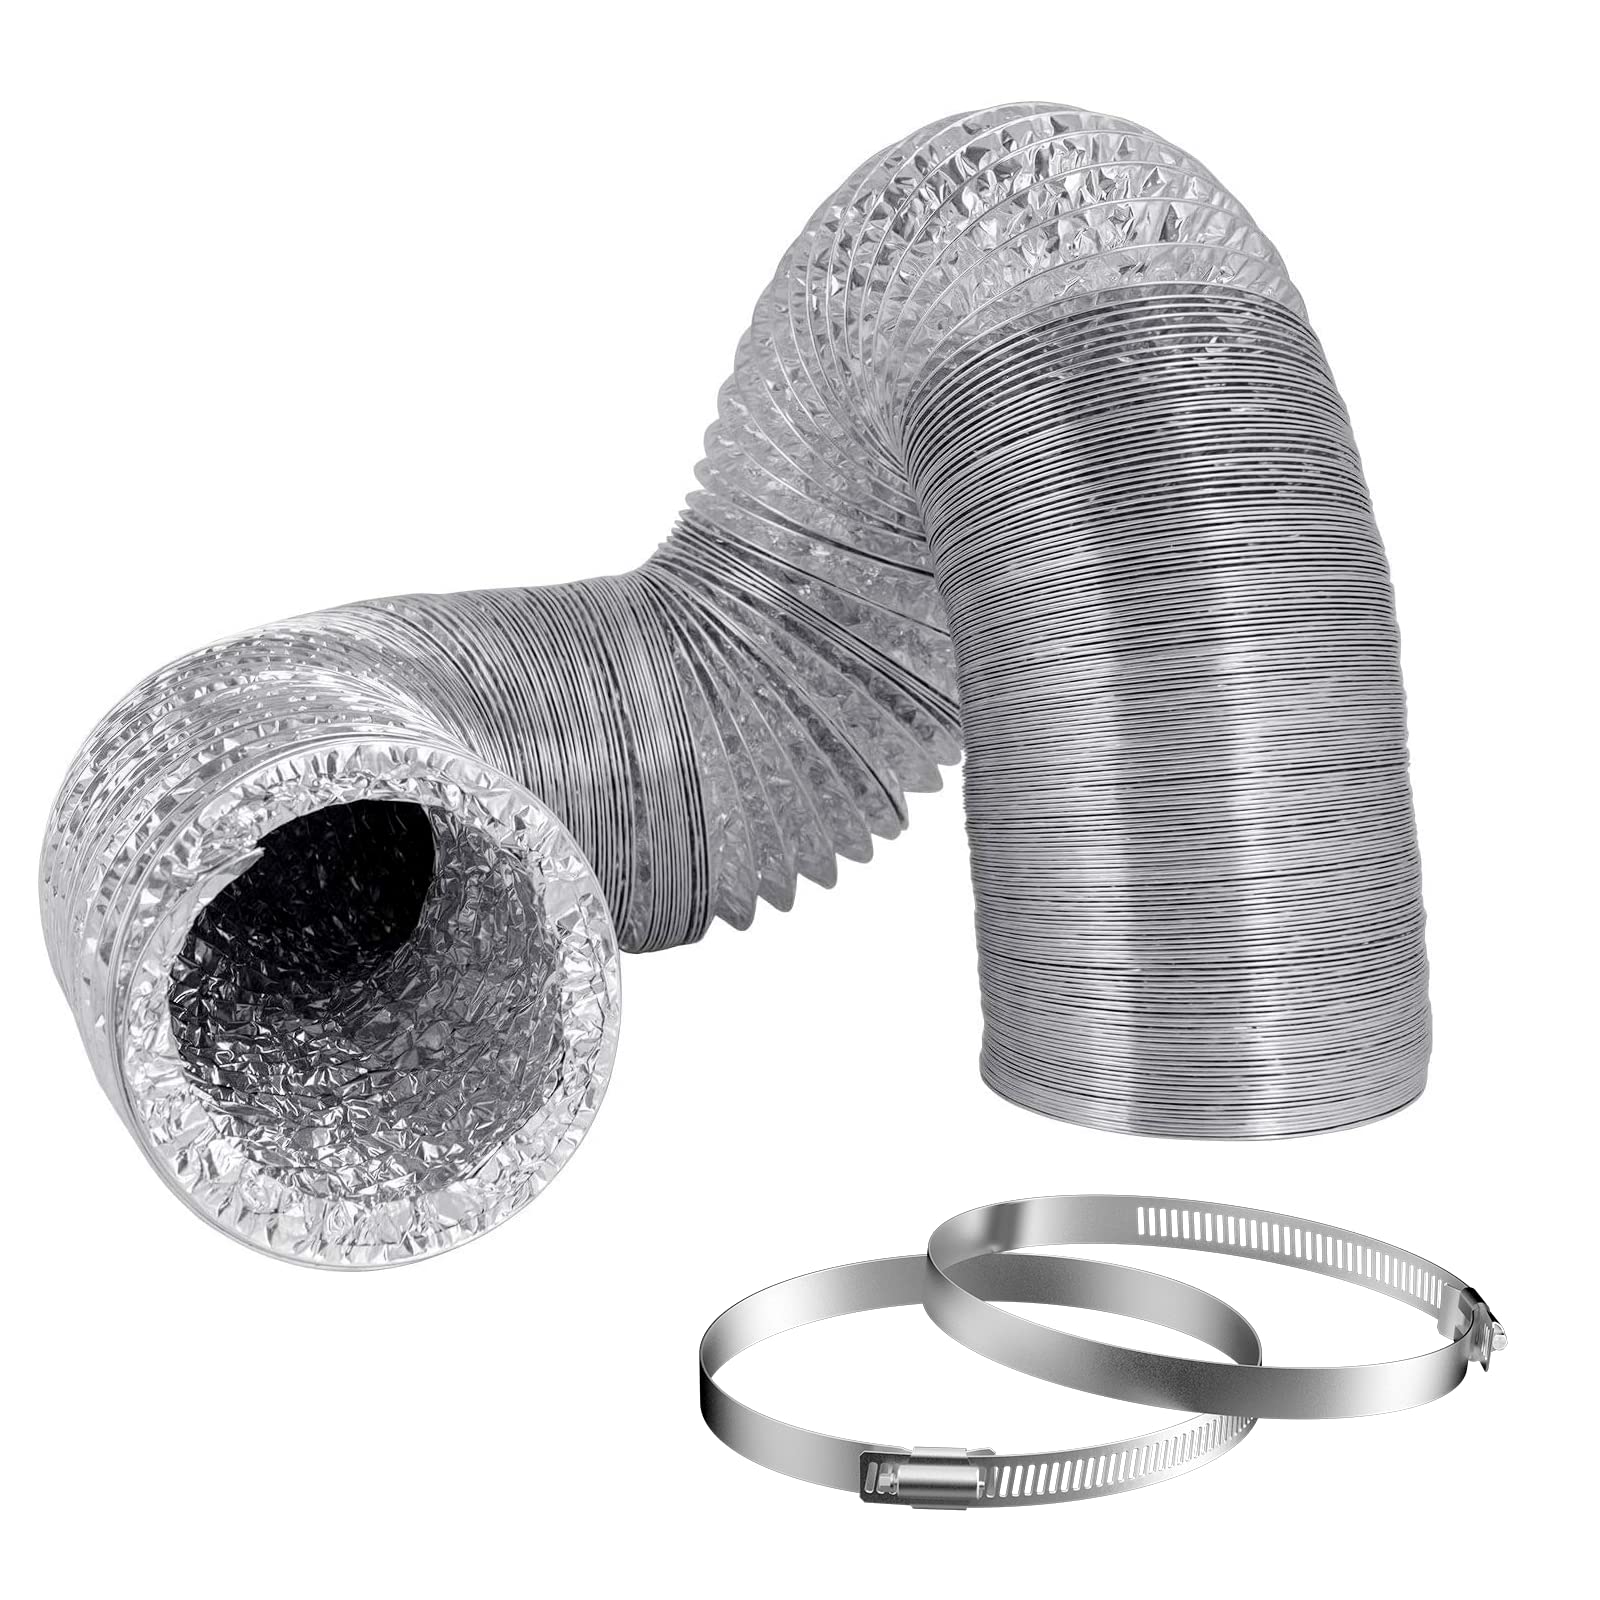
Flexible Foil Vent: This type of vent is made of flexible aluminum foil and is relatively easy to install. It is flexible and can be maneuvered around obstacles, making it ideal for tight spaces. However, it is less durable compared to rigid metal vents and can be prone to kinks and tears if not handled carefully.
Rigid Metal Vent: Rigid metal vents are constructed of rigid aluminum or galvanized steel. They offer excellent airflow and durability, ensuring a long-lasting venting solution. However, rigid metal vents are less flexible and may require additional effort to install, especially in confined spaces.
Semi-Rigid Metal Vent: This type of vent combines the benefits of flexibility and durability. It is made of a combination of aluminum and steel, offering good airflow while still being relatively easy to install. Semi-rigid metal vents are a popular choice for homeowners looking for a balance between flexibility and strength.
When selecting the correct vent type, consider factors such as the distance between the dryer and the vent outlet, the space available for installation, and any potential obstacles that need to be navigated. Additionally, be sure to check the manufacturer’s recommendations for your specific dryer model.
It’s important to note that plastic or vinyl vents should never be used, as they are flammable and can be easily damaged by heat. Always opt for vent materials that are specifically designed for dryer venting to ensure safety and efficiency.
Once you have determined the appropriate vent type for your dryer, you can move on to the next step: positioning the dryer for installation.
Step 2: Position the Dryer
Before connecting the dryer vent, it’s important to properly position the dryer in your laundry area. This will ensure that the vent hose is able to reach the designated vent outlet without any obstructions or excessive bends.
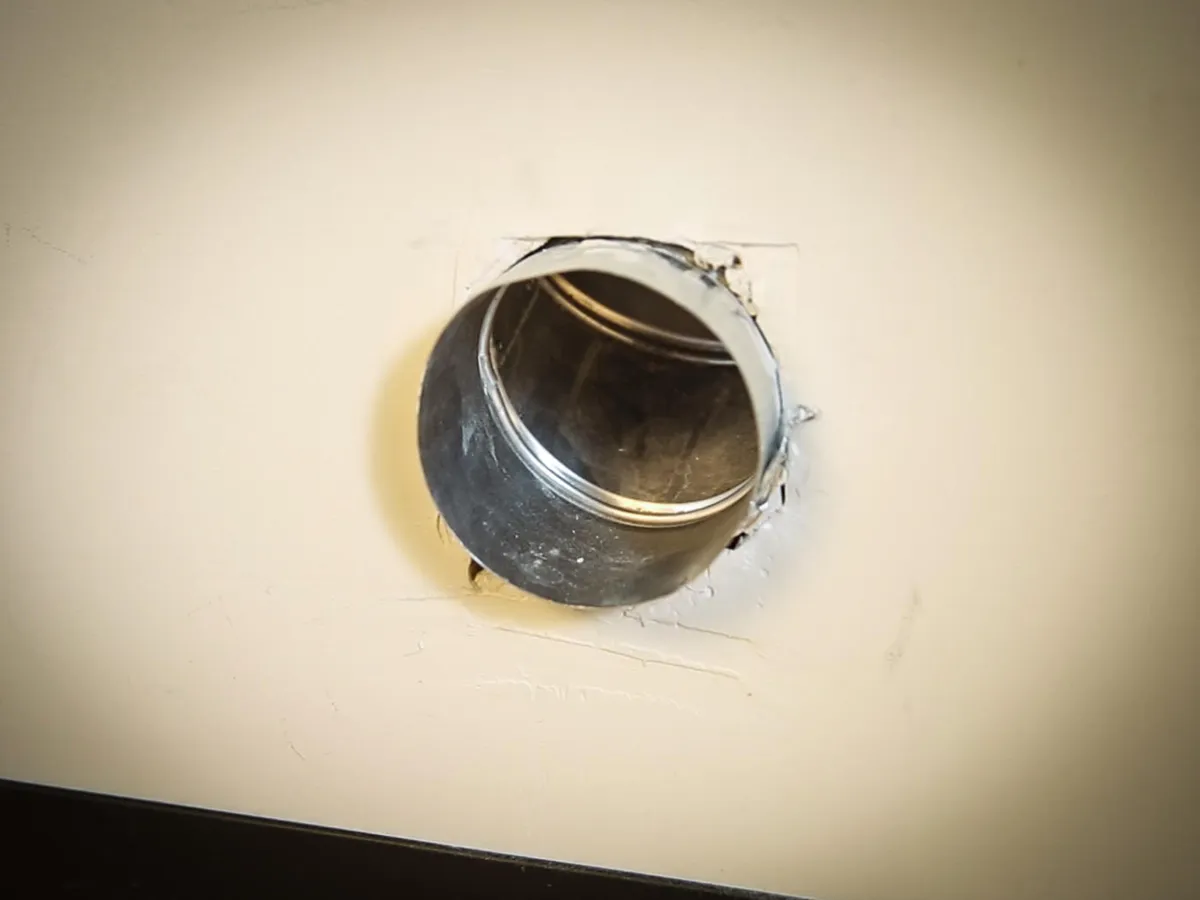
To begin, locate the vent outlet on the back of your dryer. This is typically located near the bottom of the appliance and will look like a round or rectangular opening. Make sure there is enough space behind the dryer for the vent hose to extend without any tight bends or kinks.
Next, move the dryer into position against the wall or in its designated spot. It’s essential to leave enough space between the back of the dryer and the wall to allow for proper airflow and ventilation. Refer to the manufacturer’s recommendations for the specific clearance requirements for your dryer model.
If necessary, use a level to ensure that the dryer is sitting evenly on the floor or on its pedestal. This will help prevent any vibrations or imbalance during operation.
Once the dryer is properly positioned, you’re ready to move on to the next step: measuring and cutting the vent hose.
HTML Valid.
Step 3: Measure and Cut the Vent Hose
Now that you have positioned the dryer, it’s time to measure and cut the vent hose to the appropriate length. The vent hose will connect the dryer to the vent outlet, allowing hot air and moisture to be properly expelled from your home.
Before you begin, ensure that the dryer is still in its final position and that you have enough space to work comfortably behind the appliance. You will need a tape measure, a marker or pencil, and a pair of sharp scissors or a utility knife.
Here’s how to measure and cut the vent hose:
- Start by determining the length of the vent hose required. Measure the distance from the back of the dryer to the vent outlet on the wall. Be sure to account for any additional length needed to accommodate bends or angles in the hose.
- Mark the measurement on the vent hose using a marker or pencil. Double-check your measurements to ensure accuracy.
- Carefully cut the vent hose to the desired length using sharp scissors or a utility knife. Take caution to make a straight and clean cut to avoid any obstructions or leakages later on.
After cutting the vent hose, it’s a good idea to double-check the length by holding it up against the dryer and the vent outlet. Make any necessary adjustments before proceeding to the next step.
Once you have the correctly sized vent hose, you’re ready to move on to the next step: connecting the vent hose to the dryer.
HTML Valid.
Step 4: Connect the Vent Hose to the Dryer
Now that you have measured and cut the vent hose to the appropriate length, it’s time to connect it to the dryer. This step will securely attach the hose to the vent outlet on the back of the dryer, ensuring a proper airflow pathway.
Follow these steps to connect the vent hose to the dryer:
- Locate the vent outlet on the back of the dryer. It should be a round or rectangular opening.
- Insert one end of the vent hose onto the dryer vent outlet, aligning the hose with the opening.
- Ensure a tight connection by pushing the hose onto the vent outlet firmly. You may need to twist the hose slightly to create a secure fit.
- If using a flexible foil vent, use duct tape or a hose clamp to secure the hose to the dryer vent outlet. This will help prevent any leaks or disconnections during operation.
- Give the hose a gentle tug to check if it is securely attached to the dryer. It should not easily come off or disconnect.
It’s important to note that if you are using a rigid or semi-rigid metal vent, it may not require additional securing with tape or clamps as it can provide a more stable connection on its own.
Once the vent hose is properly connected to the dryer, you’re ready to move on to the next step: attaching the vent hood to the exterior wall or roof.
HTML Valid.
Make sure to use the correct type and size of vent hose for your dryer. It should be made of metal and be as short and straight as possible to ensure proper ventilation and reduce the risk of lint buildup.
Read more: How To Connect To An Oval Dryer Vent
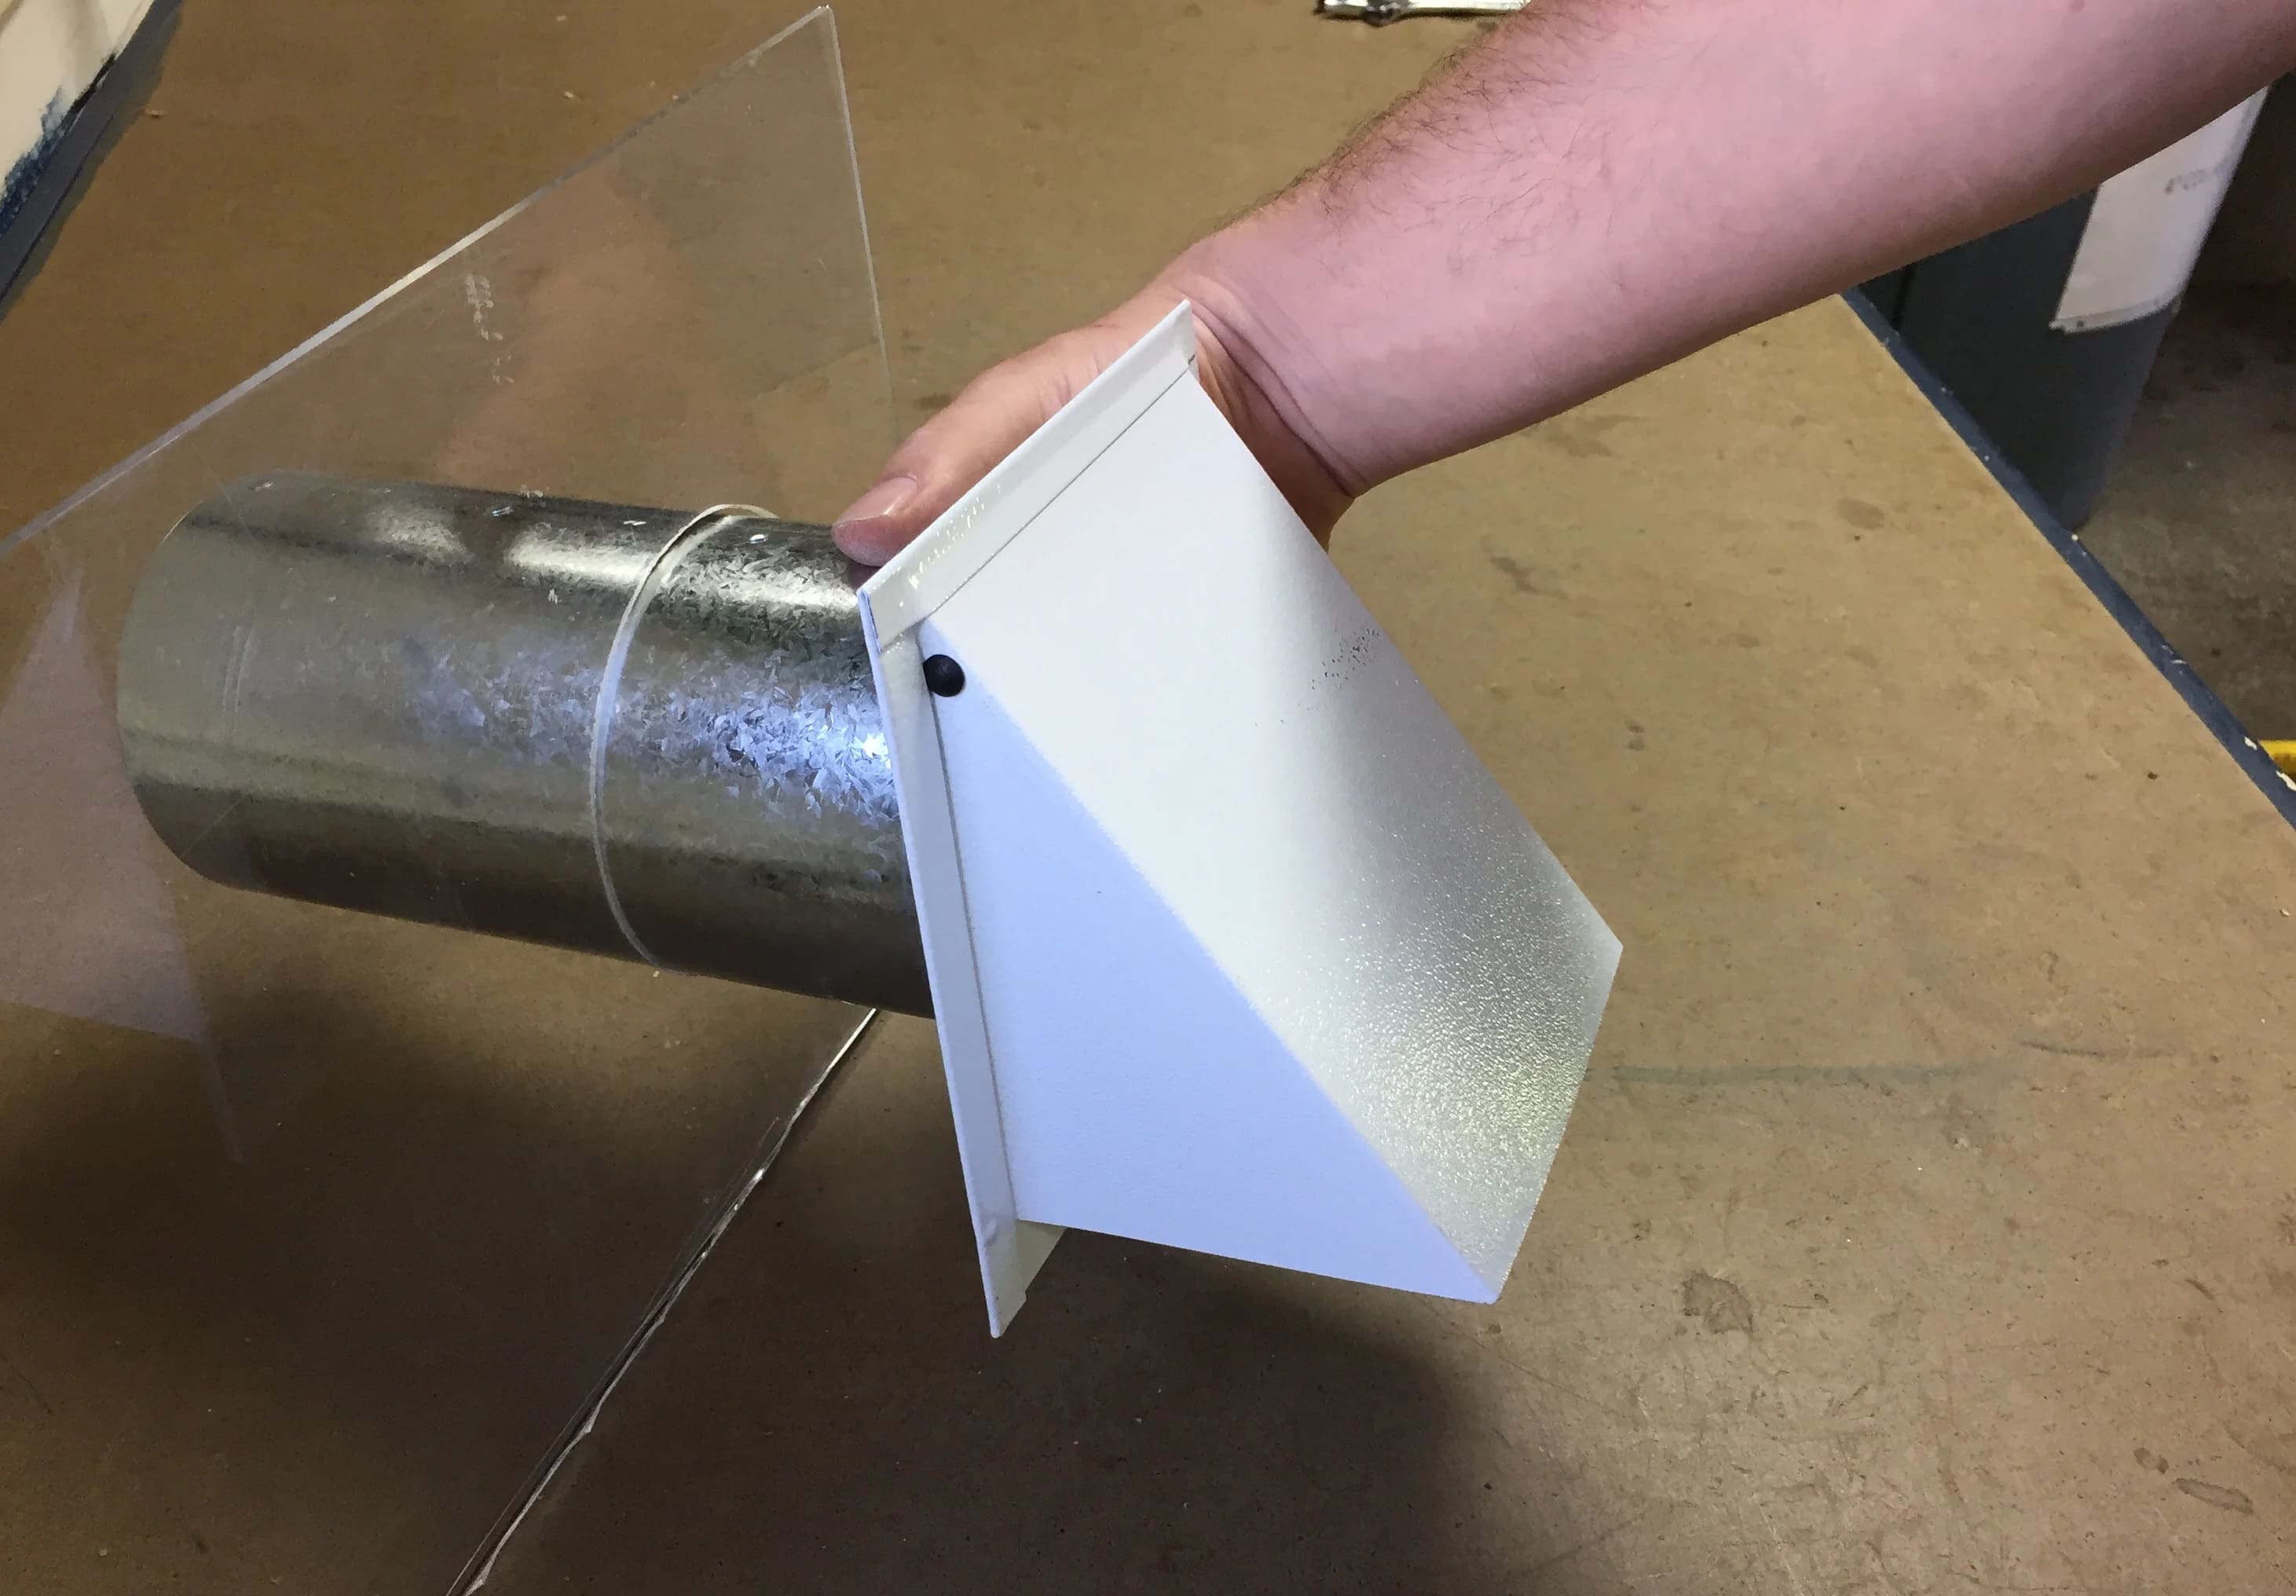
Step 5: Attach the Vent Hood
After connecting the vent hose to the dryer, the next step is to attach the vent hood to the exterior wall or roof. The vent hood acts as the outlet for the hot air and moisture from your dryer, allowing it to safely escape outside.
Here’s how to attach the vent hood:
- Determine the appropriate location on the exterior wall or roof for the vent hood. This should be a convenient and accessible spot that allows for proper airflow and ventilation.
- Using a marker or pencil, mark the location where the vent hood will be installed.
- Align the vent hood with the marked spot and ensure it is level. Secure it in place using screws or other appropriate fasteners. Make sure the vent hood is tightly attached to prevent any air leaks.
- If necessary, cut a hole through the exterior wall or roof to accommodate the vent hood. Use caution and follow safety guidelines, such as wearing protective gear and using appropriate tools.
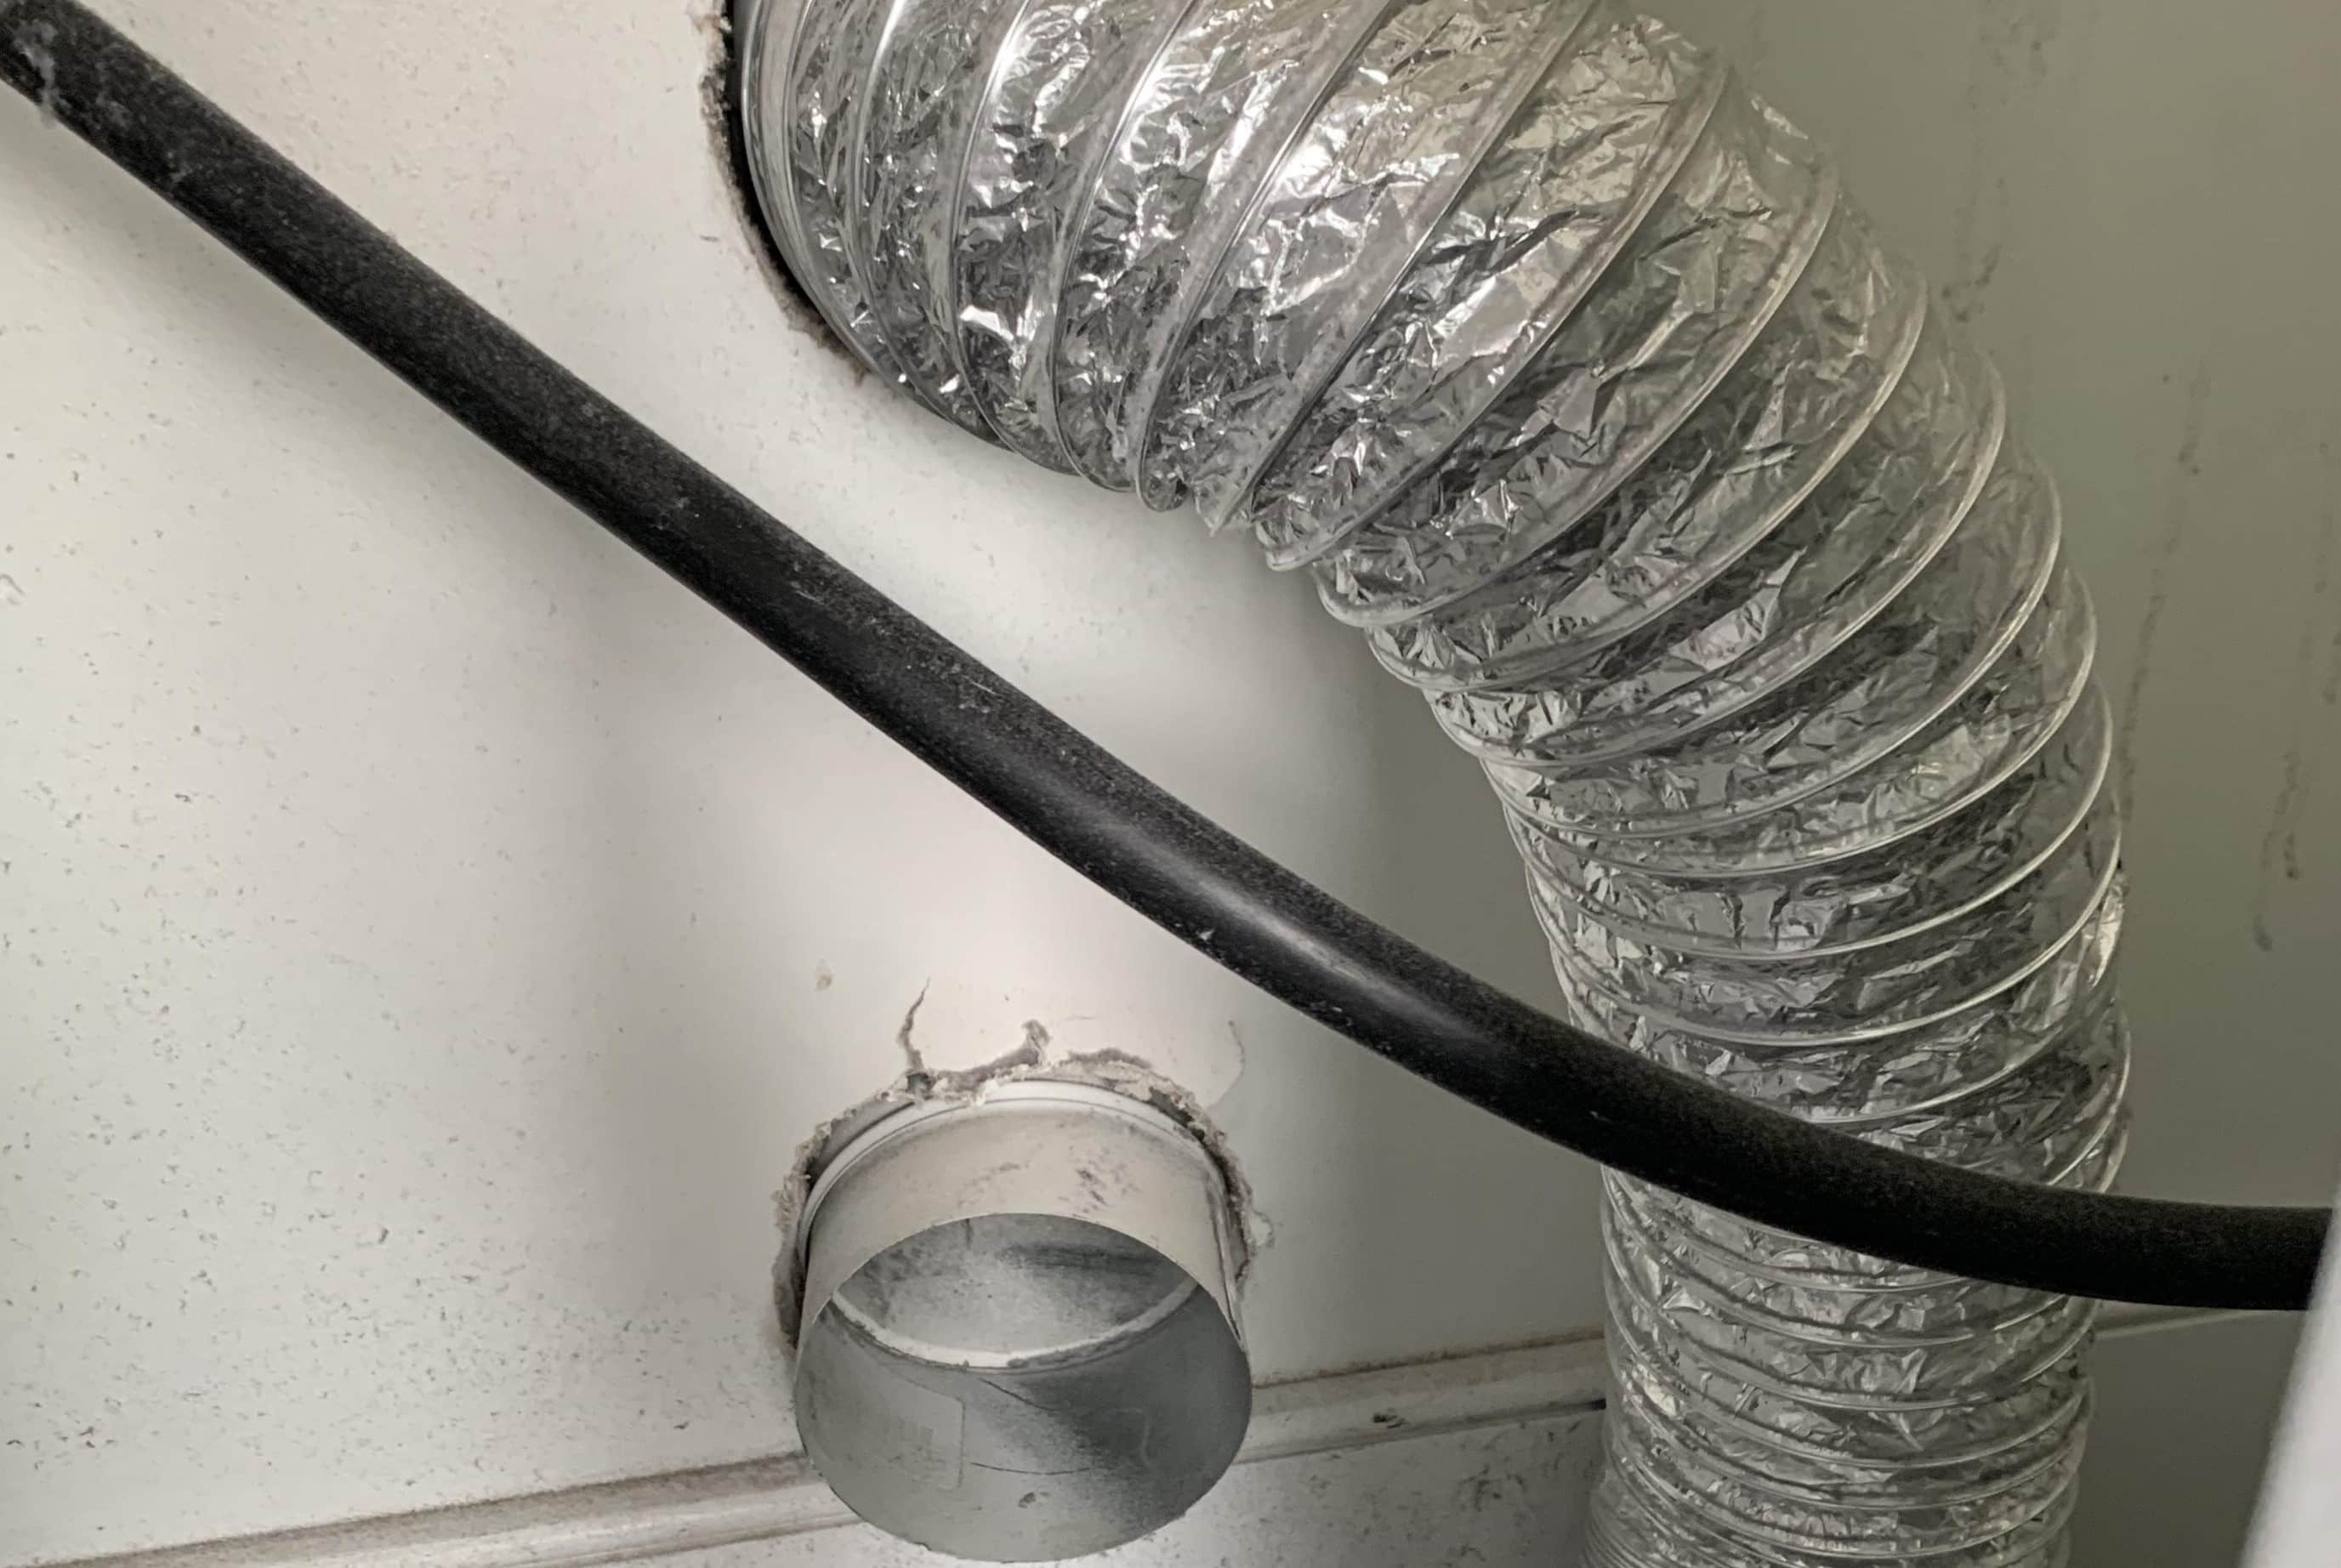
- Once the vent hood is securely installed, connect the other end of the vent hose to the opening on the back of the vent hood. Ensure a tight fit and use duct tape or a hose clamp to secure the connection if needed.
- Inspect the vent hood and hose to make sure there are no obstructions or blockages that could impede airflow. Clear any debris or buildup that may have accumulated during installation.
Properly attaching the vent hood is crucial to ensure that hot air and moisture can be efficiently expelled from your home. It helps maintain a safe and functional dryer vent system.
Once the vent hood is securely in place, you’re ready to move on to the next step: securing the vent hose to the wall.
HTML Valid.
Step 6: Secure the Vent Hose to the Wall
Securing the vent hose to the wall is an important step to ensure that it remains in place and properly directs the hot air and moisture out of your home. This step will help prevent the vent hose from sagging or becoming disconnected over time.
Follow these steps to secure the vent hose to the wall:
- Determine the path that the vent hose will take from the dryer to the vent hood. Ensure that it is free from any obstructions or sharp turns.
- Using appropriate materials such as adjustable metal straps or clamps, secure the vent hose to the wall at regular intervals. This will prevent the hose from sagging and keep it in position.
- Make sure the straps or clamps are tight enough to hold the vent hose securely, but not overly tight to restrict airflow.
- Ensure that the vent hose is not crushed or kinked at any point along its length. Any restrictions in the hose can lead to reduced airflow and may cause your dryer to work less efficiently.
- Inspect the entire length of the vent hose to ensure that there are no gaps or openings that could leak hot air or moisture into your home. If necessary, use duct tape or hose clamps to seal any connections or gaps.
It’s crucial to regularly check the vent hose for any signs of wear, damage, or blockages. Clear away any lint or debris that may accumulate over time, as this can lead to reduced airflow and potential fire hazards.
By securely attaching the vent hose to the wall, you can maintain a safe and effective dryer vent system, allowing your dryer to operate efficiently and reducing the risk of dryer-related issues.
HTML Valid.
Step 7: Test the Dryer Vent Connection
Once you have completed the installation of the dryer vent, it’s essential to test the connection to ensure everything is working correctly. Testing the dryer vent connection helps confirm that hot air and moisture are effectively being expelled from your home and that there are no issues with the airflow.
Follow these steps to test the dryer vent connection:
- Make sure the dryer is plugged in and turned on.
- Turn on the dryer and let it run for a few minutes.
- While the dryer is running, go outside and locate the vent hood. Feel for any warm air or moisture being expelled from the vent hood.
- If you do not feel any warm air or notice any moisture, there may be an issue with the vent connection. Double-check that the vent hose is securely attached to both the dryer and the vent hood.
- Inspect the vent hose for any blockages or restrictions that may be impeding the airflow. Clear away any debris if necessary.
- If the issue persists, it may be necessary to consult a professional to assess and resolve the problem. They can further inspect the vent system and ensure proper ventilation.
Regularly testing the dryer vent connection helps optimize the performance of your dryer and minimize the risk of potential hazards, such as lint buildup or reduced airflow.
Keep in mind that it’s important to clean the dryer vent periodically to remove lint and debris that may accumulate over time. This will help maintain a safe and efficient drying operation.
By following these steps and regularly testing the dryer vent connection, you can ensure that your home remains safe, efficient, and free from the risks associated with improperly vented dryers.
HTML Valid.
Conclusion
Congratulations! You have successfully learned how to connect a dryer vent. By following the steps outlined in this guide, you have ensured that hot air and moisture from your dryer are safely and efficiently expelled from your home.
Properly connecting your dryer vent is essential for preventing potential hazards, improving energy efficiency, and prolonging the lifespan of your dryer. It helps maintain a clean and healthy living environment by reducing the risk of mold growth and maintaining proper airflow.
Remember to always choose the correct vent type for your dryer, position the dryer properly, measure and cut the vent hose accurately, connect the vent hose securely to the dryer, attach the vent hood, secure the vent hose to the wall, and test the dryer vent connection to confirm optimal performance.
Regular maintenance should also be a priority. Periodically inspect the vent system for any blockages or obstructions, and clean the vent hose and vent hood to remove lint and debris. This will help maintain a safe and efficient drying process.
If you encounter any issues or are unsure about the installation process, it is always recommended to consult a professional. They can provide expert guidance and ensure that the dryer vent is installed correctly and in compliance with local building codes.
By properly connecting your dryer vent, you can enjoy the benefits of a safer, more efficient, and longer-lasting dryer. Your home will thank you for it!
HTML Valid.
Frequently Asked Questions about How To Connect A Dryer Vent
Was this page helpful?
At Storables.com, we guarantee accurate and reliable information. Our content, validated by Expert Board Contributors, is crafted following stringent Editorial Policies. We're committed to providing you with well-researched, expert-backed insights for all your informational needs.