Home>Home Maintenance>How To Relocate A Dryer Vent

Home Maintenance
How To Relocate A Dryer Vent
Modified: October 20, 2024
Learn how to properly relocate a dryer vent with our expert tips and step-by-step guide. Ensure efficient home maintenance and prevent potential hazards.
(Many of the links in this article redirect to a specific reviewed product. Your purchase of these products through affiliate links helps to generate commission for Storables.com, at no extra cost. Learn more)
Introduction
Relocating a dryer vent can be necessary for a variety of reasons. Whether you are renovating your laundry area, adding a new room, or simply rearranging your appliances, moving the dryer vent may be a task you need to undertake. While it may seem like a daunting task, with the right guidance and tools, it can be a manageable project.
In this article, we will guide you through the process of relocating a dryer vent. We will provide step-by-step instructions and offer valuable tips to ensure a successful and safe relocation. By following these guidelines, you can optimize your dryer’s efficiency while maintaining the safety and function of your home.
Before we dive into the steps involved in relocating a dryer vent, let’s explore some common reasons why you may need to undertake this task.
Key Takeaways:
- Relocating a dryer vent involves turning off the power, disconnecting the dryer, removing the existing vent, determining the new location, and installing the new vent hole. It’s crucial to follow safety precautions and ensure proper ventilation for efficient dryer operation.
- Gathering the necessary materials and tools, connecting the ductwork, securing the vent cap, testing the ventilation, and reconnecting the dryer are essential steps in successfully relocating a dryer vent. Following these steps ensures a safe and efficient ventilation system.
Read more: How To Vent A Dryer
Reasons for Relocating a Dryer Vent
There are several reasons why you may need to relocate a dryer vent in your home. Understanding these reasons will help you determine if it’s necessary to undertake the task and guide you in planning the relocation effectively. Here are some common scenarios that may require relocating a dryer vent:
- Home Renovations: During a home renovation or remodeling project, you might find the need to relocate the dryer vent to accommodate a new layout or design. This could involve moving the laundry area or changing the placement of your appliances.
- New Room Addition: If you are adding a new room to your home, such as a basement or an extension, you will need to reroute the dryer vent to accommodate the new space. It’s important to ensure that the dryer ventilation reaches outside of the new room effectively.
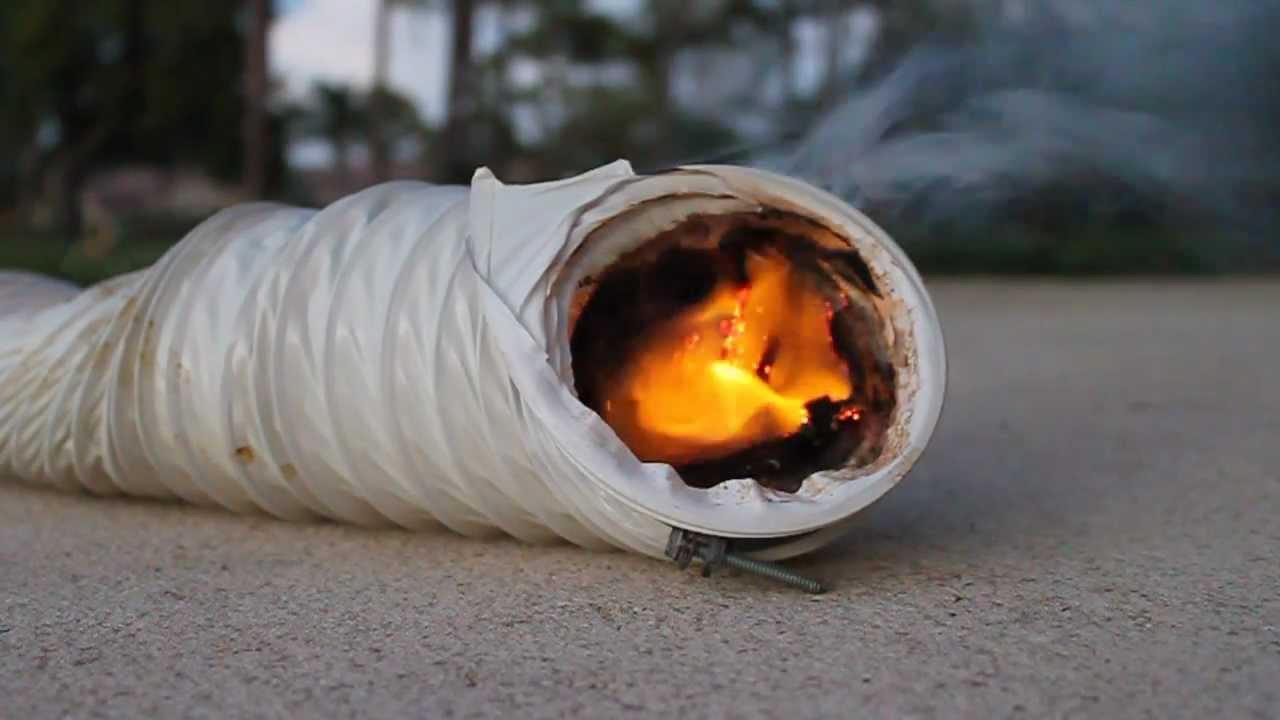
- Improved Ventilation: In some cases, the existing dryer vent location may not provide optimal ventilation. This could be due to issues like an extended duct run, bends, or a lack of proper airflow. Relocating the vent can help improve the efficiency and performance of your dryer.
- Compliance with Building Codes: If you have recently discovered that your current dryer vent location does not meet local building codes or regulations, you will need to relocate it to comply with the required guidelines. This is crucial for safety and to prevent fire hazards.
- Preventing Moisture Damage: In certain situations, the current vent placement may be causing moisture buildup or damage to your walls or surrounding structures. Relocating it to a more suitable location can prevent these issues and ensure the longevity of your home.
By understanding the reasons behind relocating a dryer vent, you can evaluate whether or not it’s necessary in your specific situation. Now that you know why you might need to undertake this task, let’s move on to the next steps: assessing the new location and gathering the necessary materials and tools.
Assessing the New Location
Before you begin the process of relocating your dryer vent, it’s crucial to assess the new location carefully. This step will help you determine the feasibility of the relocation and ensure that the new spot meets the necessary requirements for safe and efficient ventilation. Here are some factors to consider when assessing the new location:
- Ventilation Path: Look for a suitable area where the dryer vent can be installed with a clear path to the outside. Ensure that there are no obstructions, such as trees, electrical wires, or other appliances, blocking the airflow.
- Proximity to Combustible Materials: Keep in mind that dryer vents can get hot during operation. Choose a location that is away from any combustible materials, such as insulation, wood, or fabrics, to reduce the risk of fire hazards.
- Accessibility: Consider the accessibility of the new location for maintenance and cleaning. It should be easily reachable so that you can regularly remove lint buildup and ensure proper functioning of the vent.
- Building Codes and Regulations: Check your local building codes and regulations regarding dryer vent installations. Ensure that the new location adheres to these guidelines to avoid any issues in the future.
- Duct Length: Evaluate the length of the duct needed to connect the dryer to the new vent location. Excessive duct length or too many bends can reduce the efficiency of the dryer. It’s best to keep the duct run as short and straight as possible.
By carefully assessing the new location, you can make informed decisions about the feasibility and suitability of relocating your dryer vent. Once you have determined the new spot, it’s time to gather the necessary materials and tools for the relocation process. Let’s explore what you’ll need in the next section.
Materials and Tools needed
Before you begin relocating your dryer vent, it’s essential to gather all the necessary materials and tools. Having these items on hand will ensure a smooth and efficient relocation process. Here’s a list of the materials and tools you’ll need:
Materials:
- Dryer vent kit: This includes the vent pipe, elbows, clamps, and a vent cap.
- Dryer duct: Ensure you have enough length to reach the new vent location.
- Tape or foil duct sealer: Used to seal the joints between duct sections for proper airflow and to prevent leaks.
- Mounting hardware: Screws, nails, or anchors to secure the vent cap in place.
Tools:
- Adjustable wrench: Used to disconnect and connect the dryer vent.
- Screwdriver: Needed to remove and install screws or fasteners.
- Measuring tape: To measure the distance for the new vent location and cut the duct to the required length.
- Hacksaw or duct cutter: Used to cut the duct to the appropriate size.
- Cordless drill: Required for securing the vent cap and making holes if needed.
- Level: Used to ensure the vent pipe is properly aligned.
- Work gloves: To protect your hands during the installation process.
- Safety goggles: To protect your eyes from dust and debris.
- Dust mask: Worn to prevent inhalation of dust or insulation particles.
Having these materials and tools ready before you start the project will save you time and ensure that the vent relocation is done correctly. Once you’ve gathered everything, you’re ready to move on to the next steps involved in relocating your dryer vent. The following sections will guide you through each step of the process, ensuring a successful outcome. Let’s get started!
Steps for Relocating a Dryer Vent
Relocating a dryer vent involves a series of steps to ensure a safe and efficient transition. By following these steps carefully, you can successfully relocate your dryer vent to its new location. Here is a step-by-step guide:
- Step 1: Turn off the Power
- Step 2: Disconnect the Dryer
- Step 3: Remove the Existing Vent
- Step 4: Determine the New Location
- Step 5: Install the New Vent Hole
- Step 6: Connect the Ductwork
- Step 7: Secure the Vent Cap
- Step 8: Test the Ventilation
- Step 9: Reconnect the Dryer
Before you start the relocation process, turn off the power to the dryer. This will prevent any accidents or electrical hazards during the installation.
Using an adjustable wrench, disconnect the dryer from the existing vent. This may involve loosening clamps or unscrewing connections. Make sure to support the dryer while doing this to prevent any strain on the vent hose.
Remove the existing vent by unscrewing any fasteners or clamps securing it in place. Carefully remove the vent from the wall or floor, ensuring that no debris or lint enters the ductwork.
Using the assessments made earlier, determine the new location for the dryer vent. Mark the spot where the vent hole will be made, ensuring it aligns with the chosen ventilation path and meets building codes.
Using a cordless drill with a hole saw attachment, carefully create a vent hole in the marked location. Be cautious of any electrical or plumbing lines that may be hidden behind the wall or floor.
Attach the appropriate duct sections and elbows to connect the dryer to the new vent hole. Use foil duct sealer or tape to seal the joints for an airtight connection.
Install the vent cap on the exterior of your home, covering the new vent hole. Use mounting hardware, such as screws or nails, to secure the cap in place. Ensure it is properly aligned and level for optimal airflow.
With the dryer reconnected and the vent cap installed, turn the power back on and run a test cycle. Check for any leaks, obstructions, or airflows issues. If needed, make adjustments to ensure proper ventilation.
Finally, reconnect the dryer to the new vent using clamps or screws. Ensure a secure connection to prevent any leaks or disconnections during operation.
By following these nine steps, you can successfully relocate your dryer vent to its new location. Remember to take necessary safety precautions and consult local building codes to ensure compliance. Once the relocation is complete, enjoy a more efficient and functional laundry area in your home.
Turn off the Power
Before you begin relocating your dryer vent, the first and most crucial step is to turn off the power to the dryer. This step is essential to ensure your safety throughout the process and minimize the risk of electrical accidents.
To turn off the power, locate the dryer’s electrical panel or unplug it from the electrical outlet. If you’re unsure where the electrical panel is, consult the dryer’s manual or refer to the manufacturer’s instructions. In most cases, the electrical panel can be found on the back of the dryer or behind a removable panel on the front.
Once you’ve located the electrical panel, switch off the dryer by flipping the designated circuit breaker or unplugging it from the outlet. It’s crucial to ensure that the power is completely cut off to prevent any accidental electrical shocks during the relocation process.
Turning off the power is especially important because you will be working near electrical connections and components of the dryer. It also ensures that there is no power supply to the vent, reducing the risk of injury while manipulating the ductwork or venting system.
Remember that electrical safety should be a top priority when working with any household appliances. Always follow proper procedures to prevent accidents and ensure a safe working environment.
Once you have turned off the power to the dryer, you are ready to move on to the next step: disconnecting the dryer from the existing vent.
Disconnect the Dryer
After you have turned off the power to the dryer, the next step is to disconnect the dryer from the existing vent. This step is crucial to ensure that you can safely remove the vent and proceed with relocating it elsewhere.
Here’s a step-by-step guide on how to disconnect the dryer from the existing vent:
- Start by moving the dryer away from the wall, creating enough space to access the back of the appliance.
- Locate the connection point between the dryer and the vent. It is typically located at the back of the dryer near the bottom or at the side.
- Using an adjustable wrench, loosen the clamp or fasteners securing the vent hose to the dryer. Some dryers may have screws or other types of connectors that need to be removed.
- Gently pull the vent hose away from the dryer, ensuring not to damage or strain the hose. Be cautious if the hose is tightly connected, as excessive force can cause it to snap or break.
- Inspect the vent opening on the dryer and ensure that there is no lint or debris blocking it. Clean out any accumulated lint using a vacuum cleaner or a brush.
- Maintain support for the dryer while disconnecting the vent hose to prevent it from tipping or falling.
It is essential to take precautions while disconnecting the dryer to avoid damaging any components or causing injury. If you encounter any difficulties or resistance during the disconnection process, refer to the dryer’s manual or consult a professional for guidance.
By following these steps, you can safely and effectively disconnect the dryer from the existing vent. Now that the dryer is disconnected, you can proceed to the next step: removing the existing vent.
Remove the Existing Vent
With the dryer disconnected, the next step in relocating your dryer vent is to remove the existing vent from its current location. Removing the old vent is crucial to create a clean slate for installing the new vent in the desired spot.
Here’s a step-by-step guide on how to remove the existing vent:
- Inspect the existing vent to identify any fasteners or screws securing it in place. These may be located on the exterior wall or floor.
- Using a screwdriver or appropriate tool, remove any screws or fasteners securing the vent to the wall or floor. Be careful not to damage the surrounding area during this process.
- Gently pull the vent away from the wall or floor to detach it from the mounting point. Take note of any additional connections, such as screws or brackets, that may need to be loosened or removed.
- Inspect the area around the vent opening for any signs of damage or deterioration. This is an excellent opportunity to assess the condition of the surrounding structure and make any necessary repairs before installing the new vent.
- Remove any debris or lint buildup in the vent opening using a vacuum cleaner or brush. It’s crucial to clean the area thoroughly to ensure optimal air flow once the new vent is installed.
When removing the existing vent, it’s important to use caution and ensure proper handling to prevent any damage to the surrounding area or injury to yourself. If you encounter any difficulties or if the vent is difficult to remove, consult a professional for assistance.
By following these steps, you can successfully remove the existing vent and prepare the area for the installation of the new vent. With the old vent removed, you’re now ready to move on to the next step: determining the new location for the vent.
Determine the New Location
Once you have removed the existing vent, the next step in relocating your dryer vent is to determine the new location where the vent will be installed. Choosing the right location is crucial for ensuring efficient airflow and safe operation of your dryer. Here’s a step-by-step guide on how to determine the new location:
- Assess the available space: Start by evaluating the area where you want to relocate the dryer vent. Consider factors such as proximity to the dryer, accessibility for maintenance, and clearance from obstructions like windows, doors, or electrical components.
- Check building codes and regulations: Research local building codes and regulations to ensure compliance for vent installations. These codes typically specify required distances from windows or property lines and may provide guidelines for vent material and placement.
- Consider ventilation path: Identify the most direct and obstruction-free path for venting the dryer air to the outside. Ideally, the new location should provide a clear and straight path for the vent pipe, minimizing resistance and maximizing airflow.
- Choose an appropriate vent height: Determine the height at which the new vent will be installed on the exterior of your home. The vent should be positioned above ground level to prevent debris or water from entering but low enough for easy access during maintenance.
- Mark the new vent location: Use a pencil or marker to mark the exact spot where the new vent hole will be created. Ensure that the mark is clearly visible and aligned with the chosen ventilation path.
During this step, take the time to carefully plan and visualize the new location of the vent. Consider factors such as aesthetics, convenience, and safety to ensure that the chosen location will meet your requirements.
Remember to take measurements and double-check the chosen location against the dryer’s specifications and the available duct length. This will help ensure that the new vent will properly connect to the dryer and allow for efficient ventilation.
By following these steps, you can accurately determine the new location for your dryer vent. With the location determined, you’re now ready to move on to the next step: installing the new vent hole.
When relocating a dryer vent, make sure to use the proper materials and follow local building codes. It’s important to ensure the vent has a clear path to the outside to prevent lint buildup and potential fire hazards.
Install the New Vent Hole
Once you have determined the new location for your dryer vent, the next step is to install the new vent hole. Creating a properly sized and aligned vent hole is crucial for efficient airflow and a secure connection to the vent pipe. Here’s a step-by-step guide on how to install the new vent hole:
- Start by gathering the necessary tools for this step, including a cordless drill and a hole saw attachment.
- Position the drill with the appropriate hole saw size at the marked spot for the vent hole.
- Hold the drill steady and apply light pressure as you begin to drill into the wall or floor. Ensure that the hole saw is perpendicular to the surface to create a clean and even hole.
- Continue drilling until the hole saw has cut through the wall or floor, creating the desired vent hole size. Be cautious of any electrical or plumbing lines that may be hidden behind the surface.
- Remove the hole saw from the drill and carefully clean any debris or excess material from the new vent hole.
- Inspect the vent hole to ensure its alignment and size. Make any necessary adjustments or refinements to ensure a proper fit for the new vent.
While drilling the hole, it’s essential to take safety precautions. Wear safety goggles to protect your eyes from debris and a dust mask to avoid inhaling any dust or insulation particles. Additionally, ensure that you are using the proper size hole saw attachment for the vent hole to achieve the desired diameter.
Keep in mind that the location and size of the vent hole may vary depending on the specific requirements of your dryer and the building codes in your area. Always check the manufacturer’s recommendations and local regulations to ensure compliance.
With the vent hole installed, you’re now ready to move on to the next step: connecting the ductwork to complete the relocation process.
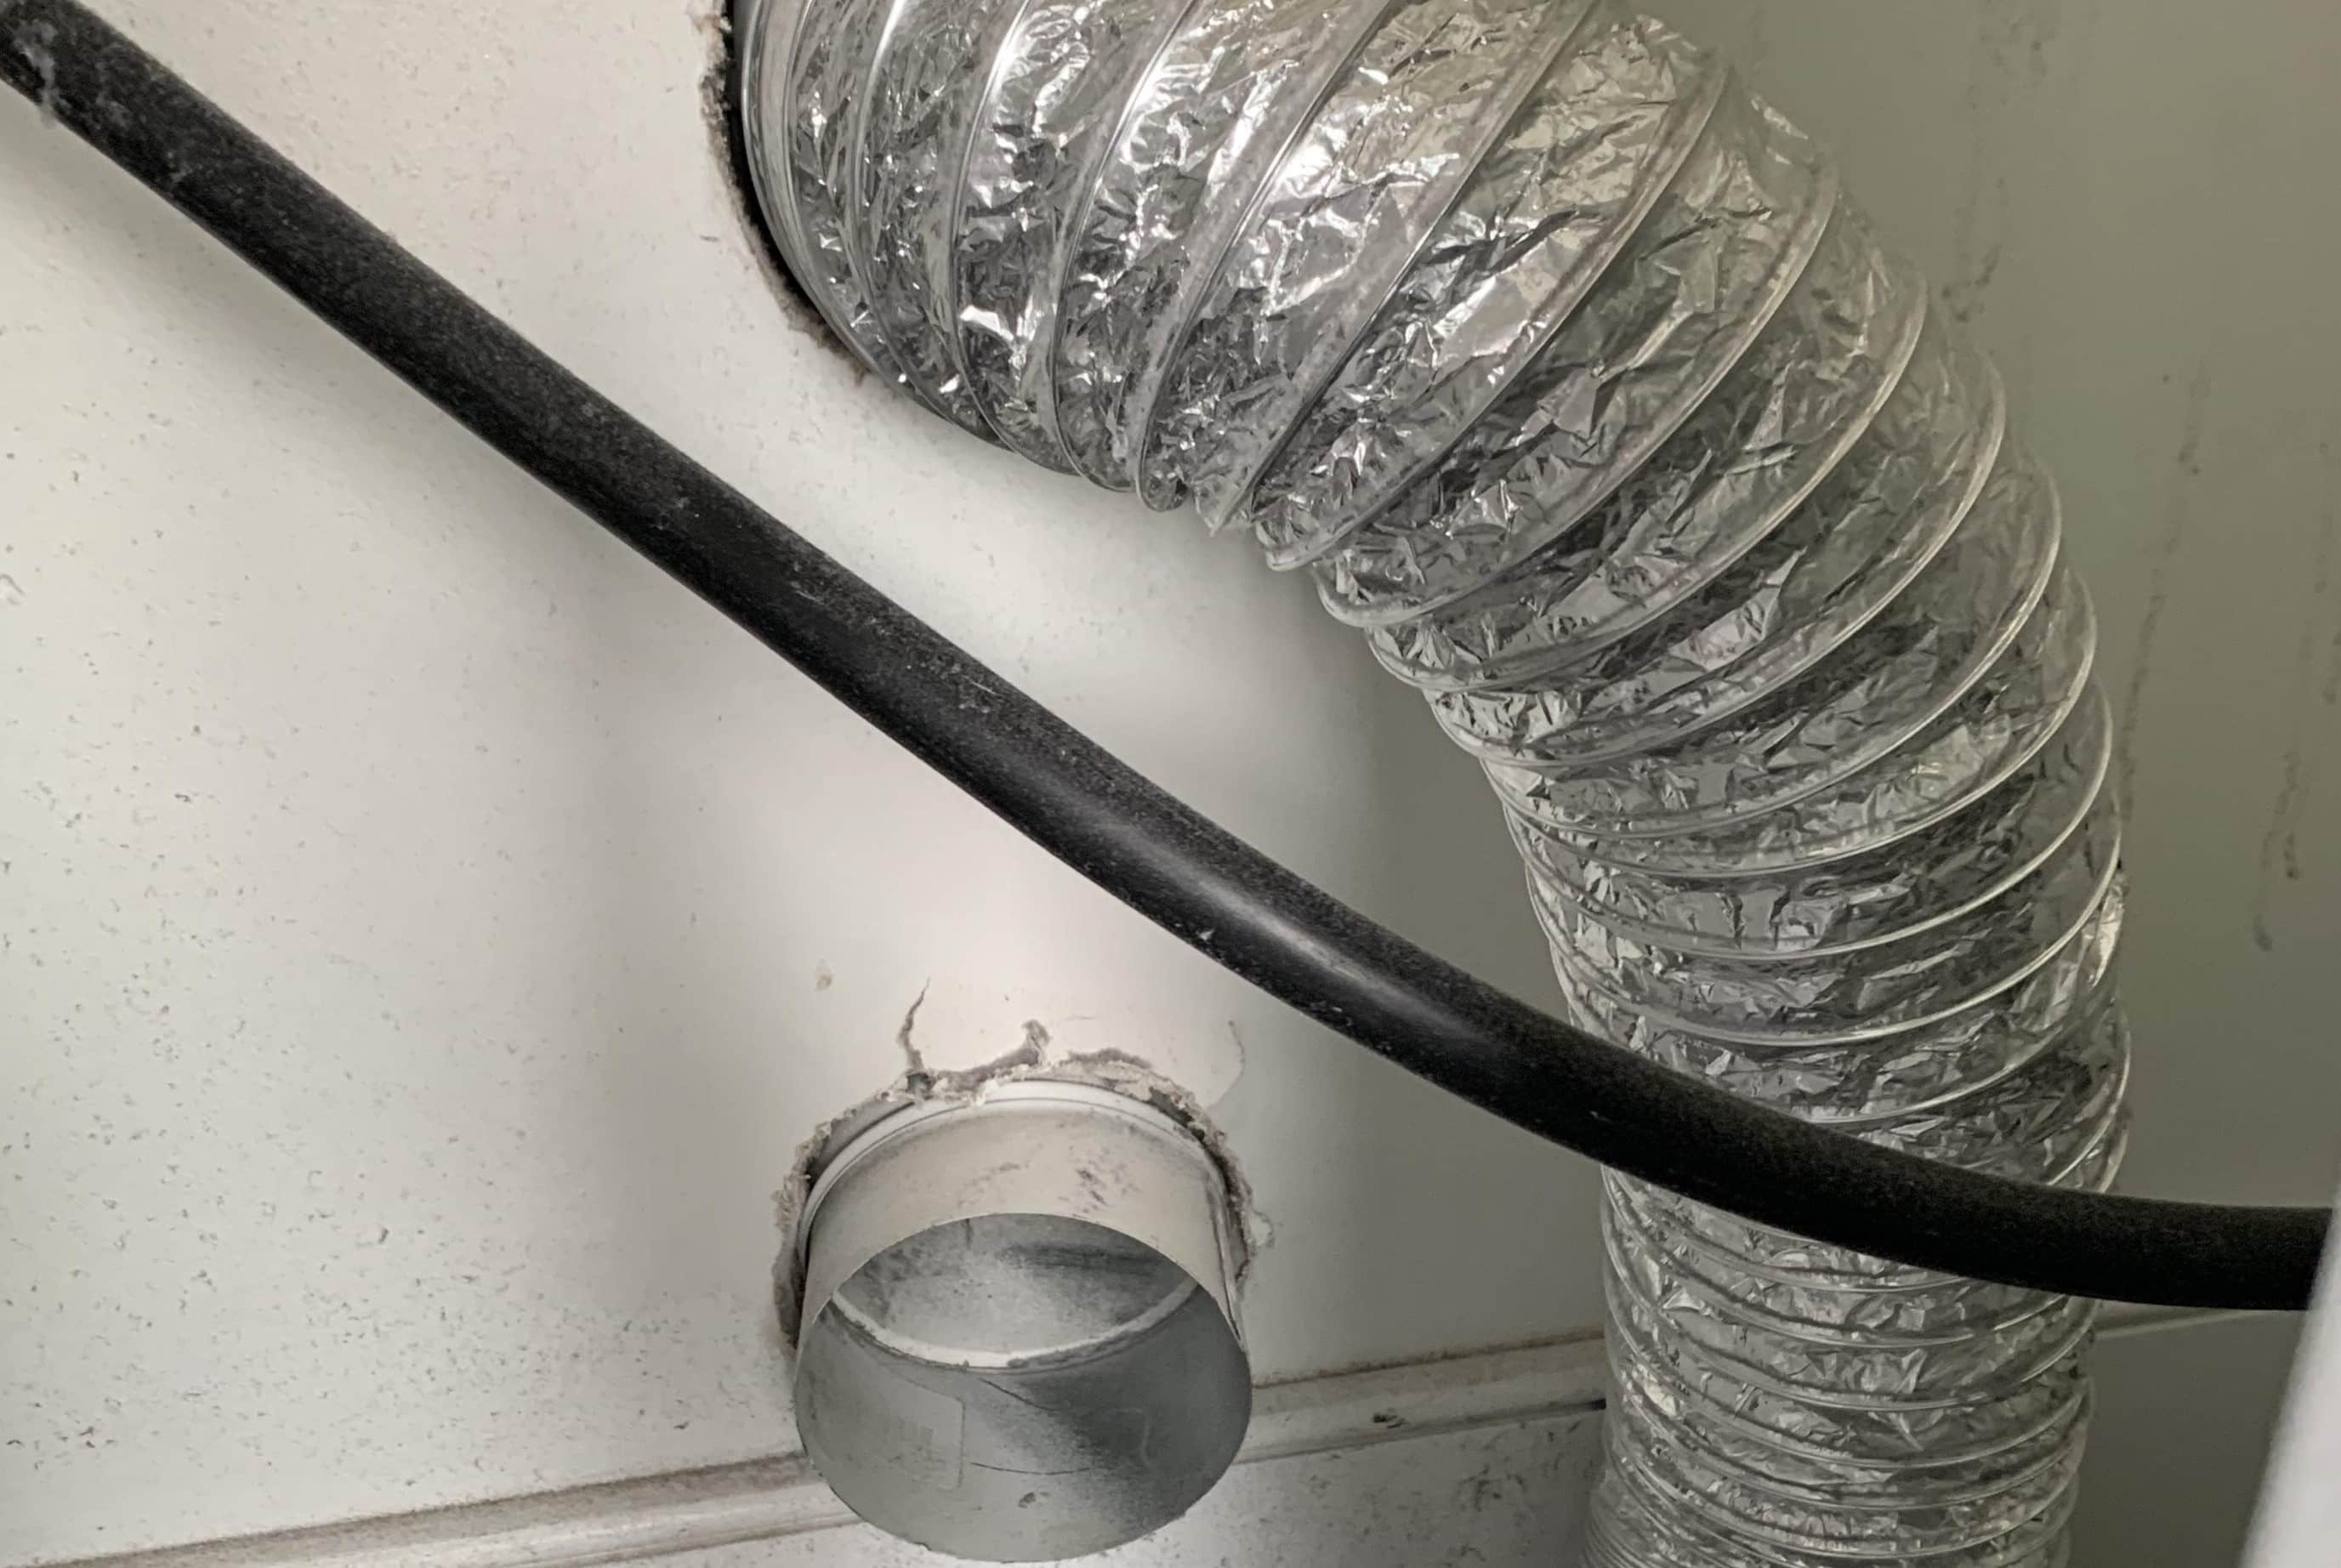
Connect the Ductwork
With the new vent hole in place, the next step in relocating your dryer vent is to connect the ductwork. This involves attaching the appropriate duct sections and elbows to create a pathway for the airflow from the dryer to the new vent hole. Here’s a step-by-step guide on how to connect the ductwork:
- Start by assessing the length and configuration needed for the ductwork to connect the dryer to the new vent hole. Take accurate measurements and ensure that you have enough duct material to create a smooth and direct path.
- Place the dryer closer to the new vent hole. Gently feed the ductwork through the opening, ensuring that it is properly aligned and not kinked or twisted.
- Attach the appropriate fittings, such as elbows or connectors, to the ends of the ductwork to create a secure and tight connection. Use either clamps or foil duct tape to secure the joints and ensure proper airflow.
- Secure the ductwork to the dryer and the wall or floor using additional clamps or straps. This will prevent the duct from becoming loose or dislodged during operation.
- Inspect the entire length of the ductwork to ensure that there are no gaps, leaks, or obstructions. Use foil duct tape or a duct sealer to seal any connections or gaps to prevent air leaks and maximize efficiency.
When connecting the ductwork, it’s crucial to follow the manufacturer’s instructions and local building codes to ensure proper installation. Use high-quality materials and secure connections to prevent any airflow restrictions or leaks.
Additionally, ensure that the ductwork is properly supported throughout its length to prevent sagging or excessive bends. This will promote optimal airflow and prevent lint buildup that can lead to clogs and reduce the efficiency of your dryer.
By following these steps, you can successfully connect the ductwork and create a reliable pathway for the ventilation from your dryer to the new vent hole. With the ductwork installed, you’re now ready to move on to the next step: securing the vent cap.
Read more: How To Replace Dryer Vent
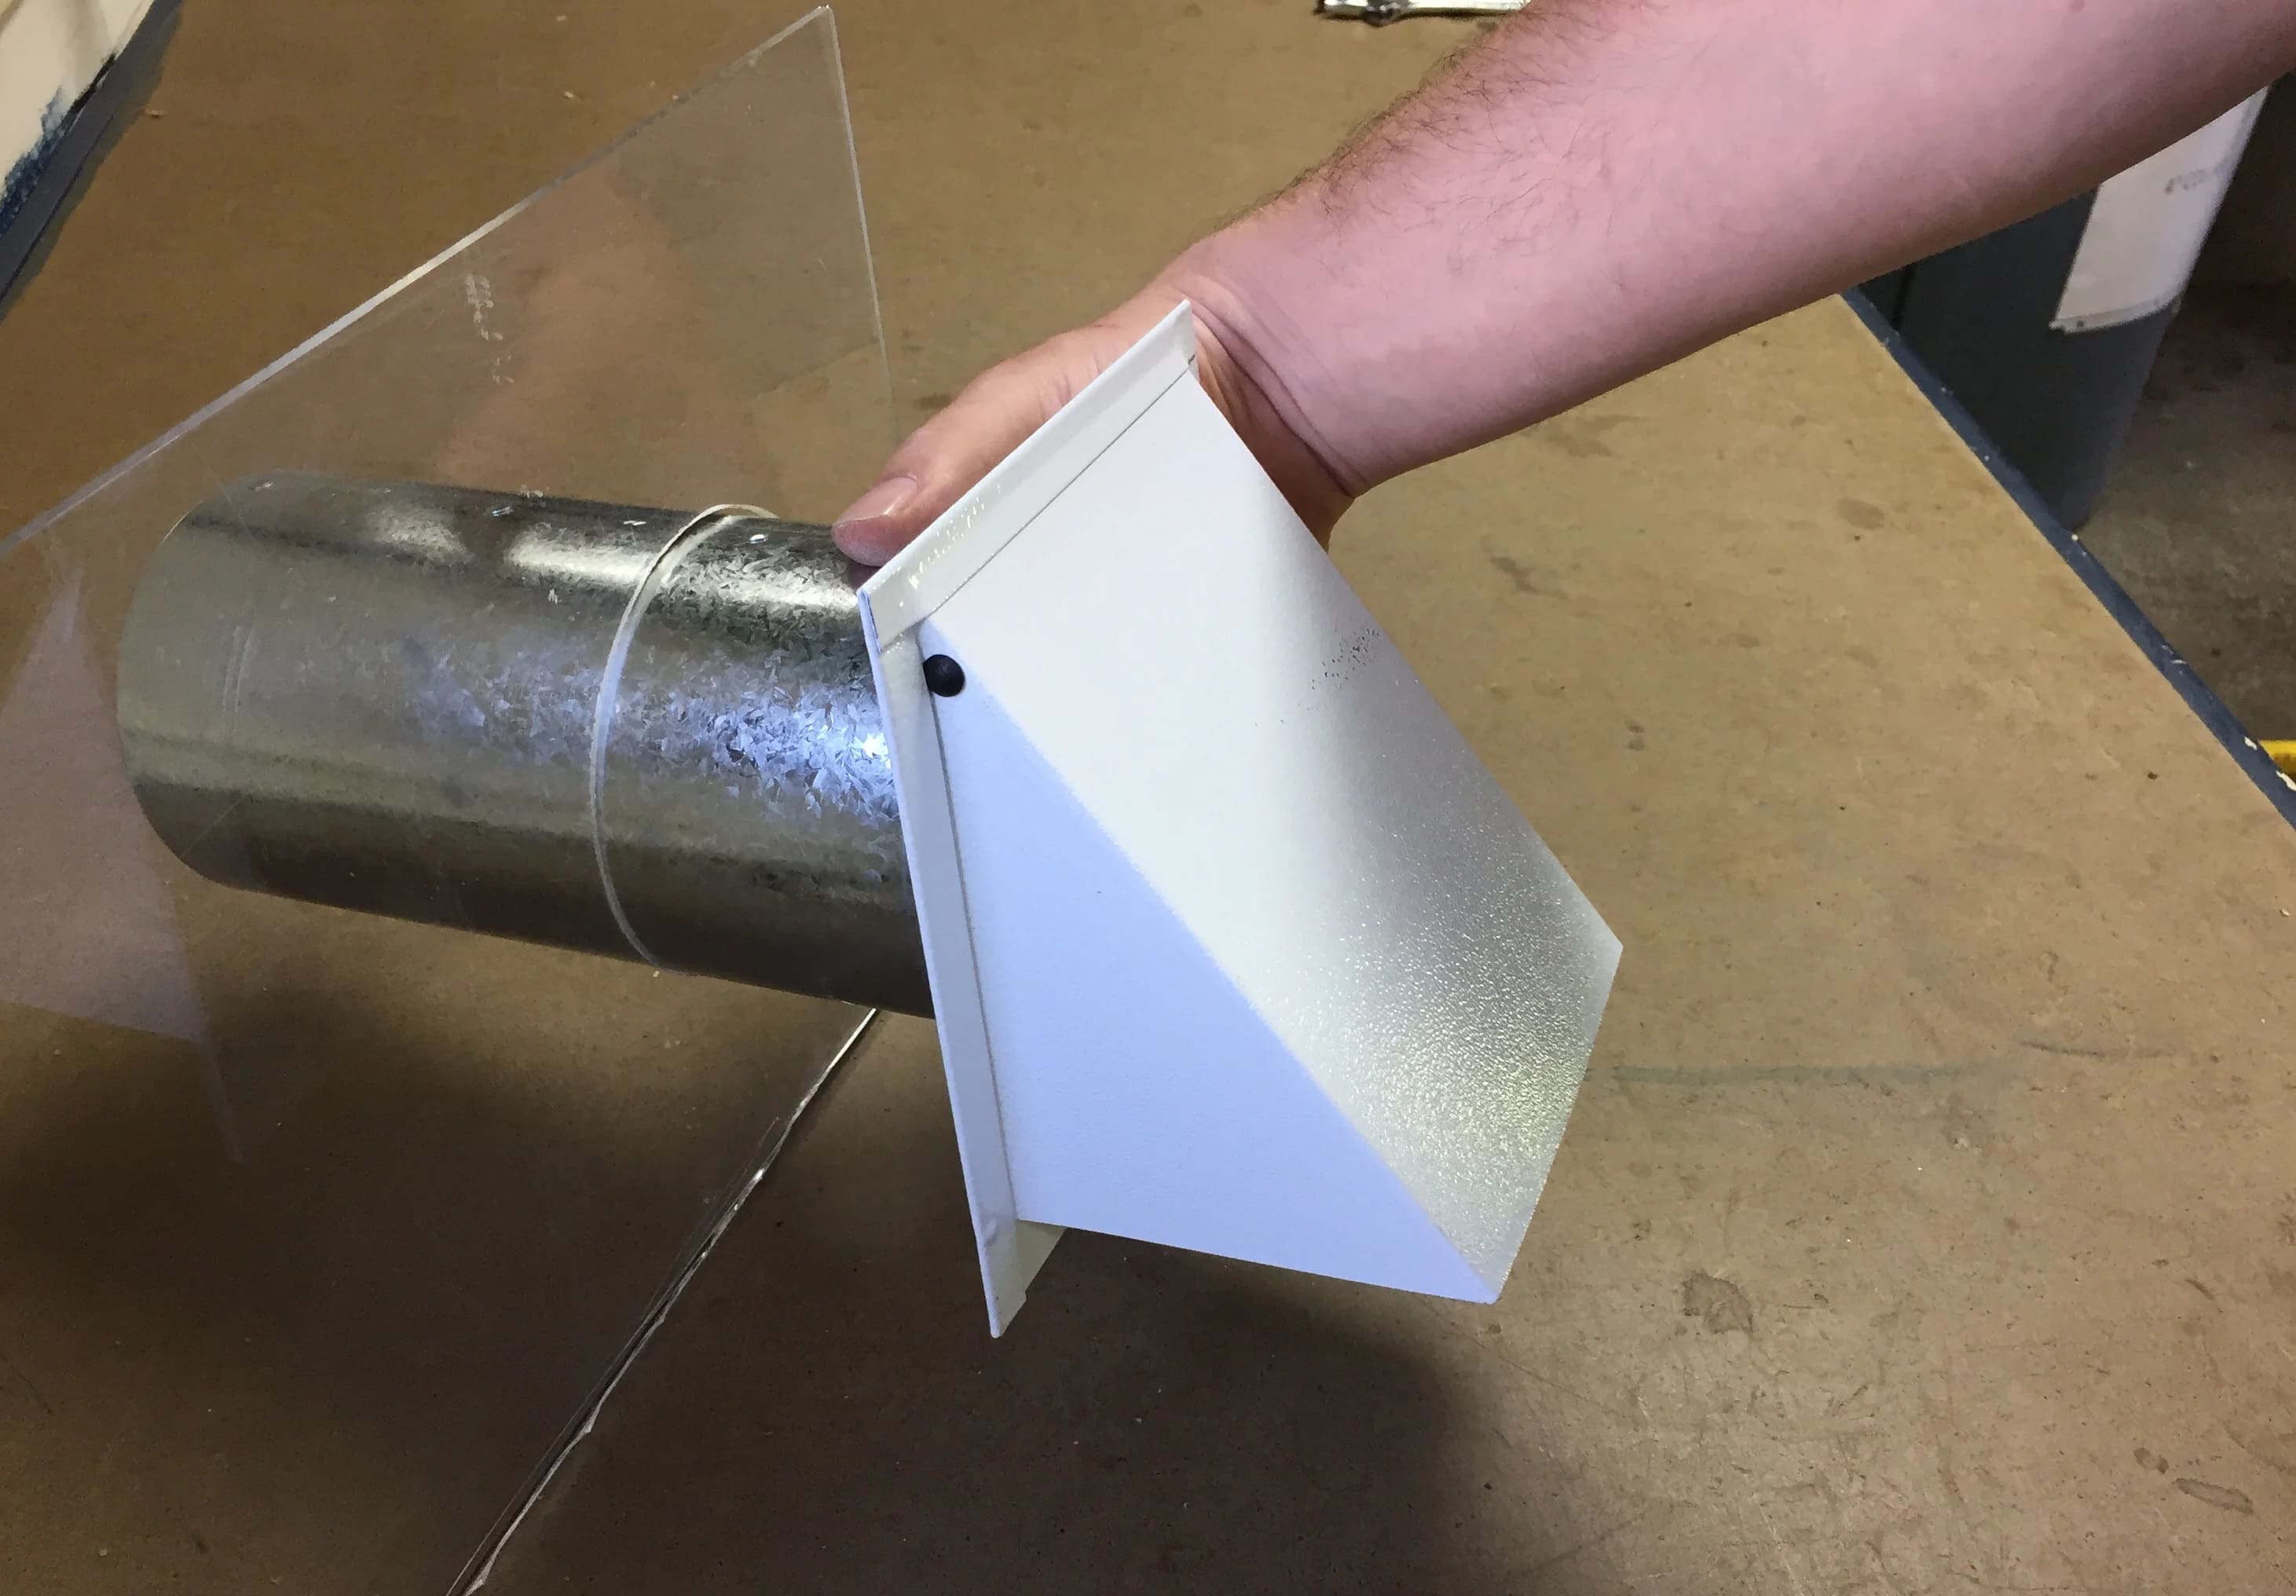
Secure the Vent Cap
Once the ductwork is connected, the next step in relocating your dryer vent is to secure the vent cap. The vent cap is an important component as it protects the vent opening from outside elements and ensures proper ventilation. Here’s a step-by-step guide on how to secure the vent cap:
- Start by selecting a vent cap that is suitable for your specific venting system and the location of the new vent hole. The vent cap should be able to withstand the weather conditions in your area.
- Position the vent cap over the vent hole on the exterior of your home. Ensure that it is aligned properly and centered over the hole.
- Using the appropriate mounting hardware, such as screws or nails, secure the vent cap to the exterior wall or surface. It’s important to follow the manufacturer’s instructions for securing the vent cap to ensure a secure and watertight connection.
- Check the alignment and levelness of the vent cap to ensure optimal airflow. It should be positioned in a way that allows for the free flow of air while preventing water or debris from entering the vent.
- Tighten the screws or fasteners securely without over-tightening to avoid damaging the vent cap or the exterior surface.
- Inspect the vent cap and surrounding area for any gaps or openings. Use a silicone caulk or weatherproof sealant to seal any gaps to prevent water leaks and maintain the integrity of the venting system.
When securing the vent cap, it’s important to consider the local building codes and regulations. Some areas may have specific requirements for vent cap installation, such as animal guards or specific materials. Ensure that you comply with these regulations to ensure the safe and efficient operation of your dryer vent.
By following these steps, you can securely install and protect the vent opening with a properly aligned and sealed vent cap. With the vent cap secured, you’re now ready to move on to the next step: testing the ventilation system.
Test the Ventilation
After securing the vent cap, the next step in relocating your dryer vent is to test the ventilation system. Testing the system is crucial to ensure that air flows smoothly and efficiently from the dryer to the outside. Here’s a step-by-step guide on how to test the ventilation:
- Turn on the power to the dryer and run a test cycle. Allow the dryer to run for a few minutes to generate airflow.
- While the dryer is running, check the area around the new vent hole for any leaks, gaps, or airflows issues. Ensure that there are no visible signs of air escaping from the connections or vent cap.
- Inspect the ductwork for any areas of excessive condensation, which could indicate inadequate insulation or airflow issues.
- Monitor the dryer’s performance during the test cycle. Ensure that the dryer is generating adequate heat and that clothes are drying in a reasonable amount of time.
- If you notice any issues, such as reduced airflow or poor drying performance, make adjustments to the ductwork and connections as necessary. Check for any obstructions or restrictions that may be affecting the ventilation system.
- If adjustments are needed, repeat the testing process until you are satisfied with the ventilation and dryer’s performance.
Testing the ventilation system is crucial for ensuring that the dryer operates efficiently and effectively. It helps to identify any potential issues or areas that require further attention. By monitoring the system during a test cycle, you can proactively address any problems and make necessary adjustments.
If you encounter persistent issues or difficulties during the testing process, it’s recommended to consult a professional for assistance. They can provide guidance and expertise to ensure that the ventilation system is functioning optimally.
Once you have successfully tested the ventilation system and made any necessary adjustments, you’re almost done with the relocation process. The final step is to reconnect the dryer to the newly relocated vent.
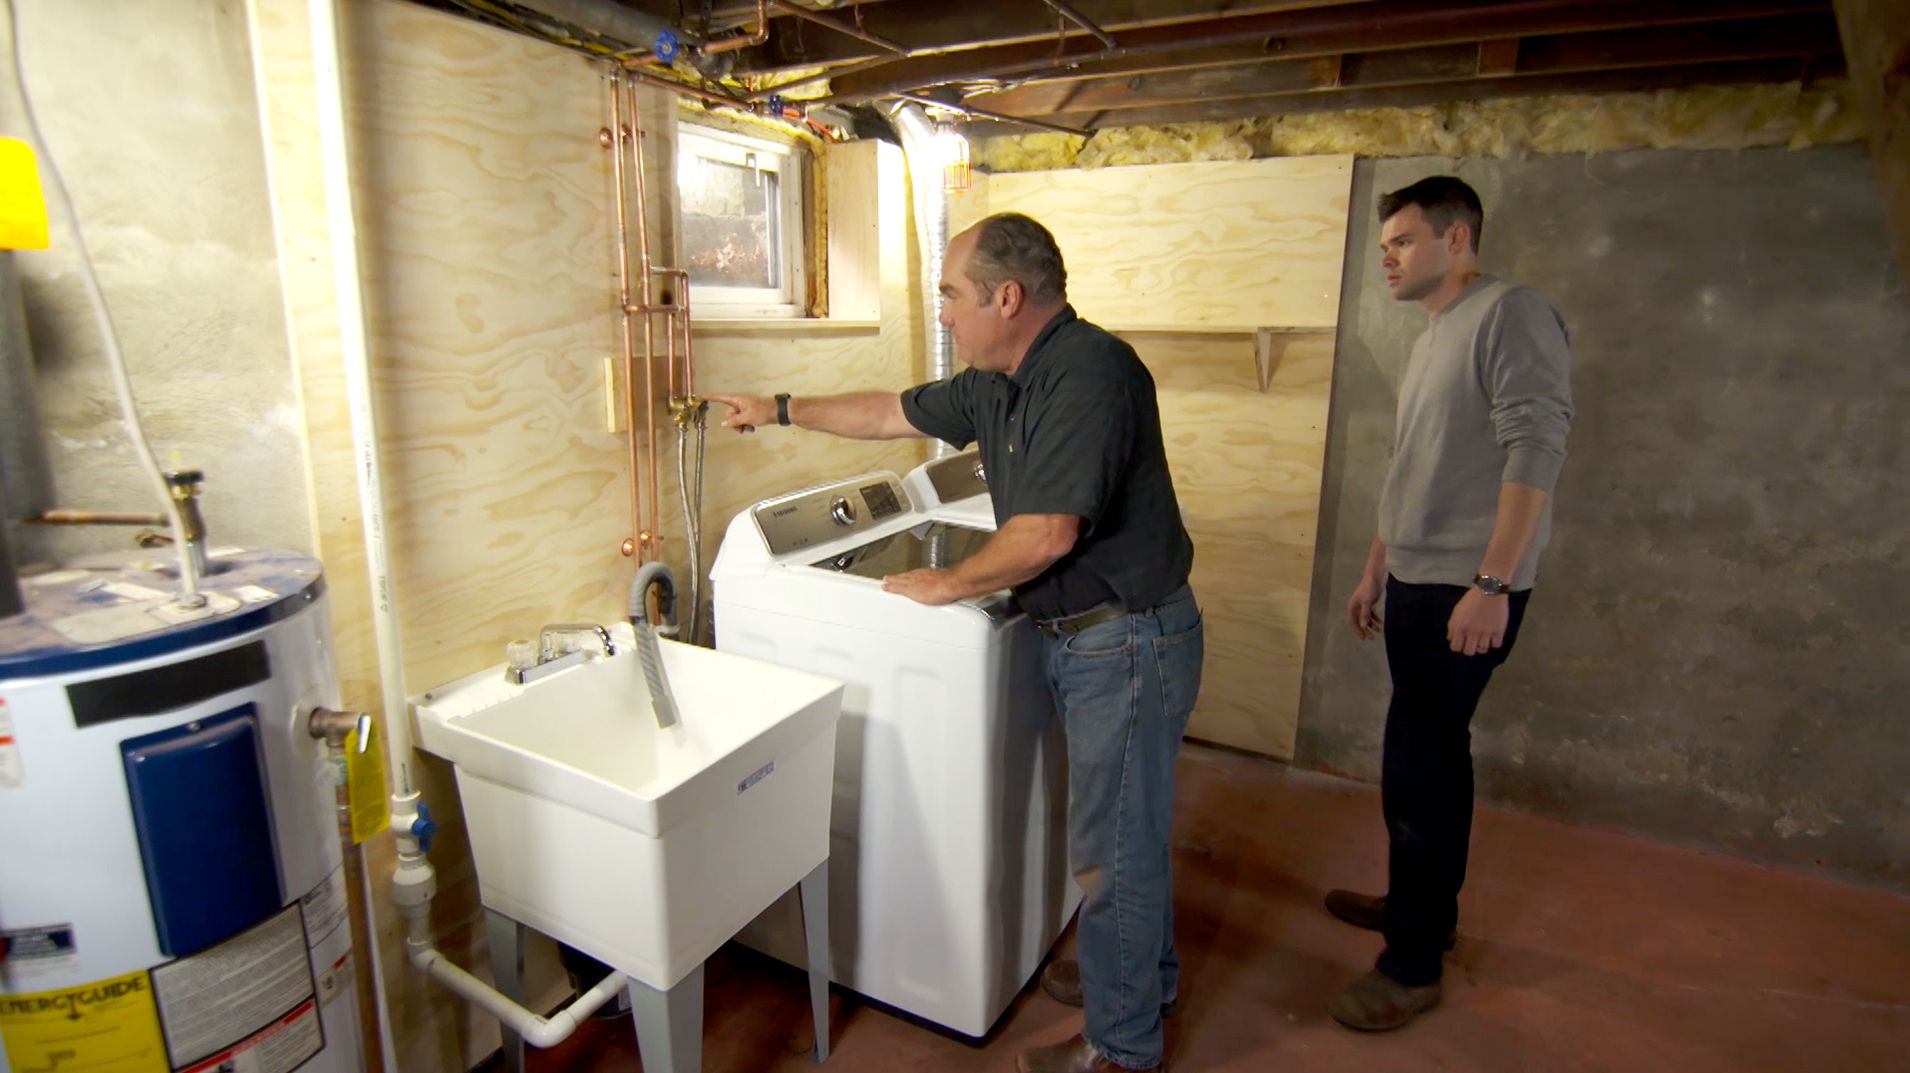
Reconnect the Dryer
After testing the ventilation system, the final step in relocating your dryer vent is to reconnect the dryer. Properly reconnecting the dryer ensures that it is securely and safely connected to the new vent, allowing for efficient airflow and optimal performance. Here’s a step-by-step guide on how to reconnect the dryer:
- Position the dryer back into place, ensuring that it is close to the new vent hole.
- Align the vent opening on the back of the dryer with the new vent hole.
- Using an adjustable wrench, secure the vent hose to the dryer. Tighten any clamps or fasteners to ensure a secure connection.
- Inspect the connection to ensure that it is tight and free of any gaps or leaks. Make any necessary adjustments to create a proper seal.
- Plug in the dryer or switch on the circuit breaker to restore power to the appliance.
- Run a test cycle on the dryer to ensure that it is operating as expected. Monitor for any unusual noises or issues during the drying process.
- Check the vent hose and connections for any signs of air leakage or dislodging. Ensure that the dryer is venting properly without any obstruction or resistance.
When reconnecting the dryer, it’s important to follow the manufacturer’s instructions and recommendations. This includes using the appropriate clamps or fasteners to secure the vent hose to the dryer and ensuring a tight and secure connection.
Take the time to inspect the vent hose and connections for any signs of wear or damage. If you notice any issues, such as cracks or holes in the vent hose, replace it with a new one to maintain optimal airflow and prevent lint buildup.
Once you have reconnected the dryer and conducted a test cycle, you have successfully completed the process of relocating your dryer vent. Enjoy the benefits of a properly functioning and efficiently vented dryer in its new location!
Keep in mind that maintaining the cleanliness of the vent and regular inspections are essential for the continued operation and safety of your dryer. Monitor the vent for any lint buildup or obstructions and clean it as needed to ensure optimal performance.
Congratulations on successfully relocating your dryer vent! By following these steps, you have created a safe and efficient ventilation system for your dryer in its new location.
Conclusion
Relocating a dryer vent may seem like a daunting task, but with proper guidance and the right tools, it can be a manageable project. By following the steps outlined in this article, you can successfully relocate your dryer vent to a new location that better suits your needs or meets building codes.
During the process, it’s important to assess the new location carefully, considering factors such as ventilation path, proximity to combustible materials, and accessibility. This ensures that the new location promotes efficient airflow and minimizes the risk of hazards.
Gathering the necessary materials and tools, such as a dryer vent kit, ductwork, and essential tools like a cordless drill and adjustable wrench, is a crucial step in preparing for the relocation process. Having everything ready before you start will make the installation smoother and more efficient.
The step-by-step instructions provided in this article, from turning off the power and disconnecting the dryer to removing the existing vent, determining the new location, and installing the new vent hole, will guide you through the process in a systematic way.
Securing the vent cap and conducting a thorough test of the ventilation system are essential to ensure proper airflow and performance of the dryer. Pay attention to any adjustments that may be needed to address air leaks, obstructions, or poor drying performance.
Finally, reconnecting the dryer to the newly relocated vent and conducting a final test ensures that the dryer is properly and safely connected for efficient operation.
Remember, safety should always be a priority when working with electrical appliances and handling ductwork. If you’re uncertain about any of the steps or encounter complex issues, it’s recommended to seek professional assistance.
Relocating a dryer vent requires careful planning, attention to detail, and adherence to local building codes. By following the guidelines provided in this article, you can successfully relocate your dryer vent and enjoy a well-ventilated laundry area that meets your specific needs.
With the completion of this project, you can now enjoy optimal dryer performance, efficient airflow, and peace of mind knowing that your dryer vent is functioning safely and effectively in its new location.
Frequently Asked Questions about How To Relocate A Dryer Vent
Was this page helpful?
At Storables.com, we guarantee accurate and reliable information. Our content, validated by Expert Board Contributors, is crafted following stringent Editorial Policies. We're committed to providing you with well-researched, expert-backed insights for all your informational needs.