Home>Home Maintenance>How To Add Freon To Home Air Conditioning Unit
Home Maintenance
How To Add Freon To Home Air Conditioning Unit
Modified: August 24, 2024
Learn how to add freon to your home air conditioning unit with our step-by-step guide. Ensure proper home maintenance for optimal cooling and comfort.
(Many of the links in this article redirect to a specific reviewed product. Your purchase of these products through affiliate links helps to generate commission for Storables.com, at no extra cost. Learn more)
Introduction
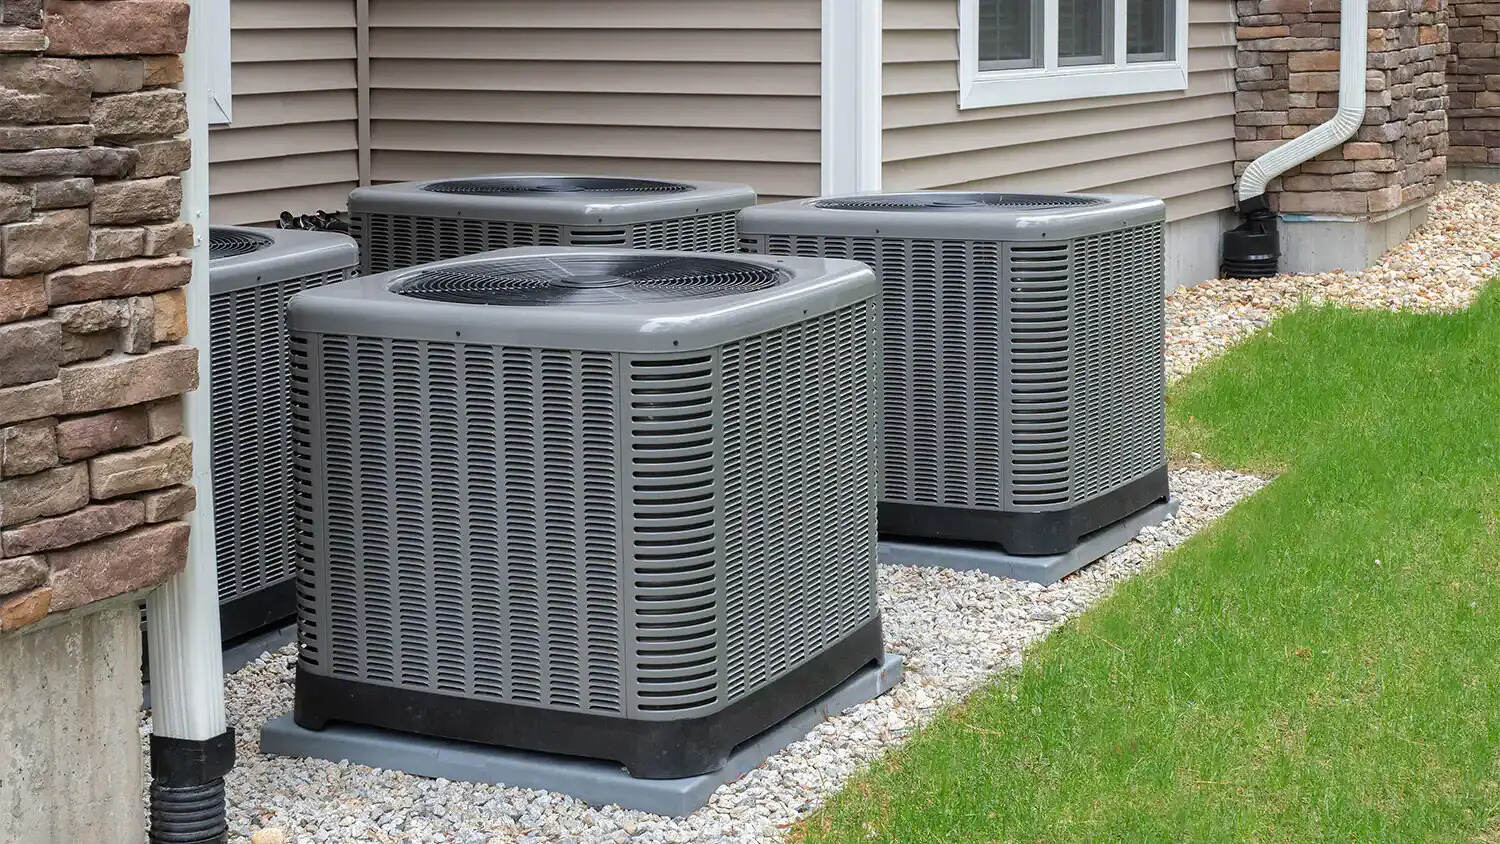
Welcome to the ultimate guide on how to add Freon to your home air conditioning unit. As the temperature rises outside, your air conditioning system becomes your greatest ally in keeping your home cool and comfortable. However, over time, the refrigerant in your AC unit may become depleted, leading to a decrease in its cooling capacity. This is where adding Freon comes into play.
Freon, also known as a refrigerant, is a chemical compound that absorbs heat from your indoor space and releases it outdoors, allowing your air conditioning system to function efficiently. Adding Freon to your AC unit is a relatively straightforward process that can be done as a part of routine maintenance or to address a performance issue.
However, before we dive into the steps of adding Freon, it is crucial to understand that handling refrigerants can be hazardous if not done properly. It is essential to prioritize safety and take the necessary precautions to protect yourself and your property.
Key Takeaways:
- Safety first! Before adding Freon to your AC unit, wear protective gear, turn off the power, and work in a well-ventilated area to prevent accidents and ensure a safe environment.
- Proper preparation is key. Clean the area, inspect refrigerant lines, and tighten fittings before adding Freon. After the addition, check for leaks and test the system for optimal performance.
Read more: How Much Is Air Conditioning Freon
Safety Precautions
When it comes to handling refrigerants and working with your home air conditioning unit, safety should always be your top priority. Follow these important safety precautions to protect yourself and prevent any potential accidents:
- Wear protective gear: Before you start working with Freon, make sure to wear safety glasses, gloves, and a mask to protect your eyes, hands, and respiratory system from any potential contact or inhalation.
- Turn off the power: Prior to working on your air conditioning unit, turn off the power supply to prevent any electrical accidents. Locate the electrical disconnect switch or breaker for your AC unit and switch it off.
- Allow time for the system to cool down: Your air conditioning unit becomes hot during operation. To avoid burns, allow the system to cool down for at least 30 minutes before you start working on it.
- Work in a well-ventilated area: Ensure that the area where you’ll be adding Freon is well-ventilated to prevent any buildup of fumes. Open windows or doors if necessary and use fans to improve air circulation.
- Avoid open flames or sparks: Freon is a flammable substance, so it is crucial to avoid any open flames or sparks during the process. Keep away from smoking, open flames, or electrical sparks to minimize the risk of fire.
- Handle refrigerant with care: Freon can cause frostbite if it comes into contact with your skin. Always handle the refrigerant canisters with gloves and avoid direct contact.
- Dispose of refrigerant properly: Never release refrigerant into the atmosphere as it is harmful to the environment. Consult local regulations or contact HVAC professionals for proper disposal methods.
By following these safety precautions, you can ensure a safe working environment and minimize the risk of accidents while adding Freon to your home air conditioning unit. Now that we’ve covered the essential safety guidelines, let’s move on to the tools and materials you’ll need for the process.
Tools and Materials Required
Before you begin adding Freon to your home air conditioning unit, gather the following tools and materials:
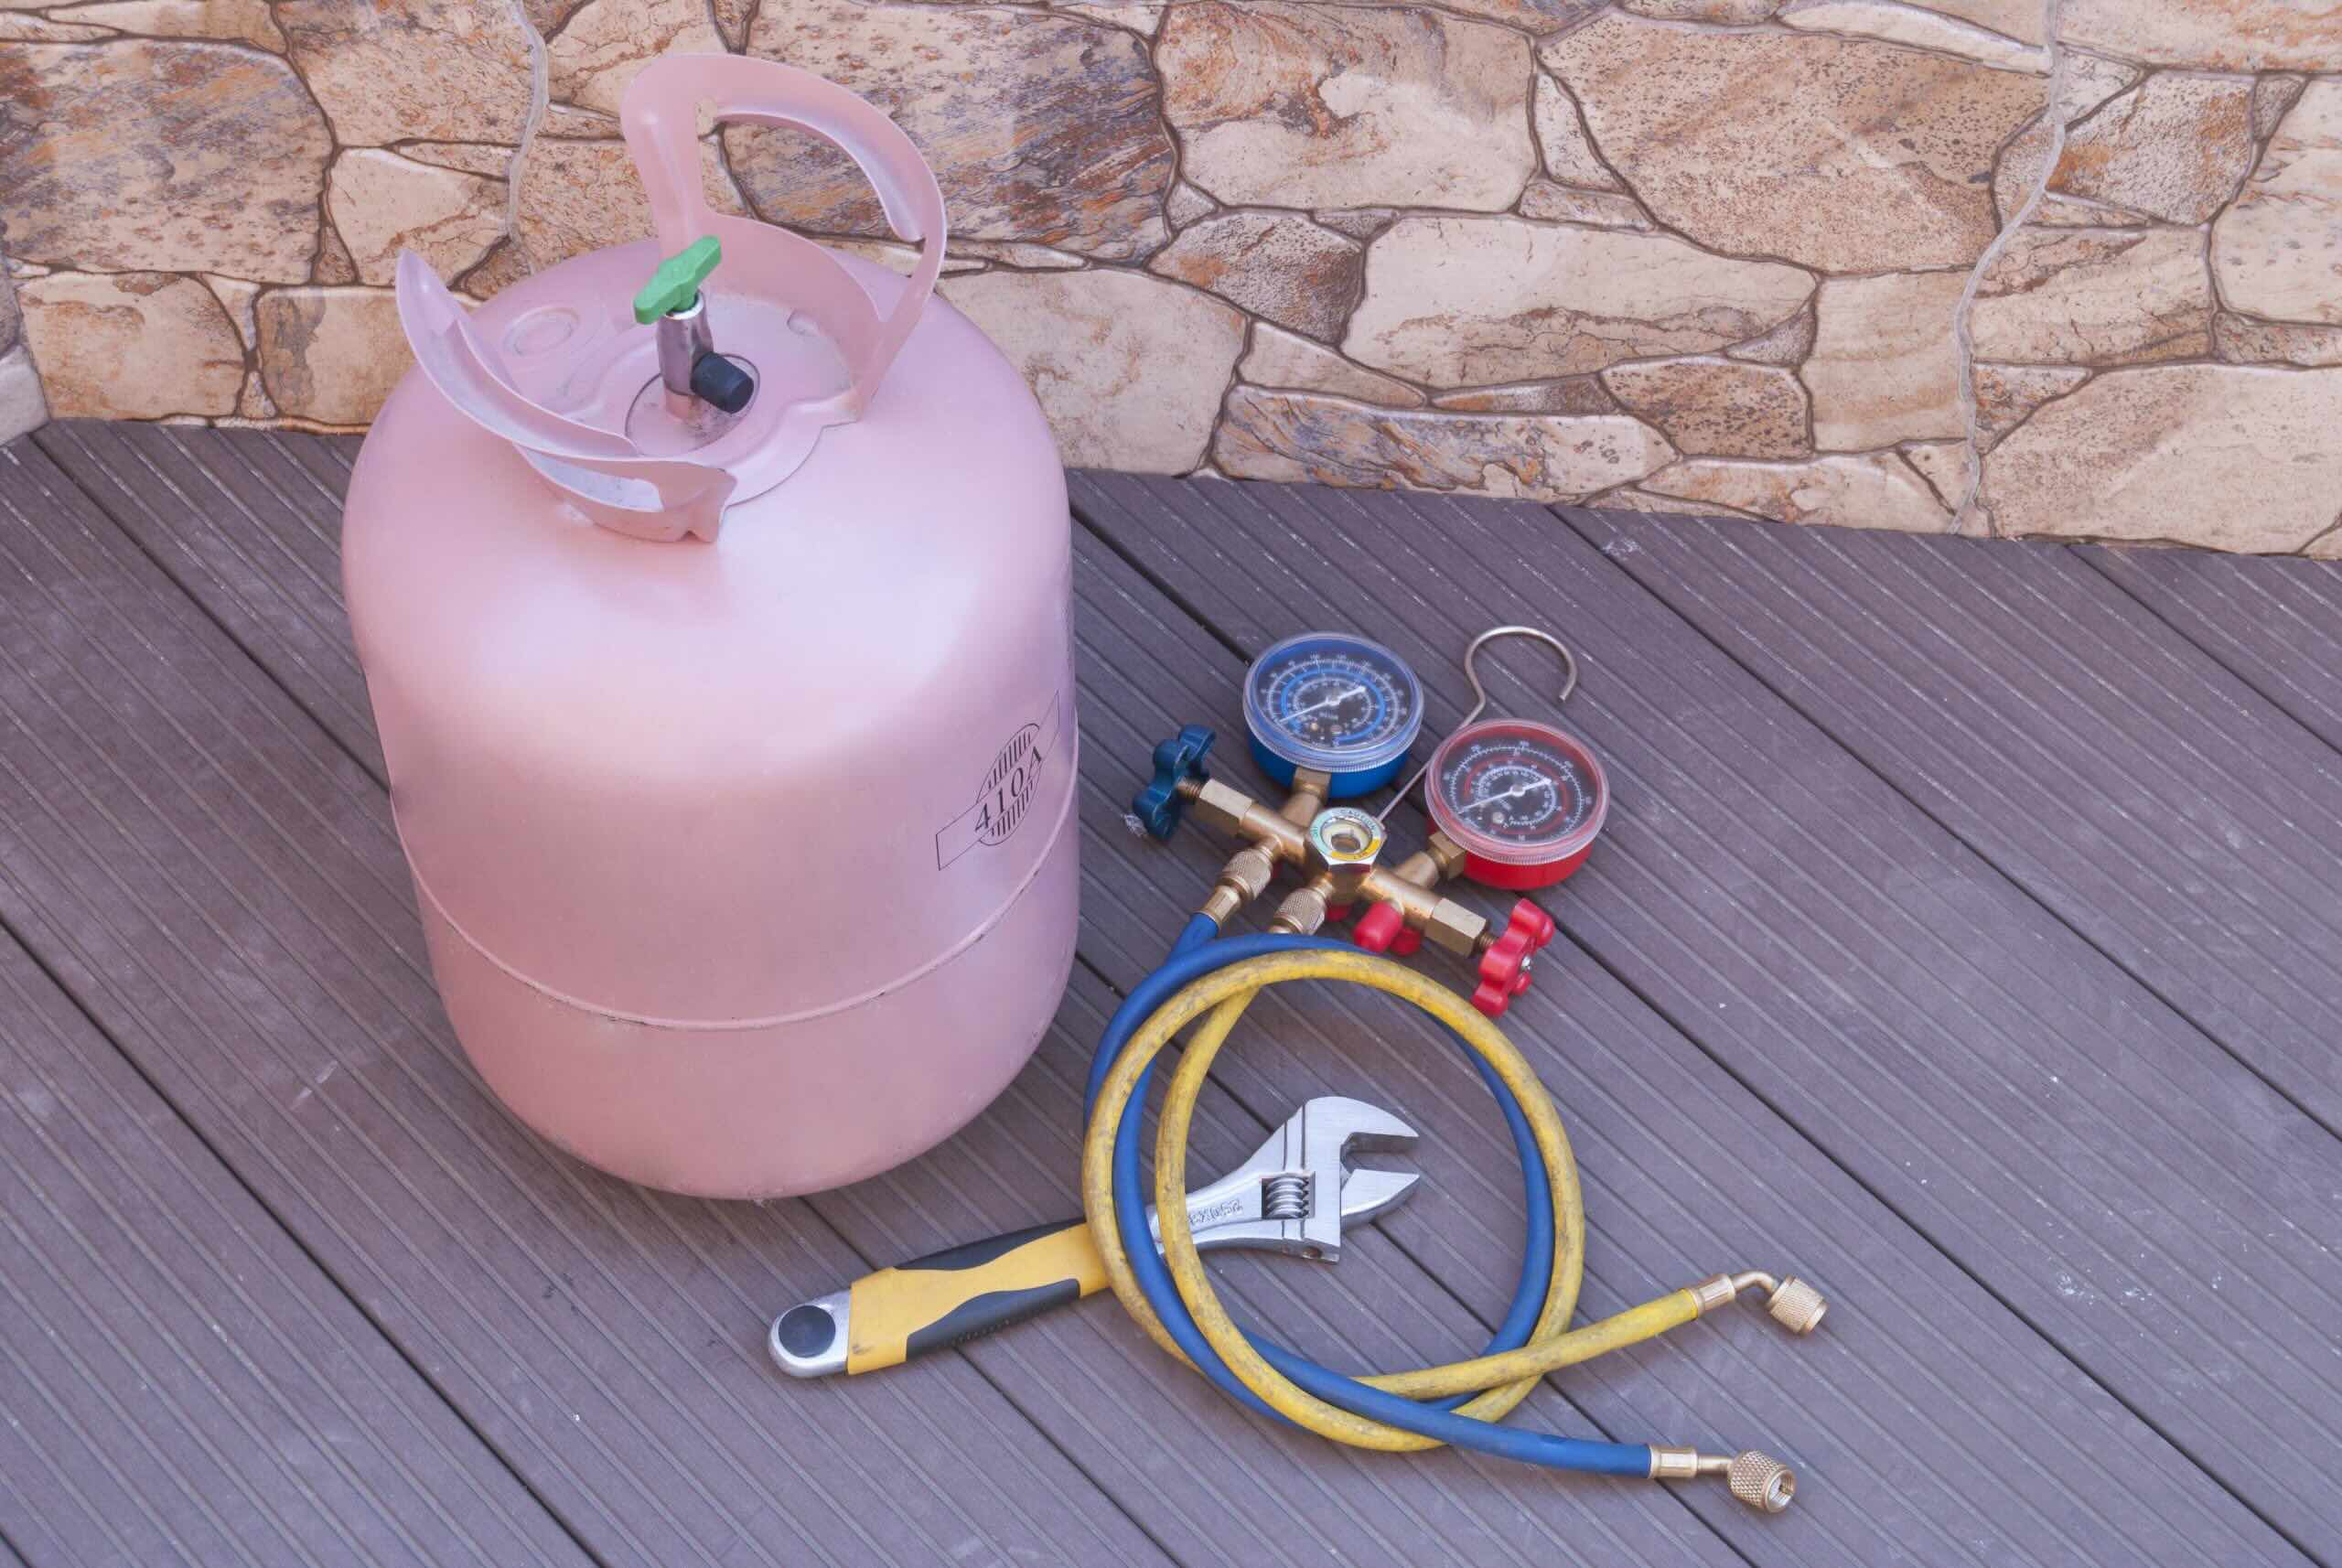
- Refrigerant canister: Purchase the appropriate type of Freon for your AC unit. Consult your unit’s manual or contact a professional to determine the specific refrigerant type and amount required.
- Gauges and hoses: You’ll need a set of gauges and hoses to connect to the service valve on your AC unit and monitor the pressure levels during the process.
- Safety glasses: Protect your eyes from any potential leaks or splashes during the Freon addition process.
- Gloves: Use gloves to protect your hands from direct contact with the refrigerant and potential frostbite.
- Mask or respirator: It is essential to wear a mask or respirator to avoid inhaling any refrigerant fumes or particles during the process.
- Adjustable wrench: You may need an adjustable wrench to open the service valve on your AC unit.
- Leak detection solution: Have a leak detection solution on hand to check for any leaks in the system after adding Freon.
- Fan or ventilation: Ensure proper ventilation in the area where you’ll be working. If necessary, use a fan to improve air circulation.
Having these tools and materials readily available will make the process of adding Freon to your home air conditioning unit smoother and more efficient. Once you have everything prepared, it’s time to proceed to the next step: locating the service valve.
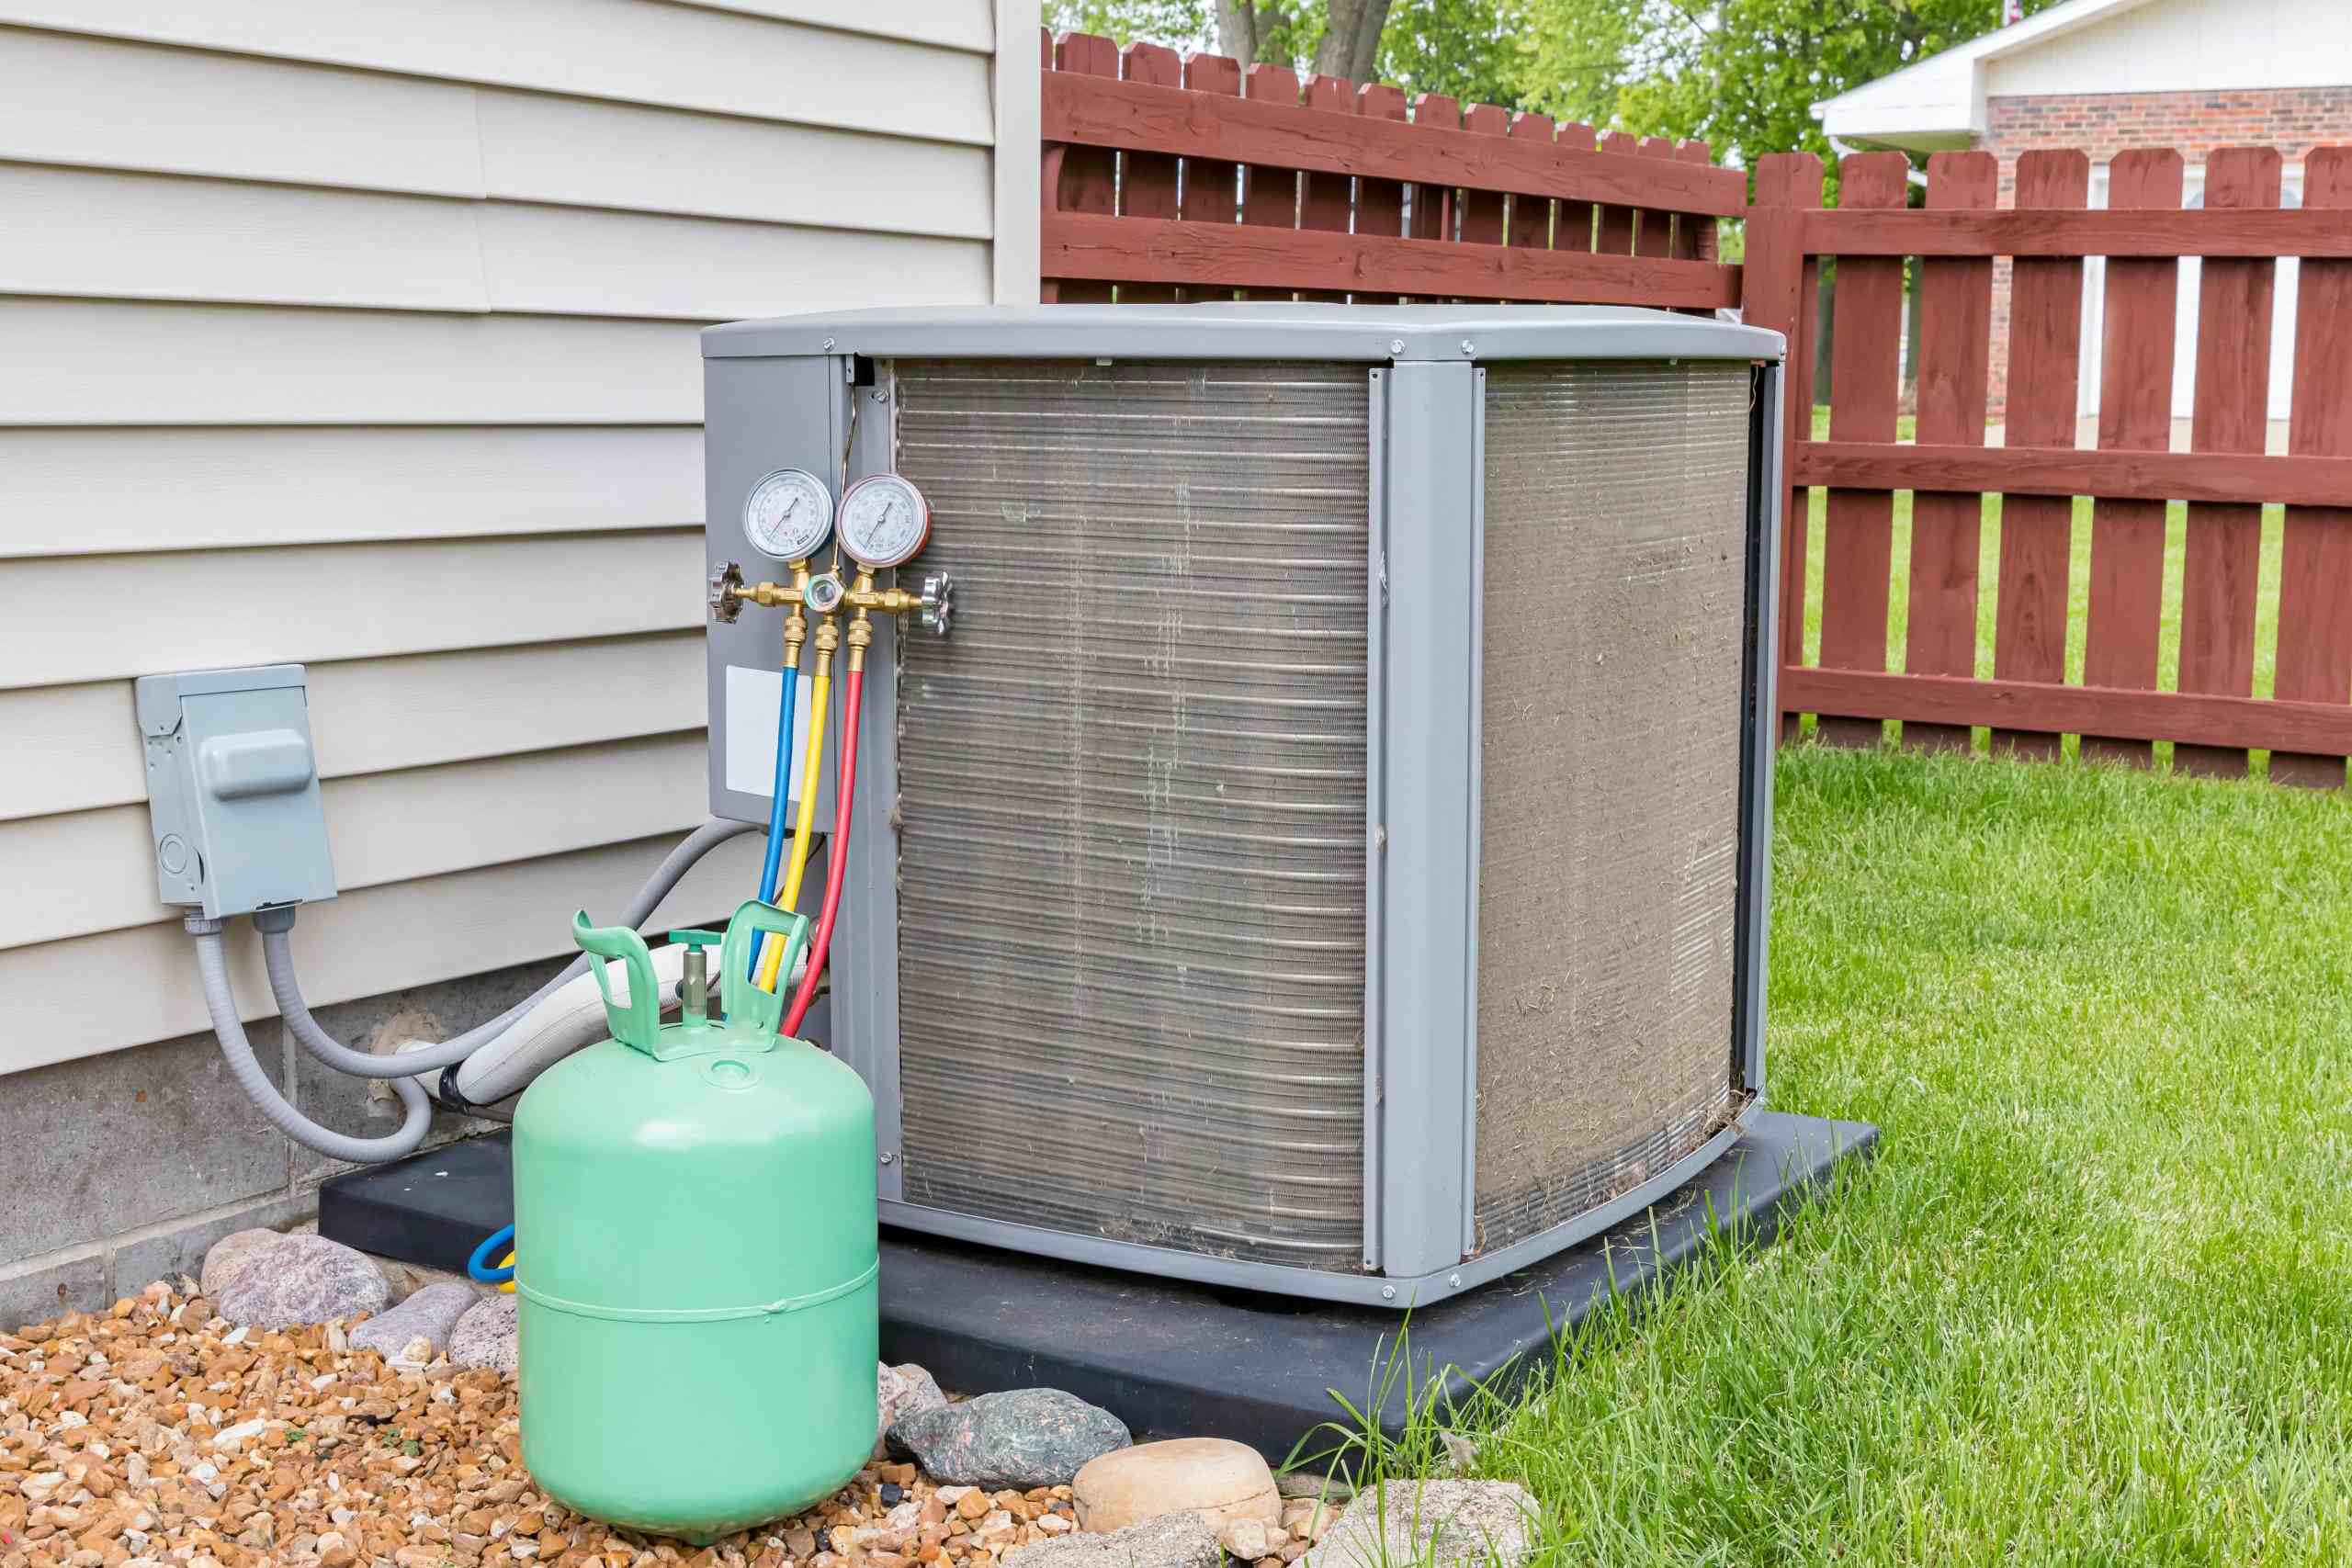
Step 1: Locate the Service Valve
The service valve is a crucial component of your air conditioning unit that allows you to add or remove refrigerant. To begin the process of adding Freon, you’ll need to locate the service valve. Here’s how:
- Turn off the power: Before you begin, ensure that the power to your AC unit is turned off. This step will help prevent any accidents or damage.
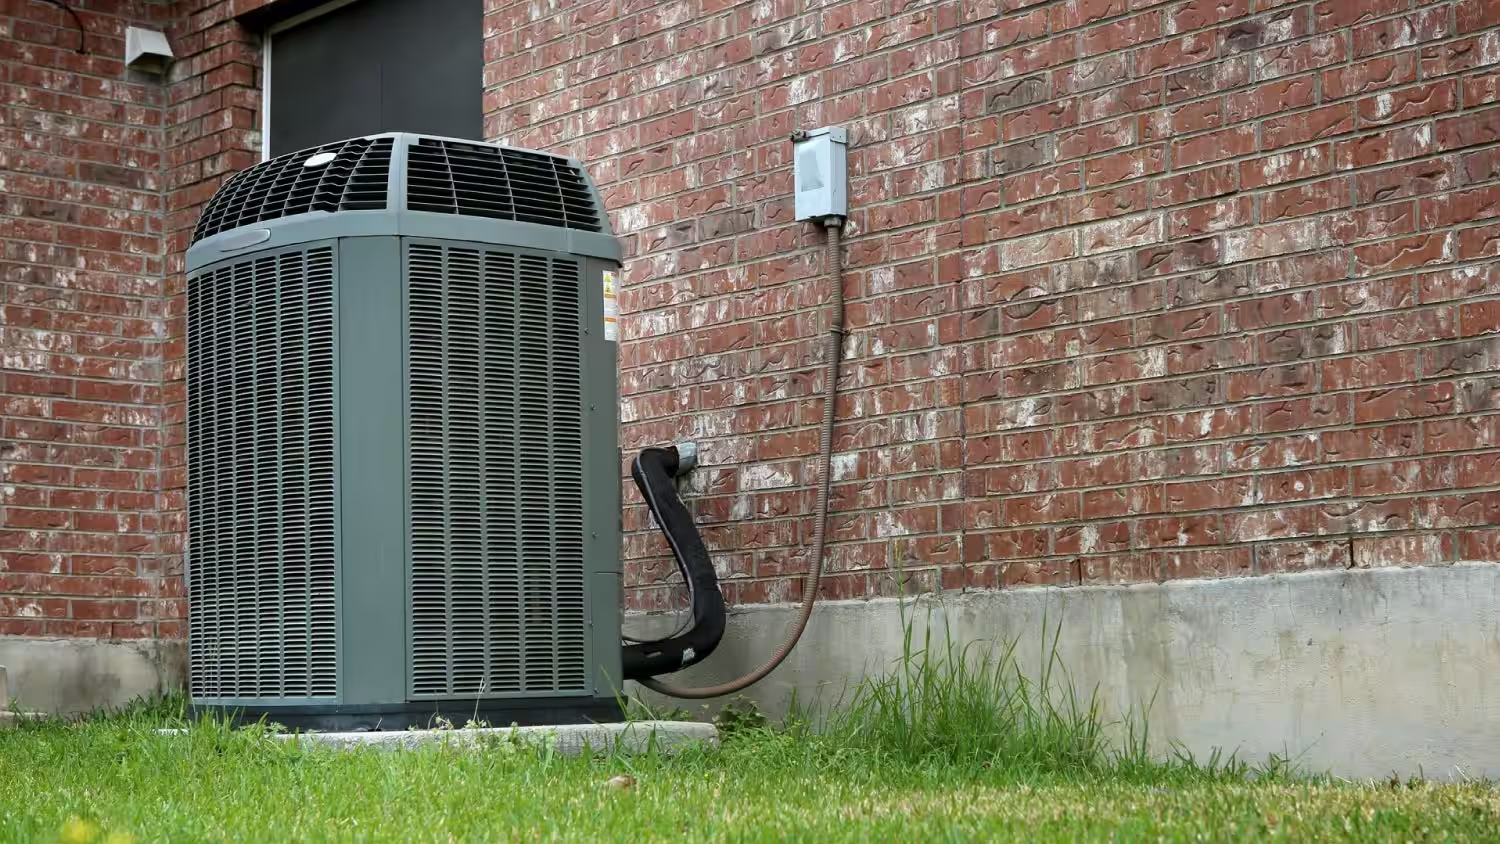
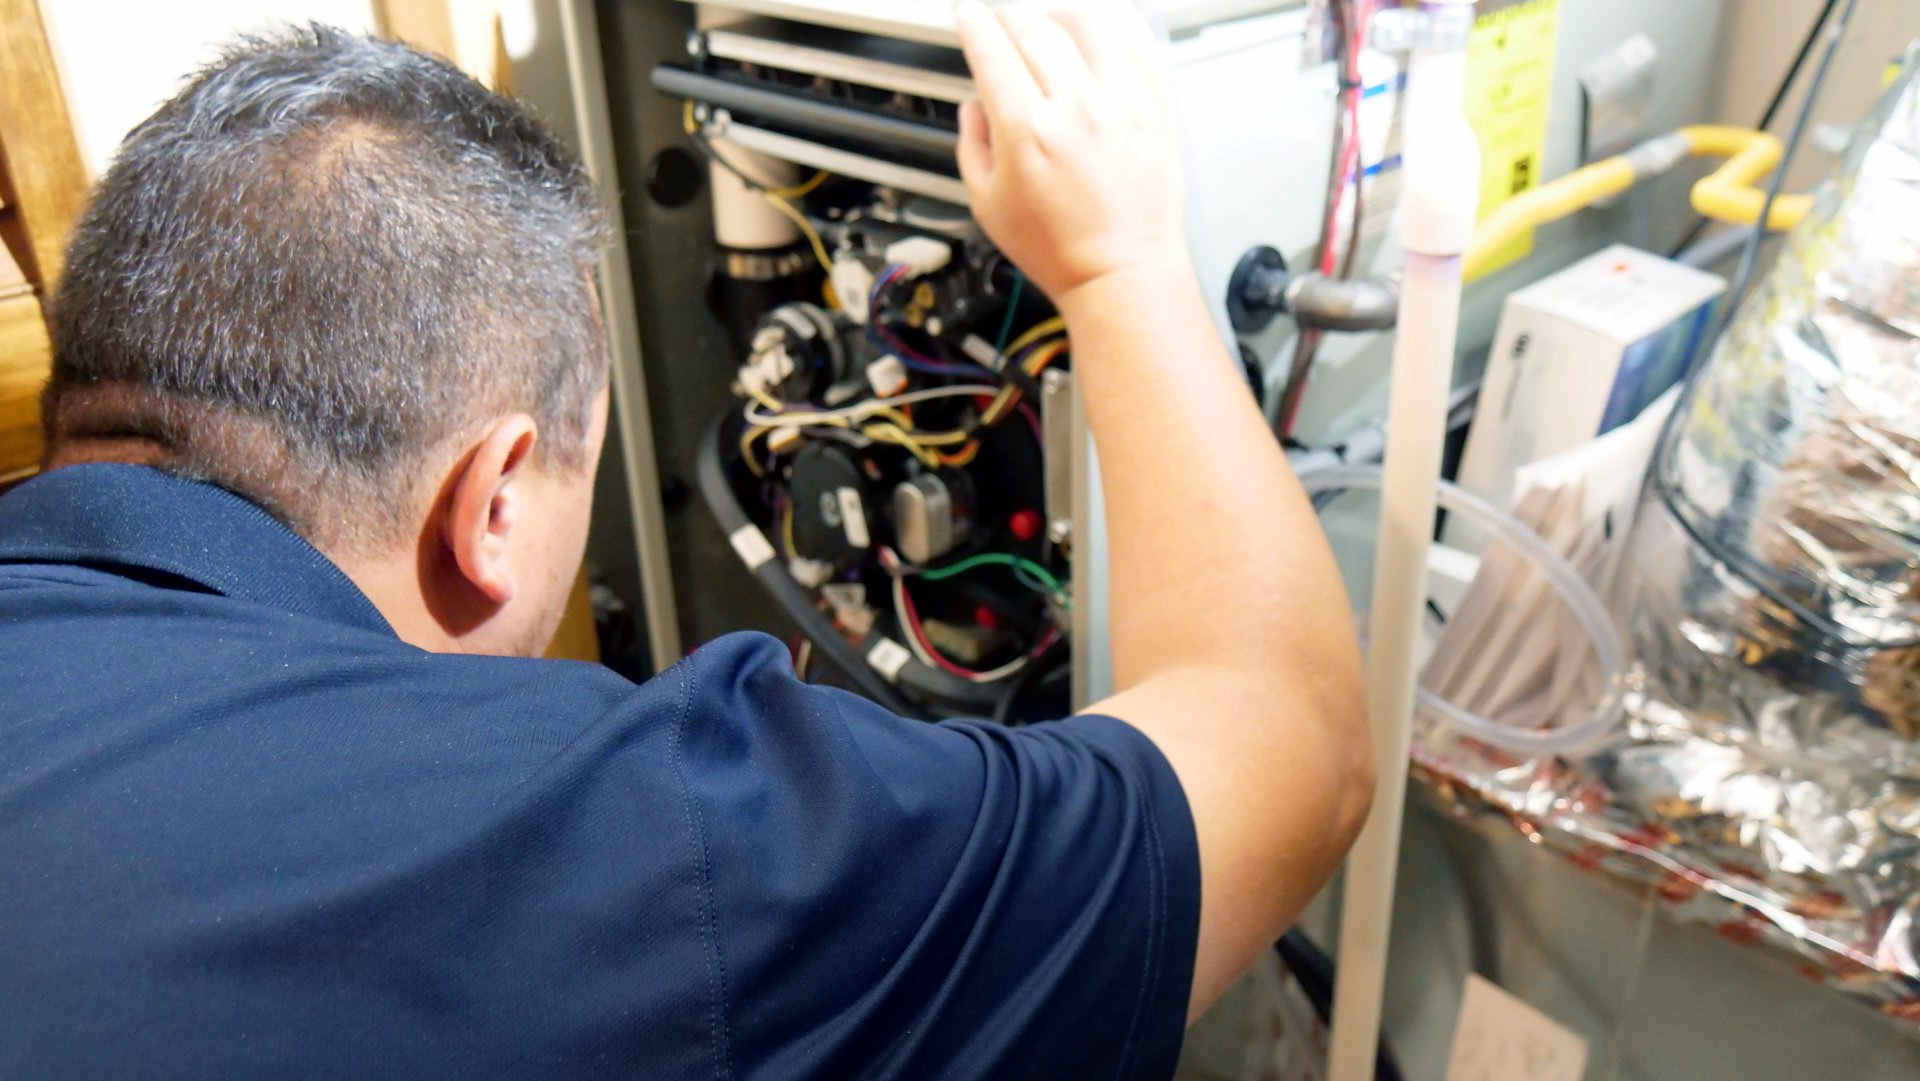
- Find the access panel: Look for the access panel on your air conditioning unit. It is typically located near the outdoor condenser or on the refrigerant lines leading to the unit.
- Remove the access panel: Use a screwdriver or the appropriate tool to remove the screws or fasteners securing the access panel. Set the panel aside in a safe place.
- Locate the service valve: Once the access panel is removed, you’ll see the service valve. It is a metal valve with a cap on top, usually colored red or blue. The service valve may be on the larger refrigerant line or the small liquid line.
- Identify the correct valve: There may be multiple valves on your air conditioning unit, but the service valve will have a larger opening and may be labeled as the “service” or “high side” valve.
Once you have located the service valve, you are ready to prepare your air conditioning unit for the Freon addition process. Proceed to the following step to learn how to do it effectively.
Step 2: Prepare the Air Conditioning Unit
Before adding Freon to your air conditioning unit, it is essential to properly prepare the system for the process. Follow these steps to ensure a smooth and efficient Freon addition:
- Turn off the power: Double-check that the power to your AC unit is turned off to prevent any electrical accidents or damage.
- Clean the area around the service valve: Use a cloth or brush to remove any dirt, debris, or dust that may have accumulated around the service valve. This will help prevent any contaminants from entering the system during the Freon addition.
- Inspect the refrigerant lines: Take a close look at the refrigerant lines leading to the service valve. Ensure that there are no visible signs of damage, such as cracks, leaks, or corrosion. If you notice any issues, it is best to consult a professional before proceeding.
- Tighten any loose fittings: Check for any loose fittings on the refrigerant lines or connections. Use an adjustable wrench to securely tighten them to prevent any leaks during the Freon addition process.
- Protect nearby components: If there are any nearby components or sensitive areas that could be affected by the cold temperature of the refrigerant, consider using insulation or a protective cover to shield them.
- Keep pets and children away: Ensure that pets and children are kept at a safe distance from the AC unit during the preparation process and throughout the Freon addition. This will help prevent any accidents or injuries.
By thoroughly preparing your air conditioning unit, you are setting the stage for a successful Freon addition. Once you have completed these steps, it’s time to move on to the next step: connecting the refrigerant canister.
Make sure to turn off the power to the AC unit before adding freon. Locate the service valve on the refrigerant line, attach the freon canister, and slowly open the valve to add the freon. Always follow the manufacturer’s instructions and consider hiring a professional if you’re not comfortable doing it yourself.
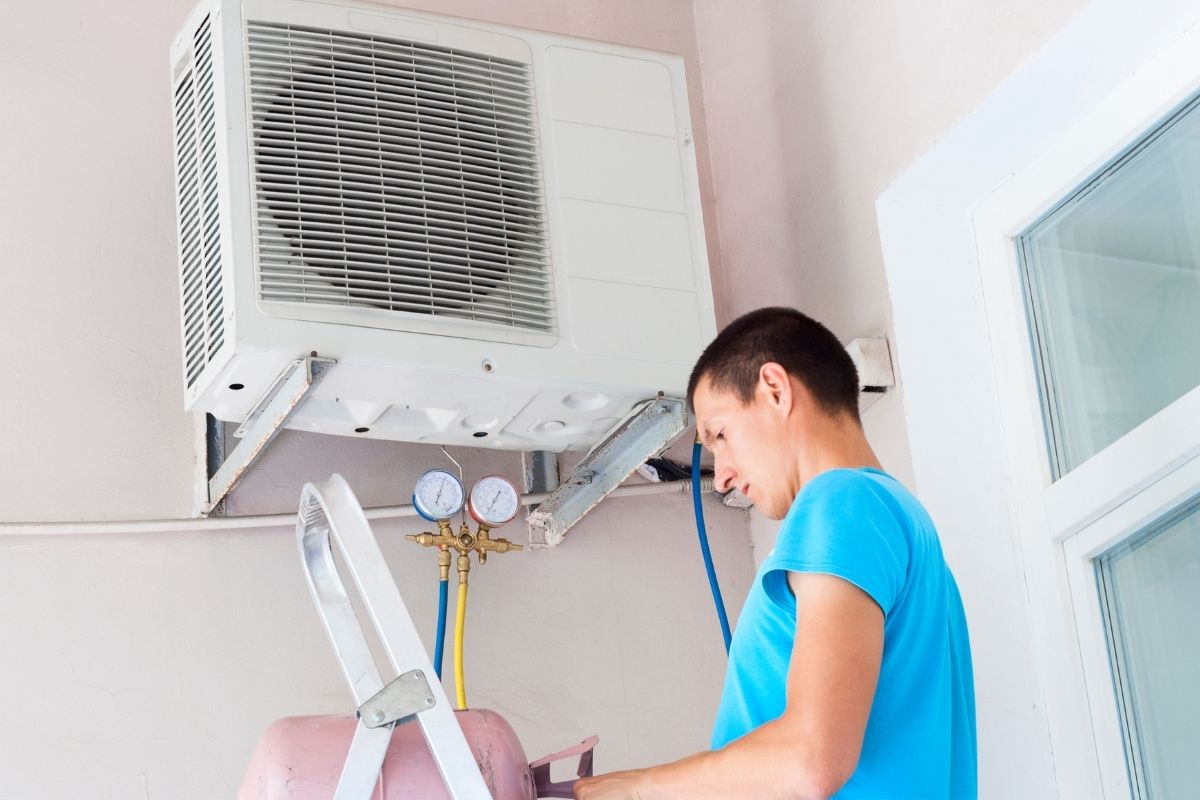
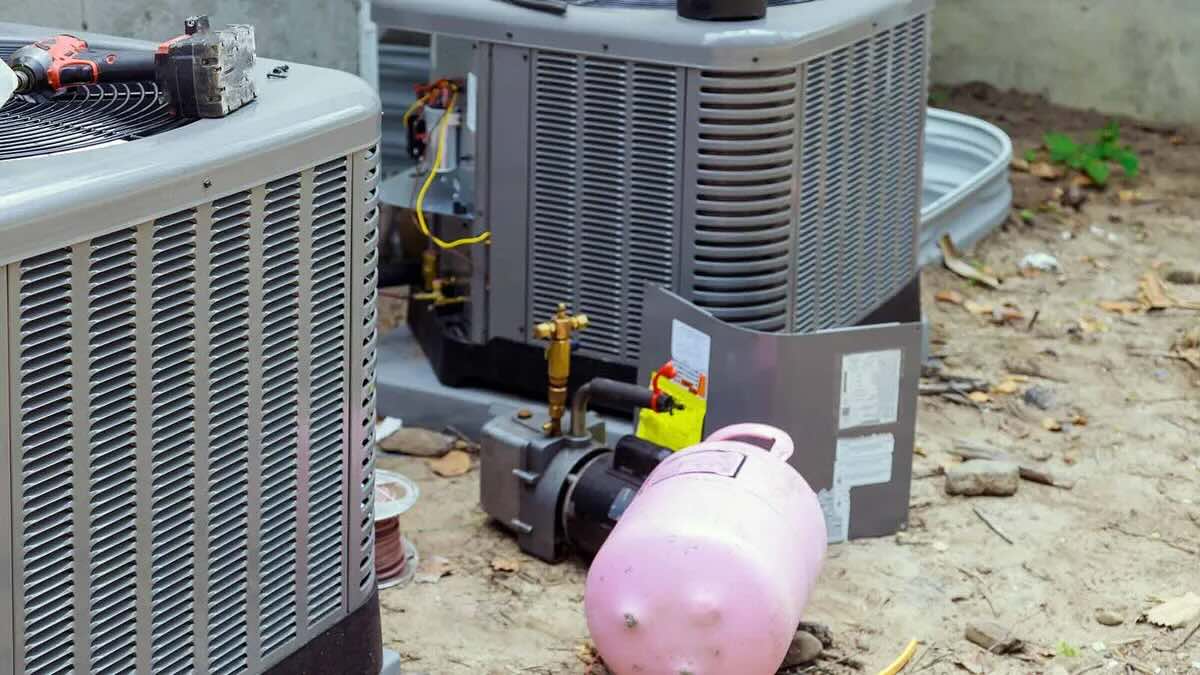
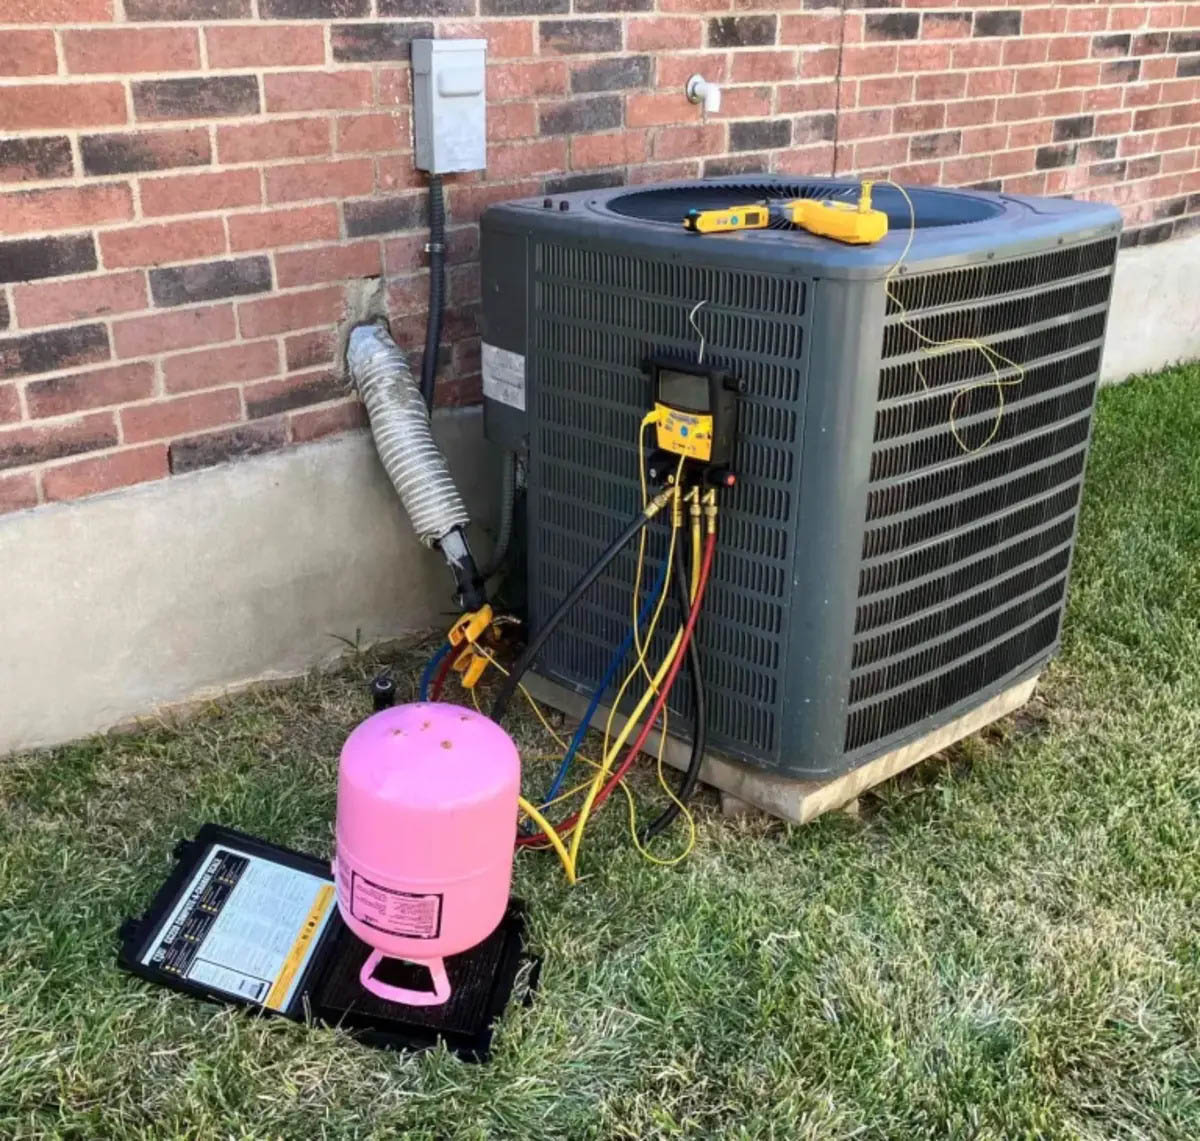
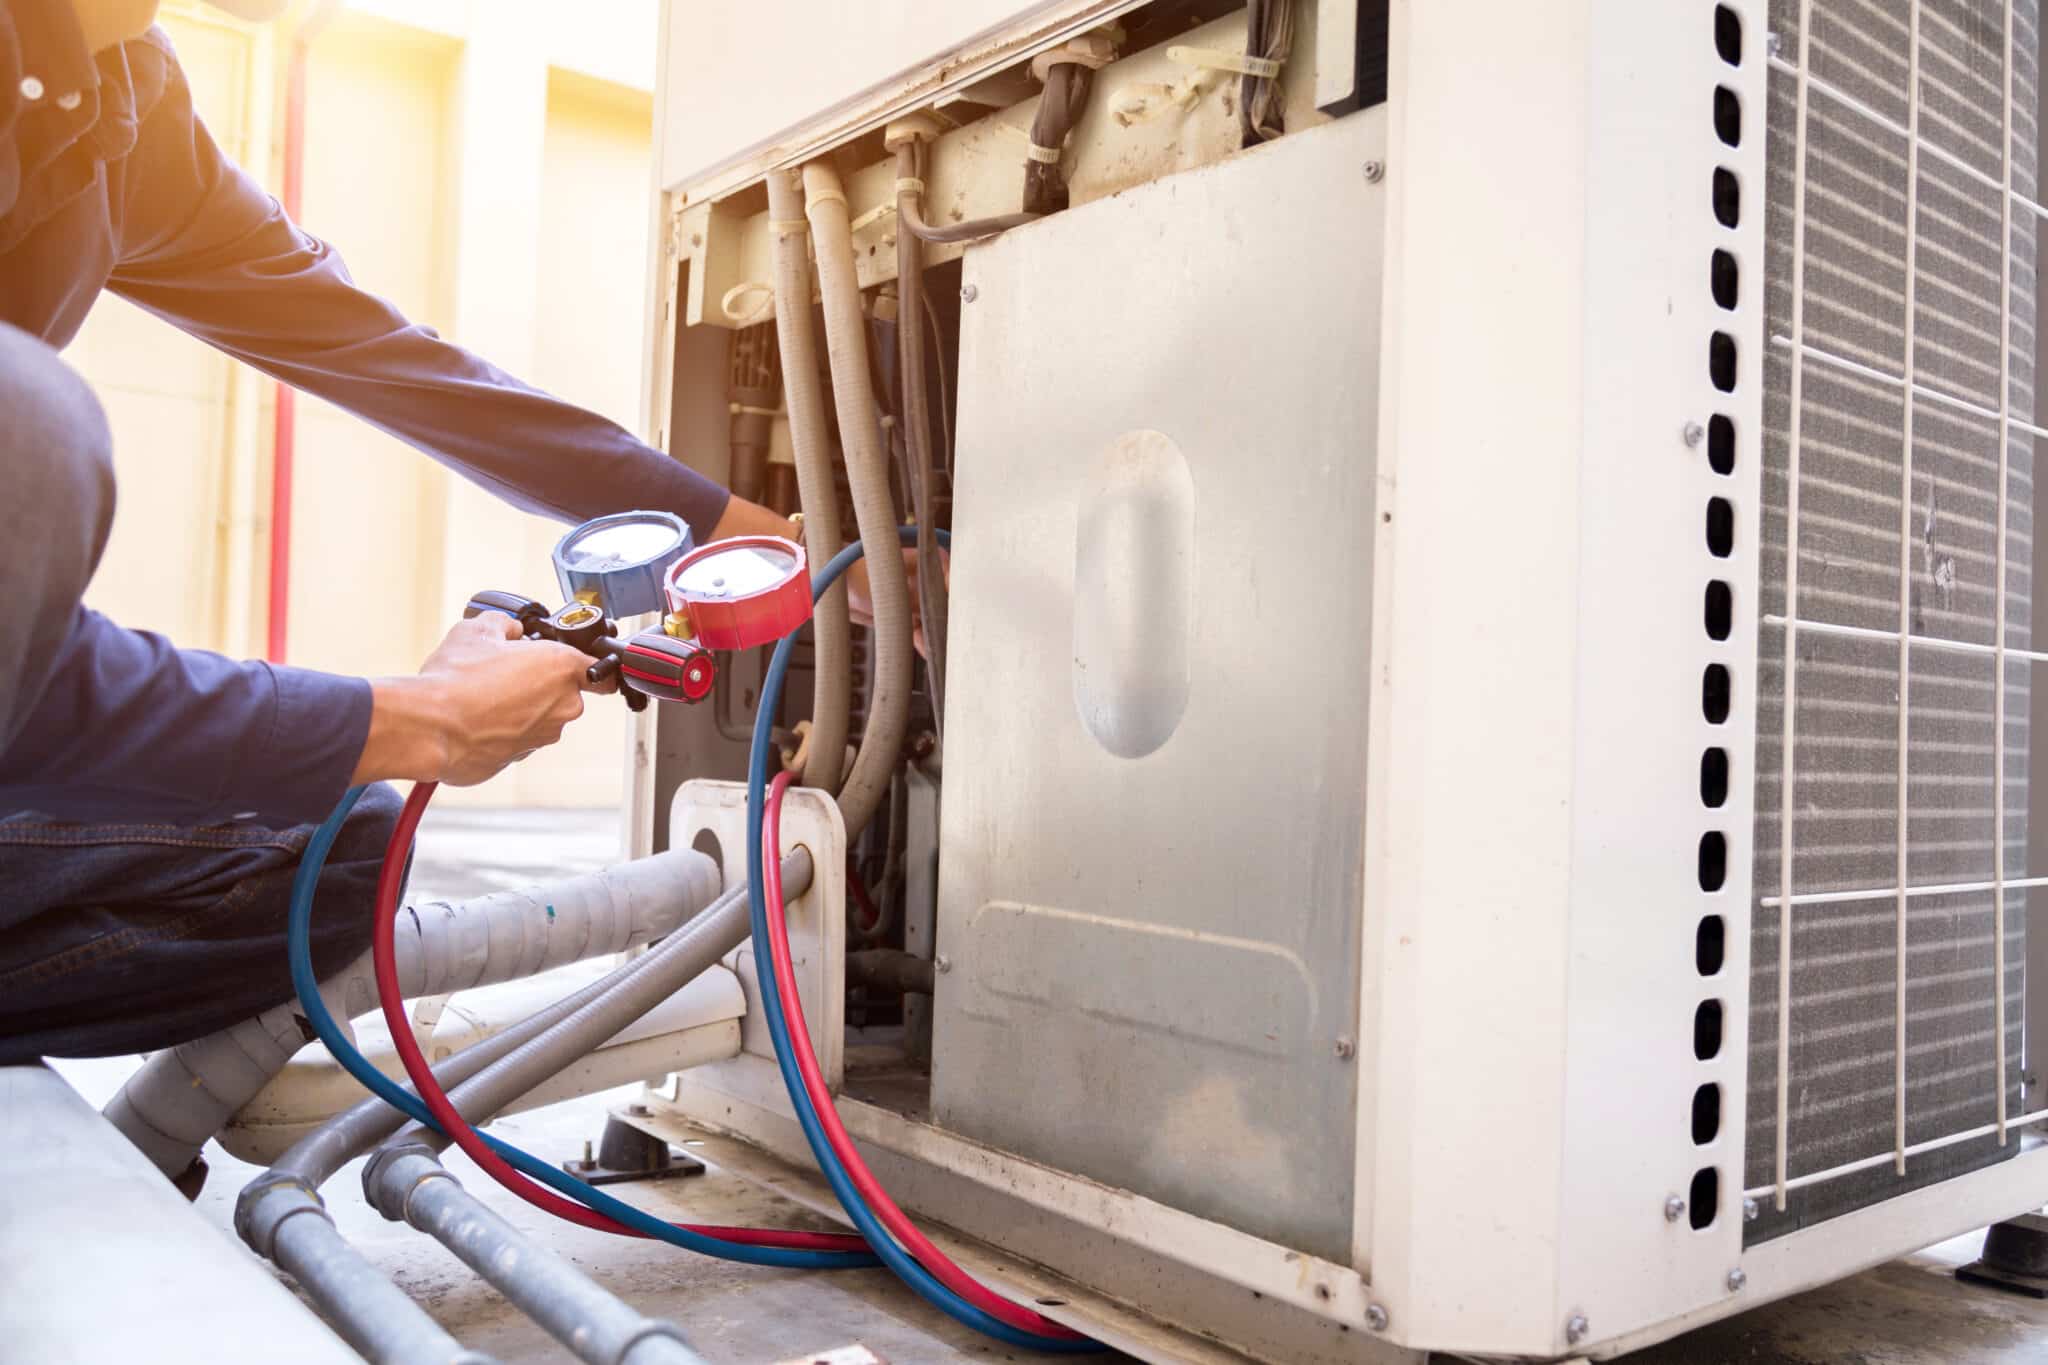
Step 3: Connect the Refrigerant Canister
Now that your air conditioning unit is prepared, it’s time to connect the refrigerant canister. Follow these steps to ensure a secure and proper connection:
- Double-check the refrigerant type: Before proceeding, verify that you have the correct type of refrigerant canister that is recommended for your specific air conditioning unit. Make sure to refer to your unit’s manual or consult a professional if you’re unsure.
- Attach the canister to the gauges: Take the refrigerant canister and attach it to the gauges by following the manufacturer’s instructions. Ensure a tight and secure connection to prevent any leaks during the process.
- Attach the hoses to the gauges: Connect the hoses from the gauges to the service valve on your air conditioning unit. Refer to the instructions provided with the gauges to identify the correct hose connections.
- Tighten the connection: Use an adjustable wrench to securely tighten the hose connections to the service valve. Ensure that the connections are snug and leak-free.
- Open the valves: Once the refrigerant canister and hoses are securely connected, it’s time to open the valves on the gauges. Follow the manufacturer’s instructions to open the valves correctly.
- Monitor the pressure levels: Keep an eye on the pressure gauges to monitor the pressure levels in the system. This will help you determine the amount of Freon you need to add and ensure that the system is properly charged.
By following these steps and ensuring a proper connection between the refrigerant canister and the service valve, you are now ready to proceed to the next step: adding Freon to your air conditioning unit.
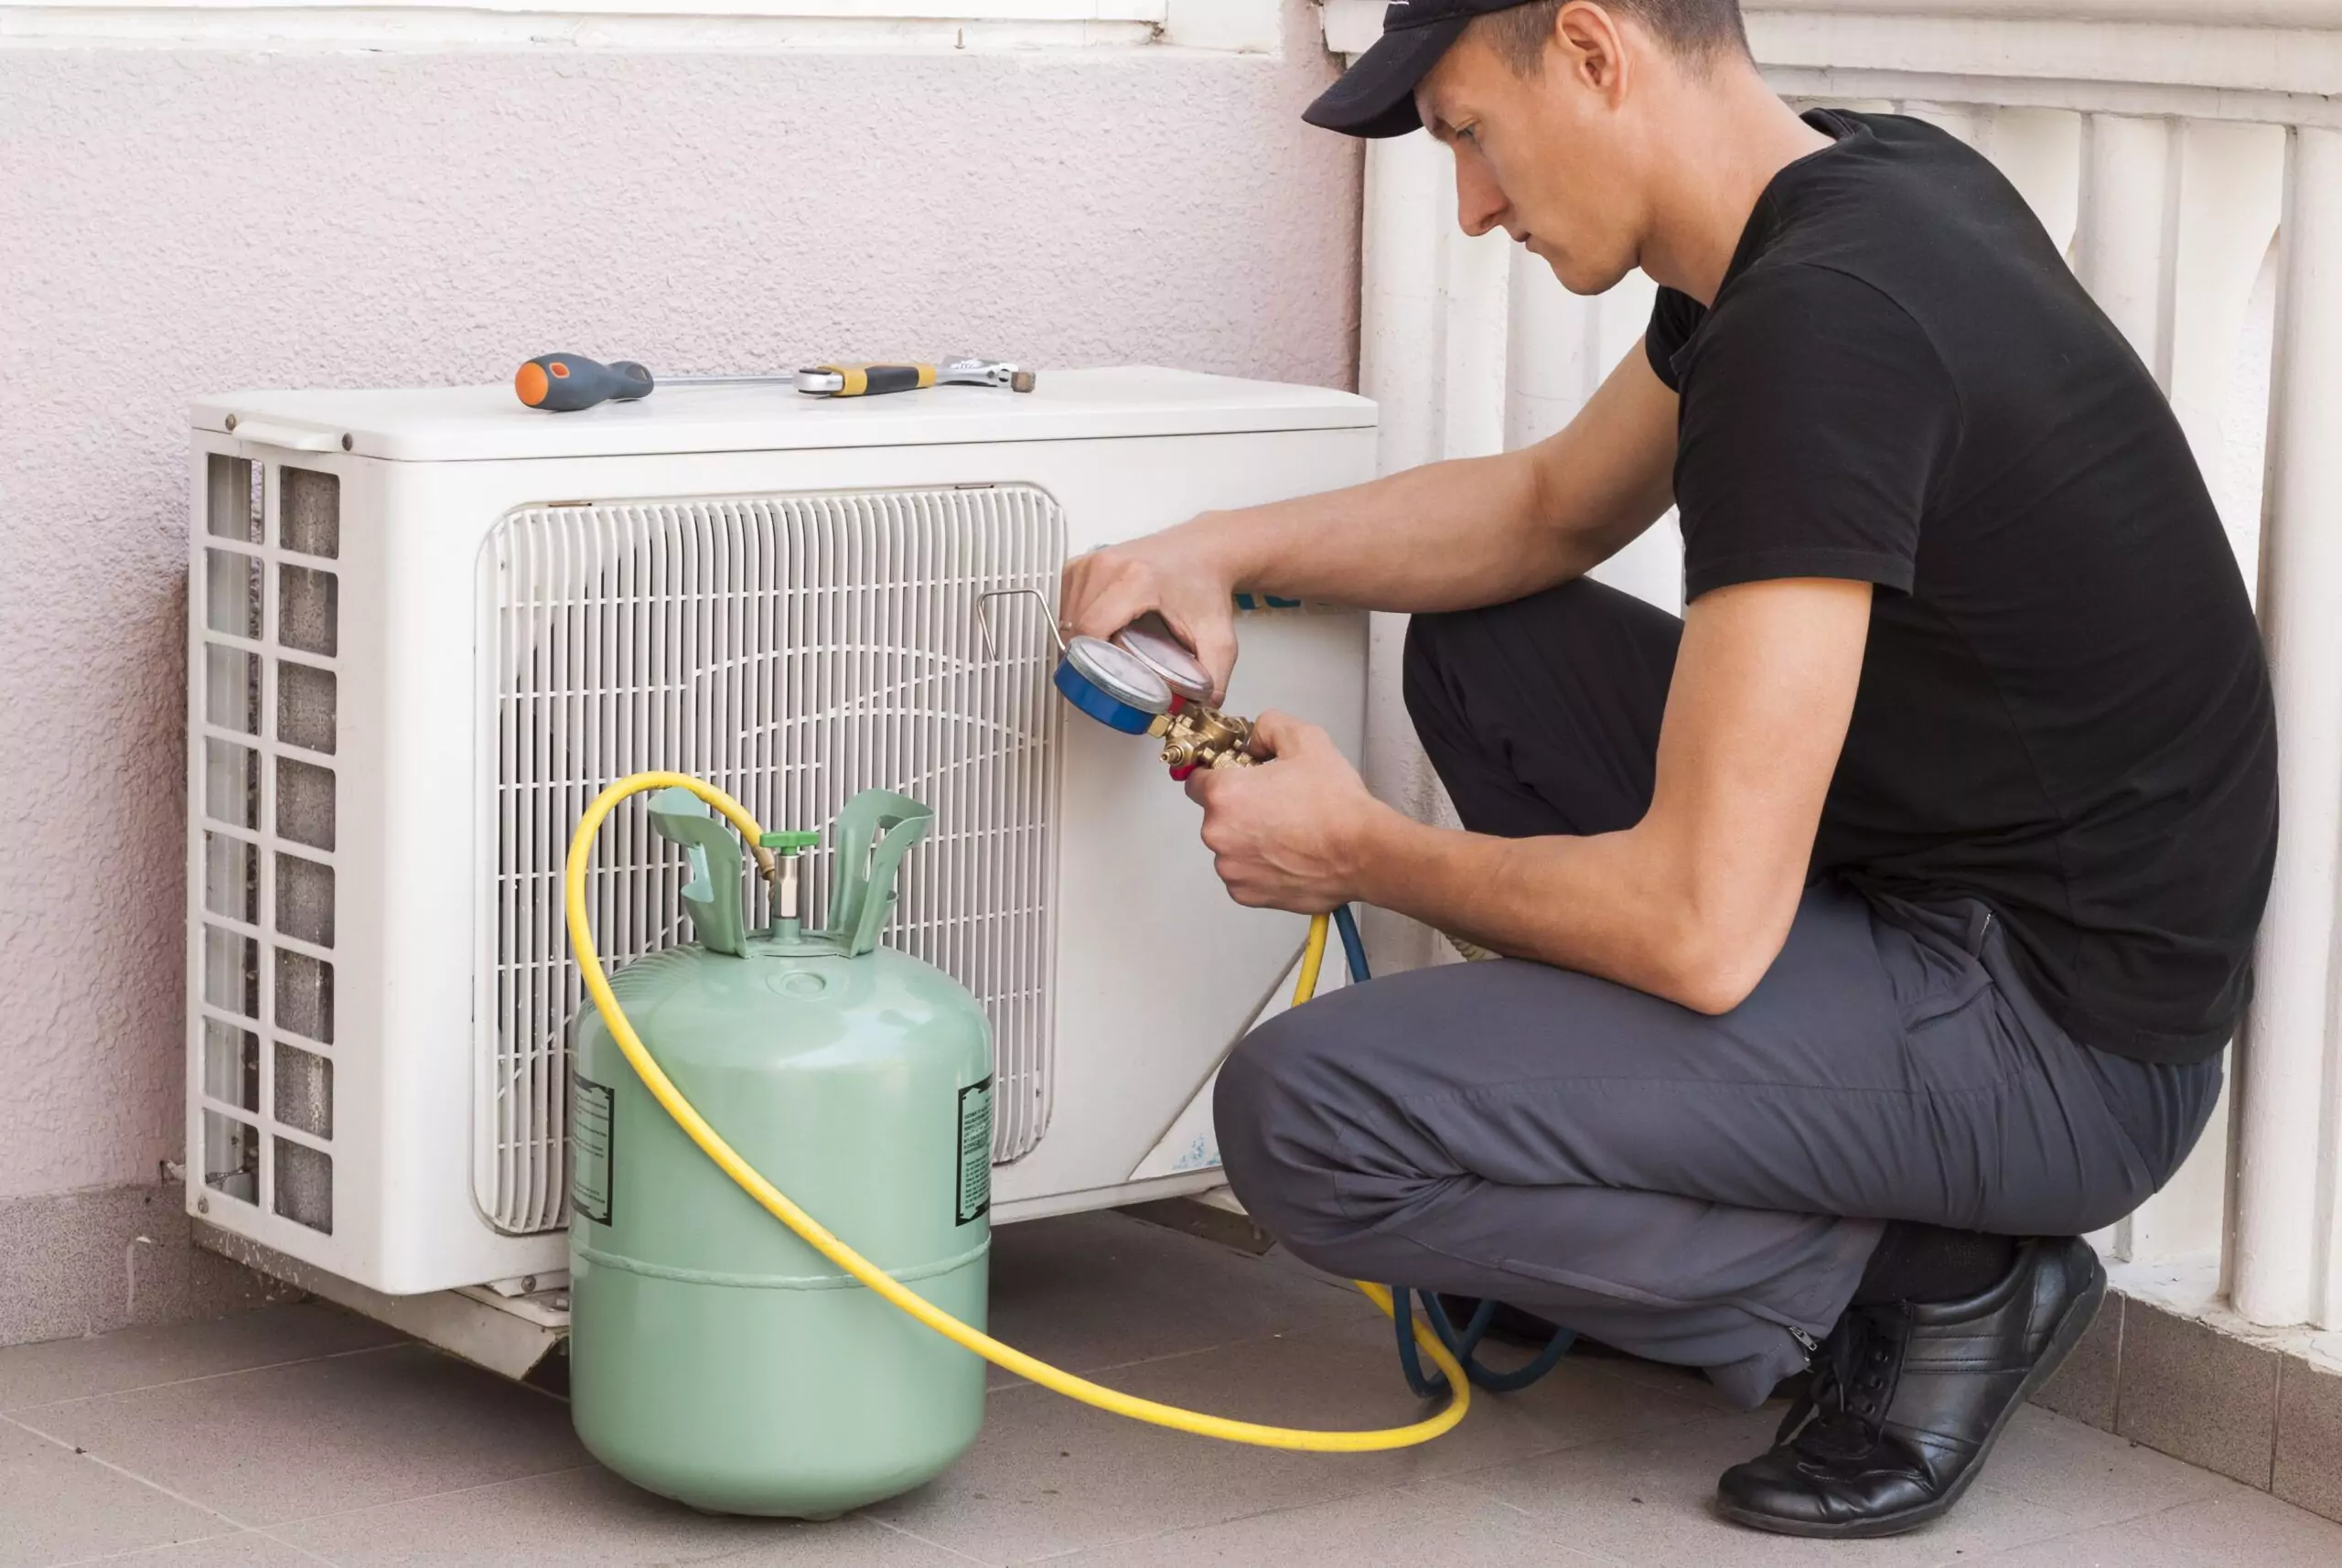
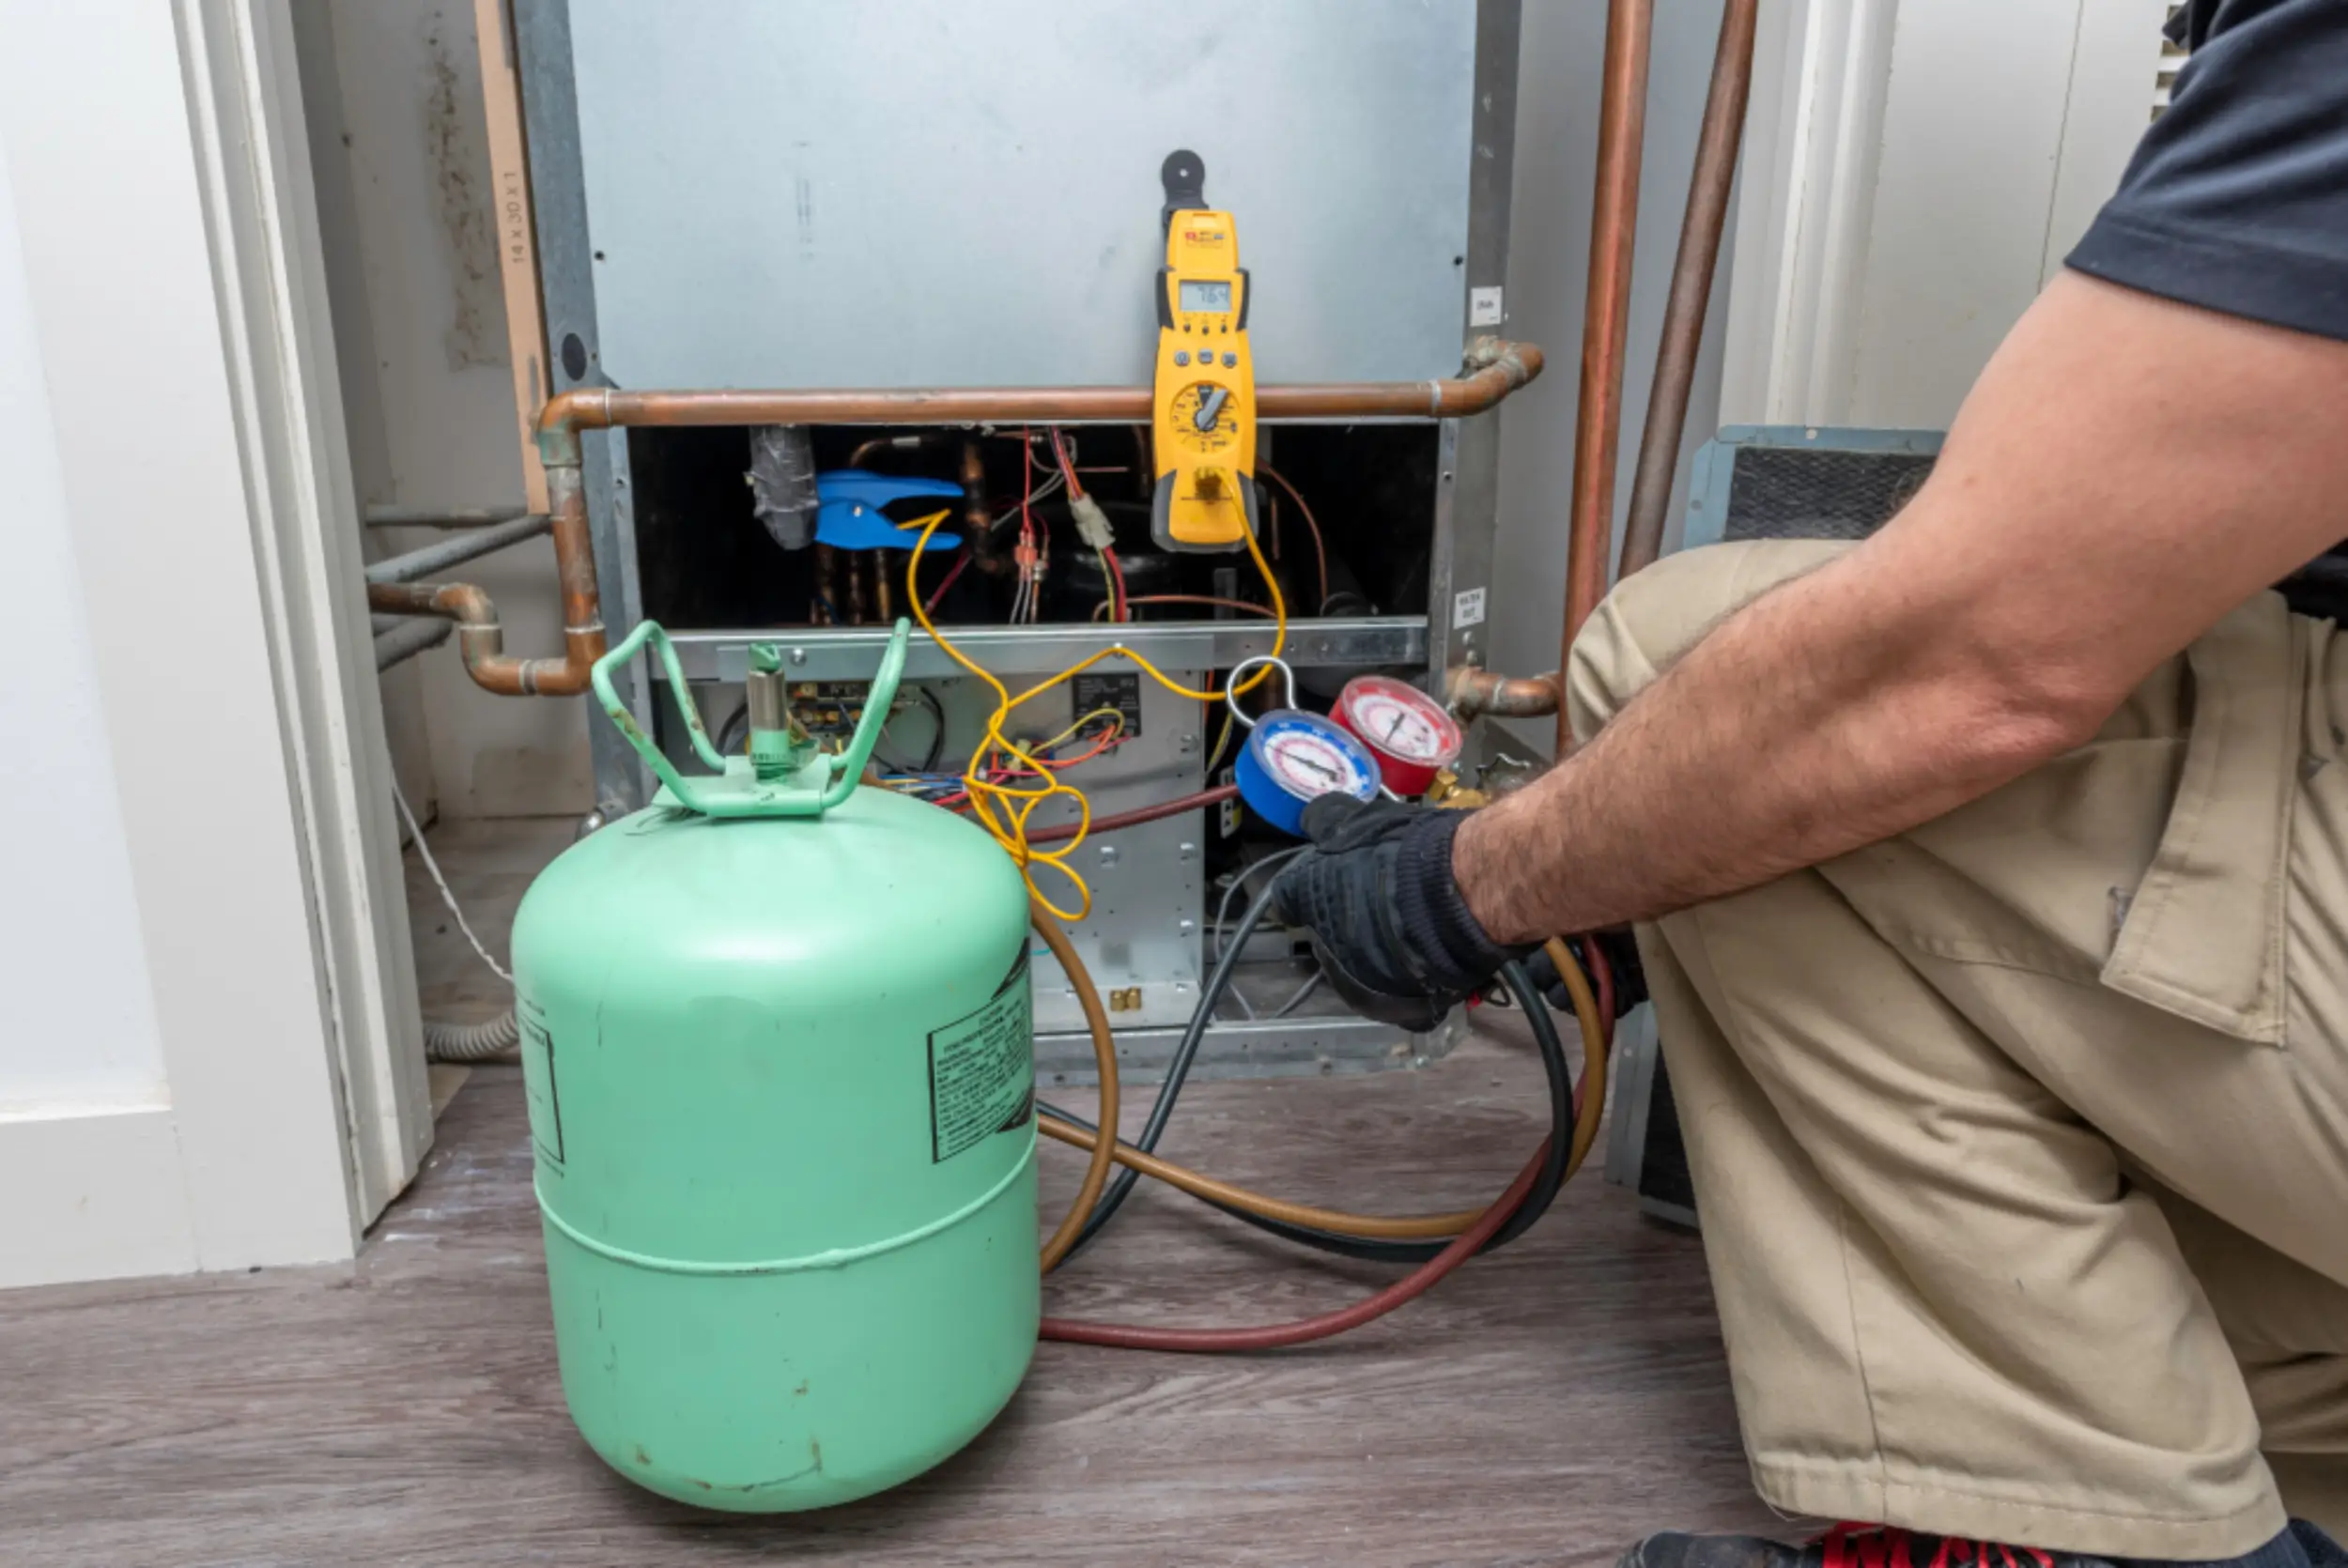
Step 4: Add Freon to the Air Conditioning Unit
With the refrigerant canister securely connected to the service valve, it’s time to add Freon to your air conditioning unit. Follow these steps to ensure a proper and effective Freon addition:
- Refer to the manufacturer’s instructions: Different air conditioning units may have specific instructions for adding Freon. Consult your unit’s manual or refer to the manufacturer’s instructions to understand the recommended procedure.
- Start the process: Slowly open the valve on the refrigerant canister to allow the Freon to flow into the system. Take it slowly to avoid overcharging the system or causing any pressure issues.
- Monitor the pressure levels: Keep an eye on the pressure gauges to ensure that the pressure levels in the system are within the recommended range. Adjust the flow rate of the Freon accordingly to maintain the desired pressure.
- Follow the recommended quantity: Refer to the manufacturer’s instructions or consult a professional to determine the appropriate quantity of Freon to add to your air conditioning unit. Adding too little or too much can negatively impact the system’s performance.
- Be patient: Adding Freon to your air conditioning unit can be a time-consuming process. Take your time and allow the Freon to flow into the system gradually. Be patient and avoid rushing the process.
- Close the valve: Once you’ve added the recommended amount of Freon, close the valve on the refrigerant canister to stop the flow. Ensure that it is tightly closed to prevent any leaks or wastage of refrigerant.
By following these steps, you can safely and effectively add Freon to your air conditioning unit. Once you have completed the Freon addition, proceed to the next step to learn how to disconnect the canister and test the system.
Step 5: Disconnect the Canister and Test the System
After successfully adding Freon to your air conditioning unit, it’s time to disconnect the refrigerant canister and test the system. Follow these steps to ensure a smooth and efficient process:
- Close the valves: Before disconnecting the canister, make sure to close the valves on the gauges. This step will prevent any refrigerant from escaping and ensure a safe disconnection.
- Disconnect the hoses: Use an adjustable wrench to loosen and remove the hoses that are connected to the service valve. Take caution while removing the hoses to avoid any leaks or spills.
- Check for any leaks: After disconnecting the canister and hoses, carefully inspect the service valve and surrounding areas for any signs of leaks. Use a leak detection solution to identify any potential leaks.
- Test the air conditioning unit: Once you’ve completed the disconnection and leak check, it’s time to test the system. Turn on the power to your air conditioning unit and allow it to run for a few minutes. Feel the air coming from the vents to ensure that it is cool and refreshing.
- Monitor the system: Keep an eye on the performance of your air conditioning unit for the next few hours. Observe if it is cooling effectively and maintaining a consistent temperature. If you notice any issues or abnormalities, it is best to consult a professional for further assistance.
By following these steps, you can safely disconnect the refrigerant canister and test your air conditioning system. Remember to always prioritize safety and be mindful of any potential leaks. Finally, proceed to the next step to learn how to check for leaks in your air conditioning unit.
Step 6: Check for Leaks
Checking for leaks in your air conditioning unit is a critical step after adding Freon. Even with proper precautions and procedures, leaks can occur, impacting the performance and efficiency of your AC system. Follow these steps to check for potential leaks:
- Inspect the service valve: Take a close look at the service valve that you connected the hoses to. Look for any signs of refrigerant leakage, such as oily residue or bubbles.
- Check the refrigerant lines: Carefully examine the refrigerant lines for any visible signs of leaks, such as frost accumulation or oil stains. Pay close attention to connections and joints, as they are common areas for leaks to occur.
- Use a leak detection solution: Apply a leak detection solution or soapy water to the service valve and refrigerant lines. Look for any bubbles or foaming, as they indicate a leak in the system. If you spot any bubbles, take note of the location for further inspection.
- Inspect other components: Check other components of your air conditioning unit, including the evaporator coil and condenser unit, for any signs of leaks. Look for oil stains or wet spots that may indicate leakage.
- Re-tighten connections: If you notice any loose connections or fittings during the inspection, use an adjustable wrench to tighten them securely. This step can help prevent future leaks.
It’s important to proactively address any leaks in your air conditioning unit, as they can lead to a decrease in efficiency and potential system damage. If you identify any leaks during the inspection, it’s advisable to seek the assistance of a professional HVAC technician to repair the issue.
By following these steps and regularly checking for leaks in your air conditioning unit, you can ensure a well-maintained and efficient cooling system for your home.
Now that you’ve completed all the steps, take a moment to reflect on the successful addition of Freon to your home air conditioning unit. By following proper safety precautions, preparing the unit, and effectively adding Freon, you have taken an important step towards maintaining a comfortable indoor environment.
Remember, if you have any concerns or are unsure about any step in the process, don’t hesitate to consult a professional HVAC technician for assistance. They have the expertise and knowledge to guide you through the process and ensure the optimal performance of your air conditioning system.
Conclusion
Adding Freon to your home air conditioning unit is a task that can help restore its cooling efficiency and maintain a comfortable indoor environment. By following the step-by-step process outlined in this guide and prioritizing safety precautions, you can successfully add Freon to your AC system.
Remember, before you begin the process, it is crucial to ensure your own safety by wearing protective gear and turning off the power to your AC unit. Throughout the process, closely monitor pressure levels and quantity of Freon added to prevent overcharging or undercharging the system. Additionally, always check for potential leaks after completing the Freon addition.
Regular maintenance of your air conditioning unit, including adding Freon when necessary, can prolong the lifespan of the system and improve its overall performance. However, if you ever feel uncertain or uncomfortable performing the task yourself, it’s always best to consult with a professional HVAC technician who can provide expert guidance and assistance.
By following this comprehensive guide, you can confidently add Freon to your home air conditioning unit and enjoy a cool and comfortable living space, even during the hottest months. Remember to prioritize safety, be mindful of environmental concerns, and perform routine maintenance to keep your AC system in optimal condition.
Stay cool and enjoy the refreshing comfort that a well-maintained air conditioning unit can provide!
Now that you've mastered adding Freon to your air conditioning unit, keeping cool on sweltering days should be a breeze. But what happens when more complex issues arise? Every homeowner knows that AC troubles don't end there. For those unexpected breakdowns and maintenance checks, having a reliable guide for AC repair is invaluable. Dive into our detailed review of top services to ensure your AC runs smoothly year-round, without a hitch.
Frequently Asked Questions about How To Add Freon To Home Air Conditioning Unit
Was this page helpful?
At Storables.com, we guarantee accurate and reliable information. Our content, validated by Expert Board Contributors, is crafted following stringent Editorial Policies. We're committed to providing you with well-researched, expert-backed insights for all your informational needs.