Articles
How To Add AC Compressor Oil
Modified: August 28, 2024
Learn how to add AC compressor oil to keep your air conditioning system running smoothly. Read articles with step-by-step instructions and expert tips.
(Many of the links in this article redirect to a specific reviewed product. Your purchase of these products through affiliate links helps to generate commission for Storables.com, at no extra cost. Learn more)
Introduction
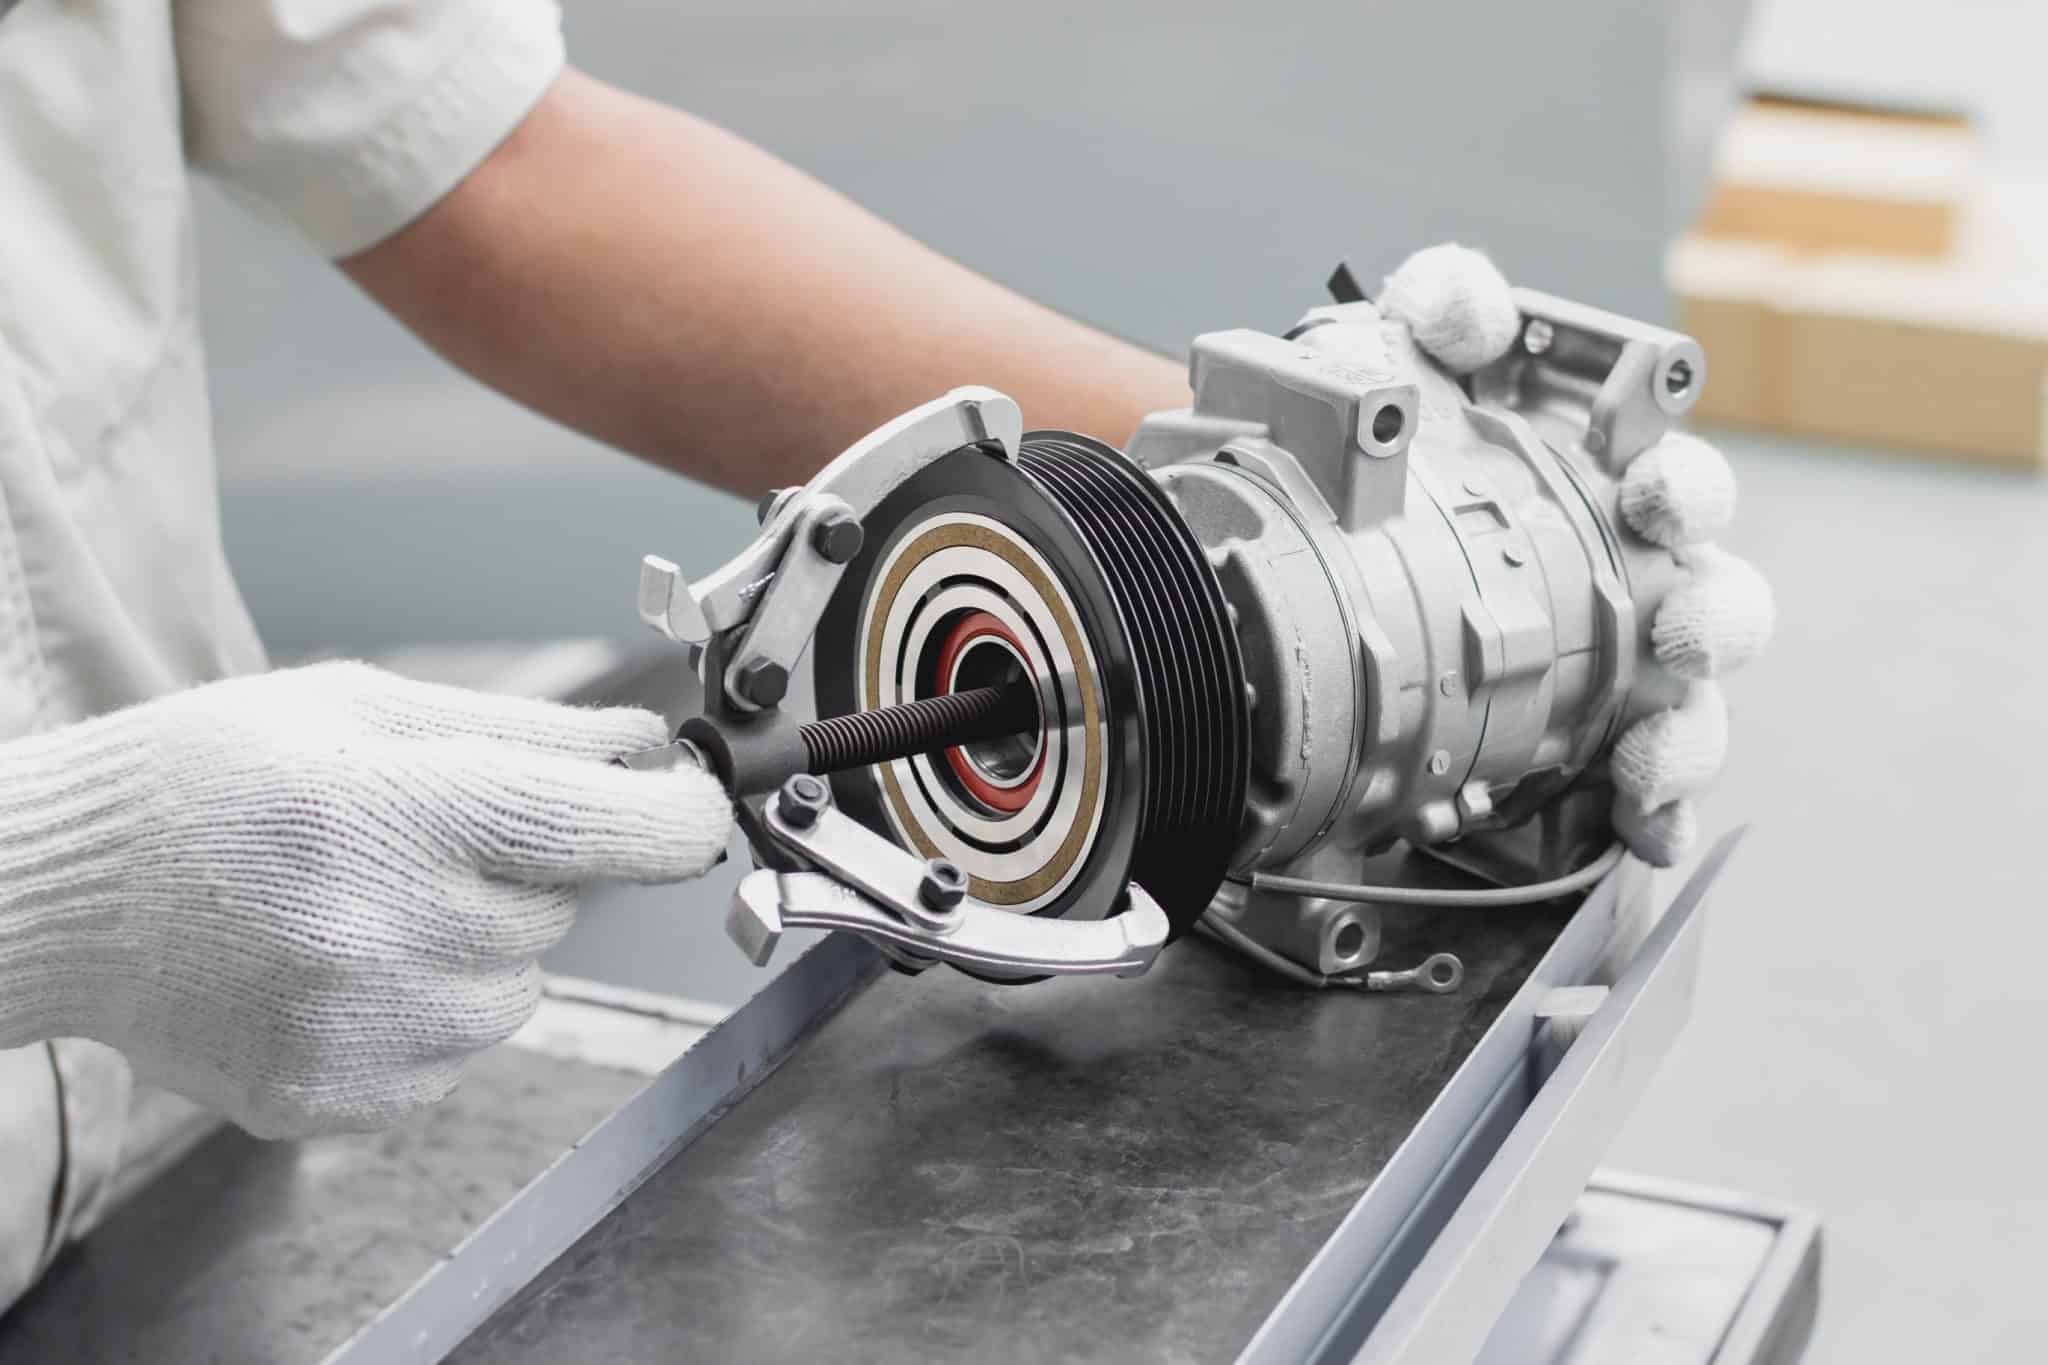
Welcome to our article on how to add AC compressor oil. If you own a car with an air conditioning system, you may have encountered issues where the system isn’t cooling as effectively as it used to. One possible cause for this could be a low level of AC compressor oil.
AC compressor oil plays a crucial role in the proper functioning of your air conditioning system. It lubricates the compressor, which is responsible for pressurizing the refrigerant and pumping it through the system. Without adequate oil, the compressor can overheat and potentially fail, leading to costly repairs.
In this article, we will guide you through the process of adding AC compressor oil to your car’s air conditioning system. By following these steps, you can help maintain the efficiency and longevity of your AC system.
Key Takeaways:
- Regularly adding AC compressor oil is crucial for maintaining the efficiency and longevity of your car’s air conditioning system. It prevents compressor failure, improves cooling performance, and ensures optimal operation.
- Prioritize safety, follow manufacturer’s recommendations, and perform regular checks to maintain the proper oil level in your AC system. Adding compressor oil helps prevent costly repairs and ensures comfortable driving experiences.
Read more: How Does A AC Compressor Work
What is AC Compressor Oil?
AC compressor oil, also known as refrigerant oil or AC lubricant, is a specialized oil used in air conditioning systems to lubricate the compressor. It is an essential component for the proper functioning of the AC system.
The primary purpose of AC compressor oil is to lubricate the compressor’s internal components, such as pistons, cylinders, and bearings. The compressor is responsible for compressing the refrigerant gas and converting it into a high-pressure, high-temperature gas that can circulate through the air conditioning system.
Compressor oil is required to reduce friction and wear between the moving parts of the compressor. It also helps in sealing the gaps between the pistons and cylinders, preventing the leakage of high-pressure gas. Additionally, it aids in heat dissipation, ensuring that the compressor does not overheat during operation.
AC compressor oil is specifically formulated to work in conjunction with the refrigerant used in the air conditioning system. Different types of refrigerants require different viscosities of oil for optimal performance. It is essential to choose the correct oil viscosity specified by the manufacturer for your specific AC system.
In modern air conditioning systems, the compressor and oil are housed in a sealed unit, which means that oil loss is minimal under normal conditions. However, over time, a small amount of oil may be lost due to leaks or seal degradation. Regular inspection of the oil level is crucial to ensure that the compressor is adequately lubricated.
It is important to note that AC compressor oil is different from engine oil. Engine oil is designed for lubricating the moving parts of an engine, while AC compressor oil is formulated specifically for the unique requirements of the air conditioning system.
Now that we understand the importance of AC compressor oil, let’s move on to why you need to add it to your AC system.
Why Do You Need to Add AC Compressor Oil?
Adding AC compressor oil to your air conditioning system is essential for several reasons:
1. Lubrication: The primary function of AC compressor oil is to lubricate the internal components of the compressor. Without sufficient oil, the compressor can experience increased friction and wear, leading to reduced performance and potential damage. Regularly adding oil helps maintain proper lubrication and ensures the longevity of the compressor.
2. Heat Dissipation: AC compressor oil also aids in heat dissipation. The compressor generates heat during operation, and the oil helps carry away the excess heat, preventing overheating. Over time, the oil can break down and lose its ability to dissipate heat effectively. Adding fresh oil replenishes this cooling capacity and helps to maintain optimal operating temperatures.
3. Sealing: The oil helps create a tight seal between the pistons and cylinders in the compressor. This seal is crucial for maintaining the high-pressure gas necessary for the air conditioning system to function properly. Without proper sealing, the system may experience refrigerant leaks, resulting in decreased cooling performance. Adding oil ensures a proper seal and reduces the risk of leaks.
4. Preventing Compressor Failure: Insufficient oil can cause the compressor to overheat and lead to compressor failure. A failed compressor is a costly repair and can result in the complete breakdown of the air conditioning system. By regularly adding AC compressor oil, you can prevent this scenario and avoid expensive repairs.
5. Maintaining Efficiency: When the AC compressor is properly lubricated, it can operate at its optimal efficiency. This means that it can compress the refrigerant more effectively, resulting in better cooling performance and faster cooling times. Adding the correct amount of oil to the system helps maintain this efficiency and ensures that your AC system operates at its best.
It is important to note that adding AC compressor oil should only be done if the oil level is low. Excessive oil can also cause issues with the system, such as reduced cooling performance or damage to other components. Therefore, it is crucial to follow the manufacturer’s guidelines and recommendations when adding compressor oil to your air conditioning system.
Now that we understand why adding AC compressor oil is necessary, let’s move on to the tools and materials required for the process.
Tools and Materials Required
Before you start adding AC compressor oil, it’s essential to gather the necessary tools and materials. Here’s a list of what you’ll need:
1. Protective Gear: Always prioritize safety when working on your vehicle. Wear protective gloves and safety goggles to protect your hands and eyes from any potential hazards.
2. Owner’s Manual: The owner’s manual is an invaluable resource for your specific vehicle. It will provide detailed information on the recommended type and amount of compressor oil to use. Refer to the manual to ensure you’re using the correct oil for your AC system.
3. AC Compressor Oil: Purchase the appropriate AC compressor oil specified by the manufacturer. Different vehicles and AC systems may require different types of oil, so make sure you select the correct one.
4. Rags: Keep some clean rags handy to wipe off any spills or excess oil during the process. This will help keep the work area clean and prevent any oil from coming into contact with other components.
5. Oil Injector or Syringe: Depending on your vehicle’s AC system, you may need an oil injector or syringe to add the oil accurately. These tools allow for precise measurement and controlled dispensing of the oil into the system.
6. Gasket or O-ring: Check if your AC system requires a gasket or O-ring replacement when adding oil. These small components help maintain a tight seal and prevent leaks. If necessary, purchase the appropriate gasket or O-ring before proceeding.
7. Wrench or Socket Set: You may need a wrench or socket set to remove or loosen any components, such as the oil cap or access panel, to access the AC compressor. The size of the tool required will vary depending on your vehicle’s specifications.
It’s important to note that the tools and materials required may vary depending on the specific vehicle and AC system. Always consult your owner’s manual and follow the manufacturer’s recommendations to ensure you have the correct tools and materials for the job.
Now that you have all the necessary tools and materials, let’s proceed to the step-by-step process of adding AC compressor oil to your system.
Step 1: Safety Precautions
Before starting the process of adding AC compressor oil, it is essential to take necessary safety precautions to protect yourself and prevent any damage to your vehicle. Follow these steps:
1. Park in a Well-Ventilated Area: Ensure that you park your vehicle in a well-ventilated area before starting. This will help prevent the buildup of harmful fumes while working on the AC system.
2. Turn Off the Engine: Always make sure that the engine is turned off before working on any part of the vehicle, including the AC system. This will prevent any accidental startup or injury.
3. Allow the Engine to Cool: Give the engine enough time to cool down before proceeding. Working with a hot engine can increase the risk of burns or other injuries.
4. Use Protective Gear: Wear appropriate protective gear, including gloves and safety goggles, to protect yourself from any potential hazards. AC compressor oil can be harmful if it comes into contact with your skin or eyes.
5. Read the Owner’s Manual: Familiarize yourself with the information provided in your vehicle’s owner’s manual regarding the AC system. It will provide specific instructions and safety guidelines for working on your particular make and model.
6. Handle Oil Containers with Care: When handling AC compressor oil, be cautious not to spill it. Always follow the manufacturer’s instructions on how to handle and dispose of the oil properly. If any spills occur, clean them up immediately.
7. Keep the Work Area Clean: Maintain a clean work area by wiping up any spills or excess oil. This will prevent contamination and minimize the risk of slipping or accidents.
By following these safety precautions, you can ensure a safe and smooth process when adding AC compressor oil. Proceeding with caution will not only protect yourself but also help maintain the integrity of the AC system. Now that you’re aware of the safety measures, let’s move on to locating the AC compressor in your vehicle.
Read more: What Is An AC Compressor
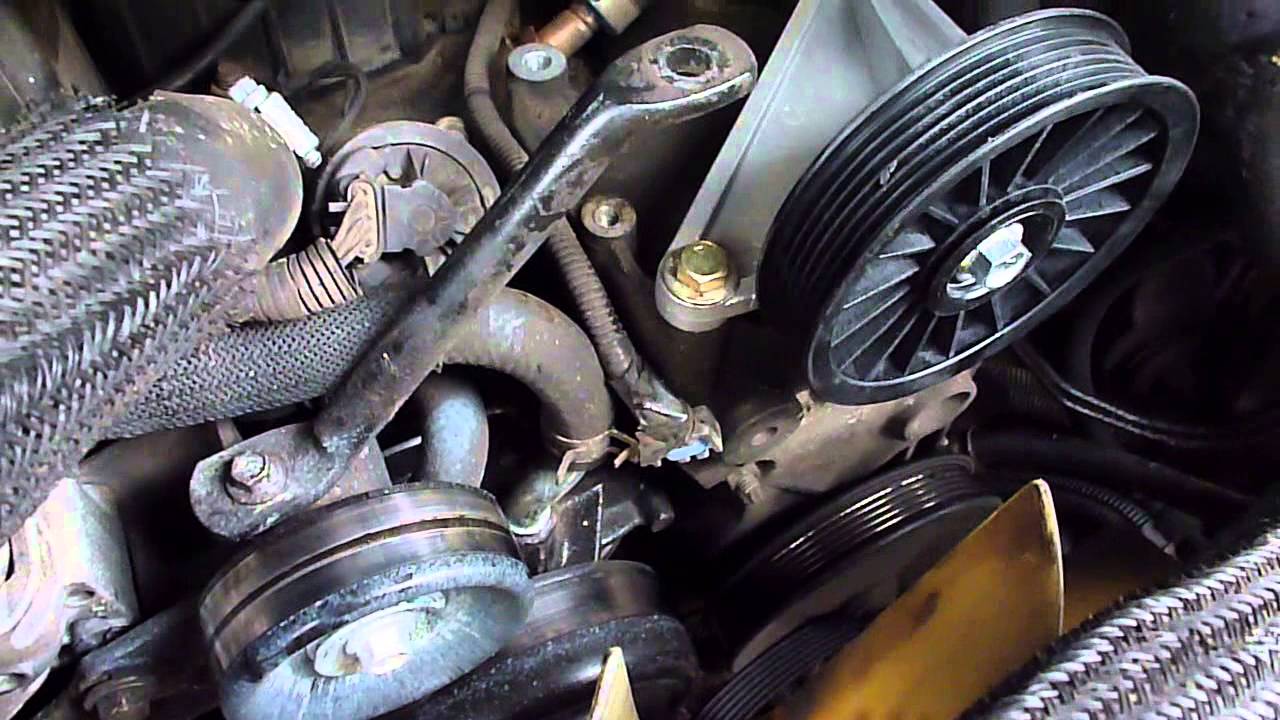
Step 2: Locating the AC Compressor
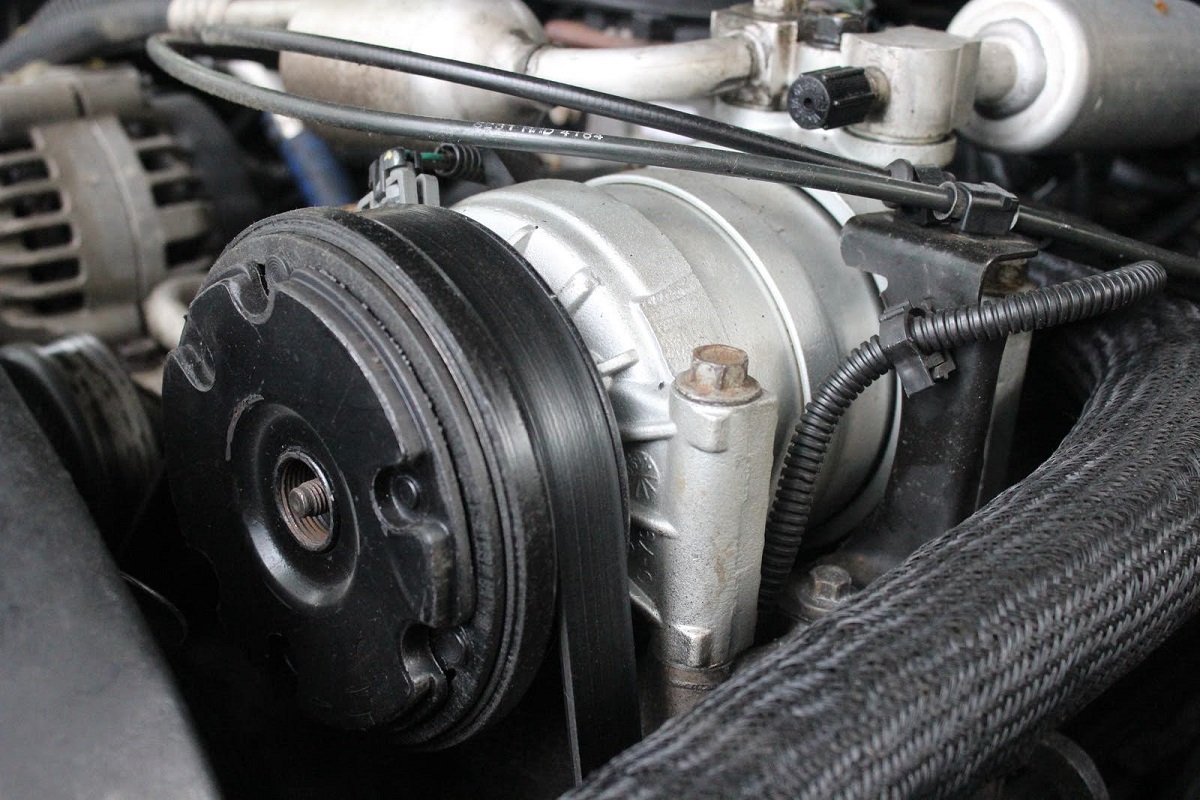
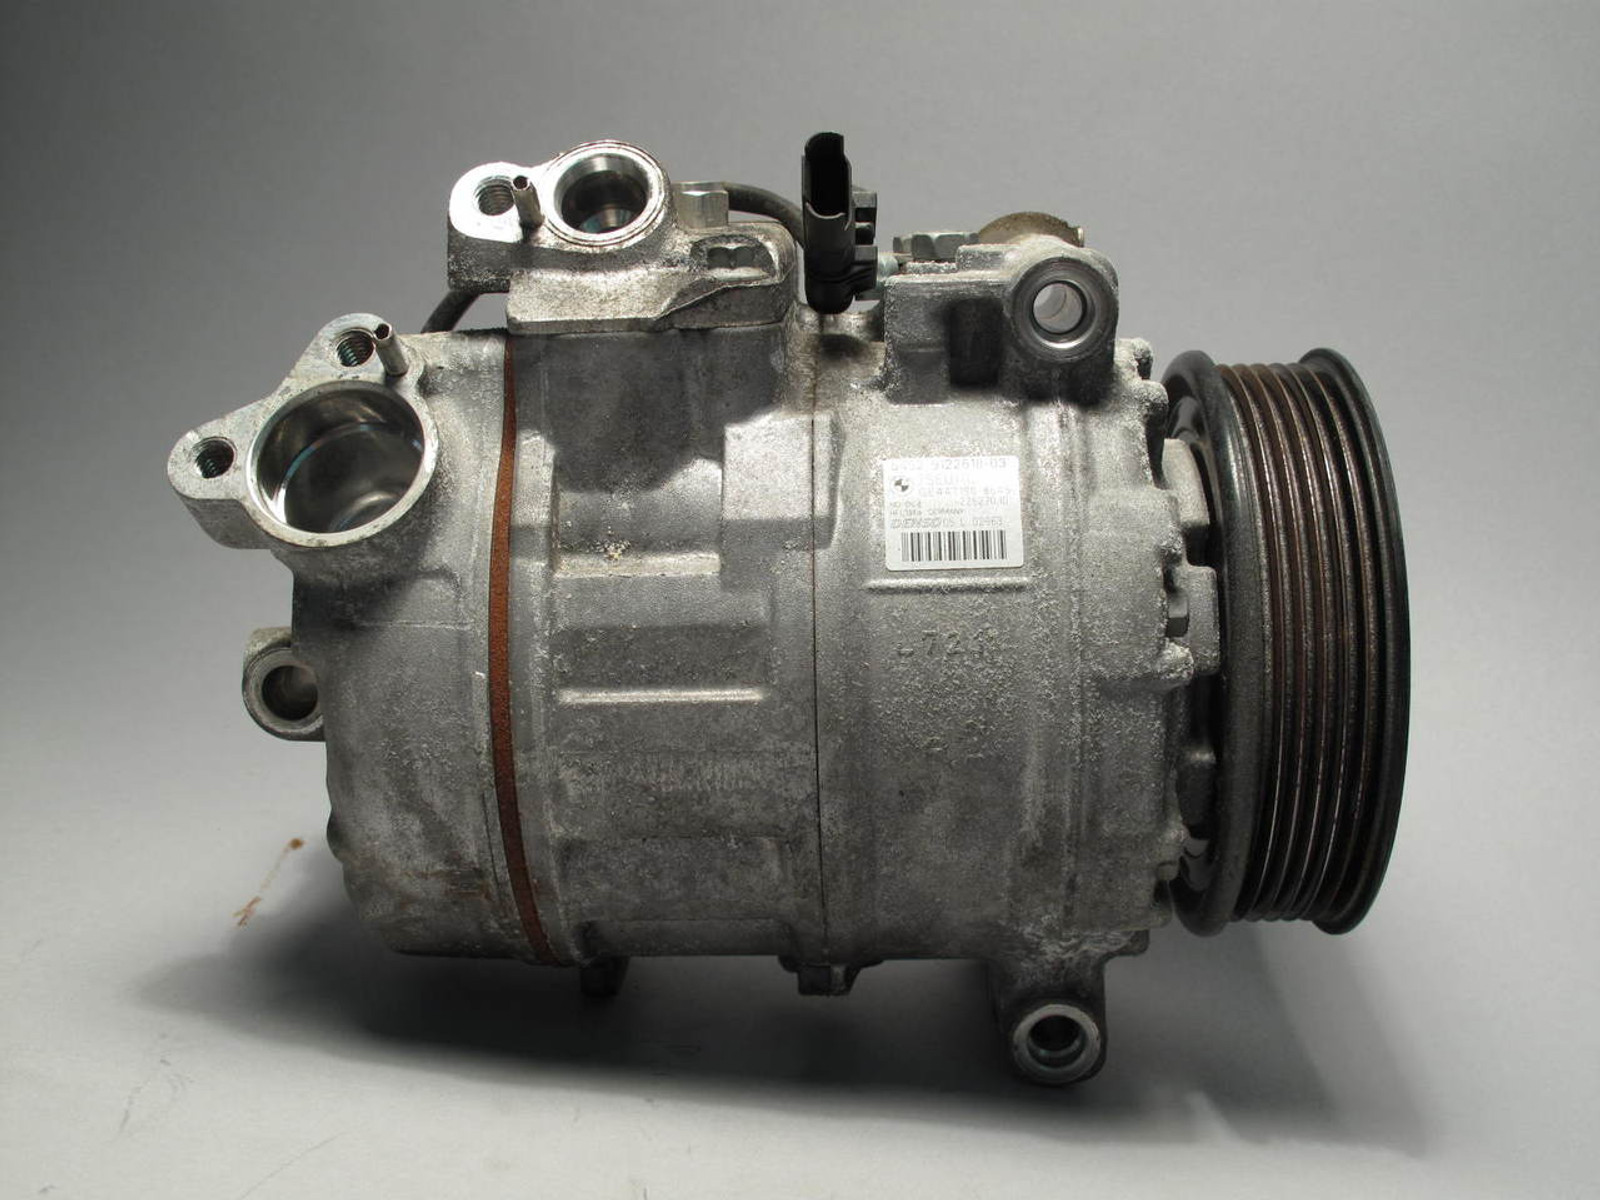
Before you can add AC compressor oil, you need to locate the AC compressor in your vehicle. The compressor is usually located on the front of the engine, typically driven by a belt connected to the crankshaft.
1. Consult the Owner’s Manual: Refer to your vehicle’s owner’s manual to find the exact location of the AC compressor. The manual will provide specific instructions and diagrams to help you locate it.
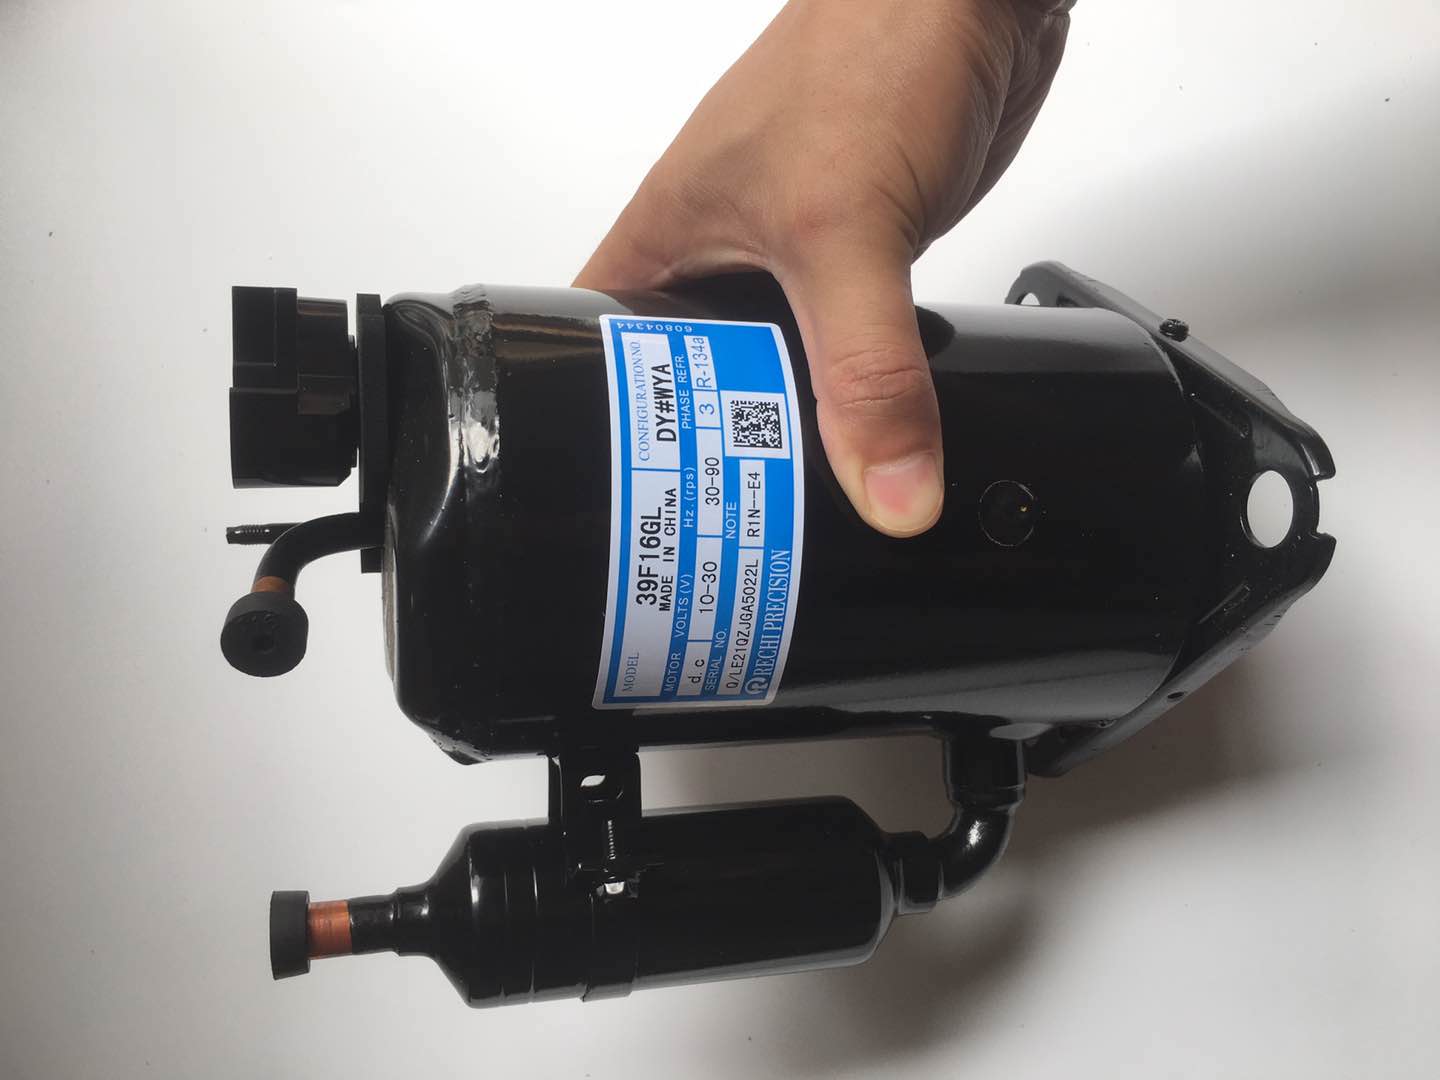
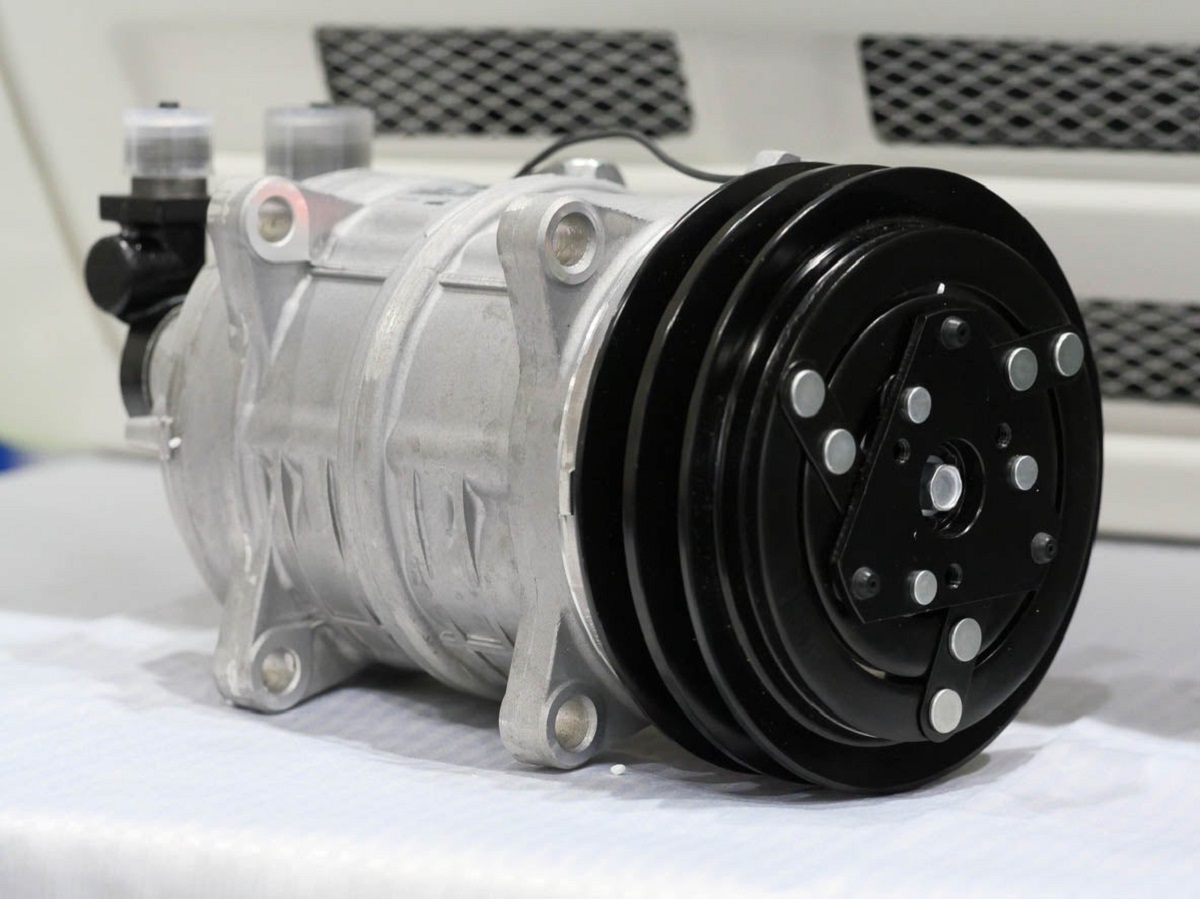
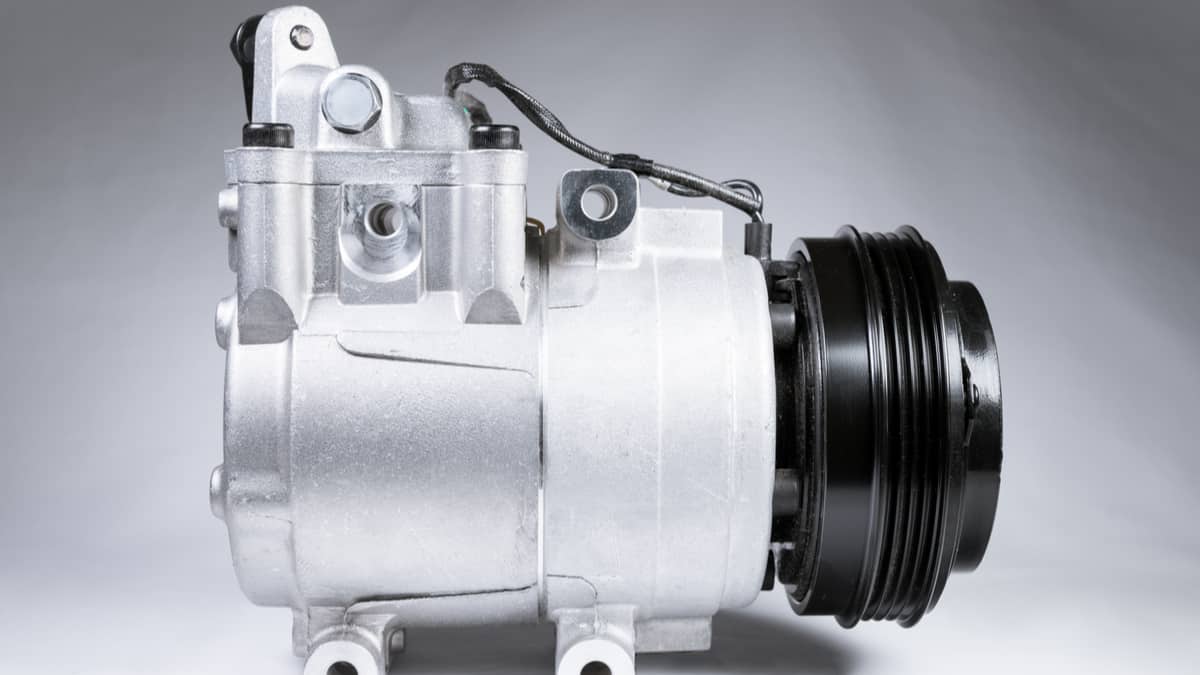
2. Identify the Compressor Features: Look for a cylindrical or oblong-shaped component with metal fittings and hoses connected to it. The compressor may be covered by a metal or plastic shroud or located behind other components, so you may need to remove some parts or panels for better access.
3. Visual Inspection: Scan the engine bay to locate the compressor. Look for an assembly that has a pulley attached to it, and wires and hoses connected to different ports. The compressor is typically located in the front part of the engine.
4. Feel for Cold Pipes: Another way to identify the compressor is to feel for the cold pipes or hoses connected to it. The AC system works by transferring heat from inside the vehicle to the outside, so the compressor’s pipes may feel cool or cold to the touch when the system is running.
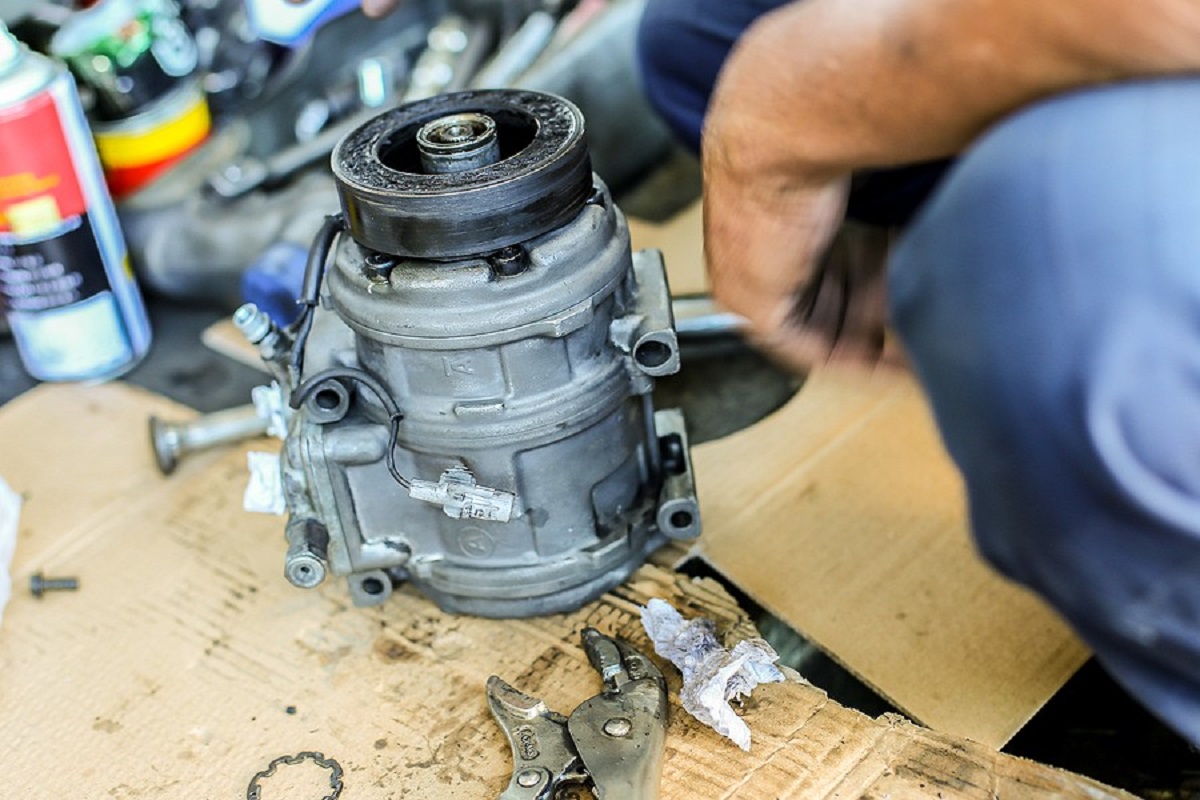
5. Seek Professional Help if Needed: If you are unsure or having difficulty locating the AC compressor, it is recommended to consult a professional mechanic who can assist you in finding it. They have the experience and knowledge to quickly identify the compressor’s location in your specific vehicle.
Remember, the location of the AC compressor may vary depending on the make, model, and year of your vehicle. It’s always best to consult your owner’s manual or seek professional help if needed. Once you have located the AC compressor, you can proceed to the next step, which involves removing the oil cap.
When adding AC compressor oil, make sure to use the correct type and amount specified by the manufacturer. Overfilling can cause damage, so it’s important to measure carefully. Always consult the vehicle’s manual for specific instructions.
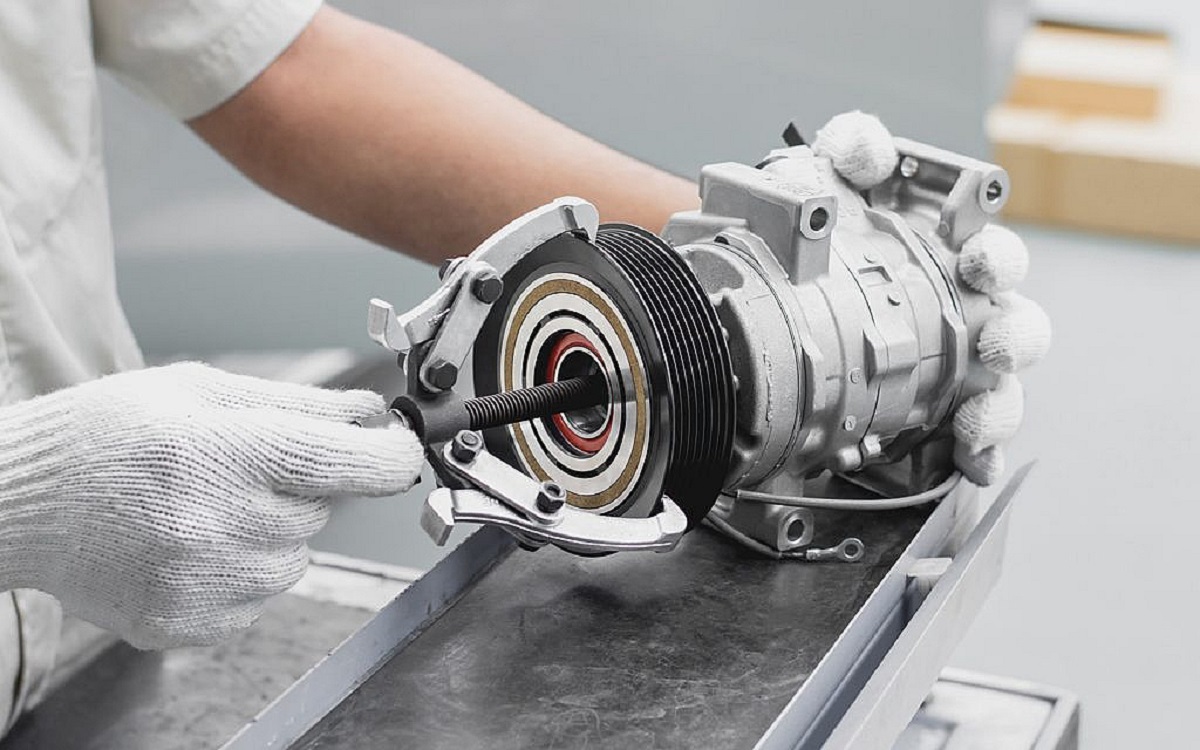
Step 3: Removing the Oil Cap
Now that you have located the AC compressor, the next step is to remove the oil cap. Follow these steps:
1. Ensure Safety: Before proceeding, ensure that the engine is turned off, and you have followed the necessary safety precautions mentioned earlier in the article, such as wearing protective gloves and goggles.
2. Locate the Oil Cap: Look for the oil cap on the AC compressor. It is typically a small, round or square-shaped cap with a mark indicating “Oil.”
3. Inspect the Oil Cap: Take a moment to inspect the oil cap and surrounding area for any dirt, grime, or debris. Clean the area if necessary to prevent any contaminants from entering the compressor.
4. Loosen the Oil Cap: Using a wrench or socket set, gently loosen the oil cap by turning it counterclockwise. Be careful not to force it or overtighten in the process, as this can cause damage to the cap or the compressor.
5. Remove the Oil Cap: Once the oil cap is loose, carefully remove it from the compressor. Set it aside in a safe place where it won’t get lost or contaminated.
6. Inspect the Oil Cap: Take a moment to inspect the oil cap for any signs of damage or wear. If you notice any cracks, leaks, or other issues, it may be necessary to replace the cap before proceeding.
By removing the oil cap, you create access to the oil reservoir in the compressor, allowing you to check the oil level and add compressor oil if necessary. However, before adding oil, it is important to check the oil level to determine if it needs to be topped up. Proceed to the next step to learn how to check the oil level in the AC compressor.
Step 4: Checking the Oil Level
Now that you have removed the oil cap, it’s time to check the oil level in the AC compressor. Follow these steps:
1. Inspect the Oil Cap: Before proceeding, take a moment to inspect the oil cap. Check if there are any oil marks or indicators on the inside of the cap. This can give you a preliminary idea of the oil level in the compressor.
2. Clean the Dipstick: Locate the dipstick or sight glass on the compressor. The dipstick is usually attached to the oil cap or located nearby. If it is dirty or covered in oil, clean it using a clean rag to get a clear reading.
3. Insert the Dipstick: Insert the dipstick or look through the sight glass into the compressor. Make sure it goes all the way into the reservoir to get an accurate reading.
4. Withdraw the Dipstick: Once the dipstick is fully inserted into the compressor, carefully withdraw it and observe the oil level. The dipstick may have markings indicating the minimum and maximum oil levels. Ensure that the oil level falls within this range.
5. Check the Oil Color and Consistency: While checking the oil level, also observe the color and consistency of the oil. The oil should be translucent or a light amber color. If it appears dark, dirty, or has metal particles floating in it, it may indicate contamination or a need for a more thorough inspection.
6. Compare with Manufacturer’s Recommendation: Refer to your vehicle’s owner’s manual or manufacturer’s specifications to determine the recommended oil level. Ensure that the measured oil level matches the manufacturer’s recommendation.
It is important to note that some AC compressors may have a sight glass instead of a dipstick. In such cases, you can observe the oil level directly through the sight glass.
Once you have determined the oil level in the AC compressor, you can proceed to the next step, which involves adding compressor oil, if necessary, to maintain the optimal level.
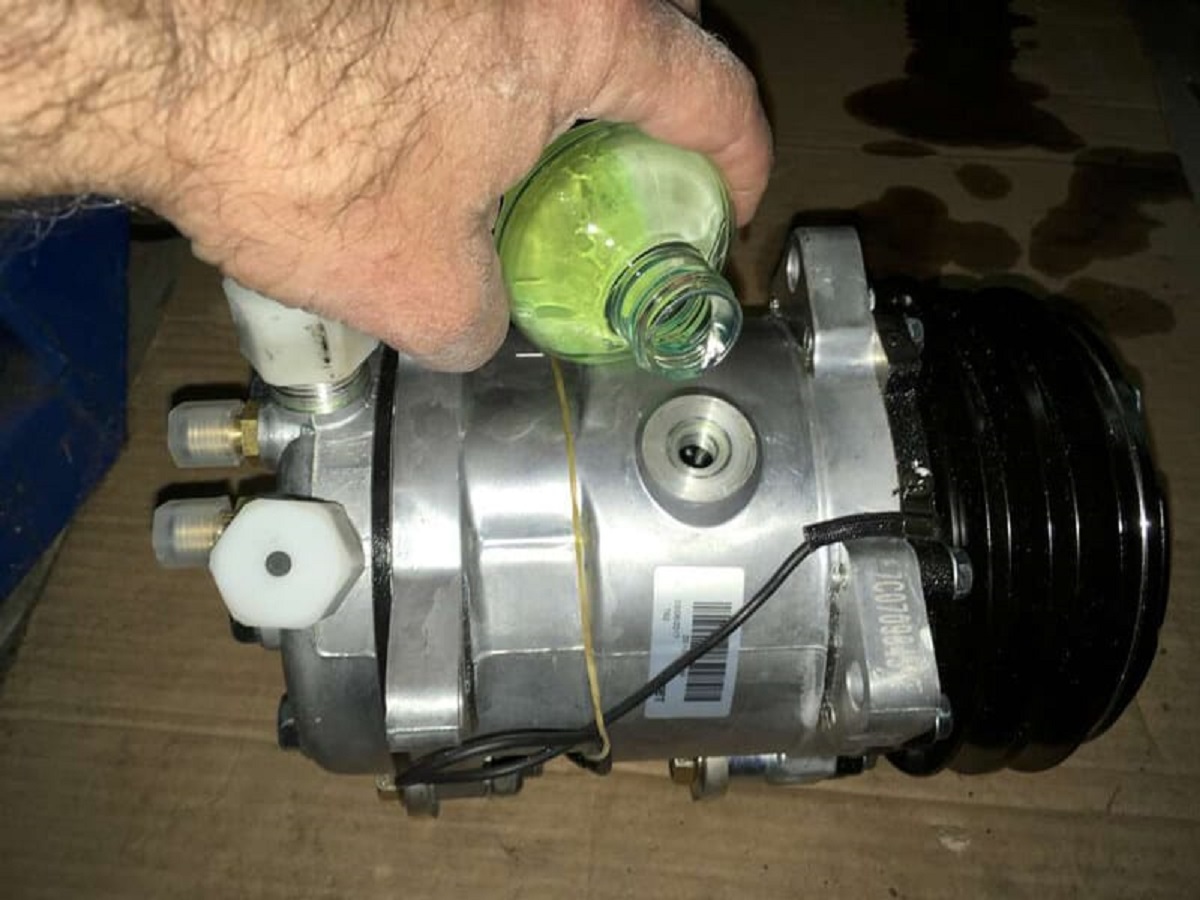
Step 5: Adding the Compressor Oil
If you have determined that the AC compressor oil level is low or below the manufacturer’s recommended level, it’s time to add oil. Follow these steps to add compressor oil:
1. Refer to the Owner’s Manual: Consult your vehicle’s owner’s manual to ensure you are using the correct type and viscosity of compressor oil specified by the manufacturer. It is important to use the recommended oil to maintain optimal performance and avoid any potential issues.
2. Prepare the Oil Injector or Syringe: If your AC system requires the use of an oil injector or syringe for precise oil measurement and dispensing, prepare it according to the manufacturer’s instructions. Attach the appropriate nozzle or fitting for easy insertion into the compressor.
3. Insert the Injector or Syringe: Carefully insert the nozzle or tip of the oil injector or syringe into the oil port or opening on the compressor. Proceed with caution to prevent any spills or contamination.
4. Slowly Add the Compressor Oil: Begin slowly injecting or dispensing the compressor oil into the compressor. Avoid adding oil too quickly to prevent overflow or excess oil in the system. Take your time and ensure controlled and precise dispensing.
5. Monitor the Oil Level: As you add the oil, regularly check the oil level using the dipstick or sight glass. Stop adding oil when the level reaches the recommended mark indicated by the manufacturer. Avoid overfilling the compressor with oil.
6. Remove the Injector or Syringe: Once you have added the desired amount of oil, carefully remove the oil injector or syringe from the oil port or opening. Be cautious not to spill any oil in the process.
7. Wipe Clean and Reinstall the Oil Cap: Before reinstalling the oil cap, ensure that the area around the oil port or opening is clean and free from any oil residue. Wipe the area with a clean rag if necessary. Then, securely reinstall the oil cap on the compressor.
By following these steps, you can effectively add compressor oil to your AC system. It is important to be cautious and precise during this process to maintain the optimal oil level without any spills or contamination. Once you have completed adding the oil, proceed to the next step to reinstall the oil cap.
Read more: How To Change AC Compressor
Step 6: Reinstalling the Oil Cap
After adding the compressor oil to the AC system, the next step is to reinstall the oil cap securely. Follow these steps to ensure proper installation:
1. Clean the Oil Cap: Before placing the oil cap back onto the compressor, inspect it for any dirt or debris. Wipe it clean using a rag if necessary to prevent any contaminants from entering the system.
2. Align the Cap: Position the oil cap above the opening on the compressor. Align the cap correctly with the threads to ensure a proper fit.
3. Hand-tighten the Oil Cap: Begin by hand-tightening the oil cap onto the compressor. Rotate it clockwise to thread it onto the opening. Use gentle pressure to avoid cross-threading or damaging the cap or the compressor.
4. Confirm a Secure Seal: Once the oil cap is hand-tight, give it an additional quarter-turn using a wrench or socket set. This will ensure a secure and tight seal without overtightening.
5. Check for Proper Fit: Ensure that the oil cap is securely in place and properly sealed. Wiggle and lightly pull on the cap to confirm that it is tightly fastened to the compressor. A properly installed oil cap should not move or come loose easily.
6. Inspect for Leaks: After reinstalling the oil cap, inspect the area around the cap for any signs of oil leakage. If you notice any oil seeping from the cap, there may be an issue with the seal or threads. In such cases, it is recommended to consult a professional for further inspection and repair.
By following these steps, you can ensure that the oil cap is securely reinstalled onto the AC compressor, preventing any oil leaks or contaminants from entering the system. Once you have completed this step, it’s time to move on to the final step: testing the AC system to ensure it is functioning properly.
Step 7: Testing the AC System
After adding oil to the AC compressor and reinstalling the oil cap, it’s important to test the AC system to ensure it is functioning properly. Follow these steps to test your AC system:
1. Start the Engine: Start your vehicle’s engine and allow it to run for a few minutes. This will help circulate the compressor oil throughout the system.
2. Switch on the AC: Turn on the air conditioning system by selecting the AC function on your control panel. Set the temperature to the desired level and turn on the fan.
3. Observe the Cooling: Pay attention to the air coming out of the vents. Check if it is cool and refreshing. The AC system should provide a noticeable drop in temperature compared to the outside air.
4. Monitor the Performance: While the AC system is running, monitor its performance. Check if the air conditioning system is cooling the cabin efficiently and maintaining the desired temperature. Listen for any unusual sounds or vibrations that may indicate a problem.
5. Check for Leaks: Keep an eye out for any signs of refrigerant or oil leaks around the compressor and other components. Leaks can affect the overall performance and efficiency of the AC system. If you notice any leaks, it is advisable to seek professional assistance for repair.
6. Test Different Settings: Experiment with different AC settings such as adjusting the fan speed and changing the airflow direction. Make sure that each setting is functioning correctly and providing the desired cooling effect.
7. Monitor the Compressor: Observe the compressor while the AC system is running. It should be running smoothly without any unusual noises or excessive vibrations. If you notice any issues, such as grinding noises or excessive shaking, it may indicate a problem with the compressor that requires further inspection.
8. Take Note of Any Issues: If you encounter any issues, such as insufficient cooling or unusual sounds, take note of them. This information can help in diagnosing any potential problems during maintenance or future repairs.
By testing your AC system after adding compressor oil, you can ensure that it is functioning optimally and providing the desired cooling performance. If you have any concerns or encounter any issues, it is recommended to consult a professional or an experienced technician for further inspection and assistance.
Conclusion
Adding AC compressor oil is a vital maintenance task that helps ensure the proper functioning and longevity of your vehicle’s air conditioning system. By following the steps outlined in this article, you can successfully add compressor oil to your AC system. Regularly checking and maintaining the oil level helps to prevent compressor failure, improve cooling efficiency, and prolong the lifespan of the system.
Remember to always prioritize safety when working on your vehicle’s AC system. Wear protective gear, consult your owner’s manual for specific instructions, and seek professional assistance if you are unsure or uncomfortable performing the task yourself.
In summary, here are the key points to keep in mind:
- AC compressor oil is essential for lubricating and cooling the compressor in your vehicle’s air conditioning system.
- Adding oil is necessary to maintain the proper oil level and prevent compressor failure.
- Ensure you have the necessary tools, materials, and safety equipment before starting.
- Follow the step-by-step instructions for safety precautions, locating the AC compressor, removing the oil cap, checking the oil level, adding the oil, reinstalling the oil cap, and testing the AC system.
- Regularly monitor the AC system for leaks, unusual sounds, and performance issues.
- Consult a professional if you encounter any difficulties or concerns during the process.
By taking the time to add AC compressor oil and properly maintain your vehicle’s air conditioning system, you can enjoy comfortable and reliable cooling during your drives. Stay cool!
Frequently Asked Questions about How To Add AC Compressor Oil
Was this page helpful?
At Storables.com, we guarantee accurate and reliable information. Our content, validated by Expert Board Contributors, is crafted following stringent Editorial Policies. We're committed to providing you with well-researched, expert-backed insights for all your informational needs.


0 thoughts on “How To Add AC Compressor Oil”