Home>Home Maintenance>How To Check My Car Air Conditioning
Home Maintenance
How To Check My Car Air Conditioning
Modified: October 20, 2024
Learn how to check your car's air conditioning system with our easy step-by-step guide. Keep your home maintenance up to date and stay cool on the road!
(Many of the links in this article redirect to a specific reviewed product. Your purchase of these products through affiliate links helps to generate commission for Storables.com, at no extra cost. Learn more)
Introduction
Having a properly functioning and efficient car air conditioning system is crucial for a comfortable driving experience, especially during hot summer months. However, over time, the performance of your car’s air conditioning may start to decline, leading to weaker airflow or warmer temperatures. In order to ensure that your car’s air conditioning is working optimally, it’s important to perform regular checks and maintenance.
In this article, we will guide you through a step-by-step process of checking your car air conditioning system. By following these simple steps, you can identify any potential issues and address them before they become more serious and costly to fix.
Key Takeaways:
- Regularly checking your car’s air conditioning system ensures cool and comfortable drives. Follow simple steps to identify and address potential issues before they become costly problems.
- If in doubt, consult a professional technician to accurately diagnose and repair any air conditioning issues. Regular maintenance keeps your system reliable for refreshing drives.
Read more: How To Clean My Car Air Conditioning
Step 1: Start the Car Engine
The first step in checking your car’s air conditioning system is to start the car’s engine. This allows the system to begin operating and provides power to the components necessary for testing.
Ensure that the car is parked in a well-ventilated area, as running the engine will produce exhaust fumes. It’s also important to keep the car in park or neutral, with the parking brake engaged, to ensure safety during the testing process.
Once the engine is running, you can proceed to the next step in evaluating your car’s air conditioning system.
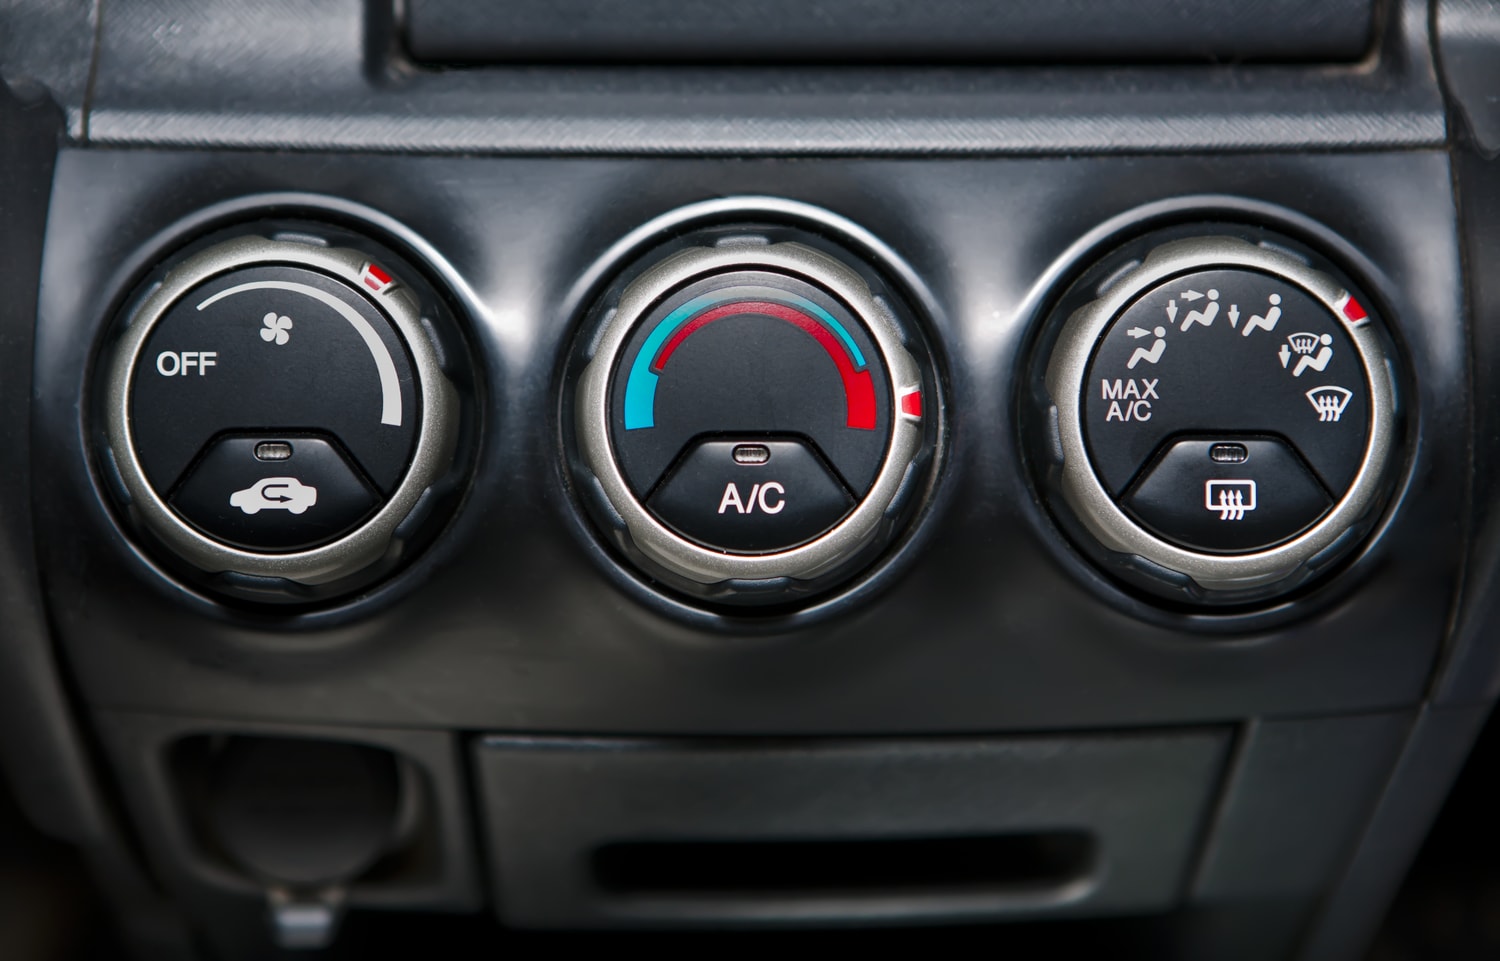
Step 2: Set the Air Conditioning to Maximum
After starting the car engine, the next step is to set the air conditioning to its maximum setting. This allows you to test the system at its full capacity and assess its performance.
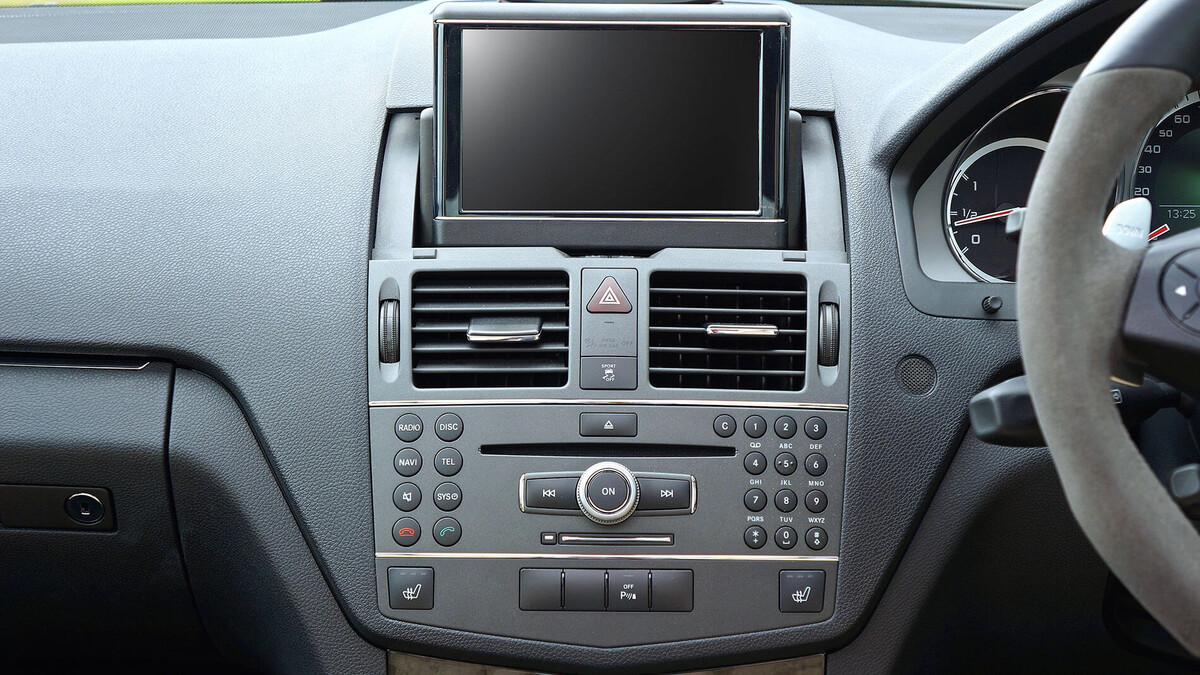
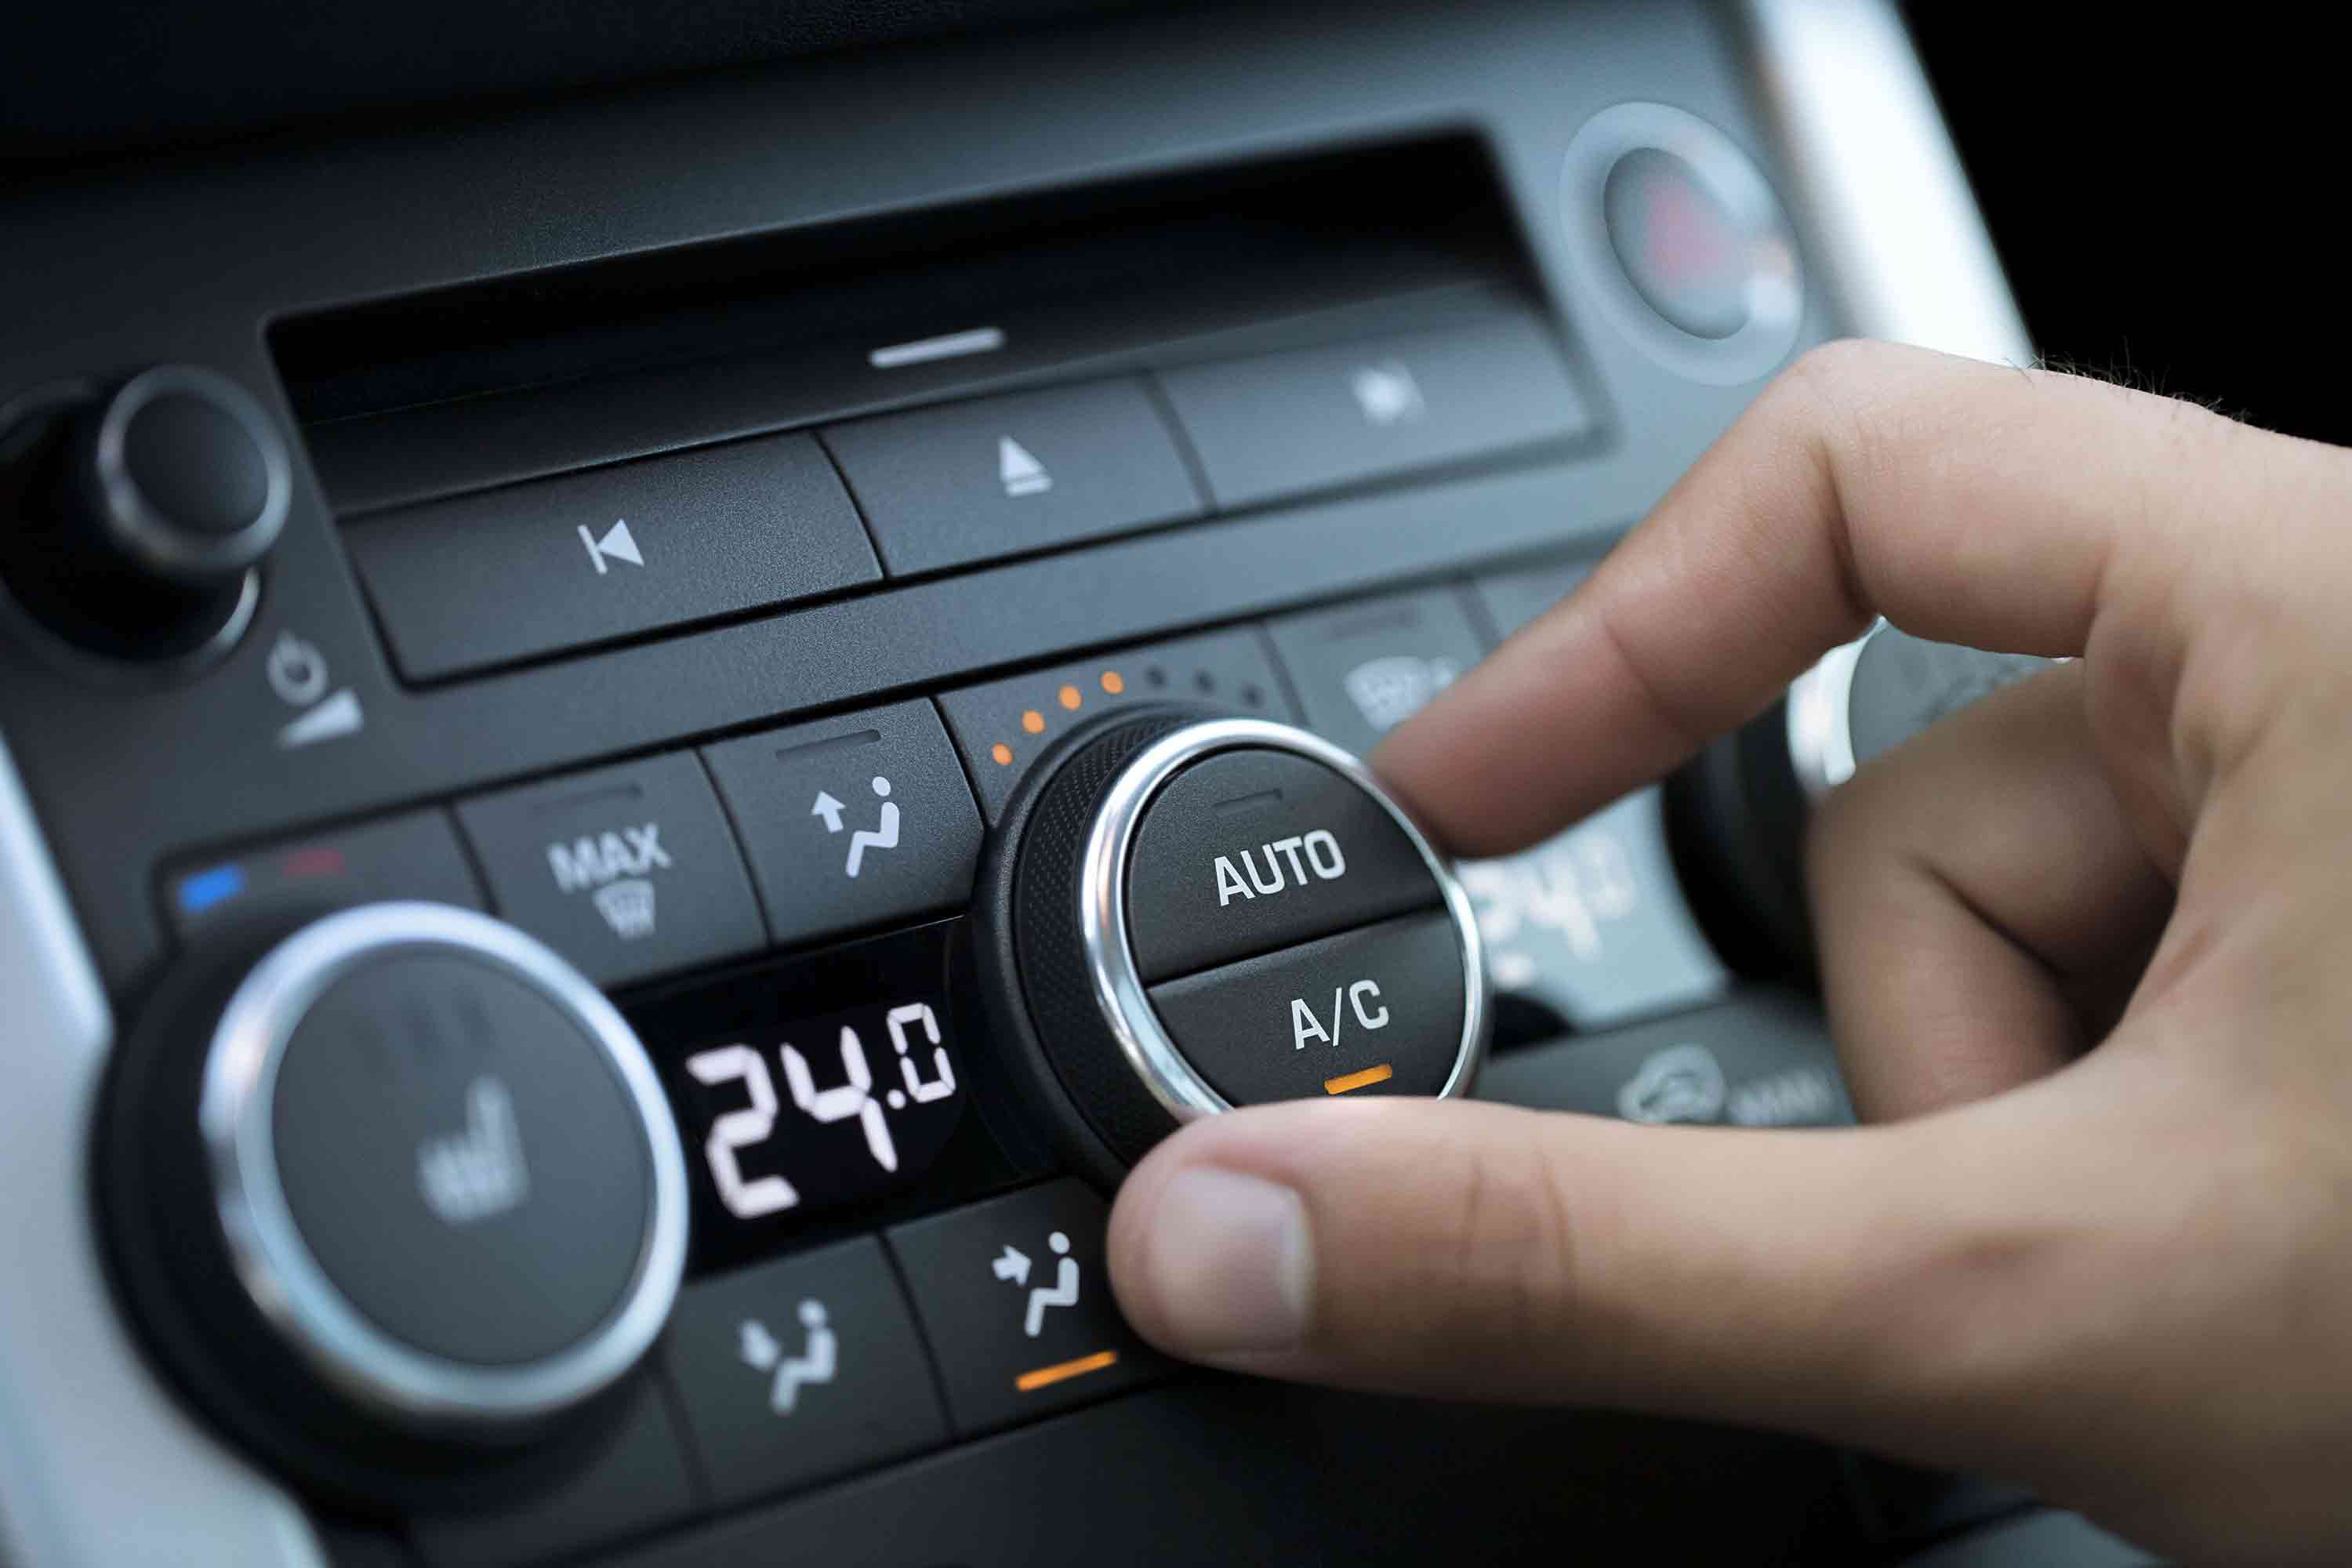
Locate the air conditioning controls in your car, which are typically found on the center console or dashboard. Look for the button or dial that adjusts the fan speed and temperature. Turn the fan speed to the highest setting and set the temperature to the coldest setting possible.
It’s important to note that some cars may have slightly different control configurations. Refer to your car’s manual if you’re unsure about the specific steps required to set the air conditioning to maximum.
Once you’ve adjusted the settings, you’re ready to move on to the next step and observe the airflow and temperature.
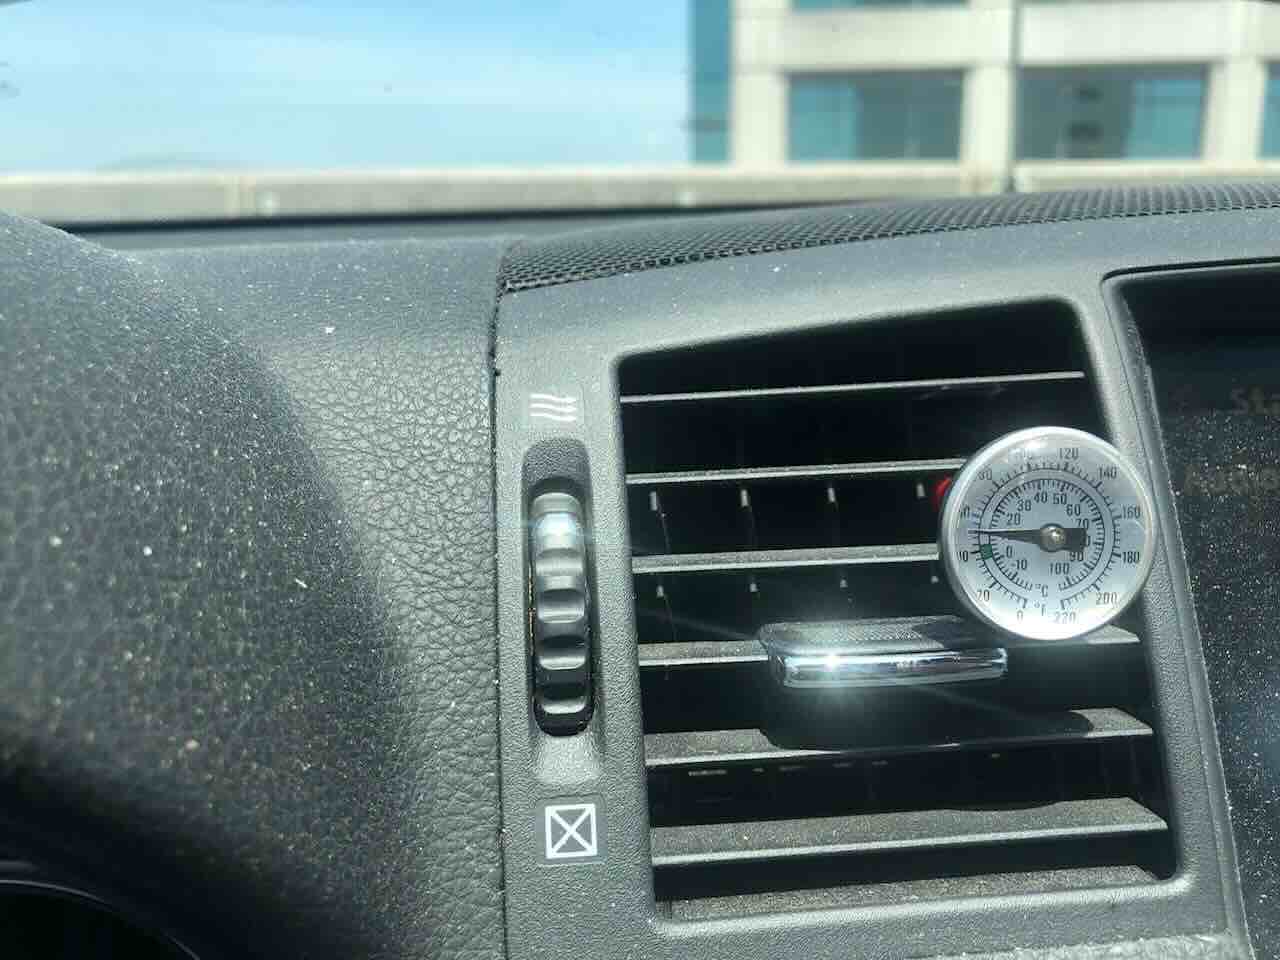
Step 3: Observe the Airflow and Temperature
With the air conditioning set to its maximum setting, it’s time to observe the airflow and temperature coming from the vents. Sit in the driver’s seat and feel the air blowing from the vents to evaluate its strength and consistency.
If the airflow feels weak or inconsistent, this could indicate a problem with the blower motor, fan, or other components of the air conditioning system. Additionally, pay attention to any strange noises coming from the vents, as this could indicate a malfunctioning part.
Next, assess the temperature of the air coming from the vents. It should feel noticeably cooler than the ambient air temperature inside the car. If the air does not feel cool, it may suggest a refrigerant leak, a faulty compressor, or other issues that require further inspection.
Take note of any abnormal observations during this step, as they will be helpful in diagnosing potential problems and determining the necessary repairs or maintenance.
Once you have assessed the airflow and temperature, you can proceed to the next step and check for any unusual noises in the system.
Step 4: Check for Any Unusual Noises
One common sign of a problem in a car’s air conditioning system is the presence of unusual noises. It’s important to listen carefully during this step to identify any strange or unfamiliar sounds that could indicate a malfunction.
While the air conditioning is running at maximum capacity, pay attention to any grinding, squealing, or rattling noises coming from the vents or the engine compartment. These noises could be an indication of a faulty compressor, worn-out belts, or other mechanical issues.
If you hear any unusual noises, it’s best to consult with a professional technician who specializes in air conditioning repairs. They will be able to diagnose the problem and recommend the appropriate course of action.
Checking for unusual noises is a crucial step in assessing the overall condition of your car’s air conditioning system. By addressing any issues early on, you can avoid further damage and costly repairs down the line.
Once you have completed this step, it’s time to move on to the next and examine the air conditioning compressor.
Read more: Why Is My Car Air Conditioning Not Working
Step 5: Inspect the Air Conditioning Compressor
The air conditioning compressor plays a vital role in the functionality of your car’s air conditioning system. It is responsible for compressing and circulating the refrigerant, which cools the air before it enters the cabin.
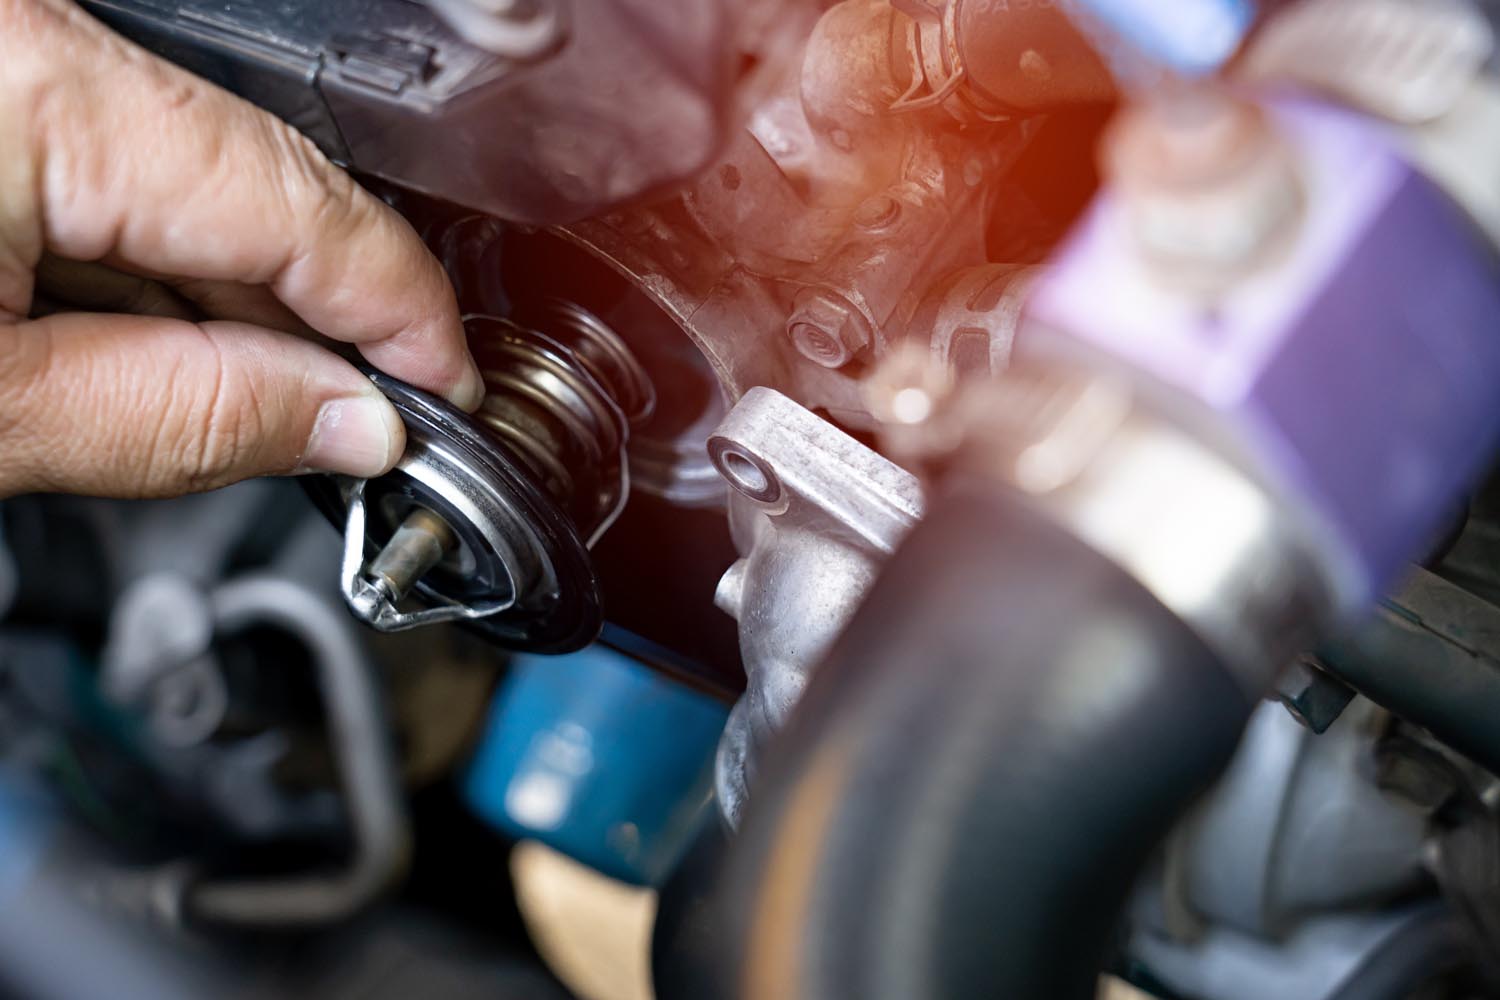
To inspect the air conditioning compressor, open the hood of your car and locate the compressor. It is a cylindrical-shaped component typically driven by a belt connected to the engine. Look for any signs of damage or leaks, such as oil stains or visible cracks.
Additionally, check the compressor’s clutch, which is connected to the outside of the compressor and engages or disengages the compressor with the engine. Ensure that the clutch engages smoothly and without any hesitation when the air conditioning is turned on.
If you notice any issues with the compressor or its clutch, it’s best to consult a professional technician for further inspection and necessary repairs. The compressor is a complex component that requires specialized knowledge and tools to diagnose and fix.
Inspecting the air conditioning compressor is an important step in evaluating the overall health of your car’s air conditioning system. By identifying any issues with the compressor, you can prevent further damage and ensure optimal performance.
Once you have completed this step, you can move on to the next and examine the refrigerant levels in your air conditioning system.
To check your car’s air conditioning, start the car and turn on the AC to the highest setting. Listen for any unusual noises and feel if the air is cold. If it’s not, you may need to recharge the system or have it checked by a professional.
Step 6: Examine the Refrigerant Levels
Checking the refrigerant levels in your car’s air conditioning system is crucial for its proper functioning. The refrigerant is responsible for absorbing heat from the air and cooling it before it is circulated back into the cabin.
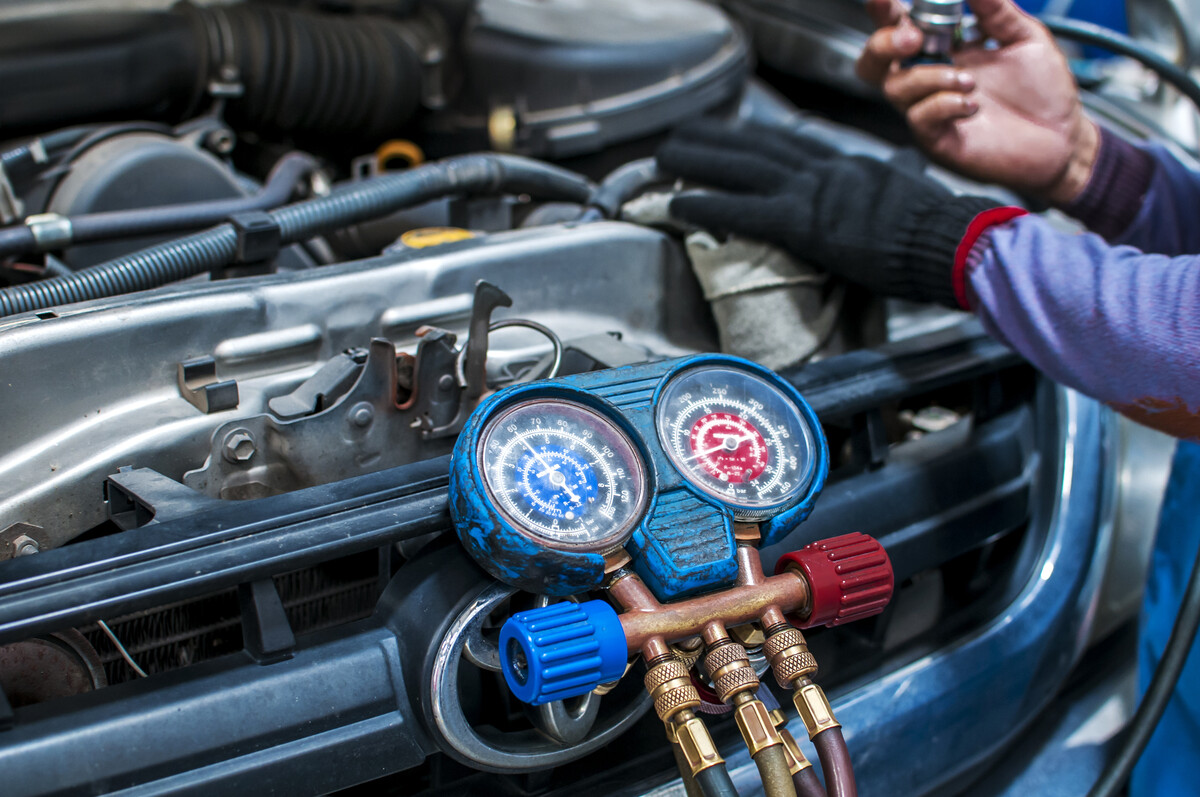
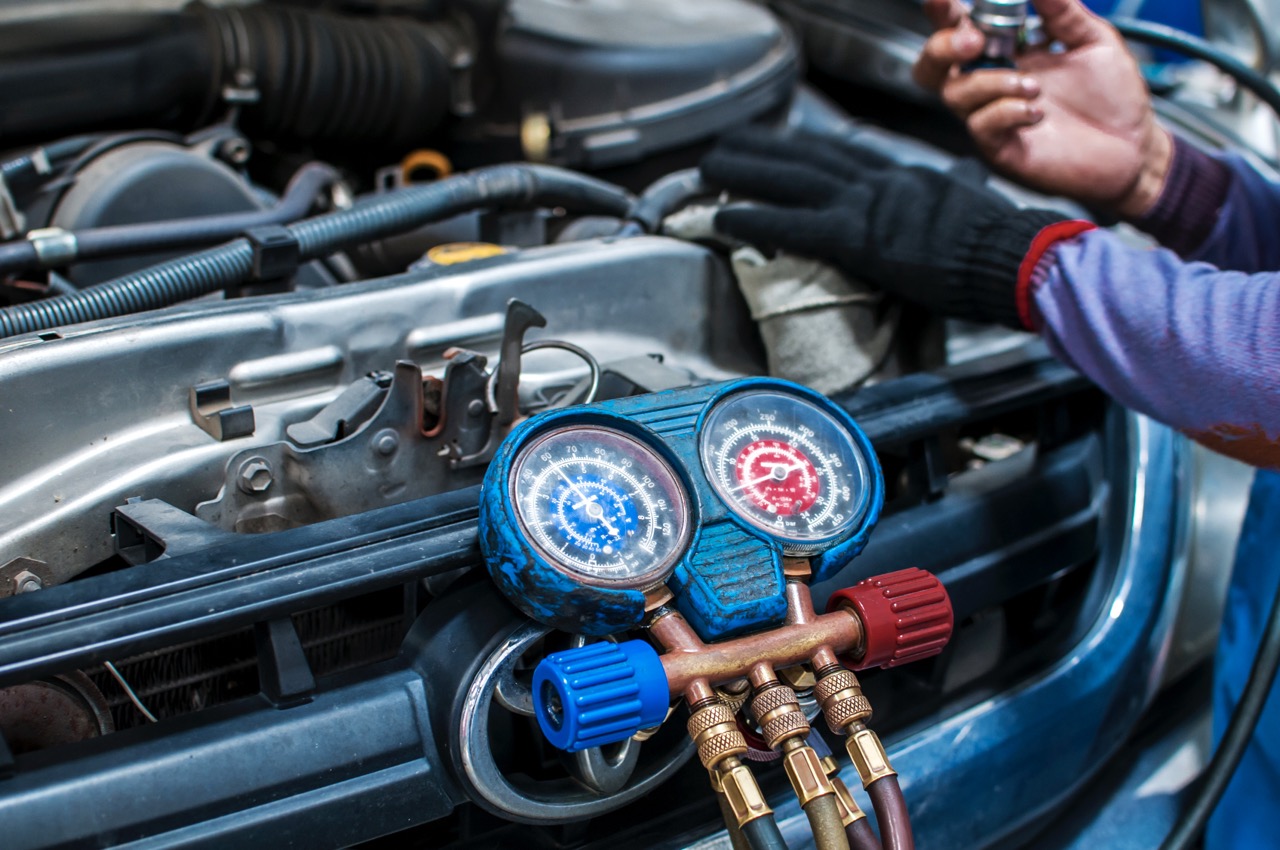
To examine the refrigerant levels, you will need an air conditioning manifold gauge set, which allows you to measure the pressure and temperature of the refrigerant. This tool is typically used by professionals, so if you don’t have access to one, it’s best to consult a certified technician.
If you’re qualified to proceed with checking the refrigerant levels, locate the low-pressure port and the high-pressure port of the air conditioning system. The ports are usually labeled and can be found near the compressor or along the lines leading to or from the compressor.
Attach the manifold gauge set to the low-pressure port and observe the pressure reading. Compare it to the manufacturer’s recommended pressure range for your specific car model. If the pressure reading is outside the normal range, it could indicate a refrigerant leak or other issues with the system.
It’s important to note that refrigerant is harmful to both humans and the environment. If you suspect a refrigerant leak or need to add refrigerant, it’s advisable to consult with a professional technician who can safely handle and properly recharge the system.
Examining the refrigerant levels is a critical step in maintaining the optimal performance of your car’s air conditioning system. By ensuring the proper amount of refrigerant, you can enjoy cool air during your drives.
Once you have completed this step, you can proceed to the next and check for leaks in the system.
Step 7: Check for Leaks in the System
Checking for leaks in your car’s air conditioning system is essential to ensure its functionality and efficiency. Even a small leak can lead to a significant loss of refrigerant, resulting in decreased cooling performance and potential damage to the system.
To check for leaks, you can use an electronic leak detector or a UV dye. The electronic leak detector can detect refrigerant leaks by sensing the presence of the gas, while the UV dye can help identify leaks by highlighting them under UV light.
Start by inspecting the various components of the air conditioning system, including the hoses, connections, and fittings. Look for any signs of oil stains, greasy residue, or visible cracks. These can indicate a leak in the system.
If you’re using a UV dye, add the dye to the refrigerant system following the manufacturer’s instructions. After running the air conditioning for some time, use a UV light to examine the components. The dye will appear as a bright fluorescent color around any areas with leaks.
If you detect any leaks, it’s recommended to consult with a professional technician to properly repair the leak and prevent further damage to the system. They have the expertise and tools to accurately diagnose and fix leaks in the air conditioning system.
Regularly checking for leaks in your car’s air conditioning system is essential to maintain its performance and efficiency. By addressing leaks promptly, you can avoid costly repairs and enjoy consistently cool air throughout your journeys.
Once you have completed this step, you can move on to the next and test the air conditioning pressure.
Step 8: Test the Air Conditioning Pressure
Testing the air conditioning pressure is an important step to ensure that the system is operating within the appropriate range. By checking the pressure, you can identify any potential issues and determine if the system needs to be serviced or recharged.
To test the air conditioning pressure, you will need a pressure gauge specifically designed for automotive air conditioning systems. The gauge should be connected to the low-pressure port of the system, following the manufacturer’s guidelines.
Start the car engine and let it run for a few minutes to allow the air conditioning system to reach its operating temperature. Then, turn on the air conditioning to its maximum setting and observe the pressure reading on the gauge.
The pressure reading will vary depending on factors such as ambient temperature and humidity. Refer to the manufacturer’s specifications for the appropriate pressure range for your specific car model. If the pressure reading falls outside the recommended range, it may indicate a problem with the system that requires further inspection or servicing.
It’s important to note that testing the air conditioning pressure requires knowledge and experience in working with automotive air conditioning systems. If you’re unsure about performing this step or interpreting the pressure readings, it’s best to reach out to a professional technician who can accurately assess the system.
By testing the air conditioning pressure, you can ensure that your car’s air conditioning system is operating optimally, providing you with cool and comfortable air during your drives.
Once you have completed this step, you can move on to the final step and consult a professional if necessary.
Read more: How To Check Air Conditioner In Car
Step 9: Consult a Professional if Necessary
If, after completing all the previous steps, you still have concerns or if you discovered any issues with your car’s air conditioning system, it’s advisable to consult a professional technician. They have the expertise and specialized knowledge to accurately diagnose and repair any problems.
At this stage, it’s crucial to remember that automotive air conditioning systems are complex and require specific tools and equipment for proper diagnosis and repair. A professional technician will have access to the necessary tools and resources to identify the root cause of any issues.
Whether it’s a refrigerant leak, a faulty compressor, or any other component malfunction, a professional technician can provide the appropriate solutions and perform the required repairs. They can also conduct a more thorough inspection of the air conditioning system to uncover any underlying issues that may not be visible to the untrained eye.
By consulting a professional, you can ensure that your car’s air conditioning system is restored to optimal performance and efficiency, providing you with cool and comfortable air during your drives. Additionally, a professional can offer maintenance tips and recommendations to help you prolong the life of your air conditioning system.
Remember, it’s better to be safe than sorry when it comes to your car’s air conditioning system. If you have any doubts or concerns, reach out to a trusted professional technician who can assist you and provide the necessary expertise for a proper diagnosis and repair.
With this final step, you have completed the comprehensive process of checking your car’s air conditioning system. By following these steps regularly, you can ensure that your car’s air conditioning system remains in top condition, providing you with the comfort you deserve.
Conclusion
Maintaining a properly functioning car air conditioning system is essential for a comfortable driving experience, especially during hot weather. By following the step-by-step process outlined in this article, you can check your car’s air conditioning system and identify any potential issues before they worsen.
Starting with the engine running and setting the air conditioning to maximum, you can observe the airflow, temperature, and any unusual noises. Inspecting the air conditioning compressor and examining the refrigerant levels help assess the overall health of the system.
Checking for leaks and testing the air conditioning pressure further ensure the efficient operation of the system. If any issues arise during the inspection process, consulting a professional technician is advisable. Their expertise and specialized knowledge will be instrumental in accurately diagnosing and repairing any problems.
Regular maintenance and attention to your car’s air conditioning system will contribute to its long-term performance and reliability. By taking the time to check and address any issues promptly, you can enjoy cool and comfortable air during your drives.
Remember, if you’re unsure or uncomfortable performing any of the steps outlined in this article, it’s always best to seek professional assistance. They will have the necessary tools and expertise to ensure the proper functioning of your car’s air conditioning system.
Don’t let a malfunctioning air conditioning system detract from your driving pleasure. Take proactive measures to maintain and care for your car’s air conditioning system, and enjoy cool and refreshing air no matter the weather outside.
With these steps and a bit of regular maintenance, you can ensure your car’s air conditioning system remains a reliable companion throughout your journeys on the road.
Frequently Asked Questions about How To Check My Car Air Conditioning
Was this page helpful?
At Storables.com, we guarantee accurate and reliable information. Our content, validated by Expert Board Contributors, is crafted following stringent Editorial Policies. We're committed to providing you with well-researched, expert-backed insights for all your informational needs.